manuals.online logo
Brands
  1. Home
  2. •
  3. Brands
  4. •
  5. Sony
  6. •
  7. Camera Lens
  8. •
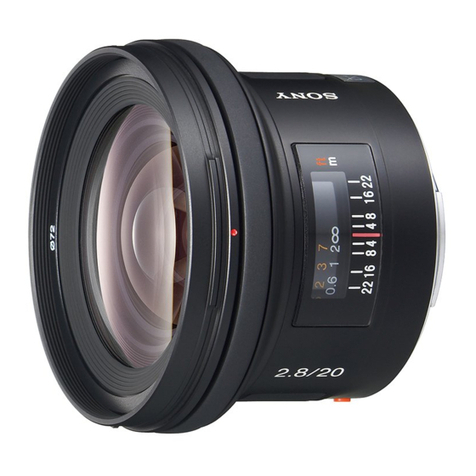
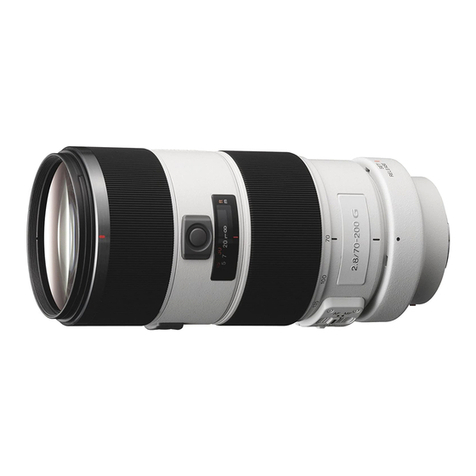
  9. Sony FE 70-200mm F4 G 0SS User manual

Sony FE 70-200mm F4 G 0SS User manual

SONY.
4-531-386.03(1)
Hv::.tX
Interchangeable
Lens
Objectifinterchangeable
RJ.!!~t!l~
FE
7D-200mm
F4
G
055
Cil
a
hnp:/lwww.sony.neV
Printed
in
Japan
''"'·"Ill'
10
2014
Sony
Corporation
1111111111111111~1111111111
4531386030
[1]-1
(1) (2)
[1]-2
(1)
(3) (4)
(1)
(2)
u
IUIIIoliltl,ti07::11>0U·III·IJ
St.J~Ic,AJI"Q)IIa'I'JI:ll!t.JcQ)Jt
8"~·~4~~~c~~O~T
.
L:O)!iliiD~Il!ll!ll~l<l:.
$1N~fll:i
-::rciJJO)!\JI't»'t:@$IIlc
!1.1/ii\O)Jil(DIDG\b'tc~mu
C::G1a<1l",
L:O)Jil(l!l!$11l!lil~
J;<
Si;';i/iO)J:.~Iii\~~~I~SiJI;G
1(
tcC<:G
'·
Sil'iilil~
t.>:ol::i!SC:I<I:,
c\C:::>"C:t>l'!5tl<'>ilili:£\9'('i'§u
C::<:TcC<:
"'·
L.O)rJll(ID~B!lSJ<:'Id:
L;;.;;;(O)fiel
\b'Tc<r~B!l
un
'*9
· fieffl.tO)c;±;:;t.>cld:81J
ffi!O)rfie
lflii!iO)c;±;o;Jc:c~mr:tw9,
t09'2fiellJO)ii!il<:,21<i!!<'::t'it>ti"L"' <
il5~0:1
0)3x
c:c:fiem<rc<"l'·
21<ll\lld:c-'=
-
l<ia:I:J>5C~7.7'LE?'::o
t--:I:J>
5
WllJO)L;;.;;;(c9,
A??;.;
J--:I:J.)(51<:1d:il5ilf!l\l<:
l<>fl*tifv,
(:I:J.)(
52!<1<$:<'::0):9J!I!1i!i;ffil<:-::ll
\C::Id:)Wifl+:t;Jl
-
t--+:t-1'
t--cclii
&ll<rcN
\,
http://www.sony.eo.jp/DSLR/support/
•
c-:..-::>:~liliDf:ti1C::tJ><5~ffl'5i!li<lict!la:.tJ.><5c
u/::l:O)i"iJJ~u:ob'Dffl:oC::<Tc<!G1,
• <tllll<l:llilulv.
llilililttlc~l!l
t.,
<:ai!ote<:n
<:c
'ifll"IJ'.
llil
7.1<ttitll<l:lll!i.
c:G
1a<tt1v.
m<Pill!!!lll<!1d:cla:.
7.1<ilii1J'IJ'
b'S1J:L,)J::51<:G
<:<iCCl\o
77~>~:~.illlllliC7.>i:!U
•
:IJP71'liii75"''-'~I<I:Sill!o11Ct.>;f1ifttlv,
?!11117
5':J:J.:r (81J7f){tLtfffl<tD.'sl-\o
·~·1<:'::>~11:
• u/:ZI<tl>\l!e<Jicii!iiliiJOJil!lllO)J'till!J'<P•C'lllli:lt"<lll:T
uifll".
JOJil!J't.O)fliTIJ'li:li:1d:<'>1il~l<l:.fllllil1illDIJ'
51-21ltillDi61vcc:1JI;!!l<:tc<!l\.
m
itBBO)~*:t
1
L;;.;/(7-C:I'§~
27;t
-
:IJ7,1)f1
3
:1
-
LIJ>':J
4
!i!\i~leillil'§l::'l(7L!
-
)
5
:::]!ll~l'§li,I(7L;
-
)
6
L;;.;;;(fol~*J?.*
7
=:n!ll~
s
7ot
-
1:J7.ili
-
JLoC:;Jl5';.;
911\,\':\ieilli§llil
107;t
-1J7'E-
C'7.-{"'7
1
17;t-
1:J:AL;;.;~WOM~7.-1'"'7
12=111ll~~J?.(7L;
-
)
13??;.;
1--
~,\':\
14=111l1~?5;.;::t/:7
15
'F::JL!liiHE'E-
C::A-1'
'YT
16
'F::JL!liiHE:A-1'
"'7
*
iili*'Fc~fltrl
\c<rc<:l
'0
I!)
v:I:XO)JIR~f'lJI:t1J'1::
/
IIR~IU•
1..1J't::
IIR!>M17ti
1
1::H~A
1-1!)-
[1]
.1111)
1
v;.;XO)~~v;.;:1~v~7c1J~50)ff.
7'-f~v
'Y:1~1<1:~~
.
•
uY::>:7DY~'I'v"'71<i:!iil0)(11.12)0)2iiJiDO)
JJ>l<C:lil1Df:tl1
/liliDI<I:9'u1JIC:t!if1l".
(2)1<1:.
u
/:Z7
-
I'~f:ti1Tdf!!\iC:O)u/:Z~"
"'70)Jil(D
811
/Jil(DI<t9'G1Cil!!~JC:~,
2
v;.;:1c1:J~5<7.>E3<7.>Jiii:("''?;.;
HIIJ!ii:)~
8t.>ttZ:I<I:Ibjz,Clf,
v;.;X~iii<1:J~51<:!111
IAl!Z:triJ
I
S,IIUtnio.JI<:rtJ7~JCD~?
IJ'IJ'IJq>an::l\1>:>
<
tJ
l!il~
,
• u/7,.,lil1Df:tl7<'>ct!l<l:.
:IJ.)(
50)l/Y:ZIIltDI<I:
WL..i1{5':;;~~C!tcJ:L.\C(t,:(!t.,\o
•
c-:;::>:,.,~!blclfiui6if/Jo'c<rc~o
'·
11!!!>!:1'l,tl•t::(-1'~A
1-l!)-[g].JIII)
1:J~50)v;.;X~&bi<I:~Gff.:S>;,t~!111Gr.:a:
a:.
v;.;:1~&~Hnio.JI<=fli1Gz:ra:~~.
[!)
=lll'if!5
=:n!ll<ri15fiel
\0)1:§1§;,
:I:J
.)(
50)=:illl1:1<~1i:c:'ld:TJ
<,
L;;.;;;(O)=:n!il~I<:Jll(01111:t9,
llfil
••
!Jiill.O)Jfl!
=:lllll.!!i!?5;.;::t
/::J<ri11>:&>1b:&><'::
(1
),
:I:J
.)(52<':
ff!i!l<=191fliC:ttr.>c.C::b'ciO':t9,
=:n!llfiellll>ll<=.
'li':iE:.!i<r!<ltJt>9'1<:iiHil.lli/110fil.l!iO);Jl'J!'<r91<1'
1'>(<:'10'*9,
• =nlll!l!lcla:.
90
'
c:e:lc::tu
-
O)J!i\1=:!141!1!~!!:\)IJ'iiB
Difll"o
u/:Z00J0):7l/-O)!ii(::0!14JJ!I!I!i~)c~IJtt<'>
(::,
:IJ.)(
50)iEil!tJil'!li!);I!IJJIJ'C:~a<
1l"
(2).
• il'Ill!,.,;;l!lbrc!f<I<I:.::0!141J!1!?5Y7
/7~u:o1J'Dclii!
lbc:<rcN'·
•
::0!1411!1!~§~1l"<'>c-lll0)1:J.X5<$c~
.
SJ:U??t~
Uc'f:!>Git'Jl",
:IJ.X5$~
.
SJ;Ur?t~UC:O)§:J~
1iUIIIi:::>l1
C:
I
<I:IIl'!!l~;f(-
~~-(
~
cC:iii:l<TcZ<:o1.
=·JIO)JIR!)J:'J'l,b't::
=:lllll"'i13fieo
\I<:!<>SI<>l
11:§1§;,
L;;.;;;(b'S=:n!ll.!!i!"'
r&ora:9'9L.cb'c10':t9.
1
v;,tX~1:J~51J
1
SI&bl<l:~~
.
• 11'u<l<l:. rllJu/::l:O)Jil(IJ1111b'rc/liliD1<1:9'u
IJ'rcJ,.,ltl~u
c:<rce<:o'·
2
31JIIm?5;.;::t/:1~f!iiG,=:!lPUbl<l:
~Gmac?5;.;::t.J::tO)•Jiii:~8t.>tt:@
(3)
.
3
=:!lJIJ!I!?5;.;:1/::t~~b!&btriJ
1
S"fl:f
(4).=:JIIPJ!I!~IIIJ(
,
•
::OMliJ!I!,.,~<ct!l<l:u:..-::>:e:=:!141J!I!O)iifiiJJ~u:o1J'
t>:m~"C(tC.'(!L,\c
•
::O!I4JJ!I!O)~Y~lll,.,ffl:ot:~<:C:.~'"'~GSttl
IJ'iiBD'ifll".
::0!14lil!~~<ct!l<l:~/~!liWJ?I~
;tij::>C:<tCCL.\,
• u/7,.,:1J.X5b'5liliDI<I:9'2:9'1i:::0!141J!I!'"'fl,l<:
C:.-IJI!O):IJ.)(5<$c~SJ:U??t~UC:'f:!lilif
1l".
::0!141J!I!~Jil(DI<I:9'1l"lllll<l:.
u/:Z~:IJ.)(
51J'S
llltDI<t9'1l"L:C:,.,S1l"91bu*~·
m
v:~:x:1-
.-~&~f'lJI:t~
i!!liilii~l2il5i:>7'tb'l1ii~1
<:
~119
i:>O)"'~
<:tclb!<:,
L;;.;;;(7-f'O)fiellJ"'il599/bl_,;l"9,
v;.;X7-~C7.>~~v;.;X<7.>~•<v;.;X
7-
~R>t<=8t.>tt-cla:lb;z.Clf,
v;.;X7-
~
O)~Jiii:cv;,t:1<7.>fflll1J'8-=>Z:r1J7-yJc~l3
a:-c~rtnio.JI<=I!il~
.
•
?lf:tl175"''-'~<8
'
i'i'Cl~lll!:o<:!lll!li1l":Qct!l<l:.
7
5"''-'
~J'tb'illlStl:QL:cb'<!SI)if'Jl"O)C:,
l/Y77-
1',.,1<1:9'u
c::<:rc~u.
•
!ilPJ!f<vY:Z7-I''li'Jiilljl]l":S,c~ld:
.~i5Jt!
ICL//7
lcllltDiil1c:<rc~l'·
lEI
:X-~T~
:1-LIJ
;.;:::t"'IQIL_,
C::.1i\>IIO)!i\,\':\ieilli(;;(-LO)
iil.ii!!)
l<:t'ibti:@,
Iii t::':l
t-~8btt~
•
<t~ffi\0)7ot-:IJA'E-
1'7.-1"'71<t
.-:lBO):IJ.)(5$
~~~so
\C:Sil!;c
'l~t.>
nifttlv
.
tJ.><5<t~cO)s:J!l!tliltllc::>G\t:la:lll!!l~nt-
~~..,
~
CC!il~<r.:r!L.'o
AF
(;t-
l-7:t-1:JA)
/
MF
<~=~7
1117:t-:t.JA)C0~!>8il
AF(:t-
l--7;t-:I:J:A:
§!IJJI::'
;.;
1--t'it>ti)/MF(?
=:r7J[,7;t-:I:J7.:'¥!WJI<:J:i:>l::';.; t--t'it>ti)O)
~:;E"',
L;;.;;;(1l!UcWt:IM~i:>U
:
b'c10'3"9.
AFcl1!~9
:@1§1§;1d:,
:I:J
;X
51l!IJ<'::
L!
;.;;;(1f11Jii!j7JO)
~:iE<rAFI<:
l_,lf9,
:I:J.)(
5\11Jil5'6>l
\ld:
L;;.;;;(1l!IJO)
l
19'flb'-7J,
:ttcl<l:ii!l7JO)~)Eb'MFO)t,iii;";,
MF
I<:TJt);J"g
,
IJ;,tX.C7.>11Rif:
7:t-1:J7.~-
~A-1'~7~.
AFa:11:1<1:MFO)
~\~f\IJ1ilm':l_,f1:~\f~31<:8t.>tt:@(1)
.
• :IJ.)(50)7ot-:IJ7.'E-I'O)llt)E)'J$1C::>o1'CI<I:,:IJ.)(
50)11ltl!la!IB!ll!~
c:Ji
<
rc~c
'·
•
MFC:1<1:7r-1Y5'-~'"'ll.ld:b'5
7ot-!J7.U
YO'~
§G<:
.
~y
~~~1Jttif1l"(2).
AF/Mf:J;:I
t-D-I~lK1';:1'1i:HG1::f.IJ(7'1<3S
i!LIO).;!;
•
AFB<!Ii:MFICtTIDM!i.<'>li:l;l,
:IJ.X5cvY7ii!iiJJO)~
:lEb'AFO)C:t!l~.
AF/MF:::JY
~D-J
f,;((5'/~Jilluif
~-
•
MFB<!I~AFii:tTIDtl'!i.:Qicl<t.
:IJ.)(50)~)E1J'MF.
l/Y
::l:O)iJ!:lEIJ'AFO)C:~Ii:.
AF/MF:::J/
~D-Jv;((5'Y~
Jllll_,if~.
lJi:11JlliEA-1'~7
•
ON
~:lu'li'liliiEGa<~,
• OFF:
~7u~liliiEua<ttlv.
lilrtfl<!.::OMli~SiJI;c\li:
t.><'><::czSll"Jrlbuifo
.
lJi:11JlliE~-~A-1''Y7
'F::JL!lill
!E:A-1'
'Y7<rONI<:
l_,,
'¥:/L!lill!E
'E-
C:
wol!l!~:;z-1',71toli:iEu*9·
•
MODEl
:
±lc,iiJi:ill0)~7u~liliiEG*9.C/-?Jv)
• MODE2:
ll'!l!1l":@lili">~'li'illuiiD1l"<'>lil>~.~7u
~liliiEua<Jr.
rn7-r-~~~-·.-~~:~~~m
T~
•
:ts:~Ba0)7:t-1JA!ti-JV
1-!Jl\5'/ld:,-000)1J..X5;$:
~IC<tlc
1C:<tl1JI;c
1
li:1d:tlifttlv
.
tJ.><5<!>~cO)s:J~1l'lltllc::>o'c:la:<'J!!l~;tt-
~cr-1
~
CC&~<rC<!"L..),
7ot-tJ7.ili-Jv
C:;Jl5';.;tr'31'llii'lfl<=!i2ill<:nc::c'
3"9.
AFc:jll<:7;t-:I:J:Aili-Jl.o C:;Jl5';.;"'Jlll9
<'::
.
AFO)
~~mll"'!.l:lbi:><::<'::b'ciO'll"9.
1::';.;
t--b'llil:iE<"fl.
'tO)*'
;tO)!::';.; 1--cY.\'
'Y5'
-"'Wf13"9o ".!'\'"'
5'
-;Jl5';.;"'
'!'JllluurcV:!!!\<:'. 7
ot
-1J7.ili-!v
C:;Jl5';.;Uii91::,
Afbl~fllll_,lf9,
o
7-r-~~v:~!l(AFIDII8111)
~tJJ~-~~
AFO)~m!Ji!il!!l<rWDM~
'C, t::;.;
~§t>tiO)I>lrOJ
"'mlliic~W9,
JflJJ~;ieillib'-:iEO)i!JI!!JrJI<='NS
f1C::l1i:>\\il;";i<:~f
1Jc
9o
7-r-1:JAv;.;~i;)JbfiilA-1'~7c.!ii~il!
.Uilli!II~D~:@
.
•
FULL:
il!lillillJ~I<ti!SDa<ttlv.
~~C:AFb'III111Juif1l".
• oo-3m:
lffl~i!!IJ'53.0mit'C:AF1Jii11111JG'if1l".
III!!.~D"(m)
ot-c7,-:t.J:;z8<l
~(ftl)
ltl]lllHl
"7.<
'
1~11
~IN!)
~
~
9!Jt:"<!i1i(lt;;;~xli!<!)
80X175
(I'J
:mm)
~:g)(=-m!i)
-
~
~7vMttD~
®0
*'
L:L:c0)35mm*'l!!!!
llf
l<£1€11!cl~-
APS-
Cth71§
"JO)!Ji!f3<llfl"1!'!~l!
GTc
v::;
7xl!!!it7'V:9
Jl
dJ
;<
5
c0)11l1!'l!<G*~,
"i'lll"l11~35mm'I'J:I:J;i.5,i'lll"l2
1~
APS,C;:t-(71§"30)
!l!f3<i!!'l"1!'ffi:ii
GTc
vY7xl!!!it7'V:9
Jv:I:J
;<
5c0)
li!!1!'l!<G*9,
*'
ll!lll!ll~iel!lcl~-llif3<l!lHiiiJ'Sl!l"'i*'*cO)i€M1!'
l!<G*~
·
• vY70)i!l!IIIC.Ic
:>
C::l~-
!iiliJi€jj!O)J!'Ii;ICI'i':>
ell\,<!:\
i€JIILIJ'll'li;
~
10J!!;§IJ'S
0
*9.
o
oll!O)JO!i':liEJIILI~!II!)
i€1li!IJ'ffltlll!~cO);Eftc~,
15J
!I
lW!l:
l/Y7(l),L;::;;:oo::;
I--'Ft-Y::7(1),
l.;;J;:ZIJ'\?'f't- y::;l(l),
l.J/:1'7
-C'(l),
l.J/:1
7-::Z(l),EPlilU
w.J
-
it
f±!if<!:>J;U:91ll!!ld:,
i!llfi<O)Tc/;b'fiS:TJ:
<
;J\'~9:@
<::
cb'®tlifob<.
<:>Tiil:<rctoL\,
a
<!:>
J;
U
Cil
l<tY
=-ttit'ftt±O)i!llt:'l<:'9.
m;m!l
This i
nstru
ction manual e
xp
lains
how
to use lenses.
Notes on use are found in
the
separate "Precautions
before using
n.
Be
sure to read
both
d
ocume
nt
S
bef
o
re
using
your
lens.
This lens
is
designed for So
ny
a camera system E-mount
cameras.
You
cannot
use it
on
A-m
ount
cameras.
For further information on compatibility, visit the Sony
web site in your area,
or
consult your Sony dealer
or
local
authorized
S
ony
service facility.
Notes
on
use
• When carrying a camera with t
he
lens attached, a
lw
ays firmly
hold both the camera and the
le
ns.
• This lens is not
wa
ter-proof, although designed with dust-
proofness and
sp
l
as
h-proofness in mind. !fusing
in
the
ra
in
e
tc
.,
keep water drops away from the
le
ns.
Precautions
on
using a flash
•
You
cannot
use
a
bu
ilt-in camera flash with this lens.
Use
an
external flash (sold separate
ly)
.
Vignetting
• When using the lens, the corners
of
the screen become darker
than the center.
To
re
duce this phenomena
{c
alled vignetting),
close
th
e apertu
re
by
I
to
2 stops.
r.:1
Identifying
the
parts
I Lens
hood
index 2 Focusing ring 3
Zoo
ming ring
4 Focal-length index (gray) 5
Co
llar index (gray)
6 Lens c
ont
ac
ts* 7
Tripod
-
mounting
collar
8 Focus-
hold
button
9 Focal-length scale
10
Focus-mode
switch
II
Focus-range limiter
12
Co
ll
ar
index {gray)
13
Lens
mounting
index
14
Collaf"locking
knob
I5 Shake
compensation
mod
e switch
16
Shake
compensation
switch
* Do
not
tou
ch
the
lens contacts.
I!J
Attaching/detaching
the
lens
To
attach
the
lens (See illustration
m-rn.)
1
Remo
ve
the rear and front lens
caps
and the
camera
body
cap.
•
You
can attach/detach the front lens cap in two
ways,
(I)
and (2). When you anach/detach
th
e lens cap
wi
th the
lens hood attached, use method (2).
2 Align the white
dot
on the lens barrel
with
the
white
dot
on
the
camera
(mounting
index),
then
insert
the
lens
into
the camera
mount
and rotate
it
clockwise
until
it
locks.
• Do not press the lens release button
on
the camera when
mounting the lens.
•
Do
not mount the lens at an angle.
To
remove
the
lens (See illustration
m-[2].)
Whi
leholding do
wn
th
e
len
s
release
button
on
the
ca
mera
,ro
tate
th
el
ens
co
unterclockwise until it
stops,
th
en
detach
the
lens.
l!J
Using
the
tripod
When
using a tripod, attach it
to
the
-mou
ntin
g collar
of
the
lens, not to the
tripod
receptacle
of
the
camera.
To
changevertical/horizontal position
Loosen the collar-locking knob on the tripod-mounting collar
(I) and rotate the camera either direction. The camera can be
quickly switched between vertical and horizontal positions
while maintaining stability when using a tripod.
• Gray dots (collar indexes) are located at90" intervals on the
co
llar. Align a gray dot on the tripod-mounting
co
llar with
the gray
li
ne (co
ll
ar index) on the lens
to
adjust the camera
position precisely (2).
• Tighten the collar-locking knob
fi
rm
ly
af
ter the camera
position
is
set.
• The collar may hit the camera body or accessory when rotated,
depending on the camera or accessory model. For more
information on compatibility with cameras and accessories,
visit the Sony web site
for
your area.
To
detach
the
tripod-mounting collar
from
the
lens
Th
e
tripod
-mo
untin
g
co
llar can
be
det
ic
h
ed
from the lens
w
hen
not using a tripod.
1 Remove
the
lens from
the
camera.
•
See
"
GJ
Attaching/detaching the lens" for deta
ils.
2 Turn the collar-locking knob,
to
align the
marks
of
collar-locking knoband the collar
(3).
3 Pull the collar-locking knob
down
(4),
and
open the collar.
• Hold the lens and the
co
llar firmly when opening the
co
llar.
•
Do
not hold the hinge when opening the
co
ll
ar. If you
hold the
hi
nge you may pinch your hand.
• If you open the collar witho
ut
removing the lens from the
camera, the collar may hit the camera body
or
accessory.
We recommend you remove the lens
fro
m the camera
beforedetaching the collar.
I!J
Attaching
the
lens hood
It
is
recommended
that you use a lens
hood
to
reduce flare
and
en
sure
maximum
image quality.
Align the
red
line on the lenshood with the
red
line
on the lens (
lens
hood index
),
then in
sert
the
lens
hood intothe lensmount
and
rotate It clockwise until
it
clicks intoplace
and
the
red
doton thel
ens
hood is
aligned with the
red
lineon the
len
s
(lens
hood index).
• When
us
ing an external
fla
sh (sold separately
),
remove the
lens hood to avoid blocki
ng
the flash light.
• When storing,
fit
the lens hood on
to
the lens backwards.
!!~Zooming
Rotate the zooming ring
toth
edesired focal length.
IiiFocusing
• The focus-mode
swi
tch
of
this lens does not function with
some camera model
s.
For further information on compatibilit
y,
visit the Sony
web
site in
yo
ur
area, or consult y
our
Sony dealer or local
authorized So
ny
service facility.
To
switch
AF
(autofocus)/MF (manual
focus)
The
focus
mode
can
be
switch
ed
be
tween AF
and
MF
on
th
e lens.
For AF photography,
both
the
camera
and
lens should be
set to
AF.
For
MF
photography,
either
or
both
the
camera
or
lens sh
ould
be
set
to
MF.
To
set
the
focus
mode
on
the
lens
Slide
the
fo
cus
-m
ode
swit
ch
to
the
appropriate
mode
,AF
orMF(l).
• Refer to the camera manuals
to
set the focus mode of
th
e
• In MF,turn the focusing ri
ng
to adjust the focus (2) while
looking through the viewfind
er,
etc.
To
use
a camera
equipped
with
an
AF/MF
control
button
• Press the AF/MF control button to swit
ch
AF
to MF when
both the camera and lens are set
to
A
F.
• Press the AF/MF control button to switch
MF
to
AF
when the
camera
is
set
to
MF and the lens is set
to
AF.
[!'I Using
the
shakecompensation
function
Shake compensation switch
• ON: Compensate
fo
r camera shake.
• OFF: Does not compensate for camera shak
e.
We
recommend
using a tripod duringshooting.
Shakecompensation
mode
switch
Set
th
e shake
co
mpen
sation switch
to
ON,
and
set
th
e s
hak
e
compensa
tion
mode
switch.
• MODEl: Compensate
for
normal came
ra
shake.
• MODE2: Compensate for camera shake when panning
moving su
bJec
t
s.
mUsing focus-hold
buttons
• The focus-hold button
of
this lens does not function with
some camera modds.
For
fu
rther information on compatibility,visit the Sony
we
b site in your area, or consult your Sony dealer
or
local
authorized So
ny
service
faci
lity.
This
lens has 3 focus-
hold
buttons
.
Pr
ess
the
focus-
hold
button
in
AF
to
cancel A
F.
Th
e
fo
cus
is fixed
and
you can release
the
shutter
on
the fixed focus.
Release
th
e focus-
hold
butt
on while pressing
the
s
hutt
er
button
halfway
to
start
AF again.
0 Switching focus range
(AF
range)
The
focus-range limiter enables you to reduce
the
auto
focusing
time
.
This
is
useful
when
the
su
bject distance is
definite.
Slide
the focus-range limiter
to
select thefocus
range.
•
FULL
:
AF
is set
to
the minimum focusing distance
to
infin
ity.
•
<><>
-3m:
AF
is
set to
3m
(9.8
fee
t) to infin
ity.
Specifications
FE
7Q-200mm
F4
G
055
N,lme
\Mode
l
name
!SELlClOOG1
Equ
ivalent 35mm-format focal 105-300
length*' (
mm
)
le~~
~
-
Angle
of
view 1*2
·
~£..
~
.
6..
Min
imum
fo
cus*l
(m
(feet))
Auto focus
Dimensions
80
x 175
(maximum
diameter
x height)
(3
1/4
x
7)
(approx
.,
mm
(in
.))
'
~~-
g(9z,)
)_
~.
,.-.
(e~
. •
....._
collar)
Shake
compensa
tion function
Yes
"'
The values shown above for equi
va
lent 35mm-format
focal
le
ngth are for Interchangeable Lens Digital Cameras
equipped w
it
h
an
APS-C sized image sensor.
"2 Angle
of
view I
is
the value for 35
mm
cameras, and angle
of
view 2
is
the value for Inter
ch
angeable Lens Digital Cameras
equipped with an APS-C sized ima
ge
sensor.
*1 Minimum
fo
cus is the distance from the
imil.g
e sensor to the
subject.
• Depending
on
the lens mechanism, the
fo
cal
length may
change with any change in shooting distance. The focal lengths
given above assume the lens
is
focused at infinity.
Included items: Lens (I), F
ro
nt lens cap (I), Rear lens cap
(1), Lens
hood
(1), Lens case (I), Set
of
printed
d
oc
umentation
Designs
and
specifications are subject
to
change
without
notice.
(X
and
[il
is
a
trademark
of
Sony
Corporation.
'if"'W
Cette notice explique
comment
se
servir
de
s objectifs.
Les
re
marqu
es
sur
J
em
ploi se trouvent
dans
les
« Precautions avant
to
ute
utilisation»
se
pa
recs. V
eu
illez
li
re les
deux
do
c
uments
ava
nt
d'
utiliser votre objectif.
Votre
objectif
est
con~u
pour
les appareils
photo
a
monture
E de type Sony a.
II
ne
peut
pa
s Ctre utilise
pou
r les appareils
photo
a
monture
A.
Pour
plus
d'informations
sur
Ia
co
mpatibilite, consultez le
site
de
Sony de votre pays,
ou
adressez-vous·a
un
revendeur
Sony
ou
a
un
service aprCs-vente agree Sony.
Remarques
sur
I'utilisation
•
Lor
sque vous portez un appare
il
photo avec l'objectifdessus,
tenez toujours fermement l
'a
ppar
ei
l photo et lbbjecti
f.
• Cet objectif nest pas c!tanche a leau
bi
en qu'il soit com;u pour
resister a Ia
poussihe
et aux &:laboussures.
Si
vous l'utilisez
sous Ia plu
ie
, etc. veillez
ace
que de l'eau ne tombe pas dessus.
Precautions
concernant
l'emploi
d'un
flash
•
Vo
us
ne
pouvez pas utiliser le flash de l'appareil photo avec cet
object
if.
Utilisez un tlash externe (vendu
sC
parCment
).
Vignetage
•
Lo
rsque lbbjectifest utilise, les coins de lecran deviennent plus
sombres que
le
centre. Pour rCduire
ce
ph€nomene (appele
vignetage), fermez lbuverture
del
ou 2crans.
r.:1
Identification
des
elements
I
Rephe
de
parasoleil 2
Ba
gue
de
mise
au
point
3 Bague
du
zoom
4 R
epC
re de
Ia
longueur
focale (gris)
5 Repere
du
cadre
{gris) 6
Contacts
de
lbbjectif*
7
Ca
dre
de
montage
du tn!pied
8 Touche
de
desactiva
tion
de
Ia mise
au
point
9
&he
ll
e
de
Ia l
ong
ueur
focale
10
Comm
utat
eu
r
de
mise au point
I I l.imit
eu
r
de
plage
de
mise
au
point
12
Rephe
du
cadre (gris)
13
Repere
de
montage
de
\Objectif
14
Bouton
de
verrouiJiage
du
cadre
15
Commutateur
du
mode
Antibouge
16
Commutateur
Antiboug
e
* Ne touchez pas les contacts
dbb
jec
tif
.
I!J
Fixation/retrait
de
l'objectif
Fixation
de
l'objectlf(Voir !'Illustration
m
-rn.
)
1 Retirez les capuchons d'
objectif
situes a
I'avant
et
l'arriere, ainsi
que
le capuchon de
l'appareil photo,
• Vous pouvez poser et deposer les capuchons d'objectif
avant de deux fa,ons,
(I)
et (2).
Si
vous posez/d
c!posez
le
capuchon d'objectif avec
le
parasol
ei
l, utilisez
Ia
methode
(2).
2 Alignez le
point
blanc du barilletd
'o
bjectif
sur le
point
blanc de l'appareil photo (repere
de
montage), puis posez l'objec
tif
sur
Ia
monturede l'appareil photo
et
tournez-le
dans le sens horaire de sorte qu'il
s'encliquette.
• N'appuyez pas
sur
Ia
touche de dCblocage de l'objectifde
l'appareil photo lorsque vous
fixez
l'objectif.
• Ne fixez pas l'objectif de travers.
Retrait
de
l'objectif
(Voir
!"Illustration
m-[2].)
Tout
en
appuya
nt
sur
lebouton
de
liberation
de
l'objectif
sur
l'appareil photo, tournez l'objectif
dans
le
sens
antihoraire
jusqu'a
l
'a
rret,
puis
deposez
l
'obje'ct
if.
l!lUtilisation
du
trepled
Lors
de
!'utilisation d
'un
trep
ied, flxez-le
sur
le
cadre
de
montag
e
de
IObjectifet
non
pas s
ur
le logeme
nt
du
trepied
de
l'appareil photo.
Modification
de
Ia
position vertlcale/
horizontale
Desserrez
Ia
touche de
ve
rrouillage
du
cadre
sur
le cadre de
montage
du
tn!pied
(I)
pu
is
orientez l'appareil photo dans
\e sens
de
votre choix. Lorsque vous utilisez un
tn
!pied,
vous pouvez rapidement passer d'une position a!'autre
to
ut
maintenant Ia stabi
litC
de
l'appareil photo.
• Des points gris (repCres de cadre) se trouvent ades inter
va
lle
s
de
90
° s
ur
le cadre.
Al
ignez un point gris
du
cadre sur
Ia
ligne gri
se
(rephe
de cadre) de lbbjectifpour ajuster
pl
us
pr&:isCment Ia position de J'appareil photo (2).
• Apres avoir regie
!Orien
tation de l'appareil photo, se
rr
ez
fermement
le
bo
uton
de
verrouilla
ge
du
cadre.
•
Le
ca
dr
e
ri
sque de heurter l'appare
il
photo ou l'accessoire lors
de
Ia
rotation, selon le modele de camera ou d'accessoire. Pour
plus d'informations sur Ia compati
bil
it
e avec
les
appa
re
ils
photo et accessoires,
vi
sitez le site Web de Sony
de
votre
rc!g
ion.
Detachement
du
cadre
de
montage
du
trepied
de
l'objectif
Lors
de
I'
utilisation d'un
tr
epied,
il
est
po
ssible
de
detacher le
cadre
de
montage
du
tr
Cp
ied.
1 Retirez l'objectifde l'appareil photo.
• Pour
pl
us
d'informations, reportez-vous a
Ia
section « (D
Fix
ation/retrait de l'objectif
».
2 Tournez le
bouton
de
verrouillage
du
cadre
pour
aligner les reperes
du
bouton
de
verrouillage
du
cadre sur le cadre (3).
3
nrez
le
bouton
de verrouillage
du
cadre le
bas
(4),
puis ouvrezle cadre.
• Tenez l'objectife
tl
e cadre fermement lors de J'ouverture
du
cadr
e.
• Ne tcnez pas
Ia
charnihe
lors de l'ouvertu
re
du
cadre.
Vous risqueriez
de
vous pincer
Ia
main dans
le
cas
co
ntraire.
•
Si
vo
us
ouvrez le cadre sans retirer l'objectif
de
l'appareil
photo, le cadre risque de heurter J'appare
il
photo ou
J'
ac
cessoire. Nous vous conseillons de retirer l'objectifde
l'apparcil photo avant
de
retirer le cad
re.
I!J
Fixation
du
parasoleil
II
est conseil\e d'utiliser
un
paraso
le
il
pour
rtlduire
Ia
lumiere
parasite et
obtenir
Ia
meilleure image possibl
e.
Alignez
Ia
ligne rouge du parasoleil
sur
Ia
ligne rouge
de l'objectif(repere de parasole
il),
puis
ins
e
rez
le
parasoleil
sur
Ia
monture d'objectifet tournez-le
dans
le
sens
horairejusqu'a
ce
qu'il s'encliquette et
le
point
rouge du parasoleil
s'a
ligne
sur
Ia
ligne rouge de
l'objectif(repere de parasoleil).
•
Si
vous utilisez un flash
ex
terne (vendu st:'parCment), retirez
le
p.arasoleil
pour
Cviter de
blO<juer
Ia
lumiCre du flash.
• Pour ranger
le
parasoleil, in
sCrez-le
a l'arr
ihe
de lbbject
if.
1!1
Utilisation
du
zoom
Tournez
Ia
baguedu zoom pourobtenir
Ia
longueur
focale de votre choix.
IiiMise au point
•
Le
commutateur
du
mode de mise au poi
nt
de
cet objec
ti
f ne
fonctionne pas
sur
certains modeles d'appare
il
photo.
Pour
plus
d'informations
s
ur
Ia
compatibilite, consultez
le site
de
Sony
de
votre pays,
ou
adressez-
vous
a
un
revendeur Sony
ou
a
un
service apres-ve
nt
e agree Sony.
Commutation
AF
(mise au point
automatlque)
et
MF
(mise au point
manuelle)
II
est possible
de
regler le
mode
de
mise au point s
ur
AF
ou
MF
sur IObjectif.
Pour
effec
tuer
des
pri
ses
de
vue
en
mode
AF,
l'appareil
photo
et
IObj
ectif
doi
ve
nt
tous
deux
C
tr
e r
c!g
les sur A
F.
Pour
effectuer des prises
de
vue
en
mode
MF, l'appareil
photo
ou
l'objectifdoit Ctre regie
sur
MF.
R4!glage
du
mode
de
mise
au
point
sur
l'objectif
R
eg
lez
lecommutateur du mode de
mise
au
point
sur
lemode
ada
pte,
AF
ou
MF
(
1).
• Reportez-vous
aux
manuels de l'appareil photo pour
rCgler
le
mode de mise
au
point de l'appareil photo.
•
En
mode
MF,
tournez
Ia
bague de mise
au
point
pour
regler
Ia
mise
au
point (2) tout en regardanl dans le viseur, e
tc.
Utilisation
d'un
appareil
photo
dote
de
Ia
touche
de
commande
AF
/MF
•
Ap
puyez s
ur
Ia
touche de commande AF/MF
pour
passer de
AFaMF lorsque
J'
appare
il
photo et lbbjectifsont
rfg!Cs
sur
AF.
• Appuyez sur
Ia
touche de commande AF/MF pour passer
de
MF aAF lo
rs
que l'appareil photo est
rc!gle
sur
MF
et lbbjectif
surAF.
[!'I Utilisation
de
Ia
fonction Antibouge
CommutateurAntibouge
• ON : compense les vibrations de l'appareil photo.
• OFF :
ne
compense pas les
vib
rations de l'appare
il
photo. Nous
vous conse
ill
ons d'utiliser un
trc!pied
pendant
Ia
prise de
Commutateur
du
mode
Antibouge
RCglez le
co
mmutateur
Antibouge
s
ur
ON,
puis
reglez le
comm
utat
e
ur
du
mode
Antibouge.
• MODEl : compense les vibrations normales de l'appareil
photo.
•
MODEl:
compense les vibrations de l'appareil photo lors d'un
panorama de sujets en mouvement.
(Suitea
lap
agearrihe)
SONY.
4-535-6%-Q1(1)
3CBU,.~;.t;;(
Interchangeable Lens
Objectif interchangeable
iiJj!~-~
http:
//
www.sony.neV
Printed
in
Japa
n
1111111111~11111111111111111
4535696010
tlllllii~.l!ll!o.>t::l!>o.>it·Q~'if5U
~>I:.A.--.o.>t.,.:A:ll!Ul:o.>llt."-o.>ll
·~-'O~i><:l:b'llHlltT.
i:O)illll!llliBJl&ICI<t.
!11!11'.<"1
<:Toi!>O)ll!~l«iH!I!!!l11:
!!:lffil
O)£NIJW:L\fJ
1
ftil'!ffi"l..LL\~9o
CO)INW~8~
·
1,!J::(S
ME
(}fO)_t.~86~~
j::f
;:::<:D~l\<tC.CLl
o
<O~Cbl<:.t.f.Jtc.®C.Id:,
Lr::n:t~~Sn.Qmr;:l09'"f-f§
L...
<:
<r.:cL
'0
<:::(J)r~lllliiJ(J)<::)±!l':J<:Id:u/::Cic:*'ill'iurc<::
):1:!\to:C:.
c~lllliiJI<=S"'ilil
1/c/C.i!rcl\f']§lc:
-:Jc\C:OiiB!lVn•ifg.
i.JY:::<cc(J)Ii!!l'b'lc
IC:-:Jl
\C:Id:81J/ffi(J)
ri&l!l~B!l'&J
<:
2'1Wil:tifg.
dY9'c~l!l(J)liiJIC:.:$:l!!C:€ibttZ:d::<S"'ili(J)
3
:t
<:
cli!!lll
<
rc.'"c
'·
~=-~ffilld:.'l<~I<=3'E511l2!1'"nn•*g·
ub•
L.,,
rOI~::>/c~l
\b'lc
'E:g~c
•
.A.!lill'itlllb'Jt.OV'~
JDnb
1
®tJIB~<:g.
iO'tlll'E:flJ5<:rciVI<=;J:(J)<:::c
'E:<09'S9'tJ<IC.Nt.
• 'l<"EOJ/.:0/lOJi:t!!!l!lli'.<"l'.Q.
•
I&~
L-T.:
Si<'IJ9'1C.
S<lo
1_ll1/li.
;f
T.:
I<!:/=
-OJl~ilii
ll:OICilH!I!'.rii'<!i'i9-Q.
1//:X'!<ill!L.,Z::
.::l;JIII~
l!ill\:i't'l<-'!.to:l\
El'E:l•r.:IVrc
tJ
.:"'BJl(J)IJRI'!lcto:~<:::cb'
®'J;Jog.
Jt.ti.J\'l!o.>'¥o.>liil<
fl!Piil<=lllb•ta:c'
!l'itlll~l:tb'to:c(J)IJRI'!lcto:o
;Jog.
f!JII..to.>~~-
•
Lo7'[email protected]:l::~t>l'lo>l'til!lc!Dl11T.:;c;<lc
V<>orc
<IC<!L
\o
U:/:Z::O)~:J'tf"Fffli<:J::IJ,*W-t->i"rt71
·
Ll
/7f'JilllOJI&~OJIJlU5liCI<rtl
if9.
t>iG'.<I~9':l::f'.lll'tT
1!JICS<ll.!-&1<1.
iiD
!JtL--/7'\'i'
"17'.r
!11(tl
t11
1C:<T
c
(!l,\Q
•
L--/7.
7'l/:J/I(-5'-'.rll1ill1t.QI:;!'\>c@'i!KT<>
-<>l'll
lcl<~:
.
itl~z"i::t1<1:o
'<i:
':lice;
±!!
<
rc.cco
'·
•
il<i'!OJI'llld:.i:\Wv/7.7'
l/:J/J(
-5'-ICL//7
"~'"
"J7'.r!;l(t>f111C::<TC.cc'·
• illilfOJiiilc>!>li'/iiC!lloll!ll"lilib''«c
rc<
TC.cc
'·
1J
t:b'~
~1t.QL:I:b'il5tJ;fg.
•
L--Y7f
!i,.
lll8~!<St<>c'c<rc.cco\.
<~:c:n1!>1c<~:o
llli!HTE!ICt~<OC:.1J;i
5/:0Jm
..
OJt>tJ
1:
tJ
b'JE
L.,
<
fronw.1J;~
5b'JE
L-
<Jhf~
L-1<1:<
t<>t>
;cvOJcc>±
1J<iC~l,\o
••
1;:?~\Z::
i>'i~C:Id:.
i.JY:::<'E::ll'l\~f'lib'Sf<\IC:ailb'l1\llli'li"
I!J'5i?>fv/C.C:V'IO:C:IC:,
u/;:((J)f']fl!~'l'>~fl!IJIC:*J®i
~M<C~C'~I>'in'E:Jt.OL:'J~(<g~~l;b~
ld:.
-
!il:i.JY;:(~;t(IJ!iWib:7tJ:C:IC:.AnZ:.Ii!!
!flg~!lllf!(J))fifi!il:l<:!d:v1fttZ:b'S.l&tJt±lL.,
<::<
r.:c!L-\o
S¥J..ttl;:?~l'l:
• L--Y70Jl!<iili1CI<Iill!lll!lfl1<J:c\c<TC.ccr.
•
l/:.tAb'i~rticC~I<:f:,
:107'
-
C
iif
C::.I:J~O)~~-~S
1J'l,
i
)~Jg1J
fiJCti<
i}l~Itll:~
"'C
<t.:f!L,io
(?
IJ
-=:;?
?D70Jci<'ill'.rS1t90/ll.,;fg
.)
• l/Y7Nl!ll'lOJ<O'l'J..fliCI<t.
0//7-.
"'-/''.1/td'cOJ
fll!i!illlilll<t!@r.!IC@'IJ1<J:c
IC'<
TC.cc
'·
flliESc779-'!t-t:A
~~~~·
•
c:OJ~aolcl<til<iiH!Wcllficnc:c
'*90Jc.
Si'ic
•..t
11/licil5:'1tl1!11(tl
(TeN>.
• Fli>Ell!IIiOJocJ..SJ:UicO!f'll'l'.<SiilW!bOJ.l.
o\:I)]IC
fo<i!:V<:<TC.cc\.
•
il<!il:ll!lr-111<1.
mo:c\.li1EIJ:t> l'FI!IIc<t.
77~-<:t-1:::7.
•~t.I'8B~Icl!la:ill'7z
"'~"'"
L:(J)OiiB!l~C:.81Jfffi(J)rl&l!l~B!ll!!J'E:B5-!ll:c'li
l
<=
to:::>Z:SOI!l"<r.:'""'·
.z-ncB!'<€>(J)~c'~
V'ld:.
S:OO:c
•1:11!5,
1ftcld:~=
-(J)t§Oli1:!l(DI<=c
t§Oli1<1C.Nt.
fili!IIIMII>o.>tlllla:
iliHilE!!!(J)ociO!II'lt>l<=ii!-::5c
1Z:IlfJ!!l'"ttn
'rcrcV"
;Jog.
~u<ld:i'i!off~'E:2Jt<rc'"l'.
fiiDIMiil!ill.o.>IJII!a:
llfJ!!liC:d::::>
Z:ll\lliWI!II!JC'V'~I.!!€>1d:.
2\ll'~IC:d::
tJW'I41li'J!!l'"ttz:c•r.:rcV"1fg.
8Biiil<1.lfiUMI;:?~I'l:
~l±<:ld:x~uY:::<(J)l!llllflll'liiigllllffil<~ffil(J)ll\lim
'E:If!I!Jg~/cl;biC<i3\ll'7d:llllffil
)
'!;£.
~
..
H'51;1J
01&7
"Fr.lli*'llun
'*g.
r.:rc.
u.1iP~(])tJC)Jt't(])fl!l(J)
$1\KJ::'J,
fi1!l!I!IC:it:t
C::~
ffilx~'l;£
g~JJ]l €lb'i5
'J;fg(J)C'277ii<TC.Nt.
http://www.sony.jp/support/
:JIJ
$'-{"\?)
[..
/IJ
:.'1.-ft'J
[.,
......
0120-333-020
0120-222-330
)j!:f!fii~·PHS·-8f!O)IPtiA!
~
;&ai!
·PHS·-!?£(1)1Pfl.,
~
050-3754-9577
......
050-3754-9599
llfit!W
ti!EJl
•.
I)'E::J/"11.liiA
*ilG:
Iil
.::
55"-t:
ll!!l~l"atll
.!(
f~<!l,
\,
FAX
(:MB)
0120-333-389
•
..t.lt:lt~"-Hltmi.
IUJJ(1)tj-f~YAh
1
iifl:flLl-1l:llldll.::
[402J+f#J
'!!IIILL<.~i!l.l
i£!11,
t§~g0"-8-='TJi!L~l"
.
'..1=-ru:t.g.tt
TlOB-OD75l!iJ'a
fl!
~Z:?.!~l
-7-
l
umm;w
"Precautions
before using" contains
information
you
should
read before using the lens, such as preca
ution
s
common
to lenses.
How
to
usc individual lenses is
described
in
"Operating
instructions"
on
a separate sheet.
Be
sure
to
read
both
documents
before using the lens.
- --
-"'
To
reduce
fire
or
shock hazard,
do
not
expose the
unit
to
rain
or
moisture
.
Do
not
directly l
ook
at the
sun
through
this lens.
Doing
so
might
har
m
your
eyes
or
cause loss
of
eyesight.
Keep the lens
out
of
reach
of
small chi
ldr
en.
There
is
danger
of
accident
or
injury.
For
the
customers
in
the
U.S.A.
This
device complies with
Part
IS
of
the
FCC
Rules.
Operation
is
subject
to
the
following two conditions:
(I)
This
device
may
not cause harmful interference,
and
(2)
this device must accept any interference received,
including
interference that
may
cause undesired
operation
.
CAUTION
You are
caut
i
oned
that
any
changes
or
modifications not
expressly
approved
in this manual
could
void
your
authority
to
operate
this
equipment.
NOTE
:
This
equipment
has been tested
and
found
to
compl
y with
the limits for a Class 8 digital device,
pursuant
to
Part 15
of
the
FCC Rules.
These
limits are designed to provide
reasonable protection against
harm
fu
l interference in a
residential installation.
This
equipment
generates, uses,
and
can radiate radio frequency energy and, ifnot installed
and
used in
accordance
with the instructions,
may
cause
harmfu
l interference
to
radio
communications.
Ho
wever,
there
is no
guarantee
that
interference will not
occur
in a
particular
installation. If this
equipment
doe
s
cause harmful interference
to
radio
or
television reception,
which can be
determined
by
t
urning
the
equipment
off
and
on,
the
user
is
encouraged
to try
to
correct
the
interference
by
one
or
more
of
the
following measures:
-Reorient
or
relocate the receiving antenna.
-
In
crease the separation between the equipment and receiver.
-Connect the equipment into an outlet on a circuit different
from that
to
which the receiver
is
connected.
-Consult the dealer or an experienced radio/TV technician for
help.
For
the
customers
in
Canada
CAN
ICES-3 B/NMB-3 B
For
the
customers
in
Europe
-Disposal
of
Old Electrical & Electronic
Equipment (Applicable
In
the
European
Union
and
other
Europeancountries
with
separate
collection systems)
This
symbol
on
the
product
or
on
its
packaging indicates
that
this
product
sha
ll
not
be
treated
as
household
waste.
Instead it shall be h
anded
over
to
the
app
licable collection point for
the
recycling
of
electrical
and
electronic
equipment.
By
ensuring
this
product
is
disposed
of
correctly,
you
will help prevent potential
negative consequences for
the
environment
and
human
health, which
could
otherwise be
caused
by
inappropriate
waste
handling
of
this
product.
The
recycling
of
materials
will help to conserve
natural
resources. For
more
detailed
information
about
recycling
of
this
product,
please
contact
your
local Civic Office, y
our
household
waste disposal
service
or
the
shop
where you
purchased
the
product.
Notice for
the
customers in
the
countriesapplying
EU
Directives
Manufacturer
: Sony
Corporation,
1-7-1
Kanan
Minato-ku
Tok
yo, 108-0075 Japan
For
EU
product
compliance: Sony Deutschland
GmbH,
Hedclfmger Strasse
61,70327
Stuttgart,
Ge
rmany
Notes
on
use
• Do not leave the lens exposed
to
the sun or a
br
ight light
source. Internal malfunction
of
the
cam
e
ra
body and lens,
or
a
fir
e may result due
to
the effect
of
light focusing. If
circumstances necessitate le
av
ing the lens in sunlight,
be
sure
to attach the lens caps.
•
Be
careful not to subject the lens/teleconverter to mechanical
shock while attaching it.
•
Always
place the lens caps
on
the lens/teleconverter when
storing.
• Do not keep the lens in a very humid place for a long period
of
time
to
prevent mold.
• Do not touch the lens contacts. Ifdirt, etc., gets on the lens
co
ntact
s,
it
may interfere or prevent the sending and receiving
of
signals between the lens and the camera, resulting
in
operational malfunction.
Condensation
If
yo
ur
lens is
brought
directly from a cold place
to
a warm
place,
condensation
may
appear
on
the
lens.
To
avoid this,
place the lens in a
pl
astic bag
or
somethi
ng similar.
When
the air
temperature
inside t
he
bag reaches
the
surrounding
temperature,
take
th
e lens
out.
Cleaning
the
lens
• Do not touch the surface
of
the lens direc
tl
y.
•
If
the lens gets dirty, brush offdust with a lens blower
and wipe with a soft, clean
doth
(Cleaning Cloth
is
recommended).
•
Do
not
use
any organic solvent, such
as
thinner or benzine,
to
dean
the lens
or
the camera cone.
1
if!.IW
La
section«
Precautions avant toute utilisation » co
nt
icnt
des
informations
alire impCrativement avant d'utiliser
l'objectif, telles
que
des
precautions
communes
a
tousles
objectifs. L'utilisation
de
chaque
object
if
est dCcrite
dans
le"
Mode
d
'emp
loi "
dans
un
do
c
ument
sCparC.
Veuillez
lire
attenti
ve
ment
ces
deux
documents
avant d'utiliser
l'objectif.
Pour
n:duire
les risques
d'incendi
e
ou
d'
Clec
trocution
,
tenir
cet appareil al'abri
de
Ia
pluie et
de
l'hum
iditC.
Ne
regar
de
z pas
directement
le solei! atravers cet objectif.
Ceci
pcut
causer des lesions visuelles
ou
entrainer
Ia
perte
dela
vue.
Gardez
l'objectif
hor
s
deportee
des
enfants
en
bas age.
II
peut
presenter
des risques
d'
accident
ou
de
blcssure.
A!'intention
des
clients
aux
~.-U.
Ce
t appareil est
conforme
a
Ia
Partie IS
de
Ia
reglementation
de
Ia
FCC des
~tats
-
Unis.
Son utilisation est sujette aux
deux
conditions
suivantes :
(l)
Cet appareil
ne
doit pas gCnCrer d'interfCrences nuisibles
et (2)
il
doit Ctre
en
mesure d'accepter
toute
interference
re~ue,
y
compris
les interferences
po
uvant
generer
un
fonctionnement
indesirable.
AVERTISSEMENT
Par
Ia
presente,
vous
etes avise
du
fait
que
tout
changement
ou
toute modification
ne
faisant pas ]'objet
d'une
autorisation expresse
dans
le present
manuel
pourrait
annuler
votre
droit
d'utiliser l'appareil.
REMARQUE
:
L'appareil a
CtC
teste et est
conforme
aux exigences
d'un
appareil numCrique
deClasse
8,
conformCment
3.
Ia
Partie
IS
de
Ia
rCglementation
de
Ia
FCC.
Ces criteres
sont
con~us
pour
fournir
une
protection
raisonnable
contre
les interfer
ences
nuisibles
dans
un
environnemen
t rCsidentiel. L'appareil gCnhe, utilise et
peut
Cmettre des frCquences radio; s'il n'est pas installe
et
utilise
conformCment
aux.
instructions,
il
pourrait
provoquer
des
in
terf
ere
nc
es nuisibles
aux
communications
radio.
Cependant,
il n'est pas possible
de
garantir
que
des
interferences
ne
seront pas provoquCes
dans
certaines
conditions
particulieres.
Si
l'appareil devait
provoq
uer des
interferences nuisibles a
Ia
reception radio
ou
a
Ia
tCICvision,
ce qui peut etre
demontre
en allumant et Cteignant
l'appareil, il est
recommande
al'utilisateur d'essayer
de
corriger
cette situation
par
l'une
ou
I'
autre
des mesures
s
uivantes;
-Rffirienter ou
dCp
lacer l'antenne n!ceptrice.
-Augmenter Ia distance entre l'appareil et
le
recepteur.
-Brancher l'appareil dans une prise ou sur un circuit diffCrent
de
celui sur lequelle r
Ccep
teur est branchC.
-Consulter
le
dCtaillant
ou
un technicien expCrimentC
en
radio/
televiseurs.
Pour les clients
au
Canada
CAN
ICES-3 8/NMB-3 B
Pourles clients
en
Europe
Traitementdesappareils etectriques
et
4!1ectroniques
en
fin
de
vie (Applkable
dans les pays
de
!'Union Europeenne
et
aux autres pays europeens disposant
de
systemesde collecteselective)
-
Ce
symbole, appose
sur
le
produit
ou
sur
son emballage,
indique
que
ce
produit
ne
doit
pas etre
traM
avec les dCchets
m
Cn
agers.
II
doit etre remis a
un
point
de
co
llecte
appropriC
pour
le recyclage des Cquipements Clectriques et
Clcctroniques.
En
vous
assurant
que
ce
produit
soot
mis
au
rebut
de
fa~on
appropriCe,
vous
participez activement a
Ia
prevention des consequences negatives
que
leur
mauvais
traitement
pourrait
provoqucr
sur
l"environnement et
sur
Ia
sante
humaine
.
Le
recyclage des matCriaux
contribue
par
ailleurs aIa preservation des ressources naturelles.
Pour
toute
information
comp!Cmen
tair
e
au
sujet
du
recydage
de
ce
produit,
vous
pouvez
con
tacl
er
votre
muni
cipali
tC
, votre
dCchetterie locale
ou
le point de vente
oU
vous avez achete
leprodui
t.
Avis
aux
consommateurs
des
pays
appliquant
les Directives
UE
Fabricant :
Sony
Corporation,
1·7-1
Kanan
Minato-ku
Tokyo, 108-0075 Japan
Pour
toute
question relative a
Ia
conformite
des
produits
dans
l'UE : Sony Deutschland
GmbH,
Hedelfinger Strasse
61
,70327
Stuttgart, Allemagne
Remarques
sur
I'
utilisation
• Ne laissez
pas
J'objectifexpose au solei! ou a une autre source
de lumiCre
vive.
Cela risque de provoquer un probiCme
de
fonctionnement interne du boitier
de
l'appareil photo et de
l'objectif, voire
de
provoquer un incendie.
Si
toutefois vous ne
pouvez
pas
faire autrement, veillez afixer les capuchons sur
l'objectif.
• Veillez ane pas soumettre l'objectif!le teleconvenisseur aun
choc mb:anique lorsque vous
le
fixez
.
• Place1.toujours \es capuchons sur l'obje<tif/le
h~leconvert\sseur
avantdeleranger.
• Ne laissez
pas
l'objectifdans
un
endroit tres humide
pendant une pfriode prolongfe afin
d'C
vi
ter
Ia
formation
de
moisissure.
•
Ne
touch
ez
pas
les
contacts
de
l'objectif. Side
la
saletf, et
c.,
se
trouve sur l
es
contacts
de
l'objectif, cda risque
de
poser
un
probltme
ou
d'empecher
Ia
recep
tion
et
I'envoi
de
signaux
entre l'objectif
et
l'appareil phot
o.
provoquant
ainsi
un
dysfonctionnement.
Condensation
Si
votre objectifest dCplace directement
d'un
endroit froid
aun
endro
it
chaud, de
Ia
condensation risque de se former
sur
I'
objectif. P
our
eviler ce phenomene, placez I'objectif
dans
un
sac
plastique
ou
au
tr
e.
Sortez I'objectif du sac
lorsque
Ia
te
mperature
de
I'
air al'intCrieur
du
sac a atteint
Ia
temperature ambiante.
Nettoyage
de
I'
objectif
• Ne touchez
pas
directement
Ia
surface de J'objectif.
•
Si
J'obje<tifest sal
e,
eliminez
Ia
poussihe avec une souffiette
et essu
yez
-le avec
un
chiffon doux et propre (le chiffon
de
nettoyage est recommande).
• N'utilisez aucun solvant organique,
tel
qu'
un
diluant ou de
I'essence pour nettoyer J'objectif ou
le
cOne
de
l'appareil.
p.mU.!I
~
Precauciones
previas a
Ia
utili7.aci6n
del
producto"contiene
informaciOn que debe leerse antes
de
utilizar
el
objeti\·o
como, porejemplo, precauciones
co
munes relacionadas con
los objeti
vos
.
El
funcionamiento
de
objetivos individuales
se
describe
en
el
"Manual de instrucciones"
en
una hoja
independiente.
AsegUrese
de leer ambosdocumentos antes
de
utilizarelobjetivo.
Para
reducir
el riesgo
de
incendio o descarga c]Cctrica, no
exponga
Ia
unidad
a Ia lluvia ni a
Ia
humedad
.
No
mire
directamente
el sol a travCs de este objetivo.
De lo contrario,
podria
daflar sus ojos o causar una pCrdida
desu
vista.
Mantenga el objetivo fuera del alcance
de
los niiios
Existe riesgo
de
sufrir
daiios o
un
accidente.
Para los clientes
de
Europa
Tratamlento
de
los equipos eltktricos y
electrOntcos
al
ftnal
de
su vtda
Util
(aphcable
en
Ia
UmOn
Europea
yen
paiseseuropeoscon sistemasde
tratamientoselecttvo
de
restduos)
-Este si
mbolo
en
el
equipo
o
en
su embalaje
indica
que
c\
presente
producto
no
puede
ser
tratado
como
residuos domCstico
normal.
Debe
entregarse
en
el
co
rr
espondiente
punta
de
recogida
de
equipos
e\Cctricos y electr6nicos.
AI
asegurarse de
que
este
producto
se desecha correctamente, usted ayuda a prevenir
las consecuencias potencialmentc negativas para el
media
ambiente
y
Ia
sa!Ud
humana
que
podrian
derivarse de
Ia
incorrecta manipulaciOn
en
el
momenta
de
deshacerse
de
este
producto.
El
reciclaje
de
materiales ayuda a conservar
los recursos naturales.
Para
recibir informaciOn detallada
sobre
el
rcciclaje
de
este
producto,
p6n
gase
en
contacto
con
el
ayuntamiento,
el
punta
de
recogida miis
cercano
o
el
establ
ecimiento
donde
ha
adquirido
el producto.
Aviso
para
los clientes
de
paises
en
los
que
se
aplican las directivas
de
Ia
UE
Fabricante; Sony
Corporation,
I-7
-l
Kanan
Minato-ku
Tokyo, 108-0075 JapOn
Para
Ia
conformidad
del
produ
cto
en
Ia
UE:
Sony
Deutschland
GmbH.
Hedelfinger Stra
sse61,
70327
Stuttgart, Alemania
Notas
sobre
el uso
• No deje
el
objetivo expuesto
al
sol o a fuentes de luz intcnsas.
Es
posible que
se
produzcan fallos de funcionamiento inlerno
del cuerpo de la c3mara y del objetivo o un incendio como
efecto de
Ia
luz directa.
Si
las circunstancias exigen dejar
el
objetivo expuesto a Ia luz solar, asegUrese de colocar las tapas
de
lob
jetivo.
• Procure
no
exponer
e1
objetivo o
el
teleconversor a
go
lpes
mientras los coloca.
• Coloque siempre l
as
tapas del objetivo en
el
objetivo o en
el
teleconversor en
el
momenta de guardarlos.
• No guarde
e)
objelivo en
un
Iugar muy hUmedo durante un
largo perlodo de tiempo para
ev
itar
Ia
aparici6n de moho.
• No toque los contactos del objetivo. Si
Cstos
se
ensucian,
es
posible que ello interfiera o impida
el
envio y
Ia
recepci6n de
sei\al
es
entre
el
objetivo y
Ia
d.mara, lo que podria ocasionar
un
fallo en
el
funcionamiento.
Condensaci6n
Si
el objetivo se traslada
directamente
de
un
Iugar frio a
uno
coilido, es posible
que
aparezca
conde
nsaci6n en
e1
mismo.
Para
evitarlo,
coloque
el objetivo
en
una
bolsa
de
pJastico
o similar.
Cuando
Ia
t
empera
tura
del
interior
de
Ia
balsa
alcance
Ia
temperatura
ambiente,
extraiga
el
objetivo.
Limpieza del objetivo
•
No
toque
Ia
superficiedel objetivo directamente.
•
Si
el
objetivo se ensucia, utilice un soplador para eliminar
cl
polvo del objetivo y limpiclo con un paiio suave y limpio (se
recomienda
el
paiio de limpieza).
• No utilice disolventes org3nicos como diluyentes o
bendna
para limpiar
eJ
objetivo o el
co
no de
Ia
d.mara.
SONY®
!Interchangeable Lens
LIMITED
WARRANTY(usonlvl
SonyElectronicsInc.
("Sony")warrantsthis
productagainstdefectsin material
orworkmanshipforthetime
periods
and
as
set forth below when purchased directly
from
Sony
or
a Sony Retailer. Pursuant
to
this Limited Warranty,
Sonywill, at its option, (i) repairthe product using
new
or
refurbished parts
or
(ii) replace the product
with
a
new
or
refurbished product. For purposes
of
this Limited Warranty, "refurbished" means a product
or
part that has been
returned
to
its original specifications. In
the
event
of
a defect,these are
your
exclusive remedies.
Term: For a period
of
one
(1)
year
from
the original date
of
purchase
of
the product, Sonywill, at its option, repair
or
replace
with
new
or
refurbished product
or
parts, any product
or
parts determined
to
be defective.
This LimitedWarrantycovers
only
the hardwarecomponents packaged
with
the Product. Itdoes notcovertechnical
assistance
for
hardware
or
software usage and it does notcover any software productswhether
or
notcontained in
the Product; any such software is provided
"AS
IS" unless expressly provided
for
in anyenclosed software Limited
Warranty. Please refer
to
the End User LicenseAgreements included
with
theProduct
for
your
rights and obligations
with respect
to
the software.
Instructions:
To
obtainwarrantyservice,you
must
deliverthe product,freightprepaid, in eitheritsoriginal packaging
or
packaging affording an equal degree
of
protection
to
the Sony authorized service facility specified.
It
is
your
responsibility
to
backup anydata,
software
or
other
materials
you
may
havestored
or
preserved
on
your
unit.
It
is
likely
that
such data, software,
or
other
materials
will
be
lost
or
reformatted during service and
Sony
will
not
be
responsible
for
any such damage
or
loss. A dated purchase receipt
from
Sony
or
a Sony Retailer is required. For
specific instructions on
how
to
obtain warranty service
for
your
product,
Visit Sony's Web Site:
www.sony.com/support
Orcall the Sony Customer Information Service Center
1-800-222-SONY (7669)
For
an
accessory
or
part not available
from
your
authorized dealer, call:
1-800-488-SONY
(7669)
Repair I Replacement Warranty: This Limited Warranty shall apply
to
any repair, replacement part
or
replacement
product
for
the remainder
of
the original Limited Warranty period
or
for
ninety
(90)
days, whichever is longer.
Any
parts
or
product replaced underthis Limited Warranty will become the property
of
Sony.
This Limited Warranty only covers product issues caused by defects in material
or
workmanship during ordinary
use; itdoes notcover product issues caused by any other reason, including
but
not limited
to
product issues due
to
acts
of
God, misuse, limitations
of
technology,
or
modification
of
or
to
any part
of
the Sony product
or
product
purchased from other than Sony
or
a Sony Retailer.
To
determine
if
a retailer is part
of
the Sony Retailer Network,
please contact Sony's Customer Service Call Center
or
go
to
www.sony.com/support. This Limited Warranty does
notcover Sony products sold AS
IS
or
WITH ALL
FAULTS
or
consumables (such
as
fuses
or
batteries). This Limited
Warranty is invalid
if
the factory-applied serial
number
has been altered
or
removed
from
the product. This Limited
Warranty is valid
only
in the United States.
LIMITATIONONDAMAGES: SONYSHALL NOT
BE
LIABLE
FOR
ANY
INCIDENTAL
OR
CONSEQUENTIALDAMAGES
FOR
BREACH
OF
ANY
EXPRESS
OR
IMPLIED WARRANTY ON THIS
PRODUCT.
DURATION
OF
IMPLIEDWARRANTIES:
EXCEPT
TO
THE
EXTENTPROHIBITED BYAPPLICABLE LAW,
ANY
IMPLIED
WARRANTY
OF
MERCHANTABILITY
OR
FITNESS
FOR
A
PARTICULAR
PURPOSE
ON THIS PRODUCT
IS
LIMITED
IN
DURATION TO
THE
DURATION
OF
THIS WARRANTY.
Somestates
do
not
allow
the exclusion
or
limitation
of
incidental
or
consequential damages,
or
allow
limitationson
how
long
an
implied warranty lasts, so the above limitations
or
exclusions
may
not apply
to
you. This Limited
Warranty gives you specific legal rights and you
may
have other rights which vary
from
state
to
state.
4-448-940-02
11111111111111111111111111111
Printed in Japan

This manual suits for next models

1

Other Sony Camera Lens manuals

Sony SAL14TC - 1.4x Teleconverter Lens User manual

Sony

Sony SAL14TC - 1.4x Teleconverter Lens User manual

Sony VCL-ECF1 User manual

Sony

Sony VCL-ECF1 User manual

Sony FE 28-60mm F4-5.6 User manual

Sony

Sony FE 28-60mm F4-5.6 User manual

Sony VCL-HGD0758 User manual

Sony

Sony VCL-HGD0758 User manual

Sony SAL-300F28G User manual

Sony

Sony SAL-300F28G User manual

Sony VCL-M3367 User manual

Sony

Sony VCL-M3367 User manual

Sony Alpha SAL1650 User manual

Sony

Sony Alpha SAL1650 User manual

Sony SAL-24105 User manual

Sony

Sony SAL-24105 User manual

Sony Alpha FE 28-70mm F3.S-S.6 OSS User manual

Sony

Sony Alpha FE 28-70mm F3.S-S.6 OSS User manual

Sony SELP1650 User manual

Sony

Sony SELP1650 User manual

Sony SEL-50F18 User manual

Sony

Sony SEL-50F18 User manual

Sony VF-25CPKS User manual

Sony

Sony VF-25CPKS User manual

Sony VCL-0630 S User manual

Sony

Sony VCL-0630 S User manual

Sony SAL28F28 - Wide-angle Lens - 28 mm User manual

Sony

Sony SAL28F28 - Wide-angle Lens - 28 mm User manual

Sony SAL-24105 User manual

Sony

Sony SAL-24105 User manual

Sony SEL-1855 User manual

Sony

Sony SEL-1855 User manual

Sony SAL50F18 - 50mm f/1.8 SAM DT Lens User manual

Sony

Sony SAL50F18 - 50mm f/1.8 SAM DT Lens User manual

Sony SEL-50F18 User manual

Sony

Sony SEL-50F18 User manual

Sony SAL1118 - DT 11-18mm f/4.5-5.6 Aspherical ED Super Wide Angle Zoom... User manual

Sony

Sony SAL1118 - DT 11-18mm f/4.5-5.6 Aspherical ED Super Wide Angle Zoom... User manual

Sony VCL-DE07T User manual

Sony

Sony VCL-DE07T User manual

Sony SAL55200-2 User manual

Sony

Sony SAL55200-2 User manual

Sony VCL-ECF1 User manual

Sony

Sony VCL-ECF1 User manual

Sony VCL-HA07A User manual

Sony

Sony VCL-HA07A User manual

Sony DSLRA100H - Alpha A100H 10.2MP Digital SLR... User manual

Sony

Sony DSLRA100H - Alpha A100H 10.2MP Digital SLR... User manual

Popular Camera Lens manuals by other brands

Panasonic WV-LM6B2 instruction manual

Panasonic

Panasonic WV-LM6B2 instruction manual

Nikon AF-I Nikkor ED 300mm f/2.8D IF instruction manual

Nikon

Nikon AF-I Nikkor ED 300mm f/2.8D IF instruction manual

Panasonic Lumix H-FT012 operating instructions

Panasonic

Panasonic Lumix H-FT012 operating instructions

Lumix S-R70200 Service training manual

Lumix

Lumix S-R70200 Service training manual

Schneider Kreuznach PC-SUPER-ANGULON 28 mm f/2.8 user manual

Schneider Kreuznach

Schneider Kreuznach PC-SUPER-ANGULON 28 mm f/2.8 user manual

Nikon AF Micro-Nikkor 60 mm f/2.8D user manual

Nikon

Nikon AF Micro-Nikkor 60 mm f/2.8D user manual

Panasonic Lumix S S-S85 operating instructions

Panasonic

Panasonic Lumix S S-S85 operating instructions

Vivitar 28-85mm f/2.8-3.8 Service manual

Vivitar

Vivitar 28-85mm f/2.8-3.8 Service manual

Canon HJ22EX7.6B Brochure & specs

Canon

Canon HJ22EX7.6B Brochure & specs

Nikon AF-S Zoom-Nikkor 28-70mm f/2.8D IF-ED (2.5x) instruction manual

Nikon

Nikon AF-S Zoom-Nikkor 28-70mm f/2.8D IF-ED (2.5x) instruction manual

Nikon NIKKOR Z DX 12-28mm f/3.5-5.6 PZ VR reference guide

Nikon

Nikon NIKKOR Z DX 12-28mm f/3.5-5.6 PZ VR reference guide

Nikon AF DX Fisheye Nikkor Repair manual

Nikon

Nikon AF DX Fisheye Nikkor Repair manual

Canon MP-E 65 mm 1:2.8 1-5x parts catalog

Canon

Canon MP-E 65 mm 1:2.8 1-5x parts catalog

Nikon NIKKOR Z 24-70mm f/2 8 S user manual

Nikon

Nikon NIKKOR Z 24-70mm f/2 8 S user manual

Nikon NIKKOR user manual

Nikon

Nikon NIKKOR user manual

Leica M8 Specifications

Leica

Leica M8 Specifications

Panasonic Lumix H-FS14140 Service training manual

Panasonic

Panasonic Lumix H-FS14140 Service training manual

Nikon NIKKOR 16-80mm f/2.8-4E ED VR user manual

Nikon

Nikon NIKKOR 16-80mm f/2.8-4E ED VR user manual

manuals.online logo
manuals.online logoBrands
  • About & Mission
  • Contact us
  • Privacy Policy
  • Terms and Conditions

Copyright 2025 Manuals.Online. All Rights Reserved.