English 中文
E
C
D
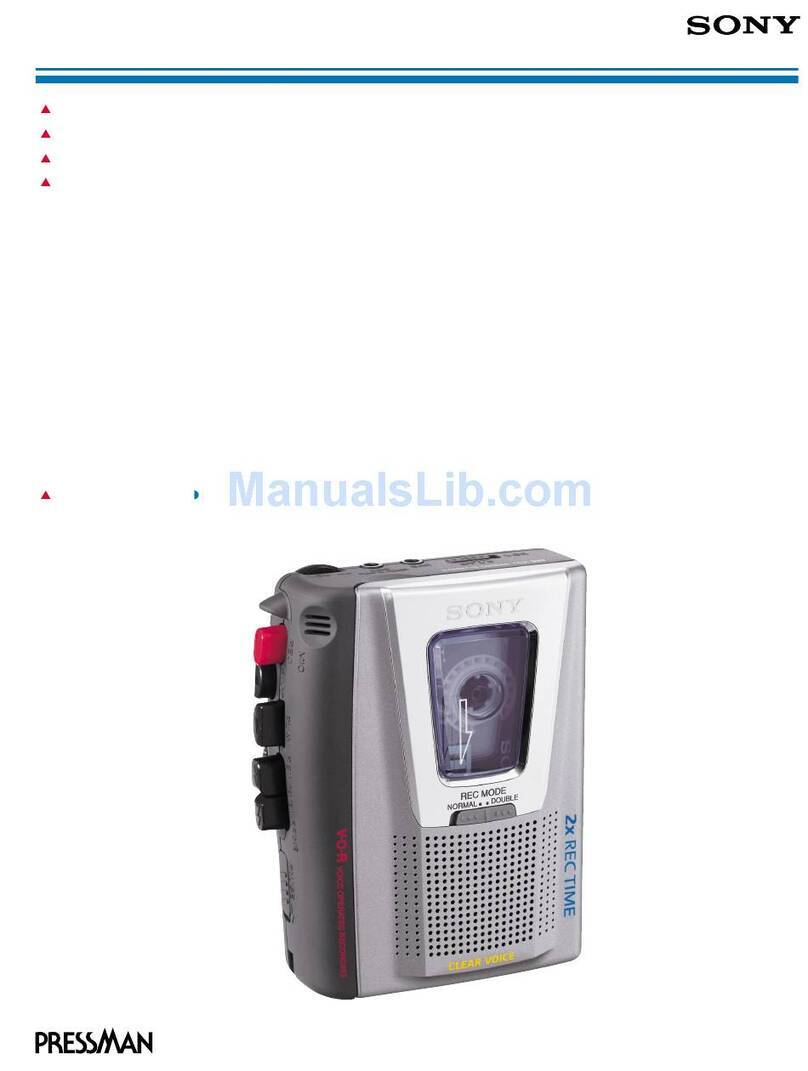
MIC (PLUG IN POWER)*
xSTOP
mREW/REVIEW
MFF/CUE
PAUSE .
NPLAY*
REC TIME/
PLAY MODE*
EAR
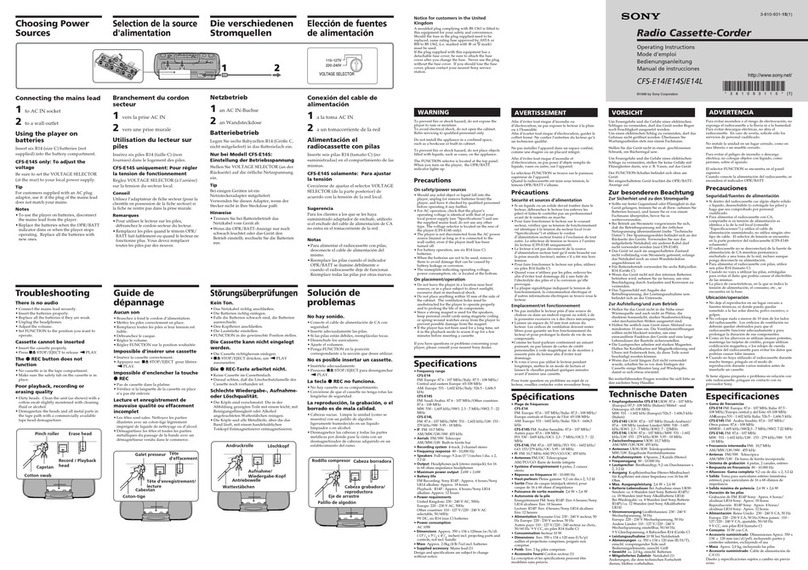
Erase head
擦去磁头 Capstan
主动轮
Record/playback
head
录音/播放磁头
Pinch-roller
压轮
Cotton swab
棉棒
* The button has a tactile dot.
* 键有一个触点。
* There is a tactile dot beside the MIC jack.
* 在 MIC(麦克风)插孔旁边有一个触点。
Recording from
Various Sound
Sources
Notes
•When you are going to record
something that you may not have an
opportunity to record again, test the
unit first before you actually start
recording.
•When recording with an external
microphone, the VOR system may
not work properly because of the
difference in sensitivity.
Recording with an
External Microphone (see
Fig. C)
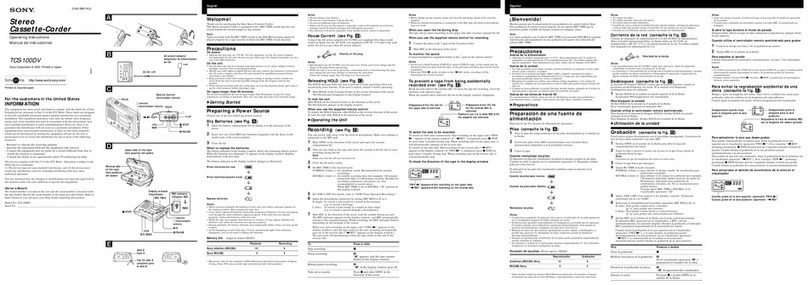
Connect a microphone firmly to the
MIC jack.
Use a microphone of low
impedance (less than 3 kΩ). When
using a plug-in-power system
microphone, the power to the
microphone is supplied from this
unit.
Recording from Another
Equipment
Connect another equipment firmly
to the MIC jack using the
connecting cord (not supplied).
Set this unit to the recording mode
and another equipment to the
playback mode.
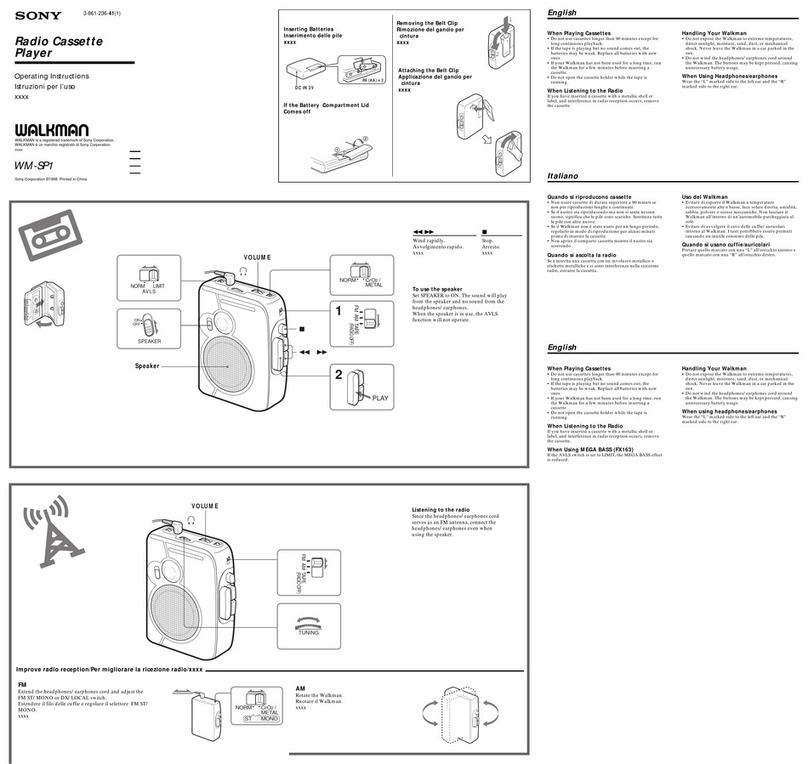
Playing a Tape (see
Fig. D)
1Insert a normal (TYPE I) tape
with the side to start playing
facing the lid
2Set REC TIME/PLAY MODE
to the same position as that
used for recording.
To playback commercially
available music tape, etc.,
select NORMAL.
3Press NPLAY and then
adjust the volume.
There is a tactile dot beside VOL
on to show the direction to turn
up the volume.
4Adjust the tape playback
speed.
Turn SPEED CONTROL to:
SLOW (slow) to play back at
a slower speed.
Center position to play back
at normal speed.
FAST (fast) to play back at a
faster speed.
At the end of the tape, playback
stops and the unit turns off
automatically (Automatic shut-off
mechanism). After the tape has
been wound or rewound, be sure to
press xSTOP.
If you plug in headphones (not
supplied) to the EAR jack, you will
get monaural output from both left
and right channels.
To Press or slide
Stop playback/ xSTOP
stop fast
forward or
rewind
Pause Slide PAUSE .in
playback the direction of the
arrow.
To release pause
playback, release
PAUSE .*.
Fast MFF/CUE during
forward** (FF) stop
Rewind** mREW/REVIEW
(REW) during stop
Search forward Press and hold
during playback MFF/CUE and
(CUE) release it at the point
you want.
Search Press and hold
backward mREW/REVIEW
during and release it at the
playback point you want.
(REVIEW)
Start recording zREC
during
playback
Take out Press xSTOP and
a cassette open the cassette
compartment lid by
hand.
*PAUSE .will also be
automatically released when
xSTOP is pressed (stop-pause-
release function).
**If you leave the unit after the tape
has been wound or rewound, the
batteries will be consumed rapidly.
Be sure to press xSTOP.
Note
Playback may not start automatically
even if you release mREW/
REVIEW at the end of the tape. To
start playback again, press xSTOP,
then press NPLAY.
BAdditional
Information
Precautions
On power
•Operate the unit only on 3 V DC. For
battery operation, use two R03 (size
AAA) batteries.
On the unit
•Do not leave the unit in a location
near heat sources, or in a place
subject to direct sunlight, excessive
dust or mechanical shock.
• Should any solid object or liquid fall
into the unit, remove the batteries
and have the unit checked by
qualified personnel before operating
it any further.
• Keep personal credit cards using
magnetic coding or spring-wound
watches, etc. away from the unit to
prevent possible damage from the
magnet used in the speaker.
• When you do not use the unit for
long, remove the batteries to avoid
damage caused by battery leakage
and subsequent corrosion.
•If the unit has not been used for
long, set it in the playback mode and
warm it up for a few minutes before
inserting a cassette.
On tapes longer than 90
minutes
We do not recommend the use of tape
longer than 90 minutes except for a
long continuous recording or
playback. They are very thin and tend
to be stretched easily. This may cause
malfunction of the unit or sound
deterioration.
If you have any questions or problems
concerning your unit, please consult
your nearest Sony dealer.
Troubleshooting
Should any problem persist after
you have made these checks,
consult your nearest Sony dealer.
You cannot insert a cassettte or
close the cassette compartment
lid.
•The cassette is being inserted in the
wrong way.
•NPLAY has been already pressed.
The unit does not operate.
•The batteries have been inserted
with incorrect polarity.
•The batteries are weak. Replace
both batteries with new ones.
•PAUSE .is slid in the direction
of the arrow.
Recording cannot be made.
•There is no cassette in the cassette
compartment.
•The tab on the tape has been
removed. To reuse the tape for
recording, cover the tab hole with
adhesive tape.
•The batteries are weak. Replace
both batteries with new ones.
Recording is interrupted.
•The VOR switch is set to ON. When
you do not use VOR, set it to OFF.
Recording cannot be erased
completely.
•The erase head is contaminated. See
“Maintenance.”
•You are using a High-position
(TYPE II) or metal (TYPE IV) tape.
Playback cannot be made.
•The tape has reached the end.
Rewind the tape.
No sound comes from the
speaker.
•The earphone is plugged in.
Unplug it.
•The volume is turned down
completely.
The sound drops out or comes
with excessive noise.
•The volume is turned down
completely.
•The batteries are weak. Replace
both batteries with new ones.
•The heads are contaminated. See
“Maintenance.”
•Direct placement of the cassette
tape on the speaker resulted in
magnetization and deteriorated
tonal quality.
•You are using a High-position
(TYPE II) or metal (TYPE IV) tape.
•Use the unit away from radiowave-
emitting devices such as cellular
phones.
Tape speed is too fast or too
slow or the sound is distorted in
the playback mode.
•SPEED CONTROL is set at a point
other than the center.
•Improper setting of the REC TIME/
PLAY MODE switch. Set it to the
same speed as that used for
recording.
•The batteries are weak. Replace
both batteries with new ones.
There is a clicking noise during
tape operation.
•The unit is not in the stop mode.
Press xSTOP.
Maintenance
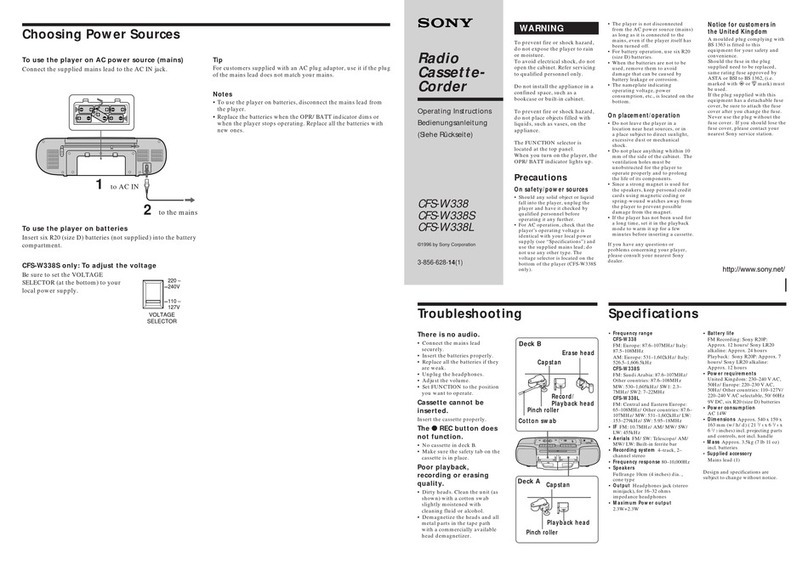
To clean the tape heads and
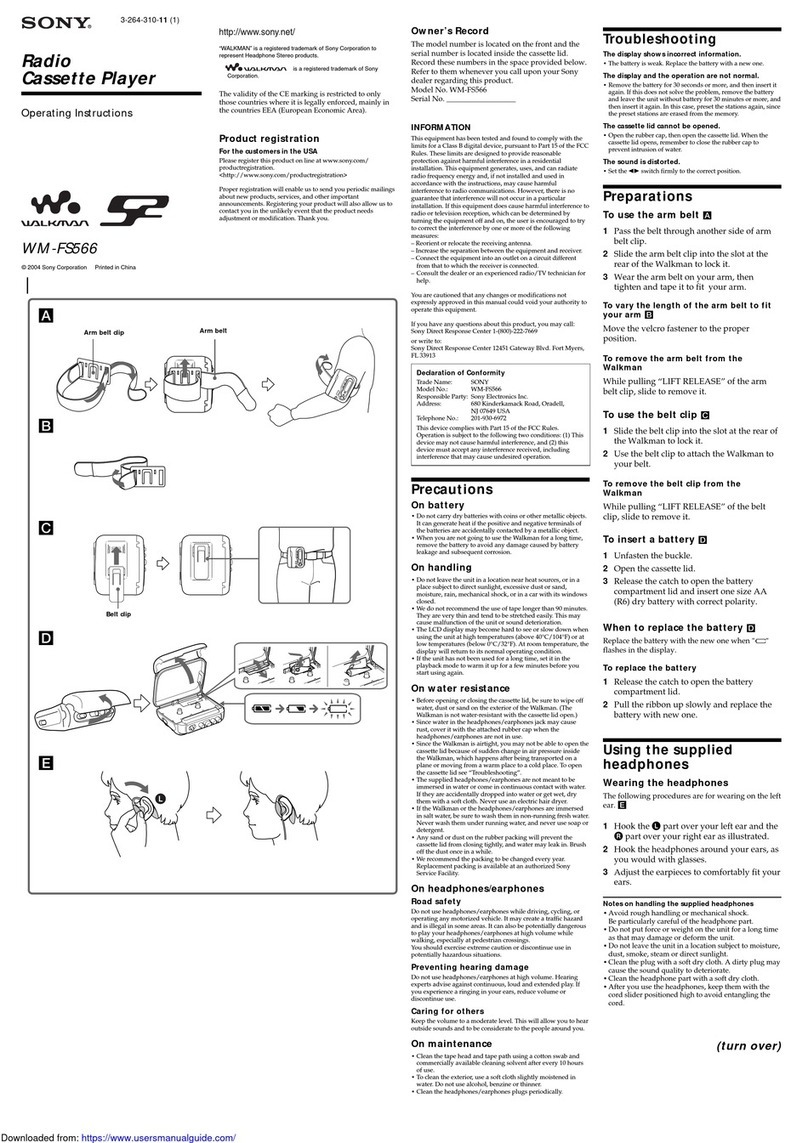
path (see Fig. E)
Press NPLAY and wipe the heads,
pinch roller and the capstan with a
cotton swab, moistened with
alcohol every 10 hours of use.
To clean the exterior
Use a soft cloth slightly moistened
in water. Do not use alcohol,
benzine or thinner.
Specifications
Recording system
2-track 1 channel monaural
Speaker
Approx. 3.6 cm dia.
Tape speed
4.8 cm/s or 2.4 cm/s
Variable range of the tape speed
From approx. +30% to –20% (with
REC TIME/PLAY MODE switch
at “NORMAL”)
Frequency range
250 - 6 300 Hz using nomal (TYPE
I) cassette (with REC TIME/PLAY
MODE switch at “NORMAL”)
Input
Microphone input jack (minijack/
monaural/PLUG IN POWER)
sensitivity 0.2 mV for 3 kΩor
lower impedance microphone
Output
Earphone jack (minijack/
monaural) for 8 - 300 Ωearphone
Power output (at 10 % harmonic
distortion)
450 mW
Power requirements
3 V DC, batteries R03 (AAA) ×2
Dimensions (w/h/d) (incl. projecting
parts and controls)
Approx. 86.3 ×113.4 ×28.9 mm
Mass (main unit only)
Approx. 173 g
Supplied accessory
Carrying pouch (1)
Design and specifications are subject
to change without notice.
从各种声源录音
注
•将要录制某些仅有一次录音机会的声
源时,请在开始录音前先测试本机。
•使用机外麦克风时,因为各个麦克风
的灵敏度不同,所以VOR功能也许不
能正常工作。
另连接麦克风录音
(参见图 C)
将麦克风牢固地连接到 MIC 插
孔。
使用低阻抗(低于 3kΩ)的麦克
风。使用插入通电式麦克风时,麦克
风电源由本机提供。
从其他装置录音
用连接导线(无附带)将另一磁
带录音机连接到 MIC 插孔。
把本机设定在录音状态,并把另
一架录音机设定在放音状态
放音(参见图 D)
1将要开始放音的一面对着卡带
室盖,插入普通(TYPE I)磁
带。
2将REC TIME/PLAY MODE
设为与录音时相同的状态。
要放音在市面上选购的音
乐磁带等,请选择 NORMAL。
3按NPLAY 键,然后调节音
量。
VOL 旁的触点表示调高
音量的方向
。
4调节磁带放音速度。
将SPEED CONTROL旋
钮转至:
SLOW(慢速)以较慢的速
度进行放音。
中心位置以标准速度进行
放音。
FAST(快速)以较快的速
度进行放音。
到达磁带末端时,放音停止并且
本机自动关闭(自动关机机制)。磁带
完全绕完或重绕完之后,请务必按
xSTOP 键。
如果把头戴耳机(无附带)接插
到EAR插孔,则从左频道及右频道都
将听到单耳声输出。
要须按压或设定的控制器
停止放音/停
止快转或倒转
暂停放音
快速前转 **
(FF)
快速倒转 **
(REW)
在放音过程中
向前寻找
(CUE)
在放音过程中
向后寻找
(REVIEW)
在放音过程中
开始录音
取出磁带
*按xSTOP键时PAUSE.键也将
自动释放(停止 - 暂停 - 释放功能)。
**若在录音带走到尽头,或被卷回起点
以后离开录音机,则电池将很快就用
完,切记此时一定要按下x STOP键
才离开座位。
注
即使在磁带结束时释放 mREW/
REVIEW键,也有可能不会自动开始放
音。若要重新开始放音,按xSTOP键,
然后再按 NPLAY 键。
B
附加信息
使用前须知注意事项
电源
•本机只可使用 3V DC 直流电操作。
录音机
•不可把录音机放在热源附近,或直接
受到阳光照射的地方,以及灰尘极多,
容易受震动之处。
•若让固体或液体掉落机内,请取出电
池,并经电气专业人员检查以后,方可
再行使用。
•不要把涂有磁层的个人信用卡或发条
手表等,放在录音机附近,以免受到录
音机里的扬声器磁性的影响,而损失
功能。
•若长期不使用电池,请取出,以免电池
溶液泄漏,损伤机体或腐蚀。
•录音机若长期没使用,下一次要再使
用时,先把录音机设定在放音状态,使
机器预热了几分钟,然后才插入录音
带。
90 分钟以上长的磁带须知
除非进行长时间的连续录音或播放,不
建议使用长度长于90米的磁带。因为这
类磁带很薄,容易拉伸,可能引起机器
故障或音质变差。
若对机器有任何疑问时,请向最近的
Sony 销售店咨询。
故障排除
若在经过自己进行下列检查调查
以后,仍然不能使录音机恢复正常的
话,请向 Sony 经销店商量。
无法插入磁带或关闭卡带室盖。
•录音带方向装反了。
•NPLAY 键已经被按下了。
本机不工作。
•电池装反了。
•电池电量不足。请同时更换两个新电
池。
•PAUSE.往箭头方向移动了。
不能录音。
•卡带室里没装录音带。
•磁带上的防录保险片被拆掉了。要使
磁带能重新录音,用胶带覆盖保险片
孔。
•电池用完了。请用新电池更换两节旧
电池。
录音中途停止。
•VOR开关被设为ON。当不使用VOR
时,请把它设为 OFF。
以前的录音不能完全消除。
•擦去磁头脏了。参看“维修”。
•正在使用高频(TYPE II)磁带或金
属(TYPE IV)磁带。
不能播放。
•磁带已到头了。重绕磁带。
扬声器没有声音。
•已插入耳机。请将其拔出。
•音量被调到最小。
声音跳音或噪音太大。
•音量被调到最小。
•电池电量不足。请同时更换两个新电
池。
•磁头脏了。参看“维修”。
•把卡带放在扬声器上导致磁化以及声
音质量劣化。
•正在使用高频(TYPE II)磁带或金
属(TYPE IV)磁带。
•在远离无线电发射设备如手机处使用
本机。
磁带速度太快或太慢或者放音模式时
声音失真。
•SPEED CONTROL没有设在中心位
置。
•REC TIME/PLAY MODE开关设置
不正确。将其设为与录音时相同的速
度。
•电池电力不足。用两节新电池进行更
换。
在磁带运转过程中有“卡嗒”的噪音。
•录音机不在停止状态。按xSTOP键。
维修
清洁磁头和磁带通道(参见图 E)
每使用 10 小时后,按 NPLAY
键,然后用蘸有酒精的棉球棒擦拭磁
头、压带轮及输带轴。
机体外表的清洁
机体外表请以一稍微沾湿的柔软
布块擦拭,不可使用酒精、挥发性油
脂或稀释剂。
规格
录音系统
2轨迹, 1 声道,单声道
扬声器
直径约为 3.6cm
磁带速度
4.8cm/ 秒或 2.4cm/ 秒
磁带速度变化范围
大约 +30% 到 -20%(REC TIME/
PLAY MODE 开关设定于
“NORMAL”)
频率范围
250-6300Hz,使用标准盒带
(TYPE I)(REC TIME/PLAY
MODE 开关设定于“NORMAL”)
输入
麦克风输入插孔(小型插孔/单声道/
PLUG IN POWER,插入通电式)
灵敏度为 0.2mV,用于阻抗为 3kΩ
或低于 3kΩ的麦克风。
输出
耳机插孔(小型插孔/单声道),用于
8-300Ω的耳机
功率输出(10% 谐波失真时)
450mW
电源
3V DC 电池 R03(AAA,7 号)× 2
尺寸(宽/高/深)(包括突出部分及控
制器)
约86.3 × 113.4 × 28.9mm
质量(只包括主机)
约173g
随机附件
便携袋(1)
本机设计及规格或有变更之处,恕不另
行通知。
按xSTOP 键
把PAUSE.开关
往箭头方向移动。
要取消暂停放音,请释
放PAUSE
.
*键
。
在停止状态下按
MFF/CUE 键
在停止状态下按
mREW/REVIEW 键
按住 MFF/CUE 键,
在所需的地方释放该
键。
按住 mREW/
REVIEW 键,在所需
的地方释放该键。
按zREC 键
按xSTOP 键,用手
打开卡带室盖。
*
