manuals.online logo
Brands
  1. Home
  2. •
  3. Brands
  4. •
  5. Sony
  6. •
  7. DVD Recorder
  8. •
  9. Sony PSX DESR-7500 User manual

Sony PSX DESR-7500 User manual

DVDrecorderwithharddiskDESR-7500/DESR-5500
DESR-7500
DESR-5500
Printed in Japan
After reading, be sure to keep it in a place where you can refer to it at any time.
Fire or personal injury may result.
©2004 Sony Corporation
For Safety" to use the product safely.
If you do not follow the safety precautions for electrical products,
Indicates how to handle the product. This “Instruction Manual” and the separate “Safety
Thank you for your purchase.
please give me.
This instruction manual contains important precautions to prevent accidents and
2-349-916-01(2)
This manual uses 100% recycled paper.
DVD recorder instruction manual with hard disk
Machine Translated by Google
Connection and preparation Preparation 1 Checking the accessories ÿ ÿ ÿ ÿ ÿ ÿ ÿ ÿ ÿ ÿ ÿ ÿ ÿ ÿ ÿ ÿ ÿ ÿ ÿ ÿ ÿ ÿ ÿ ÿ ÿ ÿ ÿ ÿ ÿ ÿ ÿ ÿ ÿ 10
Step 2 Connect the antenna ÿ ÿ ÿ ÿ ÿ ÿ ÿ ÿ ÿ ÿ ÿ ÿ ÿ ÿ ÿ ÿ ÿ ÿ ÿ ÿ ÿ ÿ ÿ ÿ ÿ ÿ ÿ ÿ ÿ ÿ ÿ ÿ ÿ ÿ ÿ ÿ ÿ ÿ ÿ 10Preparation 3 Connect video and audio cables ÿ ÿ ÿ ÿ ÿ ÿ ÿ ÿ ÿ ÿ ÿ ÿ ÿ ÿ ÿ ÿ ÿ ÿ ÿ ÿ ÿ ÿ
ÿ ÿ ÿ ÿ ÿ ÿ ÿ ÿ ÿ ÿ ÿ ÿ ÿ ÿ ÿ ÿ ÿ ÿ ÿ ÿ ÿ ÿ ÿ ÿ ÿ ÿ14 Preparation 4 Prepare the remote control ÿ ÿ ÿ ÿ ÿ ÿ ÿ ÿ ÿ ÿ ÿ ÿ ÿ ÿ ÿ ÿ ÿ ÿ ÿ ÿ ÿ ÿ ÿ ÿ ÿ ÿ ÿ ÿ ÿ ÿ ÿ ÿ ÿ ÿ ÿ ÿ ÿ ÿ ÿ ÿ ÿ ÿ ÿ ÿ ÿ ÿ ÿ ÿ ÿ ÿ ÿ ÿ ÿ ÿ
ÿ ÿ ÿ ÿ ÿ ÿ ÿ ÿ ÿ ÿ ÿ ÿ ÿ ÿ 15 Preparation 5 Installation ÿ ÿ ÿ ÿ ÿ ÿ ÿ ÿ ÿ ÿ ÿ ÿ ÿ ÿ ÿ ÿ ÿ ÿ ÿ ÿ ÿ ÿ ÿ ÿ ÿ ÿ ÿ ÿ ÿ ÿ ÿ ÿ ÿ ÿ ÿ ÿ ÿ ÿ ÿ ÿ ÿ ÿ ÿ ÿ ÿ ÿ ÿ 16Preparation 6 Connect the power cord ÿ ÿ ÿ ÿ
ÿ ÿ ÿ ÿ ÿ ÿ ÿ ÿ ÿ ÿ ÿ ÿ ÿ ÿ ÿ ÿ ÿ ÿ ÿ ÿ ÿ ÿ ÿ ÿ ÿ ÿ ÿ ÿ ÿ ÿ ÿ ÿ ÿ ÿ ÿ ÿ ÿ ÿ ÿ ÿ ÿ ÿ ÿ ÿ ÿ ÿ ÿ ÿ ÿ ÿ ÿ ÿ ÿ ÿ ÿ ÿ ÿ ÿ ÿ ÿ ÿ ÿ ÿ ÿ ÿ ÿ ÿ ÿ ÿ ÿ ÿ ÿ ÿ ÿ ÿ ÿ ÿ ÿ ÿ ÿ ÿ ÿ ÿ ÿ ÿ ÿ ÿ ÿ ÿ ÿ ÿ ÿ ÿ ÿ ÿ ÿ ÿ ÿ ÿ ÿ ÿ ÿ ÿ ÿ ÿ
ÿ ÿ ÿ ÿ ÿ ÿ ÿ ÿ ÿ ÿ ÿ ÿ ÿ ÿ ÿ ÿ ÿ ÿ ÿ ÿ ÿ ÿ ÿ ÿ ÿ ÿ ÿ ÿ ÿ ÿ ÿ ÿ ÿ ÿ ÿ ÿ ÿ ÿ ÿ ÿ ÿ ÿ ÿ ÿ ÿ ÿ18 Changing the guide channel manually ÿ ÿ ÿ ÿ ÿ ÿ ÿ ÿ ÿ ÿ ÿ ÿ ÿ ÿ ÿ ÿ ÿ ÿ ÿ ÿ ÿ ÿ ÿ ÿ ÿ ÿ ÿ ÿ ÿ ÿ 20Turn on
the power ÿ ÿ ÿ ÿ ÿ ÿ ÿ ÿ ÿ ÿ ÿ ÿ ÿ ÿ ÿ ÿ ÿ ÿ ÿ ÿ ÿ ÿ ÿ ÿ ÿ ÿ ÿ ÿ ÿ ÿ ÿ ÿ ÿ ÿ ÿ ÿ ÿ ÿ ÿ ÿ ÿ ÿ ÿ ÿ ÿ ÿ ÿ ÿ ÿ ÿ ÿ ÿ ÿ ÿ ÿ ÿ ÿ ÿ ÿ ÿ ÿ ÿ ÿ ÿ ÿ ÿ ÿ ÿ ÿ ÿ ÿ ÿ ÿ ÿ ÿ ÿ ÿ ÿ ÿ ÿ ÿ ÿ ÿ ÿ ÿ ÿ ÿ ÿ ÿ ÿ ÿ ÿ ÿ ÿ ÿ ÿ ÿ ÿ ÿ
ÿ ÿ ÿ ÿ ÿ ÿ ÿ ÿ ÿ ÿ ÿ ÿ ÿ ÿ ÿ ÿ ÿ ÿ ÿ ÿ ÿ ÿ ÿ ÿ ÿ ÿ ÿ ÿ ÿ ÿ ÿ ÿ ÿ ÿ ÿ ÿ ÿ ÿ ÿ ÿ ÿ ÿ ÿ ÿ ÿ ÿ ÿ ÿ ÿ ÿ ÿ ÿ ÿ ÿ ÿ ÿ ÿ ÿ ÿ ÿ ÿ ÿ ÿ ÿ ÿ ÿ ÿ ÿ ÿ ÿ ÿ ÿ ÿ ÿ ÿ ÿ ÿ ÿ ÿ ÿ ÿ ÿ ÿ ÿ ÿ ÿ ÿ ÿ ÿ ÿ ÿ ÿ ÿ ÿ ÿ ÿ ÿ ÿ ÿ ÿ ÿ ÿ ÿ ÿ ÿ
ÿ ÿ ÿ ÿ ÿ ÿ ÿ ÿ ÿ ÿ ÿ ÿ ÿ ÿ ÿ ÿ ÿ ÿ ÿ ÿ ÿ ÿ ÿ ÿ ÿ ÿ ÿ ÿ ÿ ÿ ÿ ÿ ÿ ÿ ÿ ÿ ÿ ÿ ÿ ÿ ÿ ÿ ÿ ÿ 25 Connecting a digital camera ÿ ÿ ÿ ÿ ÿ ÿ ÿ ÿ ÿ ÿ ÿ ÿ ÿ ÿ ÿ ÿ ÿ ÿ ÿ ÿ ÿ ÿ ÿ ÿ ÿ ÿ ÿ ÿ ÿ ÿ ÿ ÿ ÿ ÿ ÿ ÿ ÿ ÿ ÿ ÿ ÿ ÿ ÿ
ÿ ÿ ÿ ÿ ÿ ÿ ÿ ÿ ÿ ÿ ÿ ÿ ÿ ÿ ÿ ÿ ÿ ÿ ÿ ÿ ÿ ÿ ÿ ÿ ÿ ÿ ÿ ÿ ÿ ÿ ÿ ÿ ÿ ÿ ÿ ÿ ÿ ÿ ÿ ÿ ÿ ÿ ÿ ÿ ÿ ÿ ÿ ÿ ÿ ÿ ÿ ÿ ÿ ÿ ÿ ÿ ÿ ÿ ÿ ÿ ÿ ÿ ÿ ÿ ÿ ÿ ÿ ÿ ÿ ÿ ÿ ÿ ÿ ÿ ÿ ÿ ÿ ÿ ÿ ÿ ÿ ÿ ÿ ÿ ÿ ÿ ÿ ÿ ÿ ÿ ÿ ÿ ÿ ÿ ÿ ÿ ÿ ÿ ÿ ÿ ÿ ÿ ÿ ÿ ÿ
ÿ ÿ ÿ ÿ ÿ ÿ ÿ ÿ ÿ ÿ ÿ ÿ ÿ ÿ ÿ ÿ ÿ ÿ ÿ ÿ ÿ ÿ ÿ ÿ ÿ ÿ ÿ ÿ ÿ ÿ ÿ ÿ ÿ ÿ ÿ ÿ ÿ ÿ ÿ ÿ ÿ ÿ ÿ ÿ ÿ ÿ ÿ ÿ ÿ ÿ ÿ ÿ ÿ ÿ ÿ ÿ ÿ ÿ ÿ ÿ ÿ ÿ ÿ ÿ ÿ ÿ ÿ ÿ ÿ ÿ ÿ ÿ ÿ ÿ ÿ ÿ ÿ ÿ ÿ ÿ ÿ ÿ ÿ ÿ ÿ ÿ ÿ ÿ ÿ ÿ ÿ ÿ ÿ ÿ ÿ ÿ ÿ ÿ ÿ ÿ ÿ ÿ ÿ ÿ ÿ ÿ ÿ ÿ 28
tv set
Enjoy TV ÿ ÿ ÿ ÿ ÿ ÿ ÿ ÿ ÿ ÿ ÿ ÿ ÿ ÿ ÿ ÿ ÿ ÿ ÿ ÿ ÿ ÿ ÿ ÿ ÿ ÿ ÿ ÿ ÿ ÿ ÿ ÿ ÿ ÿ ÿ ÿ ÿ ÿ ÿ ÿ ÿ ÿ ÿ ÿ ÿ ÿ ÿ ÿ ÿ ÿ ÿ ÿ ÿ ÿ ÿ ÿ ÿ ÿ ÿ ÿ ÿ ÿ ÿ ÿ ÿ ÿ ÿ ÿ ÿ47
Notes on "Introduction to PSX" ÿ ÿ ÿ ÿ ÿ ÿ ÿ ÿ ÿ ÿ ÿ ÿ ÿ ÿ ÿ ÿ ÿ ÿ ÿ ÿ ÿ ÿ ÿ ÿ ÿ ÿ ÿ ÿ ÿ ÿ ÿ ÿ ÿ ÿ ÿ ÿ ÿ ÿ ÿ ÿ ÿ ÿ ÿ ÿ ÿ ÿ ÿ ÿ ÿ ÿ ÿ ÿ ÿ ÿ ÿ ÿ ÿ ÿ ÿ ÿ ÿ ÿ ÿ ÿ ÿ ÿ ÿ ÿ ÿ ÿ ÿ ÿ ÿ ÿ ÿ 46
Please read ÿ ÿ ÿ ÿ ÿ ÿ ÿ ÿ ÿ ÿ ÿ ÿ ÿ ÿ ÿ ÿ ÿ ÿ ÿ ÿ ÿ ÿ ÿ ÿ ÿ ÿ ÿ ÿ ÿ ÿ ÿ ÿ ÿ ÿ ÿ ÿ ÿ ÿ ÿ ÿ ÿ ÿ ÿ ÿ ÿ ÿ ÿ ÿ ÿ ÿ ÿ ÿ ÿ ÿ ÿ ÿ ÿ ÿ ÿ ÿ ÿ ÿ ÿ ÿ ÿ ÿ ÿ ÿ ÿ ÿ ÿ ÿ ÿ ÿ ÿ ÿ ÿ ÿ ÿ ÿ ÿ ÿ ÿ ÿ ÿ ÿ ÿ ÿ ÿ ÿ ÿ ÿ ÿ ÿ ÿ ÿ ÿ ÿ ÿ ÿ ÿ ÿ ÿ ÿ ÿ ÿ ÿ ÿ ÿ ÿ ÿ 6
Checking basic operations ÿ ÿ ÿ ÿ ÿ ÿ ÿ ÿ ÿ ÿ ÿ ÿ ÿ ÿ ÿ ÿ ÿ ÿ ÿ ÿ ÿ ÿ ÿ ÿ ÿ ÿ ÿ ÿ ÿ ÿ ÿ ÿ ÿ ÿ ÿ ÿ ÿ ÿ ÿ ÿ ÿ ÿ ÿ ÿ ÿ ÿ ÿ ÿ ÿ ÿ ÿ ÿ ÿ ÿ ÿ ÿ ÿ ÿ ÿ ÿ ÿ ÿ ÿ ÿ ÿ ÿ ÿ ÿ ÿ ÿ ÿ ÿ ÿ ÿ ÿ ÿ ÿ ÿ ÿ ÿ ÿ ÿ 30 program list Guide ÿ ÿ ÿ ÿ ÿ ÿ ÿ ÿ
ÿ ÿ ÿ ÿ ÿ ÿ ÿ ÿ ÿ ÿ ÿ ÿ ÿ ÿ ÿ ÿ ÿ ÿ ÿ ÿ ÿ ÿ ÿ ÿ ÿ ÿ ÿ ÿ ÿ ÿ ÿ ÿ ÿ ÿ ÿ ÿ ÿ ÿ ÿ ÿ ÿ ÿ ÿ ÿ ÿ ÿ ÿ ÿ ÿ ÿ ÿ ÿ ÿ ÿ ÿ ÿ ÿ ÿ ÿ ÿ ÿ ÿ ÿ ÿ ÿ ÿ ÿ ÿ ÿ ÿ ÿ ÿ ÿ ÿ ÿ ÿ ÿ ÿ ÿ ÿ ÿ ÿ ÿ ÿ ÿ ÿ ÿ ÿ ÿ ÿ ÿ ÿ ÿ ÿ ÿ ÿ ÿ ÿ ÿ ÿ ÿ ÿ ÿ ÿ ÿ ÿ ÿ ÿ ÿ ÿ ÿ ÿ ÿ ÿ ÿ ÿ ÿ ÿ
ÿ ÿ ÿ ÿ ÿ ÿ ÿ ÿ ÿ ÿ ÿ ÿ ÿ ÿ ÿ ÿ ÿ ÿ ÿ ÿ ÿ ÿ ÿ ÿ ÿ 38 List of discs that can be played back/dubbed ÿ ÿ ÿ ÿ ÿ ÿ ÿ ÿ ÿ ÿ ÿ ÿ ÿ 44
Contents (Operation)
2
Getting
Started with PSX
enjoy
the tv
Machine Translated by Google
List of video functions ÿ ÿ ÿ ÿ ÿ ÿ ÿ ÿ ÿ ÿ ÿ ÿ ÿ ÿ ÿ ÿ ÿ ÿ ÿ ÿ ÿ ÿ ÿ ÿ ÿ ÿ ÿ ÿ ÿ ÿ ÿ ÿ ÿ ÿ ÿ ÿ ÿ ÿ ÿ ÿ ÿ ÿ ÿ ÿ ÿ ÿ ÿ ÿ ÿ ÿ ÿ ÿ ÿ ÿ ÿ ÿ ÿ ÿ ÿ ÿ ÿ ÿ ÿ ÿ ÿ ÿ ÿ ÿ ÿ ÿ ÿ ÿ
ÿ ÿ ÿ ÿ ÿ ÿ ÿ ÿ ÿ ÿ ÿ 49 Playing video or DVD ÿ ÿ ÿ ÿ ÿ ÿ ÿ ÿ ÿ ÿ ÿ ÿ ÿ ÿ ÿ ÿ ÿ ÿ ÿ ÿ ÿ ÿ ÿ ÿ ÿ ÿ ÿ ÿ ÿ ÿ ÿ ÿ ÿ ÿ ÿ ÿ ÿ ÿ ÿ 51Fast -forward/fast-rewind ÿ ÿ ÿ ÿ ÿ
ÿ ÿ ÿ ÿ ÿ ÿ ÿ ÿ ÿ ÿ ÿ ÿ ÿ ÿ ÿ ÿ ÿ ÿ ÿ ÿ ÿ ÿ ÿ ÿ ÿ ÿ ÿ ÿ ÿ ÿ ÿ ÿ ÿ ÿ ÿ ÿ ÿ ÿ ÿ ÿ ÿ ÿ ÿ ÿ 54 Playing video being recorded ( Chasing play) ÿ ÿ ÿ ÿ ÿ ÿ ÿ ÿ ÿ ÿ ÿ ÿ ÿ ÿ
ÿ ÿ ÿ ÿ ÿ ÿ ÿ ÿ ÿ ÿ ÿ ÿ ÿ ÿ ÿ ÿ ÿ ÿ ÿ ÿ ÿ ÿ ÿ ÿ ÿ ÿ ÿ ÿ ÿ ÿ ÿ ÿ ÿ ÿ ÿ ÿ ÿ ÿ ÿ ÿ ÿ ÿ ÿ ÿ ÿ ÿ ÿ ÿ ÿ ÿ ÿ ÿ ÿ ÿ ÿ ÿ ÿ ÿ ÿ ÿ ÿ ÿ ÿ ÿ ÿ ÿ ÿ ÿ 54 Recording ÿ ÿ ÿ ÿ ÿ ÿ ÿ ÿ ÿ
ÿ ÿ ÿ ÿ ÿ ÿ ÿ ÿ ÿ ÿ ÿ ÿ ÿ ÿ ÿ ÿ ÿ ÿ ÿ ÿ ÿ ÿ ÿ ÿ ÿ ÿ ÿ ÿ ÿ ÿ ÿ ÿ ÿ ÿ ÿ ÿ ÿ ÿ ÿ ÿ ÿ ÿ ÿ ÿ ÿ ÿ ÿ ÿ ÿ ÿ ÿ ÿ ÿ ÿ ÿ ÿ ÿ ÿ ÿ ÿ ÿ ÿ ÿ ÿ ÿ ÿ ÿ ÿ ÿ ÿ ÿ ÿ ÿ ÿ ÿ ÿ ÿ ÿ ÿ ÿ ÿ ÿ ÿ ÿ ÿ
ÿ ÿ ÿ ÿ ÿ ÿ ÿ ÿ ÿ ÿ Recording 55 bilingual broadcasts (dual audio broadcasts) ÿ ÿ ÿ ÿ ÿ ÿ ÿ ÿ ÿ ÿ ÿ ÿ ÿ ÿ ÿ ÿ ÿ ÿ ÿ ÿ ÿ ÿ ÿ ÿ ÿ ÿ ÿ ÿ ÿ ÿ 58 Recording
reservation _ ÿ ÿ ÿ ÿ ÿ ÿ ÿ ÿ ÿ ÿ ÿ ÿ ÿ ÿ ÿ ÿ ÿ ÿ ÿ ÿ ÿ ÿ ÿ ÿ ÿ ÿ ÿ ÿ ÿ ÿ ÿ ÿ ÿ ÿ ÿ ÿ ÿ ÿ ÿ ÿ ÿ ÿ ÿ ÿ ÿ ÿ ÿ ÿ ÿ ÿ ÿ ÿ ÿ ÿ ÿ ÿ ÿ ÿ ÿ ÿ ÿ ÿ ÿ ÿ ÿ ÿ ÿ ÿ ÿ ÿ ÿ ÿ ÿ ÿ ÿ ÿ ÿ ÿ
ÿ ÿ ÿ ÿ ÿ ÿ ÿ ÿ ÿ ÿ ÿ ÿ ÿ ÿ 60 broadcasting time (Sports extension compatible/program tracking recording) ÿ ÿ ÿ ÿ ÿ ÿ ÿ ÿ ÿ ÿ ÿ ÿ ÿ ÿ ÿ ÿ ÿ ÿ ÿ ÿ ÿ ÿ ÿ ÿ ÿ ÿ
ÿ ÿ ÿ ÿ ÿ ÿ ÿ ÿ ÿ ÿ ÿ ÿ ÿ ÿ ÿ ÿ ÿ ÿ ÿ ÿ ÿ ÿ ÿ ÿ ÿ ÿ ÿ ÿ ÿ ÿ ÿ ÿ ÿ ÿ ÿ ÿ ÿ ÿ ÿ ÿ ÿ ÿ ÿ ÿ ÿ ÿ ÿ ÿ ÿ ÿ ÿ ÿ ÿ ÿ ÿ ÿ ÿ ÿ ÿ ÿ ÿ ÿ ÿ ÿ ÿ ÿ ÿ ÿ ÿ ÿ ÿ ÿ ÿ ÿ ÿ ÿ ÿ ÿ ÿ ÿ ÿ ÿ ÿ ÿ ÿ
ÿ ÿ 67 ÿ ÿ ÿ ÿ ÿ ÿ ÿ ÿ ÿ ÿ ÿ ÿ ÿ ÿ ÿ ÿ ÿ ÿ ÿ ÿ ÿ ÿ ÿ 68 Auto set the conditions for recording automatically ÿ ÿ ÿ ÿ ÿ ÿ ÿ ÿ ÿ ÿ ÿ ÿ ÿ ÿ ÿ ÿ ÿ ÿ ÿ ÿ ÿ ÿ ÿ ÿ ÿ ÿ ÿ ÿ
ÿ ÿ ÿ ÿ ÿ ÿ ÿ ÿ 69 ÿ ÿ ÿ ÿ ÿ ÿ ÿ ÿ ÿ ÿ ÿ ÿ ÿ ÿ ÿ ÿ ÿ ÿ ÿ ÿ ÿ ÿ ÿ ÿ ÿ ÿ ÿ ÿ ÿ 71 ÿ ÿ ÿ ÿ ÿ ÿ ÿ ÿ ÿ ÿ ÿ ÿ ÿ ÿ ÿ ÿ ÿ ÿ ÿ ÿ ÿ ÿ ÿ ÿ ÿ ÿ ÿ ÿ ÿ ÿ ÿ ÿ ÿ ÿ ÿ ÿ ÿ ÿ ÿ ÿ ÿ ÿ ÿ ÿ ÿ
ÿ ÿ ÿ ÿ ÿ ÿ ÿ ÿ ÿ 74 Setting Chapter Marks ÿ ÿ ÿ ÿ ÿ ÿ ÿ ÿ ÿ ÿ ÿ ÿ ÿ ÿ ÿ ÿ ÿ ÿ ÿ ÿ ÿ ÿ ÿ ÿ ÿ ÿ ÿ ÿ ÿ ÿ ÿ ÿ ÿ ÿ ÿ ÿ ÿ ÿ ÿ ÿ ÿ ÿ ÿ ÿ ÿ ÿ ÿ ÿ ÿ ÿ ÿ ÿ ÿ ÿ ÿ ÿ ÿ ÿ ÿ ÿ ÿ ÿ ÿ ÿ ÿ ÿ ÿ ÿ 77
game
tv set
getting Started
Prepare
Dubbing to DVD ÿ ÿ ÿ ÿ ÿ ÿ ÿ ÿ ÿ ÿ ÿ ÿ ÿ ÿ ÿ ÿ ÿ ÿ ÿ ÿ ÿ ÿ ÿ ÿ ÿ ÿ ÿ ÿ ÿ ÿ ÿ ÿ ÿ ÿ ÿ ÿ ÿ ÿ ÿ ÿ ÿ ÿ ÿ ÿ ÿ ÿ ÿ ÿ ÿ ÿ ÿ ÿ ÿ ÿ ÿ ÿ ÿ ÿ ÿ ÿ ÿ ÿ ÿ ÿ ÿ ÿ ÿ ÿ ÿ ÿ ÿ ÿ ÿ ÿ ÿ ÿ ÿ ÿ ÿ ÿ ÿ ÿ ÿ ÿ ÿ ÿ ÿ 78
Automatically dubbing video from a device connected to the DV terminal to this unit (Automatic DV dubbing)
(DESR-7500 only ) ÿ ÿ ÿ ÿ ÿ ÿ 83 Optimize video ÿ ÿ ÿ ÿ ÿ ÿ ÿ ÿ ÿ ÿ ÿ ÿ ÿ ÿ ÿ ÿ ÿ ÿ ÿ ÿ ÿ ÿ ÿ ÿ ÿ ÿ ÿ ÿ ÿ ÿ ÿ ÿ ÿ ÿ ÿ ÿ ÿ ÿ ÿ ÿ ÿ ÿ ÿ ÿ ÿ ÿ ÿ ÿ ÿ ÿ ÿ ÿ ÿ ÿ ÿ ÿ ÿ ÿ ÿ ÿ ÿ ÿ ÿ ÿ ÿ ÿ ÿ ÿ ÿ ÿ ÿ ÿ
ÿ ÿ ÿ ÿ ÿ ÿ ÿ ÿ ÿ ÿ ÿ ÿ ÿ ÿ ÿ ÿ ÿ ÿ 84 Notes on "Enjoying Videos" ÿ ÿ ÿ ÿ ÿ ÿ ÿ ÿ ÿ ÿ ÿ ÿ ÿ ÿ ÿ ÿ ÿ ÿ ÿ ÿ ÿ ÿ ÿ ÿ ÿ ÿ ÿ ÿ ÿ ÿ ÿ ÿ ÿ ÿ ÿ ÿ ÿ ÿ ÿ ÿ ÿ ÿ ÿ ÿ ÿ ÿ ÿ ÿ ÿ ÿ ÿ ÿ ÿ ÿ ÿ ÿ ÿ ÿ ÿ ÿ ÿ ÿ ÿ ÿ ÿ
ÿ ÿ ÿ ÿ ÿ ÿ ÿ ÿ ÿ ÿ 86
Photo function list ÿ ÿ ÿ ÿ ÿ ÿ ÿ ÿ ÿ ÿ ÿ ÿ ÿ ÿ ÿ ÿ ÿ ÿ ÿ ÿ ÿ ÿ ÿ ÿ ÿ ÿ ÿ ÿ ÿ ÿ ÿ ÿ ÿ ÿ ÿ ÿ ÿ ÿ ÿ ÿ ÿ ÿ ÿ ÿ ÿ ÿ ÿ ÿ ÿ ÿ ÿ ÿ ÿ ÿ ÿ ÿ ÿ ÿ ÿ ÿ ÿ ÿ ÿ ÿ ÿ ÿ ÿ ÿ ÿ ÿ ÿ ÿ ÿ ÿ ÿ ÿ ÿ ÿ ÿ ÿ ÿ ÿ ÿ ÿ ÿ ÿ 102
Playback _ ÿ ÿ ÿ ÿ ÿ ÿ ÿ ÿ ÿ ÿ ÿ ÿ ÿ ÿ ÿ ÿ ÿ ÿ ÿ ÿ ÿ ÿ ÿ ÿ ÿ ÿ ÿ ÿ ÿ ÿ ÿ ÿ ÿ ÿ ÿ ÿ 104 Importing to this unit ÿ ÿ ÿ ÿ ÿ ÿ ÿ ÿ ÿ ÿ ÿ ÿ ÿ ÿ ÿ ÿ ÿ ÿ ÿ ÿ ÿ ÿ ÿ ÿ ÿ ÿ ÿ ÿ ÿ ÿ ÿ ÿ ÿ ÿ ÿ ÿ ÿ ÿ ÿ ÿ ÿ ÿ ÿ
ÿ ÿ ÿ ÿ ÿ ÿ ÿ ÿ ÿ ÿ ÿ ÿ ÿ ÿ ÿ ÿ ÿ ÿ ÿ ÿ ÿ ÿ ÿ ÿ ÿ ÿ ÿ ÿ ÿ ÿ ÿ ÿ ÿ ÿ ÿ ÿ ÿ ÿ ÿ ÿ ÿ ÿ ÿ ÿ ÿ ÿ ÿ ÿ ÿ ÿ ÿ ÿ ÿ ÿ ÿ ÿ ÿ ÿ ÿ ÿ ÿ ÿ ÿ ÿ ÿ ÿ ÿ ÿ ÿ ÿ ÿ ÿ ÿ ÿ ÿ ÿ ÿ ÿ ÿ ÿ ÿ ÿ ÿ ÿ ÿ ÿ ÿ ÿ ÿ ÿ ÿ ÿ ÿ ÿ ÿ ÿ ÿ ÿ ÿ ÿ
ÿ ÿ ÿ ÿ ÿ ÿ ÿ ÿ ÿ ÿ ÿ ÿ ÿ ÿ ÿ ÿ ÿ ÿ ÿ ÿ ÿ ÿ ÿ ÿ ÿ ÿ ÿ ÿ ÿ ÿ ÿ ÿ ÿ ÿ ÿ ÿ ÿ ÿ ÿ ÿ ÿ ÿ ÿ ÿ ÿ ÿ ÿ ÿ ÿ ÿ ÿ ÿ ÿ ÿ ÿ ÿ ÿ ÿ ÿ ÿ ÿ ÿ ÿ ÿ ÿ ÿ ÿ ÿ ÿ ÿ ÿ ÿ ÿ ÿ ÿ ÿ ÿ ÿ 111
List of game functions ÿ ÿ ÿ ÿ ÿ ÿ ÿ ÿ ÿ ÿ ÿ ÿ ÿ ÿ ÿ ÿ ÿ ÿ ÿ ÿ ÿ ÿ ÿ ÿ ÿ ÿ ÿ ÿ ÿ ÿ ÿ ÿ ÿ ÿ ÿ ÿ ÿ ÿ ÿ ÿ ÿ ÿ ÿ ÿ ÿ ÿ ÿ ÿ ÿ ÿ ÿ ÿ ÿ ÿ ÿ ÿ ÿ ÿ ÿ ÿ ÿ ÿ ÿ ÿ ÿ ÿ ÿ ÿ ÿ ÿ ÿ ÿ ÿ ÿ ÿ ÿ ÿ ÿ ÿ ÿ ÿ ÿ ÿ ÿ ÿ ÿ ÿ
113 games Play ÿ ÿ ÿ ÿ ÿ ÿ ÿ ÿ ÿ ÿ ÿ ÿ ÿ ÿ ÿ ÿ ÿ ÿ ÿ ÿ ÿ ÿ ÿ ÿ ÿ ÿ ÿ ÿ ÿ ÿ ÿ ÿ ÿ ÿ ÿ ÿ ÿ ÿ ÿ ÿ ÿ ÿ ÿ ÿ ÿ ÿ ÿ ÿ ÿ ÿ ÿ ÿ ÿ ÿ ÿ ÿ ÿ ÿ ÿ ÿ ÿ ÿ ÿ ÿ ÿ ÿ ÿ ÿ ÿ ÿ ÿ ÿ ÿ ÿ ÿ ÿ ÿ ÿ ÿ ÿ ÿ ÿ ÿ ÿ ÿ ÿ ÿ ÿ ÿ ÿ ÿ
ÿ ÿ ÿ ÿ ÿ ÿ ÿ ÿ ÿ ÿ ÿ ÿ ÿ ÿ ÿ ÿ ÿ ÿ ÿ ÿ ÿ ÿ ÿ ÿ ÿ ÿ ÿ ÿ ÿ ÿ ÿ ÿ ÿ ÿ ÿ ÿ ÿ ÿ ÿ ÿ ÿ ÿ ÿ ÿ ÿ ÿ ÿ ÿ ÿ ÿ ÿ ÿ ÿ ÿ ÿ ÿ ÿ ÿ ÿ ÿ ÿ ÿ ÿ ÿ ÿ ÿ ÿ ÿ ÿ ÿ ÿ ÿ ÿ ÿ ÿ ÿ ÿ ÿ ÿ ÿ ÿ ÿ ÿ ÿ ÿ ÿ ÿ ÿ ÿ ÿ ÿ ÿ ÿ ÿ ÿ ÿ ÿ ÿ ÿ ÿ
ÿ ÿ ÿ ÿ ÿ ÿ ÿ ÿ ÿ ÿ ÿ ÿ ÿ ÿ 115 Quit the game ÿ ÿ ÿ ÿ ÿ ÿ ÿ ÿ ÿ ÿ ÿ ÿ ÿ ÿ ÿ ÿ ÿ ÿ ÿ ÿ ÿ ÿ ÿ ÿ ÿ ÿ ÿ ÿ ÿ ÿ ÿ ÿ ÿ ÿ ÿ ÿ ÿ ÿ ÿ ÿ ÿ ÿ ÿ ÿ ÿ ÿ ÿ ÿ ÿ ÿ ÿ ÿ ÿ ÿ ÿ ÿ ÿ ÿ ÿ ÿ ÿ ÿ ÿ ÿ ÿ ÿ ÿ ÿ ÿ ÿ ÿ ÿ ÿ ÿ ÿ
ÿ ÿ ÿ ÿ ÿ ÿ ÿ ÿ ÿ ÿ ÿ ÿ 115 Notes on "Enjoying games" ÿ ÿ ÿ ÿ ÿ ÿ ÿ ÿ ÿ ÿ ÿ ÿ ÿ ÿ ÿ ÿ ÿ ÿ ÿ ÿ ÿ ÿ ÿ ÿ ÿ ÿ ÿ ÿ ÿ ÿ ÿ ÿ ÿ ÿ ÿ ÿ ÿ ÿ ÿ ÿ ÿ ÿ ÿ ÿ ÿ ÿ ÿ ÿ ÿ ÿ ÿ ÿ ÿ ÿ ÿ ÿ ÿ ÿ ÿ ÿ ÿ ÿ ÿ ÿ ÿ ÿ ÿ ÿ ÿ ÿ 116
Format DVD ÿ ÿ ÿ ÿ ÿ ÿ ÿ ÿ ÿ ÿ ÿ ÿ ÿ ÿ ÿ ÿ ÿ ÿ ÿ ÿ ÿ ÿ ÿ ÿ ÿ ÿ ÿ ÿ ÿ ÿ ÿ ÿ ÿ ÿ ÿ ÿ ÿ ÿ ÿ ÿ ÿ ÿ ÿ ÿ ÿ ÿ ÿ ÿ ÿ ÿ ÿ ÿ ÿ ÿ ÿ ÿ ÿ ÿ ÿ ÿ ÿ ÿ ÿ ÿ ÿ ÿ ÿ ÿ ÿ ÿ ÿ ÿ ÿ ÿ ÿ ÿ ÿ ÿ ÿ ÿ ÿ ÿ ÿ ÿ 82
List of music functions ÿ ÿ ÿ ÿ ÿ ÿ ÿ ÿ ÿ ÿ ÿ ÿ ÿ ÿ ÿ ÿ ÿ ÿ ÿ ÿ ÿ ÿ ÿ ÿ ÿ ÿ ÿ ÿ ÿ ÿ ÿ ÿ ÿ ÿ ÿ ÿ ÿ ÿ ÿ ÿ ÿ ÿ ÿ ÿ ÿ ÿ ÿ ÿ ÿ ÿ ÿ ÿ ÿ ÿ ÿ ÿ ÿ ÿ ÿ ÿ ÿ ÿ ÿ ÿ ÿ ÿ ÿ ÿ ÿ ÿ ÿ ÿ ÿ ÿ ÿ ÿ ÿ ÿ ÿ ÿ ÿ ÿ ÿ ÿ ÿ ÿ
90Play music ÿ ÿ ÿ ÿ ÿ ÿ ÿ ÿ ÿ ÿ ÿ ÿ ÿ ÿ ÿ ÿ ÿ ÿ ÿ ÿ ÿ ÿ ÿ ÿ ÿ ÿ ÿ ÿ ÿ ÿ ÿ ÿ ÿ ÿ ÿ ÿ ÿ ÿ ÿ ÿ ÿ ÿ ÿ ÿ ÿ ÿ ÿ ÿ ÿ ÿ ÿ ÿ ÿ ÿ ÿ ÿ ÿ ÿ ÿ ÿ ÿ ÿ ÿ ÿ ÿ ÿ ÿ ÿ ÿ ÿ ÿ ÿ ÿ ÿ ÿ ÿ ÿ ÿ ÿ ÿ ÿ ÿ ÿ ÿ ÿ ÿ ÿ ÿ ÿ ÿ ÿ ÿ
ÿ ÿ ÿ ÿ ÿ ÿ ÿ ÿ ÿ ÿ ÿ ÿ ÿ ÿ ÿ ÿ ÿ ÿ 92 ÿ ÿ ÿ ÿ ÿ ÿ ÿ ÿ ÿ ÿ ÿ ÿ ÿ ÿ ÿ ÿ ÿ ÿ ÿ ÿ ÿ ÿ ÿ ÿ ÿ ÿ ÿ ÿ ÿ ÿ ÿ ÿ ÿ ÿ ÿ ÿ ÿ ÿ ÿ ÿ ÿ ÿ ÿ ÿ ÿ ÿ ÿ 93 Save to hard disk Enjoy non-stop DJ performances using
tracks recorded by x-DJ ÿ ÿ ÿ ÿ ÿ ÿ ÿ ÿ ÿ ÿ ÿ ÿ ÿ ÿ ÿ ÿ ÿ ÿ ÿ ÿ ÿ ÿ ÿ ÿ ÿ ÿ ÿ ÿ ÿ ÿ ÿ ÿ ÿ ÿ ÿ ÿ ÿ ÿ ÿ ÿ ÿ ÿ ÿ ÿ ÿ ÿ ÿ ÿ ÿ ÿ ÿ ÿ ÿ ÿ ÿ ÿ ÿ ÿ ÿ 96 Notes on "Enjoying Music" ÿ ÿ ÿ ÿ ÿ ÿ ÿ ÿ ÿ ÿ
ÿ ÿ ÿ ÿ ÿ ÿ ÿ ÿ ÿ ÿ ÿ ÿ ÿ ÿ ÿ ÿ ÿ ÿ ÿ ÿ ÿ ÿ ÿ ÿ ÿ ÿ ÿ ÿ ÿ ÿ ÿ ÿ ÿ ÿ 100
photo
PSX
photo
video
game
3
enjoy
the video
enjoy
the game
enjoy
the
music
enjoy
photos
Music
Music
video
Machine Translated by Google
Updating the unit's software (network update) ÿ ÿ ÿ ÿ ÿ ÿ ÿ ÿ ÿ ÿ ÿ ÿ ÿ ÿ ÿ ÿ ÿ ÿ ÿ ÿ ÿ ÿ ÿ 136 When this unit acquires program information ÿ ÿ ÿ ÿ ÿ ÿ ÿ
ÿ ÿ ÿ ÿ ÿ ÿ ÿ ÿ ÿ ÿ ÿ ÿ ÿ ÿ ÿ ÿ ÿ ÿ ÿ ÿ ÿ ÿ ÿ ÿ ÿ ÿ ÿ ÿ 137 ÿ ÿ ÿ ÿ ÿ ÿ ÿ ÿ ÿ ÿ ÿ ÿ ÿ ÿ ÿ ÿ ÿ ÿ ÿ ÿ ÿ ÿ ÿ ÿ ÿ ÿ ÿ ÿ ÿ ÿ ÿ ÿ ÿ ÿ ÿ ÿ ÿ ÿ ÿ ÿ ÿ ÿ ÿ ÿ ÿ ÿ ÿ ÿ ÿ ÿ ÿ ÿ ÿ ÿ
ÿ ÿ ÿ ÿ ÿ ÿ ÿ ÿ ÿ ÿ ÿ ÿ 137 About “Memory Stick” ÿ ÿ ÿ ÿ ÿ ÿ ÿ ÿ ÿ ÿ ÿ ÿ ÿ ÿ ÿ ÿ ÿ ÿ ÿ ÿ ÿ ÿ ÿ ÿ ÿ ÿ ÿ ÿ ÿ ÿ ÿ ÿ ÿ ÿ ÿ ÿ 138 Is it a malfunction? ÿ ÿ ÿ ÿ ÿ ÿ ÿ
ÿ ÿ ÿ ÿ ÿ ÿ ÿ ÿ ÿ ÿ ÿ ÿ ÿ ÿ ÿ ÿ ÿ ÿ ÿ ÿ ÿ ÿ ÿ ÿ ÿ ÿ ÿ ÿ ÿ ÿ ÿ ÿ ÿ ÿ ÿ ÿ ÿ ÿ ÿ ÿ ÿ ÿ ÿ ÿ ÿ ÿ ÿ ÿ ÿ ÿ ÿ ÿ ÿ 139Warranty and after- sales service ÿ ÿ ÿ ÿ ÿ ÿ ÿ ÿ ÿ ÿ
ÿ ÿ ÿ ÿ ÿ ÿ ÿ ÿ ÿ ÿ ÿ ÿ ÿ ÿ ÿ ÿ ÿ ÿ ÿ ÿ ÿ ÿ ÿ ÿ ÿ ÿ ÿ ÿ ÿ ÿ ÿ ÿ ÿ ÿ ÿ ÿ ÿ ÿ ÿ ÿ ÿ ÿ ÿ ÿ ÿ ÿ ÿ ÿ ÿ ÿ ÿ ÿ ÿ ÿ ÿ ÿ ÿ 144 Main Specifications ÿ ÿ ÿ ÿ ÿ ÿ ÿ ÿ ÿ ÿ ÿ ÿ ÿ
ÿ ÿ ÿ ÿ ÿ ÿ ÿ ÿ ÿ ÿ ÿ ÿ ÿ ÿ ÿ ÿ ÿ ÿ ÿ ÿ ÿ ÿ ÿ ÿ ÿ ÿ ÿ ÿ ÿ ÿ ÿ ÿ ÿ ÿ ÿ ÿ ÿ ÿ ÿ ÿ ÿ ÿ ÿ ÿ ÿ ÿ ÿ ÿ ÿ ÿ ÿ ÿ ÿ ÿ ÿ ÿ ÿ ÿ ÿ ÿ ÿ ÿ ÿ ÿ ÿ ÿ ÿ ÿ ÿ ÿ ÿ ÿ ÿ ÿ ÿ ÿ ÿ ÿ ÿ ÿ ÿ ÿ ÿ ÿ
ÿ ÿ ÿ ÿ 145 Trademarks ÿ ÿ ÿ ÿ ÿ ÿ ÿ ÿ ÿ ÿ ÿ ÿ ÿ ÿ ÿ ÿ ÿ ÿ ÿ ÿ ÿ ÿ ÿ ÿ ÿ ÿ ÿ ÿ ÿ ÿ ÿ ÿ ÿ ÿ ÿ ÿ ÿ ÿ ÿ ÿ ÿ ÿ ÿ ÿ ÿ ÿ ÿ ÿ ÿ ÿ ÿ ÿ ÿ ÿ ÿ ÿ ÿ ÿ ÿ ÿ 146 About the G
Guide System ÿ ÿ ÿ ÿ ÿ ÿ ÿ ÿ ÿ ÿ ÿ ÿ ÿ ÿ ÿ ÿ ÿ ÿ ÿ ÿ ÿ ÿ ÿ ÿ ÿ ÿ ÿ ÿ ÿ ÿ ÿ ÿ ÿ ÿ ÿ ÿ ÿ ÿ ÿ ÿ ÿ ÿ ÿ ÿ ÿ ÿ ÿ ÿ ÿ ÿ ÿ ÿ ÿ ÿ ÿ ÿ ÿ ÿ ÿ ÿ ÿ ÿ ÿ ÿ ÿ ÿ ÿ 147 Guide
Channel List ÿ ÿ ÿ ÿ ÿ ÿ ÿ ÿ ÿ ÿ ÿ ÿ ÿ ÿ ÿ ÿ ÿ ÿ ÿ ÿ ÿ ÿ ÿ ÿ ÿ ÿ ÿ ÿ ÿ ÿ ÿ ÿ ÿ ÿ ÿ ÿ ÿ ÿ ÿ ÿ ÿ ÿ ÿ ÿ ÿ ÿ ÿ ÿ ÿ ÿ ÿ ÿ ÿ ÿ ÿ ÿ ÿ ÿ ÿ ÿ ÿ ÿ ÿ ÿ ÿ ÿ ÿ ÿ ÿ ÿ ÿ ÿ ÿ ÿ ÿ ÿ ÿ
ÿ ÿ ÿ 148 names of each part ÿ ÿ ÿ ÿ ÿ ÿ ÿ ÿ ÿ ÿ ÿ ÿ ÿ ÿ ÿ ÿ ÿ ÿ ÿ ÿ ÿ ÿ ÿ ÿ ÿ ÿ ÿ ÿ ÿ ÿ ÿ ÿ ÿ ÿ ÿ ÿ ÿ ÿ ÿ ÿ ÿ ÿ ÿ ÿ ÿ ÿ ÿ ÿ ÿ ÿ ÿ ÿ ÿ ÿ ÿ ÿ ÿ ÿ ÿ ÿ ÿ ÿ ÿ ÿ ÿ ÿ ÿ
ÿ ÿ ÿ ÿ 152 Keyboard Part Names ÿ ÿ ÿ ÿ ÿ ÿ ÿ ÿ ÿ ÿ ÿ ÿ ÿ ÿ ÿ ÿ ÿ ÿ ÿ ÿ ÿ ÿ ÿ ÿ ÿ ÿ ÿ ÿ ÿ ÿ ÿ ÿ ÿ ÿ ÿ ÿ ÿ ÿ ÿ ÿ ÿ ÿ ÿ ÿ ÿ ÿ ÿ ÿ ÿ ÿ ÿ ÿ ÿ ÿ ÿ ÿ ÿ ÿ ÿ ÿ ÿ ÿ ÿ ÿ ÿ
ÿ ÿ ÿ ÿ ÿ ÿ ÿ ÿ ÿ ÿ ÿ ÿ ÿ ÿ ÿ ÿ ÿ ÿ ÿ ÿ ÿ ÿ ÿ ÿ ÿ ÿ ÿ ÿ ÿ ÿ ÿ ÿ ÿ ÿ 156 Glossary ÿ ÿ ÿ ÿ ÿ ÿ ÿ ÿ ÿ ÿ ÿ ÿ ÿ ÿ ÿ ÿ ÿ ÿ ÿ ÿ ÿ ÿ ÿ ÿ ÿ ÿ ÿ ÿ ÿ ÿ ÿ ÿ ÿ ÿ ÿ ÿ ÿ ÿ ÿ ÿ ÿ ÿ
ÿ ÿ ÿ ÿ ÿ ÿ ÿ ÿ ÿ ÿ ÿ ÿ ÿ ÿ ÿ ÿ ÿ ÿ ÿ ÿ ÿ ÿ ÿ ÿ ÿ ÿ ÿ ÿ ÿ ÿ ÿ ÿ ÿ ÿ ÿ ÿ ÿ ÿ ÿ ÿ ÿ ÿ ÿ ÿ ÿ ÿ ÿ ÿ ÿ ÿ ÿ ÿ ÿ ÿ ÿ ÿ ÿ 157 Index ÿ ÿ ÿ ÿ ÿ ÿ ÿ ÿ ÿ ÿ ÿ ÿ ÿ ÿ ÿ ÿ ÿ ÿ ÿ ÿ ÿ
ÿ ÿ ÿ ÿ ÿ ÿ ÿ ÿ ÿ ÿ ÿ ÿ ÿ ÿ ÿ ÿ ÿ ÿ ÿ ÿ ÿ ÿ ÿ ÿ ÿ ÿ ÿ ÿ ÿ ÿ ÿ ÿ ÿ ÿ ÿ ÿ ÿ ÿ ÿ ÿ ÿ ÿ ÿ ÿ ÿ ÿ ÿ ÿ ÿ ÿ ÿ ÿ ÿ ÿ ÿ ÿ ÿ ÿ ÿ ÿ ÿ ÿ ÿ ÿ ÿ ÿ ÿ ÿ ÿ ÿ ÿ ÿ ÿ ÿ ÿ ÿ ÿ ÿ ÿ ÿ ÿ ÿ ÿ ÿ ÿ ÿ ÿ ÿ 160
Contents (Settings)
How to display the setting screen ÿ ÿ ÿ ÿ ÿ ÿ ÿ ÿ ÿ ÿ ÿ ÿ ÿ ÿ ÿ ÿ ÿ ÿ ÿ ÿ ÿ ÿ ÿ ÿ ÿ ÿ ÿ ÿ ÿ ÿ ÿ ÿ ÿ ÿ ÿ ÿ ÿ ÿ ÿ ÿ ÿ ÿ ÿ ÿ ÿ ÿ ÿ ÿ ÿ ÿ ÿ ÿ ÿ ÿ ÿ ÿ ÿ ÿ ÿ ÿ ÿ ÿ ÿ ÿ ÿ ÿ ÿ ÿ ÿ ÿ ÿ ÿ ÿ ÿ
ÿ 118 ÿ ÿ ÿ ÿ ÿ ÿ ÿ ÿ ÿ ÿ ÿ ÿ ÿ ÿ ÿ ÿ ÿ ÿ ÿ ÿ ÿ ÿ ÿ ÿ ÿ ÿ ÿ ÿ ÿ ÿ ÿ ÿ ÿ ÿ ÿ ÿ ÿ ÿ ÿ ÿ ÿ ÿ ÿ ÿ ÿ ÿ ÿ ÿ ÿ ÿ ÿ ÿ ÿ ÿ ÿ ÿ ÿ ÿ ÿ ÿ ÿ ÿ ÿ ÿ ÿ 118 TV Settings ÿ ÿ ÿ ÿ ÿ ÿ ÿ ÿ ÿ ÿ ÿ ÿ ÿ ÿ ÿ ÿ
ÿ ÿ ÿ ÿ ÿ ÿ ÿ ÿ ÿ ÿ ÿ ÿ ÿ ÿ ÿ ÿ ÿ ÿ ÿ ÿ ÿ ÿ ÿ ÿ ÿ ÿ ÿ ÿ ÿ ÿ ÿ ÿ ÿ ÿ ÿ ÿ ÿ ÿ ÿ ÿ ÿ ÿ ÿ ÿ ÿ ÿ ÿ ÿ ÿ ÿ 119 Video Settings ÿ ÿ ÿ ÿ ÿ ÿ ÿ ÿ ÿ ÿ ÿ ÿ ÿ ÿ ÿ ÿ ÿ ÿ ÿ ÿ ÿ ÿ ÿ ÿ ÿ ÿ ÿ ÿ ÿ ÿ ÿ ÿ
ÿ ÿ ÿ ÿ ÿ ÿ ÿ ÿ ÿ ÿ ÿ ÿ ÿ ÿ ÿ ÿ ÿ ÿ ÿ ÿ ÿ ÿ ÿ ÿ ÿ ÿ ÿ ÿ ÿ ÿ ÿ ÿ ÿ ÿ ÿ ÿ ÿ ÿ ÿ ÿ ÿ ÿ ÿ ÿ ÿ ÿ ÿ ÿ ÿ ÿ ÿ ÿ ÿ ÿ ÿ 121
DVD settings ÿ ÿ ÿ ÿ ÿ ÿ ÿ ÿ ÿ ÿ ÿ ÿ ÿ ÿ ÿ ÿ ÿ ÿ ÿ ÿ ÿ ÿ ÿ ÿ ÿ ÿ ÿ ÿ ÿ ÿ ÿ ÿ ÿ ÿ ÿ ÿ ÿ ÿ ÿ ÿ ÿ ÿ ÿ ÿ ÿ ÿ ÿ ÿ ÿ ÿ ÿ ÿ ÿ ÿ ÿ ÿ ÿ ÿ ÿ ÿ ÿ ÿ ÿ ÿ ÿ ÿ ÿ ÿ ÿ ÿ ÿ ÿ ÿ ÿ ÿ ÿ ÿ ÿ ÿ ÿ ÿ ÿ ÿ ÿ ÿ
124 Photo Settings ÿ ÿ ÿ ÿ ÿ ÿ ÿ ÿ ÿ ÿ ÿ ÿ ÿ ÿ ÿ ÿ ÿ ÿ ÿ ÿ ÿ ÿ ÿ ÿ ÿ ÿ ÿ ÿ ÿ ÿ ÿ ÿ ÿ ÿ ÿ ÿ ÿ ÿ ÿ ÿ ÿ ÿ ÿ ÿ ÿ ÿ ÿ ÿ ÿ ÿ ÿ ÿ ÿ ÿ ÿ ÿ ÿ ÿ ÿ ÿ ÿ ÿ ÿ ÿ ÿ ÿ ÿ ÿ ÿ ÿ ÿ ÿ ÿ ÿ ÿ ÿ ÿ ÿ ÿ ÿ ÿ
126 Setting Music ÿ ÿ ÿ ÿ ÿ ÿ ÿ ÿ ÿ ÿ ÿ ÿ ÿ ÿ ÿ ÿ ÿ ÿ ÿ ÿ ÿ ÿ ÿ ÿ ÿ ÿ ÿ ÿ ÿ ÿ ÿ ÿ ÿ ÿ ÿ ÿ ÿ ÿ ÿ ÿ ÿ ÿ ÿ ÿ ÿ ÿ ÿ ÿ ÿ ÿ ÿ ÿ ÿ ÿ ÿ ÿ ÿ ÿ ÿ ÿ ÿ ÿ ÿ ÿ ÿ ÿ ÿ ÿ ÿ ÿ ÿ ÿ ÿ ÿ ÿ ÿ ÿ ÿ ÿ ÿ ÿ ÿ ÿ
ÿ ÿ ÿ ÿ ÿ ÿ ÿ ÿ ÿ ÿ ÿ ÿ ÿ ÿ ÿ ÿ ÿ ÿ ÿ ÿ ÿ ÿ ÿ ÿ ÿ ÿ ÿ ÿ ÿ ÿ ÿ ÿ ÿ ÿ ÿ ÿ ÿ ÿ ÿ ÿ ÿ ÿ ÿ ÿ ÿ ÿ ÿ ÿ ÿ ÿ ÿ ÿ ÿ ÿ ÿ ÿ ÿ ÿ ÿ ÿ ÿ ÿ ÿ ÿ ÿ ÿ ÿ ÿ ÿ ÿ ÿ ÿ ÿ ÿ ÿ ÿ ÿ ÿ ÿ ÿ ÿ ÿ ÿ ÿ ÿ ÿ ÿ ÿ ÿ ÿ ÿ ÿ ÿ ÿ
ÿ ÿ ÿ ÿ ÿ ÿ ÿ ÿ ÿ ÿ ÿ ÿ ÿ ÿ ÿ ÿ ÿ ÿ ÿ ÿ ÿ ÿ ÿ ÿ ÿ ÿ ÿ ÿ ÿ ÿ ÿ ÿ ÿ ÿ ÿ ÿ 127 Setting the Main Unit ÿ ÿ ÿ ÿ ÿ ÿ ÿ ÿ ÿ ÿ ÿ ÿ ÿ ÿ ÿ ÿ ÿ ÿ ÿ ÿ ÿ ÿ ÿ ÿ ÿ ÿ ÿ ÿ ÿ ÿ ÿ ÿ ÿ ÿ ÿ ÿ ÿ ÿ ÿ ÿ ÿ ÿ ÿ
ÿ ÿ ÿ ÿ ÿ ÿ ÿ ÿ ÿ ÿ ÿ ÿ ÿ ÿ ÿ ÿ ÿ ÿ ÿ ÿ ÿ ÿ ÿ ÿ ÿ ÿ ÿ ÿ ÿ ÿ ÿ ÿ ÿ ÿ ÿ ÿ ÿ ÿ ÿ ÿ ÿ ÿ ÿ ÿ ÿ ÿ ÿ ÿ ÿ ÿ ÿ ÿ ÿ ÿ ÿ ÿ ÿ ÿ ÿ ÿ ÿ ÿ ÿ ÿ ÿ ÿ ÿ 128Setting the date and time ÿ ÿ ÿ ÿ ÿ ÿ ÿ ÿ ÿ ÿ
ÿ ÿ ÿ ÿ ÿ ÿ ÿ ÿ ÿ ÿ ÿ ÿ ÿ ÿ ÿ ÿ ÿ ÿ ÿ ÿ ÿ ÿ ÿ ÿ ÿ ÿ ÿ ÿ ÿ ÿ ÿ ÿ ÿ ÿ ÿ ÿ ÿ ÿ ÿ ÿ ÿ ÿ ÿ ÿ ÿ ÿ ÿ ÿ ÿ ÿ ÿ ÿ ÿ ÿ ÿ ÿ ÿ ÿ ÿ ÿ ÿ ÿ ÿ ÿ ÿ ÿ ÿ ÿ 129 character input setting ÿ ÿ ÿ ÿ ÿ ÿ ÿ ÿ ÿ ÿ
ÿ ÿ ÿ ÿ ÿ ÿ ÿ ÿ ÿ ÿ ÿ ÿ ÿ ÿ ÿ ÿ ÿ ÿ ÿ ÿ ÿ ÿ ÿ ÿ ÿ ÿ ÿ ÿ ÿ ÿ ÿ ÿ ÿ ÿ ÿ ÿ ÿ ÿ ÿ ÿ ÿ ÿ ÿ ÿ ÿ ÿ ÿ ÿ ÿ ÿ ÿ ÿ ÿ ÿ ÿ ÿ ÿ ÿ ÿ ÿ ÿ ÿ ÿ ÿ ÿ ÿ ÿ ÿ ÿ ÿ ÿ ÿ ÿ ÿ ÿ ÿ ÿ ÿ ÿ ÿ ÿ ÿ 129 Remote control
settings ÿ ÿ ÿ ÿ ÿ ÿ ÿ ÿ ÿ ÿ ÿ ÿ ÿ ÿ ÿ ÿ ÿ ÿ ÿ ÿ ÿ ÿ ÿ ÿ ÿ ÿ ÿ ÿ ÿ ÿ ÿ ÿ ÿ ÿ ÿ ÿ ÿ ÿ ÿ ÿ ÿ ÿ ÿ ÿ ÿ ÿ ÿ ÿ ÿ ÿ ÿ ÿ ÿ ÿ ÿ ÿ ÿ ÿ ÿ ÿ ÿ ÿ ÿ ÿ ÿ ÿ ÿ 130 Yes _ ÿ ÿ ÿ ÿ ÿ ÿ ÿ ÿ ÿ ÿ ÿ ÿ ÿ ÿ ÿ ÿ
ÿ ÿ ÿ ÿ ÿ ÿ ÿ ÿ ÿ ÿ ÿ 130 Network Connection and Settings ÿ ÿ ÿ ÿ ÿ ÿ ÿ ÿ ÿ ÿ ÿ ÿ ÿ ÿ ÿ ÿ ÿ ÿ ÿ ÿ ÿ ÿ ÿ ÿ ÿ ÿ ÿ ÿ ÿ ÿ ÿ ÿ ÿ ÿ ÿ ÿ ÿ ÿ ÿ ÿ ÿ ÿ ÿ ÿ ÿ ÿ ÿ ÿ ÿ ÿ ÿ ÿ ÿ ÿ ÿ ÿ ÿ ÿ ÿ ÿ ÿ ÿ 131
4
others
Make settings
for this unit
Machine Translated by Google
Other settings
That
he
5
Machine Translated by Google
Handling the hard disk Since the hard disk has a
high recording density, you can enjoy long-time recording and quick cue
playback. On the other hand, it is vulnerable to dust, shocks, vibrations, and
should not be used near magnetic objects. The hard disk has a built-in safety
mechanism to protect the recorded image data, but please note the following
points so as not to lose important data.
Precautions for afterimage phenomenon (image
burn-in) Do not leave a still image such as a disc menu or the menu screen of
this unit displayed on the TV screen for a long time. It may cause an afterimage
phenomenon on the screen. Note that afterimages are particularly likely to
occur on plasma display panel TVs or LCD TVs.
How to read this
manual/Instruction manual (this manual) mainly explains using the buttons on
the remote control.
Handling of this machine
Condensation
Condensation is a phenomenon in which moisture in the air adheres to a metal
plate, etc., and forms water droplets. Condensation may form on the surface or
inside of the unit when the unit is suddenly brought from a cold place to a warm
place, or in a room that has just been heated, such as on a winter morning. If
dew condensation occurs, do not turn on the power until the dew condensation
disappears. Continuing to use the product as it is may cause a malfunction.
Handling of this machine
Please be sure to read it
ÿ/ÿ (power) lamp
Lights/blinks in green HDD ACCESS
lamp blinks
•When the power is on, remove the power plug from the outlet.
is due to the copy protection applied to DVD-Video. Do not modify or
remove this copy protection
Do not pull out the If you unplug
the power while the ÿ/ÿ (power) lamp on the main unit is lit or flashing
or the HDD ACCESS lamp is flashing,
- Do not replace or expand the hard disk by yourself, as this may
cause failure.
This unit is for use in Japan only.
or is prohibited by law.
•Do not move the unit while the power plug is plugged into the outlet.
•Do not use in a vibrating or unstable location.
About starting and shutting down
this unit In order to optimize the entire system, this unit has a short
period of time between pressing the ÿ/ÿ (power) switch on the main
unit and turning off the power. This will take some time. When the ÿ/ÿ
(power) lamp on the main unit is lit or blinking in green, or when the
HDD ACCESS lamp is blinking, disconnect the power cord.
It might be.
•Do not place in places with high humidity, dust, oily smoke, steam,
or in direct sunlight. It may cause fire or electric shock. Especially,
never use it near a bathroom or a humidifier.
I'm using
•If cigarette smoke or fumigation pesticides get inside the unit, it may malfunction.
•Do not use in places with rapid temperature changes (changes of 10°C or more per hour).
Your screen may vary.
Access control is applied to this machine. Non-exclusive software,
excluding DVD videos and music CDs, and exclusive
not.
•The screen illustrations used in the instruction manual (this document) and the actual screens
Recording DVD-Videos, even for personal use, is prohibited by law.
The operating method of this unit may differ from that of “PlayStation”
or “PlayStation 2”.
When playing DVD-Video on this unit and recording on another
device, the recording operation may be stopped or restricted. this
do not have.
We cannot compensate for recorded contents under any
circumstances, including when the equipment fails for some reason.
Use the hard disk as a temporary storage location until important
image data is edited and dubbed to DVD . 6
It will be the cause.
Copies of the software may not be used on the machine under this
access control. Transfer, hand over, exhibit, export, import, or
otherwise transfer, transfer, transfer, display, export, or
The built-in hard disk is damaged and the unit cannot be used.
•Do not give a shock to the machine.
•Use this unit near an outlet. If a problem occurs while using this unit,
immediately disconnect the plug from the outlet and turn off the
power.
•The illustrations in the instruction manual (this document) are for the DESR-7500.
do not do.
Machine Translated by Google
•According to the copyright law, you cannot use what you have recorded with this unit
for purposes other than personal enjoyment without permission from the copyright holder.
•This unit is equipped with a copy protection function (copy guard), and cannot
record software or broadcast programs for which a copy restriction signal has
been recorded by the copyright holder.
Includes control signals.
•This unit has a mode that allows you to select the screen size according to the
screen of the connected TV. Depending on the setting items, the appearance of
the original image may differ. Please keep this in mind when choosing the
settings for this unit. If you use this unit for commercial purposes or for the
purpose of viewing by the public at a coffee shop, hotel, etc., using the screen
display function, you may violate the copyrights protected by the Copyright Act.
Please be aware that there is a risk of infringing on rights.
•This product incorporates copyright protection technology and is protected by US
patents and other intellectual property rights owned by Macrovision Corporation
and other copyright owners. Use of this copyright protection technology must be
authorized by Macrovision Corporation, and is intended for home and other
limited viewing uses only unless otherwise authorized by Macrovision
Corporation. Disassembly or modification is also prohibited.
The price of DESR-7500/5500 includes "private recording compensation".
Compensation is stipulated by the Copyright Act to be paid to the right holder
for protection of rights. Inquiries about private recording compensation
Recording a program that contains a copy control signal of "recording prohibited"
•This unit is equipped with a function that restricts the playback of unauthorized
discs (pirated copies, etc.), and cannot play such discs.
please note
You can not.
•The program of the tuner connected to the external input of this unit may have a
recording prevention function (copy guard). Note that some programs cannot be
recorded in this case.
Most programs on terrestrial, BS, and 110-degree CS digital broadcasts are copied.
7
DVD-Video, etc. × ×
If recording/editing is not possible for any reason, including R/DVD-
RW disc malfunction, failure, repair, replacement, or other external factors,
and
We do not take any responsibility for
erased from the hard disk.
Recording is not possible. Also, the "Can only be recorded once"
Please Confirm.
In rare cases, due to an unexpected problem during software update,
Copy control signal hard disk type
Recorded on disc Dubbing from
hard disk to
DVD
In any case, such as when the recorded / edited material is damaged or disappeared
When dubbing a video containing a Peep control signal to a DVD,
Doing so may damage images, etc., stored on the hard disk.
In addition, compensation for recorded contents and any damages associated with it
As soon as dubbing to DVD is completed, the dubbed video is
About recording and dubbing
About copyright
We cannot compensate
for the recorded content .
To clean the cabinet and
panel surfaces, wipe them with a soft cloth moistened
with a little neutral detergent. Do not use thinner,
benzine, alcohol, etc., as they will damage the surface.
Restrictions on recording and
dubbing
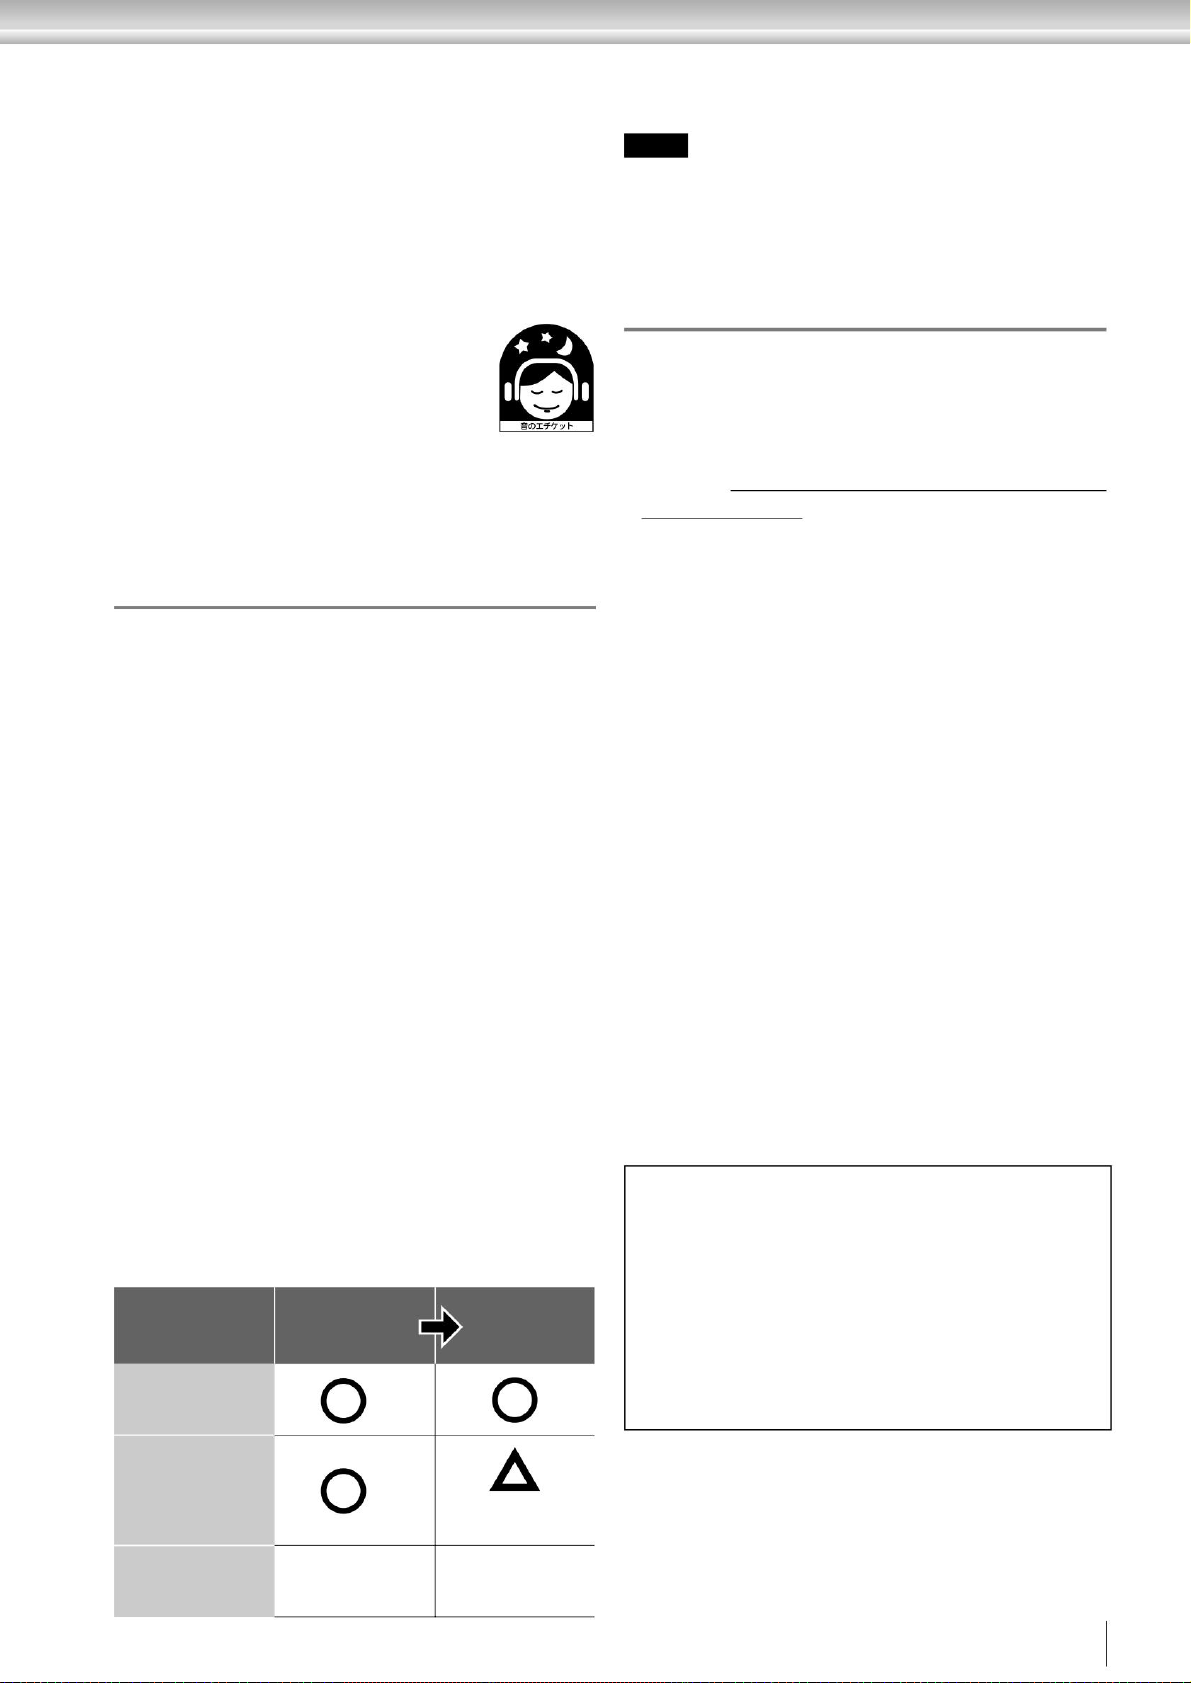
Stereo Etiquette When listening to
music on a stereo, please listen at a volume that will not
disturb your neighbors. Especially at night, even a small
sound can pass through the surroundings. Please take care
of each other by closing the windows, using headphones,
etc., to maintain a pleasant living environment. This mark is a
symbol of sound etiquette.
Cleaning discs Do not use
commercially available lens cleaning discs with this
camera. Failure to do so may result in malfunction.
In the case of important recording,
be sure to make a trial recording in advance and make sure that the recording is performed normally.
TEL 03-3560-3107 (generation)
Private
Recording Compensation Management
Association
FAX 03-5570-2560
from hard disk
Move to DVD
recording prohibited
Free recording
Terrestrial broadcasting, etc.
BS digital broadcasting,
etc.
Recordable only once
Machine Translated by Google
Discs purchased overseas This unit
supports the NTSC color television system. PlayStation 2 standard
CD-ROMs and DVD-ROMs purchased overseas and marked with ,
System), Sony Computer Entertainment Inc.'s proprietary software
that enables copyright and security protection
ÿ "PlayStation 2" standard software , "PlayStation" standard software, or
Japan
marked with ÿÿÿÿ ÿÿÿÿ ÿÿÿÿ ÿÿÿÿ ÿÿ ÿÿÿÿÿÿ ÿÿÿÿ Domestic specification "PSX"
A “PlayStation” standard CD-ROM can not be used with this unit .
ÿ
The region number is indicated on the DVD-Video package.
Do not put it in an unclean place.
I am using an authentication system. Transfer, hand over, exhibit,
export, disable device or program of this system,
If the area code contains "ALL" or "2", the
Please do not use it as it may damage the risk.
possible to live.
The software disc is
Importing or transmitting is prohibited by law.
please.
Only compatible with
vinegar. In addition, content compatible with "DNAS" can be used on other "PSX" or
Precautions when using game discs ÿUsing a
“PlayStation 2” standard software disc or a “PlayStation” standard
software disc on other models may damage the device or damage
the ears, eyes, or other parts of the body. Please do not do this
as it may affect you.
It cannot be used on “PlayStation 2”.
About the game About discs
• Always keep discs clean. Fingerprints and dust on the disc
can cause distorted images and poor sound quality.
ÿ Do not use benzine, record cleaners, anti-static agents, etc.
ÿ Do not touch the playback or recording screen.
• Store discs in their cases.
• When wiping a disc, use a soft cloth to gently
wipe it from the center of the disc to the
outside. If it is very dirty, wipe it with a soft
cloth slightly moistened with water, and then
wipe off the water with a dry cloth.
ÿ Do not write on the disc with a pencil or ballpoint pen.
ÿ Do not store in places with high temperature such as direct sunlight, or in places with high humidity.
• Using the following types of discs may cause the unit to
malfunction.
“PSX”ÿÿ“DNAS”(Dynamic Network Authentication
• When inserting a “PlayStation 2” standard software disc or a
“PlayStation” standard software disc into this unit, be sure to
insert the disc into the disc slot with the label side (the side
on which titles, etc. are printed) face up.
- specially shaped discs;
- Discs with paper or stickers
attached - Adhesive such as cellophane tape or rental disc labels
Discs with traces of being ejected or peeled off
8
About “PSX” Certification
When adjusting the
volume, the disc is much quieter than the record. If you adjust
the volume while listening to the noise of the part where no
sound is present, such as when playing a record, an unexpectedly
loud sound may be produced, which may damage the speakers.
Always turn down the volume before starting playback.
Notes on handling discs
About area codes (region codes)
Machine Translated by Google
•Never move this unit with a disc inserted.
ÿ Do not get it wet.
•Please purchase a disc that has "for video" or "for video" written on the
package .
receive. Depending on the program, the copy control signal prevents recording.
it may not work. Instructions supplied with the disc to be played
ÿ Do not drop the product.
•Only playback is supported for 8 cm discs.
Playback or capture may not be possible. It is scheduled to start broadcasting in Receivable in the applicable area
ÿ Do not give a strong impact or bend it.
It cannot be played on a normal DVD player. Playable only on DVD-
RW (VR mode) compatible players.
With DVD-Video, the playback status is determined by the intention of the software creator.
may be removed.
ÿ Do not store in humid places or places with corrosive substances.
increase.
It is decided as a national policy to end by 2020.
• Do not touch the terminals of the “Memory Stick” or allow metal objects to
come into contact with it.
please don't
•This product is designed to play music discs that conform to the compact
disc (CD) standard . Recently, some record companies are selling
music discs equipped with technology for copyright protection.
Terrestrial analog broadcasting will start in July 2011, and BS analog broadcasting will start in 2011.
• Put the “Memory Stick” in the included storage case when carrying or
storing it.
ÿ Do not store in a hot place such as in a hot car or under the scorching sun.
DVD+RW/DVD-RW/DVD-R or CD-R discs may not be playable due to
scratches , dirt, recording conditions, characteristics of the recorder,
or CD/DVD software . Also, discs that have not been properly finalized
to record end information at the end of all recordings cannot be played.
For details, please read the instruction manual of the recording device.
You may not be able to dub images or titles that have already been recorded.
Record digital broadcasts by connecting this unit to a TV
It cannot be played on a normal DVD player. Playable only on DVD+R/
DVD+RW compatible players.
ÿ Do not disassemble or modify the product.
The area will be limited at first, but will be expanded gradually.
Please also see
Since playback is performed according to the contents of the disc, the functions are performed as you operate.
may be This unit does not support discs intended by the software creator.
please give me.
•Discs dubbed in the DVD-RW VR mode of this unit are
It started in December 2003, and will continue in other regions until the end of 2006.
•Do not store in direct sunlight.
•Data recorded on a computer that cannot be read by this unit will be deleted.
If you move the unit while the ÿ (eject) lamp is lit, the disc may be
scratched. Be sure to remove the disc before changing the orientation
of the unit (vertical or horizontal).
To record digital broadcasts with
this unit, use an optional digital tuner or a built-in digital tuner.
Transition schedule to digital
broadcasting
Notes on discs
Precautions when playing DVD discs
•DVD+R/DVD+R DL/ recorded on other DVD devices
•Discs dubbed with DVD+R/DVD+RW on this unit are
Notes on handling “Memory Stick”
Transition from analog broadcasting to digital
broadcasting
year 20112000 year 2006
December
Year 2003
December
BS analog broadcasting
digital terrestrial broadcasting
end of July
end
Terrestrial analog broadcasting
BS digital broadcasting
9
Machine Translated by Google
How to remove the cover on the bottom of the machine
How to install when connecting
Prepare
Preparation 1 Check the accessories Preparation 2 Connect the antenna
Push ÿ once, then pull ÿ toward you.
After opening the box, check that all accessories are included.
instruction manual
please.
Install and connect the unit as shown in the diagram below only when making connections.
For your safety
Remote control (1)
please.
PSX preparation guide
AA battery (2)
Connecting with the front face down may damage the front face.
“x-appli” utilization guide
Be sure to connect the unit with the top side down on a soft cloth.
please give me.
warranty
power cord (1)
After completing the connection, see “Preparation 5 Installation” (page 16).
“PSX” chart
and install the machine in the correct way.
(1 copy each)
Video/audio code (1)
Coaxial cable with F-type connector (1)
Be sure to connect the power cord after completing all connections.
See page 28 for caution
10
Connection and preparation
ÿ
ÿ
soft cloth
Machine Translated by Google
The optional accessories described in this manual are current as of November 2004. Please accept our apologies if the product is out of stock or production is completed.
BS IF OUT
(output)
VHF/UHF IN
(input)
BS IF IN
(input)
VHF/UHF OUT
(output)
When the VHF/UHF and BS antennas are mixed, separate
the BS and TV broadcasts and connect as shown in the connection diagram below.
Connection method for the DESR-7500 model
Satellite (CS/BS)/UV mixed demultiplexer
( EAC-DSSM2 sold separately, etc.)
11
VHF/UHF
BS
Satellite coaxial cable (for indoor use: sold separately)
Antenna connection cable
for VHF/UHF (sold separately)
To wall antenna terminal
To TV BS IF input
terminal
Satellite coaxial cable (for indoor
use: sold separately)
To TV VHF/UHF input
terminal
Coaxial cable with F-
type connector (included)
back of the unit
Prepare
Machine Translated by Google
12
BS
VHF/UHF
Coaxial cable with F-type connector (included)
VHF/UHF splitter (sold separately)
back of the unit
VHF/UHF IN
(input) VHF/UHF OUT
(output)
When VHF/UHF and BS antennas are separate
Antenna connector
(Optional EAC-29A, etc.)
Antenna Mixer
(Optional EAC-68, etc.)
BS IF OUT
(output)
VHF/UHF OUT
(output)
BS IF IN
(input)
VHF/UHF IN
(input)
To TV BS IF input
terminal
Satellite coaxial cable (for indoor
use: sold separately)
Antenna connection cable for VHF/
UHF (sold separately)
To wall antenna terminal
Satellite coaxial cable (outdoor
waterproof type: sold separately)
Coaxial cable with F-
type connector (included)
To TV VHF/UHF input
terminal
VHF
back of the unit
Prepare
UHF
If your TV is a feeder line + coaxial cable with plug
Machine Translated by Google
Antenna connection cable for VHF/
UHF (sold separately)
Coaxial cable with F-
type connector (included)
To TV VHF/UHF input
terminal
To wall antenna terminal
VHF/UHF OUT
(output)
VHF/UHF IN
(input)
VHF/UHF IN
(input) VHF/UHF OUT
(output)
VHF
VHF/UHF splitter (sold separately)
Coaxial cable with F-type connector (included)
back of the unit
Antenna connector
(Optional EAC-29A, etc.)
Antenna Mixer
(Optional EAC-68, etc.)
UHF
13
Prepare
For VHF/UHF
back of the unit
If your TV is a feeder line + coaxial cable with plug
VHF/UHF
The optional accessories described in this manual are current as of November 2004. Please accept our apologies if the product is out of stock or production is completed.
If the TV program received by this unit is not displayed or the screen is distorted, Connect a dedicated coaxial cable to the BS -IF input terminal Never
connect a cable other than the satellite (BS) coaxial cable to the BS-IF input
terminal. Since the BS-IF input terminal supplies power for the BS converter,
failure to connect the dedicated cable may result in a short circuit, resulting in a
fire or other accident.
If this occurs, use a commercially available antenna booster and connect the
antenna to the VHF/UHF terminal.
Connection method for the DESR-5500 model
When the TV reception is poor
Machine Translated by Google
back of the unit
Connecting using an S-video cable
Connecting using a D video cable
14
back of the unit
Step 3 Connect the video and audio cables
back of the unit
Prepare
To TV
audio input
Video/audio cord (included)
To TV
video input
TV's
To TV
audio input
S video cord (sold separately) To S video input
Video/audio cord (included)
TV's
D video cord (sold separately)
To TV
audio input
To D video input
Video/audio cord (included)
R (right)
(red)
R (right)
L (left)
(White)
L (left)
VIDEO OUT
(video output)
AUDIO OUT
(yellow)
D1/D2
R (right)
Video output
(red)
L (left)
(White)
S VIDEO OUT
(yellow)
(S1 video output)
(red) (White)
AUDIO OUT
AUDIO OUT
(yellow)
Connect using a video cable
Machine Translated by Google
Preparation 4 Prepare the remote control
Prepare
Step1
Setting to operate the TV of each company
put batteries in the remote control
Operate while pressing the TV power button.
the numeric keys of the manufacturer registration number of the TV you want to
one by one, and finally release the power button.
Numeric (1-9 ) buttons
10 (0) button
power button for tv
See page 28 for caution
NEC
TV
03
04
06
05
09
10
14
*1
If there are two or more manufacturer numbers, try them in order and the TV will not operate.
Please select a number that you can
ÿÿ
Matsushita Electric Industrial*1
Fujitsu General 11
02ÿ13
Sanyo Electric*1
Funai
Toshiba
07ÿ15
Sharp*1
Aiwa*1
Hitachi
08ÿ16
01ÿ17
TV manufacturer registration number
Samsung (SAMSUNG)*1 18 , 19
Mitsubishi Electric
01 (default setting), 12
pioneer
Sony
japan victor
15
Pioneer: While pressing the TV power button ÿ
You can operate the TV channel, volume, and power with the remote control of this unit.
Release the power button.
Input example
to come. At the time of purchase, you can operate a Sony TV.
ÿ
Open the lid on the back of the remote control and insert the included batteries.
Toshiba: While pressing the TV power button ÿ
It is set.
Be sure to insert the battery from the ÿ pole side as shown in the figure below.
Release the power button.
ÿ
Machine Translated by Google
Preparation 5 Install When the power lamp of this unit is lit or flashing,
When placed vertically
please give
me. Horizontal orientation
Do not subject the hard disk to vibration or impact
while the HDD ACCESS lamp is blinking.
When installing the unit, install it in an orientation other than the correct installation method.
•A place where the waste heat of the unit is trapped
Please pay particular attention to the following points.
Do not install in the following locations: - Locations exposed
to direct sunlight or high humidity (If the temperature inside the projector
becomes excessively high, the power will automatically turn off.) -
Extremes in a cold place , or near a tuner, TV or VCR (when used together
with a tuner, TV or VCR, noise may occur or the image may be distorted.
Especially indoor antennas) (This is more likely to occur when the
weather is dark, so we recommend using an outdoor antenna.)
Also, do not do the following as it may cause malfunction.
please don't
•Do not apply vibration or impact.
please
If installed incorrectly, the disc may become unreadable or malfunction.
•Do not use in a vibrating or unstable location.
•On a carpet, etc.
•Place a container filled with water, such as a vase, on the unit.
may be the cause of
•Do not unplug the power cord during recording or playback.
When installing the unit, place it on a flat surface as shown in the illustration below.
•Put hot objects such as kettles on it
•Do not pull the cable of the dedicated analog controller, etc. strongly.
•A place where water splashes
•Inclining the unit
do not have. When placed vertically, the machine may topple over.
Parents, please be careful with your children.
•Dusty place
built-in safety mechanisms to prevent misuse.
•Do not move the unit or change its orientation while the power cord is
connected. Even if the power cord is connected and the power lamp
lights red, the hard disk may still be operating.
•An unstable place
•Block the ventilation holes by covering the unit with a cloth, etc.
Doing so may cause loss of recorded data or malfunction.
•Do not move or move the product immediately after connecting/
disconnecting the power cord or turning the power on/off. To protect the
hard disk , wait about 20 seconds after turning off the power.
•In racks with doors that are poorly ventilated
Prohibited Installation Method
Correct installation
Prepare
- Front side down
- Installed on its side
- If you place a TV, etc. on this unit,
set up
- Installed with the top side down
16
Machine Translated by Google
Power cord (included)
outlet
Check if the power turns on with the power button on the remote
control.
When changing the
installation location, do not move the unit with a disc
inserted. Doing so may damage the disc .
The ventilation holes of this machine are located on both sides of the main body.
Step 6 Connect the power cord
Do not
block the ventilation holes
Prepare
~AC IN
(power input)
back of the unit
be.
Plug the power cord into the outlet.
Press the power button on the remote control to turn on the power of this unit.
put in.
Connect the power cord to the AC IN terminal of this unit .
Step1
Step2
Step 2
Step 1
Be sure to follow the procedure below after all connections are completed.
The “PSX” logo will appear on the screen, and after a while the simple
setup screen will appear. See “Preparation 7 Easy Setup” (page 18). 17
increase.
Wait until the HDD ACCESS lamp turns off, then turn on the power.
Improper connection of the power cord may damage the unit.
works.
When the power cord is connected, the cooling fan of this unit and the hard disk
Please connect accordingly.
please give me.
Machine Translated by Google
Always supply power to the BS antenna.
Does not supply power to the BS antenna.
Setting 3: Omakase/Maru-Roku settings
Setting 2: Time setting
Preparation 7 Easy setting
You can set the following items in Easy
Settings. Easy setting flow
If the remote control
malfunctions, change the receiver settings (page 130) to
"Front" when placed horizontally and "Top" when placed vertically.
If the remote control's power button does not turn
on the power, is the remote control mode switch set to "1"?
If the remote control does not work well,
expose the remote control sensor to direct sunlight or strong light from a lighting fixture.
Setting 1: BS antenna power setting (DESR-7500 only)
18
page). 1 Select the setting
with ÿÿ and press .
You can also add or change settings after completing Easy Setup.
For details, refer to “Using the automatic recording function (x-Omakase/Maruroku)” (68
This is a setting for using automatic recording (x-Omakase/Maruku).
Set the remote control mode of the remote control to a different number from other "PSX"
If the numbers are different, you cannot operate this unit with the remote control. to display the simple settings.
please.
This is a setting for supplying power from this unit to the BS antenna.
Select the setting with ÿÿ and press .
For details on the setting method, see “Changing the remote control mode” (page
130).
you can't.
If it still doesn't work, change the sensor to "Front" for horizontal installation
and "Top" for vertical installation in "Receiving area settings" (page 130).
Perform basic settings for using this machine.
Follow the on-screen instructions to make the settings.
The remote control mode of this unit is set to “1” at the time of purchase.
enter
Therefore, set the remote control mode switch on the remote control to "1".
is needed.
please confirm.
and remote control operation may not work. remote control
The remote control mode of the unit and the remote control mode switch of the remote control
If it is difficult to turn on, change the installation location so that it is not exposed to light.
cut
Turn on the power as described in "Preparation 6: Connect the power cord" (page 17).
and check if it can be operated with the remote control.
Prepare
You can set the date (year/month/day) and time (hour/
minute/second). press 1 . 2 Select the item you want to set
with ÿÿ, set with ÿÿ, and press .
Set the correct current time including the Western calendar and AM/PM.
3 Press ÿ.
If you want to operate multiple “PSX” with one remote control,
Machine Translated by Google
19
If you select "Yes", a screen for setting keywords for programs
to be recorded automatically appears. 2 Select a keyword with
ÿÿ and press .
No
*Keywords can be changed later. 3 Press ÿ.
yes
You can select multiple keywords.
Prepare
Setting 8: Setting DTS**
Set the region where the machine is used.
please look at. At the time of purchase or after changing the region where the unit is used,
To change it, select the region with ÿÿ and press .
For details on regions, see “List of Guide Channels” (page 148).
Execute automatic channel setting when the channel is changed.
4:3 pan scan
Select the TV aspect ratio with ÿÿ and press .
16ÿ9
to come.
You can display images that match the aspect ratio of your TV.
project
TV type
**DTS and DTS Digital Out are trademarks of Digital Theater Systems, Inc.
Omakase / Complete recording
Dolby Digital Off
cut
enter
42 Tokyo 23 Wards
cut
Select the setting with ÿÿ and press .
BS antenna power off
Area code setting
Default settings
This setting is for connecting to an AV amplifier with an optical digital cable.
Setting 6: TV type setting
16:9
DTS
Setting 4: Area code setting
yes
If you want to manually change the receiving channel, select "Receiving
Select the setting with ÿÿ and press .
No
The time and channel for recording are also set automatically.
Please change the channel.
Acquire program information in the program guide when automatic channel setting is performed
Automatically set the receivable channels.
Select this when the aspect ratio of the TV screen is 4:3 and you want
to view 16:9 images in 4:3 screen ratio.
Select this when the aspect ratio of the TV screen is 16:9.
Default settings for settings 1 to 8
4:3 Letterbox Select
this when the aspect ratio of the TV screen is 4:3 and you want to view
16:9 images with the original aspect ratio.
enter
* Manufactured under license from Dolby Laboratories . Dolby, Dolby and the double D
symbol are trademarks of Dolby Laboratories .
This setting is for connecting to an AV amplifier with an optical digital cable.
Select the setting with ÿÿ and press .
cut
Setting the Channel Manually” (page 119), see [Receiving
Setting 5: Automatic channel setting
Select when connecting an audio device with a built-in DTS decoder.
Select when connecting an audio device that does not have a built-
in DTS decoder.
Setting 7: Dolby Digital* Settings
Select when connecting an audio device with a built-in Dolby
Digital decoder.
Select when connecting an audio device that does not have a
built-in Dolby Digital decoder.
Do not use the x-Omakase/Maru-Roku function.
Use the functions of x-Omakase and Maru-Roku.
Automatically sets the receiving channel.
It will take some time for the automatic setting to finish.
No automatic channel setting here.
Machine Translated by Google
ÿÿÿ
ÿÿÿ
ÿÿÿ
ÿÿÿ
ÿÿÿ
ÿÿÿ
ÿÿÿ
20
Change the settings on the list screen of the file settings by following the steps below.
I'll explain it while looking at an example when you want to correct the tunnel correctly.
This completes the guide channel settings.
Here is a Hokkaido TV guide channel that has been set incorrectly.
If you want to change the guide channel manually, select the manual channel
Manually change the guide channel
to display the home menu, then press ÿ
Prepare
setting
Step4
Step7
Step1
Step6
Step8
Step5
Step3
Step2
Select the line containing the , and
press . Select the 4th line where Hokkaido TV is set.
Select [TV Settings] with ÿÿ and press .
Press when the settings are complete.
From the list of guide channels on the right,
Select the guide channel found in Step 5 with ÿÿ.
Enter "291" in the guide channel field.
Press.
will be
Select [Manual Channel Settings] and press .
and
The wrong guide channel was set with ÿÿ.
Search for the guide channel of a broadcasting
station that Hokkaido TV's guide channel is "291"
Select the guide channel field with ÿÿ, and
select.
Select (Settings).
Broadcasting station name
area
ÿÿÿÿGeneral
Hokkaido Broadcasting
ÿÿÿÿHokkaido Television
Television Hokkaido
ÿÿÿÿEducation Sapporo
Television ÿÿHokkaido
Cultural Broadcasting
Hokkaido
guide channel
Machine Translated by Google

Other manuals for PSX DESR-7500

1

This manual suits for next models

1

Other Sony DVD Recorder manuals

Sony RDR-GX330 - DVD Recorder With TV Tuner User manual

Sony

Sony RDR-GX330 - DVD Recorder With TV Tuner User manual

Sony SLV-D370P - Dvd/vcr Combo User manual

Sony

Sony SLV-D370P - Dvd/vcr Combo User manual

Sony RDR-HX720 User manual

Sony

Sony RDR-HX720 User manual

Sony RDR-GX350 User manual

Sony

Sony RDR-GX350 User manual

Sony RDR-HX825 User manual

Sony

Sony RDR-HX825 User manual

Sony VRDMC6 - DVDirect Compact Size DVD Burner User manual

Sony

Sony VRDMC6 - DVDirect Compact Size DVD Burner User manual

Sony RDR-HXD790 User manual

Sony

Sony RDR-HXD790 User manual

Sony RDR-GX7 User manual

Sony

Sony RDR-GX7 User manual

Sony RDR-GX360 User manual

Sony

Sony RDR-GX360 User manual

Sony RDR-GX315 User manual

Sony

Sony RDR-GX315 User manual

Sony RDR-GX7 User manual

Sony

Sony RDR-GX7 User manual

Sony RDR-VX500  (RDRVX500) User manual

Sony

Sony RDR-VX500 (RDRVX500) User manual

Sony RDR VXD655 - DVDr/ VCR Combo User manual

Sony

Sony RDR VXD655 - DVDr/ VCR Combo User manual

Sony RDR-GX355 - Tunerless DVD Recorder User manual

Sony

Sony RDR-GX355 - Tunerless DVD Recorder User manual

Sony RDR-GX7 Owner's manual

Sony

Sony RDR-GX7 Owner's manual

Sony DRU-710A User manual

Sony

Sony DRU-710A User manual

Sony RDR-HX950 User manual

Sony

Sony RDR-HX950 User manual

Sony RDR-GX7 User manual

Sony

Sony RDR-GX7 User manual

Sony RDR-GX7 User manual

Sony

Sony RDR-GX7 User manual

Sony DVDirect VRD-MC3 User manual

Sony

Sony DVDirect VRD-MC3 User manual

Sony RDR-HXD560 User manual

Sony

Sony RDR-HXD560 User manual

Sony RDR-HXD710 User manual

Sony

Sony RDR-HXD710 User manual

Sony RDR-HX750 User manual

Sony

Sony RDR-HX750 User manual

Sony RDR-HX820 User manual

Sony

Sony RDR-HX820 User manual

Popular DVD Recorder manuals by other brands

Philips DVDR610 Quick use guide

Philips

Philips DVDR610 Quick use guide

Samsung DVD Recorder Quick setup guide

Samsung

Samsung DVD Recorder Quick setup guide

Philips DVDR3575H/ user manual

Philips

Philips DVDR3575H/ user manual

Samsung writemaster SE-S164L user manual

Samsung

Samsung writemaster SE-S164L user manual

VisionQuest PVR-5000-250G user manual

VisionQuest

VisionQuest PVR-5000-250G user manual

Panasonic Diga DMR-EH675 operating instructions

Panasonic

Panasonic Diga DMR-EH675 operating instructions

Pioneer PRV-9000 Specification sheet

Pioneer

Pioneer PRV-9000 Specification sheet

Wintal DVDR-X250 user manual

Wintal

Wintal DVDR-X250 user manual

Pioneer DVR-54HX-S Operating instructions and owner's manual

Pioneer

Pioneer DVR-54HX-S Operating instructions and owner's manual

Sanyo DVR-DX600 Service manual

Sanyo

Sanyo DVR-DX600 Service manual

Toshiba DVR80KF Service manual

Toshiba

Toshiba DVR80KF Service manual

Sharp SR3U - DV DVD Recorder Operation manual

Sharp

Sharp SR3U - DV DVD Recorder Operation manual

Panasonic Diga DMR-EZ27 operating instructions

Panasonic

Panasonic Diga DMR-EZ27 operating instructions

Pioneer DVR-218L Specifications

Pioneer

Pioneer DVR-218L Specifications

JVC DR-DX5SU quick start guide

JVC

JVC DR-DX5SU quick start guide

JVC DR-M10SAG Service manual

JVC

JVC DR-M10SAG Service manual

MicroBoards Technology Orbit 3 user manual

MicroBoards Technology

MicroBoards Technology Orbit 3 user manual

LG RH398H manual

LG

LG RH398H manual

manuals.online logo
manuals.online logoBrands
  • About & Mission
  • Contact us
  • Privacy Policy
  • Terms and Conditions

Copyright 2025 Manuals.Online. All Rights Reserved.