Sony AIR-SA10 User manual

SERVICE MANUAL
Sony Corporation
Audio Business Group
Published by Sony Techno Create Corporation
AIR-SA10
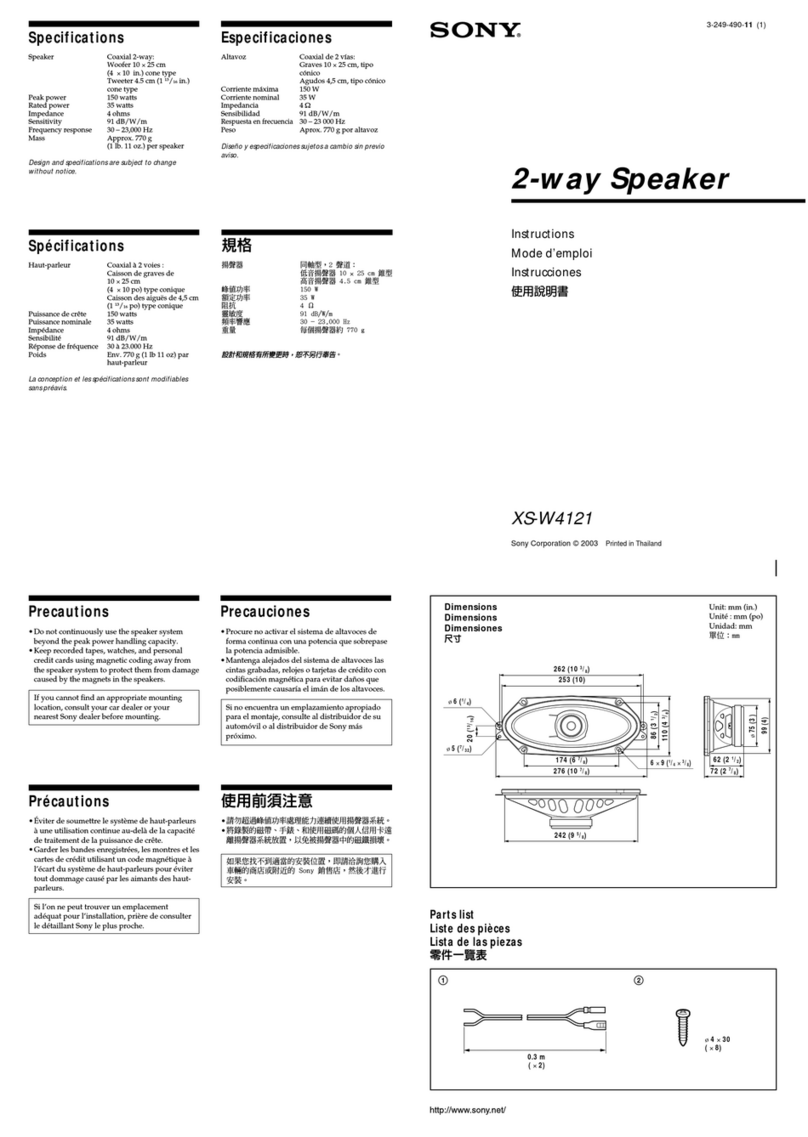
SPECIFICATIONS
WIRELESS SPEAKER SYSTEM
9-887-984-01
2008B05-1
© 2008.02
US Model
Canadian Model
Ver. 1.0 2008.02
Amplifier section
U.S.A. model:
AUDIO POWER SPECIFICATIONS
POWER OUTPUTAND TOTAL HARMONIC
DISTORTION:
With 3 ohm loads, both channels driven, from 300 –
20,000Hz; rated 4 watts per channel minimum RMS
power, with no more than 10% total harmonic distor-
tion from 250 milliwatts to rated output.
Other models:
Continuous RMS power output (reference):
4 + 4 W (3 ohms at 1 kHz, 10% THD)
Output
i(stereo mini jack):Accepts headphones with an im-
pedance of 8 ohms or more
Speaker section
Speaker system: Full range, bass-reflex type
Speaker units: 65 mm, cone type (2)
Nominal impedance: 3 ohms
Wireless transceiver (EZW-RT10)
Communication System: S-AIR Specification version
1.0
Output: 12.0 mW
Frequency band: 2.4000 GHz – 2.4835 GHz
Modulation method: DSSS
Power requirements: DC 3.3 V, 350 mA
Dimensions (w/h/d): 50 mm × 13 mm × 60 mm
(2 × 17/32 × 2 3/8in)
Mass: 24 g (1 oz)
General
Power requirements:
North American model: 120 VAC, 60 Hz
Power consumption: 15 W
Dimensions (w/h/d): Approx. 300 × 136 × 115 mm
(11 7/8× 5 3/8× 4 5/8in)
Mass: Approx. 2.2 kg (4 lb 14 oz)
Supplied accessories: Wireless transceiver EZW-
RT10 (1)
Design and specifications are subject to change with-
out notice.

AIR-SA10
2
1. SERVICING NOTES ............................................. 3
2. GENERAL .................................................................. 4
3. DISASSEMBLY
3-1. Disassembly Flow........................................................... 5
3-2. Top Panel Block.............................................................. 6
3-3. HP Board, Front Panel Block.......................................... 7
3-4. Speaker (6.5 cm) (SP101: L-CH/SP201: R-CH)............ 7
3-5. S-AIR RX-IF Board, KEY Board, MAIN Board............ 8
3-6. REG Board, Power Transformer (PT901),
Power Cord..................................................................... 9
3-7. AMP Board, LCD Board ................................................ 9
4. TEST MODE ............................................................ 10
5. ELECTRICAL CHECK ......................................... 10
6. DIAGRAMS
6-1. Printed Wiring Board - S-AIR RX-IF Board -................ 12
6-2. Schematic Diagram - S-AIR RX-IF Board - .................. 13
6-3. Printed Wiring Boards - AMP Section -.......................... 14
6-4. Schematic Diagram - AMP Section -.............................. 15
6-5. Printed Wiring Boards - PANEL Section - ..................... 16
6-6. Schematic Diagram - PANEL Section -.......................... 17
6-7. Printed Wiring Board - MAIN Board -........................... 18
6-8. Printed Wiring Boards - POWER SUPPLY Section - .... 19
6-9. Schematic Diagram - MAIN Section - ........................... 20
7. EXPLODED VIEWS
7-1. Overall Section ............................................................... 24
7-2. Top Panel Section ........................................................... 25
7-3. Front Panel Section......................................................... 26
7-4. Rear Panel Section.......................................................... 27
8. ELECTRICAL PARTS LIST .............................. 28
TABLE OF CONTENTS
SAFETY-RELATED COMPONET WARNING!
COMPONENTS IDENTIFIED BY MARK 0OR DOTTED LINE
WITH MARK 0ON THE SCHEMATIC DIAGRAMS AND IN
THE PARTS LIST ARE CRITICAL TO SAFE OPERATION.
REPLACE THESE COMPONENTS WITH SONY PARTS
WHOSE PART NUMBERS APPEAR AS SHOWN IN THIS
MANUAL OR IN SUPPLEMENTS PUBLISHED BY SONY.
ATTENTION AU COMPOSANT AYANT RAPPORT
À LA SÉCURITÉ!
LES COMPOSANTS IDENTIFIÉS PAR UNE MARQUE 0SUR
LES DIAGRAMMES SCHÉMATIQUES ET LA LISTE DES
PIÈCES SONT CRITIQUES POUR LA SÉCURITÉ DE FONC-
TIONNEMENT. NE REMPLACER CES COM- POSANTS QUE
PAR DES PIÈCES SONY DONT LES NUMÉROS SONT DON-
NÉS DANS CE MANUEL OU DANS LES SUPPLÉMENTS
PUBLIÉS PAR SONY.
Notes on chip component replacement
• Never reuse a disconnected chip component.
• Notice that the minus side of a tantalum capacitor may be dam-
aged by heat.
SAFETY CHECK-OUT
After correcting the original service problem, perform the follow-
ing safety check before releasing the set to the customer:
Check the antenna terminals, metal trim, “metallized” knobs,
screws, and all other exposed metal parts for AC leakage.
Check leakage as described below.
LEAKAGE TEST
The AC leakage from any exposed metal part to earth ground and
from all exposed metal parts to any exposed metal part having a
return to chassis, must not exceed 0.5 mA (500 microamperes.).
Leakage current can be measured by any one of three methods.
1. Acommercial leakage tester, such as the Simpson 229 or RCA
WT-540A. Follow the manufacturers’ instructions to use these
instruments.
2. A battery-operated AC milliammeter. The Data Precision 245
digital multimeter is suitable for this job.
3. Measuring the voltage drop across a resistor by means of a
VOM or battery-operatedAC voltmeter. The “limit” indication
is 0.75 V, so analog meters must have an accurate low-voltage
scale. The Simpson 250 and Sanwa SH-63Trd are examples
of a passive VOM that is suitable. Nearly all battery operated
digital multimeters that have a 2 VAC range are suitable. (See
Fig. A)
Fig. A. Using an AC voltmeter to check AC leakage.
1.5 kΩ0.15 μFAC
voltmeter
(0.75 V)
To Exposed Metal
Parts on Set
Earth Ground

AIR-SA10
3
UNLEADED SOLDER
Boards requiring use of unleaded solder are printed with the lead-
free mark (LF) indicating the solder contains no lead.
(Caution: Some printed circuit boards may not come printed with
the lead free mark due to their particular size)
: LEAD FREE MARK
Unleaded solder has the following characteristics.
• Unleaded solder melts at a temperature about 40 °C higher
than ordinary solder.
Ordinary soldering irons can be used but the iron tip has to be
applied to the solder joint for a slightly longer time.
Soldering irons using a temperature regulator should be set to
about 350 °C.
Caution: The printed pattern (copper foil) may peel away if the
heated tip is applied for too long, so be careful!
• Strong viscosity
Unleaded solder is more viscous (sticky, less prone to flow)
than ordinary solder so use caution not to let solder bridges
occur such as on IC pins, etc.
• Usable with ordinary solder
It is best to use only unleaded solder but unleaded solder may
also be added to ordinary solder.
NOTE THE S-AIR COMMUNICATION CONFIRMING
EZW-RT10 of the attachment is necessary for the confirmation of
S-AIR communication.
Confirm S-AIR after inserting EZW-RT10 in the set (AIR-SA10).
DIRECTION OF EZW-RT10 INSTALLATION
When EZW-RT10 is install with the S-AIR RX-IF board detached
of the set, the label of EZW-RT10 is the under and install.
SECTION 1
SERVICING NOTES
S-AIR RX-IF board
EZW-RT10
label

AIR-SA10
4
SECTION 2
GENERAL This section is extracted
from instruction manual.
Operations
Unit (AIR-SA10/Wireless Speaker System)
Setting the clock
1Turn on the unit.
Press .
2Select the clock set mode.
Press CLOCK/TIMER MENU . If the current
mode appears on the display, press /
repeatedly to select “CLOCK,” and then press
CLOCK/TIMER ENTER .
3Set the time.
Press / repeatedly to set the hour, and
then press CLOCK/TIMER ENTER . Use the
same procedure to set the minute.
e clock settings are lost when you disconnect the
power cord or if a power failure occurs.
Listening to the sound of the
connected S-AIR main unit
You can use the S-AIR function to listen to the sound of
an S-AIR main unit in a remote location.
1Perform the procedure described in“Preparing the
unit” and check that the S-AIR indicator is lit.
2Press S-AIR CH repeatedly to select the desired
function of the S-AIR main unit.
Wireless strength
e functions that can be selected depend on the
S-AIR main unit. For details, refer to the Operating
Instructions supplied with the S-AIR main unit.
3Press VOLUME +/ to adjust the volume.
To operate the S-AIR main unit from the unit
You can perform the following operations using the
buttons on the unit.
Press To
Start playback of a CD/DVD,
etc.
Stop playback of a CD/DVD,
etc.
Pause playback of a CD/DVD,
etc.
/Select a track, le or chapter
of a CD/DVD, etc.
PRESET +/ Select a preset station when
listening to the radio.
Depending on the connected S-AIR main unit,
the operation may dier. Refer to the Operating
Instructions of the S-AIR main unit.
To listen with headphones
Connect headphones (not supplied) to the
(headphone) jack located on the rear of the unit.
Note
e elapsed playing time or remaining playing time of the
CD/DVD, etc. being played on the S-AIR main unit may not
be displayed on this unit. In this case, “ .” appears.
Tip
You can listen to the sound even when the connected S-AIR
main unit is in standby mode. For details, refer to the Operating
Instructions supplied with the S-AIR main unit.
Changing the display
To change the information on the display
while the unit is on
Press DISPLAY . Each time you press the button, the
display changes as follows:
When the unit is connected to an S-AIR main unit:
Information of the connected S-AIR main unit1)
Model name of the connected S-AIR main unit2)
Clock2)3) ...
When the unit is not connected to an S-AIR main unit:
“S-AIR” “UNLINKED”2) Clock2)3) ...
To turn o the display
You can turn o the clock display to minimize the
amount of power consumed when the unit is o (Power
Saving Mode).
Press DISPLAY . Each time you press the button, the
display changes as follows:
No display (Power Saving Mode) Clock3) ...
1) e displayed information depends on the connected S-AIR main
unit.
2) Displayed for about 8 seconds.
3) Displayed only when the clock is set.
Note
e STANDBY indicator lights up when the unit is o.
Using the Timers
e unit oers two timer functions. If you use the
Play Timer with the Sleep Timer, the Sleep Timer has
priority.
Sleep Timer:
You can fall asleep to music. is function works even if
the clock is not set.
Press SLEEP repeatedly.
Note
Even if you set the timer, no sound is output from the unit if
playback on the connected S-AIR main unit ends within the set time
period or if communication with the S-AIR main unit is cut o.
Play Timer:
You can wake up to the sound of the connected S-AIR
main unit at a preset time.
Make sure you have set the clock.
1Prepare the sound source on the S-AIR main unit.
For details, refer to the Operating Instructions
supplied with the S-AIR main unit.
Press VOLUME +/ to adjust the volume.
2Press CLOCK/TIMER MENU .
3Press / repeatedly to select“PLAY SET,”
then press CLOCK/TIMER ENTER .
“ON TIME” appears, and the hour indication ashes.
4Set the time to start playing.
Press / repeatedly to set the hour, and
then press CLOCK/TIMER ENTER .
e minute indication ashes. Use the procedure
above to set the minute.
5Use the same procedure as in step 4 to set the time
to stop playing.
6Press / repeatedly to select the desired
option.
AUTO:
Sound from the connected S-AIR main unit is
output. However, an alarm sounds in the following
cases.
When communication with the S-AIR main unit
is cut o.
When no sound is output from the S-AIR main
unit or the audio signal level is too low.
When the S-AIR main unit is not ready for
playback at the set start time. Note that the alarm
continues to sound even if the S-AIR main unit
becomes ready aer the start time has passed.
ALARM:
An alarm is output.
S-AIR:
Sound from the connected S-AIR main unit is
output. However, sound from the S-AIR main unit
is not output in the following cases. An alarm does
not sound.
When communication with the S-AIR main unit
is cut o.
When no sound is output from the S-AIR main
unit or the audio signal level is too low.
When the S-AIR main unit is not ready for
playback at the set start time. Note that sound
from the S-AIR main unit is output once the S-
AIR main unit is ready for playback even aer the
start time has passed.
7Press CLOCK/TIMER ENTER .
e display shows the timer settings.
8Press (on/standby) to turn o the unit.
e unit turns on about 40 seconds before the preset
time.
If the unit is on at the preset time, the Play Timer will
not play.
To stop the alarm
Press any button.
To activate or check the timer again
1Press CLOCK/TIMER MENU .
“SELECT” ashes in the display.
2Press CLOCK/TIMER ENTER .
3Press / repeatedly to select“PLAY SEL.”
4Press CLOCK/TIMER ENTER .
To cancel the timer
1Press CLOCK/TIMER MENU .
“SELECT” ashes in the display.
2Press CLOCK/TIMER ENTER .
3Press / repeatedly to select“OFF.”
4Press CLOCK/TIMER ENTER .
To change the setting
Start over from step 1.
Tip
e Play Timer setting remains as long as the setting is not canceled
manually.
AIR-SA10
5
SECTION 3
DISASSEMBLY
• This set can be disassembled in the order shown below.
3-1. DISASSEMBLY FLOW
3-2. TOP PANEL BLOCK
(Page 6)
3-3. HP BOARD,
FRONT PANEL BLOCK
(Page 7)
3-4. SPEAKER (6.5 cm)
(SP101: L-CH/SP201: R-CH)
(Page 7)
3-7. AMP BOARD, LCD BOARD
(Page 9)
3-5. S-AIR RX-IF BOARD, KEY BOARD,
MAIN BOARD
(Page 8)
3-6. REG BOARD,
POWER TRANSFORMER (PT901),
POWER CORD
(Page 9)
SET
Other manuals for AIR-SA10
4
Table of contents
Other Sony Speakers manuals

Sony
Sony XS-E6911 User manual

Sony
Sony XS-F6936SE User manual

Sony
Sony XS-MP1610B Product guide

Sony
Sony WS-IT1000F User manual

Sony
Sony XS-V1350G User manual

Sony
Sony XS-A82P Product guide

Sony
Sony SS-X90ED Marketing User manual

Sony
Sony LSPX-S2 Reference guide

Sony
Sony SRS-XB20 User manual

Sony
Sony SRS-XB33 User manual