Sony HCD-GTX777 User manual

1
HCD-GTX777/GTX787/GTX888
Ver. 1.1 2008. 05
SERVICE MANUAL
AEP Model
HCD-GTX777
E Model
HCD-GTX777/GTX787/GTX888
Australian Model
HCD-GTX888
HCD-GTX777/GTX787/GTX888
AUDIO POWER SPECIFICATION
Amplifier section
MHC-GTX888 (HCD-GTX888)
The following are measured at
Mexican model: AC 127 V, 60 Hz
Other models: AC 120, 220, 230 – 240 V, 50/60 Hz
Front/Surround speaker
Power Output (rated): 190 W + 190 W (at 8 :and 24 :,
1 kHz, 1% THD, at LINK MODE)
RMS output power (reference):
295 W + 295 W (per channel at 8 :and
24 :, 1 kHz, 10% THD, at LINK MODE)
Subwoofer
RMS output power (reference):
160 W + 160 W (per channel at 6 :,
100 Hz, 10% THD)
SPECIFICATIONS
MHC-GTX787 (HCD-GTX787)
The following are measured at
Mexican model: AC 127 V, 60 Hz
Other models: AC 120, 220, 230 – 240 V, 50/60 Hz
Front speaker
Power Output (rated): 230 W + 230 W (at 4 :, 1 kHz, 1% THD)
RMS output power (reference):
380 W + 380 W (per channel at 4 :, 1 kHz, 10% THD)
MHC-GTX777 (HCD-GTX777)
European model only
The following are measured at
AC 230 V, 50/60 Hz
Front/Surround speaker
Power Output (rated): 235 W + 235 W (at 8 :and 8 :, 1 kHz,
1% THD, at LINK MODE)
RMS output power (reference):
380 W + 380 W (per channel at 8 :and
8 :, 1 kHz, 10% THD, at LINK MODE)
Sony Corporation
Audio Business Group
Published by Sony EMCS (Malaysia) PGTec
9-890-504-02
2008E08-1
© 2008. 05
– Continued on next page –
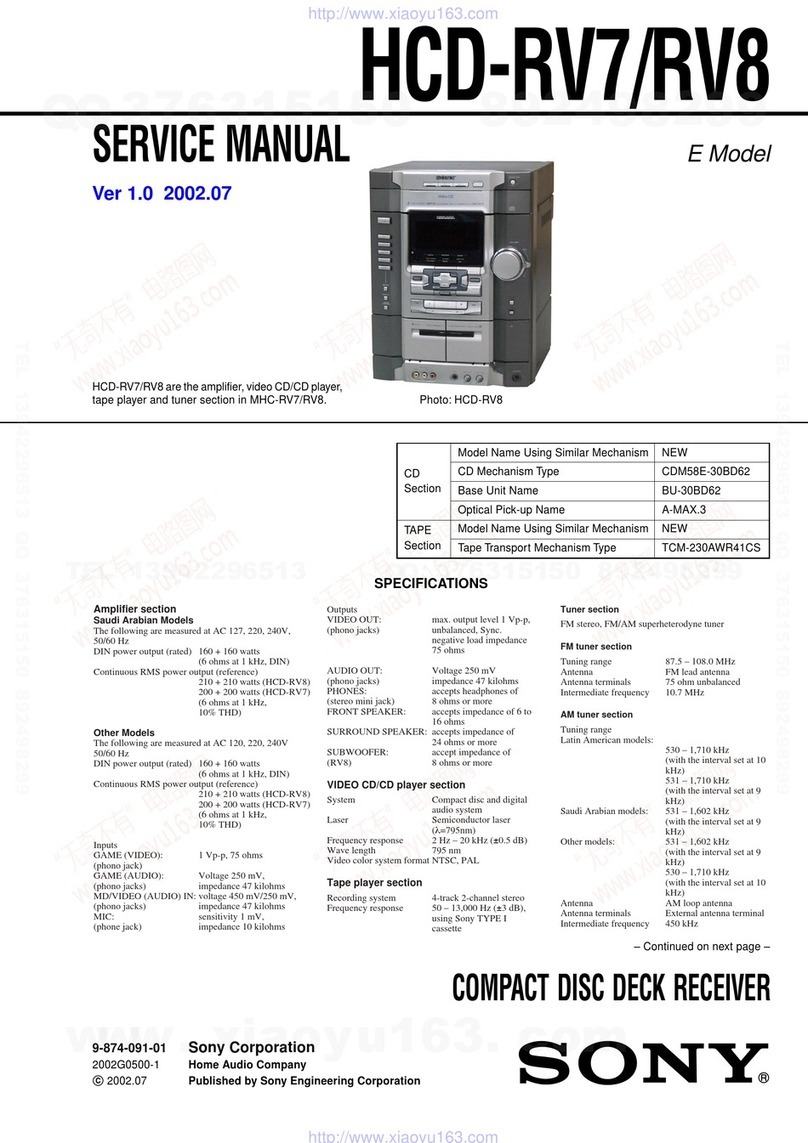
CD DECK RECEIVER
• HCD-GTX777/GTX787/GTX888
are the tuner, deck, CD and
amplifier section in
MHC-GTX777/GTX787/GTX888.
Model Name Using Similar Mechanism HCD-GTX66/GTX77/GTX88
CD CD Mechanism Type CDM74KF-K6BD93-WOD//M
Section Optical Pick-up Name KSM-213DCP/C2NP
Tape Deck Model Name Using Similar Mechanism NEW
Section Tape Mechanism Type CFP42608
Photo : HCD-GTX888 (E Model)
w
w
w
.
x
i
a
o
y
u
1
6
3
.
c
o
m
Q
Q
3
7
6
3
1
5
1
5
0
9
9
2
8
9
4
2
9
8
T
E
L
1
3
9
4
2
2
9
6
5
1
3
9
9
2
8
9
4
2
9
8
0
5
1
5
1
3
6
7
3
Q
Q
TEL 13942296513 QQ 376315150 892498299
http://www.xiaoyu163.com

2
HCD-GTX777/GTX787/GTX888
SAFETY-RELATED COMPONENT WARNING!!
COMPONENTS IDENTIFIED BY MARK 0OR DOTTED LINE
WITH MARK 0ON THE SCHEMATIC DIAGRAMS AND IN THE
PARTS LIST ARE CRITICAL TO SAFE OPERATION. REPLACE
THESE COMPONENTS WITH SONY PARTS WHOSE PART
NUMBERS APPEAR AS SHOWN IN THIS MANUAL OR IN
SUPPLEMENTS PUBLISHED BY SONY.
Other models
The following are measured at
AC 120, 220, 230 – 240 V, 50/60 Hz
Front/Surround speaker
Power Output (rated): 235 W + 235 W (at 8
:
and 8
:
, 1 kHz,
1% THD, at LINK MODE)
RMS output power (reference):
380 W + 380 W (per channel at 8
:
and
8
:
, 1 kHz, 10% THD, at LINK MODE)
Inputs
VIDEO (AUDIO IN) L/R:
Voltage 250 mV, impedance 47 kilohms
AUDIO INPUT L/R: Voltage 450 mV, impedance 47 kilohms
MIC: Sensitivity 1 mV, impedance 10 kilohms
(USB) port:
Type A
Outputs
PHONES: accepts headphones of 8
:
or more
Disc player section
System Compact disc and digital audio system
Laser Semiconductor laser
(
O
= 770 – 810 nm)
Emission duration: continuous
Laser Output Max. 44.6 µW*
* This output is the value measured at
a distance of 200 mm from the
objective lens surface on the Optical
Pick-up Block with 7 mm aperture.
Frequency response 20 Hz – 20 kHz
Wave length 770 – 810 nm
Signal-to-noise ratio More than 90 dB
Dynamic range More than 88 dB
Tape deck section
Recording system 4-track 2-channel stereo
Frequency response 50 – 13,000 Hz (±3 dB),
using Sony TYPE I tape
Wow and flutter ±0.35% W.Peak (IEC)
0.3% W.RMS (NAB)
±0.4% W.Peak (DIN)
Tuner section
FM stereo, FM/AM superheterodyne tuner
FM tuner section
Tuning range
Brazil model: 87.5 – 108.0 MHz (100 kHz step)
Other models: 87.5 – 108.0 MHz (50 kHz step)
Antenna FM lead antenna
Antenna terminals 75 ohms unbalanced
Intermediate frequency 10.7 MHz
AM tuner section
Tuning range Pan-American and Oceanian models:
530 – 1,710 kHz (with the interval set at 10 kHz)
531 – 1,710 kHz (with the interval set at 9 kHz)
European model: 531 – 1,602 kHz (with the interval set at 9 kHz)
Other models: 531 – 1,602 kHz (with the interval set at 9 kHz)
530 – 1,610 kHz (with the interval set at 10 kHz)
Antenna AM loop antenna
Antenna terminals External antenna terminal
Intermediate frequency 450 kHz
USB section
Supported bit rate MP3 (MPEG 1 Audio Layer 3): 32 – 320 kbps,VBR
WMA: 32 – 192 kbps, VBR AAC: 48 – 320 kbps
Sampling frequencies MP3 (MPEG 1 Audio Layer 3): 32/44.1/48 kHz
WMA: 44.1 kHz, AAC: 44.1 kHz
Transfer speed Full-Speed
Supported USB device Mass Storage Class
Maximum current 500 mA
General
Power requirements
European model: 230 V AC, 50/60 Hz
Mexican model: 127 V AC, 60 Hz
Oceanian model: 230 – 240 V AC, 50/60 Hz
Argentina models: 220 V AC, 50/60 Hz
Other models: 120 V, 220 V or 230 – 240 V AC, 50/60 Hz,
adjustable with voltage selector
Power consumption MHC-GTX888: 430 W
MHC-GTX787/MHC-GTX777: 300 W
Dimensions (w/h/d) (Approx.)
HCD-GTX888/HCD-GTX787/
HCD-GTX777: 281 × 365 × 454 mm
(11 1/8 × 14 3/8 × 17 7/8 inches)
Mass (Approx.) HCD-GTX888: 14.0 kg (30 lb 14 oz)
HCD-GTX787/HCD-GTX777:
12.0 kg (26 lb 8 oz)
Supplied accessories Remote Commander (1)
R6 (size AA) batteries (2)
AM loop antenna (1)
FM lead antenna (1)
Front speaker pads (8)
Surround speaker pads
(MHC-GTX888/MHC-GTX777 only) (8)
Subwoofer pads (MHC-GTX888 only) (Black) (8)
Speaker cords (MHC-GTX787 only) (2)
Spacer A (MHC-GTX888 only) (2)
Spacer B (MHC-GTX888 only) (2)
Spacer C (MHC-GTX777 only) (2)
Audio cable (1) (Mexico only)
Design and specifications are subject to change without notice.
w
w
w
.
x
i
a
o
y
u
1
6
3
.
c
o
m
Q
Q
3
7
6
3
1
5
1
5
0
9
9
2
8
9
4
2
9
8
T
E
L
1
3
9
4
2
2
9
6
5
1
3
9
9
2
8
9
4
2
9
8
0
5
1
5
1
3
6
7
3
Q
Q
TEL 13942296513 QQ 376315150 892498299
http://www.xiaoyu163.com

3
HCD-GTX777/GTX787/GTX888
CAUTION
Use of controls or adjustments or performance of procedures
other than those specified herein may result in hazardous
radiation exposure.
NOTES ON HANDLINGTHE OPTICAL PICK-UP BLOCK
OR BASE UNIT
The laser diode in the optical pick-up block may suffer electrostatic
breakdown because of the potential difference generated by the
charged electrostatic load, etc. on clothing and the human body.
During repair, pay attention to electrostatic break-down and also
use the procedure in the printed matter which is included in the
repair parts.
The flexible board is easily damaged and should be handled with
care.
Notes on Chip Component Replacement
• Never reuse a disconnected chip component.
• Notice that the minus side of a tantalum capacitor may be
damaged by heat.
Flexible Circuit Board Repairing
• Keep the temperature of soldering iron around 270°C during
repairing.
• Do not touch the soldering iron on the same conductor of the
circuit board (within 3 times).
• Be careful not to apply force on the conductor when soldering or
unsoldering.
UNLEADED SOLDER
Boards requiring use of unleaded solder are printed with the lead
free mark (LF) indicating the solder contains no lead.
(Caution: Some printed circuit boards may not come printed with
the lead free mark due to their particular size)
: LEAD FREE MARK
Unleaded solder has the following characteristics.
• Unleaded solder melts at a temperature about 40 °C higher than
ordinary solder.
Ordinary soldering irons can be used but the iron tip has to be
applied to the solder joint for a slightly longer time.
Soldering irons using a temperature regulator should be set to
about 350 °C.
Caution: The printed pattern (copper foil) may peel away if the
heated tip is applied for too long, so be careful!
• Strong viscosity
Unleaded solder is more viscou-s (sticky, less prone to flow) than
ordinary solder so use caution not to let solder bridges occur such
as on IC pins, etc.
• Usable with ordinary solder
It is best to use only unleaded solder but unleaded solder may also
be added to ordinary solder.
This appliance is
claassified as a CLASS 1
LASER product. This
label is located on the
rear exterior.
NOTES ON LASER DIODE EMISSION CHECK
The laser beam on this model is concentrated so as to be focused on
the disc reflective surface by the objective lens in the optical pick-up
block. Therefore, when checking the laser diode emission,
observe from more than 30 cm away from the objective lens.
Laser component in this product is capable
of emitting radiation exceeding the limit for
Class 1.
w
w
w
.
x
i
a
o
y
u
1
6
3
.
c
o
m
Q
Q
3
7
6
3
1
5
1
5
0
9
9
2
8
9
4
2
9
8
T
E
L
1
3
9
4
2
2
9
6
5
1
3
9
9
2
8
9
4
2
9
8
0
5
1
5
1
3
6
7
3
Q
Q
TEL 13942296513 QQ 376315150 892498299
http://www.xiaoyu163.com
4
HCD-GTX777/GTX787/GTX888
MODEL IDENTIFICATION
– MODEL NUMBER LABEL –
• Abbreviation
E2 : 120V AC area in E model
E3 : Middle Easten, African and Indian model
E51 : Chilean and Peruvian model
AR : Argentina model
AUS : Australian model
MX : Mexican model
PART NO
(GTX888 ONLY)
(GTX888 ONLY)
MODEL Parts No
GTX888: E2, E51 3-290-078-0s
GTX777: E2, E51 3-290-078-1s
GTX787: E2 3-290-078-2s
GTX777: AEP 3-290-079-1s
GTX888: AR 3-873-456-0s
GTX777: AR 3-873-456-1s
GTX888: AUS 3-873-457-0s
GTX888: E3 3-873-458-0s
GTX777: E3 3-873-458-1s
GTX888: MX 3-873-459-0s
GTX777: MX 3-873-459-1s
w
w
w
.
x
i
a
o
y
u
1
6
3
.
c
o
m
Q
Q
3
7
6
3
1
5
1
5
0
9
9
2
8
9
4
2
9
8
T
E
L
1
3
9
4
2
2
9
6
5
1
3
9
9
2
8
9
4
2
9
8
0
5
1
5
1
3
6
7
3
Q
Q
TEL 13942296513 QQ 376315150 892498299
http://www.xiaoyu163.com
5
HCD-GTX777/GTX787/GTX888
TABLE OF CONTENTS
1. GENERAL
Guide to parts and controls...................................................... 6
2. DISASSEMBLY
2-1. Case (Top).......................................................................... 13
2-2. Loading Panel.................................................................... 13
2-3. CD Block Section.............................................................. 14
2-4.
Front Panel Section
............................................................ 14
2-5.
Tape Mechanism Deck, Mic Board,
USB Connector Board....................................................... 15
2-6.
Panel Board, Function Board, Jog Board
.......................... 15
2-7.
CD-SW Board
.................................................................... 16
2-8.
Cover (CDM)
..................................................................... 16
2-9. Tuner Pack......................................................................... 17
2-10. Back Panel Section
, Sub Trans Board
............................... 17
2-11.
Main Board
....................................................................... 18
2-12.
Power Board Section
......................................................... 18
2-13. Subwoofer Board, Power Board........................................ 19
2-14. Power Transformer (T1200).............................................. 19
2-15. BD93 Board....................................................................... 20
2-16. Driver Board, SW Board, USB Board............................... 20
2-17. Optical Pick-up.................................................................. 21
2-18. Sensor Board...................................................................... 21
2-19. Motor (TB) Board.............................................................. 22
2-20. Motor (LD) Board ............................................................. 22
3.TEST MODE
..............................................................
23
4. MECHANICAL ADJUSTMENTS
.........................
27
5. ELECTRICAL ADJUSTMENTS
..........................
28
6. DIAGRAMS
6-1. Block Diagram — RF/Servo Section — ........................... 31
6-2. Block Diagram — Tape/Tuner Section —......................... 32
6-3. Block Diagram — Main Section — .................................. 33
6-4. Block Diagram — USB Section —................................... 34
6-5. Block Diagram — AMP/Subwoofer Section —................ 35
6-6. Block Diagram — Display/Power Section —................... 36
6-7. Circuit Boards Location..................................................... 37
6-8. Printed Wiring Board — BD93 Board — ......................... 40
6-9. Schematic Diagram — BD93
Board
— ............................ 41
6-10. Printed Wiring Boards — Driver
Board
— ....................... 42
6-11. Schematic Diagram — Driver
Board
— ........................... 43
6-12. Printed Wiring Board — Main Board —........................... 44
6-13. Schematic Diagram — Main
Board
(1/4) —..................... 45
6-14. Schematic Diagram — Main
Board
(2/4) —..................... 46
6-15. Schematic Diagram — Main
Board
(3/4) —..................... 47
6-16. Schematic Diagram — Main
Board
(4/4) —..................... 48
6-17. Printed Wiring Board — USB
Board
— ........................... 49
6-18. Schematic Diagram — USB
Board
—.............................. 50
6-19. Printed Wiring Board — Panel Function
Board
—........... 51
6-20. Schematic Diagram —
Panel Function
Board
—.............. 52
6-21. Printed Wiring Board — Power
Board
—......................... 53
6-22. Schematic Diagram — Power
Board
—............................ 54
6-23. Printed Wiring Board — Sub Woofer
Board
—................ 55
6-24. Schematic Diagram — Sub Woofer
Board
—................... 56
6-25. Printed Wiring Boards — Trans
Board
—......................... 57
6-26. Schematic Diagram — Trans
Board
—............................. 58
6-27. Printed Wiring Board —
Illumination
Board
— ............... 59
6-28. Schematic Diagram —
Illumination
Board
—.................. 60
6-29. Printed Wiring Board — MIC
Board
— ........................... 61
6-30. Schematic Diagram — MIC
Board
— .............................. 62
6-31. Printed Wiring Boards — TC
Board
— ............................ 63
6-32. Schematic Diagram — TC
Board
—................................. 64
6-33. Printed Wiring Boards — Meter Display Board — .......... 65
6-34. Schematic Diagram — Meter Display Board —............... 66
7. EXPLODEDVIEWS
7-1. Main Section...................................................................... 80
7-2. Back Panel Section............................................................ 81
7-3. Front Panel Section (1)...................................................... 82
7-4. Front Panel Section (2)...................................................... 83
7-5. Meter Display Assy ........................................................... 84
7-6. Chassis Section.................................................................. 85
7-7. CD Mechanism Section (1) ............................................... 86
7-8. CD Mechanism Section (2) ............................................... 87
8. ELECTRICAL PARTS LIST
.................................
88
w
w
w
.
x
i
a
o
y
u
1
6
3
.
c
o
m
Q
Q
3
7
6
3
1
5
1
5
0
9
9
2
8
9
4
2
9
8
T
E
L
1
3
9
4
2
2
9
6
5
1
3
9
9
2
8
9
4
2
9
8
0
5
1
5
1
3
6
7
3
Q
Q
TEL 13942296513 QQ 376315150 892498299
http://www.xiaoyu163.com
6
HCD-GTX777/GTX787/GTX888
SECTION 1
GENERAL Note:
This section is extracted
from instruction manual.
Guide to parts and controls
This manual mainly explains operations using the buttons on the unit, but the same
operations can also be performed using the buttons on the remote having the same or
similar names.
Unit
– Front view
– Top view
RH
RKRL RI
RT
RM RE
RE RG
RB
X
XB
XT
R
XE
XG
XH
R
X
L
X
K
X
M
X
I
Continued
M
w
w
w
.
x
i
a
o
y
u
1
6
3
.
c
o
m
Q
Q
3
7
6
3
1
5
1
5
0
9
9
2
8
9
4
2
9
8
T
E
L
1
3
9
4
2
2
9
6
5
1
3
9
9
2
8
9
4
2
9
8
0
5
1
5
1
3
6
7
3
Q
Q
TEL 13942296513 QQ 376315150 892498299
http://www.xiaoyu163.com
7
HCD-GTX777/GTX787/GTX888
Remote
"EQ BAND/MEMORY (page 38)
Press to select a frequency band.
#Display (pages 11, 31, 32, 48)
Meter display (page 32)
$Power illuminator (pages 31, 32)
%PRESET EQ (pages 30, 38)
Press to select a preset sound effect.
&Disc tray (pages 11, 20, 43, 48)
'SURROUND SPEAKER MODE
(MHC-GTX888 only) (page 30)
Press to select the sound system.
SURROUND
(MHC-GTX787/MHC-GTX777
only) (page 30)
Press to select the surround effect.
(GROOVE (page 30)
Press to reinforce the bass.
)METER MODE (page 32)
Press to select a preset display
pattern.
*Function buttons:
CD (pages 15, 20, 24, 32, 33, 36)
TUNER/BAND (pages 22, 32)
Unit: TAPE (pages 29, 32)
Unit: AUDIO (pages 29, 32)
Unit: VIDEO (pages 29, 32)
Unit:
(
pages 25, 27, 32, 33
)
Remote: USB (pages 25, 27, 33)
Remote: FUNCTION (page 29)
Press to select a function.
+Unit: /9 (play/pause)
(pages 20, 24, 27, 29, 44)
Remote: (play) (pages 20,
27, 29, 44)
Remote: 9(pause) (pages 20,
29)
Press to start or pause playback.
Y(stop) (pages 20, 22, 27, 29,
37, 43)
Press to stop playback, recording or
transferring.
(go backward/go
forward) (pages 20, 27, 34)
Press to select a track or file.
Unit: TUNING +/– (page 22)
Remote: +/– (tuning) (pages 22,
35)
Press to tune in a radio station.
+/– (pages 20, 27, 33, 36)
Press to select a folder.
N.(rewind/fast forward)
(pages 20, 28, 29)
Unit: Press to fast forward or rewind.
Remote: Press to find a point in a
track or file.
FT
FE
FG
FH
XH
FB
RM
XE
FI
XM
R
RG
F
R
USB
w
w
w
.
x
i
a
o
y
u
1
6
3
.
c
o
m
Q
Q
3
7
6
3
1
5
1
5
0
9
9
2
8
9
4
2
9
8
T
E
L
1
3
9
4
2
2
9
6
5
1
3
9
9
2
8
9
4
2
9
8
0
5
1
5
1
3
6
7
3
Q
Q
TEL 13942296513 QQ 376315150 892498299
http://www.xiaoyu163.com
8
HCD-GTX777/GTX787/GTX888
Guide to parts and controls
,PUSH ;OPEN/CLOSE
(page 29)
Press to insert or eject a tape.
Tape deck (pages 29, 36, 40, 47)
-REC TO TAPE (page 37)
Press to record onto a tape.
REC TIMER (page 40)
Press to set the Recording Timer.
REC TO (page 24)
Press to transfer onto the connected
optional USB device.
.FLANGER (pages 31, 43, 47)
DELAY (pages 31, 43, 47)
CHORUS (pages 31, 43, 47)
SOUND FLASH (page 31)
Press to create a party atmosphere.
/Unit: MASTER VOLUME
(pages 20, 27, 29, 31, 42)
Turn to adjust the volume.
Remote: VOLUME +/–
*
(pages 20, 27, 29, 31, 42)
Press to adjust the volume.
* TheVOLUME+buttonhasa tactiledot.
Use the tactile dot as a reference when
operating the system.
0MIC (jack) (pages 39, 42, 53)
Connect an optional microphone.
MIC LEVEL (pages 37, 39, 42)
Turn to adjust the microphone
volume.
1(indicator)
Lights up when transferring to the
connected optional USB device, or
when erasing audio files or folders.
(USB) port (pages 23, 25,
27, 46, 53)
Connect an optional USB device.
2AUDIO INPUT L/R (jacks)
(page 29)
Connect to an audio component
(Portable audio player, etc.).
3PHONES (jack) (pages 42, 53)
Connect the headphones.
4ENTER (pages 20, 27, 30, 31,
34, 35, 38)
Press to enter the selection.
5RETURN (page 20)
Press to return to the parent folder.
Press to exit search mode.
6ERASE (page 25)
Press to erase audio files or folders
on the connected optional USB
device.
USB
Continued
M
w
w
w
.
x
i
a
o
y
u
1
6
3
.
c
o
m
Q
Q
3
7
6
3
1
5
1
5
0
9
9
2
8
9
4
2
9
8
T
E
L
1
3
9
4
2
2
9
6
5
1
3
9
9
2
8
9
4
2
9
8
0
5
1
5
1
3
6
7
3
Q
Q
TEL 13942296513 QQ 376315150 892498299
http://www.xiaoyu163.com
9
HCD-GTX777/GTX787/GTX888
7OPTIONS (pages 30, 31)
Press to select the display pattern,
MP3 BOOSTER+ function and USB
SELECT.
8DISPLAY (pages 19, 32, 32, 36)
Press to change the information in
the display.
9IR Receptor (page 42)
: (on/standby) (pages 14, 15,
42, 48)
Press to turn the system on or off.
;OPEN/CLOSE ;(pages 15, 20,
43)
Press to load or eject a disc.
XK DISC 1 ~ 3 (pages 21, 33)
Press to select a disc.
Press to switch to CD function from
other function.
XL OPERATION DIAL (pages 20,
27, 31, 38)
Turn to select a track, file or folder.
Turn to select a setting.
XM Unit: DISC SKIP/EX-CHANGE
(pages 15, 20, 21, 33)
Press to select a disc.
Press to exchange other discs during
playback.
Remote: DISC SKIP (pages 21,
33)
Press to select a disc.
F CLOCK/TIMER SELECT
(page 40)
CLOCK/TIMER SET (pages 19,
40)
Press to set the clock and the timers.
F[ REPEAT/FM MODE (pages 20,
23, 28, 47)
Press to change the Repeat Play
setting.
Press to select the FM monaural or
stereo reception.
FT EQ (pages 30, 38)
Press to select a preset sound effect.
FE CLEAR (page 34)
Press to delete a pre-programmed
track.
FG PLAY MODE/TUNING MODE
(pages 21, 22, 28, 33, 35, 37, 44,
48)
Press to select the play mode of CD
or USB function.
Press to select the tuning mode.
FH TUNER MEMORY (page 35)
Press to preset a radio station.
FI SLEEP (page 39)
Press to activate the Sleep Timer.
w
w
w
.
x
i
a
o
y
u
1
6
3
.
c
o
m
Q
Q
3
7
6
3
1
5
1
5
0
9
9
2
8
9
4
2
9
8
T
E
L
1
3
9
4
2
2
9
6
5
1
3
9
9
2
8
9
4
2
9
8
0
5
1
5
1
3
6
7
3
Q
Q
TEL 13942296513 QQ 376315150 892498299
http://www.xiaoyu163.com
10
HCD-GTX777/GTX787/GTX888
Guide to parts and controls
– Display
"
“ ” lights up during playback.
“
/9
” lights up when playback is
paused.
#
Indicates the activated sound effect
(pages 30, 31, 38).
Note
“LINK”, “MATRIX SUR 1” and
“MATRIX SUR 2” light up for
MHC-GTX888 only.
$
Lights up when the USB function is
selected (page 27).
%
Indicators for the disc tray (page 20).
“ ” lights up when the disc is
selected. “ ” lights up when there is
a disc on the disc tray. “1”, “2” and
“3” light up when the system is turned
on.
&
Displays the current status and
information (page 32).
'
Lights up during transferring onto an
USB device or recording onto a tape
(pages 23, 36).
(
Lights up when the timer is set
(page 39).
)
Lights up when the Sleep Timer is
activated (page 39).
*
Indicators for the TUNER function
(pages 22, 35).
+
Lights up when the MP3 file contains
ID3 tag information.
,
Lights up when an optional USB
device is recognized (page 23).
-
Indicates the selected play mode
(pages 21, 28).
.
Indicates the type of disc or file that
the system recognized.
/
Indicates the type of audio file
information that displayed (page 32).
“ ” lights up when a file name is
displayed. “ ” lights up when an
artist name is displayed. “ ” lights
up when a folder name is displayed.
R
RBRT
RERG
w
w
w
.
x
i
a
o
y
u
1
6
3
.
c
o
m
Q
Q
3
7
6
3
1
5
1
5
0
9
9
2
8
9
4
2
9
8
T
E
L
1
3
9
4
2
2
9
6
5
1
3
9
9
2
8
9
4
2
9
8
0
5
1
5
1
3
6
7
3
Q
Q
TEL 13942296513 QQ 376315150 892498299
http://www.xiaoyu163.com
11
HCD-GTX777/GTX787/GTX888
Using the subwoofers
(MHC-GTX888 only)
You can use the subwoofers to enhance
the bass.
Subwoofer A (SS-WG888A)
1Press SUBWOOFER ON/OFF on
the subwoofer A to light up the
indicator.
The subwoofers are turned on.
2Turn SUBWOOFER LEVEL on the
subwoofer A to adjust the level.
w
w
w
.
x
i
a
o
y
u
1
6
3
.
c
o
m
Q
Q
3
7
6
3
1
5
1
5
0
9
9
2
8
9
4
2
9
8
T
E
L
1
3
9
4
2
2
9
6
5
1
3
9
9
2
8
9
4
2
9
8
0
5
1
5
1
3
6
7
3
Q
Q
TEL 13942296513 QQ 376315150 892498299
http://www.xiaoyu163.com
12
HCD-GTX777/GTX787/GTX888 SECTION 2
DISASSEMBLY
Note : This set can be disassembled in the order shown below.
2-19. MOTOR (TB) BOARD
(Page 22)
2-20. MOTOR (LD) BOARD
(Page 22)
2-1. CASE (TOP)
(Page 13)
2-2. LOADING PANEL
(Page 13)
SET
2-9. TUNER PACK
(Page 17)
2-16. DRIVER BOARD,
SW BOARD,
USB BOARD
(Page 20)
2-15. BD93 BOARD
(Page 20)
2-17. OPTICAL PICK-UP
(Page 21)
2-3. CD BLOCK SECTION
(Page 14)
2-10. BACK PANEL SECTION,
SUB TRANS BOARD
(Page 17)
2-4. FRONT PANEL SECTION
(Page 14) 2-18. SENSOR BOARD
(Page 21)
2-8. COVER (CDM)
(Page 16)
2-12. POWER BOARD SECTION
(Page 18)
2-13. SUBWOOFER BOARD,
POWER BOARD
(Page 19)
2-14. POWER TRANSFORMER
(T1200)
(Page 19)
2-11. MAIN BOARD
(Page 18)
2-5. TAPE MECHANISM DECK,
MIC BOARD,
USB CONNECTOR BOARD
(Page 15)
2-7. CD-SW BOARD
(Page 16)
2-6. METER DISPLAY ASSY
PANEL BOARD,
FUNCTION BOARD,
JOG BOARD
(Page 15)
w
w
w
.
x
i
a
o
y
u
1
6
3
.
c
o
m
Q
Q
3
7
6
3
1
5
1
5
0
9
9
2
8
9
4
2
9
8
T
E
L
1
3
9
4
2
2
9
6
5
1
3
9
9
2
8
9
4
2
9
8
0
5
1
5
1
3
6
7
3
Q
Q
TEL 13942296513 QQ 376315150 892498299
http://www.xiaoyu163.com
13
HCD-GTX777/GTX787/GTX888
2-2. LOADING PANEL
Note : Follow the disassembly procedure in the numerical order given.
2-1. CASE (TOP)
screw
(case 3 TP2)
screw
(case 3 TP2)
two
screws
(case 3 TP2)
two
RT
two screws
(+BVTP 3 x 10)
two screws
(+BVTP 3 x 10)
RB
two screws
(+BVTP 3 x 10)
RE
case (top)
panel (side-R)
panel (side-L)
screws
(case 3 TP2)
loading panel
Pull-out the disc tray.
Turn the pulley to the direction of the arrow.
pulley
Front panel side
CD mechanism deck (CDM74KF)
w
w
w
.
x
i
a
o
y
u
1
6
3
.
c
o
m
Q
Q
3
7
6
3
1
5
1
5
0
9
9
2
8
9
4
2
9
8
T
E
L
1
3
9
4
2
2
9
6
5
1
3
9
9
2
8
9
4
2
9
8
0
5
1
5
1
3
6
7
3
Q
Q
TEL 13942296513 QQ 376315150 892498299
http://www.xiaoyu163.com
14
HCD-GTX777/GTX787/GTX888
2-3. CD BLOCK SECTION
tapping screw
tapping screw
RE
CN400
(8p)
three
screw s
(+BVTP 3
x 12)
wire (flat type) (13 core)
(CN701)
wire (flat type) (11 core)
(CN410 )
RB
CD block section
wire (flat type) (13 core)
(CN110)
CN903 (5P)
RT
Wire (flat type) (21 core)
(CN907)
CN901 (2P)
wire (flat type) (21 core)
(CN204)
RH
wire (flat type) (11 core)
(CN102)
wire (flat type) (31 core)
(CN430)
a
d
b
b
da
c
c
c
a
b
d
RG
two screws
(+BVTP 3
x 10)
2-4. FRONT PANEL SECTION
front panel section
three
screw s
(+BVTP 3 x 10)
(+BVTP 3 x 10)
two screw s
wire (flat type) (25 core)
(CN114)
wire (flat type) (7 core)
(CN115)
CN101 (7P)
Ver. 1.1
w
w
w
.
x
i
a
o
y
u
1
6
3
.
c
o
m
Q
Q
3
7
6
3
1
5
1
5
0
9
9
2
8
9
4
2
9
8
T
E
L
1
3
9
4
2
2
9
6
5
1
3
9
9
2
8
9
4
2
9
8
0
5
1
5
1
3
6
7
3
Q
Q
TEL 13942296513 QQ 376315150 892498299
http://www.xiaoyu163.com

15
HCD-GTX777/GTX787/GTX888
2-6. PANEL BOARD, FUNCTION BOARD, JOG BOARD
a
b
b
six screws
(+BVTP 2.6 (3CR))
four
screws
(+BVTP 2.6 (3CR))
two screws
(+BVTP 2.6 (3CR))
four screws
(+BVTP 2.6 (3CR))
four screws
(+BVTP 2.6 (3CR))
knob (volume)
RB
nut
RT
holder (jog)
RE
knob jog assy
RG
gear (encoder)
RH
JOG board
six screws
(+BVTP 2.6 (3CR))
illumination board
meter display assy
panel board
2-5.TAPE MECHANISM DECK, MIC BOARD, USB CONNECTOR BOARD
four screws
(+BVTP 2.6 (3CR))
three screws
(+BVTP 2.6 (3CR))
two
screws
(+BVTP 2.6 (3CR))
three screws
(+BVTP 2.6 (3CR))
USB CONNECTOR board
bracket (MIC shield)
MIC board
tape mechanism deck
knob (MIC)
w
w
w
.
x
i
a
o
y
u
1
6
3
.
c
o
m
Q
Q
3
7
6
3
1
5
1
5
0
9
9
2
8
9
4
2
9
8
T
E
L
1
3
9
4
2
2
9
6
5
1
3
9
9
2
8
9
4
2
9
8
0
5
1
5
1
3
6
7
3
Q
Q
TEL 13942296513 QQ 376315150 892498299
http://www.xiaoyu163.com
16
HCD-GTX777/GTX787/GTX888
2-7. CD-SW BOARD
two
screws
(+BVTP 2.6 (3CR))
CD-SW board
escucheon (CD)
three
screws
(+BVTP 2.6 (3CR))
2-8. COVER (CDM),TC BOARD
two screws
(+BVTP 3
s
10)
cover (CDM)
CD mechanism deck
one screw
(+BVTP 3
s
10)
TC board
two screw
(+BVTP 2.6 (3CR))
Ver. 1.1
w
w
w
.
x
i
a
o
y
u
1
6
3
.
c
o
m
Q
Q
3
7
6
3
1
5
1
5
0
9
9
2
8
9
4
2
9
8
T
E
L
1
3
9
4
2
2
9
6
5
1
3
9
9
2
8
9
4
2
9
8
0
5
1
5
1
3
6
7
3
Q
Q
TEL 13942296513 QQ 376315150 892498299
http://www.xiaoyu163.com

17
HCD-GTX777/GTX787/GTX888
2-10. BACK PANEL SECTION, SUBTRANS BOARD
RB
back panel section
three screw s
(+BVTP 3
s
10)
one screw
(+BVTP 3
s
10)
(GTX787)
two screw s
(+BVTP 3
s
10)
(GTX777/GTX888)
two screws
(+BVTP 3
s
10)
(GTX777/GTX787)
three screw s
(+BVTP 3
s
10)
(GTX888)
one
screw (GTX888 only)
(+BVTP 3
s
10)
one
screw (GTX888 only)
(+BVTP 3
s
10)
CN206 (3P)
CN1203 (4P)
sub trans bo ar d
two screw s
(+BVTP 3
s
10)
CN202 (3P)
2-9.TUNER PACK
two
screw s
(+BVTP 3 x 8)
tuner pack
wire (flat type) (9 core)
(CN1)
Ver. 1.1
w
w
w
.
x
i
a
o
y
u
1
6
3
.
c
o
m
Q
Q
3
7
6
3
1
5
1
5
0
9
9
2
8
9
4
2
9
8
T
E
L
1
3
9
4
2
2
9
6
5
1
3
9
9
2
8
9
4
2
9
8
0
5
1
5
1
3
6
7
3
Q
Q
TEL 13942296513 QQ 376315150 892498299
http://www.xiaoyu163.com
18
HCD-GTX777/GTX787/GTX888
2-12. POWER BOARD SECTION, DC FAN (FOR GTX888)
2-11. MAIN BOARD
two screw s
(+BVTP 3
×
10)
(Fo r G
TX
888 Only)
DC fan (M893)
P O WER board section
four screw s
(+BV3 (3-CR))
three screw s
(+BVTP 3
×
10)
P O WER board assy
CN809 (9 pin)
MAIN board
two screw s
(+BV3 (3-CR))
CN611
(8 pin)
CN610
(8 pin)
w
w
w
.
x
i
a
o
y
u
1
6
3
.
c
o
m
Q
Q
3
7
6
3
1
5
1
5
0
9
9
2
8
9
4
2
9
8
T
E
L
1
3
9
4
2
2
9
6
5
1
3
9
9
2
8
9
4
2
9
8
0
5
1
5
1
3
6
7
3
Q
Q
TEL 13942296513 QQ 376315150 892498299
http://www.xiaoyu163.com
19
HCD-GTX777/GTX787/GTX888
2-14. POWERTRANSFORMER (T1200)
2-13. SUBWOOFER BOARD, POWER BOARD
POWER board
heat sink assy
SUBWOOFER board
two screws
(+BV3 (3-CR))
two screws
(transistor)
two screws
(transistor)
power transfomer (T1200)
TRANS board
three
screws
three
screws
(+BVTT 4 x 8)
(+BVTT 4 x 8)
w
w
w
.
x
i
a
o
y
u
1
6
3
.
c
o
m
Q
Q
3
7
6
3
1
5
1
5
0
9
9
2
8
9
4
2
9
8
T
E
L
1
3
9
4
2
2
9
6
5
1
3
9
9
2
8
9
4
2
9
8
0
5
1
5
1
3
6
7
3
Q
Q
TEL 13942296513 QQ 376315150 892498299
http://www.xiaoyu163.com
20
HCD-GTX777/GTX787/GTX888
2-15. BD93 BOARD
2-16. DRIVER BOARD, SW BOARD, USB R BOARD
BD93
board
Remove the four solders.
wire (flat type) (16 core)
(CN301)
CN703 (4P)
CN704 (2P)
DRIVER board
SW board
two screws
(+BVTT (M2.6))
screw
(+BVTT (M2.6))
two screws
(+BVTP2.6 (3CR))
USB board
wire (flat type) (5 core)
(CN702)
Ver. 1.1
w
w
w
.
x
i
a
o
y
u
1
6
3
.
c
o
m
Q
Q
3
7
6
3
1
5
1
5
0
9
9
2
8
9
4
2
9
8
T
E
L
1
3
9
4
2
2
9
6
5
1
3
9
9
2
8
9
4
2
9
8
0
5
1
5
1
3
6
7
3
Q
Q
TEL 13942296513 QQ 376315150 892498299
http://www.xiaoyu163.com
This manual suits for next models
2
Table of contents
Other Sony Stereo System manuals

Sony
Sony MHC-G99AV User manual

Sony
Sony SRS-X77 User manual

Sony
Sony LBT-GPX555 User manual

Sony
Sony CMT-MD1DX User manual

Sony
Sony HCD-GX45 - System Components User manual

Sony
Sony HCD-VX555J User manual

Sony
Sony MHC-ESX9 User manual

Sony
Sony MHC-RV990D User manual

Sony
Sony MHC-450 User manual

Sony
Sony LBT-N455KRW User manual

Sony
Sony CMT-MX700Ni Owner's manual

Sony
Sony SRS-BTX300 User guide

Sony
Sony HCD-ZX50MD User manual

Sony
Sony CMT-EP305 User manual

Sony
Sony MHC-V50 User manual

Sony
Sony GTK-XB60 User manual

Sony
Sony hcd-tb20 User manual

Sony
Sony HCD-VX33 User manual

Sony
Sony CMT-EP315 User manual

Sony
Sony CMT-MX550I User manual