Table
of
Contents
Getting
Started
Configuration
oo...
ceccccccceeveceveeveteeesevetevestetteviteavees
Precautions
.0....000.000cccceeeececeeeeeeceeees
Pr@ParationS
.ns...cecceccccssescccecceescessnsessecesevensvevetesssoestsesessnen:
GONMECTIONS
5255.25,
8.25
ccdhc
och
itael
weatncvheoedesdeeebereadacstedseesdecate
deen
Using
Your
Stereo
Turning
ON
the
POWER
oo...
ccccccccececesctsecseeeerevseesvsetaeeeess
6
Basic
sound
adjustments
..0..0..0.00.cccccciccceeeccceesserscetereeeeeees
6
Receiving
broadcasts
00.00.00
ccccccccccscseneeestesveserevseeaeeeeeees
8
Playing
back
tapes
Recording
on
tapes
Dubbing
tapes
o.oo
ceececeseeeceseensevetesteesttessess
General
Maintenance
00...
eceseceeseesesetsecuseecseccsesersnecseeeess
15
Location
of
CONTIONS
.......00
ccc
ceccceecccccecssetsseesescssseveseceeeeess
16
Specifications
oo...
ccc
ccccccccscseseseeseseesesevstsessvsttevsnesee,
17
Troubleshooting
Quide
0.0...
ccccccccccscccseesescescserevecteeseees
18
Precautions
Before
operating
the
system,
read
the
following
precautions
carefully.
*
Operate
the
unit
only
on
120
V
AC,
60
Hz.
*
Unplug
the
system
from
the
wall
outlet
if
it
is
not
to
be
used
for
an
extended
period
of
time.
To
disconnect
the
cord,
pull
it
out
by
grasping
the
plug.
Never
pull
the
cord
itself.
*
Should
any
solid
object
or
liquid
fall
into
a
unit,
unplug
the
unit
and
have
it
checked
by
qualified
personnel
before
any
further
operation.
*
The
nameplate
indicating
operation
voltage,
power
consumption,
etc.
is
located
at
the
rear.
*
The
AC
power
cord
must
be
changed
only
at
a
qualified
service
shop.
If
you
have
any
questions
or
problems
concerning
your
system,
please
consult
your
nearest
Sony
dealer.
For
detailed
precautions,
see
the
leaflet
“IMPORTANT
SAFEGUARDS”.
Preparations
You
can
control
the
system
with
the
supplied
remote
commander.
Remote
Commander
:
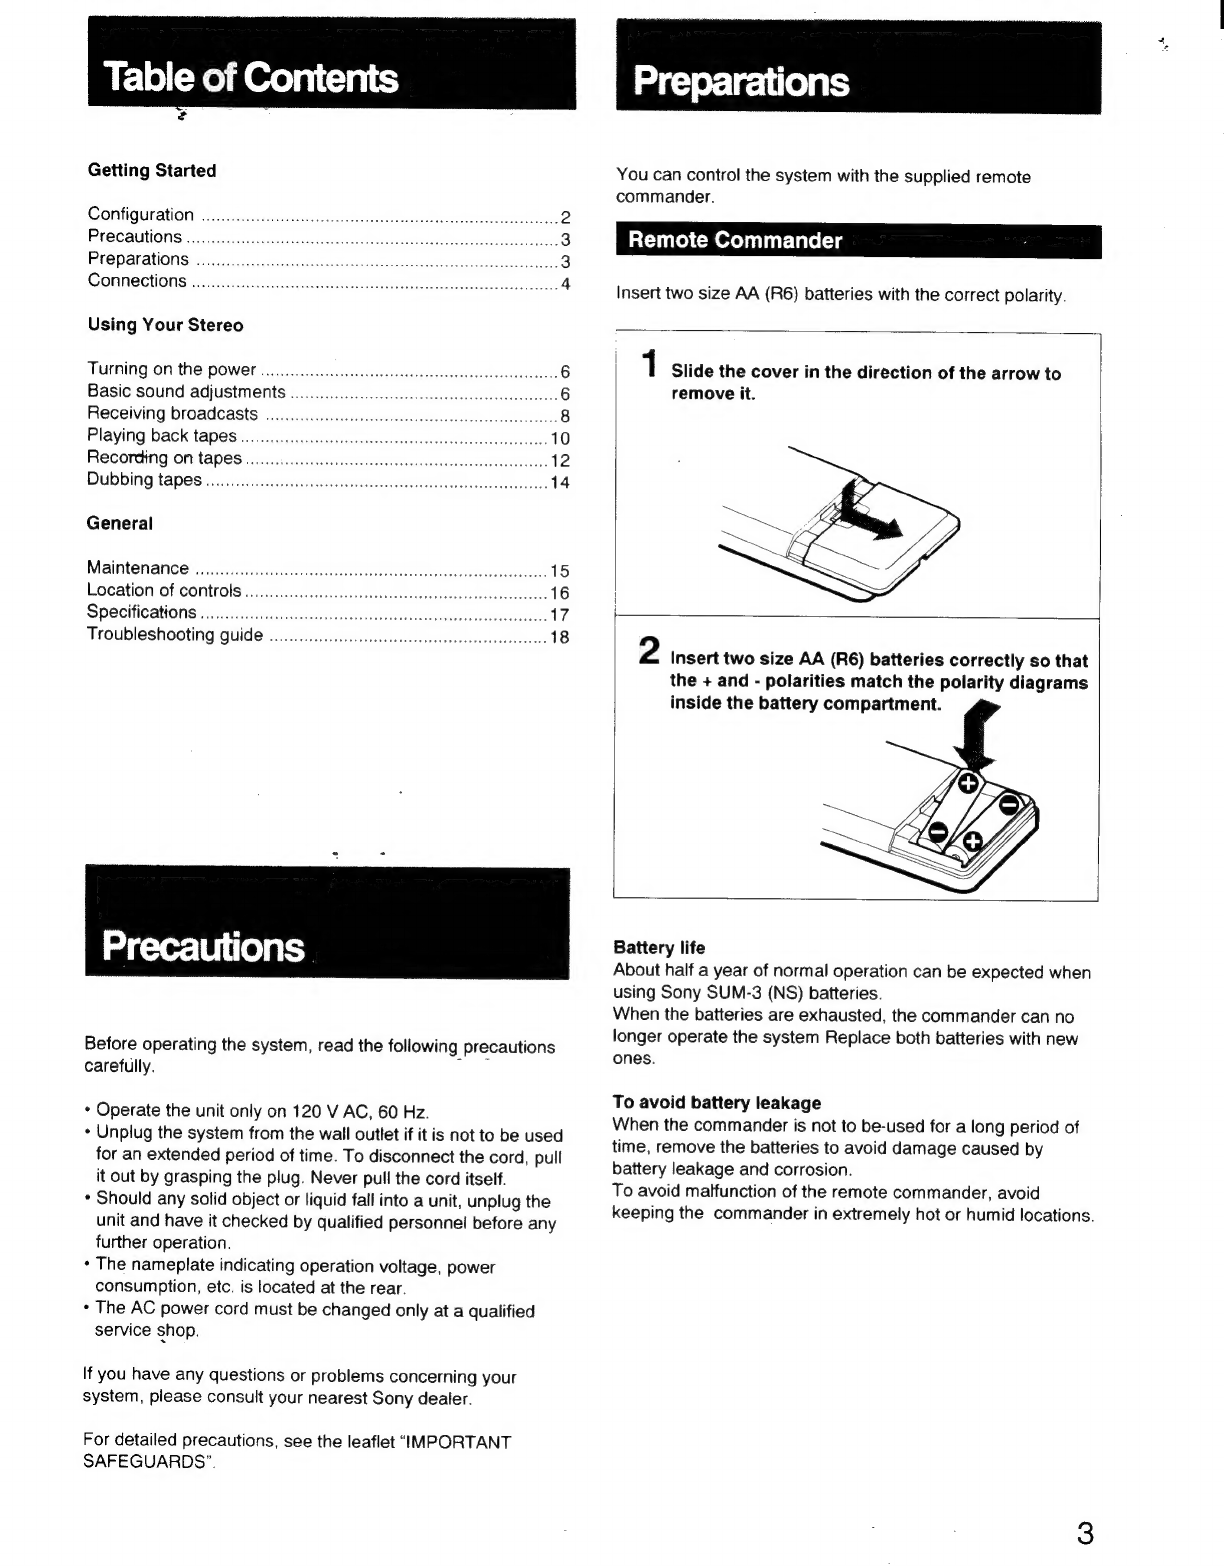
Insert
two
size
AA
(R6)
batteries
with
the
correct
polarity.
1
Slide
the
cover
in
the
direction
of
the
arrow
to
remove
it.
2
Insert
two
size
AA
(R6)
batteries
correctly
so
that
the
+
and
-
polarities
match
the
polarity
diagrams
inside
the
battery
compartment.
Battery
life
About
half
a
year
of
normal
operation
can
be
expected
when
using
Sony
SUM-3
(NS)
batteries.
When
the
batteries
are
exhausted,
the
commander
can
no
longer
operate
the
system
Replace
both
batteries
with
new
ones.
To
avoid
battery
leakage
When
the
commander
is
not
to
be-used
for
a
long
period
of
time,
remove
the
batteries
to
avoid
damage
caused
by
battery
leakage
and
corrosion.
To
avoid
malfunction
of
the
remote
commander,
avoid
keeping
the
commander
in
extremely
hot
or
humid
locations.


 User manual")