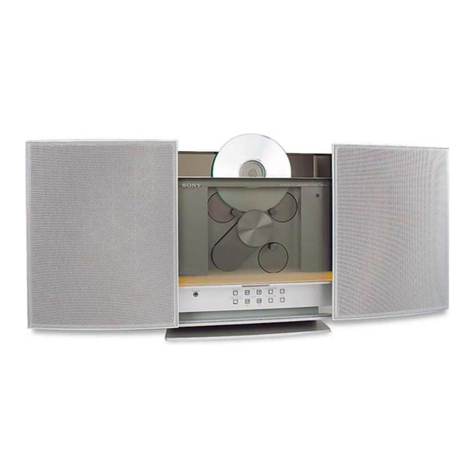
Sony LBT-D109CD User manual

SONY.
3-756-343-21(2)
Compact
Hi-Fi
Stereo
System
—
Operating
Instructions
Hist
LBI-D109CD
LBI-D110CD
©
1998
by
Sony
Corporation

t
NN
ETaaliatel
pee
Sot
Pa
he
ee
ee
dwner's
Record
“he
model
and
serial
numbers
are
located
on
the
rear
of
the
init.
%ecord
the
serial
number
in
the
space
provided
below.
%efer
to
them
whenever
you
call
upon
your
Sony
dealer
egarding
this
product.
fode!
No.
Serial
No.
“o
prevent
fire
or
shock
hazard,
do
not
‘xpose
the
unit
to
rain
or
moisture.
CAUTION
RISK
OF
ELECTRIC
SHOCK
00
NOT
OPEN
CAUTION
:
TO
REDUCE
THE
RISK
OF
ELECTRIC
SHOCK,
DO
NOT
REMOVE
COVER
(OR
BACK).
NO
USER-SERVICEABLE
PARTS
INSIDE.
REFER
SERVICING
TO
QUALIFIED
SERVICE
PERSONNEL.
This
symbol
is
intended
to
alert
the
user
to
the
presence
of
uninsulated
“dangerous
voltage”
within
the
product's
enclosure
that
may
be
of
sufficient
magnitude
to
constitute
a
risk
of
electric
shock
to
persons.
the
presence
of
important
operating
and
maintenance
(servicing)
instructions
in
the
literature
accompanying
the
appliance.
|
This
symbol
is
intended
to
alert
the
user
to
\UTION
e
use
of
optical
instruments
with
this
product
will
increase
3
hazard.
r
the
customers
in
Canada
—
CAUTION:
O
PREVENT
ELECTRIC
SHOCK,
DO
NOT
USE
THIS
OLARIZED
AC
PLUG
WITH
AN
EXTENSION
CORD,
ECEPTACLE
OR
OTHER
OUTLET
UNLESS
THE
LADES
CAN
BE
FULLY
INSERTED
TO
PREVENT
LADE
EXPOSURE.
“IS
APPARATUS
COMPLIES
WITH
THE
CLASS
B
MITS
FOR
RADIO
NOISE
EMISSIONS
SET
OUT
IN
4DIO
INTERFERENCE
REGULATIONS.
INFORMATION
This
equipment
has
been
tested
and
found
to
comply
with
the
limits
for
a
Class
B
digital
device,
pursuant
to
Part
15
of
the
FCC
Rules.
These
limits
are
designed
to
provide
reasonable
protection
against
harmful
interference
ina
residential
installation.
This
equipment
generates,
uses,
and
can
radiate
radio
frequency
energy
and,
if
not
installed
and
used
in
accordance
with
the
instructions,
may
cause
harmful
interference
to
radio
communications.
However,
there
is
no
guarantee
that
interference
will
not
occur
in
a
particular
installation.
If
this
equipment
does
cause
harmful
interference
to
radio
or
television
reception,
which
can
be
determined
by
turning
the
equipment
off
and
on,
the
user
is
encouraged
to
try
to
correct
the
interference
by
one
or
more
of
the
following
measures:
—Reorient
or
relocate
the
receiving
antenna.
—Increase
the
separation
between
the
equipment
and
receiver.
—Connect
the
equipment
into
an
outlet
on
a
circuit
different
from
that
to
which
the
receiver
is
connected.
—Consult
the
dealer
or
an
experienced
radio/TV
technician
for
help.
CAUTION
You
are
cautioned
that
any
changes
or
modifications
not
expressly
approved
in
this
manual
could
void
your
authority
to
operate
this
epuipment.
Note
to
CATV
system
installer:
This
reminder
is
provided
to
call
the
CATV
system
installer's
attention
to
Article
820-40
of
the
NEC
that
provides
guidelines
for
proper
grounding
and,
in
particular,
specifies
that
the
cable
ground
shall
be
connected
to
the
grounding
system
of
the
building,
as
close
to
the
point
of
cable
entry
as
practical.
Con
iguration
eae
re
eT
This
manual
covers
the
system
in
the
chart
below.
The
system
number
is
shown
on
the
carton
box.
Compact
disc
deck
receiver}
HCD-D109 HCD-D109
|
Speakers
|
SSD1I0
|
SSDI10
|
In
the
instructions
starting
from
page
7,
buttons
on
the
remote
commander
are
indicated
in
parentheses,
unless
mentioned
otherwise.

Getting
Started
PRECAUTIONS
sic.
Ssccssetsecscksccsccedsssssetensesenssocssesvaconceesonseosensbasseses
3
PLAPArAtlONns
...:...sscseccsnssssrcossesssessesnseosseascnssseseoaseasossscessosecoees
3
CONNMECUONG
icccisiscceccscectacssesossebcsscossecesss
cb
sebecscdostesteasccéecestevsed
4
Using
Your
Stereo
Turning
on
the
Power
...........csssssssssssssssssssccsecssserssccesensenees
5
Basic
Sound
Adjustment
.............s.scscccsssscsrsssssscsccnssessescers
6
Receiving
Broadcasts
...............sscscscsccsssscecessessesscsscssseceees
7
Playing
Back
Tapes
............ssscscsscenscscsscsssescsessesersnsees
Seashonsts
9
Recording
On
Tape
............sccssscecccscrsscssesseccsscsosessesseesseees
10
DUDDING.
TADS
55
cis8<ccsccssccssnccsesstseatossengsesesecesasestesincsesessenes
12
Playing
Compact
DISCS
..............scsscccssssssesseseesesceserserssserses
13
Playing
in
a
Random
Order
...........s.sccsscrserssrsscseccsecsecserseees
15
Playing
in
a
Desired
Order
and
Time
...............essccssssesseseree
16
Playing
the
Beginning
of
Each
Selection
..........
sdbeecestdscesuses
18
Playing
Repeatedly
...........sescssosrssrrssscsssessessonserseossecsssseseoes
18
Designating
the
Total
Playing
Time
.............s.secccscecesssseeses
19
Tips
On
Editing
Tapes
............sccccsccsssssscessessesessscsssecsssesees
20
General
MaiNtONaNCS
ne
ccccessccsssccessecsstestnsscssctecessastscestessbessisaseccctescscs
22
SPOChIGAlONS
éi.cccicscccescdesexsecsccecaieondactessansseserteuddooacess
cnedesase
23
Troubleshooting
Guide
............cccccsccccesecsssscessasecsseeseceseneeees
24
Location
of
Controls
............00.
sdapsavbsbivendssessabensbéunssessioestasess
26
ad
qsvers
10]
telat
Before
operating
the
system,
read
the
following
precautions
carefully
¢
Operate
the
unit
only
on
120
V
AC,
60
Hz.
©
Unplug
the
system
from
the
wall
outlet
if
it
is
not
to
be
used
for
an
extended
period
of
time.
To
disconnect
the
cord,
pull
it
out
by
grasping
the
plug.
Never
pull
the
cord
itself.
¢
Should
any
solid
object
or
liquid
fall
into
the
unit,
unplug
the
unit
and
have
it
checked
by
qualified
personnel
before
any
further
operation.
As
the
laser
beam
used
in
this
unit
is
harmful
to
the
eyes,
do
not
attempt
to
disassemble
the
cabinet.
Refer
servicing
to
qualified
personnel
only.
¢
AC
power
cord
must
be
changed
only
at
the
qualified
service
shop.
If
you
have
any
questions
or
problems
concerning
your
system,
please
consult
your
nearest
Sony
dealer.
For
detailed
precautions,
see
the
leaflet
“IMPORTANT
SAFEGUARDS”.
Preparations
You
can
control
the
system
(except
the
cassette
deck)
with
the
supplied
remote
commander.
nic)
paleccm
Ore)
aatearclatelsa
Insert
two
size
AA
(R6)
batteries
with
the
correct
polarity.
1
Slide
the
cover
in
the
direction
of
the
arrow
to
remove
it.
2
insert
two
size
AA
(R6)
batteries
correctly
so
that
the
+
and
-
polarities
match
the
polarity
diagrams
inside
the
battery
compartment.
Battery
life
About
half
a
year
of
normal
operation
can
be
expected
when
using
Sony
SUM-3
(NS)
batteries.
When
the
batteries
are
exhausted,
the
commander
can
no
longer
operate
the
unit.
Replace
both
batteries
with
new
ones.
To
avoid
battery
leakage
When
the
commander
is
not
to
be
used
for
a
long
period
of
time,
remove
the
batteries
to
avoid
damage
caused
by
battery
leakage
and
corrosion.
To
avoid
malfunction
of
the
remote
commander
Avoid
keeping
the
commander
in
extremely
hot
or
humid
locations.
|.
Poke
Tages
STE
a
“<=
Connections
_.
Pee
ea
7
Ct
eee
Turn
all
the
power
off
before
making
any
connections.
The
diagram
below
shows
the
system
connection.
The
letters
in
the
diagram
correspond
to
those
in
the
text.
Notes
on
Connection
)
¢
Connect
the
AC
power
cord
last.
¢
Cord
plugs
and
jacks
are
color
coded.
Red
plugs
and
jacks
are
for
the
right
channel
(R)
and
white
ones
are
for
the
left
channel
(L).
Speaker
Cord
Connection
An.
1
Strip
15
mm
of
the
speaker
cord
coating
from
the
end
of
the
cord.
HCD-D109
2
Connect
the
right
speaker
to
the
R
(right)
speaker
De
whi
|
-
términal,
and
the
left
speaker
to
the
L
(left)
speaker
terminal,
with
the
red
cords
to
+
and
the
black
cords
to
-.
:
FM
Antenna
Connection
Bi
Connect
the
supplied
FM
wire
antenna
to
the
FM
75
Q
terminal
and
extend
horizontally.
How
to
attach
a
wire
to
the
terminal
1
Press
down
on
the
button.
iH
(
PS
EN
Adee
a
ay
pny
(=
AY
ut
fit
2
insert
the
wire.
Supplied
wire
antenna
For
better
reception
Connect
to
an
outdoor
antenna.
3
Push
up
the
button.

Turn
on
the
power
after
completing
all
connections.
Connect
the
supplied
loop
antenna
to
the
AM
and
4
terminals.
You
can
attach
the
loop
antenna
on
the
wall
using
commercially
available
screws.
=--
i
cIIma@?
\)
1)
SS
Lind
i
i
las
Lad
i
i
==
= =
Ee
ee
iia
eooooe
)
(ess
|]
00000
asim
yt
L
FS
ay
PAPAL
For
better
reception
In
addition
to
the
loop
antenna,
connect
an
insulated
wire
of
6
to
15
meters
(20-
to
50-
feet)
to
the
AM
terminal
(the
lower
terminal).
Be
sure
not
to
disconnect
the
loop
antenna.
Press
the
POWER
button
to
turn
on
the
compact
:
disc
deck
receiver.
yXo
folate
my:
Vale)
¢al=)an@xelen)
ole)
alzsahe-m
Com
(also)
(2101)
You
can
connect
a
tumtable
PS-LX52
to
the
compact
disc
deck
receiver.
To
listen
to
analog
discs,
press
the
PHONO
button.
PS-LX52
HCD-D109
AC
Power
Cord
Connect
the
AC
power
cord
to
a
wall
outlet.

Basic
Sound
Adjustments
The
following
operations
apply
only
to
reproduced
sound.
The
letters
in
the
illustration
below
correspond
to
those
in
the
text.
ee
Fae
mee”)
ree
|
es
| |
Parra
ae
ye
a
eS
Adjusting
the
Volume
To
increase
the
volume,
turn
the
VOLUME
control
clockwise.
To
decrease
it,
turn
the
control
counterclockwise.
¢
Turn
down
the
volume
before
switching
on
the
unit
to
prevent
possible
damage
to
the
speakers.
VOLUME
MIN
MAX
Nol
Ttrsyelatemeat=motoleiare
me
lereliiay
BI
Adjust
the
following
5
BAND
GRAPHIC
EQUALIZER
controls.
100
Hz:
Boosts
or
cuts
heavy
bass.
330
Hz:
Adjusts
the
power,
spaciousness
and
warmth
of
the
sound.
1kHz:
Accentuates
or
dims
vocals.
3.3
kHz:
Boosts
to
a
brighter
sound
or
reduces
stridency.
10
kHz:
Adjusts
tape
hiss
noise.
AND
GRAPHIC
EQUALIZER
stetancelgediate
Miat=e
st:
05
'C|
Adjust
the
DBFB
control.
StahfonvatatemcatcMclolacelelarematti-loie
Di
Adjust
the
SURROUND
control.
¢
The
surround
effect
does
not
function
when
the
sound
source
is
monaural.
SURROUND
~~
).
For
private
listening
Connect
a
pair
of
headphones
to
the
HEADPHONES
Jack.
No
sound
is
heard
from
the
speakers.

Receiving
Broadcasts
You
can
listen
to
FM
and
AM
stations.
wetdateanen
aster:
se
dimmer
8+
heh
Ce
ee
ee
eee
1
Press
the
TUNER
button.
0
TUNER
2
Press
the
BAND
SELECT
button
repeatedly
until
the
desired
band
appears.
BAND
SELECT
I
a
_|
Each
time
you
press
the
BAND
SELECT
button,
the
received
band
changes
as
follows:
FM
———>
AM
3
Keep
the
DUAL
MODE
TUNING
+
or
-
button
pressed
for
over
1
second
so
that
“AUTO”
flashes.
:
The
unit
starts
scanning
frequencies
and
stops
when
it
tunes
into
a
station.
Repeat
this
step
until
the
desired
station
is
tuned
in.
DUAL
MODE
TUNING
4
——
fy
a
SBE
Oal
When
you
press
the
TUNER
button
The
CD
player
is
automatically
turned
off
so
that
radio
broadcast
may
not
be
disturbed
by
noise.
For
receiving
FM
stations
in
stereo
Press
the
ST/MUTE
button
so
that
“MUTING”
appears.
If
you
cannot
tune
in
a
desired
station
A
station
with
a
weak
signal
may
be
skipped.
In
this
case,
tune
in
the
station
manually.
¢
Press
the
DUAL
MODE
TUNING
+
or
-
button
again
to
stop
scanning.
¢
Press
the
DUAL
MODE
TUNING
+
or
-
button
repeatedly
and
tune
in
the
exact
frequency.
When
an
FM
stereo
program
is
noisy
or
hard
to
receive
Press
the
ST/MUTE
button
so
that
“MUTING’
disappears
from
the
display.
There
will
be
no
stereo
effect,
but
the
reception
will
be
improved.
Press
it
again
to
restore
the
stereo
effect.
The
“TUNED”
indication
appears
When
a
station
of
sufficient
signal
strength
is
turied
in.
The
“STEREO”
indication
appears
When
an
FM
stereo
program
of
sufficient
signal
strength
is
tuned
in.

Tet
Tee
Sra
°
Receivino
Broadcasts
eit
ce
ele
ee
one
oe
oe
|
Co
.
Sa
Si
ea
ali
be
Dd
ce
iginiase
Ser?
Pee
ae
INN
ae
Ae
SRN
EES
SOLAS
You
can
store
station
frequencies
in
the
unit's
memory
for
quick
recall
later
on.
Up
to
30
frequencies
in
any
band
can
be
stored
by
specifying
a
code
for
each
frequency.
The
code
is
a
combination
of
a
letter
-
A,
B
or
C—
and
a
number
—
0
to
9:
A-1,
A-2,
..,
A-9, A-0,
B-1,
...,
C-1,
...,
C-0.
Storing
Stations
|
1
Press
the
DUAL
MODE
TUNING
+
or
-
button
to
tune
in
the
desired
station.
2
Press
the
MEMORY
button.
“MEMORY”
appears
and
“—”
starts
blinking.
MEMORY
[hy
pn
8
150.Ae
3
Press
the
SHIFT
button
to
select
a
letter
(A,
B
or
C).
SHIFT
ry
G58
cn
8
ISOAR
4
Press
a
numeric
button
to
select
a
number
(0
—
9).
A
code
is
specified
and
the
setting
of
the
ST/MUTE
button
is
also
stored.
i
2 3
4
§
6
7
9
Se
If
you
cannot
store
a
station
successfully
Be
sure
to
press
the
buttons
for
the
code
while
the
“MEMORY’
indication
is
displayed.
If
the
indication
has
gone
off,
press
the
MEMORY
button
again.
To
erase
a
stored
station
Storing
a
new
station
on
a
used
code
erases
the
previously
stored
one.
Wee
lartalempalcom-
me)
co)g-1e
me)
cclelolemOligcionahy
Press
the
SHIFT
button
and
the
numeric
button
to
specify
the
code
for
the
desired
station.
Changing
the
AM
Tuning
Interval
The
unit
tunes
in
AM
stations
at
10-kHz
intervals.
To
use
the
unit
where
the
tuning
interval
is
9-kHz,
change
the
setting
as
follows:
1
Turn
on
the
power.
2
Tune
in
any
AM
station.
3
Tum
off
the
power.
4
While
pressing
the
DUAL
MODE
TUNING
+
button,
tum
on
the
power.
To
reset
the
interval,
repeat
the
same
procedure.
Teal
stelacsiate
¢
Stored
stations
will
be
erased
from
the
memory
when
you
change
the
interval.
*
Stored
stations
will
be
erased
from
the
memory
when
the
AC
power
cord
is
disconnected
for
a
long
time.

Playing
Back
Tapes
You
can
use
tapes
of
type
|
and
II
for
playback.
Playing
Deck
A
or
B
4
Press
the
TAPE
SELECT
button
to
select
tape
type.
TAPE
SELECT
Wn
Grom®©)?°
5
Press
the
&
buiton.
=
|
2
Playback
starts.
Pees
|
ee
} |
ees
1
Press
the
TAPE
button.
When
the
tape
is
played
to
the
end,
the
deck
stops.
To
stop
during
playback,
press
the
B/&
button.
To
fast
forward
or
rewind,
press
the
>>
or
<4
button.
To
pause,
press
the
if
PAUSE
button.
To
resume,
press
the
tt
PAUSE
button
again.
To
play
a
tape
recorded
with
the
Dolby
NR*
effect
Set
the
DOLBY
NR
switch
to
ON.
The
setting
is
operated
on
both
decks.
This
unit
is
provided
with
DOLBY
B
NR
system.
When
both
decks
are set
to
play
mode
Only
the
sound
from
deck
B
will
be
heard.
*
Dolby
noise
reduction
manufactured
under
license
from
Dolby
Laboratories
Licensing
Corporation.
“DOLBY"and
the
double-D
symbol
00
are
trademarks
of
Dobly
Laboratories
Licensing
Corporation.
Playing
from
Deck
to
Deck—Relay
Play
1
Insert
tapes
into
deck
A
and
B.
2
Press
the
&
button
on
deck
B.
Deck
B
starts
playing.
3
Press
the
lf
PAUSE
button
and
the
&
button
on
deck
A.
When
the
tape
in
deck
B
ends,
the
tape
in
deck
A
starts
playing.

You
can use
tape
type
I
and
Il
for
recording.
Recording
a
Tape
4
Set
the
DOLBY
NR
switch
to
ON
or
OFF.
DOLBY
NR
The
Dolby
NR
(noise
reduction)
system
reduces
tape
hiss
noise
in
low-level,
high-frequency
signals
by
boosting
the
signals
during
recording
and
then
lowering
them
during
playback.
wn
ceo
=.0°
|
[==35
mee
A
5
Press
the
@
REC
button
and
start
the
selected
source.
;
Recording
starts.
1
Select
a
source
(except
TAPE)
with
the
function
selectors.
When
the
tape
is
recorded
to
the
end,
the
deck
stops.
To
stop
during
recording,
press
the
Mi/@
button.
To
start
recording
more
precisely
1
After
steps
1
to
4
above,
press
the
i!
PAUSE
button.
2
Press
the
@
REC
button.
3
Press
the
i!
PAUSE
button
again
to
start
recording.
3
Press
the
TAPE
SELECT
button
to
select
tape
type.
TAPE
SELECT
10

eace)ccrordialem
dole
atzierelgeiiare|
‘
Break
off
the tab
of
the
side
to
be
protected.
For
side
A,
break
off
the
right-hand
tab
facing
the
side
A
up.
This
prevents
further
recording
on
that
side.
Side
A
AT
LO
ON
Tab
ofsideB
°
TabofsideA
To
record
on
a
protected
tape,
cover
the
opening
with
plastic
tape.
ad
[KB
(OQ)
When
using
type
!I
(CrOz)
tape,
take
care
not
to
cover
the
slots
used
for
tape
type
detection.
TYPE
Il

Dubbing
Tapes_
<a
bor
ee
res
You
can
dub
a
tape
in
deck
A
onto
a
tape
in
deck
B.
1
Press
the
TAPE
button.
2
Insert
a
recorded
tape
into
deck
A
and
a
blank
tape
into
deck
B.
F
3
Press
the
TAPE
SELECT
button
to
select
tape
type.
Be
sure
to
use
tapes
of
the
same
type
for
dubbing,
as
the
switch
setting
is
effective
on
both
decks.
TAPE
SELECT
12
4
Select
dubbing
speed
(NORMAL
or
HIGH)
with
the
DUBBING
SPEED
button.
OUBBING
SPEED
5
Press
the
8
PAUSE
button,
then
the
®
button
on
deck
A.
6
Press
the
@
REC
button
on
deck
B.
Dubbing
starts.
To
stop
dubbing,
press
the
II/4
button
on
deck
A,
then
press
the
I§/&
button
on
deck
B.
You
need
not
designate
the
Dolby
NR
system
The
tape
in
deck
B
is
recorded
with
the
same
recording
level
and
Dolay
NR
system
as
the
original
tape
in
deck
A.
You
can
listen
to
other
program
sources
during
dubbing
Select
the
program
source
with
the
function
selectors.

You
can
enjoy
various
play
modes
provided
by
the
CD
player.
Playing
the
Entire
Disc
—
Continuous
Play
=
CB
|
SSS
==
i
eo
oQ”
ze.
43
==.
ey
ee
a
—
en
|
|
4
Press
the
>
button.
To
stop
during
play,
press
the
@
button.
To
pause,
press
the
fl
button.
To
resume
play,
press
the
P
or
the
If
button
again.
To
stop
play
and
open
the
tray,
press
the
4
OPEN/CLOSE
button.
To
close
the
tray
without
starting
play,
press
the
4
OPEN/
CLOSE
button.
To
play
an
8-cm
(3-inch)
CD
°
Place
it
on
the
inner
circle
of
the
tray.
If
the
disc
is
provided
with
an
adaptor,
first
remove
it.
Do
not
put
a
12-cm
(5-inch)
CD
upon
an
8-cm
CD.
If
you
press
the
TUNER
button
during
play
The
CD
player
is
turned
off
and
disc
play
stops.
Caution
on
volume
adjustment
Do
not
turn
up
the
volume
while
listening
to
a
portion
with
very
low
level
inputs
or
no
audio
signals.
If
you
do,
the
speakers
may
be
damaged
when
a
peak
level
portion
is
played.
On
moisture
condensation
If
the
unit
is
brought
directly
from
a
cold
to
a
warm
location,
or
is
placed
in
a
very
damp
room,
moisture
may
condense
on
the
lens
inside
the
unit.
Should
this
occur,
the
unit
will
not
operate.
In
this
case,
remove
the
disc
and
leave
the
unit
tumed
on
for
about
an
hour
until
the
moisture
evaporates.
13

Tehcelauerctdlolamiel
the
Display
When
you
press
the
&
OPEN/CLOSE
button
to
close
the
tray,
or
press
the
TIME
button
in
stop
mode,
the
display
shows
you
the
following
information:
The
total
number
of
selections
(a))
and
the
total
playing
time
of
the
inserted
disc
(
b)).
re
—=m00)°
|
_—7
mV
er
Ceirr
y—
aa
ia
id
</p>
PDI
|
a
Ss
ee
ee
ae
ne
eee
a
te
ere
Se
abe
Each
time
you
press
the
TIME
button
during
play
Locating
a
Particular
Selection
(continuous
or
program),
the
display
changes
to
show
you
the
following
information:
You
can
locate
the
beginning
of
a
desired
selection
during
—
Remaining
time
inthe
current
selection
(a).
stop,
play
or
pause
mode.
If
the
current
selection
number
is
over
20,
“——
.——"
is
displayed.
To
locate
the
beginning
of
the
current
or
precedin
—
Remaining
time
of
the
disc
(b)).
selection
° :
‘
:
—
Elapsed
playing
time
(c)).
°
Press
the
I4
<4
(or
4)
button
as
many
times
as
During
shuffle
play,
the
display
switches
between
a)
and
c).
required.
(
:
¢
Keep
the
I44
<<
(or
i)
button
pressed
to
skip
selections
(This
is
operable
during
the
stop
mode
only,
when
using
the
button
on
the
main
unit.)
To
locate
the
beginning
of
a
succeeding
selection
¢
Press
the
>>
>PI
(or
PPI)
button
as
many
times
as
required.
¢
Keep
the
>>
PI
(or
PPI)
button
pressed
to
skip
selections.
(This
is
operable
during
the
stop
mode
only,
when
using
the
button
on
the
main
unit.)
To
locate
directly
Press
one
of
the
numeric
buttons
((77_]
to
[12])
on
the
remote
commander
to
enter
the
desired
selection
number.
|
Molorchd
isle
i-m
excl
adcereitclam
ane)ta|
@e)
am
tg
[=m
BJtctey
To
search
quickly
while
monitoring
the
sound
Keep
the
>>
PPI
or
44
<4
button
pressed
during
play,
then
release
it
at
the
desiréd
point.
ie
ae
aaa
To
search
quickly
while
observing
the
display
Press
the
If
button
to
pause,
then
keep
the
>>
PPI
or
144
<<
button
pressed.
The
search
speed
will
increase
but
there
will
be
no
sound.
Watch
the
display
to
find
the
desired
The
“
na
diSC
*
indication
appears
point.
To
resume
play,
press
the
>
or
0}
button
at
the
desired
When
there
is
no
disc
in
the
tray.
point.
If
you
press
the
TIME
button
during
stop
The
“15
”
indication
appears
The
total
time
and
total
number
of
selections
will
be
displayed.
When
you
reach
the
end
of
a
disc
by
continuously
pressing
{fa
program
is
stored,
the
total
number
of
programmed
selections
will
be
displayed.
the
>>
PPI
button.
Press
the
4
<4
(orl¢<
)button
to
return
to
normal
1
4
indication.

Playing
in
a
Random
Order
You
can
have
the
selections
played
in
a
random
order.
The
unit
will
play
all
the
selections,
or
just
the
selections
you
desire.
Shuffle
Play
i
=a:
—=15
2
Press
the
SHUFFLE
button.
“SHUFFLE”
appears
in
the
display.
3
Press
the
>
button.
Shuffle
play
starts.
To
stop
playing
Press
the
@
button.
To
cancel
shuffle
play
Press
the
CONTINUE
button
and
the
unit
enters
continuous
play
mode.
“SHUFFLE”
disappears
from
the
display.
To
play
only
desired
selections
in
a
random
order
—
Delete
shuftie
play
(only
performed
by
the
remote
commander)
Delete
the
undesired
selections
before
or
during
play.
To
delete
a
selection,
press
the
numeric
button
on
the
remote
commander
for
that
selection
(only
from
the
selection
number
1
to
12).
“OFF”
will
be
displayed
in
the
display.
When
selections
have
been
deleted
before
playing,
the
remaining
selections
can
be
played
by
pressing
the
>
button.
To
restore
a
selection
which
you
have
deleted,
press
the
numeric
button
for
that
selection.
“On”
appears
in
the
display.
To
restore
all
the
selections
you
have
deleted,
press
the
B
button
during
stop
mode.
When
delete
shuffle
play
ends
The
unit
will
be
ready
to
play
the
same
remaining
selections
in
a
different
order.
What
is
this
indication?
/-
cs
This
indication
appears
while
the
player
is
“shuffling”
the
selections.
1B

Playing
i
ina
Desired
Order
andT
Time
al
ete
Dh
che
iN
er
ek
You
can
make
a
program
by
designating
up
to
24
selections
in
the
order
you
want
them
to
be
played.
At
the
same
time,
you
can
adjust
the
total
playing
time
of
the
program.
The
unit
will
play
the
disc
according
to
your
program.
Designating
the
Playing
Order
3
Press
the
4
<<
or
D>
PPI
button
to
change
a
selection
and
check
the
time.
If
satisfactory,
go
to
the
next
step.
If
not,
choose
another
selection.
==
re
=
ime
coo]?
=
=)8
fone
Ee
ee
EES)
Beco
4
Press
the
PROGRAM
button
to
store
the
selection.
fn
a)
Last
programmed
selection
b)
The
order
to
be
played
c)
Programmed
selection
numbers
d)
Total
playing
time
of
selections
5
Repeat
steps
3
and
4.
2
Press
the
PROGRAM
buiton.
°
“PROGRAM”
appears
in
the
display.
PROGRAM
You
can
play
the
same
program
repeatedly
as
long
as
you
do
not
cancel
program
play
or
erase
the
program.
You
can
also
program
selections
(only
from
selection
number
1
to
12)
directly
by
pressing
the
numeric
buttons
on
the
remote
commander.
When
you
press
the
TUNER
button
The
CD
player
is
automatically
turned
off
and
the
program
will
be
erased.
16

To
play
the
program
Press
the
>
button.
To
stop
playing
Press
the
&
button.
To
cancel
program
play
Press
the
CONTINUE
buiton,
the
unit
enters
continuous
play
mode.
The
program
will
be
erased.
To
erase
the
entire
program
Press
the
i
button
once
during
stop;
twice
during
play.
The
program
is
also
erased
when
the
unit
is
turned
off.
if
you
press
the
PROGRAM
button
during
play
The
selection
being
played
will
be
the
first
one
in
the
program.
To
check
your
program
Press
the
CHECK
button.
The
first
selection
in
the
program
will
be
displayed.
Each
time
you
press
the
CHECK
button,
the
next
selection
in
the
program
will
be
displayed.
After
the
last
selection,
“End”
will
be
indicated
and
the
display
wil!
soon
return
to
the
initial
status.
Or
aT-Talehialemm
elem
aa
gexe|t-1a|
You
can
make
the
following
changes
before
starting
play.
To
erase
the
last
selection,
press
the
CLEAR
button.
Each
time
you
press
the
CLEAR
button,
the
last
selection
in
the
program
will
be
erased.
To
add
a
selection
to
the
end
of
the
program,
just
press
the
numeric
button
on
the
remote
commander
for
that
selection.
You
can
also
add
a
selection
during
play
or
pause.
To
delete
a
selection,
press
the
CHECK
button
repeatedly
until
the
unwanted
selection
is
displayed.
Then
press
the
CLEAR
buiton.
To
change
the
order,
press
the
&
button
during
stop
to
erase
the
program.
Then
repeat
the
programming
procedure
from
the
beginning.
Making
a
Program
for
Editing
a
Tape
You
can
insert
a
pause
in
your
program
by
pressing
the
Il
button.
Use
this
function
to
make
a
program
for
both
sides
of
the
tape
at
one
time.
1
Program
the
selections
for
side
A
2
Press
the
&
button.
“P”
will
be
appear
in
the
display
and
the
total
playing
time
will
be
reset
to
0.
3
Choose
selections
for
side
B.
When
you
start
playing,
the
selections
for
side
A
will
be
played
and
then
the
unit
will
pause
with
the
chosen
selections
for
side
B
illuminated
in
the
display.
Set
the
tape
to
the
beginning
of
side
B,
then
press
the
>
or
il
button.
The
selections
for
side
B
will
be
played.
What
is
the
tape
indicator?
During
program
play,
the
tape
indicator
shows
you
which
side
of
the
tape
the
program
being
played
is
for.
ST
.
;
AQ_¢o
:
Side
A
is
being
played.
“aon:
Side
A
has
been
played
and
the
unit
is
in
pause
“——~
mode,
or
side
B
is
being
played.
To
check
the
remaining
time
Press
the
TIME
button
once
to
see
the
remaining
time
of
the
selection
being
played;
twice
to
see
the
total
remaining
time;
once
more
to
return
to
the
initial
display.
If
you
have
inserted
a
pause,
the
display
shows
the
remaining
time
until
the
pause.
feo;
appears
while
checking
the
program
for
side
A
and
also
‘o03
appears
while
checking
the
program
for
side
B.
If
“--—.--”
is
displayed
instead
of
the
actual
time
—
you
have
programmed
a
selection
number
over
20.
—
the
total
time
has
exceeded
100
minutes.
17

Playing
the
Beginning
of
_
Each
Selection
This
function
can
be
used
in
any
play
mode.
Music
Scan
Play
_=n
ET
Ere
yy]
ES
©
ee)
2
Press
the
MUSIC
SCAN
button.
Each
selection
will
be
played
for
10
seconds
and
then
fade
out
for
2
seconds.
After
all
selections
are
played,
scan
play
will
end.
MUSIC
SCAN
To
start
playing
immediately
Press
the
>
button.
To
stop
music
scan
during
scanning
Press
the
&
button.
Note
When
you
press
the
MUSIC
SCAN
button
again,
while
playing
the
beginning
of
a
selection,
playing
will
be
extended
for
another
10
seconds.
18
You
can
choose
between
two
different
repeat
play
modes.
One
repeats
selections
in
the
current
play
mode,
the
other
repeats
any
particular
selection
you
like.
Repeating
Selections
To
repeat
all
selections
a)
Press
the
REPEAT
button
once.
“REPEAT”
appears
in
the
display.
The
unit
will
repeat
in
the
current
play
mode
after
completing
the
first
play.
Play
mode
Continuous
play
Selections
to
be
played
All
the
selections
All
the
programmed
selections
in
the
same
order
All
the
selections
that
the
unit
reshuffles
All
the
remaining
selections
that
the
unit
reshuffles
Program
play
Shuffle
play
Delete
shuffle
play
To
repeat
the
selection
currently
playing
b)
(only
during
continuous
play)
Press
the
REPEAT
button
again.
“REPEAT1*
appears
in
the
display.
The
unit
will
repeat
the
current
selection.
To
cancel
repeat
play
c)
Press
the
REPEAT
button
again.
In
continuous
play
mode,
“REPEAT”
disappears.
In
any
other
play
mode,
“REPEAT”
disappears.

Designating
the
Total
Playing
Time
You
can
designate
a
playing
time
and
the
unit
will
make
two
different
programs
of
selections
each
fitting
within
that
period.
Use
this
function,
by
designating
the
salah
of
your
tape,
for
editing
both
sides
of
a
tape.
This
feature,
called
Time
Edit,
sets
the
playing
time
of
each
program
within
the
designated
time
automatically
by
choosing
selections
in
numerical
order.
|
You
can
also
program
desired
selections
by
priority.
In
this
case,
you
can
designate
desired
selections
beforehand
and
the
remaining
selections
will
be
programmed
to
fit
the
remaining
time.
3
Press
the
dq
<4/
D>
PPI
(or
led
/
PPI)
button.
[em00:
|
=
a
eT
Eee
‘
q
Each
time
you
press
the
44
44
/>>
PPI
(or
ied
3
|
<=
2
PPI)
button,
the
display
sa
to
give
you
the
———
:
following
duration.
23.-
—-<——>
27.-
-
<>
90.-
|
~--
*—
>
45.-
-<
>
97.--
To
designate
the
length
of
one
side
of
your
tape
by
the
numeric
buttons.
Press
[10
]for
0
on
the
remote
commander.
It
is
generally
not
necessary
to
press
numeric
buttons
for
seconds.
|
To
adjust
the
seconds
Keeping
the
l¢¢
<<
/P>>
PPI
button
pressed
2
Press
the
EDIT
button
and
display
“EDIT”.
changes
the
set
time
by
10
second
intervals.
4
Press
the
EDIT
button.
The
selections
for
program
A
are
determined
i
automatically.
Then
the
display
shows
the
last
selection
to
be
recorded
(a)),
total
playing
time
(6)),
|
and
the
selections
to
be
recorded
(c)).

Fite
Se
EWM
5
Press
the
EDIT
button
once
more
while
“B”
in
the
tape
indicator
is
blinking.
Another
program
for
the
other
side
is
completed.
To
play
the
program
Press
the
>
button.
The
selections
for
side
A
will
be
played
and
then
the
unit
will
pause.
Set
the
tape
to
the
beginning
of
side
B,
then
press
the
>
or
the
Il
button.
The
selections
for
side
B
will
be
played.
To
stop
playing
Press
the
&@
button.
You
can
play
the
same
program
repeatedly
as
long
as
you
do
not
cancel
the
edit
or
erase
the
program.
To
cancel
the
edit
Press
the
CONTINUE
button
and
put
the
unit
into
continuous
play
mode.
The
program
will
be
erased.
To
erase
the
entire
program
Press
the
Ill
button
once
during
stop;
twice
during
play.
The
program
is
also
erased,
when
you
turn
off
the
unit.
To
check
the
program
See
page
17.
If
your
disc
has
more
than
20
selections
Selection
over
number
20
cannot
be
programmed
with
the
time
edit
function;
use
the
programming
procedure
on
page
16.
To
designate
a
different
time
for
each
side
Execute
steps
1
to
4
on
page
19,
then
press
the
It
button.
Then
execute
steps
2
to
4
for
the
other
side.
if
you
have
included
desired
selections
in
the
program
The
program
will
consist
of
the
selections
of
your
choice
plus
other
ones
for
the
unit
to
fit
the
program
as
close
to
the
designated
period
as
possible.
20
Tips
on
Editing
Tapes
A
ee
CIS
OS
The
following
functions
are
convenient
for
editing
your
own
tapes.
Ia
=~
m
come?
|
ee
|
=I
Tee
Eee
Cer)
2.
eosbee
|)
|
ooene
#
:
i
}
|
i
3
lareColbatem
lar@lene
You
can
have
the
play
fade
in
or
fade
out
from
2
to
10
seconds.
To
end
the
play
fading
out
Press
the
FADE
button
when
you
want
to
start
fading
out.
“ju”
in?)
flashes
in
the
window,
and
play
fades
out
and
the
unit
enters
pause
mode.
To
restart
the
play
fading
in
Press
the
FADE
button
in
the
pause
mode.
“<a
*
in
(“*)
flashes
in
the
window.
The
unit
enters
play
mode
and
play
fades
in.
To
designate
the
fading
duration
1
Press
the
FADE
button
during
stop
mode.
2
Designate
the
fading
duration
within
the
range
of
2
to
10
seconds
by
pressing
the
dq
<44/P>>
PPI
(orld¢
/
PPI)
button.
if
you
do
not
designate
the
duration,
it
is
set
to
5
seconds.
3
Press
the
FADE
button
again.
Note
Whenever
the
unit
is
tumed
off,
fading
time
is
reset
to
5
seconds.
This manual suits for next models
1
Table of contents
Other Sony Stereo System manuals

Sony
Sony HCD-H66 User manual

Sony
Sony MHC-GZR999DA User manual

Sony
Sony hcd-grx40av User manual

Sony
Sony HCD-H11 User manual

Sony
Sony MHC-EC599 User manual

Sony
Sony CMT-EP707 - Micro Hi Fi Component System Operation and maintenance manual

Sony
Sony CMT-BT60 User manual

Sony
Sony DX10 User manual

Sony
Sony MEX-BT3700U User manual

Sony
Sony MHC-BX9 User manual

Sony
Sony HCD-M90 User manual

Sony
Sony HCD-D90AV User manual

Sony
Sony HCD-FX300i - Compact Disc Receiver User manual

Sony
Sony 4-183-777-12(1) User manual

Sony
Sony MHC-V43D User manual

Sony
Sony HCD-GP6V User manual

Sony
Sony SRS-X55 User manual

Sony
Sony DAB User manual

Sony
Sony HCD-XB8KW User manual

Sony
Sony HCD-RV222 User manual