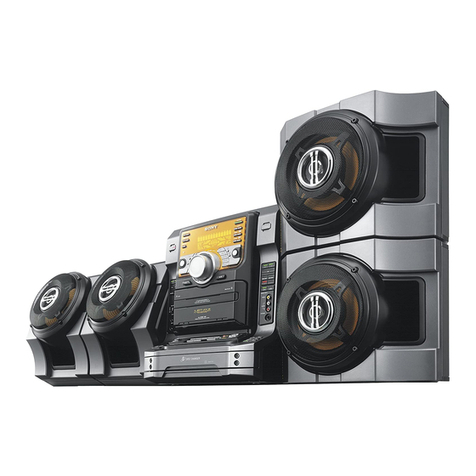
Sony CMT-EH55DAB User manual

© 2008 Sony Corporation
CMT-EH55DAB
Micro HI-FI
Component
System
CMT-EH55DAB.GB.3-874-280-11(1)
Operating Instructions
3-874-280-11(1)

CMT-EH55DAB.GB.3-874-280-11(1)
2GB
WARNING
To reduce the risk of re, do not cover the
ventilation opening of the apparatus with
newspapers, tablecloths, curtains, etc. Do
not place the naked ame sources such as
lighted candles on the apparatus.
To reduce the risk of re or electric shock,
do not expose this apparatus to dripping
or splashing, and do not place objects
lled with liquids, such as vases, on the
apparatus.
As the main plug is used to disconnect
the unit from the mains, connect the unit
to an easily accessible AC outlet. Should
you notice an abnormality in the unit,
disconnect the main plug from the AC
outlet immediately.
Do not install the appliance in a conned
space, such as a bookcase or built-in
cabinet.
Do not expose batteries or apparatus with
battery-installed to excessive heat such as
sunshine, re or the like.
CAUTION
e use of optical instruments with this
product will increase eye hazard.
Except for customers in the U.S.A.
is appliance is classied as a CLASS 1
LASER product. is marking is located
on the rear exterior.
European model only
Excessive sound pressure from earphones
and headphones can cause hearing loss.
Notice for the customer in the
countries applying EU Directives.
e manufacturer of this product is Sony
Corporation, 1-7-1 Konan Minato-ku,
Tokyo, 108-0075 Japan. e Authorized
Representative for EMC and product safety
is Sony Deutschland GmbH, Hedelnger
Strasse 61, 70327 Stuttgart, Germany. For
any service or guarantee matters, please
refer to the addresses given in separate
service or guarantee documents.
Disposal of Old Electrical
& Electronic Equipment
(Applicable in the
European Union and
other European countries
with separate collection
systems)
is symbol on the product or on its
packaging indicates that this product
shall not be treated as household waste.
Instead it shall be handed over to the
applicable collection point for the
recycling of electrical and electronic
equipment. By ensuring this product
is disposed of correctly, you will help
prevent potential negative consequences
for the environment and human health,
which could otherwise be caused by
inappropriate waste handling of this
product. e recycling of materials will
help to conserve natural resources. For
more detailed information about recycling
of this product, please contact your
local Civic Oce, your household waste
disposal service or the shop where you
purchased the product.
Applicable accessories: Remote
commander
CMT-EH55DAB.GB.3-874-280-11(1)
3GB
Disposal of waste
batteries (applicable
in the European
Union and other
European countries
with separate
collection systems)
is symbol on the battery or on the
packaging indicates that the battery
provided with this product shall not be
treated as household waste. By ensuring
these batteries are disposed of correctly,
you will help prevent potentially negative
consequences for the environment and
human health which could otherwise be
caused by inappropriate waste handling of
the battery. e recycling of the materials
will help to conserve natural resources.
In case of products that for safety,
performance or data integrity reasons
require a permanent connection with an
incorporated battery, this battery should
be replaced by qualied service sta only.
To ensure that the battery will be treated
properly, hand over the product at end-of-
life to the applicable collection point for
the recycling of electrical and electronic
equipment.
For all other batteries, please view the
section on how to remove the battery from
the product safely. Hand the battery over
to the applicable collection point for the
recycling of waste batteries.
For more detailed information about
recycling of this product or battery, please
contact your local Civic Oce, your
household waste disposal service or the
shop where you purchased the product.
Note on DualDiscs
A DualDisc is a two sided disc product
which mates DVD recorded material on
one side with digital audio material on
the other side. However, since the audio
material side does not conform to the
Compact Disc (CD) standard, playback on
this product is not guaranteed.
Music discs encoded with copyright
protection technologies
is product is designed to playback
discs that conform to the Compact Disc
(CD) standard. Recently, various music
discs encoded with copyright protection
technologies are marketed by some
record companies. Please be aware that
among those discs, there are some that
do not conform to the CD standard and
may not be playable by this product.
“WALKMAN” and “WALKMAN”
logo are registered trademarks of Sony
Corporation.
MPEG Layer-3 audio coding
technology and patents licensed from
Fraunhofer IIS and omson.

CMT-EH55DAB.GB.3-874-280-11(1)
4GB
Table of Contents
Guide to parts and controls .............5
Information on the display...............9
Getting Started
Hooking up the system
securely..................................................10
Setting the clock ................................12
Basic Operations
Playing a CD/MP3 disc .....................13
Listening to the radio .......................14
Playing a tape......................................15
Recording onto a tape......................16
Listening to music of
an USB device......................................17
Using optional audio
components.........................................18
Adjusting the sound .........................19
Changing the display .......................19
Other Operations
Creating your own program
(Program Play).....................................20
Presetting radio stations .................21
Using the Timers.................................22
Others
Troubleshooting.................................23
Messages...............................................26
Precautions...........................................28
Specications ......................................30
Playable USB devices with this
system....................................................32

CMT-EH55DAB.GB.3-874-280-11(1)
5GB
Guide to parts and controls
is manual mainly explains operations using the remote, but the same operations can
also be performed using the buttons on the unit having the same or similar names.
Unit
Continued
Open the tape
section lid.

CMT-EH55DAB.GB.3-874-280-11(1)
6GB
Remote
/(power) button (page 12, 22,
26)
Press to turn on the system.
/(go back/go forward)
button (page 13, 17, 20, 22)
Press to select a track or le.
Unit: TUNING +/(tuning)
button (page 14)
Remote: +/(tuning) button
(page 14, 21)
Press to tune in the desired station.
/(rewind/fast forward)
button (page 13)
Press to nd a point in a track or le.
DAB (page 11, 14)
Press to select the DAB function.
DAB AUTO SCAN (page 11)
Press to run the DAB Automatic Scan.
Sound buttons (page 19)
Unit: DSGX button
Remote: EQ button
Press to select the sound eect.
PUSH OPEN/CLOSE (page 13)
Press to open or close the CD
compartment.
Remote sensor (page 23)
Playback buttons and function
buttons
Unit: USB (play/pause)
button (page 17)
Press to select the USB function.
Press to start or pause playback of an
optional USB device.
Remote: USB button (page 17)
Press to select the USB function.
Unit: CD (play/pause)
button (page 13)
Press to select the CD function.
Press to start or pause playback of a disc.
Remote: CD button (page 13)
Press to select the CD function.

CMT-EH55DAB.GB.3-874-280-11(1)
7GB
Guide to parts and controls
Remote: (play) button,
(pause) button
Press to start or pause playback.
TUNER/BAND button (page 14)
Press to select the TUNER function.
Press to select DAB or FM reception
mode.
FUNCTION button (page 13, 15,
17, 18, 20)
Press to select the function.
(stop) button (page 13, 14, 17)
Press to stop playback.
(USB) port (page 17, 32)
Connect to an optional USB device.
Unit: VOLUME control (page 13,
14, 17, 18)
Remote: VOLUME +/button
(page 13, 14, 17, 18)
Turn or press to adjust the volume.
(record) button, (play)
button, /(rewind/fast
forward) button, (stop/
eject) button, (pause) button
(page 15, 16)
Press to operate the tape functions.
PHONES jack
Connect the headphones.
AUDIO IN jack (page 18)
Connect to an optional audio
component.
STANDBY indicator (page 19, 23)
Lights up when the system is turned o.
CLOCK/TIMER SELECT button
(page 22)
CLOCK/TIMER SET button (page
12, 22)
Press to set the clock and the Play Timer.
REPEAT/FM MODE button (page
13, 15, 17)
Press to listen to a disc or USB device
repeatedly. Or press to listen to a single
track/le or all tracks/les in a folder (for
USB devices only) repeatedly.
Press to select the FM reception mode
(monaural or stereo).
ENTER button (page 12, 20, 21,
22)
Press to enter the settings.
Continued

CMT-EH55DAB.GB.3-874-280-11(1)
8GB
+/(select folder) button
(page 13, 17, 20)
Press to select a folder.
Battery compartment lid
(page 11)
CLEAR button (page 20)
Press to delete a pre-programmed track
or le.
TUNER MEMORY button (page
21)
Press to preset the radio station.
PLAY MODE/TUNING MODE
button (page 13, 14, 20, 21)
Press to select the play mode of a CD or
MP3 disc.
Press to select the tuning mode.
DISPLAY button (page 19)
Press to change the information on the
display.
SLEEP button (page 22)
Press to set the Sleep Timer.

CMT-EH55DAB.GB.3-874-280-11(1)
9GB
Guide to parts and controls
Information on the display
Timer (page 22)
DAB service reception
Lights up when secondary service is
received.
Label indication (page 19)
Text information
Play mode (page 13)
DSGX (page 19)
Tuner reception mode (page 14)
Tuner reception (page 14)
Audio format
Play/Pause
DAB (page 11, 14)
Lights up when the DAB function is
selected.

CMT-EH55DAB.GB.3-874-280-11(1)
10GB
Getting Started
Hooking up the system securely
FM/DAB lead antenna (Extend it horizontally.)
Speaker cord (Black/)
Speaker cord (Red/)
Left speaker
Wall socket
Right speaker

CMT-EH55DAB.GB.3-874-280-11(1)
11GB
Getting Started
Antennas
Find a location and an orientation that
provide good reception, and then set up
the antenna.
Keep the antennas away from the speaker
cords, the power cord and the USB cable
to avoid picking up noise.
Speakers
Insert only the stripped portion of the
speaker cords into the SPEAKER jacks.
Power
Connect the power cord to a wall socket.
If the plug does not t the wall socket,
detach the supplied plug adaptor (only
for models equipped with an adaptor).
To use the remote
Slide and remove the battery
compartment lid , and insert the two
R6 (size AA) batteries (not supplied),
side rst, matching the polarities shown
below.
Notes
With normal use, the batteries should last for
about six months.
Do not mix an old battery with a new one or
mix dierent types of batteries.
If you do not use the remote for a long period
of time, remove the batteries to avoid damage
from battery leakage and corrosion.
To run the DAB Automatic Scan
When you turn on the system for the rst
time aer you purchase the system, DAB
Automatic Scan starts automatically and
creates a list of available services. If you
want to run the DAB Automatic Scan
again, perform the procedure below.
1
Press DAB AUTO SCAN on the
unit.
“DAB SCAN” and “PUSH DAB”
appear.
2
Press DAB on the unit.
Scanning begins. e scanning
progress is indicated by advancing
asterisks. Depending on the DAB
services available in your area,
scanning may take a few minutes.
When scanning is complete, a list of
available services is created.
Notes
If your country or region does not support
DAB broadcast, “NO SERV” appears.
Do not press any button on the unit or
the remote during DAB Automatic Scan.
If scanning is interrupted, run the DAB
Automatic Scan again.
If you move to another area, repeat this
procedure to store the stations for your new
area.
is procedure clears all previously stored
presets.
Before unplugging the DAB antenna, make
sure the system is turned o to preserve your
own DAB settings.
is tuner does not support data services.

CMT-EH55DAB.GB.3-874-280-11(1)
12GB
Setting the clock
Use buttons on the remote to set the
clock.
1
Press /to turn on the
system.
2
Press CLOCK/TIMER SET .
e hour indication ashes in the
display.
If “PLAY SET” ashes in the display,
press /repeatedly to
select “CLOCK” and then press
ENTER .
3
Press /repeatedly
to set the hour, and then press
ENTER .
4
Use the same procedure to set
the minutes.
e clock settings are lost when you
disconnect the power cord or if a
power failure occurs.
To display the clock when the system
is o
Press DISPLAY . e clock is
displayed for about 8 seconds.

CMT-EH55DAB.GB.3-874-280-11(1)
13GB
Basic Operations
Basic Operations
Playing a CD/MP3 disc
1
Select the CD function.
Press CD (or FUNCTION repeatedly)
.
2
Place a disc.
Press PUSH OPEN/CLOSE
on the unit, and place a disc
with the label side up on the CD
compartment.
To close the CD compartment, press
PUSH OPEN/CLOSE on the
unit again.
3
Start playback.
Press (or CD on the unit)
.
4
Adjust the volume.
Press VOLUME +/(or turn the
VOLUME control on the unit) .
Other operations
To Press
Pause playback (or CD on the
unit) . To resume
play, press the button
again.
Stop playback .
Select a folder
on an MP3
disc
+/.
Select a track
or le
/.
Find a point in
a track or le
Hold down /
during playback, and
release the button at the
desired point.
Select Repeat
Play
REPEAT repeatedly
until “REP” or “REP1”
appears.
To change the play mode
Press PLAY MODE repeatedly while
the player is stopped. You can select
normal play (“ *” for all MP3 les
in the folder on the disc), shue play
(“SHUF” or “ SHUF*”), or program
play (“PGM”).
* When playing a CD-DA disc, (SHUF)
Play performs the same operation as normal
(shue) play.
Notes on Repeat Play
All tracks or les on a disc are played
repeatedly up to ve times.
“REP1” indicates that a single track or le is
repeated until you stop it.
Continued

CMT-EH55DAB.GB.3-874-280-11(1)
14GB
Listening to the radio
Before you can receive DAB, you
must complete the DAB Automatic
Scan procedure (see “To run the DAB
Automatic Scan” (page 11)).
1
Select “DAB” or “FM.”
Press TUNER/BAND repeatedly.
You can also select DAB directly by
pressing DAB on the unit.
2
Select the tuning mode.
Press TUNING MODE repeatedly
until “AUTO” appears.
3
Tune in the desired station.
Press +/(or TUNING +/
on the unit) . Scanning stops
automatically when a station is tuned
in, and then “TUNED” (DAB only)
and “STEREO” (for stereo programs
only) appear.
When you tune in a DAB station or
an FM station that provides RDS
services, the service name or station
name appears on the display.
4
Adjust the volume.
Press VOLUME +/(or turn the
VOLUME control on the unit) .
To stop automatic scanning (FM band
only)
Press .
Notes on playing MP3 discs
Do not save other types of les or
unnecessary folders on a disc that has MP3
les.
Folders that have no MP3 les are skipped.
MP3 les are played back in the order that
they are recorded onto the disc.
e system can only play MP3 les that have
a le extension of “.MP3”.
If there are les on the disc that have the
“.MP3” le extension, but that are not MP3
les, the unit may produce noise or may
malfunction.
e maximum number of:
folders is 150 (including the root folder).
MP3 les is 255.
MP3 les and folders that can be
contained on a single disc is 256.
folder levels (the tree structure of les) is
8.
Compatibility with all MP3 encoding/writing
soware, recording device, and recording
media cannot be guaranteed. Incompatible
MP3 discs may produce noise or interrupted
audio or may not play at all.
Notes on playing multisession discs
If the disc begins with a CD-DA (or MP3)
session, it is recognized as a CD-DA (or
MP3) disc, and other sessions are not played
back.
A disc with a mixed CD format is recognized
as a CD-DA (audio) disc.

CMT-EH55DAB.GB.3-874-280-11(1)
15GB
Basic Operations
To tune in a station with a weak signal
(FM band only)
Press TUNING MODE repeatedly
until “MANUAL” appears, and then press
+/(or TUNING +/on the unit)
repeatedly to tune in the desired station.
To reduce static noise on a weak FM
stereo station
Press FM MODE repeatedly until
“MONO” appears to turn o stereo
reception.
Notes on listening to DAB stations
When tuning in a DAB station, it may take a
few seconds before you hear any sound.
Primary service is automatically received
when secondary service ends.
Playing a tape
Use buttons on the unit to play tape.
1
Select the TAPE function.
Press FUNCTION repeatedly to
select “TAPE.”
2
Insert a tape.
Press , and insert the tape
into the cassette holder. Make sure
there is no slack in the tape to avoid
damaging the tape or the tape deck.
3
Start playback.
Press .
Other operations
To Press
Pause playback . To resume play,
press again.
Stop playback .
Rewind or fast
forward*
/.
* Make sure to press aer the tape has
been wound or rewound to the end.
Note
Do not turn o the system during playback.

CMT-EH55DAB.GB.3-874-280-11(1)
16GB
Recording onto a tape
Use a TYPE I (normal) tape only.
You can record just the portions you like
from a sound source, including the USB
device or connected audio components.
Use buttons on the unit to control tape
recording.
1
Insert a recordable tape.
Press , and insert the tape
into the cassette holder with the side
you want to record facing forward.
2
Prepare the recording source.
Select the desired source to record.
Place the disc you want to record.
When recording a folder from an
MP3 disc, press PLAY MODE
repeatedly to select “ ” and then
press +/repeatedly to select
the desired folder.
To record only your favorite CD
tracks or MP3 les in your desired
order, perform steps 2 to 5 of
“Creating your own program” (page
20).
3
Start recording.
Press .
e CD starts playing automatically.
When recording from a connected
USB device or audio component, start
playing desired recording sources
manually.
To stop recording, press .
Notes
If there is noise while recording from the
tuner, reposition the appropriate antenna to
reduce the noise.
While recording, you cannot listen to other
sources.
Do not turn o the system during recording.
Tip
We recommend that you press rst,
and then press to avoid noise being
recorded when you stop recording.

CMT-EH55DAB.GB.3-874-280-11(1)
17GB
Basic Operations
Listening to music of
an USB device
You can listen to music stored in the USB
device.
e audio format that can be played back
by this system is MP3*.
See “Playable USB devices with this
system” (page 32) for a list of USB devices
that can be connected to this system.
*Files with copyright protection (Digital
Rights Management) cannot be played by
this system.
Files downloaded from an online music store
may not be played by this system.
1
Select the USB function.
Press USB (or FUNCTION
repeatedly) .
2
Connect an optional USB device
to the (USB) port .
When the USB device is connected,
the display changes as follow:
“READING” “1*”
*When connecting the USB device, “1”
(volume label) is displayed next if
recorded.
Note
It may take about 10 seconds before
“READING” appears depending on the
type of USB device connected.
3
Start playback.
Press (or USB on the unit)
.
4
Adjust the volume.
Press VOLUME +/(or turn the
VOLUME control on the unit) .
Other operations
To Press
Pause playback USB on the
unit. To resume play,
press the button again*.
Stop playback .
Select a folder +/.
Select a le /.
Select Repeat
Play
REPEAT repeatedly
until “REP,” “ REP”
or “REP1” appears.
*When playing a VBR MP3 le, the system
may resume playback from a dierent point.
Notes on the USB device
Some time may be needed to start playback
when:
the folder structure is complex.
the memory capacity is excessive.
When the USB device is connected, the
system reads all the les on the USB device.
If there are many folders or les on the USB
device, it may take a long time to nish
reading the USB device.
Do not connect the system and the USB
device through an USB hub.
With some connected USB devices, aer an
operation is performed, there may be a delay
before it is performed by this system.
is system does not necessarily support all
the functions provided in a connected USB
device.
e playback order for the system may dier
from the playback order of the connected
USB device.
Do not save other types of les or unnecessary
folders on an USB device that has audio les.
Folders that have no audio les are skipped.
e maximum number of audio les and
folders that can be contained on a single USB
device is 999 (including the “ROOT” folder).
e maximum number of audio les and
folders may vary depending on the le and
folder structure.
Continued

CMT-EH55DAB.GB.3-874-280-11(1)
18GB
e audio format that you can listen to
with this system is MP3 with an “.mp3” le
extension.
Note that even when le name has the
correct le extension, if the actual le diers,
the system may produce noise or may
malfunction.
Compatibility with all encoding/writing
sowares, recording devices, and recording
media cannot be guaranteed. Incompatible
USB device may produce noise or interrupted
audio or may not play at all.
Note on Repeat Play
All les on an USB device are repeated until
you stop playback.
Using optional audio
components
1
Connect additional audio
component to the AUDIO
IN jack on the unit using
an audio analog cord (not
supplied).
2
Turn down the volume.
Press VOLUME (or turn the
VOLUME control on the unit) .
3
Select the AUDIO IN function.
Press FUNCTION repeatedly.
4
Start playing the connected
component.
5
Adjust the volume.
Press VOLUME +/(or turn the
VOLUME control on the unit) .

CMT-EH55DAB.GB.3-874-280-11(1)
19GB
Basic Operations
Adjusting the sound
To add a sound eect
To Press
Generate a
more dynamic
sound
(Dynamic
Sound
Generator
X-tra)
DSGX on the unit.
Set the sound
eect
EQ repeatedly.
Changing the display
To Press
Change
information on
the display1)
DISPLAY repeatedly
when the system is on.
Check the
clock when the
system is o
DISPLAY when
the system is o2). e
clock is displayed for 8
seconds.
1) For example, you can view CD/MP3 disc
information, such as;
track or le number during normal play.
track or le name (“ ”) during normal play.
artist name (“ ”) during normal play.
album or folder name (“ ”) during normal
play.
total playing time while the player is
stopped.
You can also view DAB station information
such as the service name, channel label, preset
number, frequency, DLS (Dynamic Label
Segment), or ensemble label.
2) e STANDBY indicator on the unit
lights up when the system is o.
Notes on the display information
Characters that cannot be displayed appear
as “_”.
e following are not displayed:
total playing time for a CD-DA disc
depending on the play mode.
total playing time and remaining playing
time for an MP3 disc and USB device.
e following is not displayed correctly:
folder and le names that do not follow
either the ISO9660 Level 1, Level 2 or
Joliet in the expansion format.
e following are displayed:
ID3 tag information for MP3 les when
ID3 version 1 and version 2 tags are used.
up to 15 characters of ID3 tag information
using uppercase letters (A to Z), numbers
(0 to 9), and symbols (" $ % ’ ( ) * + , – . / <
= > @ [ \ ] _ ` { | } ! ? ^).

CMT-EH55DAB.GB.3-874-280-11(1)
20GB
Other Operations
Creating your own
program
(Program Play)
1
Select the desired function.
Press CD (or FUNCTION repeatedly)
to select the CD function.
2
Press PLAY MODE repeatedly
until “PGM” appears while the
system is stopped.
3
Press /repeatedly
until the desired track or le
number appears.
When programming MP3 les, press
+/repeatedly to select the
desired folder, and then select the
desired le.
Example: When programming tracks
on a CD
Selected track or le number
4
Press ENTER to add the track
or le to the program.
“.” appears when the total
program time exceeds 100 minutes
for a CD, or when you select a CD
track whose number is 21 or over, or
when you select an MP3 le.
5
Repeat steps 3 through 4 to
program additional tracks or
les, up to a total of 15 tracks or
les.
6
To play your program of tracks
or les, press .
e program remains available until
you open the CD compartment. To
play the same program again, press
.
To cancel Program Play
Press PLAY MODE repeatedly until
“PGM” disappears while the system is
stopped.
To delete the last track or le of the
program
Press CLEAR while the system is
stopped.
Table of contents
Other Sony Stereo System manuals

Sony
Sony MHC-RG590S User manual

Sony
Sony HCD-GV10AV User manual

Sony
Sony CMT-V10IP User manual

Sony
Sony MEX-BT2850 User manual

Sony
Sony SRS-X11 User manual

Sony
Sony MEX-GS620BT User manual

Sony
Sony CMT-NEZ3 - Micro Hi Fi Component System User manual

Sony
Sony HCD-XGR6 User manual

Sony
Sony LBT-D560 User manual

Sony
Sony MHC-GX750 User manual

Sony
Sony ZS-SN10 User manual

Sony
Sony CMT-FX300i Marketing User manual

Sony
Sony MHC-GNX100, MHC-GNX90, MHC-GNX User manual

Sony
Sony HCD-ZX9 - Receiver Cd User manual

Sony
Sony LBT-LV100AV User manual

Sony
Sony 3-293-639-11(1) User manual

Sony
Sony FH-B650 User manual

Sony
Sony H.ear go SRS-HG1 User manual

Sony
Sony CX-LEM200 User manual

Sony
Sony 2-661-374-11(4) User manual