Sound Town CARPO-S1 User manual

USER MANUAL
EN
CARPO-S1
MULTI-POSITION PA SYSTEM
Please carefully read the user manual before using our products.
Lea este manual atentamente antes de utilizar nuestros productos.
Sound Town Inc. Accepts no liability for any loss which may be
suffered by any person who relies either wholly or in part upon
any description, photograph, or statement contained herein.
Technical specifications, appearances and other information are
subject to change without notice. .
For the applicable warranty terms and conditions, including addi-
tional information regarding Sound Town's limited warranty, please
find details online at: .
Https://www.soundtown.com/pages/return-warranty .
MANUAL DE USUARIO
ES
The SOUND TOWN CARPO-S1 multi-position powered speaker system is designed for
quality sound while takes small footprint. It is light enough to transport effortlessly.
The CARPO-S1 is the ultimate all-in-one PA, floor monitor, practice amplifier and primary
music system.
It features versatile connections with inputs for microphones, music instruments, line level
devices, TWS bluetooth linking and streaming devices which provide great compatibility
with a variety of sound and speaker systems.
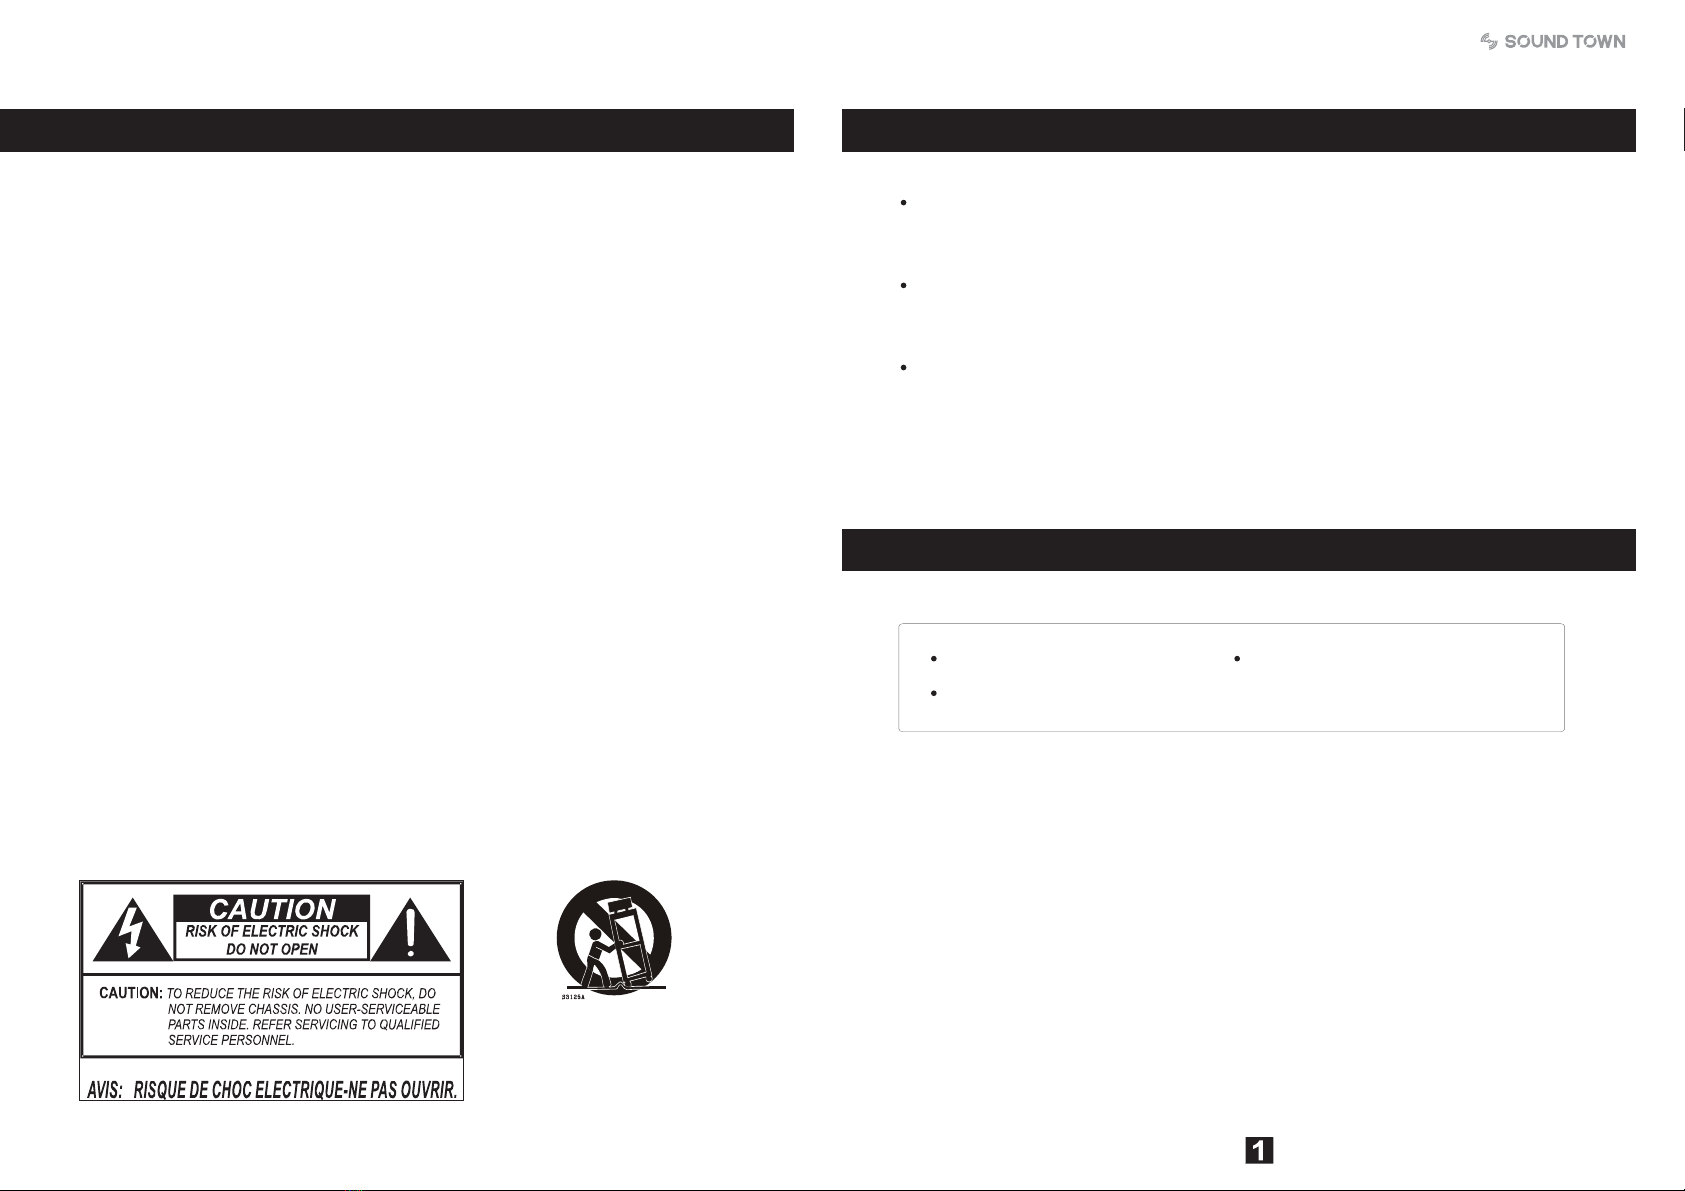
IMPORTANT SAFETY INSTRUCTIONS
1. Read all safety and operating instructions before using this product.
2. All safety and operating instructions should be kept for future reference.
3. Read and understand all warnings listed on the operating instructions.
4. Follow all operating instructions to operate this product.
5. This product should not be used near water, i.e. Bathtub, sink, swimming pool, web basement etc.
6. Only use dry cloth to clean this product.
7. Do not block any ventilation openings, it should not be placed flat against a wall or placed in a built-in
enclosure that will impede the flow of cooling air.
8. Do not install this product near any heat sources, such as, radiators, heat registers, stove or other apparatus
(including heat producing amplifiers) that produce heat.
9. Do not defeat the safety purpose of the polarized or grounding-type plug. A polarized plug has two blades
with one wider than the other. A grounding-type plug has two blades and a third grounding prong. The side
blade or the third prong are provided for your safety if the provided plug does not fit into your outlet, consult
an electrician for replacement of the obsolete outlet.
10. Protect the power cord being walked on or pinched particularly at Plugs, convenience receptacles and the
point where they exit from the apparatus. Do not break the ground pin of the power supply cord.
11. Only use attachments specified by the manufacturer.
12. Use only the cart, stand, tripod, bracket, or table specified by the manufacturer or sold with the apparatus.
When a cart is used use caution when moving cart/apparatus combination to avoid injury from tip-over.
13. Unplug this apparatus during lightning storms or when unused for long periods of time.
14. Care should be taken so that objects do not fall and liquids are not spilled into the unit through the ventilation
ports or any other openings.
15. Refer all servicing to qualified service personnel. Servicing is required when the apparatus has been damaged
in any way; such as, power-supply cord or plug is damaged, liquid has been spilled or objects have fallen into
the apparatus, the apparatus has been exposed to rain or moisture, does not operate normally or has been
dropped.
16. WARNING: To reduce the risk of fire or electric shock, do not expose this apparatus to rain or moisture.
17. When the MAINS plug, or an appliance coupler is used as the disconnect device, the disconnect device should
remain readily operable.
18. Protective Ground Terminal: The apparatus shall be connected to an AC main socket with a protective earth
ground connection.
19. Please dispose of used batteries properly, following local regulations. Do not incinerate.
FEATURES
In the package
How can we help you?
CONTACT OUR US-BASED SUPPORT TEAM
Simple or complex, your questions are important to us. For service, support
or more information, please contact the Sound Town support team:
Email: [email protected]
1sCARPO powered peaker
1 Power cable
1 User Manual
SYSTEM CONFIGURATIONS
The versatile CARPO-L1 system operates in different unique modes. Use the examples below to
quick identify the best mode for your applications.
(On floor)Tilt-Back
For performance where your audience is close to you, tilt the
CARPO-S1 onto its back edge. For best results, the performer
should stand or sit to one side of the cabinet to avoid blocking
sound from the audience.
(On floor)Monitor
To use the CARPO-S1 as a professional floor monitor, place
it on the ground horizontally, in front of and pointing toward
the performer. Tilt the cabinet onto its side edge.
Stand (On speaker stand, table etc.)
Put the CARPO-S1 on a speaker stand, table or other elevated
surface for general-purpose sound reinforcement.
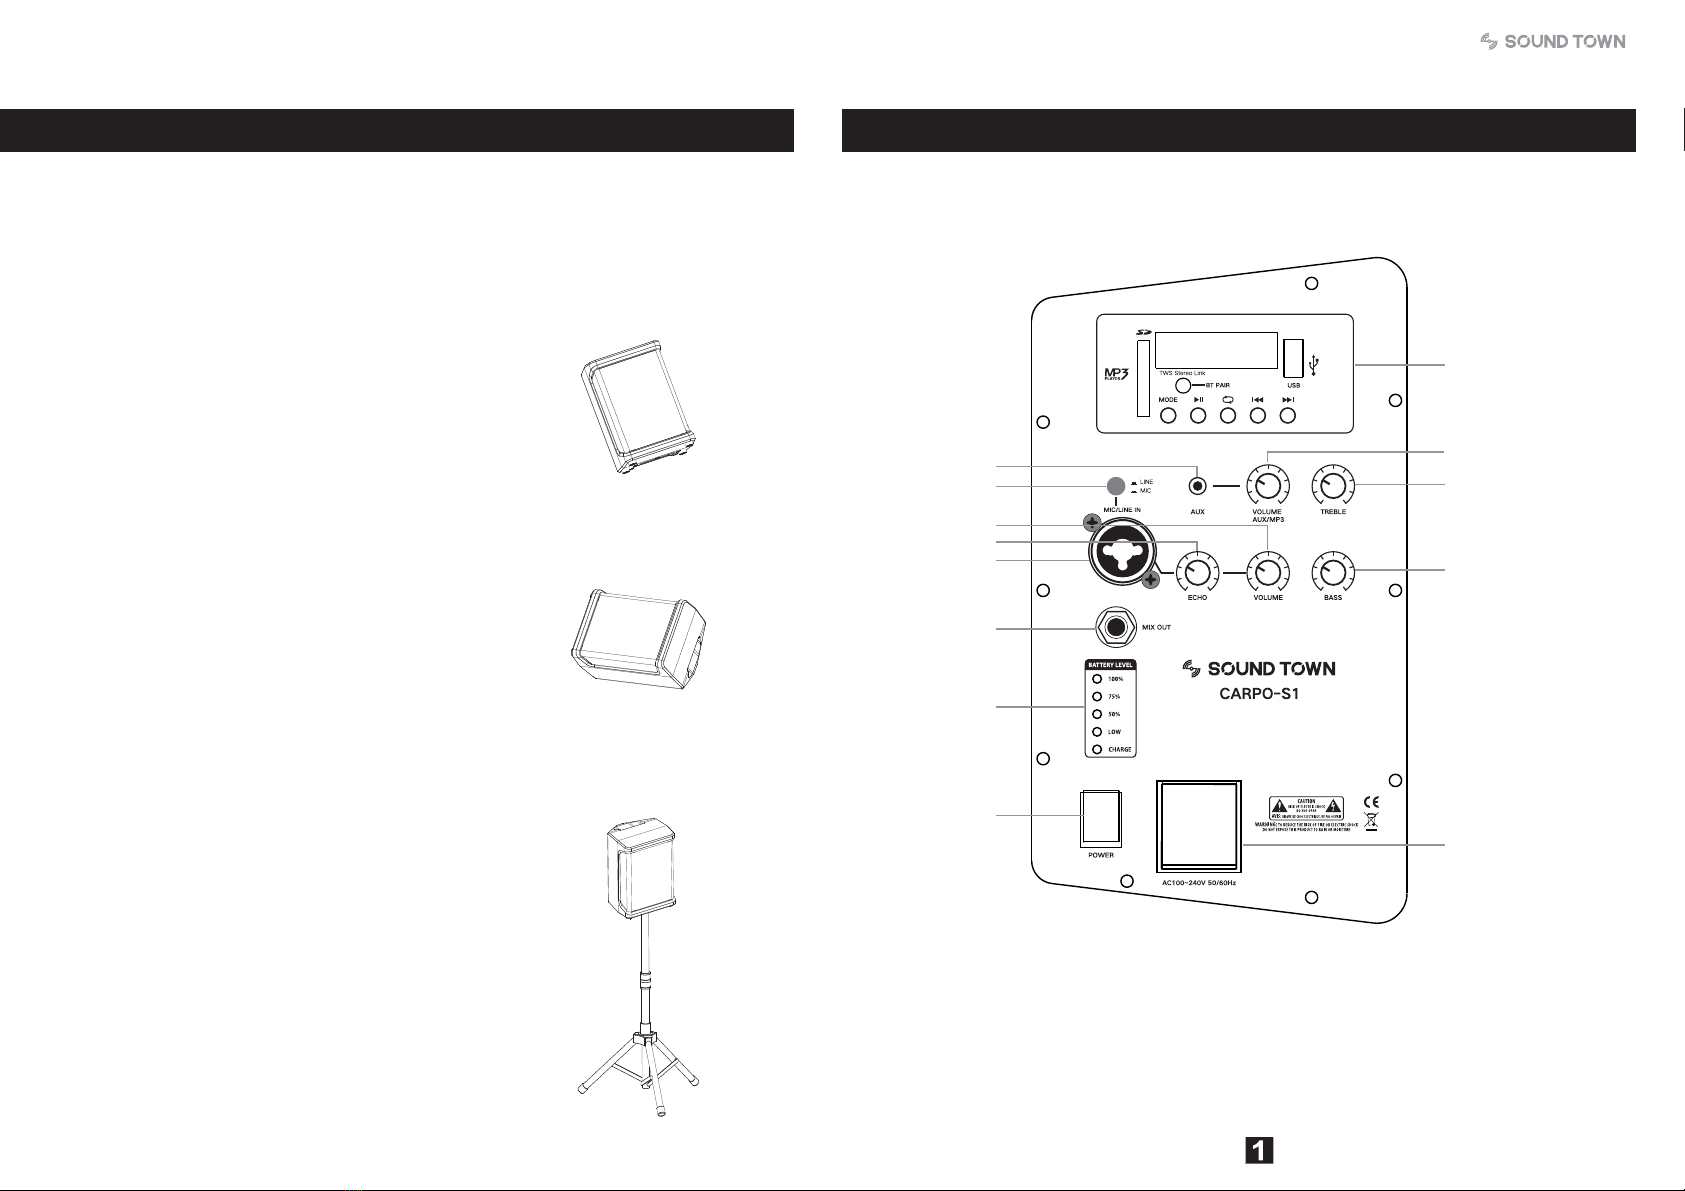
OPERATIONS
12
13
1
2
3
5
6
78
9
10
11
4

BLUETOOTH INSTRUCTIONSOPERATIONS
Single speaker Bluetooth Pairing:
1. Turn on the power of the speaker, make sure the channel 3 'AUX/MP3' button are selected to MP3 mode.
Press the E (Interchange) button on the MP3 panel to launch Bluetooth function. Screen message ('MOD ' 'bt')
The speaker will become discoverable as 'SOUNDTOWN'.
2. In the setting of your Bluetooth enabled devices, set it to 'discover' available devices. From the Bluetooth
device list, select the 'SOUNDTOWN' device.
3. The speaker is now paired with your Bluetooth enabled device.
Two speakers Bluetooth Pairing (TWS linking):
The system support 'Ture Wireless Stereo' linking which allows you to connect the other speaker by Bluetooth.
1. Turn on the power of the first speaker (Master speaker), make sure the channel 3 'AUX/MP3' button are
selected to MP3 mode.
2. Press 'MODE' button to interchange Bluetooth function (screen message 'bt')
3. Turn on the power of the second speaker (Slave speaker), make sure the channel 3 'AUX/MP3' button are
selected to MP3 mode.
4. Press 'MODE' button (slave speaker) to interchange Bluetooth function (screen message 'bt')
5. Press 'BT PAIR' (master speaker) then both of the screen message on master and slave speaker will change
to be 'bt:bt' and you will hear a prompt tone, the two speakers will pair automatically.
6. Connect your Bluetooth audio device to the master speaker and enjoy the 'TRUE WIRELESS STEREO' sound.
The two speakers are identical to each other, either one can be used as master or slave speaker.Note:
1. MP3 Player
MODE Long press to turn on/off the MP3 module,
short press to Interchange between USB/SD/Bluetooth mode
Play/Pause
Repeat
Previous Song
Next Song
BT PAIR TWS bluetooth pairing function to pair the other speaker
2. Switch Mic or Line input (for the combo connector).
3. XLR & 1/4" jack combo input.
4. Echo depth for Mic signal input.
5. Volume control for Mic/Line input signal.
6. 1/4" jack output to link out mixed signal to another amplifier or another powered speaker.
7. 1/8" Aux input.
8. Volume control for Aux/Mp3 input signal.
9. Treble frequency boost/cut, control is "flat" in center position (no effect on sound).
10. Bass frequency boost/cut, control is "flat" in center position (no effect on sound).
11. Battery level indicator.
12. Power Switch: To turn on/off the unit.
13. IEC input: To connect the included IEC power cable. (Support 100V~240V)
TECHNICAL INFORMATION
Mechanical
LF size: 6.5"
HF size: 3" x 3
Cabinet size: 11.8" x 9.9" x 14.6" (WxDxH)
Cabinet weight: 16 Lbs
Shipping Carton Size: 13.8" x 12.2" x 16.6"
Shipping Gross Weight: 18.1 Lbs
Electrical
AC power rating: 100~240V, 50/60Hz 200W max
Battery: 12v, 4000mAh
The speaker has an internal, rechargeable battery capable of up to 6 hours of continuous audio on
a full charge. Even though the speaker may have some charge when first taken out of the box, we
recommend full charging your speaker before using the system.
To charge the battery:
. Connect the speaker to a power outlet using the included power adapter.1
. Keep the system plugged in until the battery indicator changes to , indicating the battery is2 100%
fully charged.
The speaker utilizes a sealed battery. When not in use, the battery will slowly self-discharge.lithium
If you are planning not to use the speaker for a long period of time, it is advised to full charge the unit
before storing. It is also important to charge the unit every six months when not used. This will ensure
a healthy battery and extends its life. If the battery is left with a very low charge of an extended period
of time, it is possible to recharge the battery to working condition, but the charge time can take over
6 hours.
BATTERY RECHARGE
Other Sound Town Speakers manuals

Sound Town
Sound Town CARPO-L2 User manual

Sound Town
Sound Town PHOBOS-12PSD User manual

Sound Town
Sound Town OBERON-A15PW User manual

Sound Town
Sound Town CARPO-P Series User manual

Sound Town
Sound Town DEIMOS-12PSC User manual

Sound Town
Sound Town ZETHUS-112BPWX4 User manual

Sound Town
Sound Town OBERON-112PW User manual

Sound Town
Sound Town CARPO-S1 User manual

Sound Town
Sound Town ZETHUS Series User manual

Sound Town
Sound Town STCL-64 User manual


