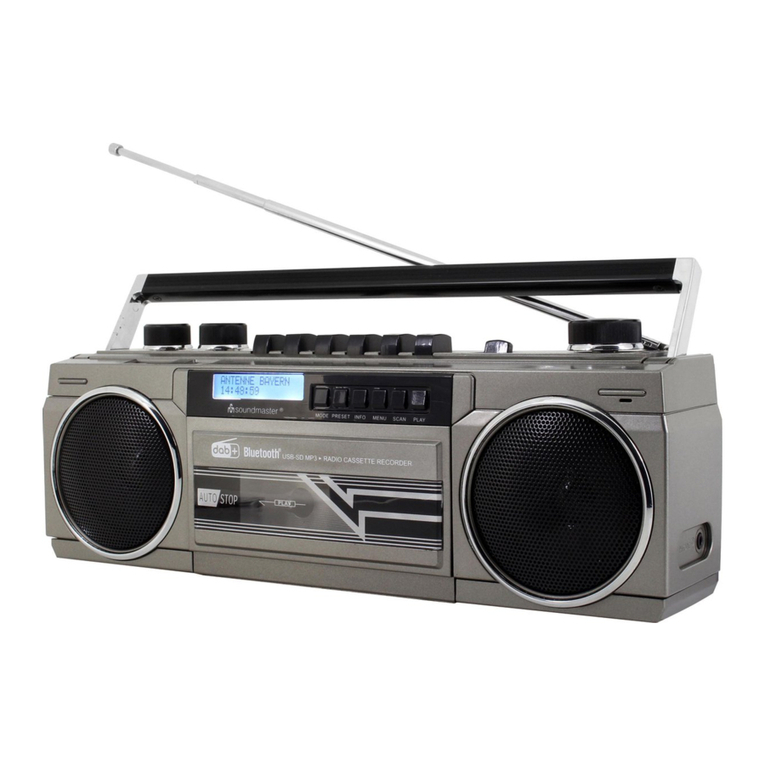
SOUNDMASTER RR110 User manual

DEUTSCH NEDERLANDS
ENGLISH ESPAÑOL
FRANÇAIS PORTUGUÊS
RR110

ENVIRONMENTAL PROTECTION
Please contact your local authorities for details about collection points.
The materials are reusable according to their markings. By reusing, recycling or
other forms of utilization of old devices you make an important contribution to
the protection of our environment.
Do not dispose of this product with the normal household waste at the end
of its life cycle. Return it to a collection point for the recycling of electrical
and electronic devices. This is indicated by the symbol on the product,
user manual or packaging.
This symbol indicates the presence of dangerous
voltage inside the enclosure, sufficient enough to
cause electric shock.
WARNING
Risk of electric shock
Do not o
p
en!
Caution: To reduce the risk of electric shock, do not remove the
cover (or back). There are no user serviceable parts inside. Refer
servicing to qualified service personnel.
This symbol indicates the presence of important
operating and maintenance instructions for the
device.
Safety, Environmental and Setup Instructions
•Use the device in dry indoor environments only.
•Protect the device from humidity.
•Do not open the device. RISK OF ELECTRIC SHOCK! Refer opening and servicing to qualified personnel.
•Connect this device to a properly installed and earthed wall outlet only. Make sure the mains voltage corresponds with
the specifications on the rating plate.
•Make sure the mains cable stays dry during operation. Do not pinch or damage the mains cable in any way.
•A damaged mains cable or plug must immediately be replaced by an authorized service center.
•In case of lightning, immediately disconnect the device from the mains supply.
•Children should be supervised by parents when using the device.
•Clean the device with a dry cloth only.
Do NOT use CLEANING AGENTS or ABRASIVE CLOTHS!
•Do not expose the device to direct sunlight or other heat sources.
•Install the device at a location with sufficient ventilation in order to prevent heat accumulation.
•Do not cover the ventilation openings!
•Install the device at a safe and vibration-free location.
•Install the device as far away as possible from computers and microwave units; otherwise radio reception may be
disturbed.
•Do not open or repair the enclosure. It is not safe to do so and will void your warranty. Repairs only by authorized
service/ customer center.
•Only use mercury and cadmium-free batteries.
•Used batteries are hazardous waste and NOT to be disposed of with the household waste!!!
Return the batteries to your dealer or to collection points in your community.
•Keep batteries away from children. Children might swallow batteries.
Contact a physician immediately if a battery was swallowed.
•Check your batteries regularly to avoid battery leakage.
•Batteries shall not be exposed to excessive heat such as sunshine, fire or the like.
•CAUTION: Danger of explosion if battery is incorrectly replaced
Replace only with the same or equivalent type

ENGLISH
CONTROL LOCATION
1. Volume Control
2. Function Switch
3. Band Selector
4. Built-in Condenser Microphone
5. Pause Button
6. Stop/Eject Button
7. Fast Forward Button
8. Rewind Button
9. Play Button
10. Record Button
11. Tuning Knob
12. Cassette Door
13. FM Telescopic Antenna
14. Dial Pointer
15. Dial Scale
16. Battery Compartment
17. AC Power Cord Socket
18. Headphone Jack
POWER SUPPLY AND CONNECTION
BATTERY OPERATION
- Set the FUNCTION switch (2) to the TAPE position.
- Remove the battery compartment cover. (16)
- Insert four D-size batteries.
- Replace the battery compartment cover. (16)
Note:
- Check your batteries regularly. Old or exhausted batteries should be replaced.
- If the unit is not going to be used for a long period of time or is being run
exclusively on an AC power supply, remove the batteries to avoid leaking and
damage to the unit.
AC OPERATION
- Plug the Power Cord into an AC outlet.
Note:
- This radio cannot be operated by batteries if the AC power cord is connected to
the unit.
ENG 1

ENGLISH
CONNECTION
- Stereo Headphone Jack (18)
Note:
- Connecting Stereo Headphones (3.5mm) will mute the sound from the main
speaker.
FUNCTION
FUNCTION SWITCH
- Position to RADIO for:
-Radio reception
-Cassette recording from the radio
- Position to TAPE for:
-Cassette playback
-Recording from built-in Condenser Microphone (4)
SOUND ADJUSTMENT
VOLUME
- The level of sound reproduced by the loudspeaker or Stereo Headphones is
adjusted by the VOLUME control (1).
Note:
- During recording, adjusting the VOLUME control (1) only affects the monitor
sound and not the content of recording.
RADIO
OPERATION
- Set the FUNCTION switch (2) to the RADIO position.
- Select the desired radio frequency band with the BAND SELECTOR (3).
- The Dial Scale shows the frequency in MHz (for FM) or kHz (for AM).
- Turn the TUNING KNOB (11) until desired radio station has been tuned in.
- To turn off the radio, set the FUNCTION Switch (2) to the TAPE position.
ENG 2

ENGLISH
ANTENNA
DO NOT CONNECT FM ANTENNA TO AN EXTERNAL ANTENNA
- For FM reception, pull out the telescopic antenna (13). To improve reception,
incline and turn the antenna (13).
- Reduce its length if the FM signal is too strong (very close to a transmitter).
- For AM reception, the signals are picked up through the built-in ferrite antenna.
- Rotate the radio itself to receive an optimum reception.
CASSETTE RECORDER
CONTROLS
- STOP/EJECT button(6)
During operation, depress to stop all deck operation. Press again to open the
cassette door.
- FAST FORWARD button(7) and REWIND button(8)
Press to rapidly advance the tape in either forward or reverse direction.
- PLAY button(9)
Press to start playback.
- PAUSE button(5)
Press to stop tape operation temporarily. Press again to resume tape operation.
- RECORD button(10)
Press to start recording. PLAY button(9) will be activated automatically.
INSERTION AND REMOVAL OF CASSETTE TAPE
- Press the STOP/EJECT button (6) to open the cassette door.
- Insert a cassette into the holding position on the inside of the cassette door, with
the exposed section upward (playback side facing you).
- Close the cassette door securely before starting.
- When finished, press the STOP/EJECT button (6) to open the cassette door and
remove your cassette tape.
CASSETTE PLAYBACK
- Set the FUNCTION switch (2) to the TAPE position.
- Press the STOP/EJECT button (6).
- Insert a pre-recorded tape into the cassette compartment.
- Close the door gently.
- Press the PLAY button (9) to activate playback.
- Adjust the VOLUME control (1) to the desired sound level.
- Press the STOP/EJECT button (6) when finished.
ENG 3

ENGLISH
RECORDING
Recording from Radio
- Set the FUNCTION switch (2) to the RADIO position.
- Tune in desired radio station.
- Open the Cassette Compartment Door (12) by pressing the STOP/EJECT
button (6) and insert a blank tape into the cassette compartment. Close the door
gently.
- Press the RECORD button (10) and PLAY button (9) simultaneously to start the
recording process.
- Press the STOP/EJECT button (6) when finished.
Note:
You may want to monitor playback during recording. You can adjust the sound
with the VOLUME control (1). This adjustment does not affect the content of
recording.
Recording from Built-in Condenser Microphone
- Set the FUNCTION switch (2) to the MIC position.
- Open the Cassette Compartment Door (12) by pressing the STOP/EJECT
button (6) and insert a blank tape into the cassette compartment. Close the door
gently.
- Press the RECORD button (10) and PLAY button (9) simultaneously to start the
recording process. This process will record the signals that are received by the
built-in Condenser Microphone (4).
- Press the STOP/EJECT button (6) when finished.
Note:
Monitoring during MICROPHONE recording is not possible.
Prevention Against Accidental Erasure
- To prevent a recording, e.g. side A, on the cassette tape from being erased
accidentally, break off the tab on the rear of the tape. Now, recording on side A is
no longer possible. If you wish to make side A recordable again, cover the hole
with adhesive tape.
SPECIAL FEATURES
Automatic Stop
- During playback or recording, the unit will shut itself off automatically at the end
of tape.
ENG 4

ENGLISH
MAINTENANCE & CARE
- Electronic products of this kind should never be subjected to extreme
temperature nor high humidity to ensure normal functioning for a long lifetime.
For instance, never place the unit in bathing areas nor around stoves and
radiators.
- If necessary, clean the unit with a piece of cloth dampened with water only.
Make sure the unit is disconnected from an AC power outlet.
- The heads and capstans of the cassette are in constant contact with moving
tapes. If dirt and dust adheres to them, deterioration of performance, such as
sound decrease, distortion or fluctuation will result. A cloth and alcohol can be
used to clean the heads and capstans carefully.
TROUBLESHOOTING
Carefully re-read the instructions to make sure the unit is being operated properly.
Check the following before you take your unit to the local dealer for repair.
SYMPTOM CAUSE
There is no sound from the speakers. The Volume control is set too low.
Headphones are connected to the unit.
The radio does not work The FUNCTION switch is in the TAPE
position.
There is excessive static during
FM reception. The antenna is not properly
positioned.
A cassette cannot be inserted into
the compartment. The tape is inserted in the wrong
direction.
The PLAY button does not lock in
position after inserting cassette tape. The tape is at its end and auto-stop
function is in operation.
The RECORD button cannot be pressed
down with a cassette tape inside. A tape with its safety tab removed
has been inserted
The TAPE does not play. The PAUSE button is depressed.
The sound is weak or distorted during
tape playback. The record/playback head is dirty.
A previous recording cannot be
completely erased. The erase head is dirty.
- If you find the unit is not working properly after checking the above chart, please
take it to your nearest Services Centre. Do not attempt to repair it by yourself.
Refer all servicing to qualified service personnel.
- This product shall not be exposed to dripping or splashing and that no objects
filled with liquids, such as vases, shall be placed on the apparatus.
ENG 5
Table of contents
Other SOUNDMASTER Cassette Player manuals

SOUNDMASTER
SOUNDMASTER CDMP 9933PRT User manual

SOUNDMASTER
SOUNDMASTER SRR70TI User manual

SOUNDMASTER
SOUNDMASTER SRR70 User manual

SOUNDMASTER
SOUNDMASTER SCD5800 User manual

SOUNDMASTER
SOUNDMASTER RR18 User manual

SOUNDMASTER
SOUNDMASTER RR18SW User manual

SOUNDMASTER
SOUNDMASTER SCD5100 User manual

SOUNDMASTER
SOUNDMASTER SCD5800SW User manual

SOUNDMASTER
SOUNDMASTER MCD 5020-1 User manual

SOUNDMASTER
SOUNDMASTER SCD7900 User manual