manuals.online logo
Brands
  1. Home
  2. •
  3. Brands
  4. •
  5. SOUNDMASTER
  6. •
  7. CD Player
  8. •
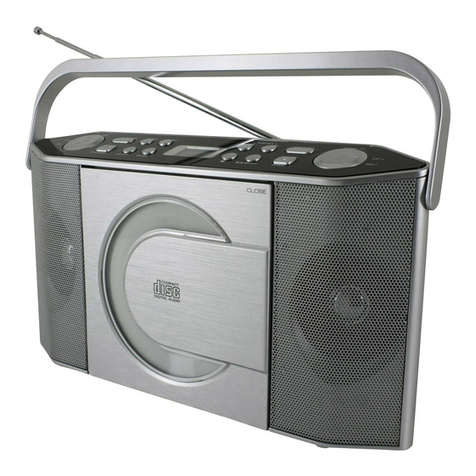
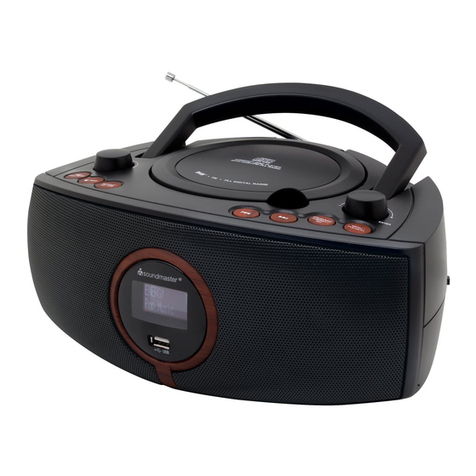
  9. SOUNDMASTER RCD 1150 User manual

SOUNDMASTER RCD 1150 User manual

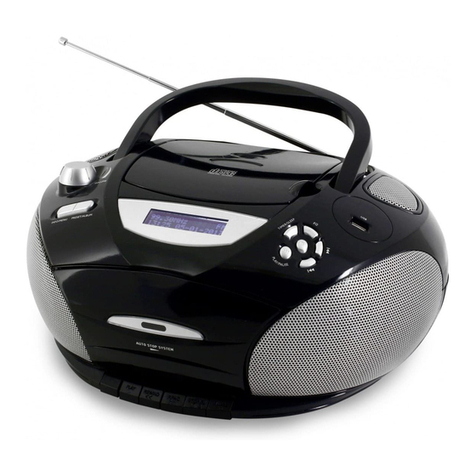
RCD 1150
Portable radio CD player
User manual
GB
1. CARRYING HANDLE
2. VOLUME CONTROL
3. FUNCTION SWITCH (AM - FM - CD)
4. TELESCOPIC ANTENNA
5. TUNING CONTROL
6. CD PLAY/PAUSE BUTTON
7. / REV./ FWD. SKIP SEARCH BUTTON
8. CD STOP BUTTON
9. PLAY MODE/PROGRAM/CLOCK-ADJ. BUTTON.
10. ON/OFF BUTTON
11. CD OPEN BUTTON
12. CD DOOR
13. BATTERY DOOR
14. AC SOCKET
15. SPEAKER
16. DIAL SCALE
17. PHONES JACK
18. LCD DISPLAY
CONTROLS IDENTIFICATION
POWER SUPPLY
ALIMENTATION
MISE EN MARCHE/ARRÊT DE L’APPAREIL
ENCENDER/APAGAR LA UNIDAD
CONFIGURACIÓN DE HORA
ESCUCHANDO LA RADIO
RÉGLAGE DE L’HEURE
ECOUTER UN CD
ESCUCHAR EL CD
MAINTENANCE
CARACTÉRISTIQUES TECHNIQUES
ECOUTER LA RADIO
TURN ON/OFF THE UNIT
TIME SETTING
LISTENING TO THE RADIO
LISTENING TO THE CD PLAYER
DESCRIPTION DE L’APPAREIL IDENTIFICACIÓN DE LOS CONTROLES
ALIMENTACIÓN
MAINTENANCE
SPECIFICATION
MORE INFORMATION
CONSIGNES DE SÉCURITÉ
This set operates on AC (230V ~ 50Hz) or DC9V (size C / UM-2 1.5V x 6)
AC OPERATION:
Connect at the back of the unit the AC power cord provided before insert into a
convenient standard AC outlet.
USING ON batteries
Open the lid of the battery compartment on the back and insert 6 PCS (size C/ UM2)
batteries (not supplied), with the + and – marks correctly aligned, then close the lid.
To switch from AC power supply to battery power supply, disconnect the AC cord
from the AC inlet, then disconnect main unit. Battery power will be cut automatically
while the cord is connected.
The batteries need to be replaced when:
The volume decreases, or sound is distorted during operation.
Notes on batteries
• Do not mix different types of batteries or old batteries with new ones.
• Never recharge the batteries, apply heat to them or take them apart.
• Battery shall not be exposed to excessive heat such as sunshine, re or the like.
• Attention should be drawn to the environmental aspects of battery disposal.
NOTE: In order to avoid leakage, always remove the batteries when unit will not be
used for a long period of time.
Cet appareil fonctionne sur secteur (230 V ~ 50 Hz) ou sur piles 9V CC (taille
C / UM-2 1.5V x 6)
Fonctionnement sur secteur
Connectez le cordon d’alimentation secteur fourni à l’entrée alimentation AC~ située
àl’arrière de l’appareil avant de brancher l’autre extrémité (che) dans une prise
secteur.
FONCTIONNEMENT SUR PILES
Ouvrez le compartiment pour piles situé à l’arrière de l’appareil et insérez-y 6
piles de type C/ UM2 (non fournies), en respectant le schéma de polarité indiqué
à l’intérieur du compartiment. Refermez ensuite le compartiment. Pour passer de
l’alimentation secteur à l’alimentation sur piles, débranchez le câble d’ alimentation
secteur de la prise murale. Lorsque l’appareil est connecté à l’alimentation secteur,
les piles ne sont pas utilisées.
Remplacement des piles
Les piles doivent être remplacées lorsque le volume diminue ou le son est
déformépendant le fonctionnement de l’appareil.
Remarques relatives aux piles
• Ne mélangez pas des piles de différents types ou des piles usagées et nouvelles.
• Ne rechargez, ne chauffez et ne démontez jamais les piles.
• Les piles ne peuvent pas être exposées à des sources de chaleur excessive,
comme la lumière du soleil, le feu, etc.
• Veillez au respect de l’environnement lorsque vous vous débarrassez des piles
usagées.
REMARQUE: Pour éviter tout écoulement, retirez toujours les piles de l’appareil
lorsque celui-ci n’estpas utilisé pendant une période prolongée.
REMARQUE: Utilisez également cette touche pour suspendre momentanément la
lecture du CD. “►” clignote. Appuyez de nouveau sur la touche
pour reprendre la lecture.
5. Appuyez sur la touche pour arrêter la lecture du disque.
AUTRES FONCTIONS DU LECTEUR CD
Piste précédente/suivante :
- Appuyez une fois sur pour passer au titre suivant ou à plusieurs reprises pour
sauter plusieurs titres.
- Appuyez sur pour revenir au début du titre ou à plusieurs reprises pour revenir
en arrière et sauter plusieurs titres.
- Appuyez en continu sur les touches ou pour avancer ou revenir en arrière
dans un titre.
LECTURE RÉPÉTÉE
Pendant le mode de lecture de CD, Il est possible de répéter une piste de CD autant
de fois que vous le voulez.
Rappuyez une fois sur PLAY MODE/PROGRAM/CLOCK-ADJ. pour répéter la piste
que vous avez sélectionnée. L'indicateur de répétition « REP » clignote.
Appuyez deux fois sur PLAY MODE/PROGRAM/CLOCK-ADJ. pour répéter tout le
disque. L'indicateur de répétition « REP » s'allume.
Appuyez trois fois sur PLAY MODE/PROGRAM/CLOCK-ADJ. pour lire aléatoirement
un disque. L'indicateur de répétition « MIX » s'allume.
Pour désactiver la fonction RÉPÉTITION
Appuyez successivement sur PLAY MODE/PROGRAM/CLOCK-ADJ. jusqu'à ce
que l'indicateur du mode répétition « REP » ou « MIX » disparaisse de l’écran. Cette
fonction répétition s’annule automatiquement à l’ouverture de la porte du CD ou à la
mise en arrêt de l’appareil.
1. Mettez le sélecteur de fonction (AM - FM - CD) sur CD et « -- » s'afche.
2. Insérez le CD, face imprimée vers le haut, dans son compartiment et refermez
la porte.
3. Au bout de quelques secondes, Le nombre total de plages s’afche.
4. Appuyez sur la touche pour lancer la lecture du CD puis réglez le volume à
votre convenance. Numéro de piste XX et “►” s’afche à l’écran.
1. Deslice el interruptor de función (AM-FM-CD) a la posición CD. Se mostrará “--“
en pantalla.
2. Coloque el disco CD con la cara impresa mirando hacia arriba dentro del
compartimento para CD y después cierre la tapa de dicho compartimento.
3. Tras algunos segundos, el número total de pistas aparecerá en la pantalla.
4. Pulse para comenzar a jugar y ajustar el nivel de volumen. icono «►» y el
número de la pista XX aparecerá en la pantalla.
NOTA: También puede utilizar este mando a suspender momentáneamente la pista
de juego “►“ comenzará a parpadear, pulse de nuevo para reanudar el
juego.
5. Presione STOP para dejar de escuchar el disco.
LECTURE PROGRAMMEE
Programmez vos pistes quand l'appareil est à l'ARRÊT.
1. Appuyez sur la touche .
2. Appuyez sur PLAY MODE / PROGRAM / CLOCK-ADJ., Écran LCD afche "P01"
indicateurs quelques secondes, puis "PROG" et "00" commence à clignoter sur
l'écran LCD.
3. Avec ou , sélectionnez une piste voulue, appuyez ensuite sur PLAY MODE/
PROGRAM/CLOCK-ADJ. pour mémoriser la piste.
4. Répétez les étapes ci-dessus pour programmer d’autres pistes. Un maximum de
20 pistes peuvent être programmées, en mémoire dans l’ordre que vous préférez.
Si la mémoire est pleine, l’écran afchera « FU » pour indiquer.
5. Appuyez sur le bouton PLAY/PAUSE pour lancer la lecture programmée,
l'indicateur « PROG.» & «►» et le "XX" numéro de la piste programmée s'afchent.
6. Appuyez sur pour arrêter le disque. Rappuyez pour annuler les pistes
programmées, puis l'indicateur « PROG.» ne s'afche plus, le nombre de pistes
total s'afche à nouveau.
REMARQUE IMPORTANTE
Mode veille automatique
REMARQUE: Dans un soucis d'économie d'énergie, à la n de la lecture et
qu’aucune opération n'est effectuée sur l'appareil pendant une période de 15
minutes celui ci se mettra automatiquement en mode veille. Pour allumer l'unité de
nouveau, appuyez sur ON/OFF.
Nettoyage
ATTENTION: Déconnectez cet appareil de toute source d’alimentation avant
de le nettoyer.
- Utilisez un chiffon doux, propre et sec. Dépoussiérez régulièrement les orices de
ventilation à l'arrière ou sur les côtés de l'appareil.
- L'utilisation de solvants ou de produits abrasifs ou à base d'alcool peut endommager
l'appareil.
- Si un objet ou un liquide entre dans l'appareil, débranchez immédiatement ce
dernier et faites-le contrôler par un ingénieur agréé.
Remarques sur les disques
* N’utilisez pas de disques de forme irrégulière (exemple: en forme de cœur,
octogonaux). L’appareil pourrait présenter des dysfonctionnements.
* Ne placez pas plusieurs disques dans le compartiment.
* N’essayez pas d’ouvrir le compartiment du disque pendant la lecture.
* Ne touchez pas la lentille. Vous pourriez provoquer un dysfonctionnement.
* Si le disque est rayé, sale ou maculé de traces de doigts, l’appareil peut ne pas
fonctionner. Avant la lecture, essuyez le disque avec un chiffon. Procédez du
centre vers l’extérieur. Ne rangez pas les disques dans des endroits présentant
des températures élevées ou une humidité importante. Ils pourraient se déformer.
Après la lecture, replacez vos disques dans leur boîtier.
Remarque importante
Retirez le disque du compartiment si l’appareil doit être transporté.
Appuyez sur le bouton ON/OFF pour allumer l'appareil.
Faites glisser le commutateur de fonction (AM - FM - CD) pour sélectionner le mode
audio entre CD et radio (AM-FM).
Appuyez de nouveau sur le bouton ON/OFF pour éteindre l'appareil. "OFF"
indicateur sera afché sur l'écran, puis reprendre l'heure actuelle.
Pulse el botón ON / OFF para encender la unidad.
Deslice el interruptor de función (AM-FM-CD) para seleccionar el modo de audio
entre CD y radio (AM-FM).
Pulse el botón ON / OFF para apagar la unidad. Indicador "OFF" aparecerá en la
pantalla y luego reanudar la hora actual.
1. En el modo en espera, pulse y sostenga el botón PLAY MODE/PROGRAM/
CLOCK-ADJ. durante 2 segundos, en la pantalla parpadeará “24H” o “12H”.
2. Pulse el botón o para seleccionar el formato de 12 o 24 horas.
3. Vuelva a pulsar el botón PLAY MODE/PROGRAM/CLOCK-ADJ.; los dígitos de la
hora parpadearán. Pulse el botón o para jar la hora.
4. Vuelva a pulsar el botón PLAY MODE/PROGRAM/CLOCK-ADJ. para conrmar;
los dígitos de los minutos parpadearán. Pulse el botón o para jar los
minutos.
5. Vuelva a pulsar el botón PLAY MODE/PROGRAM/CLOCK-ADJ. para nalizar la
conguración de hora.
Nota: “:” parpadeará cada segundo cuando la hora esté contando. Si se elige el
formato de 12 horas, el icono PM se utilizará para la hora de la tarde.
1. Deslice el interruptor de función (AM-FM-CD) a la posición AM o FM.
2. Seleccione su estación de radio y ajustar el nivel de volumen.
FM: Extienda y gire la antena cuando recibió la señal es débil.
AM: Esta unidad está equipada con una antena direccional de ferrita. Gire la unidad
para obtener la mejor posición de recepción.
3. Para dejar de escuchar la radio, pulse el botón ON/OFF para apagarlo.
VOLUMEN
Gire el control VOLUMEN +/- para ajustar el sonido a un nivel cómodo.
USO DE AURICULARES (Auticulares no incluidos)
Conecte un par de auriculares estéreo con minitoma de 3,5 mm a la toma de
teléfono de la unidad. El altavoz se desactivará automáticamente cuando se estén
utilizando los auriculares.
Nota: Para establecer un nivel de sonido de auriculares seguro, coloque el control de
volumen a un punto bajo. Aumente despacio el sonido hasta que pueda escucharlo
cómodamente y con claridad, y sin distorsión.
Voltaje de salida máximo ≤ 150 mV
1. En mode veille, maintenez enfoncée la touche PLAY MODE/PROGRAM/CLOCK-
ADJ. pendant 2 secondes, « 24H » ou « 12H » clignote sur l'écran.
2. Appuyez sur ou pour sélectionner le format d'heure 12 ou 24 heures.
3. Rappuyez sur PLAY MODE/PROGRAM/CLOCK-ADJ., les heures clignotent.
Appuyez sur ou pour régler les heures.
4. Rappuyez sur PLAY MODE/PROGRAM/CLOCK-ADJ. pour conrmer, les minutes
clignotent. Appuyez sur ou pour régler les minutes.
5. Rappuyez sur PLAY MODE/PROGRAM/CLOCK-ADJ. pour terminer le réglage de
l'heure.
Remarque: « :» clignote une fois par seconde quand l'heure tourne. Si le format 12
heures est sélectionné, l'icône PM indique l'après-midi.
Press the ON/OFF button to turn the unit on.
Slide the FUNCTION SWITCH (AM - FM - CD) to select the audio mode between
CD and RADIO (AM-FM).
Press the ON/OFF button again to turn the unit OFF. "OFF " indicator will be shown
on the display and then resume the current time.
1. In standby mode, press and hold the PLAY MODE/PROGRAM/CLOCK-ADJ.
button for 2 seconds , “24H” or “12H ” blinks on the display.
2. Press or button to select 12 or 24 hour format.
3. Press the PLAY MODE/PROGRAM/CLOCK-ADJ. button again, the hour digits
blink. Press the or button to set the hour.
4. Press the PLAY MODE/PROGRAM/CLOCK-ADJ. again to conrm, the minute
digits blink. Press the or button to set the minute.
5. Press PLAY MODE/PROGRAM/CLOCK-ADJ. again to complete time setting.
Note: “:” blinks every second when the time is counting, if 12 hours format is
selected, PM icon is used for the afternoon time.
Before throwing any batteries away, consult your distributor who may be
able to take them back for specic recycling.
Avant de jeter les piles, consultez votre revendeur car celui-ci peut les
reprendre pourles recycler.
Antes de tirar las pilas, consulte a su proveedor: puede entregárselas para
reciclarlas.
1. Slide the FUNCTION SWITCH (AM - FM - CD) to AM or FM position.
2. Select your radio station and adjust the volume level.
FM: Extend and rotate the antenna when received the signal is weak.
AM: This unit is equipped with a built-in directional ferrite antenna. Rotate the unit to
get the best receiving position.
3. To stop listening to the radio, press ON/OFF to turn off.
VOLUME
Turn VOLUME +/- control to adjust the sound to comfortable level.
USING HEADPHONES (Headphones Not Included)
Connect a set of stereo headphones with 3.5mm mini plug to the phone jack on the
unit. The speaker are automatically cut off when headphones are in use.
Note: To establish a safe headphones sound level: Start your volume control at a low
setting. Slowly increase the sound until you can hear it comfortably and clearly,
and without distortion.
Maximum output voltage ≤150 mV
To prevent possible hearing damage, do not listen at high volume levels
for long periods.
Afin de réduire les risques de lésions auditives, n’écoutez pas de la
musique à un volume élevé pendant longtemps.
Para evitar posibles daños en el oído, no escuche a un volumen elevado
durante largos periodos.
1. Slide the FUNCTION SWITCH (AM - FM - CD) to CD position.”--“is displayed.
2. Place the CD disc with label side facing up inside the CD compartment and close
the CD door.
3. After a few seconds, the total number of tracks will appear on the display.
4. Press to start playing and adjust the volume level, “►” and track no. will appear
on display.
NOTE: Use also this knob to suspend momentarily, “►” will blink, press once
again to resume play .
5. Press to stop listening to the disc .
OTHER CD PLAYER FUNCTIONS
REV./ FWD. SKIP SEARCH :
- Press to skip forward to the next track or repeatedly to skip several tracks.
- Press to beginning of the track or press repeatedly to skip backward several
tracks.
- Press and hold or to search quickly within a track.
REPEAT PLAYBACK
During the CD playback mode, A single track or the whole CD can be repeated as
many times as you like.
Press PLAY MODE/PROGRAM/CLOCK-ADJ. once to repeat your selected track.
The repeat indicator ”REP” blinks.
Press PLAY MODE/PROGRAM/CLOCK-ADJ. twice to repeat the whole disc. The
repeat indicator ”REP” lights up.
Press PLAY MODE/PROGRAM/CLOCK-ADJ. three times to disc mixture playback.
The repeat indicator ”MIX” lights up.
To cancel REPEAT Playback
Press PLAY MODE/PROGRAM/CLOCK-ADJ. button repeatedly until the repeat
indicator “REP” or “MIX” disappears from display. Repeat function is also cancelled
when the CD door is opened or turning off the unit.
PROGRAM PLAYBACK
To set your own musical program when the unit is STOP state.
1. Press button.
2. Press PLAY MODE/PROGRAM/CLOCK-ADJ., LCD shows “P01” indicator few
seconds, and then “PROG” and “00” start blinking on LCD.
3. Select with or your desired track, then press PLAY MODE/PROGRAM/
CLOCK-ADJ. to store your program in memory.
4. Repeat the above steps to program more tracks. A maximum of 20 tracks can be
programmed in memory in a preferred order. If the memory is full, LCD shows
“FU” for indicating.
5. Press PLAY/PAUSE button to start playing program mode, the “PROG”&
“►”and programmed track number “XX” will show on display.
6. Press to stop the disc. Press again to cancel the programmed tracks, and
“PROG.” icon will go off, display goes back to show the total number of tracks.
IMPORTANT NOTICE
Automatic standby mode
In a concern of saving energy, when playback has reached to the end and no control
is operated on the device for a period of 15 minutes, the unit will automatically switch
to Standby mode. To switch the unit ON again, press the ON/OFF button.
Cleaning
WARNING: Disconnect the unit from the mains supply before cleaning.
- Use a soft, dry, clean cloth. Regularly dust the vents at the back or sides.
- Using solvents, abrasive or alcohol-based products risks damaging the appliance.
- If an object or liquid enters inside the appliance, unplug it immediately and have it
checked by an authorized engineer.
Notes on disc
* Do not use irregular shape CDs (example: heart-shaped, octagonal ones). It may
result in malfunctions.
* Do not place more than one disc in the disc compartment.
* Do not try to open the disc compartment during playing.
* Do not touch the lens. Doing so may cause malfunction.
* If there is a scratch, dirt or ngerprints on the disc, it may cause tracking error.
Before playing, clean the disc with a cleaning cloth. Wipe the disc from the center
out. Don't store discs in places with high temperatures or high humidity, they can
become warped. After playing, store the disc in its case.
Important Note
Before transporting the unit, remove the disc from the disc compartment.
POWER SUPPLY: AC: 230V ~ 50 Hz, 8W
DC: 9V 1.5V 6TYPE C / LR14 / UM2
UNIT DIMENSION: 265(W) x 157(H) x 82(D)
RADIO SECTION
FREQUENCY RANGE:
FM/FREQUENCY MODULATION: 87.5 - 108 MHz
AM/AMPLITUDE MODULATION: 540 - 1600KHz
COMPACT DISC
SECTIONOPTICAL PICKUP: 3 - BEAM LASER
CAUTION: This set uses a laser beam. To prevent any accident due to this type
of beam, the set should only be opened by properly trained personnel. The unit
conforms to the international safety specications and to guidelines of the european
community, and also complies with current standards concerning electrical safety
and electromagnetic compatibility EMC.
CAUTION: To reduce the risk of electric shock, do not open
the device, there is no part inside for the user. Refer all
servicing to qualied personnel.
ATTENTION: pour réduire le risque de choc électrique,
ne démontez pas l’appareil. L’appareil ne contient aucune
pièce réparable par l’utilisateur. Conez tout entretien à un
technicien qualié.
The lightning with the arrow symbol in the triangle is a warning sign alerting
the user to “dangerous voltage” inside the unit.
Le symbole de l'éclair terminé par une èche à l'intérieur d'un triangle avertit
l'utilisateur de la présence d’une « tension dangereuse » dans l'appareil.
IMPORTANT
- The Marking plate is located at the back of the device
- Make sure to have a minimum distance of 5 cm around the unit for sufcient
ventilation.
- Ensure that the ventilation openings is not covered with items such as newspapers,
tablecloths, curtains, etc.
- Do not place naked ame sources, such as lighted candles on the apparatus.
- Do not expose this appliance to dripping or splashing water.
- Do not place objects lled with liquids, such as glass, vase on the device.
- Use the apparatus only in moderate climates.
- Do not throw batteries into re! Respect the environment when disposing of used
batteries.
- Batteries should not be exposed to excessive heat such as sunshine, re or other
similar heat source.
- This appliance shall not be exposed to dripping or splashing water and that no
object lled with liquids such as vases shall be placed on the apparatus.
- Under the inuence of fast transient and / or electrostatic electric phenomenon , the
product may malfunction and the user must perform a power reset of the device.
- To be completely disconnected the power input, the mains plug of apparatus shall
be disconnected from the mains.
- The mains plug of apparatus should not be obstructed OR should be easily
accessed during intended use.
If in the future, you need to get rid of this product, please note that Waste
electrical products should not be disposed of with household waste.
Recycling facilities exist. Check with your municipality or ask your dealer for
advice. (Directive for Waste Electrical and Electronic Equipment) Si vous souhaitez vous débarrasser de cet appareil, pensez à le recycler
dans une décharge pour appareils ménagers électriques. Renseignez-
vous pour connaître votre centre de recyclage le plus proche. Informez-
vous auprès des autorités locales ou de votre revendeur pour de plus
amples détails. (Directive sur les Déchets des équipements électriques et
électroniques)
RCD 1150
RADIO/LECTEUR CD PORTABLE
FR
1. POIGNEE DE TRANSPORT
2. REGLAGE DU VOLUME
3. BOUTON FONCTIONS (AM - FM - CD)
4. ANTENNE TELESCOPIQUE
5. MOLETTE DE RECHERCHE DES STATIONS
6. PLAY/PAUSE (TOUCHE LECTURE/PAUSE CD)
7. / REV./ FWD. SKIP SEARCH (Piste précédente/suivante)
8. STOP (TOUCHE ARRET CD)
9. PLAY MODE/PROGRAM/CLOCK-ADJ.
(MODE LECTURE/PROGRAMME/RÉGLAGE HORLOGE)
10. ON/OFF (MARCHE/ARRÊT)
11. CD OPEN
(TOUCHE OUVERTURE DU COUVERCLE DU COMPARTIMENT DE CD)
12. COUVERCLE COMPARTIMENT DE CD
13. COUVERCLE DU COMPARTIMENT DE PILES
14. PRISE AC
15. HAUT-PARLEUR
16. POINTEUR DES STATIONS RADIOPHONIQUES
17. PHONES (PRISE CASQUE)
18. AFFICHAGE LCD
1. Mango
2. Control del volumen
3. Interruptor de función (AM - FM - CD)
4. Antena FM
5. Sintonizador de radio
6. PLAY/PAUSE (Reproducir/pausa CD)
7. / REV./ FWD. SKIP SEARCH (Revers./Avance SALTAR BÚSQUEDA)
8. STOP (CD Parada)
9. PLAY MODE/PROGRAM/CLOCK-ADJ. (MODO REPROD./PROGRAMAR/
RELOJ-AJU.)
10. ON/OFF (ENCENDIDO/APAGADO)
11. CD OPEN (Apertura del CD)
12. Compartimento del disco
13. Compartimento de las pilas
14. Entrada de alimentación de red (AC ~)
15. Altavoz
16. Dial de escala
17. Phones (Auricular toma)
18. Pantalla LCD
Este aparato funciona con una tensión de 230 V ~ 50 Hz or DC 9V (tamaño C /
UM-2 1,5V x 6)
FUNCIONAMIENTO CA
Conecte el cable de alimentación a la entrada de alimentación (AC ~) situada en la
partetrasera del aparato antes de conectar el otro extremo (enchufe) a una toma de
corriente.
ALIMENTACIÓN MEDIANTE PILAS
Abra el compartimento de las pilas situado en la parte posterior del aparato,introduzca
6 pilas del tipo D (no incluidas) respetando la polaridad (signos+ y -) y, a continuación,
cierre el compartimento.
Para cambiar el tipo de alimentación, de CA a alimentación mediante pilas,
desenchufe elcable de alimentación de la toma de pared y del aparato.
Sustitución de las pilas
Las pilas han de cambiarse cuando, durante el funcionamiento del aparato, el
volumen disminuya o el sonido se deforme.
Notas relativas a las pilas
• No mezcle pilas de diferentes tipos ni pilas nuevas con pilas usadas.
• No recargue, caliente ni desmonte nunca las pilas.
• No exponga las pilas a temperaturas demasiado altas, como las producidas por la
exposición al sol, al fuego, etc.
• A la hora de deshacerse de las pilas usadas, respete el medio ambiente.
NOTA: Si no va a utilizar el aparato durante un periodo de tiempo prolongado, retire
las pilas paraevitar que se vierta líquido del interior de las mismas.
1. Mettez le sélecteur de fonction (AM - FM - CD) sur AM ou FM.
2. Sélectionnez une station de radio et réglez le volume à votre convenance.
FM: Déployez et orientez l’antenne si le signal reçu est faible.
AM: Cet appareil est équipé d’une antenne directionnelle en ferrite. Orientez
l’appareil pour obtenir la meilleure qualité de réception des signaux.
3. Pour éteindre la radio, appuyez sur ON/OFF .
VOLUME
Réglez la molette du VOLUME +/- à votre convenance.
UTILISATION DES ÉCOUTEURS (non fournis)
Branchez des écouteurs stéréo avec une che mini-jack de 3,5 mm sur la prise
casque de l'appareil. Le haut-parleur se désactive automatiquement lorsque des
écouteurs sont branchés.
Remarque: Pour établir un niveau sonore sûr avec vos écouteurs: Commencez
avec un volume bas. Montez progressivement le son jusqu'à ce que le niveau soit
confortable et sans distorsion.
Tension de sortie maximale ≤150 mV
ALIMENTATION: AC: 230 ~ 50 Hz, 8W
DC: 9V 1.5V 6TYPE C / LR14 / UM2
DIMENSIONS DE L’APPAREIL: 265(W) x 157(H) x 82(D)
RADIO SECTION
GAMME DE FRÉQUENCES:
FM: 87.5 - 108 MHz
AM: 540 - 1600KHz
DISQUE COMPACT
TETE DE LECTURE LASER: LASER 3 FAISCEAUX
ATTENTION ! Cet appareil utilise un rayon laser. An d’éviter tout accident dû à
ce type de rayons, l’appareil ne peutêtre ouvert que par un technicien qualié.
L’appareil est conforme aux normes internationales de sécurité, aux directives de la
Communauté européenne, demême qu’aux normes actuelles de sécurité électrique
et de compatibilité électromagnétique CEM.
AVERTISSEMENT: POUR PRÉVENIR TOUT RISQUE D’INCENDIE OU DE CHOC
ÉLECTRIQUE, N’EXPOSEZ PAS CET APPAREIL À LA PLUIE OU À L’HUMIDITÉ.
ATTENTION: Radiations laser invisibles lorsque les dispositifs de sécurité sont
ouverts ou défectueux. Évitez toute exposition aux rayons. Appareil à laser de classe 1.
ATTENTION !
- Veillez à assurer une ventilation correcte de l’appareil et ne couvrez pas les orices
de ventilation avec des objets tels que journaux, nappes, rideaux, etc.
- Ne placez aucune source de chaleur, telle qu’une bougie allumée, sur ou à
proximité de l’appareil.
- Utilisez cet appareil sous un climat tempéré.
- N’exposez pas l’appareil à des éclaboussures ou à l’humidité.
- Veillez à respecter une distance minimale de 5 cm autour de votre appareil an de
permettre une ventilation sufsante.
- Ne déposez pas d’objets contenant un liquide, tels qu’un vase, sur ou à proximité
de l’appareil.
- La plaque signalétique se trouve à l’arrière de cet appareil.
- La che d’alimentation secteur permet de débrancher l’appareil et doit rester
facilement accessible. Pour couper complètement l’alimentation de l’appareil,
débranchez complètement la che d’alimentation secteur de la prise secteur.
La che d’alimentation secteur ne peut pas être entravée et doit être facilement
accessible durant l’utilisation.
- Sous l’effet de phénomènes électrostatiques et/ou électriques transitoires, le
produit peut présenter des dysfonctionnements et une réinitialisation peut s’avérer
nécessaire.
RCD 1150
LECTOR DE CD DE LA RADIO PORTABLE
ES
The exclamation point in the triangle is a warning sign alerting the user of
important instructions accompanying the product.
Le point d’exclamation à l’intérieur d’un triangle avertit l’utilisateur de la
présence d’importantes instructions dans le manuel accompagnant l’appareil.
RD-509N IB SOUN 001 REV3.indd 1 2015/6/1 10:24:33
ALIMENTACIÓN: AC: 230 ~ 50 Hz, 8W
DC: 9V 1.5V 6TYPE C / LR14 / UM2
DIMENSIONES DEL: 265(W) x 157(H) x 82(D)
RADIO
GAMA DE FRECUENCIAS
FM: 87.5 - 108 MHz
AM: 540 - 1600KHz
SECCIÓ N CD
LENTE Ó PTICA: TRES RAYOS LÁSER
ATENCIÓN: Este aparato lleva incorporado un rayo láser: a n de evitar cualquier
accidente debido a este tipo derayos, el aparato solo debe ser abierto por personal
cualicado.Este aparato está conforme a las normas internacionales de seguridad,
a las directivas de la Comunidad Europeay asimismo, a las normas actuales de
seguridad eléctrica y de compatibilidad electromagnética CEM.
RCD 1150
RADIO/LECTEUR CD PORTABLE
DE
RCD 1150
DRAAGBARE RADIO CD-SPELER
NL
Otras funciones de CD
Revers./Avance SALTAR BÚSQUEDA :
- Prensa para saltar a la pista siguiente o repetidamente para saltar varias pistas.
- Prensa al principio de la pista previa orepetidamente para saltar hacia atrás
varias pistas.
- Pulse y mantenga obuscar rápidamente dentro de una pista.
REPETIR REPRODUCCIÓN
Durante el modo de reproducción de CD, Una pista individual o todo un CD se
pueden repetir tantas veces como desee.
Pulse el botón PLAY MODE/PROGRAM/CLOCK-ADJ. una vez para repetir la pista
seleccionada. El indicador de repetición “REP” parpadeará.
Pulse el botón PLAY MODE/PROGRAM/CLOCK-ADJ. dos veces para repetir todo
el disco. El indicador “REP” se encenderá
Pulse el botón PLAY MODE/PROGRAM/CLOCK-ADJ. tres veces para una
reproducción combinada de discos. El indicador de repetición “MIX” se iluminará.
Para cancelar la reproducción REPETIDA
Pulse el botón PLAY MODE/PROGRAM/CLOCK-ADJ. repetidamente hasta que
indicador “ “REP” o “MIX” desaparezca de la pantalla. La función de repetición se
cancelará también cuando la tapa del alojamiento de CD esté abierta o la unidad
apagada.
MANTENIMIENTO
CARACTERÍSTICAS TÉCNICAS
LA REPRODUCCIÓN PROGRAMADA
Para establecer su propio programa musical cuando la unidad esté en estado de
parada (STOP).
1. Pulse el botón .
2. Pulse PLAY MODE / PROGRAM / CLOCK-ADJ., Pantalla LCD muestra "P01"
pocos segundos indicadores, y luego "PROG" y "00" comenzará a parpadear en
la pantalla LCD.
3. Seleccione con ola pista que desee; a continuación, pulse PLAY MODE /
PROGRAM / CLOCK-ADJ. para almacenar su programa en memoria.
4. Repita los pasos anteriores para programar más pistas. Se pueden programar
máximo 20 pistas en la memoria, en un orden especíco. Si la memoria está
llena, aparecerá en la pantalla el indicador “FU” (LLENA).
5. Pulse el botón PLAY/PAUSE para comenzar a reproducir el modo programa;
el icono “PROG.” & “►” y número de pista programada "XX" se mostrarán en
pantalla.
6. Pulse para deterner el disco. Vuelva a pulsarlo para cancelar las pistas
programadas y el icono “PROG.” se apagará; la pantalla se encenderá mostrando
el número de pistas.
AVISO IMPORTANTE
Entrada automática en el modo de espera
Nota: Con el objetivo de ahorrar energía, cuando la reproducción haya alcanzado
el nal y no se use ningún control en el dispositivo por un periodo de 15 minutos,
la unidad pasará al modo de espera automáticamente. Para volver a encender la
unidad, Pulse el botón ON/OFF.
PROGRAMMIERTES ABSPIELEN EINER CD (max. 20 Titel)
Das Gerät muss sich im CD-STOPP Modus benden.
1. Taste drücken
2. Die Taste PLAY MODE/PROGRAM/CLOCK-ADJ., drücken. “P01” erscheint im
Display für ein paar Sekunden und im Anschluss “PROG” und “00” beginnen zu
blinken.
3. Mit Tasten oder den gewünschten Titel anwählen und drücken Sie „ PLAY
MODE/PROGRAM/CLOCK-ADJ. “, um den Track zu speichern.
4. Wiederholen Sie die obigen Schritte, um weitere Titel zu programmieren. Es
können maximal 20 Titel. Wenn der Speicher voll ist, erscheint die Meldung “FU”
in der Anzeige.
5. Mit der Taste PLAY/PAUSE die Programmwiedergabe starten. die “PROG” &
“►” und “XX” -Anzeige zeigt auf dem Display,
6. Um das Programm zu löschen, drücken Sie zwei Mal die Taste STOP , die
“PROG”-Symbol erlischt, geht Anzeige wieder auf die Gesamtzahl der Tracks
zeigen.
WICHTIGER HINWEIS
Automatischer Bereitschaftsbetrieb
HINWEIS: Aus Energiespargründen aktiviert das Gerät automatisch den Standby-
Modus, wenn das Ende der Wiedergabe erreicht und 15 minuten lang keine Eingabe
am Gerät erfolgt. Um das Gerät wieder einzuschalten, Taste ON/OFF drücken.
GEPROGRAMMEERD AFSPELEN
Om uw eigen muziekprogramma te programmeren wanneer het apparaat op STOP
staat.
1. Druk op te drukken.
2. Druk op PLAY MODE / PROGRAM / CLOCK-ADJ., LCD-scherm "P01" indicator
enkele seconden, en dan "PROG" en "00" begint te knipperen op het LCD.
3. Selecteer de gewenste track met of en druk dan op PLAY MODE/PROGRAM/
CLOCK-ADJ. om het programma op te slaan in het geheugen. Doe dit zo vaak als
nodig is.
4. Herhaal de bovenstaande stappen om meer tracks te programmeren. Er kunnen bij het
gebruik van een CD maximaal 20 tracks worden geprogrammeerd in een gewenste
volgorde. Als het geheugen vol is, dan zal het scherm dit aangegeven met de melding
“FU”.
5. Druk op de PLAY/PAUSE toets om het programma af te spelen, “PROG.” & “►” en
het geprogrammeerde tracknummer “ XX ” worden op het display getoond.
6. Druk op om het afspelen te stoppen. Druk nogmaals om de geprogrammeerde tracks
te wissen en de “PROG.” indicatie zal uitgaan, het display zal weer het totale aantal
tracks weergeven.
BELANGRIJKE OPMERKING
Automatische standbymodus
Opmerking: Om energie te besparen zal het apparaat automatisch naar de standbymodus
schakelen wanneer het afspelen het eindpunt heeft bereikt of het volume is ingesteld
op een zeer laag niveau en het apparaat niet wordt gebruikt voor een periode van 15
minuten. U kunt de wekkerradio opnieuw inschakelen door de druk op de ON/OFF-knop.
Limpieza
ATENCIÓN: Desconecte este aparato de toda fuente de alimentación antes de
limpiarlo.
- Utilice un paño suave, limpio y seco. Limpie regularmente los oricios de ventilación
de la parte trasera del aparato y de los laterales.
- El uso de disolventes o productos abrasivos o a base de alcohol puede dañar el
aparato.
- Si un objeto o un líquido penetra en el aparato, desenchúfelo inmediatamente y
póngase en contacto con personal técnico cualicado.
Notas relativas a los disco
* No utilice discos con formas especiales (octogonales, en forma de corazón, etc.),
ya que podrían ocasionar un fallo en el funcionamiento del aparato.
* No introduzca más de un disco en el compartimento.
* No intente abrir el compartimento del disco durante la reproducción.
* No toque la lente del reproductor; si lo hace, podría producirse un fallo en el
funcionamiento del aparato.
* Un disco cuya supercie esté rayada, contenga polvo o huellas puede ocasionar
fallos en el funcionamiento del aparato. Antes de comenzar la reproducción, limpie
el disco con un paño limpio. Para ello, frótelo desde el centro hacia los bordes.
No guarde los discos en lugares con temperaturas elevadas o una humedad
considerable; podrían deformarse. Una vez que haya escuchado el disco, guárdelo
en su estuche.
Nota importante
Retire el disco del compartimento cuando transporte el aparato.
INSTRUCCIONES DE SEGURIDAD SICHERHEITSANWEISUNGEN
VEILIGHEIDSINSTRUCTIES
ATENCIÓN: Para reducir el riesgo de descarga eléctrica, no
desmonte el aparato. En el interior de este aparato no existe
ninguna pieza que pueda ser reparada por el usuario. Para
cualquier operación de mantenimiento y reparación, póngase
en contacto con personal técnico cualicado.
ACHTUNG: Um Elektroschockgefahr zu vermeiden, dürfen
Sie dieses Gerät nicht demontieren. Das Gerät enthält keine
Teile, die der Benutzer selbst reparieren kann. Vertrauen Sie
die Instandhaltung des Geräts einem Fachmann an.
OPGEPAST: Om het risico op elektrische schokken te
vermijden, mag u het toestel niet demonteren. Het toestel
bevat geen enkel onderdeel dat door de gebruiker zelf kan
gerepareerd worden. Contacteer altijd een gekwalificeerde
technieker indien een reparatie nodig is.
El símbolo del rayo con una echa dentro de un triángulo equilátero advierte
al usuario de la presencia de voltaje peligroso en el interior del aparato.
Das in einem Pfeil endende Blitzsymbol innerhalb eines Dreiecks weist den
Benutzer auf die Gegenwart einer „gefährlichen Spannung“ im Gerät hin.
Het symbool van een zwarte driehoek met daarin een witte bliksemschicht
eindigend in een driehoek, waarschuwt de gebruiker dat er een gevaarlijke
spanning aanwezig is in het toestel
Si desea deshacerse de este aparato, recuerde que ha de depositarlo en
un lugar destinado al reciclado de electrodomésticos. Infórmese acerca
del centro de reciclaje más cercano. Consulte a las autoridades locales
o a su proveedor para obtener más información al respecto. (Directiva de
Residuos de Aparatos Eléctricos y Electrónicos)
Wenn Sie dieses Gerät entsorgen möchten, denken Sie daran, es bei einer
Sammelstelle für elektrische Haushaltsgeräte zu entsorgen. Erkundigen
Sie sich nach Ihrer nächstgelegenen Wertstoffsammelstelle. Für detaillierte
Informationen wenden Sie sich an die örtlichen Behörden oder an Ihren
Händler. (Richtlinie über elektrische und elektronische Abfallgeräte).
Indien u dit toestel in de toekomst wilt weggooien, denk er dan aan om
het te recycleren via een inzamelpunt voor elektrische huishoudapparaten.
Informeer naar het dichtstbijzijnde recyclagecentrum. Voor meer informatie
wendt u zich tot de lokale overheden of uw verdeler (richtlijn met betrekking
tot Afval afkomstig van elektrische en elektronische apparaten).
ADVERTENCIA: PARA PREVENIR EL RIESGO DE INCENDIO O DE DESCARGA
ELÉCTRICA, NO EXPONGA ESTE APARATO A LA LLUVIA O A LA HUMEDAD.
WARNUNG: UM BRAND- UND ELEKTROSCHOCKGEFAHR VORZUBEUGEN,
DÜRFEN SIE DIESES GERÄT WEDER REGEN NOCH FEUCHTIGKEIT
AUSSETZEN.
WAARSCHUWING: STEL HET TOESTEL NIET BLOOT AAN VOCHT OF REGEN
OM HET RISICO OP BRAND OF ELEKTRISCHE SCHOKKEN TE VERMIJDEN.
ATENCIÓN: Radiación láser invisible en caso de apertura o fallo de los cierres de
seguridad. Evite la exposición al láser. Producto láser de clase 1.
ACHTUNG: Beim Umgehen der Sicherheitsvorrichtungen oder wenn diese defekt
sind, kann aus dem Gerät unsichtbare Laserstrahlung austreten. Vermeiden Sie jede
Exposition mit dem Laserstrahl. Lasergerät der Klasse 1.
OPGEPAST: Onzichtbare laserstralen wanneer het veiligheidsmechanisme open of
stuk is. Vermijd blootstelling aan stralen product van laserklasse 1.
ATENCIÓN
- Para asegurar una ventilación correcta del aparato, no cubra los oricios de
ventilación con objetos tales como periódicos, manteles, cortinas, etc.
- No coloque ninguna fuente de calor, como por ejemplo una vela encendida, sobre
el aparato o cerca de él.
- Utilice este aparato en lugares con climas templados.
- No exponga el aparato a salpicaduras o a la humedad.
- Deje libre alrededor del aparato una distancia mínima de 5 cm para garantizar una
correcta ventilación del mismo.
- No coloque objetos que contengan líquido, como un jarrón, encima del aparato.
- La placa de identicación se encuentra en la parte posterior del aparato.
- El acceso al enchufe ha de permanecer despejado. Para cortar por completo la
alimentación del aparato, desenchúfelo de la toma de corriente. Se ha de poder
acceder fácilmente al enchufe durante el uso del aparato; procure que el acceso
al mismo esté despejado.
- Como resultado de fenómenos electroestáticos y/o eléctricos transitorios, pueden
producirse fallos en el funcionamiento del producto. En estos casos, el usuario
deberá reiniciar el aparato desenchufándolo y volviéndolo a enchufar.
ACHTUNG
- Stellen Sie eine ausreichende Belüftung des Geräts sicher und behindern Sie die
Belüftungsöffnungen nicht mit Gegenständen wie z. B. Zeitungen, Tischdecken,
Vorhängen, usw.
- Stellen Sie keine Wärmequelle wie eine angezündete Kerze auf oder in der Nähe des
Geräts ab.
- Verwenden Sie dieses Gerät in klimatisch gemäßigter Umgebung.
- Setzen Sie das Gerät niemals Wasserspritzern oder Feuchtigkeit aus.
- Achten Sie auf einen Mindestabstand von 5 cm zu Ihrem Gerät, um eine ausreichende
Belüftung zu gewährleisten.
- Stellen Sie kein mit Wasser gefülltes Gefäß, wie z. B. Vasen, in der Nähe des Geräts ab.
- Das Typenschild bendet sich auf der Rückseite des Geräts.
- Mit dem Netzstecker kann das Gerät vom Netz getrennt werden, er muss daher leicht
zugänglich sein. Um das Gerät vollständig vom Netz zu trennen, trennen Sie den
Netzstecker komplett von der Netzsteckdose. Der Netzstecker darf nicht behindert
werden und muss während der Verwendung leicht zugänglich sein.
- Unter der Einwirkung von elektrostatischen und/oder elektrischen Phänomen kann das
Produkt Fehlfunktionen aufweisen. Ein Zurücksetzen auf die Werkseinstellungen kann
sich als notwendig erweisen.
- Eine zu hohe Lautstärke kann zu einem Gehörverlust führen.
OPGELET
- Zorg voor een juiste ventilatie van het toestel en bedek de ventilatie-openingen niet met
voorwerpen zoals dagbladen, tafellakens, gordijnen, enz.
- Plaats geen warmtebron, zoals een brandende kaars, op of in de buurt van het toestel.
- Gebruik dit toestel bij een gematigd klimaat.
- Stel het toestel niet bloot aan waterspatten of vochtigheid.
- Zorg voor een afstand van minimum 5 cm rondom uw toestel voor voldoende ventilatie.
- Plaats geen voorwerpen met vloeistof, zoals een vaas, op of in de buurt van het toestel.
- Het kenmerkenplaatje bevindt zich aan de achterkant van het toestel.
- Met de netspanningsstekker kan het toestel uitgetrokken worden, deze moet
dus gemakkelijk toegankelijk blijven. Om de voeding van het toestel volledig te
onderbreken dient u de voedingsstekker helemaal uit het stopcontact te trekken. De
netspanningsstekker mag niet verhinderd worden en moet gemakkelijk toegankelijk zijn
tijdens gebruik.
- Onder invloed van tijdelijke elektrostatische en/of elektrische verschijnselen kan het
product storingen ondervinden en kan een heropstart nodig blijken.
El signo de exclamación dentro de un triángulo equilátero advierte al
usuario de la presencia de importantes instrucciones de funcionamiento y
mantenimiento en el manual que acompaña al producto.
Das Ausrufezeichen im Inneren eines Dreiecks weist den Benutzer auf
wichtige Anweisungen hin, die sich in dem das Gerät begleitenden Handbuch
benden.
Het bovenstaande symbool (zwarte driehoek met daarin een wit
uitroepingsteken) waarschuwt de gebruiker dat er belangrijke
gebruiksaanwijzingen in verband met het gebruik en het onderhoud ter
beschikking zijn in de bijgeleverde handleiding.
BEDIENELEMENTE BESCHRIJVING VAN HET TOESTEL
1. TRAGEGRIFF
2. LAUTSTÄRKE
3. FUNKTIONSSCHALTER (AM - FM - CD)
4. UKW-FM TELESKOPANTENNE
5. SENDEREINSTELLUNG
6. PLAY/PAUSE (CD WIEDERGABE/PAUSE)
7. / REV./ FWD. SKIP SEARCH (TITELSPRUNG/-SUCHE CD)
8. STOP (CD STOPP)
9. PLAY MODE/PROGRAM/CLOCK-ADJ.
(WIEDERGABE MODUS/PROGRAM/UHRZEITEINSTELLUNG)
10. ON/OFF (EIN/AUS)
11. CD OPEN (CD-FACH ÖFFNEN)
12. CD FACH
13. BATTERIEFACH
14. NETZKABELANSCHLUSS
15. LAUTSPRECHER
16. SENDERFREQUENZSKALA
17. PHONES (KOPFHÖRERANSCHLUSS)
18. LCD-ANZEIGE
1. DRAAGHENDEL
2. VOLUMEREGELAAR
3. FUNCTIE-SCHAKELAAR (AM - FM - CD)
4. TELESCOPISCHE ANTENNE
5. AFSTEMREGELAAR
6. PLAY/PAUSE (CD AFSPELEN/PAUZE-TOETS)
7. / REV./ FWD. SKIP SEARCH (Track terug / vooruit)
8. STOP (CD STOPPEN-TOETS)
9. PLAYMODE/PROGRAM/CLOCK-ADJ.
(AFSPEELMODUS/PROGRAMMEREN/KLOK-INSTELLEN.)
10. ON/OFF (AAN/UIT)
11. CD OPEN (CD DEUR OPENEN-TOETS)
12. CD-DEUR
13. BATTERIJKLEP
14. NETSPANNINGAANSLUITING
15. LUIDSPREKER
16. AFSTEMSCHAAL
17. PHONES (HOOFDTELEFOONAANSLUITING)
18. LCD-SCHERM
STROMVERSORGUNG STROOMVOORZIENING
Dieses Gerät funktioniert im Netzbetrieb (230 V ~ 50 Hz) oder mit Batterien DC 9V
(Größe C / UM-2 1,5 V x 6)
Funktionsweise mit Netzstrom:
Das mitgelieferte Netzkabel an die Wechselstrom-Netzkabelbuchse auf der
Rückseite desGeräts anschließen, erst dann das andere Ende (Stecker) in eine
Netzsteckdose stecken.
Funktionsweise mit Batterien
Das Batteriefach auf der Rückseite des Geräts öffnen und 6 Batterien (Typ C)
(nicht mitgeliefert) unter Einhalten der Polungsskizze im Inneren des Batteriefachs
einlegen; dann das Fach wieder schließen. Um vom Netzstrom auf Batteriestrom
überzugehen, das Netzkabel von der Wandsteckdose.
Ersetzen der Batterien:
Die Batterien müssen ersetzt werden, wenn die Lautstärke des Geräts niedriger wird
oderwenn der Ton sich während des Betriebs des Geräts verformt.
Hinweise zu Batterien
• Verwenden Sie keine Batterien unterschiedlichen Typs oder gebrauchte und neue
Batterien gemeinsam.
• Alkalische Batterien nicht nachladen, erhitzen, auseinander nehmen.
• Batterien dürfen keinen starken Hitzequellen, wie zum Beispiel Sonnenlicht, Feuer
usw. ausgesetzt werden.
• Entsorgen Sie leere Batterien umweltgerecht.
HINWEIS: Um ein Ausießen der Batterien zu vermeiden, müssen die Batterien
immer aus dem Gerätentfernt werden, wenn dieses während längerer
Zeit nicht verwendet wird.
Dit toestel werkt op netspanning (230 V ~ 50 Hz) of op batterijen DC 9V (maat
C / UM-2 1,5V x 6)
Werking op netspanning:
Sluit de bijgeleverde netvoedingskabel aan op de voedingsingang AC ~ aan de
achterkant van het toestel voor u het andere uiteinde (stekker) aansluit op het
stopcontact.
Werking op batterijen
Open het compartiment voor batterijen aan de achterkant van het toestel en plaats
6 batterijen van het type C (niet bijgeleverd) volgens het polariteitsschema aan de
binnenkant van het compartiment. Sluit het vervolgens weer. Om van net voeding
over te gaan op batterijen, koppel de netvoedingskabel los van het stopcontact en
de CD-speler.
De batterij vervangen:
De batterijen moeten worden vervangen wanneer het volume afneemt of het geluid
vervormtwanneer het toestel speelt..
Opmerking met betrekking tot de batterijen
• Gebruik geen batterijen van verschillende types of nieuwe en gebruikte batterijen
tegelijkertijd.
• Herlaad, verwarm of demonteer de batterijen nooit.
• De batterijen mogen niet worden blootgesteld aan hittebronnen zoals zonlicht,
vuur, enz.
• Gelieve het milieu te respecteren wanneer u gebruikte batterijen weggooit.
OPMERKIN: Om te voorkomen dat de batterijen uitlopen, haal ze steeds uit het
toestel wanneer ditlange tijd niet gebruikt wordt.
Bevor Sie die Batterien entsorgen, konsultieren Sie Ihren Händler, da dieser
die Batterien zum Recyceln zurücknimmt. Raadpleeg voor u batterijen weggooit uw verkoper om te zien of hij ze
terugneemt omze te recycleren.
GERÄT EIN- / AUSSCHALTEN HET APPARAAT AAN/ UITZETTEN
UHRZEIT EINSTELLUNG INSTELLEN VAN DE TIJD
RADIOBETRIEB NAAR DE RADIO LUISTEREN
CD-BETRIEB LUISTEREN NAAR DE CD-SPELER
1. Stellen Sie den FUNCTION Schalter (AM - FM - CD) auf den CD, „--“Angezeigt.
2. Legen Sie die CD-Disc mit der bedruckten Seite nach oben in das CD-Fach ein
und schließen Sie die Abdeckung.
3. Nach ein paar Sekunden wird die Gesamtzahl der Titel in der Anzeige angezeigt.
4. Taste drücken um CD zu starten, Lautstärke mit Regler einstellen. das Symbol
“►” und titelnummer XX erscheint im Display.
1. Zet de FUNCTIE-schakelaar (AM-FM-CD) op de CD stand. Er wordt nu “--” getoond.
2. Plaats de CD disc met het label naar boven in het CD-compartiment en sluit de
CD-deur.
3. Na een paar seconden wordt het totaal aantal tracks op het display getoond.
4. Druk op “ ” om het afspelen te starten en pas het volumeniveau aan. “ ► ”
en tracknummer zal op de display verschijnen.
Anmerkung: Drücken Sie die Taste verwenden, um die Wiedergabe kurzfristig
zu unterbrechen. Das Symbol “►” blinkt. Um die Musik wieder normal
abzuspielen, drücken Sie noch einmal diese Taste .
5. Um CD zu komplett zu stoppen, Taste drücken.
WEITERE FUNKTIONEN DES CD PLAYERS
TITELSPRUNG UND SCHNELLES SUCHEN
- Drücken Sie einmal die Taste , um zum nächsten Titel zu gehen oder drücken
Sie mehrere Male, um mehrere Titel zu überspringen.
- Drücken Sie einmal auf die Taste , um zum Beginn des aktuellen Titels
zurückzukehrenoder drücken Sie mehrere Male, um zu den vorherigen Titeln
zurückzukehren.
- Halten Sie dieTaste oder gedrückt, um schnell eine Passage in einem Titel
zu nden.
WIEDERGABE MODUS
Während des CD Wiedergabemodus,
Ein Titel wiederholen: Taste PLAY MODE/PROGRAM/CLOCK-ADJ. 1x drücken.
„REP“ blinkt.
Alle Titel wiederholen: Taste PLAY MODE/PROGRAM/CLOCK-ADJ. 2x drücken.
„REP“ leuchtet auf.
Zufallswiedergabe: PLAY MODE/PROGRAM/CLOCK-ADJ. 3x drücken. „MIX“
leuchtet auf.
Abbrechen der Wiederholungsfunktion
Betätigen Sie die PLAY MODE/PROGRAM/CLOCK-ADJ. solange, bis die Anzeige
"REPEAT" und „ MIX“ erlischt. Die wiederholte Wiedergabe wird ebenfalls durch
Öffnen des CD-Fachs oder durch Ausschalten des Geräts beendet.
OPMERKING: Gebruik ook deze toets om de afspelende track tijdelijk te pauzeren en
“ PLAY ► ” zal knipperen. Druk nogmaals op “ ” om het afspelen te hervatten.
5. Druk op “ ” om met het luisteren naar de disc te stoppen.
OVERIGE CD-SPELERFUNCTIES
Track terug / vooruit :
- Druk op “ ” om vooruit naar de volgende track te springen of druk herhaaldelijk om
meerdere tracks over te slaan.
- Druk op “ ” om naar het begin van de track te springen of druk herhaaldelijk om
meerdere tracks achteruit over te slaan.
- Druk op en houd “ ” of “ ” ingedrukt om snel binnen een track te zoeken.
HERHALEN
Tijdens het afspelen van een CD-modus, U kunt een enkel nummer of de gehele CD
zo vaak als u wilt herhalen.
Druk eenmaal op de knop PLAY MODE/PROGRAM/CLOCK-ADJ. om de
geselecteerde track te herhalen. De herhaalindicator ”REP” knippert.
Druk tweemaal op de knop PLAY MODE/PROGRAM/CLOCK-ADJ. om de gehele CD
te herhalen. De herhaalindicator ”REP” licht op.
Druk driemaal op de knop PLAY MODE/PROGRAM/CLOCK-ADJ. om de tracks te
mixen. De herhaalindicator ”MIX” gaat branden.
Om het HERHALEN te stoppen
Druk herhaaldelijk op de knop PLAY MODE/PROGRAM/CLOCK-ADJ. tot “REP” of
“MIX” van het display verdwijnt. De herhaalfunctie wordt ook geannuleerd wanneer de
CD-deur wordt geopend of het apparaat wordt uitgeschakeld.
Drücken Sie die ON/OFF Taste, um das Gerät einzuschalten
Stellen Sie den FUNCTION Schalter (AM - FM - CD) auf den gewünschten Modi CD ,
RADIO (AM-FM)
Drücken Sie die ON/OFF Taste, um das Gerät wieder auszuschalten. „OFF“ Indikator
erscheint kurz im Display gefolgt von der aktuellen Uhrzeit.
Druk op de ON / OFF-knop om het apparaat aan te zetten.
Schuif de FUNCTIE-schakelaar (AM-FM-CD) op de audio-modus tussen CD en radio
(AM-FM) te selecteren.
Druk nogmaals op de ON / OFF-knop om het apparaat uit te schakelen. "OFF" indicator
zal op het display worden weergegeven en hervat dan de huidige tijd.
1. Halten Sie im Standby-Modus PLAY MODE/PROGRAM/CLOCK-ADJ. für 2
Sekunden gedrückt., “24H” oder “12H ” blinkt im Display.
2. Mit der Taste oder 12 oder 24 Stundenformat anwählen.
3. Drücken Sie erneut die PLAY MODE/PROGRAM/CLOCK-ADJ. Taste, um die
Stunden einzustellen. Mit der Taste oder die Stunden einstellen.
4. Drücken Sie erneut die PLAY MODE/PROGRAM/CLOCK-ADJ. Taste, um die
Minuten einzustellen. Mit der Taste oder die Minuten einstellen.
5. Bestätigen Sie die Einstellung indem Sie die PLAY MODE/PROGRAM/CLOCK-ADJ.
Taste drücken.
Hinweis: ":" blinkt einmal pro Sekunde, wenn die Uhrzeitanzeige läuft. Wenn das
12-Stunden-Format eingestellt wurde, erscheint zudem das PM-Symbol bei
Tageszeit am Nachmittag und am Abend.
1. Houd in de standby-modus de knop PLAY MODE/PROGRAM/CLOCK-ADJ. 2
seconden ingedrukt , “24H” of “12H ” knippert nu op het scherm.
2. Druk op de of knop om 12 of 24 uurs weergave te kiezen.
3. Druk nogmaals op de PLAY MODE/PROGRAM/CLOCK-ADJ. knop, de uurweergave
cijfers knipperen nu. Druk op de of knop om het uur in te stellen.
4. Druk nogmaals op de PLAY MODE/PROGRAM/CLOCK-ADJ. knop om te bevestigen.
De minutenweergave cijfers knipperen nu. Druk op de of knop om de minuten
in te stellen.
5. Druk nogmaals op de PLAY MODE/PROGRAM/CLOCK-ADJ. knop om het instellen
van de tijd af te ronden.
Opmerking: “:” knippert elke seconde wanneer de tijd loopt, bij een 12-uurs instelling
wordt de PM aanduiding gebruikt voor de middagtijd.
1. Die Teleskopantenne für UKW vollständig ausziehen. (MW-Ferritantenne ist im Gerät
eingebaut).
2. Stellen Sie den FUNCTION Schalter (AM - FM - CD) auf Pos. FM-UKW oder AM-MW.
3. Mit den TUNING Regler die Senderfrequenz und mit VOLUME Regler die Lautstärke
einstellen.
4. Radiobetrieb beenden: Die Taste ON/OFF drücken.
VOLUME - LAUTSTÄRKE
Mit der VOLUME +/- Taste passen Sie die gewünschte Lautstärke an.
VERWENDEN DER KOPFHÖRERSTECKBUCHSE (KOPFHÖRER NICHT
MITGELIEFERT)
Schließen Sie einen Stereokopfhörer mit einem 3,5-mm-Mini-Stecker an den
Kopfhöreranschluss des Geräts. Die Lautsprecherausgabe wird automatisch
unterbunden, wenn Kopfhörer angeschlossen sind.Hinweis: Zum Einstellen der
Lautstärke auf einen bequemen Hörpegel beim Gebrauch von Kopfhörern, sollten Sie
mit einer niedrigen Lautstärke beginnen. Steigern Sie die Lautstärke dann allmählich,
bis Sie einen klaren und bequemen, unverzerrten Ton erhalten.
Maximale Ausgangsspannung ≤ 150 mV
1. Zet de FUNCTIE-schakelaar (AM-FM-CD) in de AM of FM stand.
2. Selecteer uw radiostation en pas het volumeniveau aan.
FM: Trek de antenne uit en draai het wanneer het ontvangst van het signaal zwak is.
AM: Dit apparaat is uitgerust met een ingebouwde directionele ferrietantenne. Draai
het toestel om de beste ontvangstpositie te krijgen.
3. Om met het luisteren naar de radio te stoppen, druk op de ON/OFF knop om de
radio uit te zetten.
VOLUME
Draai de VOLUME +/- regelaar om het geluid op een aangenaam niveau in te stellen.
GEBRUIK VAN EEN HOOFDTELEFOON (Hoofdtelefoon niet mee geleverd)
Sluit een stereo hoofdtelefoon met een 3,5mm mini jackplug aan op de
hoofdtelefoonaansluiting van het apparaat. De speaker wordt automatisch
uitgeschakeld wanneer de hoofdtelefoon gebruikt wordt.
Let op: Om het geluidsniveau van de hoofdtelefoon veilig te houden begint u met het
volume op een lage stand. Zet het geluid langzaam harder tot het voor u aangenaam
is en u het geluid duidelijk en zonder vervorming kunt horen.
Maximale uitgangsspanning ≤150 mV
Um mögliche Gehörschäden zu vermeiden, sollten Sie nicht über längere
Zeit bei hohen Lautstärken Musik hören.
Luister niet voor lange perioden op hoog volume om mogelijke
gehoorschade te voorkomen.
WARTUNG ONDERHOUD
TECHNISCHE DATEN TECHNISCHE KENMERKEN
Reinigung
ACHTUNG: Entfernen Sie alle Geräte von den vorhandenen Stromquellen,
bevor Sie das Gerät reinigen.
• Verwenden Sie ein weiches, trockenes und sauberes Tuch. Entfernen Sie
regelmäßig den Staub von den Lüftungsöffnungen hinten und an den Seiten.
• Die Verwendung von Lösungsmitteln, scharfen Reinigungsmitteln oder
alkoholhaltigen Reinigungsmitteln kann das Gerät beschädigen.
• Wenn ein Gegenstand oder eine Flüssigkeit in das Gerät gelangt, ziehen Sie sofort
den Netzstecker und lassen Sie das Gerät von einem zugelassenen Fachmann
prüfen.
HINWEISE ZU DEN DISKS
* Verwenden Sie keine CDs mit speziellen Formen (achteckige, herzförmige CDs...),
die Störungen des Gerätes hervorrufen könnten.
* Legen Sie nicht mehr als eine Disk in das CD-Fach ein.
* Versuchen Sie nicht, das CD-Fach während der Wiedergabe zu öffnen.
* Berühren Sie nicht die Linse, denn dadurch könnten Störungen des Gerätes
hervorgerufen werden.
* Eine CD, die Kratzer, Staub oder Fingerspuren aufweist, kann Störungen
verursachen. Nach dem Abspielen, reinigen Sie die CD mit einem Tuch. Reinigen
Sie die CD immer von innen nach außen. Räumen Sie CDs nicht an zu heißen
oder nassen Stellen auf, damit sie nicht verformt werden. Räumen Sie Ihre CDs
nach dem Abspielen in der zugehörigen Hülle auf.
Wichtiger Hinweis
Vor dem Transport des Geräts die eventuell vorhandene Disc herausnehmen.
OPGEPAST: Koppel het toestel los van elke voedingsbron vooraleer het schoon
te maken.
- Gebruik een propere, zachte, droge doek. Stof de verluchtingsopeningen aan de
achterzijde of zijkanten van het toestel regelmatig af.
- Het gebruik van solventen of bijtende middelen op basis van alcohol kan het toestel
beschadigen.
- Als een object of een vloeistof in het toestel loopt, koppel het dan meteen los en laat het
nakijken door een gekwaliceerd technieker.
Opmerkingen ivm disks
* Gebruik geen disks met een speciale vorm (achthoek, hartvorm, enz.) die het toestel
slecht zou doen werken.
* Plaats maar 1 disk in het compartiment.
* Open het compartiment niet tijdens de weergave.
* Raak de lens niet aan om disfunctie van het toestel te vermijden.
* Een disk met krassen, stof of vingerafdrukken kan slecht werken. Gebruik een zachte,
droge doek om de disk schoon te maken, vooraleer de disk weer te geven. Doe dit
van het midden uit naar de zijkanten toe. Plaats de disks nooit bloot aan vochtigheid
of extreme temperaturen om ze niet te vervormen. Plaats uw disks na de weergave
opnieuw in hun doosjes.
Belangrijke opmerking
Haal de disk uit het compartiment als het toestel vervoerd moet worden.
STROMVERSORGUNG: AC: 230 ~ 50 Hz, 8W
DC: 9V 1.5V 6TYPE C / LR14 / UM2
AUSMAßE DES GERÄTES: 265(W) x 157(H) x 82(D)
RADIO
UKW-Frequenz: 87.5 - 108 MHz
MW-Frequenz: 540 - 1600KHz
COMPACT DISC
OPTISCHER SENSOR: SENSOR MIT DREI LASERBÜNDELN
ACHTUNG! Dieses Gerät funktioniert mit einem Laserstrahl. Um einen
Unfall mit dieser Art von Strahl zuvermeiden, darf das Gerät nur von einem
qualizierten Techniker geöffnet werden. Das Gerät entspricht den internationalen
Sicherheitsnormen, den Richtlinien der Europäischen Union sowie deneinschlägigen
Normen für Sicherheit und elektromagnetische Verträglichkeit (EMV).
VOEDING: AC: 230 ~ 50 Hz, 8W
DC: 9V 1.5V 6TYPE C / LR14 / UM2
AFMETINGEN VAN HET TOESTEL: 265(W) x 157(H) x 82(D)
RADIO
FREQUENTIEBEREIK:
FM / FREQUENTIEMODULATIE: 87.5 - 108 MHz
AM / AMPLITUDEMODULATIE: 540 - 1600KHz
COMPACT DISKOPTISCHE SENSOR:
SENSOR MET DRIE LASERSTRALEN
LET OP! Dit toestel maakt gebruik van een laserstraal. Om ongevallen te wijten aan
dit type van stralen tevoorkomen, mag het toestel alleen door een bevoegd technicus
worden geopend.Het toestel voldoet aan de internationale veiligheidsnormen,
de richtlijnen van de Europese Gemeenschap en degeldende normen inzake
elektrische veiligheid en elektromagnetische compatibiliteit (EMC).
RD-509N IB SOUN 001 REV3.indd 2 2015/6/1 10:24:36
Other SOUNDMASTER CD Player manuals

SOUNDMASTER CD9220 User manual

SOUNDMASTER

SOUNDMASTER CD9220 User manual

SOUNDMASTER CD-9135MP3 User manual

SOUNDMASTER

SOUNDMASTER CD-9135MP3 User manual

SOUNDMASTER CD9290 User manual

SOUNDMASTER

SOUNDMASTER CD9290 User manual

SOUNDMASTER SCD5950SW User manual

SOUNDMASTER

SOUNDMASTER SCD5950SW User manual

SOUNDMASTER RCD1770 User manual

SOUNDMASTER

SOUNDMASTER RCD1770 User manual

SOUNDMASTER SCD2350 User manual

SOUNDMASTER

SOUNDMASTER SCD2350 User manual

SOUNDMASTER SCD 5850MP3 User manual

SOUNDMASTER

SOUNDMASTER SCD 5850MP3 User manual

SOUNDMASTER RCD1750SI User manual

SOUNDMASTER

SOUNDMASTER RCD1750SI User manual

SOUNDMASTER SCD1960 User manual

SOUNDMASTER

SOUNDMASTER SCD1960 User manual

SOUNDMASTER SCD1500 User manual

SOUNDMASTER

SOUNDMASTER SCD1500 User manual

SOUNDMASTER CD9180 User manual

SOUNDMASTER

SOUNDMASTER CD9180 User manual

SOUNDMASTER SCD5410 User manual

SOUNDMASTER

SOUNDMASTER SCD5410 User manual

SOUNDMASTER SCD-6300MP3 User manual

SOUNDMASTER

SOUNDMASTER SCD-6300MP3 User manual

SOUNDMASTER RCD5000 User manual

SOUNDMASTER

SOUNDMASTER RCD5000 User manual

SOUNDMASTER MCD7950 User manual

SOUNDMASTER

SOUNDMASTER MCD7950 User manual

SOUNDMASTER KCD1600 User manual

SOUNDMASTER

SOUNDMASTER KCD1600 User manual

SOUNDMASTER NR-980CD User manual

SOUNDMASTER

SOUNDMASTER NR-980CD User manual

SOUNDMASTER SCD8000 User manual

SOUNDMASTER

SOUNDMASTER SCD8000 User manual

SOUNDMASTER SCD 2400 User manual

SOUNDMASTER

SOUNDMASTER SCD 2400 User manual

SOUNDMASTER CD9250 User manual

SOUNDMASTER

SOUNDMASTER CD9250 User manual

SOUNDMASTER SCD-3700 User manual

SOUNDMASTER

SOUNDMASTER SCD-3700 User manual

SOUNDMASTER SCD-5500 User manual

SOUNDMASTER

SOUNDMASTER SCD-5500 User manual

SOUNDMASTER SCD3550 User manual

SOUNDMASTER

SOUNDMASTER SCD3550 User manual

SOUNDMASTER SCD 6600 User manual

SOUNDMASTER

SOUNDMASTER SCD 6600 User manual

Popular CD Player manuals by other brands

Sony CDX-CA650X - Fm/am Compact Disc Player Installation/connections

Sony

Sony CDX-CA650X - Fm/am Compact Disc Player Installation/connections

Philips AZ1627 Service manual

Philips

Philips AZ1627 Service manual

Marantz CD5001 user guide

Marantz

Marantz CD5001 user guide

Sony CFD-E70L operating instructions

Sony

Sony CFD-E70L operating instructions

Sanyo MCD-XP400 instruction manual

Sanyo

Sanyo MCD-XP400 instruction manual

Seg RR 1103 instruction manual

Seg

Seg RR 1103 instruction manual

Philips AZ 8110 Operating instuctions

Philips

Philips AZ 8110 Operating instuctions

Kenwood KDC-C603 instruction manual

Kenwood

Kenwood KDC-C603 instruction manual

Aiwa XP-V511 operating instructions

Aiwa

Aiwa XP-V511 operating instructions

LG LPD103 manual

LG

LG LPD103 manual

Lenoxx CD-857 operating instructions

Lenoxx

Lenoxx CD-857 operating instructions

Philips AZ 7474 Instructions for use

Philips

Philips AZ 7474 Instructions for use

Sony CDX-L300 Installation/Connection Installation/connections

Sony

Sony CDX-L300 Installation/Connection Installation/connections

Proline RCD210 instruction manual

Proline

Proline RCD210 instruction manual

Grundig CDP 75 operating manual

Grundig

Grundig CDP 75 operating manual

Sharp QT-CD5H Bedienungsanleitung

Sharp

Sharp QT-CD5H Bedienungsanleitung

Denon DCD-2560 Service manual

Denon

Denon DCD-2560 Service manual

Philips AZ1045/05 user manual

Philips

Philips AZ1045/05 user manual

manuals.online logo
manuals.online logoBrands
  • About & Mission
  • Contact us
  • Privacy Policy
  • Terms and Conditions

Copyright 2025 Manuals.Online. All Rights Reserved.