Source SEM-IP20 TW SP User manual

Installation &
Self Test Instructions
EMERGENCY TWIN SPOT
PRODUCT CODE: SEM-IP20 TW SP
Quality
Assurance
years
Unit 7/8 Ashbourne Business Centre, Ballybin Road, Ashbourne, Co. Meath, Ireland, A84 YP58,
Phone: 00353 1 835 7447
Unit 32 Junction One Business Park, Valley Road, Birkenhead, Merseyside, UK, CH41 7ED,
UK Ph: 0330 551 7000
Website: www.sgd.ie
For more information contact:
IP65
COMPLIANT
Product end of life instruction.
This Lighting product is in the scope of EU 2019/2020 directive on Waste Electrical and Electronic Equipment
(WEEE). This product must be disposed according to the legislation. This document is intended for use by
end of life recyclers or treatment facilities. It provides the basic information to assure an appropriate end of life
treatment for the components and materials of the product.
Please follow pictured diagram on the back of this manual showing how to dismantle the product into dierent
components which should be disposed of correctly. These components consist of plastic, metal and electronic
materials. It is the responsibility of the end user to dispose of this product correctly. Contact www.weeeireland.ie
or your local council for further information.
DISASSEMBLY INSTRUCTIONS
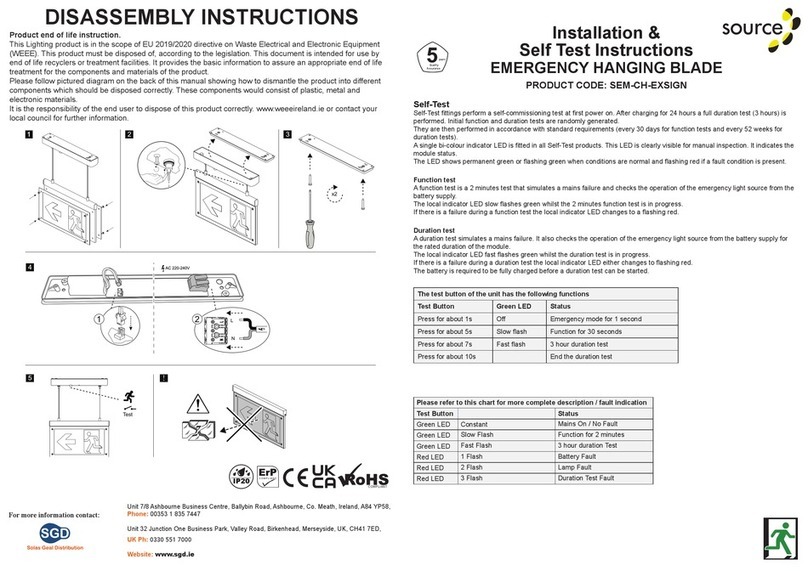
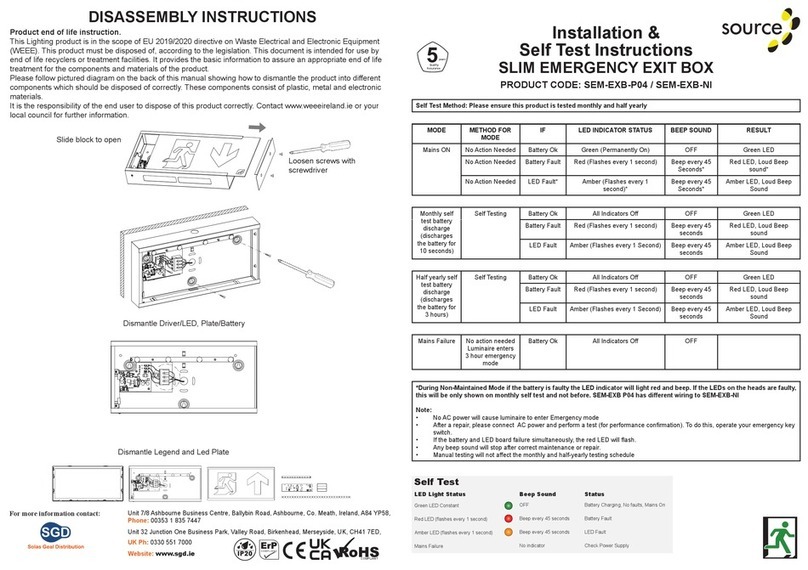
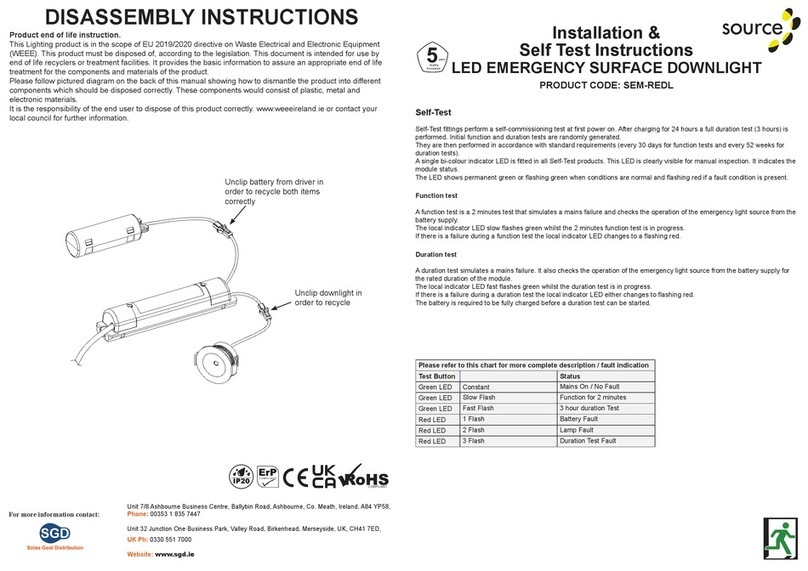
Please refer to this chart for more complete description / fault indication
Test Button Status
Green LED Constant Mains On / No Fault
Green LED Slow Flash Function for 2 minutes
Green LED Fast Flash 3 hour duration Test
Red LED 1 Flash Battery Fault
Red LED 2 Flash Lamp Fault
Red LED 3 Flash Duration Test Fault
Self-Test
Self-Test ttings perform a self-commissioning test at rst power on. After charging for 24 hours a full duration test (3 hours) is
performed. Initial function and duration tests are randomly generated.
They are then performed in accordance with standard requirements (every 30 days for function tests and every 52 weeks for
duration tests).
A single bi-colour indicator LED is tted in all Self-Test products. This LED is clearly visible for manual inspection. It indicates the
module status.
The LED shows permanent green or ashing green when conditions are normal and ashing red if a fault condition is present.
Function test
A function test is a 2 minutes test that simulates a mains failure and checks the operation of the emergency light source from the
battery supply.
The local indicator LED slow ashes green whilst the 2 minutes function test is in progress.
If there is a failure during a function test the local indicator LED changes to a ashing red.
Duration test
A duration test simulates a mains failure. It also checks the operation of the emergency light source from the battery supply for
the rated duration of the module.
The local indicator LED fast ashes green whilst the duration test is in progress.
If there is a failure during a duration test the local indicator LED either changes to ashing red.
The battery is required to be fully charged before a duration test can be started.
The test button of the unit has the following functions
Test Button Green LED Status
Press for about 1s O Emergency mode for 1 second
Press for about 5s Slow ash Function for 30 seconds
Press for about 7s Fast ash 3 hour duration test
Press for about 10s End the duration test

General Instructions
These instructions should be read carefully and retained after installation by the end user for future reference
and maintenance These instructions should be used to aid installation of the product
Safety Instructions
• Installation of this luminaire should only be carried out by a qualied electrician or competent person
to the latest Building and current IEE Wiring Regulations
(BS7671)
• Recommended routine test procedures are in line with BS
5266 & BS EN 50172 & I.S3217:2013-A1:2017
• Please isolate mains prior to installation/maintenance
• Check the total load on the circuit (including when this
luminaire is tted) does not exceed the rating of the circuit
cable, fuse or circuit breaker
• Please note the IP (Ingress of Protection) rating of this
luminaire when deciding the location for installation
• Installing in areas where the temperature consistently drops
below 0°C may shorten the battery life
• We recommend a minimum charge period of 24 hours before doing an emergency duration test
• This product is Class II, double insulated
• This product is non-dimmable
• This product is IP20 rated
Installation
• Remove the centre front screw, push near
locking tabs to clear and remove the front
cover.
• Open your selected cable entry and feed
mains cable through.
• Connect the cables to the terminal block as
shown in the diagram. Connect the mains
supply to the PERMANENT LIVE (L) and
NEUTRAL (N) connections.
• Connect the battery
• Ret the cover.
• Ret the screw back into the front cover to secure.
• Reconnect the mains supply.
General
The LED lamps tted in this product are non-
replaceable. The unit should be recycled in the
correct manner when it reaches the end of its life.
If the batteries have been left in a discharged
state for a period of time, we recommend that
several charge and discharge cycles must be
preformed to restore the battery to it full capacity.
The batteries in this tting are 3.2V LiFePO4
battery and must be disposed of correctly.
Clean with a soft dry cloth only, do not use
agressive cleaning products or solvents which
may damage the tting.
Warning
This product has a warranty of 5 years (excluding battery) from date of purchase. Failure to install this product
in accordance with the current edition of the IEE Wiring Regulations, improper use, or removal of the batch
codes will invalidate the warranty. If this product should fail within its warranty period it should be returned to
the place of purchase for a free of charge replacement. SGD does not accept responsibility for any installation
costs associated with the replacement product. Your statutory rights are not aected. SGD reserve the right to
alter product specication without prior notice.
Specication
Series: (Non-maintained) 220-240 V AC 50Hz
Input: 3.2V LiFePO4 battery IP20
Emergency Battery Duration: 3 Hours
Colour Temperature 6000K
Ingress Protection: IP20
Operating Temperature 0°C to +30°C
Wattage: 2 x 3W
Protection Class CLASS II
Testing & Commissioning
• Ensure the power is connected.
• Connect the battery
• Switch on the unswitched supply - check the charge LED illuminates
• Use the test button to test the emergency operation.
• All Emergency lighting tests must be logged. The Emergency lighting logbook must be provided in order to
be covered by any warranties.
Manby Business Park, Manby, Lincolnshire
R1.1 20012021 241840
Typical Wiring Diagram:
�Ensure the power is connected.
�Connect the
�
�
Name: Tel:
Luminaire Details:- Lamp Type—LED
ROUTINE TEST RECORD
Year 1 Year 2 Year 3 Year 4 Year 5
Monthly Test Date Date Date Date Date
Three Hour
BATTERY
BATTERY CHARGER
BATTERY CONNECTION
MAINS INPUT
CONNECTION
TEST BUTTON
CHARGE LED
These instructions should be read carefully and retained after installation by the end user for future
reference and maintenance.
These instructions should be used to aid installation of the following product:
EMTWINPC
GENERAL INSTRUCTIONS
SAFETY
INSTALLATION
• Installation of this luminaire should only be carried out by a qualified electrician or competent
person to the latest Building and current IEE Wiring Regulations (BS7671)
• Please isolate mains prior to installation/maintenance
• Check the total load on the circuit (including when this luminaire is fitted) does not exceed the
rating of the circuit cable, fuse or circuit breaker
• Please note the IP (Ingress of Protection) rating of this luminaire when deciding the location for
installation
• Installing in areas where the temperature consistently drops below 0°C may shorten the battery life
• We recommend a minimum charge period of 24 hours before doing an emergency duration test
• This product is Class II, double insulated
• This product is non-dimmable
• This product is IP20 rated
• Connect the luminaire to the mains supply (via the terminal connector) ensuring the correct polarity
is observed (see Fig 2). Live (brown), Neutral (blue) and Earth (green and yellow). Note that the earth
on this PCB is non-functional.
• Connect the battery to the battery connector on the PCB (see Fig 2)
• Replace the front cover on the luminaire
• Switch on power supply and ensure the green LED indicator is illuminated
• The test button can be pressed to ensure the luminaire comes on (note this will only work when the
battery holds at least a small charge)
The LED lamps fitted in this product are non-replaceable. The unit should be recycled in the correct
manner when it reaches the end of its life. Check local authorities for where facilities exist.
If the batteries have been left in a discharged state for any period of time, we recommend that several
charge and discharge cycles be performed to restore the battery to its full capacity.The batteries in this
fitting are Nickel Cadmium and must be disposed of correctly.
Please contact the local authorities for the disposal of this toxic waste.
Clean with a soft dry cloth only, do not use aggressive cleaning products or solvents which may damage
the fitting.
• Provide power to the required point of installation. Suitable IP rated junction boxes should be used
where required
• With the aid of a slotted screwdriver remove the front cover to access the terminal block (See Fig 1)
• Feed the power cable into the luminaire and secure to required surface
This product has a warranty of 3 years (excluding battery) from date of purchase. Failure to install
this product in accordance with the current edition of the IEE Wiring Regulations, improper use,
or removal of the batch codes will invalidate the warranty. If this product should fail within its
warranty period it should be returned to the place of purchase for a free of charge replacement. ML
Accessories does not accept responsibility for any installation costs associated with the replacement
product. Your statutory rights are not affected. ML Accessories reserve the right to alter product
specification without prior notice.
Fig 1
Fig 2
WARNING
GENERAL
Use slotted
screwdriver here
Fig2
•ConnectthebatterytothebatteryconnectoronthePCB(seeFig2)
•Placethefrontcoverbackontotheluminaire.
•SwitchonpowersupplyandensurethatthegreenLEDindicatorisilluminated
•Thetestbuttoncanbepressedtoensurethattheluminairecomeson(notethatthiswillonlyworkwhenthe
batteryholdsasmallamountofcharge)
GENERAL
TheLEDlampsfittedinthisproductarenonreplaceable.Theunitshouldberecycledinthecorrectmannerwhenit
reachestheendofitslife.Checklocalauthoritiesforwherefacilitiesexist.
Ifthebatterieshavebeenleftinadischargedstateforlongperiodoftime,werecommendthatoneormorechargeand
dischargecyclesarerequired.Thisshouldrestorethebatterytoitsfullcapacity.
ThebatteriesinthisfittingareNickelCadmiumandmustbedisposedofcorrectly.Pleasecontactthelocalauthoritiesfor
thedisposalofthistoxicwaste.
Cleanwithasoftdryclothonly,donotuseaggressivecleaningproductsorsolventswhichmaydamagethefitting.
Warranty
Thisproducthasawarrantyof3years(excludingbattery)fromdateofpurchase.Failuretoinstallthisproductin
accordancewiththecurrenteditionoftheIEEWiringRegulations,improperuse,orremovalofthebatchcodeswill
invalidatethewarranty.Ifthisproductshouldfailwithinitswarrantyperioditshouldbereturnedtotheplaceofpurchase
forafreeofchargereplacement.MLAccessoriesdoesnotacceptresponsibilityforanyinstallationcostsassociatedwith
thereplacementproduct.Yourstatutoryrightsarenotaffected.MLAccessoriesreservetherighttoalterproduct
specificationwithoutpriornotice.
N
Test
button
L
Battery
connector
E
Neutral(blue)
Earth(Greenandyellow)
(blue)
Live(brown)
LED
indicator
Earth (green and yellow)

Declaration Number:
101-SEM IP20 TW SP
This declaration of conformity is issued under the sole responsibility of the manufacturer.
Products:
Emergency led Twin spot IP20 (2X 3Watt) 6500k LifePO4 Non-Maintained
Model Number:
SEM IP20 TW SP
The product/model of the declaration described above is in conformity with the relevant
Community harmonisation legislation:
Low Voltage Directive (2014/35/EU)
EMC (2014/30/EU)
The product/model of the declaration described above is in conformity with the standards
and technical specifications listed below:
EN60598-1:2008+A11:2009, EN60598-2-22:1998+A1:2003+A2:2008, EN55015:2013,
EN61000-3-2:2014, EN6100-3-3:2013, EN61547:2009
Signed 19/10/2022
Other Source Lighting Equipment manuals
