Table of Contents
1.0 Introduction
1.1 Models 1
1.2 Manual Organization
2.0 Safety
2.1 Safety Publications 2
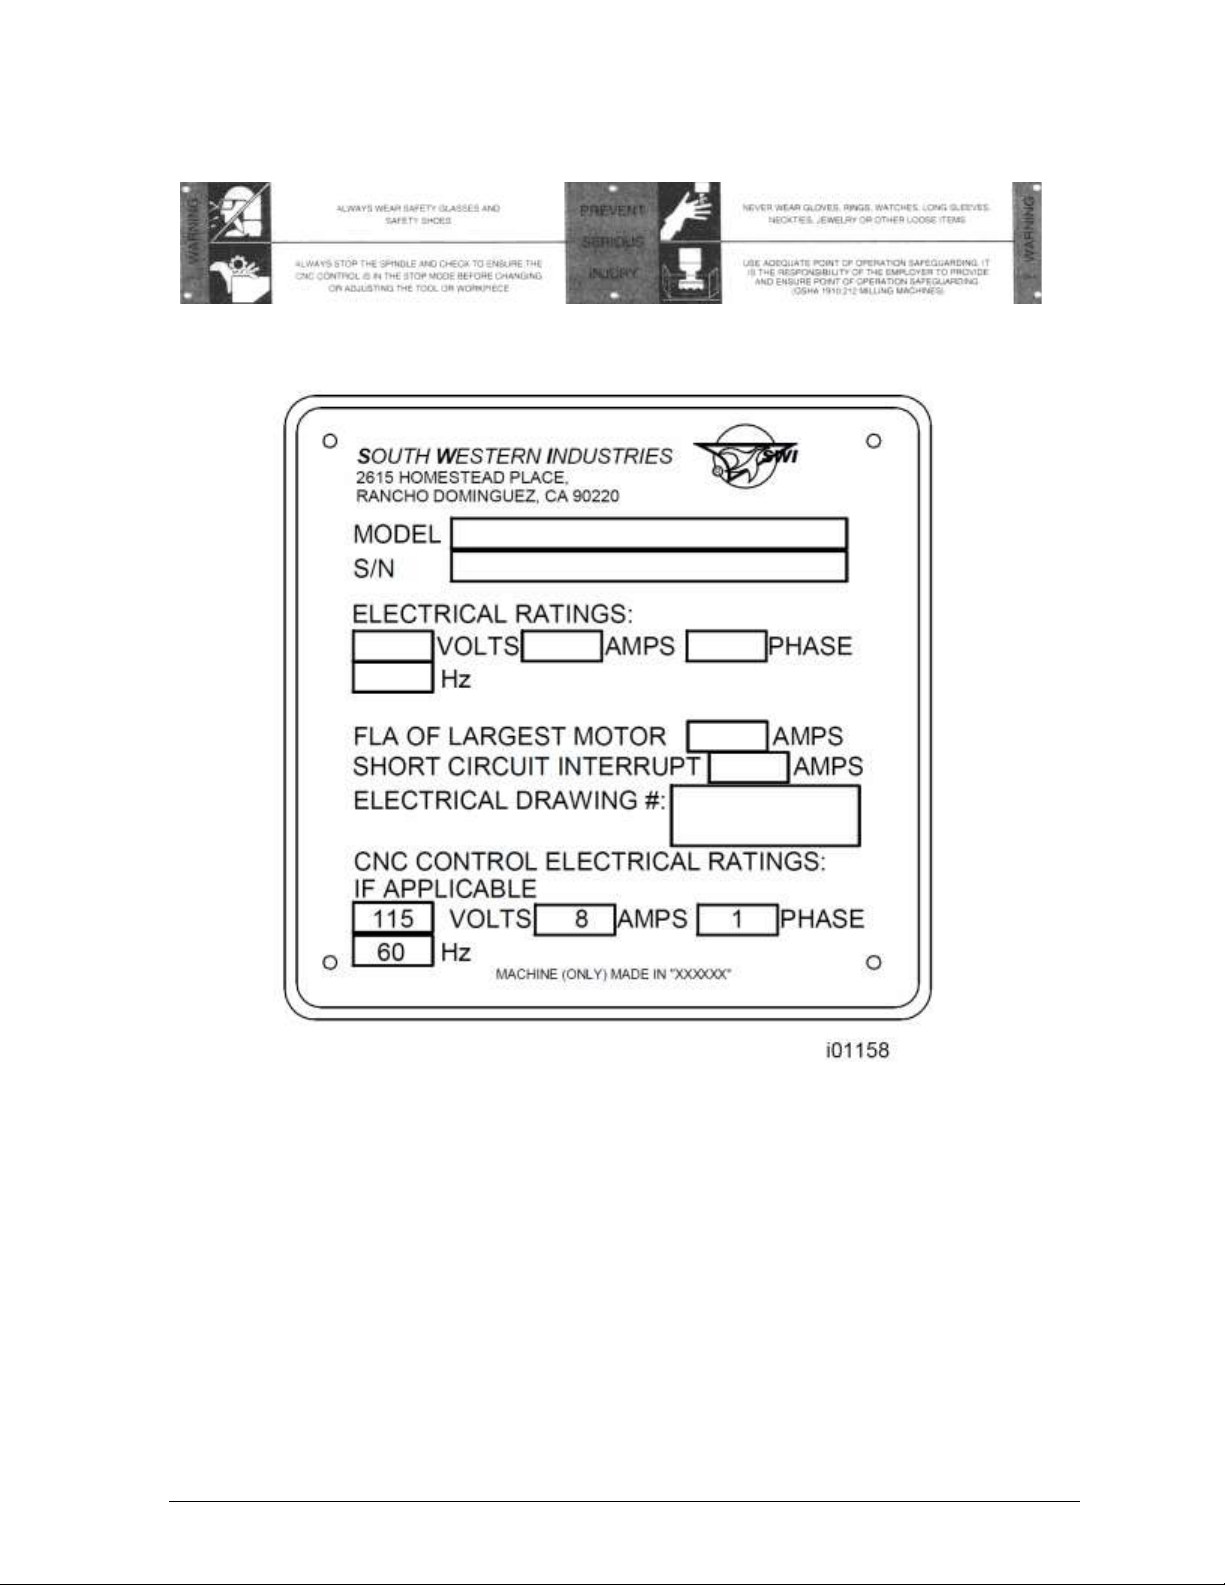
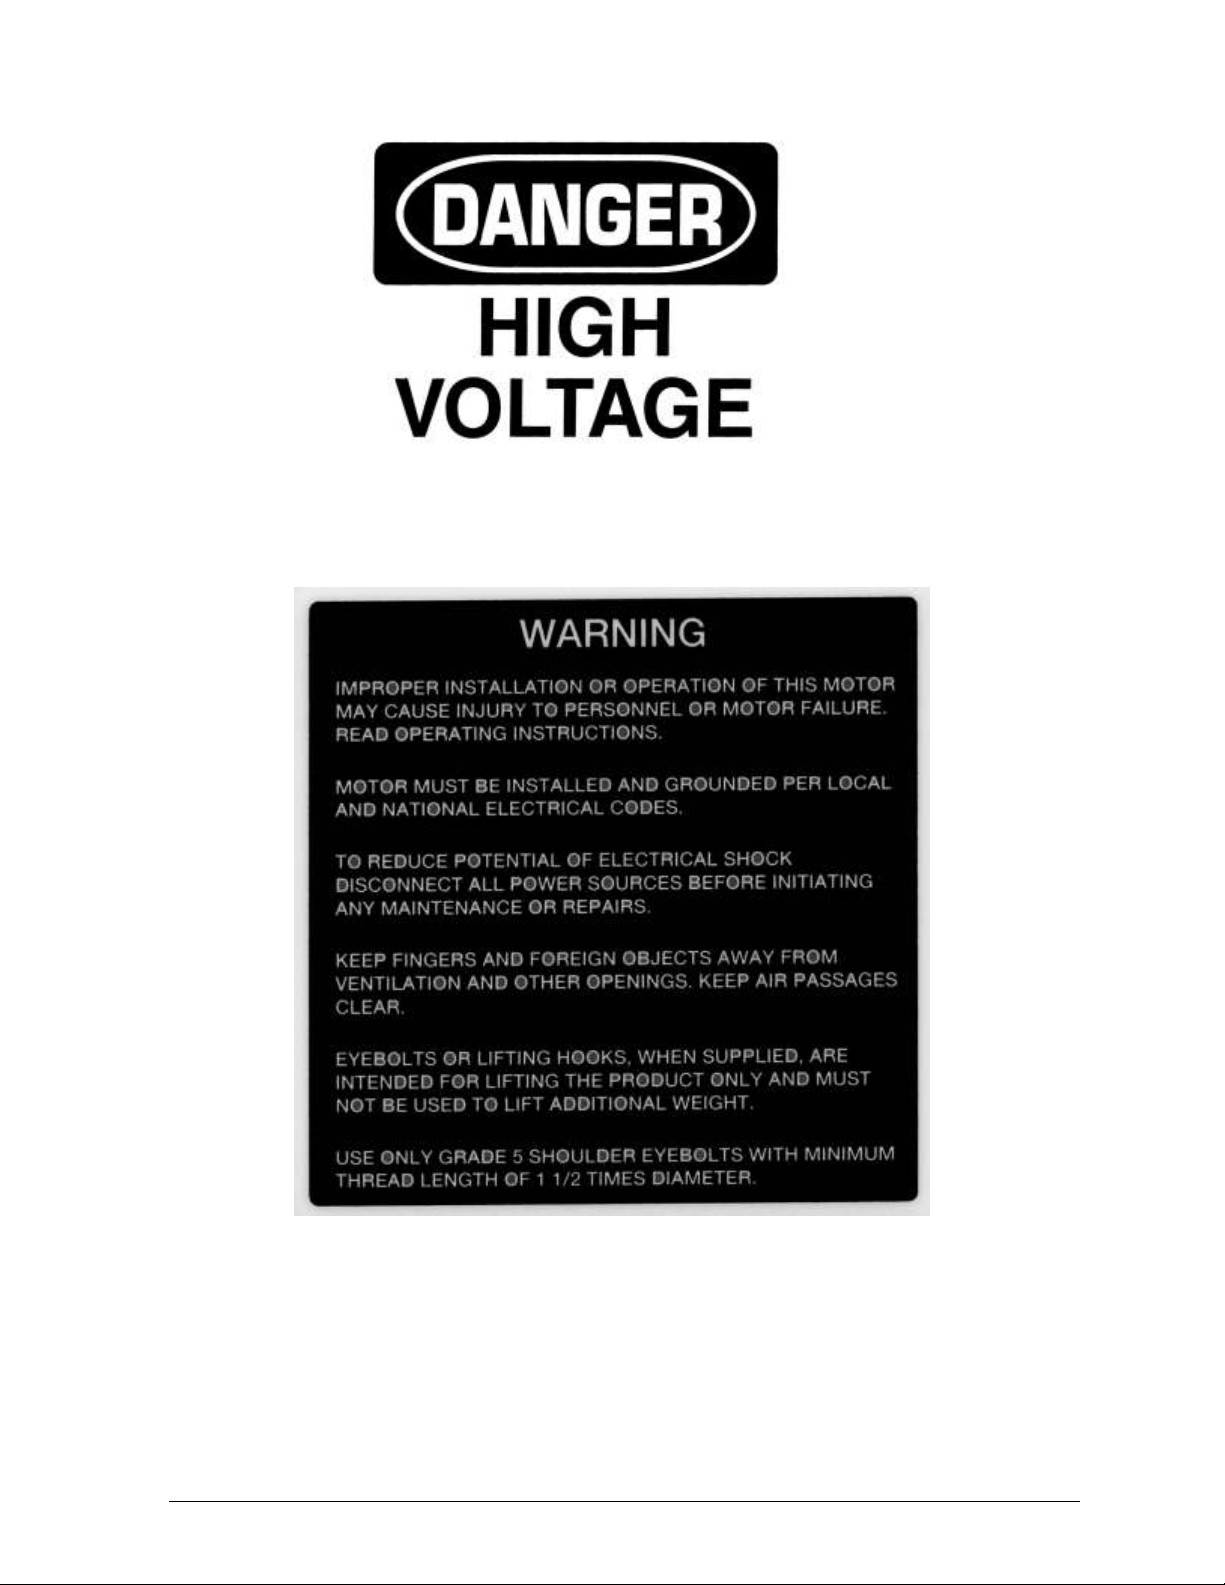
2.2 Danger, Warning, Caution and Note
Labels and Notices Used in this Manual
2.3 Safety Precautions
3.0 Description
3.1 Control Specifications 7
3.2 Display Pendant
3.2.1 Pendant Front Panel
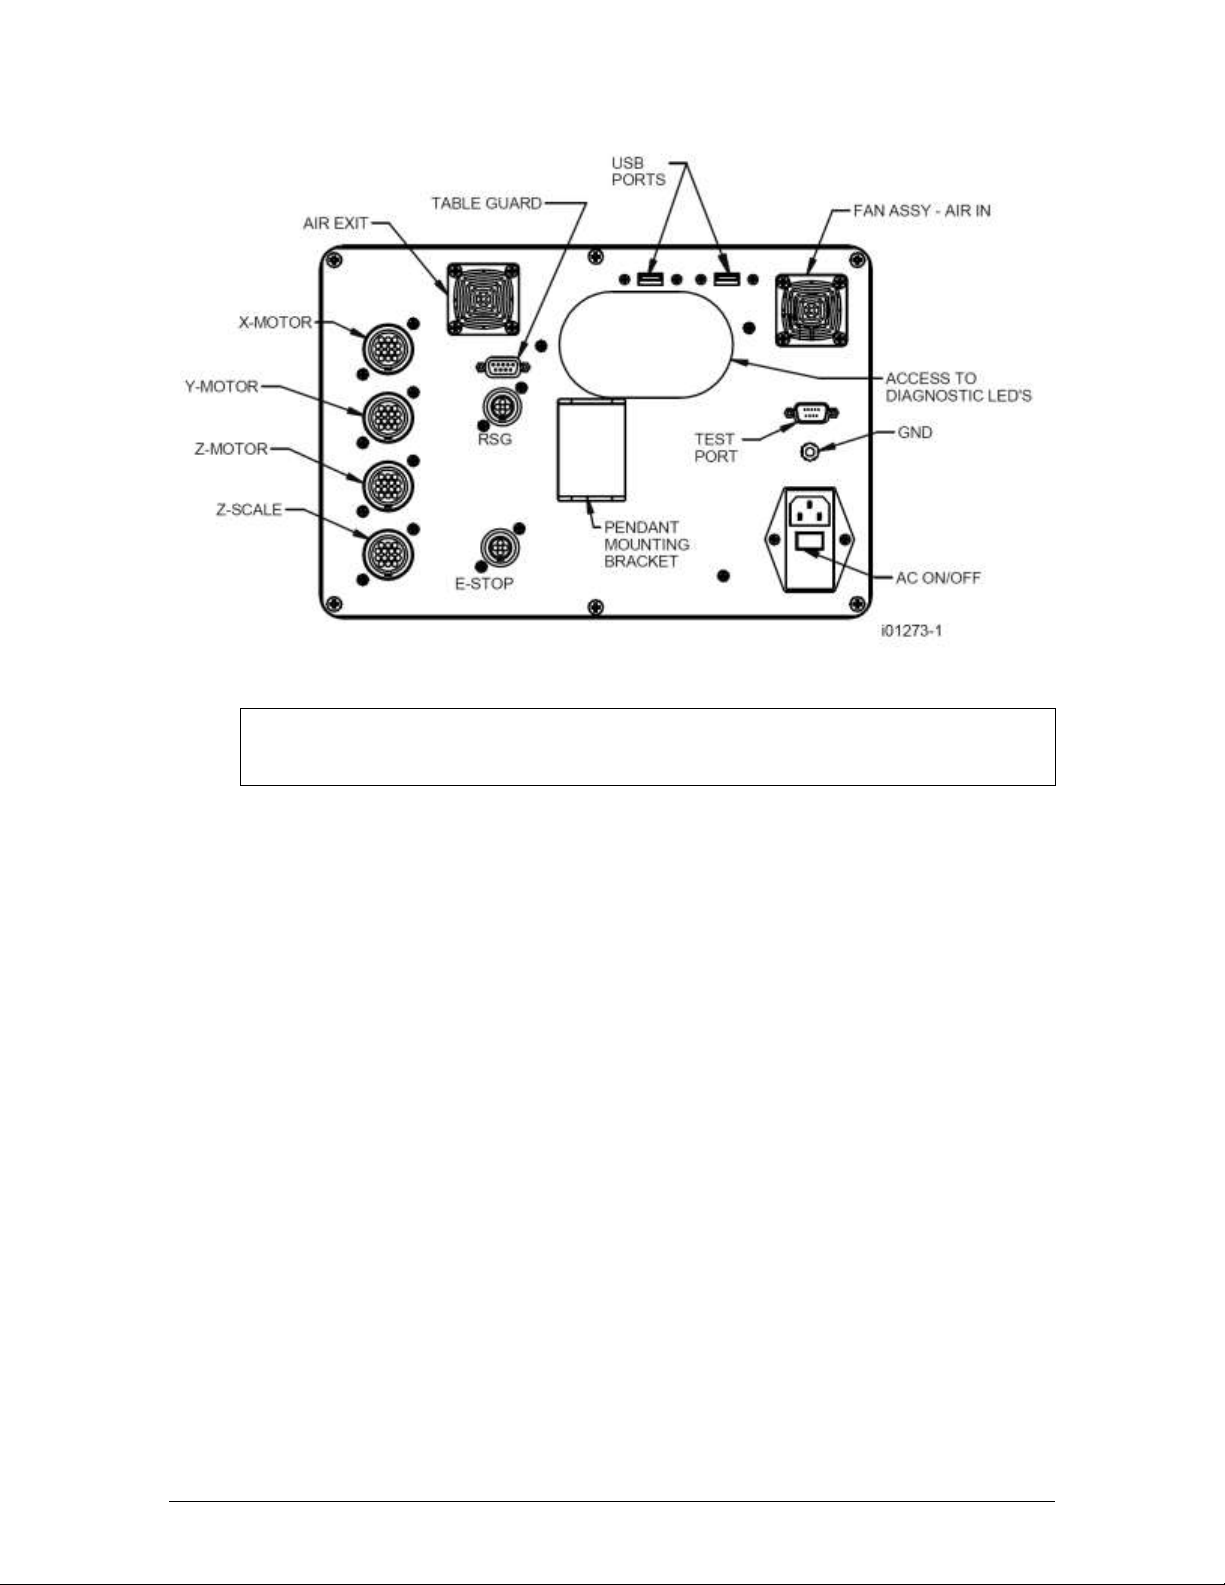
3.2.2 Pendant Back Panel
3.2.3 Servo Motors/Amplifiers
3.2.4 The Z Scale
3.2.5 Ballscrews
3.3 Machine Specifications
3.3.1 Manual Lubrication System
3.3.2 Auto Lubrication –DPMEX2
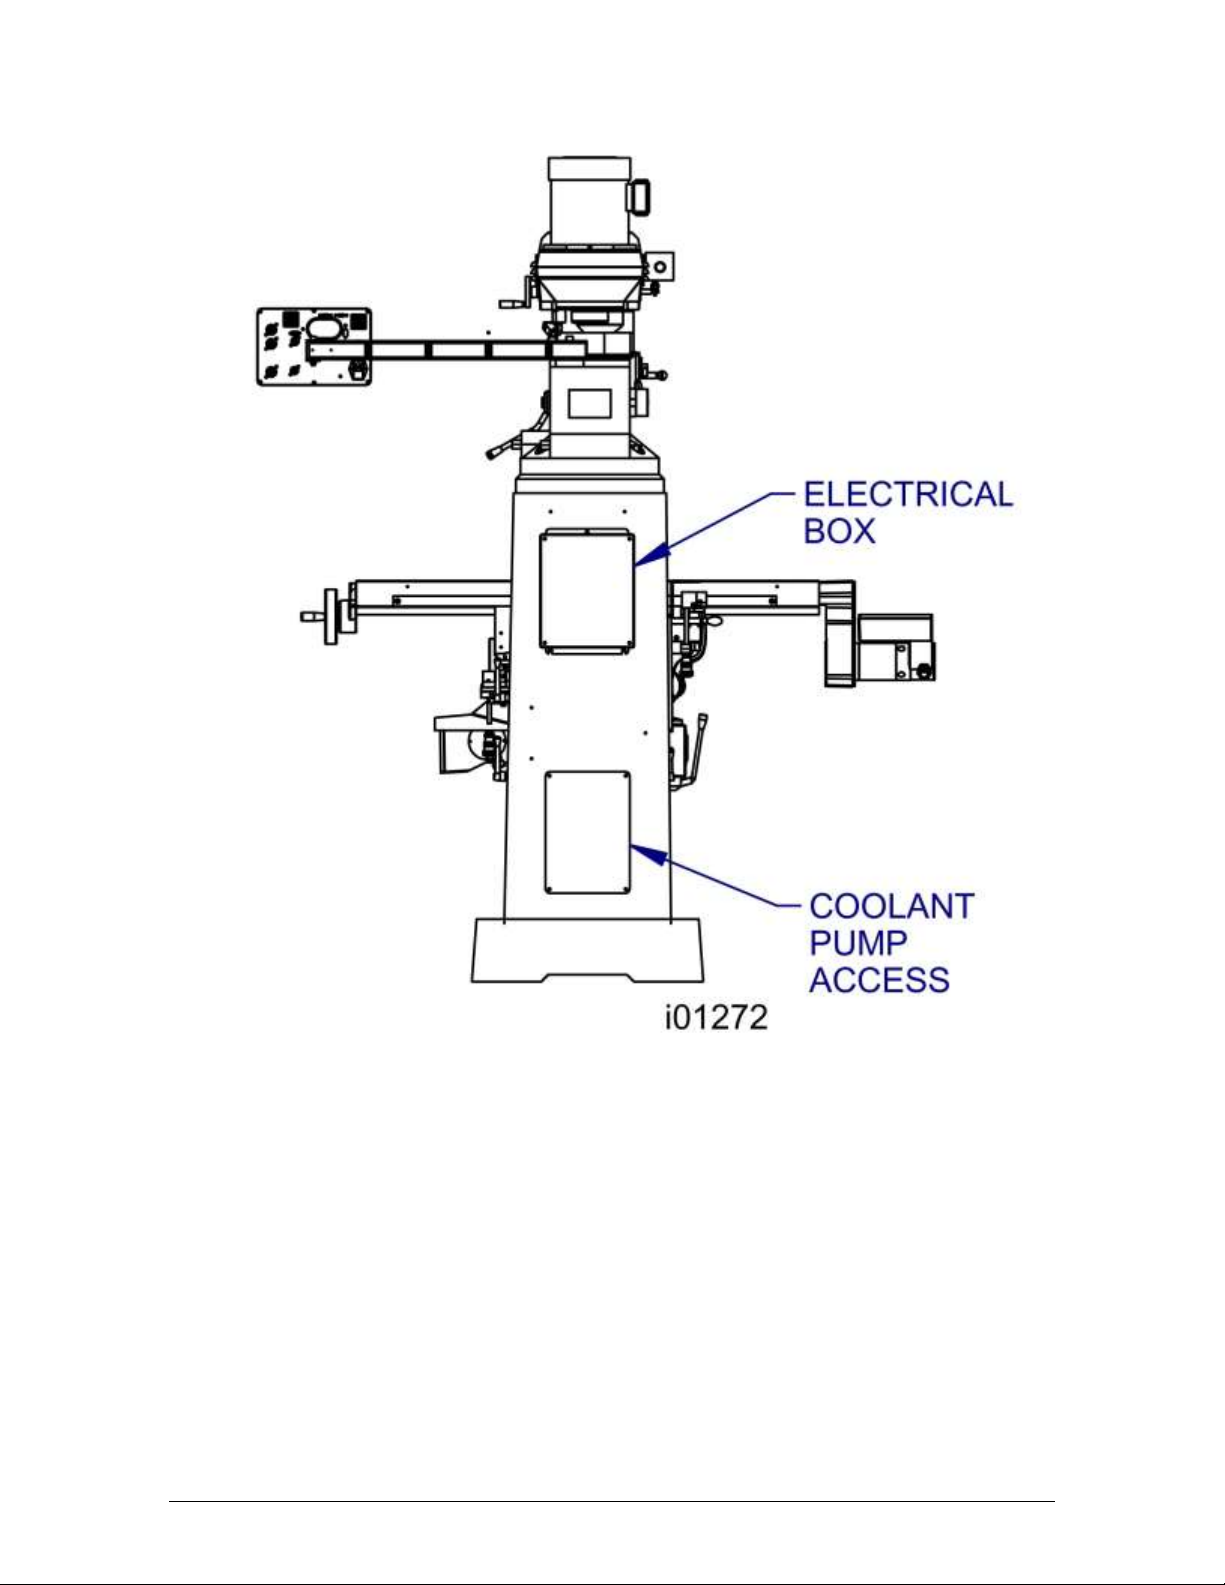
3.3.3 Electrical Cabinet
3.4 Optional Equipment
3.4.1 Power Draw Bar
3.4.2 Remote Stop Go Switch
3.4.3 Work Light
3.4.4 Coolant Pump
3.4.5 Spray Coolant
3.4.6 Chip Pan
3.4.7 Table Guard
3.4.8 USB Thumb Drive
4.0 Basic Operation
4.1 ProtoTRAK EMX Basic Operation 19
4.1.1 Switching the control on & off
4.1.2 Screen Saver
4.1.3 Modes
4.1.4 Emergency Stop
4.2 Machine Operation
4.2.1 Spindle Forward/Off/Reverse
4.2.2 Table, Saddle, Knee, Column Gib Locks
4.2.3 Raising/Lowering the Knee
4.2.4 Spindle Brake
4.2.5 Draw Bar
4.2.6 High-Low-Neutral Level
4.2.7 Speed Changes
4.2.8 Operating the Quill
4.2.9 Adjusting the Quill Stop
4.2.10 Power Feed Engagement Lever
4.2.11 Fine Feed Direction Shaft
4.2.12 Quill Feed Selector
4.2.13 Feed Trip Lever
4.2.14 Fine Hand Quill Feed
4.2.15 Fine Automatic Quill Feed
5.0 Definitions, Terms & Concepts
5.1 ProtoTRAK EMX Axis Conventions 26
5.2 Absolute & Incremental Reference
5.3 Referenced & Non-Referenced Data
5.4 Tool Diameter Compensation
5.5 Connective Events
5.6 Conrad
5.7 Memory & Storage
6.0 Using the EMX as a DRO
6.1 Enter DRO Mode 30
6.2 DRO Functions
6.3 Jog
6.4 Return to Absolute Zero
6.5 Power Feed
6.6 Service Codes
6.7 Teach
6.8 Tool #
7.0 Program Mode
7.1 Enter Program Mode & Assign Prog Name 34
7.2 Programming Strategy and Procedures
7.3 Programming Events –2 axis mode
7.3.1 Position Drill
7.3.2 Mill Event
7.3.3 Arc Event
7.3.4 Pocket/Profile Event
7.3.5 Subroutine Events
7.3.6 Finishing Teach Events
7.4 Programming Events –2 ½ axis mode
7.4.1 Position Drill
7.4.2 Mill Event
7.4.3 Arc Event
7.4.4 Pocket/Profile Event
7.4.5 Subroutine Events
7.4.6 Finishing Teach Events
7.5 Prompts Used to Define Events
7.6 Continue
7.7 Assumed Tool Offset, Feedrate, Tool #
7.8 Incremental Reference Position
7.9 Finish Cuts
7.10 Look
7.11 A Sample Program –2 Axis
7.12 A Sample Program –2 ½ Axis
8.0 Changing or Correcting Programs
8.1 Deleting a Partially Programmed Event 47
8.2 Editing Data while Programming an Event
8.3 Editing Previously Programmed Events
8.4 Changing the Feedrate
8.5 Changing a Part Number (Copy a Program)
8.6 Saving Changes to a Program
8.7 Erasing an Entire Program