Spacepro Contour User manual
SPR_INSTRUC_SC_05.2017
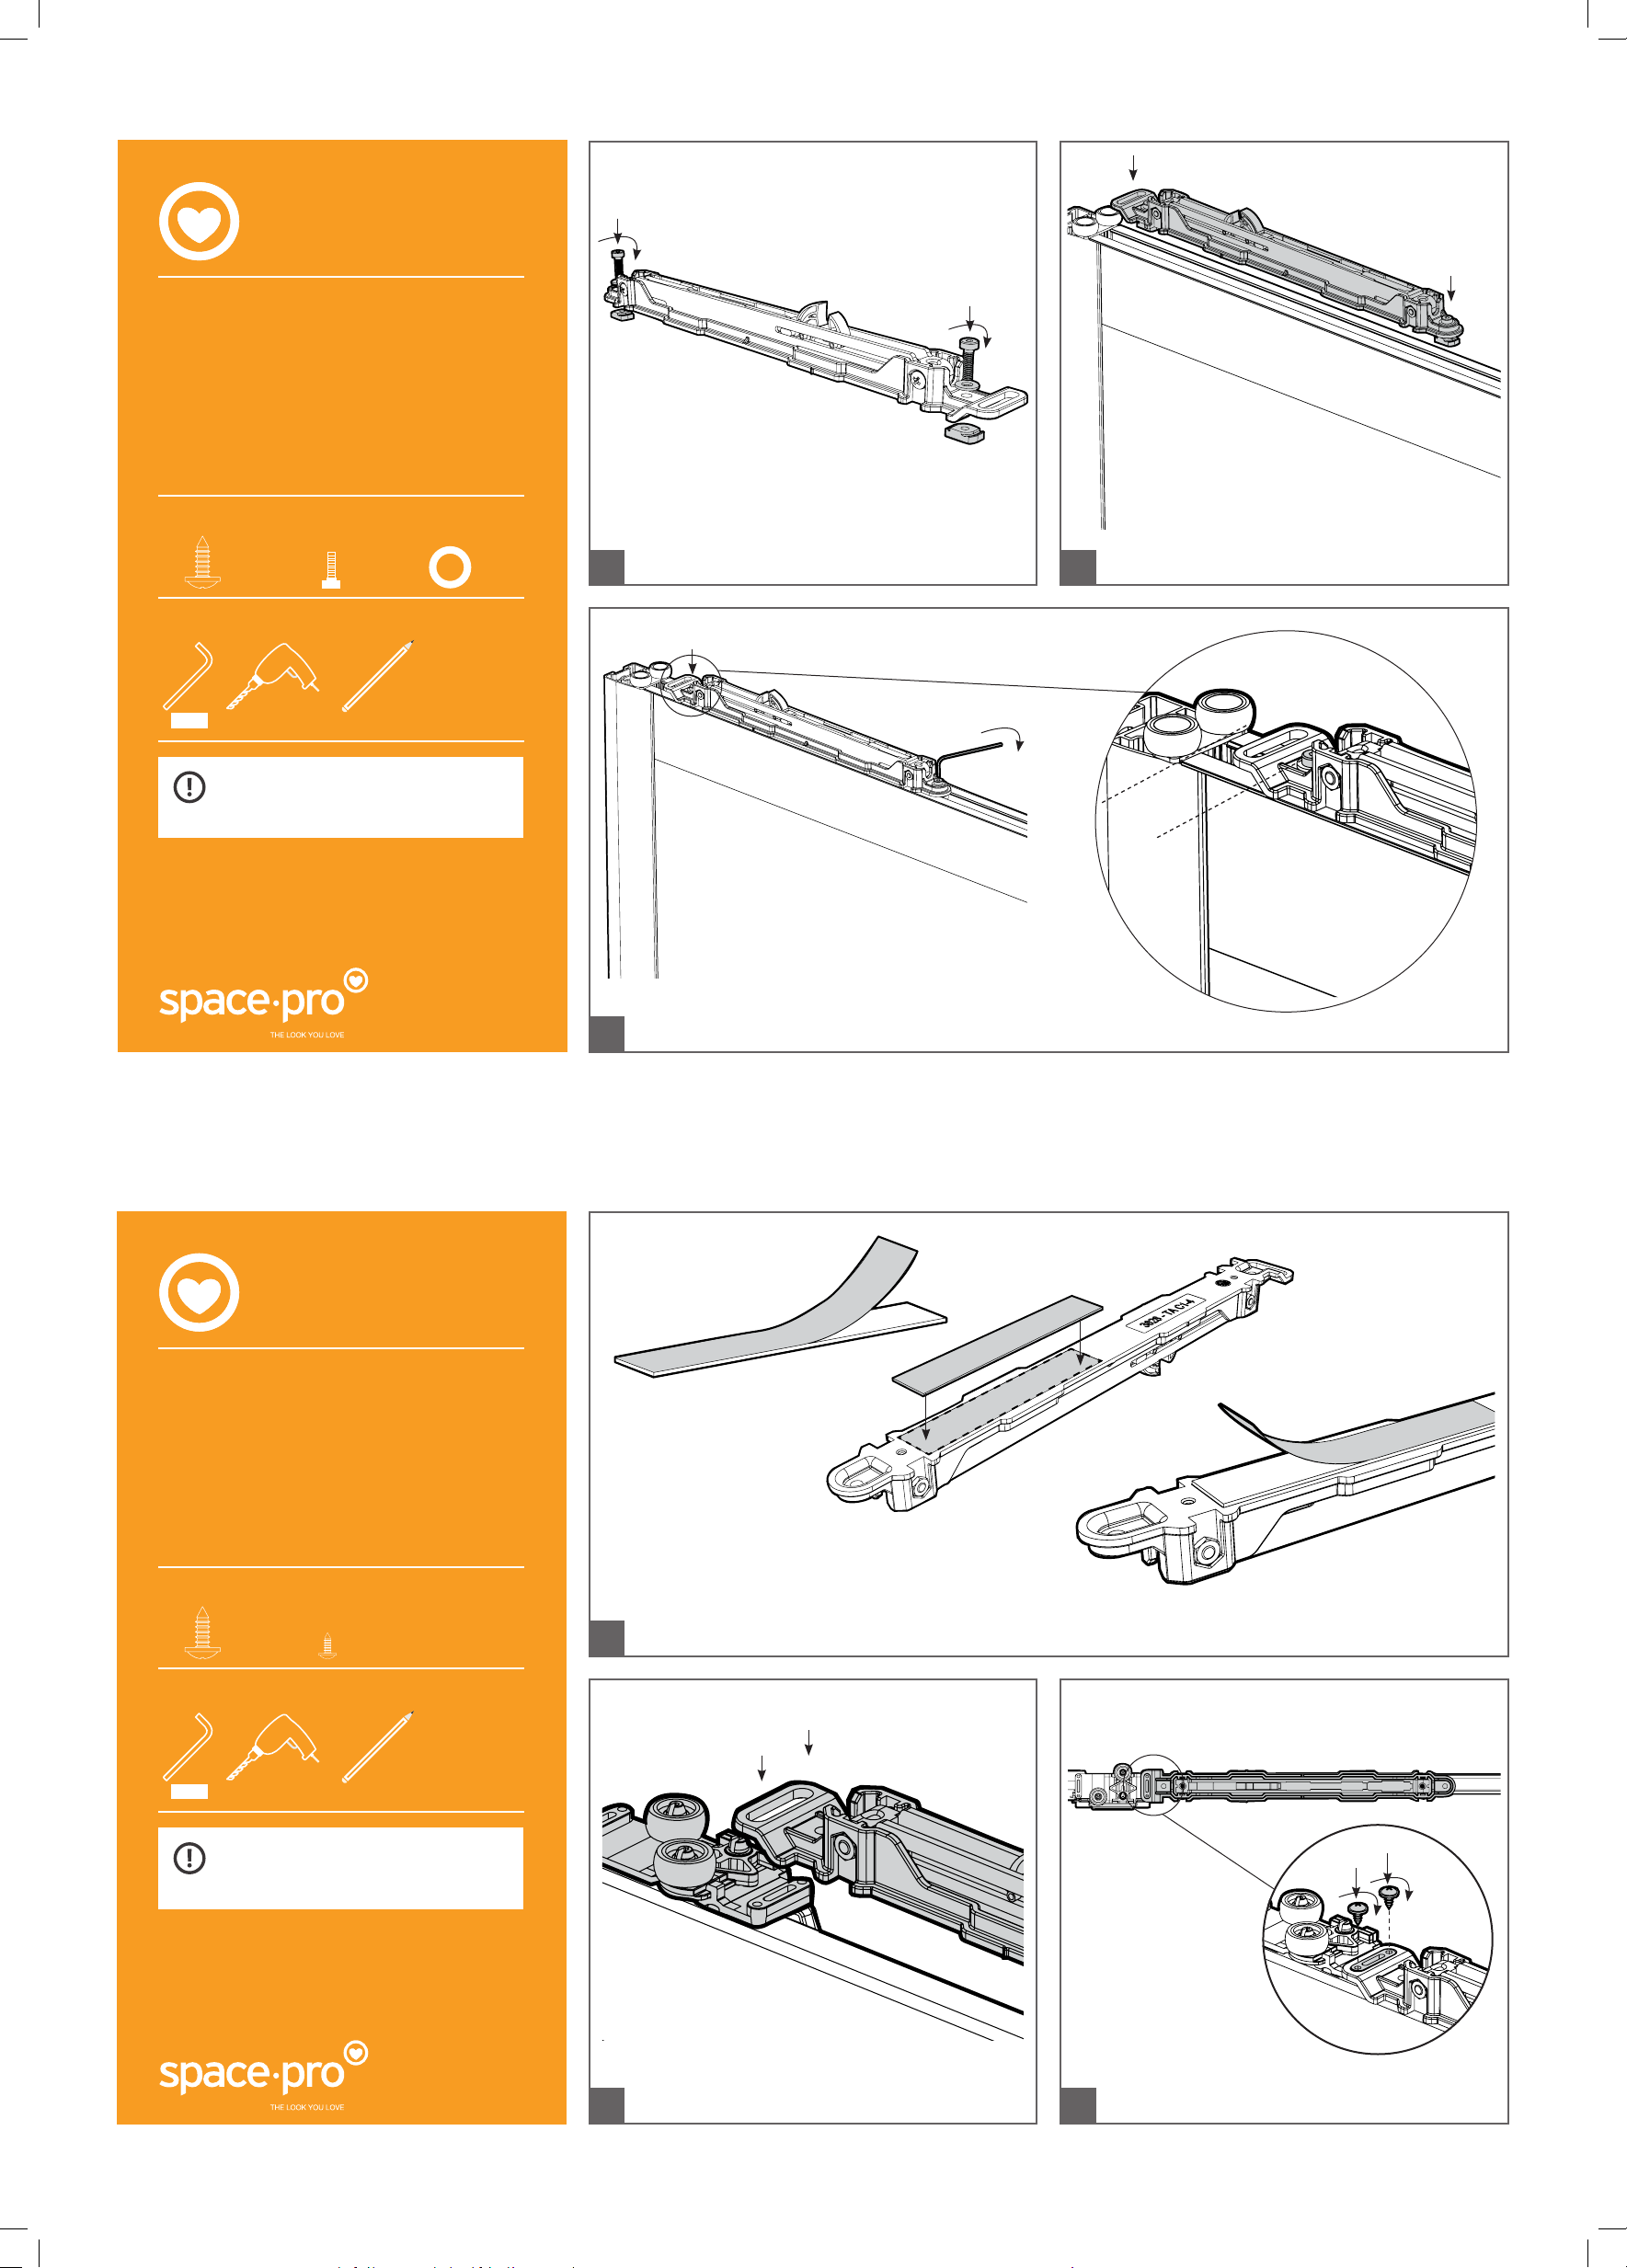
Please check your opening for any
hidden electrical wires and water
pipes before screwing.
how to fit the
soft close to an
aluminium door
Assembly Instructions
Tools required:
Fixings included:
3mm
1 2
V1
Insert the 2x M4 screws (b) using the washers (c) provided.
Screw on the cams but don’t tighten all the way yet.
Align and centralise the soft close in the centre of the top rail
and slot the cams into the gap in the top rail.
In this range: Contour, Maxima, Ellipse, Gliss
Minimalist, Titan, Switch and Domalti.
3Using an Allen key, tighten both the cams so they lock into place.
(Ensure the soft close doesn’t slide, but don’t over tighten).
Note: Do not push the unit up against the
top guide wheels, leave a 20mm gap.
Ensure they move freely
Front face of the door.
1
V1
1- Remove the backing from one side of the double sided tape.
2- Stick the tape to the soft close housing.
3- Remove the remaining backing from the double sided tape.
Please check your opening for any
hidden electrical wires and water
pipes before screwing.
how to fit the
soft close to a
steel door
Assembly Instructions
Tools required:
Fixings included:
3mm
23
3
2
1
Align the slot on the soft close housing with the tab on
the top guide. Stick the soft close to the top edge of the
door ensuring the slot has located on to the tab.
Keeping the soft close parallel to the door.
Secure the soft close in place by screwing the 2x 3mm
screws (d) into the holes in the top guide tab.
20mm
In this range: Heritage, Classic and Shaker.
Page 1 of 2
Please see reverse side for continuation of instructions.
Please see reverse side for continuation of instructions.
(a) x2 (b) x2 (c) x2
x2
(d)
x2
(a)
b
b
c
c
20mm
dd
Watch the ‘how to’ video instructions online.
https://slidingwardrobeworld.com/information/how-
to-install-sliding-wardrobe-doors/
Watch the ‘how to’ video instructions online.
https://slidingwardrobeworld.com/information/
how-to-install-sliding-wardrobe-doors/
www.slidingwardrobeworld.com
www.slidingwardrobeworld.com

SPR_INSTRUC_SC_05.2017
FRONT VIEW
PLAN VIEW
5
Using a pencil transfer the indicator mark from the soft
close unit onto the door.
Indicator mark
8
6Insert one door at a time into the track.
Repeat where necessary.
9
7
Using a pencil transfer the indicator mark from the door to the underside of the track and align the pin.
1- Align pin as shown. 3- Drill pilot holes.
2- Make sure pin is fully against the back walls of track. 4- Fix using the screws provided (a).
Front of
Track
if the soft close
doesn’t engage
first time.
10
Use an Allen key to adjust the height of the pin.
(If the door is lower than it should be, the pin can be brought down so
it will engage with the soft close).
4Prime the soft close, by sliding the nib fully across
until you hear a click.
Position your doors to the fully closed position depending on your configuration (as shown above).
2 doors 3 doors
(Middle door shown here, shows a right
side closing door.)
4 doors
To assemble the soft close pin, align the steel plate to
the plastic bottom. Insert tabs into plastic slots and
tighten the screw with anAllen key.
Page 2 of 2
Continued for both aluminium & steel doors.
Pilot Holes
a a
www.slidingwardrobeworld.com
This manual suits for next models
7
Popular Door Opening System manuals by other brands

Record
Record K32 ST user manual

Assa Abloy
Assa Abloy NORTON RIXSON 6200 Series installation instructions

GEZE
GEZE ECdrive H Pre-installation instructions, Installation and service instructions

Record
Record HA8-SP Installation instructions manual

GEZE
GEZE TS 4000 troubleshooting manual

Record
Record system 20 Translation of the original manual

Command access
Command access MLRK1 Series installation instructions

Feig Electronic
Feig Electronic TST LGB Assembly instructions

Assa Abloy
Assa Abloy Corbin Russwin DC8200 Series installation instructions

NUKI
NUKI Bridge installation guide

Dormakaba
Dormakaba GSR-EMR XEA BG Mounting instructions

Relcross
Relcross 9130 installation instructions


