SpanLink RAD User manual

RAD Shoulder System
1
SpanLink©
RAD
Shoulder System
The SpanLink RAD shoulder System (Rotation & Abduction Device) is a perfect
solution designed to immobilize while providing comfort and support for the post-
operative patient and for individuals who require shoulder immobilization.
This brace allows for both internal and external rotation and provides shoulder adduction
positioning as well as up to 75 degrees of shoulder abduction. The SpanLink RAD
Shoulder System brace replaces and improves on the GunSlinger while providing
comfortable and stable support.
The SpanLink RAD Shoulder System is designed from Aircraft grade aluminum and
finished with plush Ortho-wick type lining. The brace is also designed for ease of use
while donning and doffing in a medical setting, as well as in the home.
Benefits of the RAD Shoulder System:
Designed to maximize comfort and
function.
Adjustable light weight durable frame fits
all sizes and shapes.
Effortlessly applied and available for the
right or left arm.
Provides comfortable abduction positioning
while allowing for fine adjustments of
internal and external rotation.
The Multi-functionality reduces inventory
by replacing several single function braces.
Ranges from 20 degrees internal rotation to
45 degrees external rotation and neutral to
75 degrees of abduction.
The RAD Shoulder System brace is designed for arthroscopy, rotator cuff, labral repairs,
total shoulder repair and other shoulder injuries.
The RAD Shoulder System is also effective for shoulder instability repairs where the
ability to maintain a particular degree of external rotation is necessary.
RAD Shoulder System
2
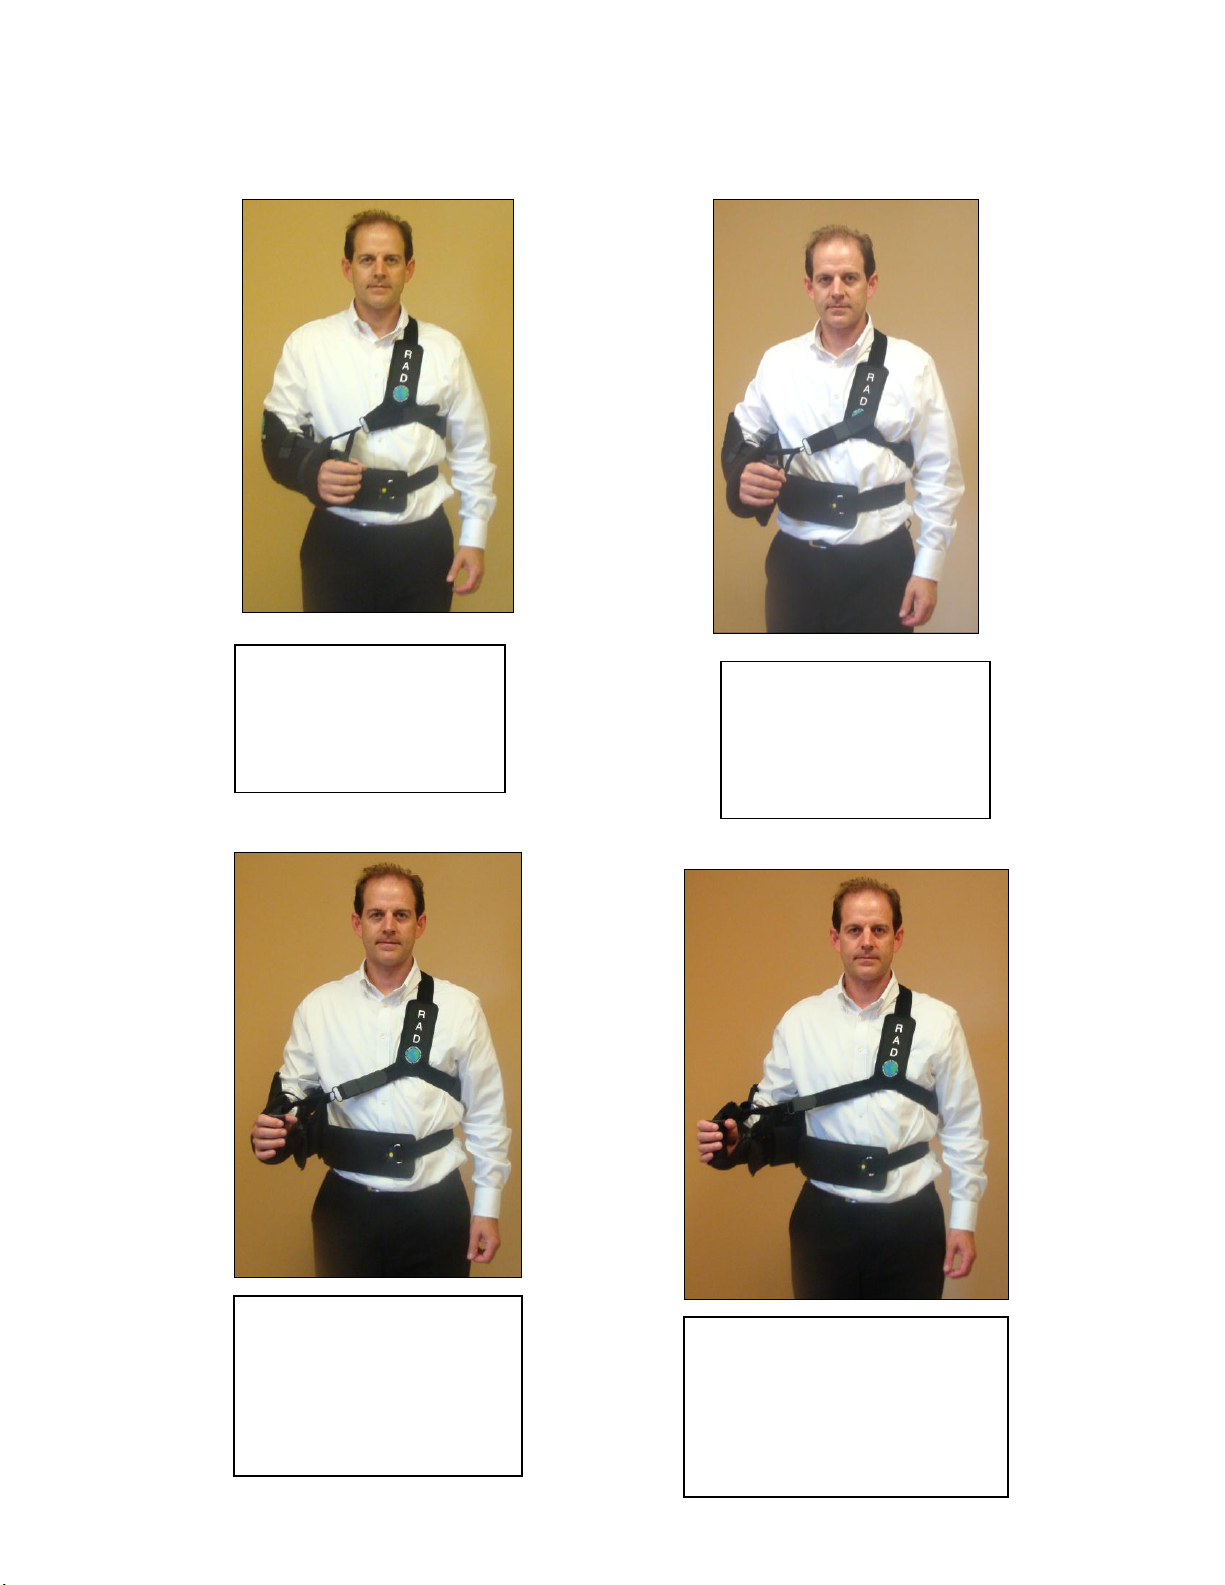
Illustrations of the RAD Shoulder Systems rotation ability
Full Internal Rotation:
The RAD Shoulder
System in full internal
rotation.
10 Degrees of External
Rotation:
The RAD Shoulder
System in 10 degrees of
external rotation
20 Degrees of External
Rotation:
The RAD Shoulder System
in 20 degrees of external
rotation
Neutral Position:
The RAD Shoulder
System in the neutral
position.
RAD Shoulder System
3
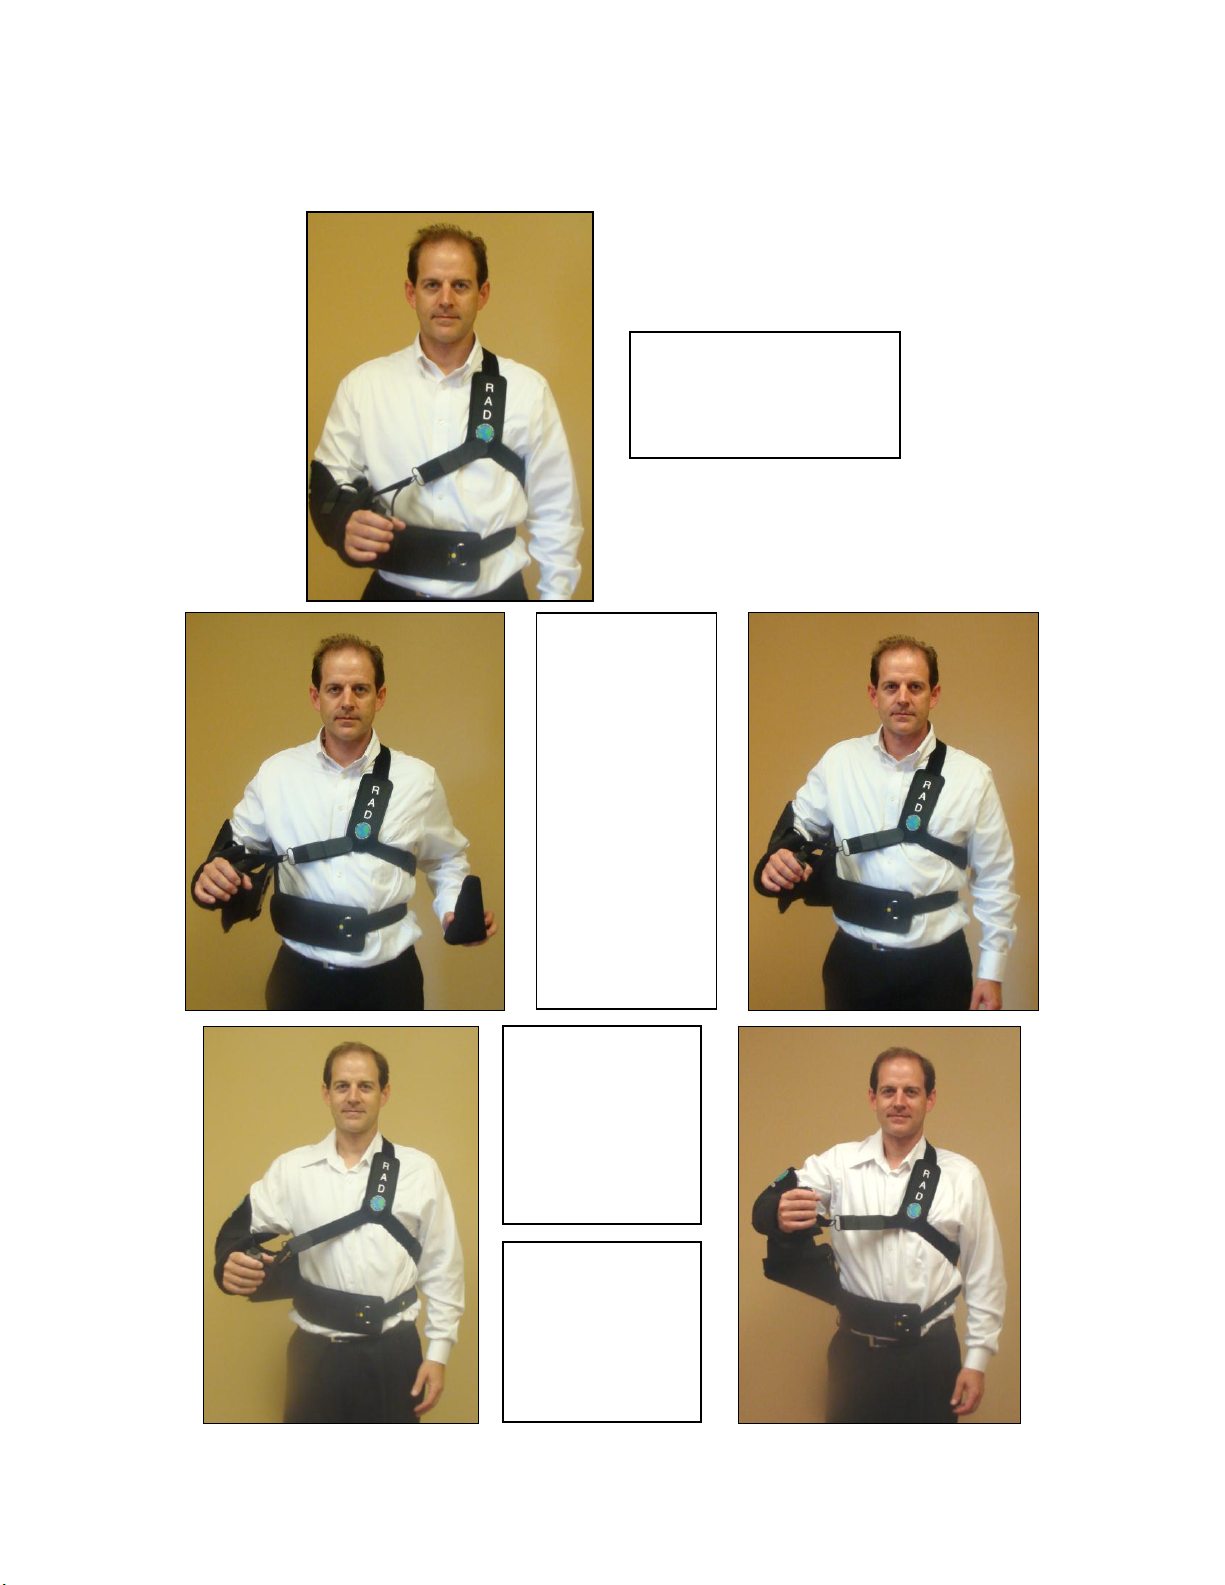
Illustrations of the RAD Shoulder systems Abduction and Adduction Ability
The RAD Shoulder
System in the adducted
position.
The RAD
Shoulder
System in 15
degrees of
abduction.
Without
wedge support
in place.
With wedge
Support in
place.
The RAD
Shoulder System
in 30 degrees of
abduction.
The RAD
Shoulder System
in 75 degrees of
abduction.

RAD Shoulder System
4
RAD Shoulder System Components
All RAD Shoulder System Components are ONE SIZE FITS ALL
RAD Shoulder System Lateral Waist Support
RAD Shoulder System Arm Sling
RAD Shoulder System Three Point
Harness and Waist Strap
RAD Shoulder System Abduction
Pillows
RAD Shoulder System
5
RAD Shoulder System Fitting Instructions
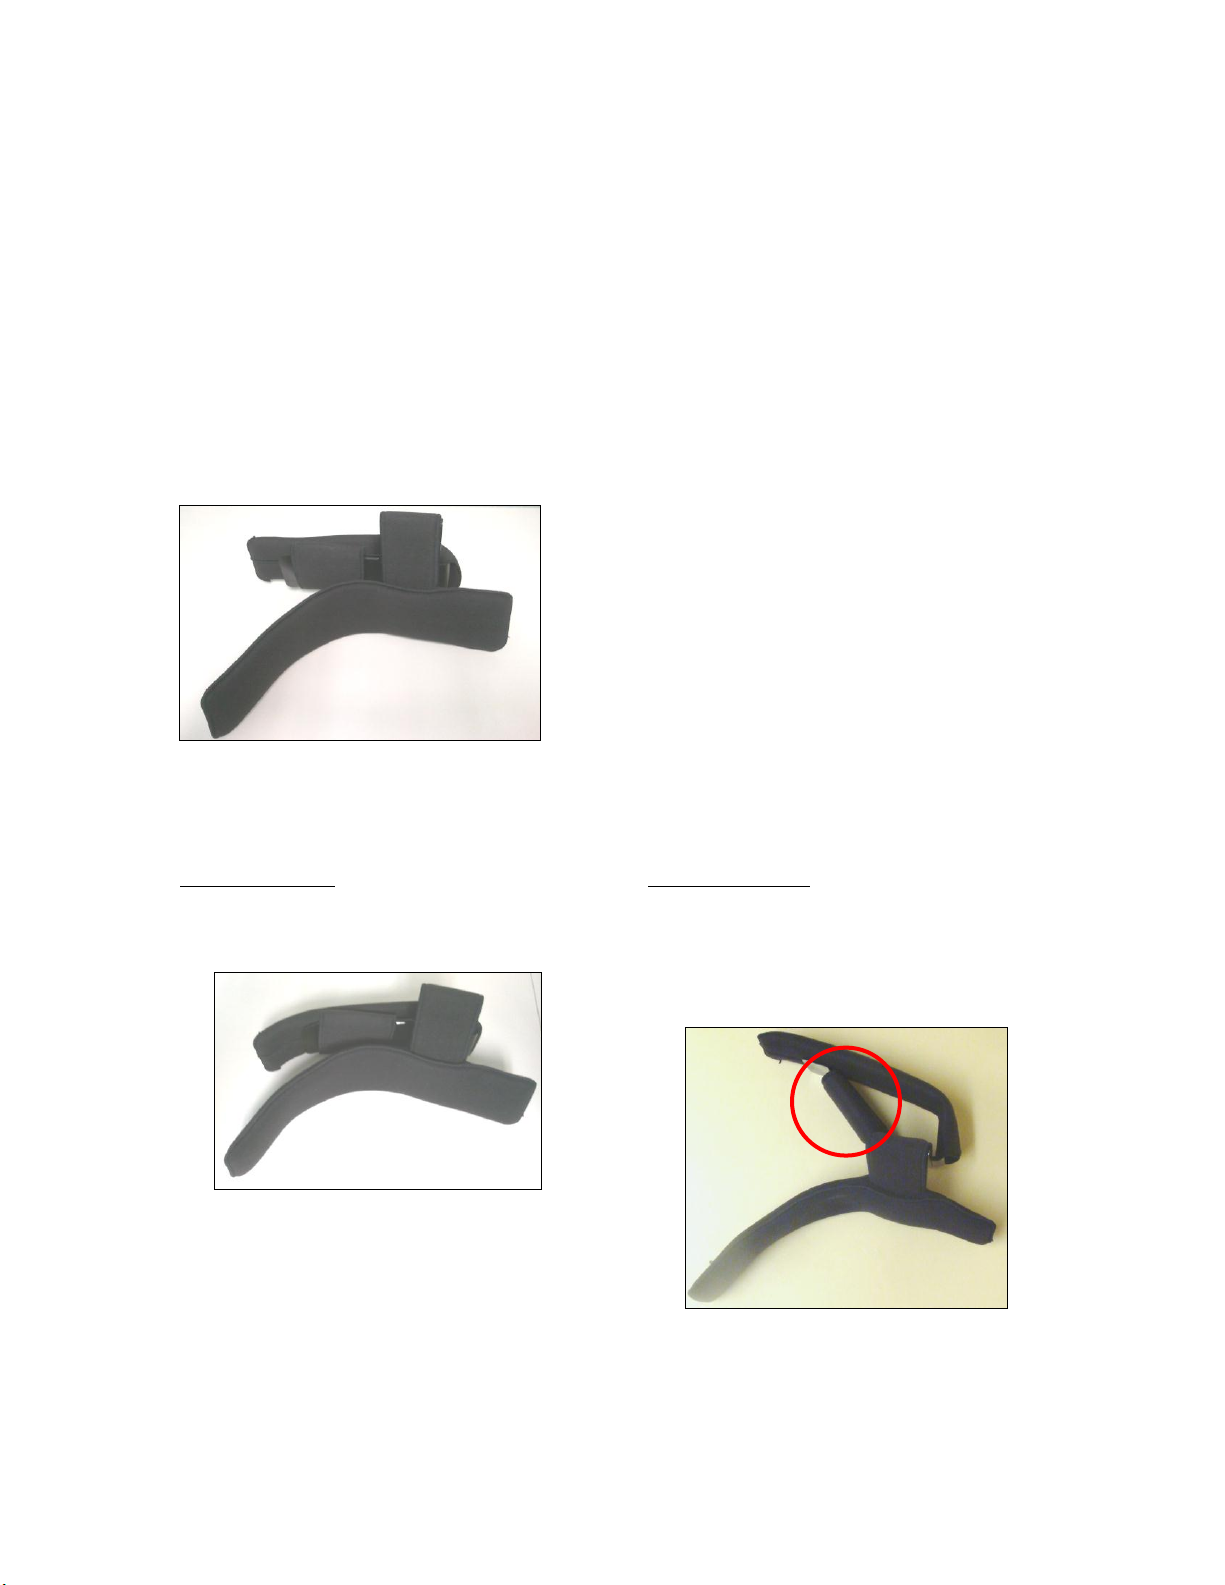
1. Separate the arm sling from the lateral waist support.
2. Position the lateral waist support under the arm of the patient’s injured shoulder with
the longer portion facing the patient’s body and the abduction tab pointed upwards and
aligned with the patient’s shoulder. Bend the innermost portion of the lateral waist
support to fit the patient’s body/waist.
Pictured:
Left: Anterior, Right: Posterior, Top: Lateral, Bottom:
Medial
RAD Shoulder System lateral waist support with
waist adjusted. The lateral waist support is
positioned for the neutral adducted position.
Internal rotation:
Bend the outmost portion of the lateral
waist support towards the patient’s body.
External rotation
Bend the outermost portion of the lateral
waist support away from the patient’s
body and secure the Velcro tab on the
middle tab for support.

RAD Shoulder System
6
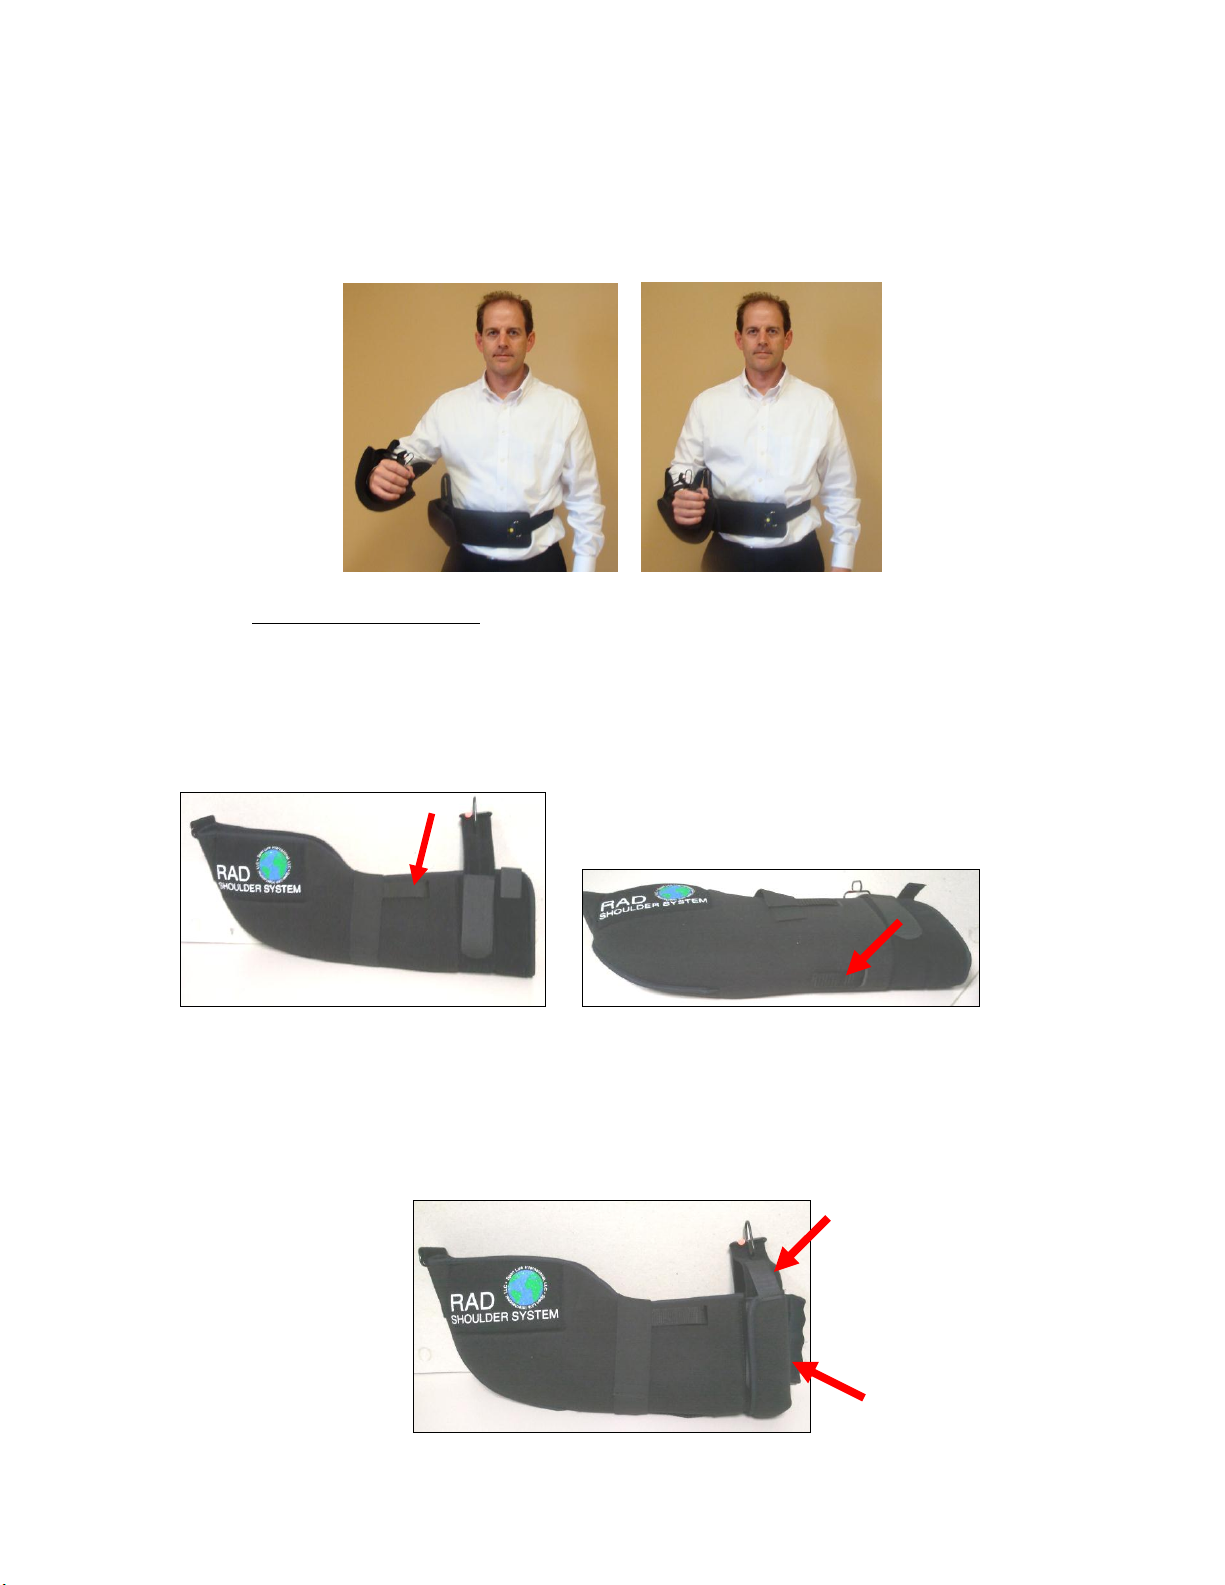
Abduction
Bend the abduction tab on the lateral waist support upward to the desired angle and insert
the wedge pillows into the space created for support.
Posterior View, Left: Medial
L: Lateral waist support without wedge inserted
R: Lateral waist support with 15 degree wedge inserted
3. Secure the RAD Shoulder System lateral waist support onto the patient’s waist by
looping the waist strap through d-rings on either end of the lateral waist support.
Strap Length Adjustment
If you find any of the straps to be too long, use a scissor cut the strap to the
desired length then transfer the alligator style Velcro attachment to the shortened
strap.
RAD Shoulder System
7
4. Place the RAD Shoulder System arm sling onto the arm of the patient’s injured
shoulder and secure the arm sling by adducting the arm so that the Velcro attaches to the
lateral waist support.
Arm Sling Adjustments
The arm sling can accommodate patients with varying arm lengths. There are
three Velcro straps that can be altered to change the location of the hand grip: two
on either side at the middle of the sling and one strap on the inferior side of the
sling.
In addition, the length of the entire sling can be altered by folding the arm sling to
create a cuff at the forearm.
a. Lift the two Velcro tabs at the superior distal end of the arm sling.
b. Fold the arm sling to create the cuff and secure the cuff using the Velcro
tabs.
RAD Shoulder System
8
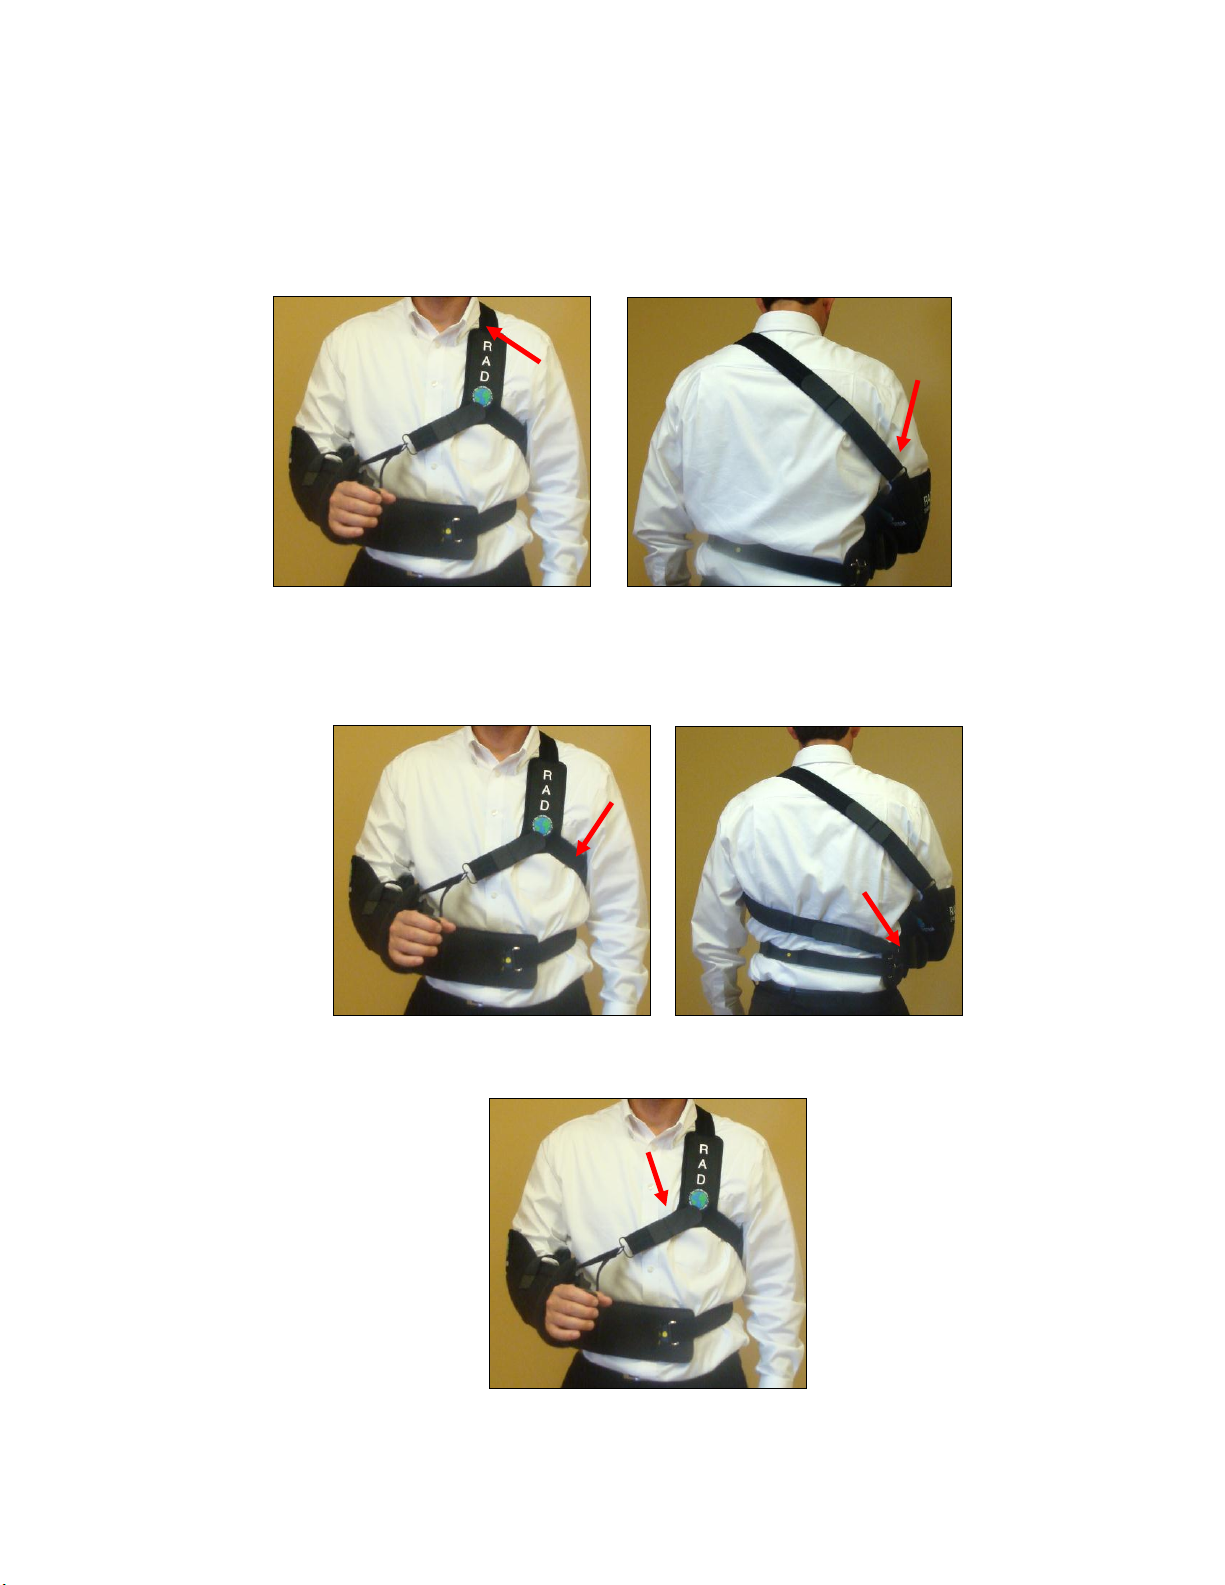
5. Position the RAD Shoulder System three point harness on the patients uninjured
shoulder such that the RAD-label is anterior to the shoulder joint.
a. Secure the top strap over the uninjured shoulder to the back of the arm sling to
the d-ring on the top/back of the arm.
b. Secure the strap directed towards the uninjured side of the patient’s body, under
the patient’s arm and around the back to the other d-ring at the waistband attachment.
c. Secure the strap directed towards the injured side of the patient’s body to the
ring at the forearm of the arm sling.

RAD Shoulder System
9
How to use the RAD Shoulder System Brace as a sling
1. Remove the arm sling from the lateral waist support.
2. Move the strap from the three point harness that was originally connected to the lateral
waist support to the outside of the elbow on the arm sling.
3. Position the arm in the RAD Shoulder System arm sling.
4. Pass the RAD Shoulder System three point harness behind the back and over the
uninjured shoulder by placing your free arm through the ring created by the straps.
Popular Medical Equipment manuals by other brands


Neauvia
Neauvia PLASMA IQ user manual

Viztek
Viztek Ultra U-Arm installation guide

Nasco
Nasco Life/form LF01008U instruction manual

Welch Allyn
Welch Allyn Spot VS100 In-Service - Quick Reference Guide

Hologic
Hologic Sentinelle Medical Vanguard Installation and service manual

Custom Surgical
Custom Surgical OPTIREC user manual


