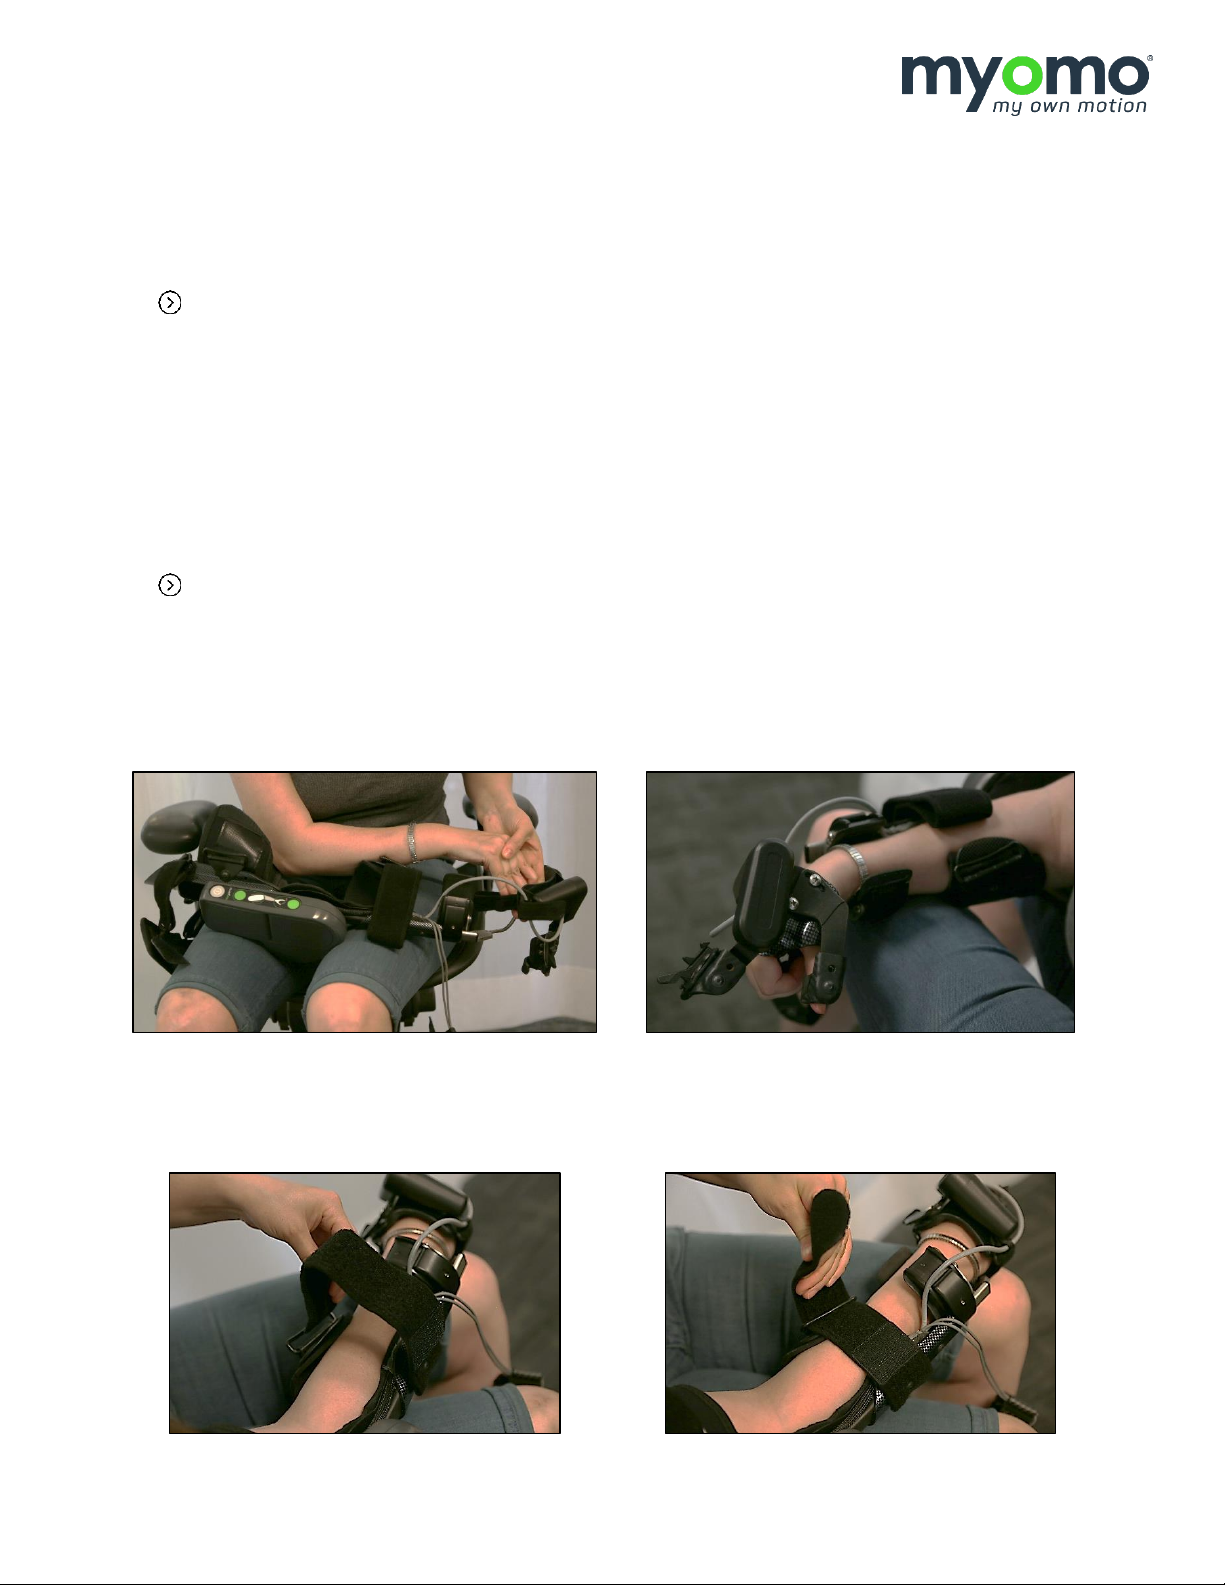
PUTTING YOUR MYOPRO 2 ON (“DONNING”)
The following pages include step-by-step instructions for putting the MyoPro 2 on (sometimes referred to as
“donning the MyoPro 2”).
WARNINGS REVIEW
BEFORE donning the MyoPro 2, review the warnings below:
WARNING: DO NOT expose the MyoPro 2 to flame or excessive heat; personal injury may
occur.
WARNING: The MyoPro 2 is a prescription device and should only be used as indicated under
clinical supervision of a Provider, or after receiving instruction from a clinical Provider for at-
home use.
WARNING: The MyoPro 2 is only to be used by the person for whom it is prescribed.
WARNING: Each component of the device is supplied for safety and best performance. Use all
provided components for optimal operation.
WARNING: ONLY use the MyoPro 2 upper limb orthosis on the prescribed elbow, wrist and
hand joints. Each MyoPro 2 is built specifically for a left arm or a right arm; never wear the
MyoPro 2 on the other arm.
WARNING: Tight straps may restrict the User’s circulation. Therefore, always check that straps
are not too tight throughout the User’s range of motion.
WARNING: Do not sleep while wearing the device as straps may alter the User’s circulation.
▲CAUTION: If you detect fumes, flames, melting of components around the battery or battery
charger, or the device is hot to touch, TURN THE DEVICE OFF IMMEDIATELY and contact your
Provider.
PN25623 Rev8 9