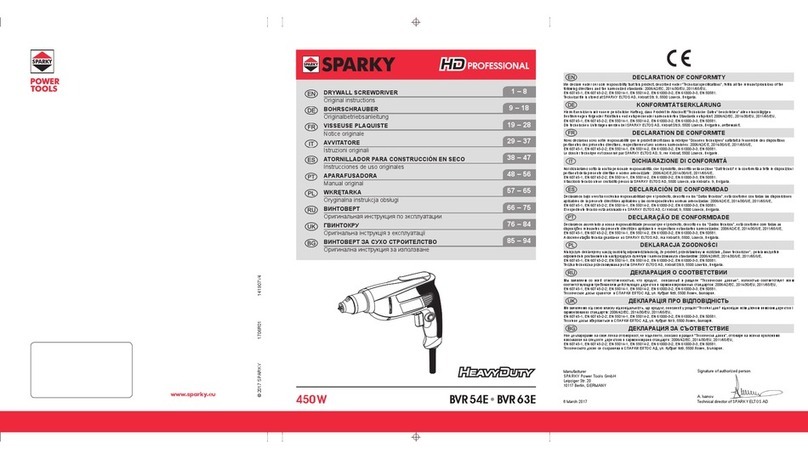
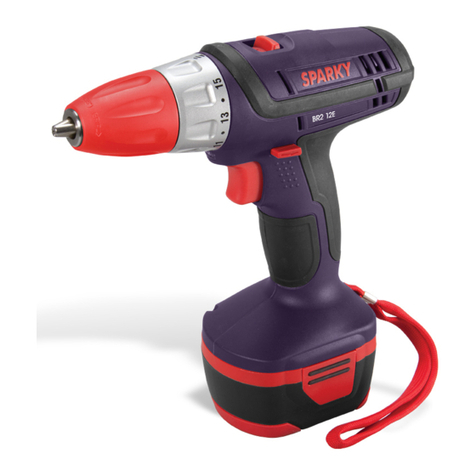
Sparky Group BAR 12E User manual

© 2008 SPARKY
www.sparkygroup.com
SPARKY Power Tools GmbH
Leipziger Str. 20
10117 Berlin, DEUTSCHLAND
Geschäftsführer Dipl.-Kfm., Dipl.-Ing. Stanislav Petkov
1001R05
1 – 9
CORDLESS ANGLE DRILL / DRIVER
Instruction Мanual
20 – 29
PERCEUSE/VISSEUSE D’ANGLE SANS FIL
Instructions d’utilisation
30 – 40
АККУМУЛЯТОРНАЯ УГЛОВАЯ ДРЕЛЬ / ШУРУПОВЕРТ
Инструкция по эксплуатации
41 – 51
АКУМУЛАТОРНА ЪГЛОВА БОРМАШИНА / ВИНТОВЕРТ
Инструкция за експлоатация
10 – 19
AKKU - WINKELBOHRSCHRAUBER
Gebrauchsanweisung
12 V BAR 12E
DECLARATION OF CONFORMITY
We declare under our sole responsibility that this product is in conformity with the provisions of the following directives
and the corresponding harmonized standards:
2006/42/EC, 2004/108/EC, EN 55014-1, EN 55 014-2, EN 60745-1, EN 60745-2-2, EN 61000-3-2, EN 61000-3-3.
KONFORMITÄTSERKLÄRUNG
Hiermit versichern wir unsere persönliche Haftung, daß dieses Erzeugnis den Anordnungen folgender Richtlinien und
entpsrechender harmonisierten Standards:
2006/42/EC, 2004/108/EC, EN 55014-1, EN 55 014-2, EN 60745-1, EN 60745-2-2, EN 61000-3-2, EN 61000-3-3.
DECLARATION DE CONFORMITE
Nous déclarons sous notre propre responsabilité que ce produit est conformé aux directives, respectivement les
standards harmonisés:
2006/42/EC, 2004/108/EC, EN 55014-1, EN 55 014-2, EN 60745-1, EN 60745-2-2, EN 61000-3-2, EN 61000-3-3.
ДЕКЛАРАЦИЯ О СООТВЕТСТВИИ
Мы заявляем нашу личную ответственность за соответствие данного изделия нижеперечисленным
директивам и соответствующим унифицированным стандартам:
2006/42/EC, 2004/108/EC, EN 55014-1, EN 55 014-2, EN 60745-1, EN 60745-2-2, EN 61000-3-2, EN 61000-3-3.
ДЕКЛАРАЦИЯ ЗА СЪОТВЕТСТВИЕ
Ние декларираме нашата лична отговорност, че това изделие е в съответствие с разпоредбите на следните
директиви, съответно хармонизирани стандарти:
92006/42/ЕС, 2004/108/EC, EN 55014-1, EN 55 014-2, EN 60745-1, EN 60745-2-2, EN 61000-3-2, EN 61000-3-3.
www.sparkygroup.com
BLACK PANTONE185
BLACK PANTONE185

А
B
1
Ние декларираме нашата отговорност, че изделието
ЗАРЯДНО УСТРОЙСТВО ЗА АКУМУЛАТОРНИ БАТЕРИИ
за обща употреба
съответстват на изискванията на следните наредби:
- Наредба за съществените изисквания и оценяване на съответствието за електромагнитна съвместимост - приета с
ПМС № 203 от 29.08.2001 г.;
- Наредба за съществените изисквания и оценяване на съответствието на електрически съоръжения, предназначени
за използване в определени граници на напрежението - приета с ПМС № 182 от 6.07.2001 г.,
- Наредба за маркировката за съответствие - приета с ПМС № 191 от 16.08.2005г..
както и на следните БДС, въвели европейски хармонизирани стандарти:
БДС EN 60335-1; БДС EN 60335-2-29; БДС EN 50366; БДС EN 55014-1; БДС EN 55014-2;
БДС EN 61000-3-2; БДС EN 61000-3-3.
СПАРКИ ЕЛТОС АД
ул. „Кубрат” 9
5500 Ловеч
България
Николай Кълбов
Изпълнителен Директор
СПАРКИ ЕЛТОС АД
EO ДЕКЛАРАЦИЯ ЗА СЪОТВЕТСТВИЕ
Продуктът е маркиран със знак
3
2
6
1
2
3
4
5
5
6
7
СПАРКИ ЕЛТОС АД
EO ДЕКЛАРАЦИЯ ЗА СЪОТВЕТСТВИЕ
СПАРКИ ЕЛТОС АД декларира, че
съответстват на изискванията на следните наредби:
- Наредба за съществените изисквания и оценяване съответствието на машините – приета с ПМС № 140 от
19.06.2008 г.
- Наредба за съществените изисквания и оценяване на съответствието за електромагнитна съвместимост – приета
с ПМС № 76 от 6.04.2007 г,
- Наредба за маркировката за съответствие – приета с ПМС № 191 от 16.08.2005 г.,
както и на следните БДС, въвели европейски хармонизирани стандарти:
БДС EN 55014-1, БДС EN 55 014-2, БДС EN 60745-1, БДС EN 60745-2-2, БДС EN 61000-3-2, БДС EN 61000-3-3.
СПАРКИ ЕЛТОС АД
ул. „Кубрат” 9
5500 Ловеч
България
Николай Кълбов
Изпълнителен Директор
АКУМУЛАТОРНА ЪГЛОВА БОРМАШИНА / ВИНТОВЕРТ
BAR 12E
4
5
08
BLACK PANTONE185
BLACK PANTONE185

EN
1
Contents
I - IntroductionIntroduction ..................................................................................................................................... 1
................................................................................................................. 3
III - Safety instructionsSafety instructions .......................................................................................................................... 4
IV - Additional safety rules for angle drills/driversAdditional safety rules for angle drills/drivers................................................................................ 5
V - Additional instructions for work with the chargerAdditional instructions for work with the charger ...........................................................................5
VI - Additional instructions for work with the battery packAdditional instructions for work with the battery pack .................................................................. 6
VII - Know your productKnow your product ..................................................................................................................... A/7
VIII - OperationOperation ........................................................................................................................................ 8
IX - MaintenanceMaintenance ................................................................................................................................... 8
X - WarrantyWarranty .......................................................................................................................................... 9
UNPACKING
Due to modern mass production techniques, it is unlikely that your power tool is faulty or that a part is
ASSEMBLY
This SPARKY cordless angle drill/driver BAR 12E is packed fully assembled.
BAR 12E • Instruction Manual
I - Introduction
Your new SPARKY power tool will more than satisfy your expectations. It has been manufactured under
easy and safe to operate, and, with proper care, it will give you many years of dependable service.
WARNING:
Carefully read through this entire Instruction Manual before using your new SPARKY power tool.
Take special care to heed the Warnings. Your SPARKY power tool has many features that will
priority in the development of this tool, making it easy to maintain and operate.
Do not dispose of electrical products together with household waste!
Waste electrical products should not be disposed of with household waste. Please recycle where
facilities exist. Check with your local authority or retailer for recycling advice.
ENVIRONMENTAL PROTECTION
The machine, accessories and packaging should be sorted for environmental-friendly recycling.
The plastic components are labelled for categorised recycling.
pages-BAR12E.indd 1 26.5.2008 г. 11:38:14

BAR 12EEN 2
DESCRIPTION OF SYMBOLS
The rating plate on your power tool may show symbols. These represent important information about the
product or instructions on its use.
Double insulated for
additional protection.
Conforms to relevant European
safety standards.
Conforms to the requirements
of Belarusian standards
II - Technical specications
BAR 12E
-1
- wood 24 mm
BATTERY
CHARGER
1.8 A
Noise and vibration information
Noise emission
pA
pA 3 dB
wA
wA 3 dB
Wear hearing protection!
Vibration emission
Total vibration values (vector sum in the three axes) determined according to EN 60745
Vibration emission value ah
11.91 m/s2
Uncertainty K 1.5 m/s2
Conforms to the requirements of
Russian standards.
pages-BAR12E.indd 2 26.5.2008 г. 11:38:15

Instruction Manual EN
3
II - Technical specications
BAR 12E
-1
- wood 24 mm
BATTERY
CHARGER
1.8 A
Noise and vibration information
Noise emission
pA
pA 3 dB
wA
wA 3 dB
Wear hearing protection!
Vibration emission
Total vibration values (vector sum in the three axes) determined according to EN 60745
Vibration emission value ah
11.91 m/s2
Uncertainty K 1.5 m/s2
The vibration emission level given in this information sheet has been measured in accordance with a
for a preliminary assessment of exposure.
used for different applications, with different accessories or poorly maintained, the vibration emission may
differ. This may significantly increase the exposure level over the total working period.
An estimation of the level of exposure to vibration should also take into account the times when the tool is
level over the total working period.
Maintain the power tool and the accessories and keep your hands warm during operation to reduce the
harmful effect of vibrations.
pages-BAR12E.indd 3 26.5.2008 г. 11:38:15

BAR 12EEN 4
III - General power tool
safety warnings
WARNING! Read all safety warn-
ings and all instructions. Failure to follow the
warnings and instructions may result in electric
shock, fire and/or serious injury.
Save all warnings and instructions for
future reference.
The term “power tool” in the warnings refers to
your mains-operated (corded) power tool or bat-
tery-operated (cordless) power tool.
1. WORK AREA SAFETY
a) Keep work area clean and well lit. Clut-
tered or dark areas invite accidents.
b) Do not operate power tools in explosive
atmospheres, such as in the presence of
flammable liquids, gases or dust. Power
tools create sparks which may ignite the dust
or fumes.
c) Keep children and bystanders away while
operating a power tool. Distractions can
cause you to lose control.
2. ELECTRICAL SAFETY
a) Power tool plugs must match the outlet.
Never modify the plug in any way. Do
not use any adapter plugs with earthed
(grounded) power tools. Unmodified plugs
and matching outlets will reduce risk of elec-
tric shock.
b) Avoid body contact with earthed or
grounded surfaces, such as pipes, radia-
tors, ranges and refrigerators. There is an
increased risk of electric shock if your body is
earthed or grounded.
c) Do not expose power tools to rain or wet
conditions. Water entering a power tool will
increase the risk of electric shock.
d)Do not abuse the cord. Never use the
cord for carrying, pulling or unplugging
the power tool. Keep cord away from
heat, oil, sharp edges or moving parts.
Damaged or entangled cords increase the
risk of electric shock.
e) When operating a power tool outdoors,
use an extension cord suitable for out-
door use. Use of a cord suitable for outdoor
use reduces the risk of electric shock.
f) If operating a power tool in a damp loca-
tion is unavoidable, use a residual cur-
rent device (RCD) protected supply. Use
of an RCD reduces the risk of electric shock.
3. PERSONAL SAFETY
a) Stay alert, watch what you are doing and
use common sense when operating a
power tool. Do not use a power tool while
you are tired or under the influence of
drugs, alcohol or medication. A moment
of inattention while operating power tools
may result in serious personal injury.
b) Use personal protective equipment.
Always wear eye protection. Protective
equipment such as dust mask, non-skid
safety shoes, hard hat, or hearing protection
used for appropriate conditions will reduce
personal injuries.
c) Prevent unintentional starting. Ensure
the switch is in the off-position before
connecting to power source and/or bat-
tery pack, picking up or carrying the tool.
Carrying power tools with your finger on the
switch or energising power tools that have
the switch on invites accidents.
d)Remove any adjusting key or wrench be-
fore turning the power tool on. A wrench
or a key left attached to a rotating part of the
power tool may result in personal injury.
e) Do not overreach. Keep proper footing
and balance at all times. This enables bet-
ter control of the power tool in unexpected
situations.
f) Dress properly. Do not wear loose cloth-
ing or jewellery. Keep your hair, cloth-
ing and gloves away from moving parts.
Loose clothes, jewellery or long hair can be
caught in moving parts.
g) If devices are provided for the connec-
tion of dust extraction and collection fa-
cilities, ensure these are connected and
properly used. Use of dust collection can
reduce dust-related hazards.
4. POWER TOOL USE AND CARE
a) Do not force the power tool. Use the cor-
rect power tool for your application. The
correct power tool will do the job better and
safer at the rate for which it was designed.
b) Do not use the power tool if the switch
does not turn it on and off. Any power tool
that cannot be controlled with the switch is
dangerous and must be repaired.
c) Disconnect the plug from the power
source and/or the battery pack from the
power tool before making any adjust-
pages-BAR12E.indd 4 26.5.2008 г. 11:38:15

Instruction Manual EN
5
ments, changing accessories, or storing
power tools. Such preventive safety meas-
ures reduce the risk of starting the power tool
accidentally.
d)Store idle power tools out of the reach of
children and do not allow persons unfa-
miliar with the power tool or these instruc-
tions to operate the power tool. Power tools
are dangerous in the hands of untrained us-
ers.
e) Maintain power tools. Check for misalign-
ment or binding of moving parts, breakage
of parts and any other condition that may
affect the power tool’s operation. If dam-
aged, have the power tool repaired before
use. Many accidents are caused by poorly
maintained power tools.
f) Keep cutting tools sharp and clean. Prop-
erly maintained cutting tools with sharp cutting
edges are less likely to bind and are easier to
control.
g) Use the power tool, accessories and tool
bits etc. in accordance with these instruc-
tions, taking into account the working con-
ditions and the work to be performed. Use
of the power tool for operations different from
those intended could result in a hazardous
situation.
5. SERVICE
a) Have your power tool serviced by a quali-
fied repair person using only identical
replacement parts. This will ensure that the
safety of the power tool is maintained.
IV - Additional safety rules
for angle drills / drivers
performing an operation where the driving
screws may contact hidden wiring. Contact with
a “live” wire will make exposed metal parts of the
tool “live” and shock the operator.
-
ing condition, because it does not have to be
plugged into an electrical outlet. Always set the
installing or removing the battery pack.
V - Additional instructions
for work with the
charger
-
tions and cautionary markings on the charger
and battery pack as well as the instructions on
using the battery pack.
charger is designed for indoor use only.
WARNING: If the battery pack is
cracked or damaged in any other way, do not
insert it in the charger. There is a danger of
electric shock.
WARNING: Do not allow any liquid to
come into contact with the charger. There is a
danger of electric shock.
than charging the exact type of SPARKY re-
chargeable battery pack as supplied with the
charger. Any other use may result in the risk of
fire or electric shock.
are specifically designed to work together. Do
not attempt to charge the battery pack with any
other charger than the one supplied.
as it could cause overheating. Do not place the
charger near any heat source.
-
nect it from the power source.
where it will not be stepped on, tripped over or
-
lutely necessary. The use of an improper exten-
sion cord could cause the risk of fire or electric
shock.
to a heavy knock, dropped or otherwise dam-
aged in any way. Do not operate charger with
damaged cord or plug - have them replaced
immediately. Take the charger to an authorised
service centre for a check or repair.
authorised service centre when service or re-
pair is required. Incorrect re-assembly may re-
sult in the risk of fire or electric shock.
pages-BAR12E.indd 5 26.5.2008 г. 11:38:16

BAR 12EEN 6
the charger from the power supply before at-
tempting to clean it. Removing the battery pack
alone does not reduce the risk.
-
Do not attempt to connect the charger to a sup-
ply with a different voltage.
unplug the charger from the mains supply and
leave it for at least 15 minutes. After this time
you can charge a second battery pack.
plugged in to the power supply, the exposed
charging contacts inside the charger can be
of a conductive nature such as, but not limited
to, steel wool, aluminium foil, or any build-up
of metallic particles should be kept away from
charger cavities. Always unplug the charger
from the power supply when there is no bat-
tery pack in the cavity. Unplug charger before
attempting to clean.
any other liquid.
VI - Additional instructions
for work with the
battery pack
in a low charge condition. You should charge
the battery pack fully before use.
-
ment.
-
tained if the battery pack is charged when the
prevent serious damage to the battery set.
warm to touch while charging. This is a normal
condition, and does not indicate a problem.
packs in direct sunlight in hot weather or near
heat sources.
kind. The battery must be placed in a well venti-
lated area during charging.
cells may occur under extreme usage or tem-
perature conditions. This does not indicate a
- Wash quickly with soap and water.
- If battery liquid gets into your eyes, flush them
-
utes and seek immediate medical attention.
a lamp or other appliance.
-
tion where the surrounding air temperature is
the tool, battery pack and charger to your lo-
cal service centre.
-
the charging procedure. You may also charge
a partially used pack whenever you desire with
no adverse affect on the battery pack.
seriously damaged or can no longer hold a
charge. The battery pack can explode in a fire.
use, avoid placing the charger or battery pack
in a warm environment such as in a metal shed,
or an uninsulated trailer.
WARNING:
the battery pack for any reason. If the plastic
housing of the battery pack breaks or cracks,
return to a service centre for recycling.
-
-
one supplied with tool or a replacement pack
-
ardous condition.
chargers.
Cadmium is considered to be a toxic material.
Use an environmentally safe disposal unit at a
municipal waste disposal centre to dispose of a
damaged or worn out battery.
FITTING OR REMOVING THE
BATTERY PACK
-
lease button and pull battery pack out of tool.
Fig. 1
BATTERY CHARGING
Before using your cordless angle drill/driver for the
If the battery pack is installed in the machine, re-
or removing the battery pack”.
As a battery pack approaches the discharged
state, you will notice a sharp drop in tool perform-
ance. When the tool is unable to perform the task
at hand, it is time to recharge; otherwise the total
operation life of the pack shall be reduced. Dis-
charging the pack beyond this point can damage
the pack.
NOTE. Battery temperature will increase during
and shortly after use. Batteries may not accept a
full charge if they are charged immediately after
use. Allow the battery pack to cool down to room
temperature before charging for best results.
After charging 2 empty battery packs, the charger
must rest for 1 hour.
WARNING: The charger must rest
on the four pads provided on the bottom of the
case. Vent slots in top and bottom of charger
must not be obstructed. Do not charge battery
If the supply cord is damaged, it must be replaced
by the manufacturer or its Service agent or a simi-
Ensure that the batteries are removed from the
appliance before it is scrapped and that they are
disposed of safely.
The appliance must be disconnected from the
supply before removing the batteries.
NORMAL CHARGING
Make sure the power circuit voltage is the same
Connect charger to power source. The orange
Fig. 2, should light up. This indicates that
pages-BAR12E.indd 6 26.5.2008 г. 11:38:16
Instruction Manual EN
7
perature conditions. This does not indicate a
- Wash quickly with soap and water.
- If battery liquid gets into your eyes, flush them
-
utes and seek immediate medical attention.
a lamp or other appliance.
-
tion where the surrounding air temperature is
the tool, battery pack and charger to your lo-
cal service centre.
-
the charging procedure. You may also charge
a partially used pack whenever you desire with
no adverse affect on the battery pack.
seriously damaged or can no longer hold a
charge. The battery pack can explode in a fire.
use, avoid placing the charger or battery pack
in a warm environment such as in a metal shed,
or an uninsulated trailer.
WARNING:
the battery pack for any reason. If the plastic
housing of the battery pack breaks or cracks,
return to a service centre for recycling.
-
-
one supplied with tool or a replacement pack
-
ardous condition.
chargers.
Cadmium is considered to be a toxic material.
Use an environmentally safe disposal unit at a
municipal waste disposal centre to dispose of a
damaged or worn out battery.
FITTING OR REMOVING THE
BATTERY PACK
-
lease button and pull battery pack out of tool.
Fig. 1
BATTERY CHARGING
Before using your cordless angle drill/driver for the
If the battery pack is installed in the machine, re-
or removing the battery pack”.
As a battery pack approaches the discharged
state, you will notice a sharp drop in tool perform-
ance. When the tool is unable to perform the task
at hand, it is time to recharge; otherwise the total
operation life of the pack shall be reduced. Dis-
charging the pack beyond this point can damage
the pack.
NOTE. Battery temperature will increase during
and shortly after use. Batteries may not accept a
full charge if they are charged immediately after
use. Allow the battery pack to cool down to room
temperature before charging for best results.
After charging 2 empty battery packs, the charger
must rest for 1 hour.
WARNING: The charger must rest
on the four pads provided on the bottom of the
case. Vent slots in top and bottom of charger
must not be obstructed. Do not charge battery
If the supply cord is damaged, it must be replaced
by the manufacturer or its Service agent or a simi-
Ensure that the batteries are removed from the
appliance before it is scrapped and that they are
disposed of safely.
The appliance must be disconnected from the
supply before removing the batteries.
NORMAL CHARGING
Make sure the power circuit voltage is the same
Connect charger to power source. The orange
Fig. 2, should light up. This indicates that
the charger is ready to begin charging.
Fig.
2, DFig. 3, E
on battery pack. Slide battery forward onto charg-
er until it stops.
Fig. 2, B-
tinuously, indicating that the battery pack is receiv-
out indicating that the battery pack is fully charged
and that the charger is now in a “Trickle Charge”
“Trickle Charge” until you are ready to use it.
WARNING: When inserting battery
Fig. 2,
A Fig. 2,
C
temperature is too high or the battery voltage is
too low, please leave battery pack on charger,
it will be charged automatically when battery
Fig. 2, B
begin to glow continuously, and the green light
will turn off.
Depending on room temperature, line voltage,
and existing charge level, initial battery charging
may take longer than one hour.
Disconnect charger from power source when not
in use.
IMPORTANT INFORMATION FOR
RECHARGING HOT BATTERIES
When using your cordless angle drill/driver con-
tinuously, the batteries in your battery pack will
become hot. You should let a hot battery pack
attempting to recharge. When the battery pack
becomes discharged and is hot, the red light on
down, the red light will glow continuously to indi-
cate fast charging mode, 1-hour charge time.
NOTE. This will occur when continuous use of
your tool causes the battery pack to become hot.
It does not occur under normal conditions.
VII - Know your product
pages-BAR12E.indd 7 26.5.2008 г. 11:38:16

BAR 12EEN 8
3. Keyless chuck
4. Torque control collar
5. Battery
6. Charger
VIII - Operation
SWITCH OPERATION
1. When the trigger switch is depressed, the tool
rotates. When the trigger is released, the tool
Fig. 4
2. The rotation speed can be controlled by varying
-
sure on the trigger switch results in low rota-
tion speed, further pressing results in smooth
increase of the rpm to maximum upon reaching
the extreme position.
INSTALLING AND REMOVING BITS
WARNING: Switch off the power tool
prior to any procedure on it. To avoid involuntary
switching on we recommend removing the
battery pack.
collar until chuck is opened sufficiently for the bit
to be inserted. Then firmly tighten front collar by
hand. Ensure that the bit is firmly fastened.
To remove a bit, rotate the front chuck collar.
TIGHTENING AND LOOSENING SCREWS
Install the bit that matches the screw, line up the
bit in the grooves of the head of the screw then
tighten it.
the head of the screw.
WARNING: Over tightening can result
in the screw breaking or damage to the end of
the driver bit.
1. Applying this power tool for too long, shall tight-
en the screw excessively and break it.
2. If the machine is held at an angle to the screw
being tightened, the head of the screw may be
damaged, or the specified torque may not be
transmitted to the screw. Always keep the unit
and the screw being tightened in a straight line.
FORWARD / REVERSE SWITCH
of the push button is pushed to turn the bit coun-
Fig. 5
WARNING: The push button can not
be switched while the drill is turning. To switch
the push button, stop the machine and then set
the push button.
TORQUE ADJUSTMENT
By rotating the torque control collar behind the
Fig. 6
The range of 12-torque setting allows better con-
trol when using the drill as screwdriver as it pre-
vents over tightening of the screws.
REMOVING THE CHUCK
screw head. Remove screw by turning clockwise.
3. Place the hex key in the chuck and tighten. Using
key sharply in counter-clockwise direction. This
will loosen the chuck so it can be unscrewed by
hand.
IX - Maintenance
CLEANING
of all air vents with dry air at least once a week.
Wear safety glasses while performing this.
damp cloth and mild detergent.
WARNING: Although exterior plastic
solvents.
Charger Cleaning Instructions
-
rior of the charger using a cloth or soft non-me-
tallic brush. Do not use water or any cleaning
solutions.
WARNING: Disconnect the charger
from the AC outlet before cleaning.
WARNING: To assure product safety
-
-
centres or other qualified service organisa-
tions, always using identical replacement parts.
ACCESSORIES
Recommended accessories for use with your
tool are available at extra cost from your local
SPARKY service centre.
pages-BAR12E.indd 8 26.5.2008 г. 11:38:17

Instruction Manual EN
9
FORWARD / REVERSE SWITCH
of the push button is pushed to turn the bit coun-
Fig. 5
WARNING: The push button can not
be switched while the drill is turning. To switch
the push button, stop the machine and then set
the push button.
TORQUE ADJUSTMENT
By rotating the torque control collar behind the
Fig. 6
The range of 12-torque setting allows better con-
trol when using the drill as screwdriver as it pre-
vents over tightening of the screws.
REMOVING THE CHUCK
screw head. Remove screw by turning clockwise.
3. Place the hex key in the chuck and tighten. Using
key sharply in counter-clockwise direction. This
will loosen the chuck so it can be unscrewed by
hand.
IX - Maintenance
CLEANING
of all air vents with dry air at least once a week.
Wear safety glasses while performing this.
damp cloth and mild detergent.
WARNING: Although exterior plastic
solvents.
Charger Cleaning Instructions
-
rior of the charger using a cloth or soft non-me-
tallic brush. Do not use water or any cleaning
solutions.
WARNING: Disconnect the charger
from the AC outlet before cleaning.
WARNING: To assure product safety
-
-
centres or other qualified service organisa-
tions, always using identical replacement parts.
ACCESSORIES
Recommended accessories for use with your
tool are available at extra cost from your local
SPARKY service centre.
X - Warranty
The guarantee period for SPARKY power tools is
determined in the guarantee card.
-
er handling will be excluded from the guarantee.
well as defects in workmanship will be corrected
free of charge through replacement or repair.
The complaints for defective SPARKY power
back to the dealer or is presented to the author-
ised warranty service centre undismantled, in its
initial condition.
Notes
Carefully read the entire Instruction Manual before
using this product.
The manufacturer reserves the right to make
changes and improvements to the products and
pages-BAR12E.indd 9 26.5.2008 г. 11:38:17

10
DE BAR 12E
Inhalt
I - Einführung .....................................................................................................................................
II - Technische Angaben ................................................................................................................... 12
III - Sicherheitsregeln bei Arbeiten mit Elektrogeräten .................................................................... 13
.......................................................... 14
................................................................. 14
......................................................................... 15
VII - Bekanntmachen mit dem Elektrogerät ....................................................................................A/17
VIII - Betriebsanleitungen ..................................................................................................................... 18
IX - Wartung ......................................................................................................................................... 18
......................................................................................................................................... 19
AUSVERPACKEN
führen.
ZUSAMMENBAU
I - Einführung
-
hen Qualitätsstandards von SPARKY hergestellt, die den strengen Anforderungen des Verbrauchers
WARNUNG!
„Warnung“
Wartung und Bedienung machen.
Keine elektrischen Geräte zusammen mit dem Hausmüll wegwerfen!
in der nächsten kommunalen Sammelstelle ab.
UMWELTSCHUTZ
Zum sortenreinen Recycling sind die Teile, hergestellt aus Kunststoffen, entsprechend
Entspricht den Anforderungen der
russischen normativen Dokumente.
pages-BAR12E.indd 10 26.5.2008 г. 11:38:17

11
Gebrauchsanweisung DE
BEDEUTUNG DER SYMBOLE
Übereinstimmung mit den
Europäischen Sicherheitsstandards.
Entspricht den Anforderungen der
russischen normativen Dokumente.
pages-BAR12E.indd 11 26.5.2008 г. 11:38:17

12
DE BAR 12E
III - Allgemeine
Sicherheitshinweise
für Elektrowerkzeuge
WARNUNG! Lesen Sie alle Sicher-
heitshinweise und Anweisungen. Versäum-
nisse bei der Einhaltung der Sicherheitshin-
weise und Anweisungen können elektrischen
Schlag, Brand und/oder schwere Verletzungen
verursachen.
Bewahren Sie alle Sicherheitshinweise und
Anweisungen für die Zukunft auf.
Der in den Sicherheitshinweisen verwendete
Begriff „Elektrowerkzeug“ bezieht sich auf netz-
betriebene Elektrowerkzeuge (mit Netzkabel)
und auf akkubetriebene Elektrowerkzeuge (ohne
Netzkabel).
1. ARBEITSPLATZSICHERHEIT
a) Halten Sie Ihren Arbeitsbereich sauber
und gut beleuchtet. Unordnung oder unbe-
leuchtete Arbeitsbereiche können zu Unfäl-
len führen.
b) Arbeiten Sie mit dem Elektrowerkzeug
nicht in explosionsgefährdeter Umge-
bung, in der sich brennbare Flüssig-
keiten, Gase oder Stäube befinden. Elek-
trowerkzeuge erzeugen Funken, die den
Staub oder die Dämpfe entzünden können.
c) Halten Sie Kinder und andere Personen
während der Benutzung des Elektrowerk-
zeugs fern. Bei Ablenkung können Sie die
Kontrolle über das Gerät verlieren.
2. ELEKTRISCHE SICHERHEIT
a) Der Anschlussstecker des Elektrowerk-
zeuges muss in die Steckdose passen.
Der Stecker darf in keiner Weise ver-
ändert werden. Verwenden Sie keine
Adapterstecker gemeinsam mit schutz-
geerdeten Elektrowerkzeugen. Unver-
änderte Stecker und passende Steckdosen
verringern das Risiko eines elektrischen
Schlages.
b) Vermeiden Sie Körperkontakt mit ge-
erdeten Oberflächen wie von Rohren,
Heizungen, Herden und Kühlschränken.
Es besteht ein erhöhtes Risiko durch elek-
trischen Schlag, wenn Ihr Körper geerdet ist.
c) Halten Sie Elektrowerkzeuge von Regen
oder Nässe fern. Das Eindringen von Was-
ser in ein Elektrowerkzeug erhöht das Risiko
II - Technische Angaben
BAR 12E
-1
BATTERIE (Ni-Cd)
LADEGERÄT
1.8 A
Information über laufgeräusche und schwingungen
Geräuschemissionswerte M
pA
pA 3 dB
wA
wA 3 dB
Gehörschutz tragen!
SchwingungsemissionswerteM
Die Schwingungen wurden entsprechend Punkt 6.2.7 von EN 60745-1:2006 festgelegt
Messwert der geschaffenen Schwingungen aMesswert der geschaffenen Schwingungen aah
11.91 m/s2
Unbestimmtheit KUnbestimmtheit KK 1.5 m/s2
-
-
Der angegebene Schwingungspegel repräsentiert die hauptsächlichen Anwendungen des Elektrowerk-
-
pages-BAR12E.indd 12 26.5.2008 г. 11:38:18

13
Gebrauchsanweisung DE
III - Allgemeine
Sicherheitshinweise
für Elektrowerkzeuge
WARNUNG! Lesen Sie alle Sicher-
heitshinweise und Anweisungen. Versäum-
nisse bei der Einhaltung der Sicherheitshin-
weise und Anweisungen können elektrischen
Schlag, Brand und/oder schwere Verletzungen
verursachen.
Bewahren Sie alle Sicherheitshinweise und
Anweisungen für die Zukunft auf.
Der in den Sicherheitshinweisen verwendete
Begriff „Elektrowerkzeug“ bezieht sich auf netz-
betriebene Elektrowerkzeuge (mit Netzkabel)
und auf akkubetriebene Elektrowerkzeuge (ohne
Netzkabel).
1. ARBEITSPLATZSICHERHEIT
a) Halten Sie Ihren Arbeitsbereich sauber
und gut beleuchtet. Unordnung oder unbe-
leuchtete Arbeitsbereiche können zu Unfäl-
len führen.
b) Arbeiten Sie mit dem Elektrowerkzeug
nicht in explosionsgefährdeter Umge-
bung, in der sich brennbare Flüssig-
keiten, Gase oder Stäube befinden. Elek-
trowerkzeuge erzeugen Funken, die den
Staub oder die Dämpfe entzünden können.
c) Halten Sie Kinder und andere Personen
während der Benutzung des Elektrowerk-
zeugs fern. Bei Ablenkung können Sie die
Kontrolle über das Gerät verlieren.
2. ELEKTRISCHE SICHERHEIT
a) Der Anschlussstecker des Elektrowerk-
zeuges muss in die Steckdose passen.
Der Stecker darf in keiner Weise ver-
ändert werden. Verwenden Sie keine
Adapterstecker gemeinsam mit schutz-
geerdeten Elektrowerkzeugen. Unver-
änderte Stecker und passende Steckdosen
verringern das Risiko eines elektrischen
Schlages.
b) Vermeiden Sie Körperkontakt mit ge-
erdeten Oberflächen wie von Rohren,
Heizungen, Herden und Kühlschränken.
Es besteht ein erhöhtes Risiko durch elek-
trischen Schlag, wenn Ihr Körper geerdet ist.
c) Halten Sie Elektrowerkzeuge von Regen
oder Nässe fern. Das Eindringen von Was-
ser in ein Elektrowerkzeug erhöht das Risiko
eines elektrischen Schlages.
d)Zweckentfremden Sie das Kabel nicht,
um das Elektrowerkzeug zu tragen, auf-
zuhängen oder um den Stecker aus der
Steckdose zu ziehen. Halten Sie das Ka-
bel fern von Hitze, Öl, scharfen Kanten
oder sich bewegenden Geräteteilen. Be-
schädigte oder verwickelte Kabel erhöhen
das Risiko eines elektrischen Schlages.
e) Wenn Sie mit einem Elektrowerkzeug im
Freien arbeiten, verwenden Sie nur Ver-
längerungskabel, die auch für den Au-
ßenbereich geeignet sind. Die Anwendung
eines für den Außenbereich geeigneten Ver-
längerungskabels verringert das Risiko eines
elektrischen Schlages.
f) Wenn der Betrieb des Elektrowerkzeuges
in feuchter Umgebung nicht vermeidbar
ist, verwenden Sie einen Fehlerstrom-
schutzschalter. Der Einsatz eines Fehler-
stromschutzschalters vermindert das Risiko
eines elektrischen Schlages.
3. SICHERHEIT VON PERSONEN
a) Seien Sie aufmerksam, achten Sie darauf,
was Sie tun, und gehen Sie mit Vernunft
an die Arbeit mit einem Elektrowerkzeug.
BenutzenSiekeinElektrowerkzeug,wenn
Sie müde sind oder unter dem Einfluss
von Drogen, Alkohol oder Medikamen-
ten stehen. Ein Moment der Unachtsamkeit
beim Gebrauch des Elektrowerkzeuges kann
zu ernsthaften Verletzungen führen.
b) Tragen Sie persönliche Schutzausrüs-
tung und immer eine Schutzbrille. Das
Tragen persönlicher Schutzausrüstung, wie
Staubmaske, rutschfeste Sicherheitsschuhe,
Schutzhelm oder Gehörschutz, je nach Art
und Einsatz des Elektrowerkzeuges, verrin-
gert das Risiko von Verletzungen.
c) Vermeiden Sie eine unbeabsichtigte In-
betriebnahme. Vergewissern Sie sich,
dass das Elektrowerkzeug ausgeschaltet
ist, bevor Sie es an die Stromversorgung
und/oder den Akku anschließen, es auf-
nehmen oder tragen. Wenn Sie beim Tra-
gen des Elektrowerkzeuges den Finger am
Schalter haben oder das Gerät eingeschaltet
an die Stromversorgung anschließen, kann
dies zu Unfällen führen.
d)Entfernen Sie Einstellwerkzeuge oder
Schraubenschlüssel, bevor Sie das Elek-
trowerkzeug einschalten. Ein Werkzeug
oder Schlüssel, der sich in einem drehenden
Geräteteil befindet, kann zu Verletzungen
führen.
pages-BAR12E.indd 13 26.5.2008 г. 11:38:18

14
DE BAR 12E
e) Vermeiden Sie eine abnormale Körper-
haltung. Sorgen Sie für einen sicheren
Stand und halten Sie jederzeit das
Gleichgewicht. Dadurch können Sie das
Elektrowerkzeug in unerwarteten Situati-
onen besser kontrollieren.
f) Tragen Sie geeignete Kleidung. Tragen
Sie keine weite Kleidung oder Schmuck.
Halten Sie Haare, Kleidung und Hand-
schuhe fern von sich bewegenden Tei-
len. Lockere Kleidung, Schmuck oder lange
Haare können von sich bewegenden Teilen
erfasst werden.
g) Wenn Staubabsaug- und -auffangeinrich-
tungen montiert werden können, verge-
wissern Sie sich, dass diese angeschlos-
sen sind und richtig verwendet werden.
Verwendung einer Staubabsaugung kann
Gefährdungen durch Staub verringern.
4. VERWENDUNG UND BEHANDLUNG
DES ELEKTROWERKZEUGES
a) Überlasten Sie das Gerät nicht. Verwen-
den Sie für Ihre Arbeit dasdafür bestimm-
te Elektrowerkzeug. Mit dem passenden
Elektrowerkzeug arbeiten Sie besser und
sicherer im angegebenen Leistungsbereich.
b) Benutzen Sie kein Elektrowerkzeug, des-
sen Schalter defekt ist. Ein Elektrowerk-
zeug, das sich nicht mehr ein- oder ausschal-
ten lässt, ist gefährlich und muss repariert
werden.
c) Ziehen Sie den Stecker aus der Steckdo-
se und/oder entfernen Sie den Akku, be-
vor Sie Geräteeinstellungen vornehmen,
Zubehörteile wechseln oder das Gerät
weglegen. Diese Vorsichtsmaßnahme ver-
hindert den unbeabsichtigten Start des Elek-
trowerkzeuges.
d)Bewahren Sie unbenutzte Elektrowerk-
zeuge außerhalb der Reichweite von Kin-
dern auf. Lassen Sie Personen das Ge-
rät nicht benutzen, die mit diesem nicht
vertraut sind oder diese Anweisungen
nicht gelesen haben. Elektrowerkzeuge
sind gefährlich, wenn Sie von unerfahrenen
Personen benutzt werden.
e) Pflegen Sie Elektrowerkzeuge mit Sorg-
falt. Kontrollieren Sie, ob bewegliche
Teile einwandfrei funktionieren und nicht
klemmen, ob Teile gebrochen oder so
beschädigt sind, dass die Funktion des
Elektrowerkzeuges beeinträchtigt ist.
Lassen Sie beschädigte Teile vor dem
Einsatz des Gerätes reparieren. Viele Un-
fälle haben ihre Ursache in schlecht gewar-
teten Elektrowerkzeugen.
f) Halten Sie Schneidwerkzeuge scharf
und sauber. Sorgfältig gepflegte Schneid-
werkzeuge mit scharfen Schneidkanten ver-
klemmen sich weniger und sind leichter zu
führen.
g) Verwenden Sie Elektrowerkzeug, Zu-
behör, Einsatzwerkzeuge usw. entspre-
chend diesen Anweisungen. Berücksich-
tigen Sie dabei die Arbeitsbedingungen
und die auszuführende Tätigkeit. Der
Gebrauch von Elektrowerkzeugen für ande-
re als die vorgesehenen Anwendungen kann
zu gefährlichen Situationen führen.
5. SERVICE
a) Lassen Sie Ihr Elektrowerkzeug nur von
qualifiziertem Fachpersonal und nur mit
Original-Ersatzteilen reparieren. Damit
wird sichergestellt, dass die Sicherheit des
Elektrowerkzeuges erhalten bleibt.
IV - Zusätzliche Sicher
heitsregeln für Winkel
bohrschrauber
Oberflächen bei der Durchführung einer Ope-
ration, bei welcher möglich ist, die bearbei-
Spannung wird die Metalleile des Elektroge-
rätes unter Spannung legen und Stromschlag
auf dem Betreiber verursachen.
-
-
lung, wenn Sie die Batterie legen oder sie ent-
fernen.
V - Zusätzliche Regeln für
die Arbeit mit dem
Ladegerät
-
sowie auch die Instruktionen für die Arbeit mit
der Batterie.
Räume bestimmt ist.
WARNUNG::
oder sonst beschädigt ist, legen Sie sie nicht in
WARNUNG: Der Kontakt von egal
unerlaubt. Es besteht Stromschlagrisiko.
kann Brand- oder Stromschlaggefahr verursa-
chen.
-
-
ten. Versuchen Sie nicht, die Batterie mit einem
-
gerät, da das eine Überwärmung verursachen
-
rätes so verlegt ist, dass es nicht getretten, be-
schädigt oder einer mechanischen Belastung
unterworfen werden kann.
Die Verwendung eines ungeeigneten Verlän-
gerungskabels kann Brand- oder Stromschlag-
gefahr verursachen.
einem starken Schlag unterworfen, fallengelas-
sen oder sonst beschädigt worden ist. Verwen-
-
paratur.
Sie sich an einem autorisierten Service. Der
falsche Wiedereinbau kann Brand- oder Strom-
schlaggefahr verursachen.
-
pages-BAR12E.indd 14 26.5.2008 г. 11:38:18

15
Gebrauchsanweisung DE
Räume bestimmt ist.
WARNUNG::
oder sonst beschädigt ist, legen Sie sie nicht in
WARNUNG: Der Kontakt von egal
unerlaubt. Es besteht Stromschlagrisiko.
kann Brand- oder Stromschlaggefahr verursa-
chen.
-
-
ten. Versuchen Sie nicht, die Batterie mit einem
-
gerät, da das eine Überwärmung verursachen
-
rätes so verlegt ist, dass es nicht getretten, be-
schädigt oder einer mechanischen Belastung
unterworfen werden kann.
Die Verwendung eines ungeeigneten Verlän-
gerungskabels kann Brand- oder Stromschlag-
gefahr verursachen.
einem starken Schlag unterworfen, fallengelas-
sen oder sonst beschädigt worden ist. Verwen-
-
paratur.
Sie sich an einem autorisierten Service. Der
falsche Wiedereinbau kann Brand- oder Strom-
schlaggefahr verursachen.
-
-
-
Ablauf dieser Zeit können Sie die nächste Bat-
terie aufladen.
-
degerätes verursachen. Die stromleitenden
andere Stoffe aus Metalleilchen sollen fern von
-
bevor Sie mit seiner Reinigung beginnen.
-
chen Sie es nicht ins Wasser oder in anderen
VI - Zusätzliche Regeln
für den Umgang
mit der Batterie
voll beladen geliefert. Sie soll vor dem Arbeits-
beginn komplett aufgeladen werden.
oder nasser Umgebung auf.
-
schaften können dann erreicht werden, wenn
die Batterie nicht bei Umgebungstempera-
Schaden der Batterie.
-
gerät und die Batterie erwärmen. Das ist nor-
mal und spricht nicht für Vorhandensein eines
Problems.
Sie die Batterie nicht bei direkter Sonnenlicht,
-
mequellen auf.
pages-BAR12E.indd 15 26.5.2008 г. 11:38:19

16
DE BAR 12E
Tank. Während der Aufladung soll sich die Bat-
terie in einem gut belüfteten Raum befinden.
-
gen aus der Batterie möglich. Dass bedeutet
Seife waschen.
sollen Sie sie reichlich mit sauberem Wasser
-
-
-
messer, ob die Spannung nicht ausgefallen ist.
-
gerät an einem Ort, wo die Umgebungstem-
bringen Sie das Elektrogerät mit der Batterie
-
tionen, die vorher leicht durchgeführt worden
eine teilweise verbrauchte Batterie laden, ohne
wenn sie ernste Deffekte aufweisen und nicht
mehr aufgeladen werden können. Die Batterien
-
rie unter Metallvordach oder in einem Wagen
ohne Wärmeisolierung.
WARNUNG:: Versuchen Sie nie,
-
-
Sie keine andere Batterie ein. Das wird das
Elektrogerät beschädigen und kann gefährliche
Situation verursachen.
werden.
EINLEGEN UND ENTFERNEN
DER BATTERIE
-
Sie sie raus.
-
auf der Batterie aus und verschieben Sie die Bat-
terie in dem Elektrogerät, bis Sie das charakter-
Abb. 1
LADEN DER BATTERIEN
Schraubbohrers soll die Batterie voll aufgeladen
-
weise im Abschnitt „Einlegen und Entfernen der
Batterie“ folgen.
Wenn die Batterie nicht genug aufgeladen ist,
nicht mehr erfüllen kann, soll die Batteri aufgela-
-
ben der Batterie. Eine weiter Entladung kann die
Battreie beschädigen.
HINWEIS:
wird sich die Temperatur der Batterie erhöhen.
-
geladen wird, kann sie nicht vollständig geladen
Batterie bis Zimmertemperatur ab.
-
gerät eine Stunde lang nicht verwendet werden.
WARNUNG::
-
-
-
degerät herausgenommen ist, bevor es gebrackt
-
-
LADEN DER BATTERIEN
Spannung, angegeben auf dem Typenschild des
-
Abb.2 soll
betriebsbereit ist.
-
ten Sie die Schieber (Abb. 2D)
(Abb. 3E) der Bat-
terie aus. Schieben Sie die Batterie nach vorne
(Abb. 2B) soll dauernd leuchten,
erlöschen, was bedeuten soll, dass die Batterie
-
Batterie kann in diesem Modus bleiben, bis Sie sie
wieder brauchen.
pages-BAR12E.indd 16 26.5.2008 г. 11:38:19

17
Gebrauchsanweisung DE
WARNUNG::
-
-
-
degerät herausgenommen ist, bevor es gebrackt
-
-
LADEN DER BATTERIEN
Spannung, angegeben auf dem Typenschild des
-
Abb.2 soll
betriebsbereit ist.
-
ten Sie die Schieber (Abb. 2D)
(Abb. 3E) der Bat-
terie aus. Schieben Sie die Batterie nach vorne
(Abb. 2B) soll dauernd leuchten,
erlöschen, was bedeuten soll, dass die Batterie
-
Batterie kann in diesem Modus bleiben, bis Sie sie
wieder brauchen.
WARNUNG:: Beim Einlegen der Bat-
(Abb. 2A)(Abb.
2C)
automatisch beginnen, wenn die Temperatur
-
male Spannung erreicht. Dass wird das rote
In Abhängigkeit von der Zimmertemperatur, der
Anspruch nehmen.
-
WICHTIGE INFORMATION FÜR DIE AUF-
LADUNG VON HEISSEN BATTERIEN
Bei längerer Arbeit mit dem Elektrogerät wird sich
-
-
leuchten, was wieder eine Schnellladung mit einer
HINWEIS: Das merkt man nur nach längerer
Arbeit mit dem Elektrogerät, wenn die Batterie
erwärmt ist. Bei normalen Betriebsbedingungen
wird so was nicht beobachtet.
VII - Bekanntmachung
mit dem Elektrogerät
1. Umschalter
3. Schnellspannfutter
4. Ring für Momentregelung
5. AKKU - Batterie
pages-BAR12E.indd 17 26.5.2008 г. 11:38:19
Other manuals for BAR 12E
3
Table of contents
Languages:
Other Sparky Group Power Screwdriver manuals

Sparky Group
Sparky Group BVR 62E User manual

Sparky Group
Sparky Group BR2 12Li-C HD User manual

Sparky Group
Sparky Group BR 12E User manual

Sparky Group
Sparky Group GR 3,6Li User manual

Sparky Group
Sparky Group GR 3 User manual

Sparky Group
Sparky Group BVR 6 User manual

Sparky Group
Sparky Group BVR54E User manual

Sparky Group
Sparky Group BR2 12E User manual

Sparky Group
Sparky Group GR 3 User manual