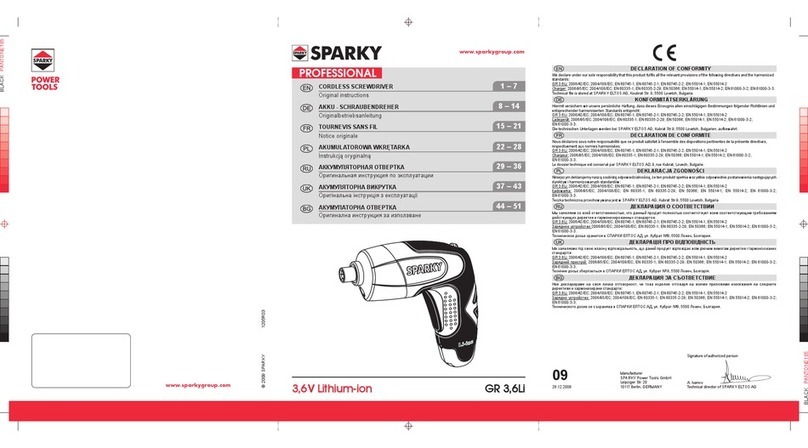
Sparky Group GR 3,6Li User manual

www.sparkygroup.com
www.sparkygroup.com
SPARKY Power Tools GmbH
Leipziger Str. 20
10117 Berlin, DEUTSCHLAND
Geschäftsführer Dipl.-Kfm., Dipl.-Ing. Stanislav Petkov
DECLARATION OF CONFORMITY
We declare under our sole responsibility that this product is in conformity with the provisions of the following directives and the
corresponding harmonized standards:
GR 3,6Li:
Charger:
KONFORMITÄTSERKLÄRUNG
Hiermit versichern wir unsere persönliche Haftung, daß dieses Erzeugnis den Anordnungen folgender Richtlinien und entpsrechender
harmonisierten Standards entspricht:
GR 3,6Li:
Ladegerät:
DECLARATION DE CONFORMITE
Nous déclarons sous notre propre responsabilité que ce produit est conformé aux directives, respectivement les standards harmonisés:
GR 3,6Li:
Chargeur:
Deklaracja zgoDności
GR 3,6Li:
Ladowarka:
ДЕКЛАРАЦИЯ О СООТВЕТСТВИИ
GR 3,6Li:
ДЕКЛАРАЦИЯ ЗА СЪОТВЕТСТВИЕ
GR 3,6Li:
© 2009 SPARKY
3,6V Lithium-ion GR 3,6Li
1 – 7
CORDLESS SCREWDRIVER
16 – 23
TOURNEVIS SANS FIL
32 – 39
АККУМУЛЯТОРНАЯ ОТВЕРТКА
40 – 48
АКУМУЛАТОРНА ОТВЕРТКА
8 – 15
AKKU - SCHRAUBENDREHER
Gebrauchsanweisung
24 – 31
AKUMULATOROWA WKRĘTARK A

A
H
B
C
A
F
F
D
D
I
E
G
1 2
3
АКУМУЛАТОРНА ОТВЕРТКА
GR 3,6Li
СПАРКИ ЕЛТОС АД
СПАРКИ ЕЛТОС АД
ЗАРЯДНО УСТРОЙСТВО ЗА АКУМУЛАТОРНИ БАТЕРИИ
за обща употреба
СПАРКИ ЕЛТОС АД
Николай Кълбов
СПАРКИ ЕЛТОС АД
Продуктът е маркиран със знак
Николай Кълбов
Продуктът е маркиран със знак
А
B

1EN
UNPACKING
Due to modern mass production techniques, it is unlikely that your power tool is faulty or that a part is
missing. If you nd anything wrong, do not operate the tool until the parts have been replaced or the fault
has been rectied. Failure to do so could result in serious personal injury.
ASSEMBLY
This SPARKY cordless screwdriver GR 3,6Li is packed fully assembled.
Contents
I - Introduction .................................................................................................................................... 1
II - Technical specications ................................................................................................................ 3
III - General power tool safety warnings ............................................................................................ 4
IV - Additional safety rules for screwdrivers ....................................................................................... 5
V - Additional safety instructions for charging.................................................................................... 5
VI - Know your product .....................................................................................................................A/6
VII - Operation ....................................................................................................................................... 6
VIII - Maintenance .................................................................................................................................. 6
IX - Environmental Protection............................................................................................................... 7
X - Warranty ......................................................................................................................................... 7
I - Introduction
Your new SPARKY power tool will more than satisfy your expectations. It has been manufactured under
stringent SPARKY Quality Standards to meet superior performance criteria. You will nd your new tool
easy and safe to operate, and, with proper care, it will give you many years of dependable service.
WARNING:
Carefully read through this entire Instruction Manual before using your new SPARKY power tool.
Take special care to heed the . Your SPARKY power tool has many features that will
make your job faster and easier. Safety, performance, and dependability have been given top
priority in the development of this tool, making it easy to maintain and operate.
Waste electrical products should not be disposed of with household waste. Please recycle where
facilities exist. Check with your local authority or retailer for recycling advice.
ENVIRONMENTAL PROTECTION
The machine, accessories and packaging should be sorted for environmental-friendly recycling.
The plastic components are labelled for categorised recycling.

2GR 3,6Li
EN
DESCRIPTION OF SYMBOLS
The rating plate on your tool and/or charger may show symbols. These represent important information
about the product or instructions on its use.
Double insulated for additional protection
Conforms to relevant European safety standards
Conforms to the requirements of the German Equipment and Product Safety Act
Conforms to the requirements of Russian standards
Read the instruction manual

3
EN
II - Technical specications
GR 3,6Li
▪ Voltage: 3,6 V
▪ No load speed: 170 min-1
▪ Max. torque: 4 Nm
▪ Spindle recess: 6 mm Hexagon
▪ Spindle lock for manual screw driving: Yes
▪ Weight (EPTA Procedure 1/2003): 320 g
BATTERY (Lithium-ion)
▪ Battery capacity: 1.3 Ah
CHARGER
▪ Voltage / frequency: 230V~50Hz
▪ Consumption: 4 W
▪ Output: 5 V 0.3 A
▪ Charging time: 3–5 h
▪ (measured values determined according to EN 60745):
A-weighted sound pressure level LpA 62 dB(A)
Uncertainty КpA 3 dB
A-weighted sound power level LwA 73 dB(A)
Uncertainty КwA 3 dB
▪ (determined according to 6.2.7 EN 60745-1:2006):
Total vibration values (vector sum in the three axes) determined according to EN 60745
Vibration emission vallue ahCHeq 0.37 m/s2
Uncertainty ahCHeq 1.5 m/s2
The vibration emission level given in this information sheet has been measured in accordance with a
standardised test given in EN 60745 and may be used to compare one tool with another. It may be used
for a preliminary assessment of exposure.
The declared vibration emission level represents the main applications of the tool. However if the tool is
used for different applications, with different accessories or poorly maintained, the vibration emission may
differ. This may significantly increase the exposure level over the total working period.
An estimation of the level of exposure to vibration should also take into account the times when the tool is
switched off or when it is running but not actually doing the job. This may significantly reduce the exposure
level over the total working period.
Maintain the power tool and the accessories and keep your hands warm during operation to reduce the
harmful effect of vibrations.

4GR 3,6Li
EN
III - General power tool
safety warnings
-
Failure to follow the
warnings and instructions may result in electric
shock, fire and/or serious injury.
The term “power tool” in the warnings refers to
your mains-operated (corded) power tool or bat-
tery-operated (cordless) power tool.
Clut-
tered or dark areas invite accidents.
Power
tools create sparks which may ignite the dust
or fumes.
Distractions can
cause you to lose control.
Unmodified plugs
and matching outlets will reduce risk of elec-
tric shock.
-
There is an
increased risk of electric shock if your body is
earthed or grounded.
Water entering a power tool will
increase the risk of electric shock.
Damaged or entangled cords increase the
risk of electric shock.
-
Use of a cord suitable for outdoor
use reduces the risk of electric shock.
-
-
Use
of an RCD reduces the risk of electric shock.
A moment
of inattention while operating power tools
may result in serious personal injury.
Protective
equipment such as dust mask, non-skid
safety shoes, hard hat, or hearing protection
used for appropriate conditions will reduce
personal injuries.
-
Carrying power tools with your finger on the
switch or energising power tools that have
the switch on invites accidents.
-
A wrench
or a key left attached to a rotating part of the
power tool may result in personal injury.
This enables bet-
ter control of the power tool in unexpected
situations.
-
-
Loose clothes, jewellery or long hair can be
caught in moving parts.
-
-
Use of dust collection can
reduce dust-related hazards.
-
The
correct power tool will do the job better and
safer at the rate for which it was designed.
Any power tool
that cannot be controlled with the switch is
dangerous and must be repaired.
-
5
EN
Such preventive safety meas-
ures reduce the risk of starting the power tool
accidentally.
Power tools are dangerous in the hands of
untrained users.
-
-
Many accidents are caused by
poorly maintained power tools.
Properly maintained cutting tools with sharp
cutting edges are less likely to bind and are
easier to control.
-
Use of the power tool for operations different
from those intended could result in a hazard-
ous situation.
-
This will ensure that the
safety of the power tool is maintained.
IV - Additional safety rules
for screwdrivers
▪ Hold tool by insulated gripping surfaces when
performing an operation where the driving
screws may contact hidden wiring. Contact with
a “live” wire will make exposed metal parts of
the tool “live” and shock the operator.
▪ Be aware that this tool is always in an operat-
ing condition, because it does not have to be
plugged into an electrical outlet. Always set the
trigger switch to the locked OFF position when
installing or removing the battery pack.
V - Additional safety rules
for charging
▪ Do not charge the tool in damp or wet environ-
ment.
▪ Longest life and best performance can be
obtained if the battery pack is charged when
the air temperature is between 65ºF–75ºF
(18ºC–24ºC). DO NOT charge the battery pack
at air temperature below +40ºF (+4.5ºC), or
above +105ºF (+40.5ºC). This is important and
will prevent serious damage to the battery set.
▪ The charger and handle may become warm to
touch while charging. This is a normal condi-
tion, and does not indicate a problem.
▪ To prevent overheating, do not cover the charger
and do not charge battery packs in direct sun-
light, during hot weather or near heat sources.
▪ If the battery pack does not charge properly:
1. Move charger and power tool to a location
where the surrounding air temperature is ap-
proximately 65ºF–75ºF (18ºC–24ºC).
2. If charging problems persist, take or send the
tool with the battery pack and charger to your
local service centre.
▪ The battery pack should be recharged when it
fails to produce sufficient power on jobs, which
were easily done previously. DO NOT CON-
TINUE to use under these conditions. Follow
the charging procedure. You may also charge
a partially used pack whenever you desire with
no adverse affect on the battery pack.
WARNING: Do not allow any liquid to
get inside charger. Electric shock may result.
To facilitate the cooling of the battery pack after
use, avoid placing the charger or the power tool
during hot weather in a warm environment such
as in a metal shed, or an uninsulated trailer.
WARNING: Never attempt to open the
battery pack for any reason. If the plastic hous-
ing of the battery pack breaks or cracks, return
to a service centre for recycling.
▪ Always use correct SPARKY battery pack (the
one supplied with tool or a replacement pack
exactly like it). Never install any other battery
pack. It will ruin your tool and may create a haz-
ardous condition.
Before attempting to charge your screwdriver,
thoroughly read all of the safety instructions.

6GR 3,6LiEN
There are two possible ways to charge your
screwdriver:
1. Plug the output cord of the charger into the
socket in the back half of the screwdriver handle
as shown in (Fig. 1). Plug the charger into any
standard electrical outlet. Charging occurs di-
rectly between the charger and the power tool.
2. Plug the output cord of the charger into the
socket in the back half of the charging base
as shown in (Fig. 2, A). Put the power tool into
the charging base as shown in (Fig. 2, B). un-
til it “clicks” into position. Plug the charger into
any standard electrical outlet. Charging occurs
through the terminal plates of the power tool
and the charging base.
The battery was discharged after manu-
facturing and will therefore require five to ten
charges/discharges before it reaches its full ca-
pacity.
3. Charger will work best at normal room tempera-
ture.
4. The charger plug and the tool handle may be-
come warm while charging. This is normal and
does not indicate a problem.
5. For most fix up jobs a charge of 3 to 5 hours will
be adequate.
WARNING: When disconnecting the
screwdriver from the charger, be sure to unplug
the charger from the outlet first, and then dis-
connect the charger cord from the screwdriver.
WARNING: The charger and tool are
specially designed to charge together. Do NOT
attempt to charge the tool with other chargers
than SPARKY.
VI - Know your product
A. ON/OFF switch
B. Forward/reverse switch
C. Bit holder
D. Socket
Е. LED – Battery Indication
F. Terminal Plates
G. Charging Base
H. Charger
I. LED work area light
VII - Operation
LED WORK AREA LIGHT
The screwdriver has LED light (I) to illuminate the
work area and improve vision when drilling in ar-
eas with insufcient light.
Max. radiant power: < 2mW
Wavelength: 400-700nm
EN 60825-1: 1994+A1:2002+A2:2001
LED RADIATION
DO NOT STARE INTO BEAM
CLASS 2 LED PRODUCT
1. Forward/reverse switch (Fig. 3, C) – set right to
clockwise rotation.
2. Forward/reverse switch (Fig. 3, D) – set left to
counter clockwise rotation.
Press on switch (A), to drive/install fasteners or to
remove fasteners.
INSERTING AND REMOVING
SCREWDRIVER BITS
1. To install, insert screwdriver bit (6 mm hex) into
bit holder (C), of tool.
2. To remove, firmly grasp bit and pull out of bit
holder.
WARNING: Always set switch to off po-
sition when installing and removing bits.
LOCKING THE SCREWDRIVER
The screwdriver is tted with an automatic spindle
lock feature. When the screwdriver is locked, it is
possible to use it as a manual tool.
VIII - Maintenance
CLEANING
▪ With the motor running, blow dirt and dust out
of all air vents with dry air at least once a week.
Wear safety glasses while performing this.
▪ Exterior plastic parts may be cleaned with a
damp cloth and mild detergent.

7
EN
WARNING: Although exterior plastic
parts are highly solvent resistant, NEVER use
solvents.
▪ Dirt and grease may be removed from the
exterior of the charger using a cloth or soft non-
metallic brush. Do not use water or any cleaning
solutions.
WARNING: Disconnect the charger
from the AC outlet before cleaning.
To assure product safety
and reliability, repairs, maintenance and adjust-
ment (including brush inspection and replace-
ment) should be performed by certified service
centres or other qualified service organisations,
always using identical replacement parts.
ACCESSORIES
Recommended accessories for use with your
tool are available at extra cost from your local
SPARKY service centre.
IX - Environmental
Protection
The machine, accessories and packaging should
be sorted for environmental-friendly recycling.
-
According to the guidelines 91/157/
EEC, power tools, which are not usable, should
be recycled.
-
All
type of batteries should be sorted for environmen-
tal-friendly recycling or destroyed.
Defective or worn out batteries must be recycled
according to the guidelines 91/157/EEC.
To remove the battery from the machine, make
sure that the battery is fully discharged. Unscrew
the screws on the casing and take off the casing
shell. Disconnect the connections at the battery
and take out the battery.
X- Warranty
The guarantee period for SPARKY power tools is
determined in the guarantee card.
Faults due to normal wear, overloading or improp-
er handling will be excluded from the guarantee.
Faults due to defective materials implemented as
well as defects in workmanship will be corrected
free of charge through replacement or repair.
The complaints for defective SPARKY power
tools will be recognized if the machine is sent
back to the dealer or is presented to the author-
ised warranty service centre undismantled, in its
initial condition.
Notes
Carefully read the entire Instruction Manual before
using this product.
The manufacturer reserves the right to make
changes and improvements to the products and
to alter specications without prior notice.
Specications may differ from country to country.
Table of contents
Other Sparky Group Power Screwdriver manuals

Sparky Group
Sparky Group BR2 12Li-C HD User manual

Sparky Group
Sparky Group BVR54E User manual

Sparky Group
Sparky Group BR2 12E User manual

Sparky Group
Sparky Group BAR 12E User manual

Sparky Group
Sparky Group BVR 6 User manual

Sparky Group
Sparky Group BVR 62E User manual

Sparky Group
Sparky Group GR 3 User manual

Sparky Group
Sparky Group BR 12E User manual

Sparky Group
Sparky Group GR 3 User manual