Spartan O'Brien User manual
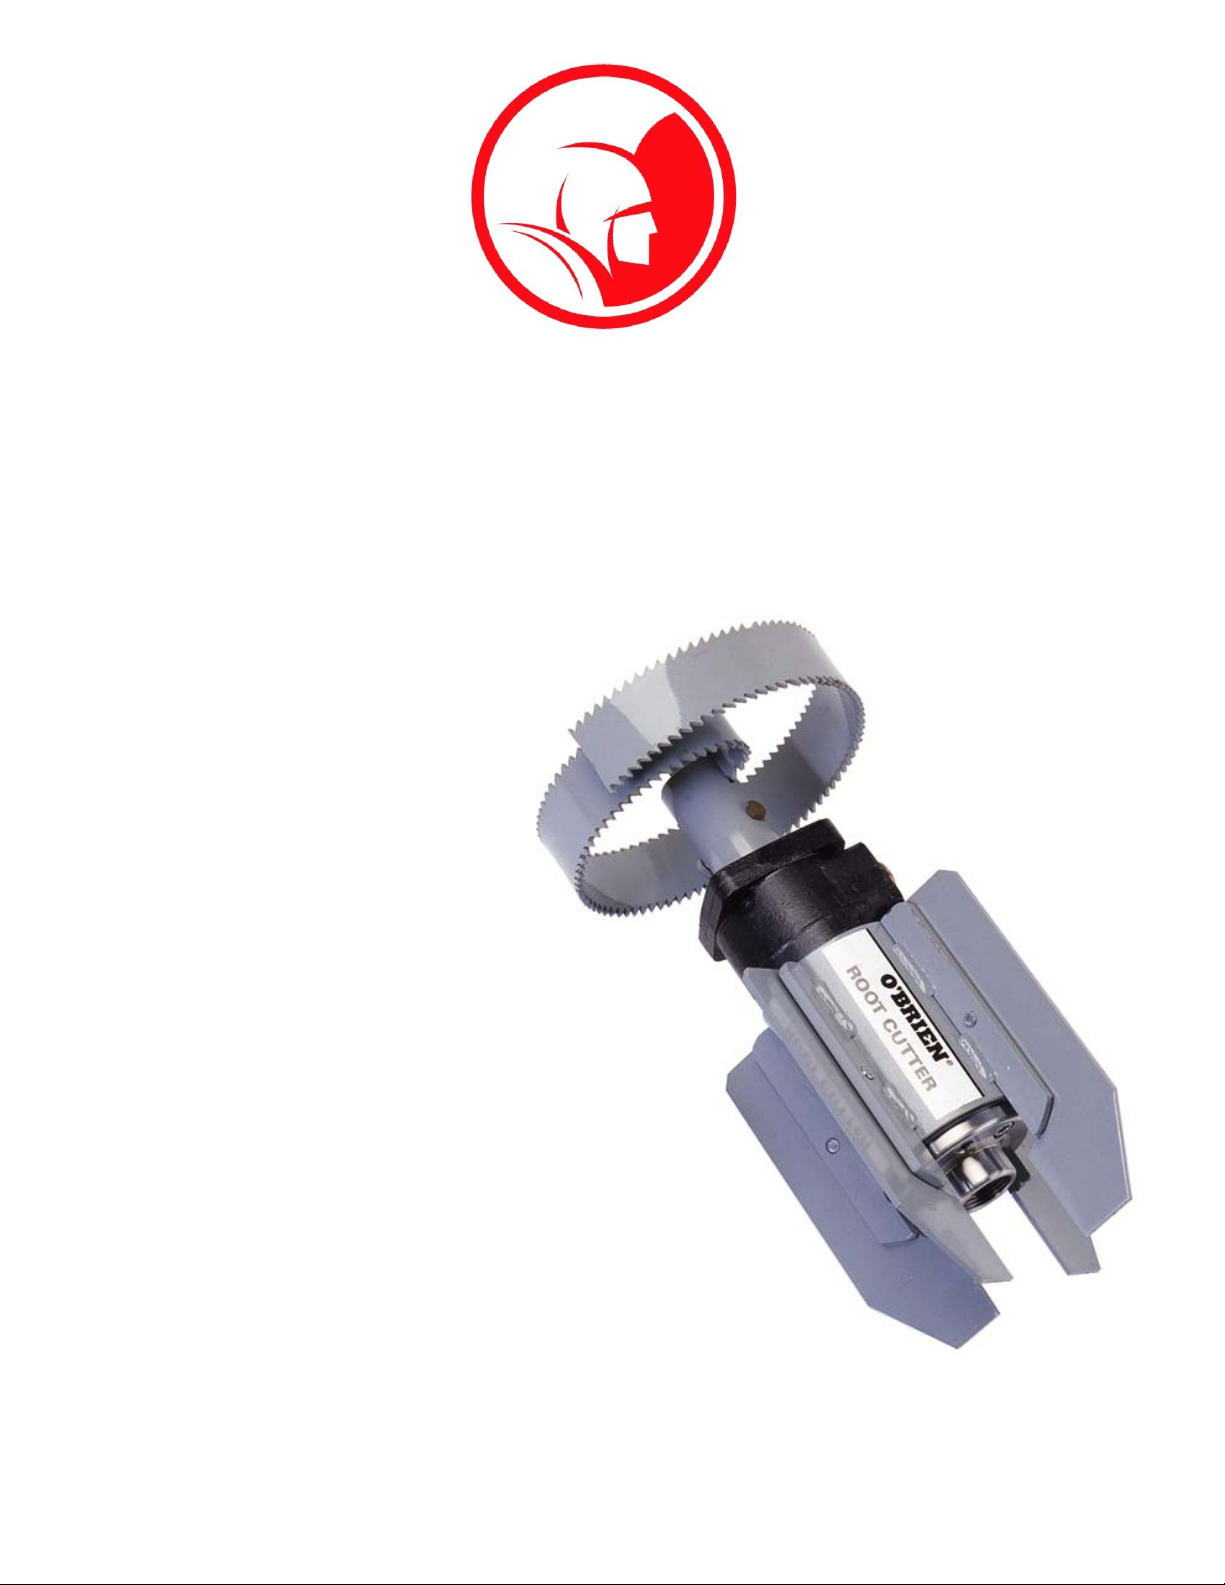
O’Brien Root Cutter
Owner’s Manual
SPARTAN TOOL L.L.C.
8 0 0 . 4 3 5 . 3 8 6 6
www.spartantool.com
Record the Serial Number of your
O’Brien Root Cutter
and give the number to the factory
when ording parts.
Serial Number ..............................................
SPSP
SPSP
SPARTART
ARTART
ARTANAN
ANAN
AN
44247500 10-170-12 © 2012 Spartan Tool LLC

Page 2
Table of Contents
Technical Data .................................................................................................... 3
Warnings............................................................................................................ 3-4
Operating Instructions ........................................................................................ 5
Proper Orifice Selection ...................................................................................... 5
Cutter Blade Selection......................................................................................... 6
Skid Mounting ...................................................................................................... 7
Attachment of Cutters .......................................................................................... 7
O’Brien Root Cutter Operation ....................................................................... 8-9
O’Brien Root Cutter Parts List .................................................................... 10-11
Optional Accessories ........................................................................................12

Page 3
Technical Data
NOTE: The correct root cutter model must be selected for proper operation.
OPERATING PRESSURES ------ 2000 PSI
FLOW RATE REQUIRED --------- 35 - 60 GPM
HOSE FITTING REQUIRED ----- 3/4” or 1” hose
WEIGHT ------------------------------- 19 lbs.
PIPE SIZES --------------------------- 6” to 20”
INCLUDED SKIDS SIZES -------- 6”, 8”, 10”, 12”, and 15”
Do not start root cutter unless it is contained inside the drain line! Severe injury will result
from contact with cutter blades.
—Drain and sewer cleaning can be dangerous. Always read the safety precautions and operators
manual before using the equipment.
—When operating any high velocity water jetter with root cutter, always wear safety goggles, rubber
boots, rubber gloves, and rain coat. A full face shield is recommended.
—Insure that the hose and root cutter has been placed in the pipe a minimum of 3’ before engaging
the water pressure to prevent the root cutter form coming out of the pipe and causing injury.
—Always shut the water pressure off before pulling the root cutter out of the pipe. Mark the hose a
minimum of 3’ from the root cutter to insure the hose is not accidentally pulled out of the pipe while
still under pressure. Shut off the water pressure when the hose mark is encountered.
“California Prop. 65: This product may contain an extremely small amount of lead in the coating. Lead
is a material known to the State of California to cause cancer or reproductive toxicity.”
Warnings

Page 4
Warnings
WARNING: Read the “Owner’s Manual” thoroughly before using any Spartan tool
products. Drain/Sewer cleaning can be dangerous if proper
procedures are not followed. Know the proper operation, correct
applications and the limitations of all Spartan Tool products before
use.
Safety must always be the operator’s prime concern. The operator must read and understand this
manual and all safety signs on the machine before operating the equipment. Failure to follow these
safety precautions could result in property damage and/or personal injury or death. This safety
summary describes basic safety measures which apply to the use and maintenance of the machine.
Further safety measures are described in other sections throughout this manual.
The precautions listed in this manual and on the equipment are not all-inclusive. The operator must be
satisfied that the use of any procedure, method, tool or part not specifically recommended by Spartan
Tool is safe for personnel, and will not damage or make the equipment unsafe.
Safety decals have been placed at operating points on the equipment to remind operators to observe
safety precautions. All standard decals and their proper locations are documented in a later section of
this manual. These decals must be visible at all times. Check these decals on a regular basis and
during machine set-up prior to the first operation. Replace damaged or unreadable decals.
Remember, your ability as a professional operator is critical to ensuring your safety and that of your co-
workers.
The following safety alert symbols are used throughout this manual:
DANGER: Indicates immediate hazards which WILL
result in severe personal injury or death.
WARNING: Indicates hazards or unsafe practices
which COULD result in severe personal
injury or death.
CAUTION: Indicates hazards or unsafe practices
which COULD result in minor personal
injury, or machine damage.
NOTE: Indicates special features or operation
of the machine.

Page 5
Operating Instructions
WARNING
Follow all safety and operating instructions provided with your high pressure water jet unit as well
as applicable local and OSHA standards. Always wear goggles, gloves and other safety attire.
Proper Orifice Selection
The O’Brien root cutter is supplied with two special bypass orifice grease fittings. One style must be
selected and screwed into the jet head for proper root cutter operation (see fig. 1). The orifice fittings
are color coded for easy identification. One black for 1” hose units and one plain for 3/4” hose units.
The 3/4” root cutter orifice is designed for units having flow capacities of 30-35 GPM (113.6 - 132.5
LPM) and the 1” root cutter orifice (black) is designed for units having flow capacities of 45-60 GPM
(170.3 - 227.1 LPM). These flows require operating pressure of 1200 PSI (80.5 bars) to 2000 PSI
(140 bars). The 3/4” root cutter hose requires the use of the reducing bushing (furnished) to be screwed
into the jet nozzle to accept a 3/4” hose fitting. After selection of the proper fitting(s) are made, screw
fitting(s) into jet nozzle tight (NOTE: Use thread lock if available).
DANGER
In no case should pressures greater that 2000 PSI (140 bars) be
applied to the root cutter unit. Damage to equipment or personal
injury including death could result.
Fig. 1
By-Pass Orifice Grease Fitting
Plain 3/4” Unit
Black 1” Unit
Page 6
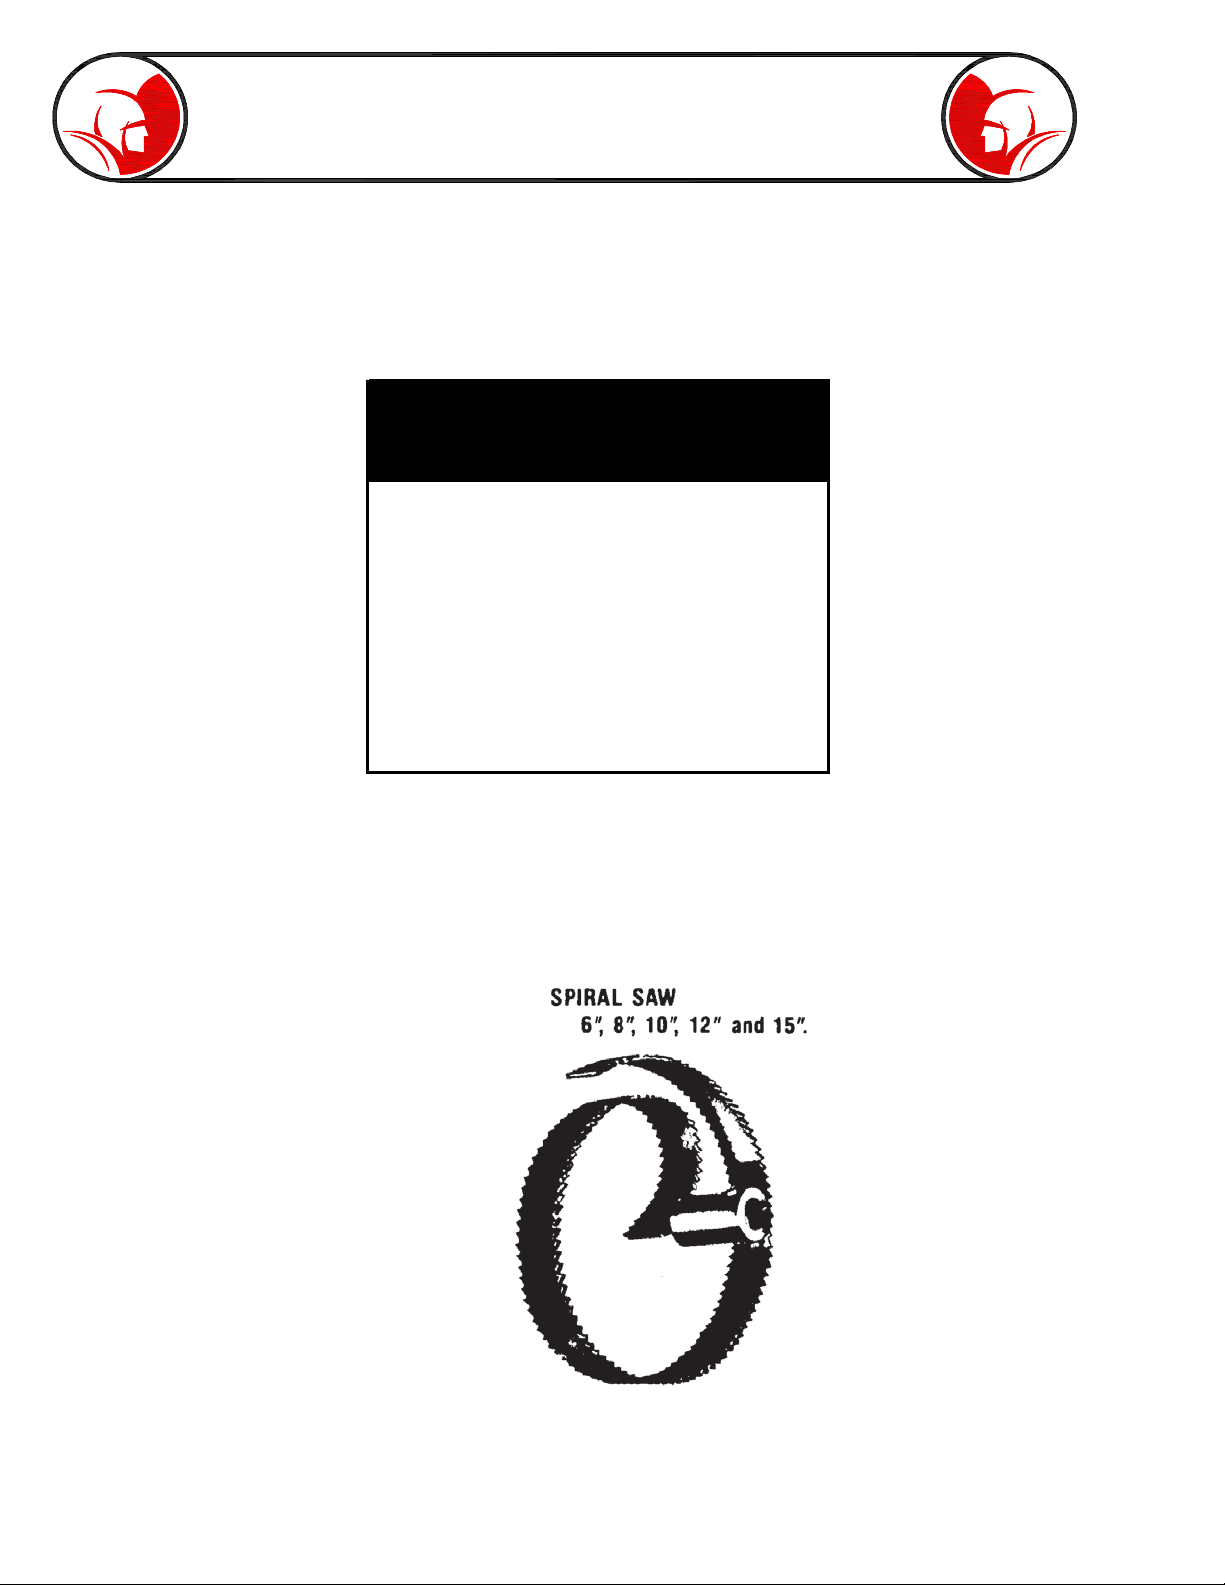
Cutter Blade Selection
Saw blades for the O’Brien root cutter are available in 6”, 8”, 10”, 12” and 15” sizes. Saw blades allow
about 1/2” clearance in the pipeline and skid assemblies are designed smaller than the cutter blades
to allow unit to pass through opening cut by the saw blade. The 6” cutter assembly with 6” blade at-
tached is designed for straight or gentle sweeping lines and will not traverse elbows. The following
indicates the size cutter and skid to be used in pipe cleaning applications.
Proper skid and cutter should be attached to root cutter before the high pressure hose is attached to
the unit. Always keep engine off while attaching root cutter assembly to hose or while root cutter is
attached and out of pipe. The rotating cutter blade and high pressure water jet discharge are poten-
tially dangerous and could cause sever injury and/or death.
Fig. 2
Pipe
Size
Skid
Size
Cutter
Size
4" none 4"
6" 6" 6"
8" 6" 6"
10" 8" 8"
12" 10" 10"
15" 12" 12"
18" to 21" 15" 15"
Page 7
Attachment of Cutters
CAUTION: Wear protective gloves when handling root cutter
blades.
All cutter units for O’Brien root cutters are attached to the motor shaft by means of a woodriff key
and a bolt and nut arrangement. The hub of the cutter must be slid over the key on the shaft which
drives the cutter. Align cross hole in hub with hole through shaft and insert bolt through hub and
secure with lock washer and nut. This prevents cutter pulling off when withdrawing unit.
CAUTION: Do not try to drive cutters without drive key or by use of
bolt and nut only, as cutter could become loose and
lost in line or cause tile damage.
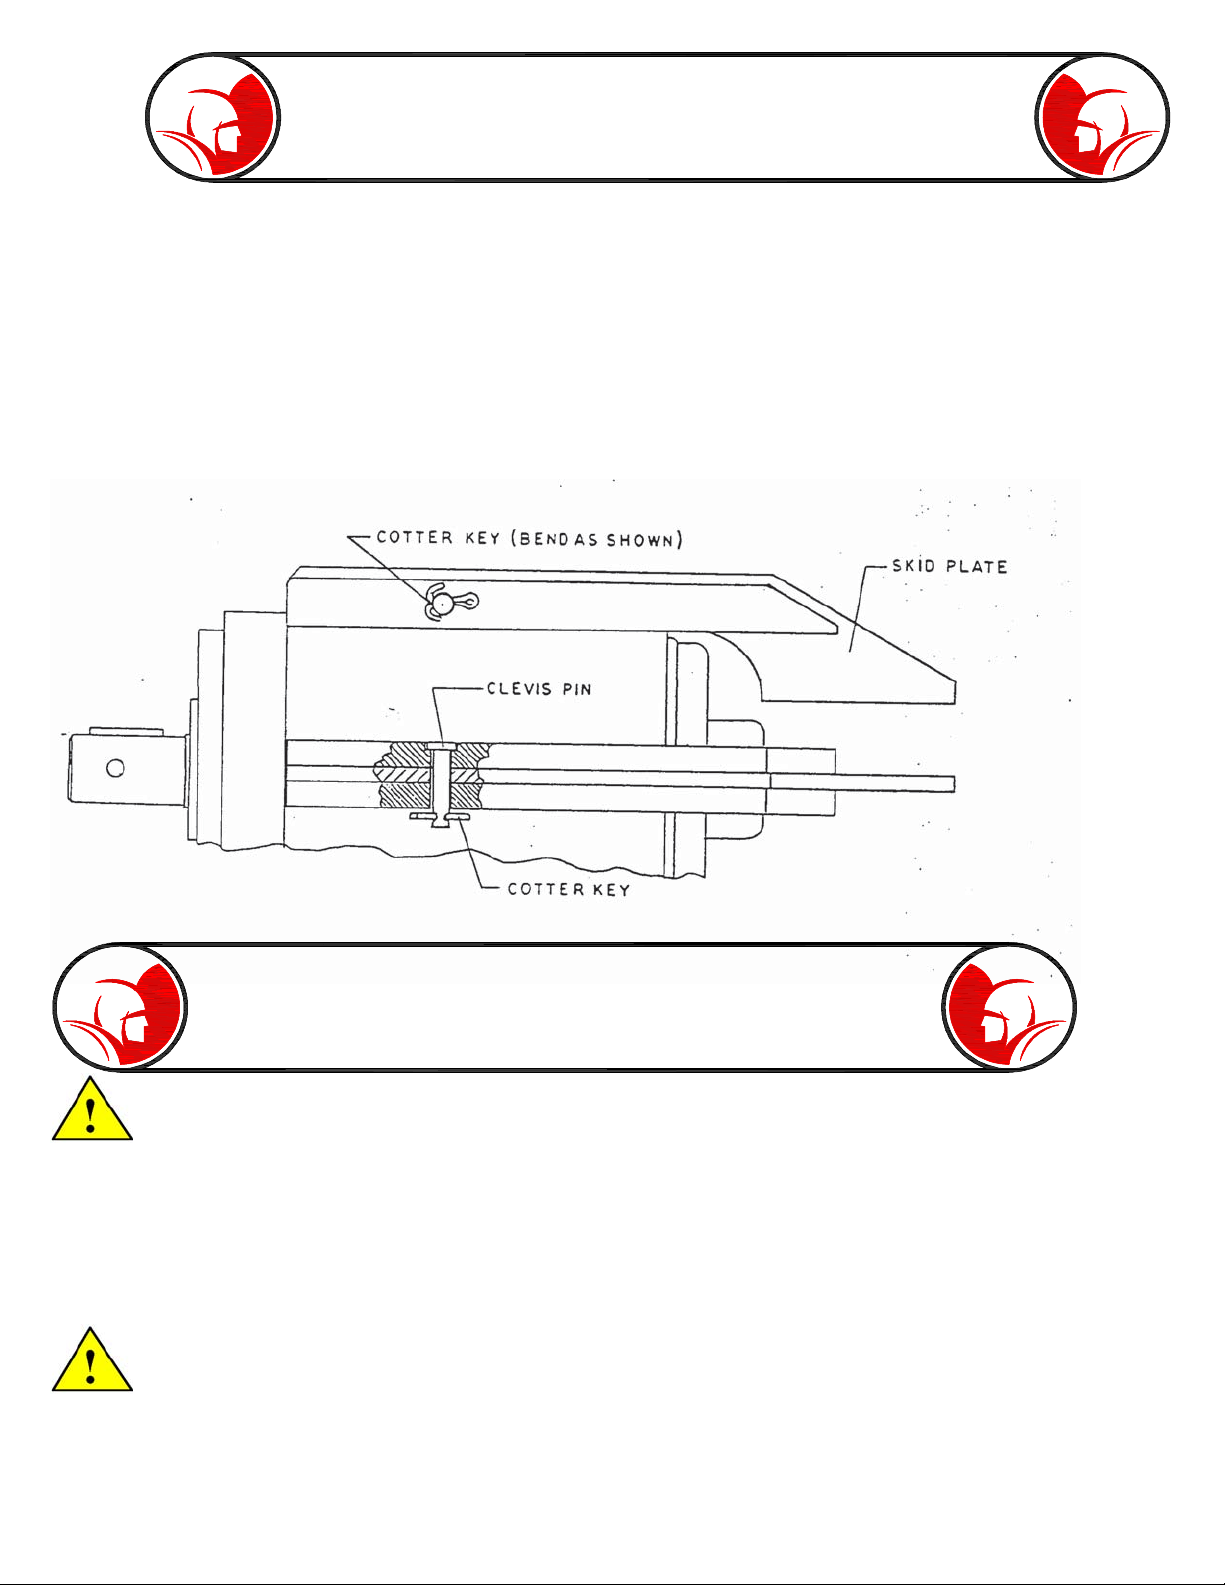
Skid Mounting
The O’Brien root cutter offers in a unique design, the mounting of plate runners to the body shell of the
root cutter by means of four removable pins which are locked in place by cotter keys (fig. 3). The main
motor need never be removed from the body shell to change skid sizes. By attaching the skid plates in
this manner, the hose end of the plates are projected downward and rearward to offer a large angle
projection over twice that of conventional skid units, thus offering greater protection to root cutter removal
in the event an offset or dropped line is encountered. Skid plates are stamped with pipe size of pipe
for easy selection. NOTE: Do not intermix skid plates on body shell. To simplify skid plate removal and
change, the snipping off of the end of the cotter key is recommended to remove same. Use only new
cotter keys for assembly (extra keys provided). As these are standard cotter keys, they may be
purchased locally for replacement.
Fig. 3

Page 8
O’Brien Root Cutter Operation
After assembly of your O’Brien root cutter with skid and cutter blade as outlined in previous sections,
attach the high pressure hose. NOTE: If tubular tiger tail hose guide is used, slide it over the hose
before attaching hose to root cutter. Attach placement tool and lower root cutter unit into manhole and
position it at the pipe entrance with cutter blade facing in the direction of travel. NOTE: If possible,
cutting should always be done against the flow to allow debris to be carried back to the working manhole.
Start jet unit engine and turn on water pressure momentarily to allow root cutter to enter line several
feet. Turn off pressure and position hose guide/guard at pipe entrance. Tie safety rope to jet or clamp
in place, avoiding trip area. Mark hose top of manhole entrance with white waterproof tape.
Begin cleaning operation by running engine at low RPM. Back off or reduce output pressure at
regulator if unit is so equipped, and increase throttle setting on jet unit to operate at full RPM.
Adjust pressure regulator for maximum pressure (never exceeding 2000 psi). Feed root cutter
hose slowly into pipe allowing cutter to cut obstructions and to avoid jamming blade. Jamming of
cutter into obstruction could cause cutter and shaft to lock in the obstruction and the body of the
motor to rotate in the pipe, causing jet hose twist and damage. When hose is in the pipe, it should
be tight against the hose guide to avoid slack. Slacking of the hose indicates the root cutter has
encountered an obstruction. Immediately pull back on the hose by hand. Gradually feed root cutter
hose forward by hand allowing cutter to cut into and through obstruction. Use care to keep your body
well balanced and maintain stable footing when performing the above.
If root cutter does not penetrate blockage after several minutes, you may have encountered a
lateral or a collapsed pipe and should consider other options. Continued operation without penetration
can damage root cutter and/or blade or cause root cutter to lockup in pipe. After penetration is
made through a blockage, no slack should be felt or seen at hose. Continue feeding root cutter
slowly a few feet up pipe and if no slack is seen or felt on the hose, you are through blockage. For
every 2 to 3 feet of blockage, pull root cutter back to manhole to clear pipeline of debris. The
marking of white tape on the hose will indicate the root cutter distance of exit from the line. Do not
pull unit all the way into manhole at this time, but reduce water pressure and flow to root cutter to
prevent debris from washing into another pipe and clogging. If debris is not excessive, root cutter
may be allowed to advance further into pipeline as outlined above and the procedure continued
until complete line is cleaned. However, if debris is excessive with first run, pull root cutter toward
pipe entrance after turning down pressure to allow debris to build up in bottom of manhole. Turn off
water pressure and engine.
DANGER: Failure to turn off engine could result in inadvertent
activation of root cutter, resulting in serious bodily
injury.

Page 9
Remove root cutter from manhole by hand, lifting with the hose. Remove debris from root cutter and
blade. Clean debris from manhole. If entrance into manhole is required, observe NIOSHA safety
rules. After cleaning of debris from first run, root cutter can be reinserted into line and following outline
as above, continue procedure until complete pipe is clean.
When job is complete, retrieve root cutter as outlined. Remove root cutter from hose. If root cutter will
not be used within a 6 hour period, remove cutter blade and with special grease coupler (supplied)
attached to grease gun, pump a light weight grease into the orifice grease fitting. Motor shaft will be
turned by the grease as this is done. When grease can be seen at hose connection, greasing is
complete and root cutter can be stored. In freezing conditions, keep root cutter motor unit warm or
service with grease immediately. As grease may become thick in extreme cold, and if warming is not
possible, service root cutter motor with S.A.E. #10 motor oil. This is done in the following manner.
Place “T” wrench provided on motor shaft, orient root cutter motor so shaft is pointing down, pour oil
into hose connection at jet nozzle a little at a time while turning motor shaft in a clockwise direction as
viewed from hose connection end. When oil is forced out of orifice grease fitting, oiling is complete.
O’Brien Root Cutter Operation

Page 10
44247601 - O’Brien RootCutter
with 6” Saw
44247602 - O’Brien RootCutter
with 8” Saw
Item Req'd Part # Description
1 44247200 O'Brien Root Cutter Only
2 1 44247300 Tool Box w/ Decal
3 1 41579000 W rench, RootCutter 'T'
4 1 44234400 Hanger Hood
5 1 44247400 Vial w/ Parts
6 1 44249100 Decal Set
7 4 44246500 Skid Plate - 6"
8 4 44246600 Skid Plate - 8"
9 4 44246700 Skid Plate - 10"
10 4 44246800 Skid Plate - 12"
11 4 44246900 Skid Plate - 15"
12 1 41306603 6" Spiral Saw
13 1 41006000 Reducer Bushing, 1" to 3/4"
14 1 04381900 Caplug, 3/4" NPT
15 1 77742600 Bushing Reducer 3/4 x 1/2
Item Req'd Part # Description
1 44247200 O'Brien Root Cutter Only
2 1 44247300 Tool Box w/ Decal
3 1 41579000 W rench, Rootcutter "T"
4 1 44234400 Hanger Hood
5 1 44247400 Vial w/ P arts
6 1 44249100 Decal Set
7 4 44246500 Skid Plate - 6"
8 4 44246600 Skid Plate - 8"
9 4 44246700 Skid Plate - 10"
10 4 44246800 Skid Plate - 12"
11 4 44246900 Skid Plate - 15"
12 1 41306604 8" S piral Saw
13 1 41006000 Reducer Bushing, 1" to 3/4"
14 1 04381900 Caplug, 3/4" NPT
15 1 77742600 Bushing Reducer 3/4 x 1/2

Page 11
3
14
5
4
2
6
7
8
910
13
12
1
11
44247603 - O’Brien RootCutter
with 10” Saw
Item Req'd Part # Description
1 44247200 O'Brien Root Cutter Only
2 1 44247300 Tool Box w/ Decal
3 1 41579000 W rench, Rootcutter 'T'
4 1 44234400 Hanger Hood
5 1 44247400 Vial w/ Parts
6 1 44249100 Decal Set
7 4 44246500 Skid Plate - 6"
8 4 44246600 Skid Plate - 8"
9 4 44246700 Skid Plate - 10"
10 4 44246800 Skid Plate - 12"
11 4 44246900 Skid Plate - 15"
12 1 41306605 10" Spiral Saw
13 1 41006000 Reducer Bushing, 1" to 3/4"
14 1 04381900 Caplug, 3/4" NPT
15 1 77742600 Bushing Reducer 3/4 x 1/2

Page 12
2
3
4
5
6
1
Optional Accessories
Item Part # Description
1 41306602 4" Spiral Saw
2 41306603 6" Spiral Saw
3 41306604 8" Spiral Saw
4 41306605 10" Spiral Saw
5 41306606 12" Spiral Saw
6 41306607 15" Spiral Saw

Page 13
Spartan Tool warrants its equipment to free from defects in material and workmanship for one year from
the date of purchase. To obtain warranty service, a purchaser should notify Spartan Tool in writing, at the
address provided below, within the warranty period, and Spartan Tool will direct where to take or send
the equipment for service. If the defect is covered by the warranty, Spartan Tool will repair or replace, at
its option, the defective equipment, without charge for labor or materials. (Freight and insurance are the
purchaser’s responsibility.)
This warranty is limited to the original retail purchaser and is not transferable. Spartan Tool assumes no
responsibility for damage due to accident, neglect, abuse, tampering or misuse, nor damage from
repairs or alterations by others. This warranty does not cover damage to the equipment resulting from
the use of replacement parts other than Spartan Tool parts.
Spartan Tool’s sole obligation and the original retail purchaser’s exclusive remedy under this warranty
shall be for repair or replacement as described above. ALL OTHER WARRANTIES, WHETHER
EXPRESSED OR IMPLIED, INCLUDING BUT NOT LIMITED TO IMPLIED WARRANTIES OF
MERCHANTABILITY AND FITNESS FOR A PARTICULAR PURPOSE ARE DISCLAIMED. IN NO
EVENT SHALL SPARTAN TOOL BE LIABLE FOR ANY INCIDENTAL OR CONSEQUENTIAL
DAMAGES.
SPARTAN TOOL L.L.C.
MENDOTA, ILLINOIS 61342
Spartan Tool L.L.C. reserves the right to make changes at any time, without notice, to specifications and
models and also discontinue models. The right is also reserved to change specifications or parts at any
time without incurring any obligation to equip same on models manufactured prior to the date of change.
SPARTAN TOOL L.L.C.
1506 W. Division Street
Mendota, IL 61342
800.435.3866 Fax 888.876.2371
www.spartantool.com
ONE YEAR WARRANTY
Table of contents
Other Spartan Cutter manuals

Popular Cutter manuals by other brands

Alpha tools
Alpha tools A-MF 1300 Original operating instructions

EIBENSTOCK
EIBENSTOCK ERC 300 Original instructions

Fortum Proffesional
Fortum Proffesional 4770840 Translation of the original user manual

Metabo
Metabo SSE 18 LTX BL Original instructions

tattered lace
tattered lace Crossover instruction manual

RED ROOSTER
RED ROOSTER RRI-8004 manual


