SpeedFun Ribelle Technical manual

ISTRUZIONI USO E MONTAGGIO
USE AND INSTALLATION INSTRUCTIONS
RIBELLE for TQ – Flyon Haibike
Pagina 1/9
ITA
ENG
Data 25. 4.2 2

IL DISPOSITIVO NON E’ STAGNO
Evitare qualsiasi contatto con l’acqua !!
Rimuovere il tappo-batteria con l'apposita chiave
Remove the battery cap with the appropriate key
Rimuovere il carter in plastica
Remove the plastic cover
Fare particolare attnzione al piccolo e delicato Joystick!!!
Pay particular attention to the small and delicate Joystick !!!
Pagina 2/9
Capovolgere l'Ebike e appoggiare le impugnature sopra degli
spessori di legno per non danneggiare comando e display.
Meglio eseguire le operazioni con l'aiuto di una seconda
persona!
Turn the Ebike over and place the handles on top of the
wooden shims so as not to damage the control and the display.
Better to do the operations with the help of a second person!
CAPOVOLGERE L'E-BIKE
TURN THE E-BIKE OVER

Rimuovere le quattro viti che fissano il carter sotto-motore.
E necessaria una chiave a brugola da 4 mm.
Remove the four screws that secure the under-engine
crankcase.
A 4 mm Allen key is required
Per comodità di movimento è oppurtuno svitare anche le due
viti che fissano il modulo gps al carter. E' necessaria una
chiave a brugola da 2 mm.
Sganciare la catena dalla corona. Se necessario rimuovere
anche il piccolo blocco anticaduta
For ease of movement it is appropriate to also unscrew the
two screws that secure the GPS module to the crankcase. A
2 mm Allen key is required.
Release the chain from the crown. If necessary, also remove
the small fall arrest block
Pagina 3/9
Rimuovere la batteria
Remove the battery
Svitare la vite indicata e aprire la copertura in plastica nera.
Unscrew the indicated screw and open the black plastic
cover.
E-BIKE IN POSIZIONE VERTICALE
E-BIKE IN VERTICAL POSITION

Sollevare il tappo in gomma e separarlo dal cavo-display.
Lift the rubber cap and separate it from the display cable.
Tirare cautamente il filo del display fino a far uscira dalla
apertura del telaio il “salsicciotto” che contiene il connettore a 6
pin del display.
Carefully pull the display wire until the “sausage” containing the
6-pin connector of the display comes out of the frame opening.
Infilare l'estremità della fascetta attraverso le due aperture
e tirare il “salsicciotto” che contiene il connettore a 6 pin
fuori dall'apertura frontale
Insert the end of the cable tie through the two openings and
pull the “sausage” containing the 6-pin connector out of the
front opening.
Pagina 4/9
Fissare una fascetta piuttosto lunga nel punto indicato dalla
freccia.
Fasten a cable tie at the point indicated by the arrow.

Pagina 5/9
Eliminare la fascetta lunga e le due fascette che stringono le
estremità del “salsicciotto” e liberare il connettore a 6 pin.
Remove the long cable tie and the two cble tie that tighten
the ends of the "sausage" and free the 6-pin connector.
Scollegare il connettore a 6 pin.
NON TIRARE DAL CAVO MA DALLA PLASTICA RIGIDA!!
Disconnect the 6 pin connector.
DO NOT PULL FROM THE CABLE BUT FROM THE RIGID
PLASTIC !!
Collegare i due connettori a 6 pin corrispondenti di Ribelle.
Infilare il cavo lungo di Ribelle dalla apertura frontale in
direzione del motore. Rimanere sulla parte alta del tubo
assieme agli altri cavi, in modo che non interferisca l'entrata
della batteria.
Non tirare dai connettori bianchi, potrebbero uscire i contatti
metallici dal loro interno!!!
Connect the two corresponding 6-pin connectors of Ribelle.
Insert the long Ribelle cable from the front opening towards
the motor. Stay on the top of the tube together with the other
cables, so that it does not interfere with the battery entry.
Do not pull on the white connectors, the metal contacts could
come out from inside !!!
Svitare le due viti che fissano il motore al telaio.
E' necessaria una chiave Torks T4 .
Separare il motore dal telaio tirando con cautela verso l'alto.
Unscrew the two screws that secure the motor to the frame.
A Torks T4 key is required.
Separate the engine from the frame by carefully pulling
upwards
CAPOVOLGERE L'E-BIKE
TURN THE E-BIKE OVER

Individuare il connettore del SENSORE DI VELOCITA'.
Fate molta attenzione perchè ci sono altri connettori
uguali ma N N sono interessati al montaggio di Ribelle.
Normalmente il connettore a due vie che ci interessa è
segnato in ROSSO e vi arrivano fili di colore nero + marrone
da un lato, e rosso + nero dall'altro.
Locate the SPEED SENSOR connector.
Be very careful because there are other identical
connectors but they are N T interested in the assembly
of Ribelle.
Normally the two-way connector that interests us is marked
in RED, and black + brown wires arrive on one side, and red
+ black wires on the other.
Aprire il connettore appena individuato premendo sulla
linguetta di sbloco con un cacciavitino.
Open the connector just identified by pressing on the release
tab with a screwdriver
Posizionare tutti i connettori ordinatamente sul fondo
dell'alloggiamento motore. Fare in modo che non si
sovrappongano altrimenti il motore farà pressione su di essi e
non si chiuderà!
Place all connectors neatly on the bottom of the motor housing.
Make sure that they do not overlap otherwise the motor will put
pressure on them and will not close!
Pagina 6/9
Collegare i due connettori appena scollegati ai corrispondenti
del cavo lungo di Ribelle.
Connect the two connectors just disconnected to the
corresponding ones of the long cable of Ribelle.

Prima di inserire il motore è IMPORTANTE controlare l'O-ring
che serve a tenere l'acqua lontana dal gruppo contatti.
Se si vede l'O-Ring come nella foto NON VA BENE.
L'O-ring va spostato e va inserito nella controparte SUL
MOTORE come si vede nella foto seguente
Before inserting the motor it is IMPORTANT to check the O-ring
which is used to keep the water away from the contact group.
If you see the O-Ring as in the photo, it is NOT OK.
The O-ring must be moved and inserted into the counterpart
ON THE MOTOR as seen in the following photo
Questa è la posizione esatta dell'O-ring sul motore.
Non rimuovere il grasso speciale di cui è sporco.
Non aggiungere grassi che potrebbero danneggiare l'O-ring.
This is the exact position of the O-ring on the engine.
Do not remove the special grease which is dirty.
Do not add greases that could damage the O-ring.
Pagina 7/4
Spingere il cavo dietro al piatto in alluminio in modo che non
interferisca con l'inserimento della batteria.
Sollevare l'holder 1 svitando le viti 2 e passare il cavo sotto di
esso.
Push the cable behind the aluminum plate so that it does not
interfere with the insertion of the battery.
Lift the holder 1 by unscrewing the screws 2 and pass the
cable under it.
1
2
Inserire il motore nel telaio.
Il motore deve entrare in modo naturale, senza forzature.
Il punto indicato dalla freccia deve essere in appoggio.
Se non è in appoggio significa che qualcosa fa spessore nel
mezzo: sollevare il motore e controllare!!!.
Insert the motor into the frame.
The motor must enter naturally, without forcing.
The point indicated by the arrow must be resting.
If it is not resting it means that something is thick in the middle:
lift the engine and check !!!.

Inserire il motore nel telaio.
Il motore deve entrare in modo naturale, senza forzature.
Il punto indicato dalla freccia deve essere in appoggio.
Se non è in appoggio significa che qualcosa fa spessore nel
mezzo: sollevare il motore e controllare!!!.
Insert the motor into the frame.
The motor must enter naturally, without forcing.
The point indicated by the arrow must be resting.
If it is not resting it means that something is thick in the middle:
lift the engine and check !!!..
Fissare il motore con le due viti M8.
Prestare attenzione al verso di inserimento delle rondelle:
Le superfici inclinate delle rondelle devono baciarsi... faccia a
faccia.
I due bullono vanno serrati con una chiave dinamometrica a
18 nm
Secure the motor with the two M8 screws.
Pay attention to the direction of insertion of the washers:
The inclined surfaces of the washers must kiss each other ...
face to face.
The two bolts must be tightened with an 18 nm torque wrench
Inserire la scheda elettronica Ribelle e tutti i cablaggi
nell'apertura frontale e rimontare le varie coperture.
Insert the Ribelle electronic card and all the wiring in the
front opening and reassemble the various covers.
Pagina 8/9
RIASSEMBLARE TUTTO PROCEDENDO IN SENSO INVERSO
REASSEMBLE EVERYTHING IN THE REVERSE WAY

Pagina 9/9
Su- Up
Descrizione e compatibilità
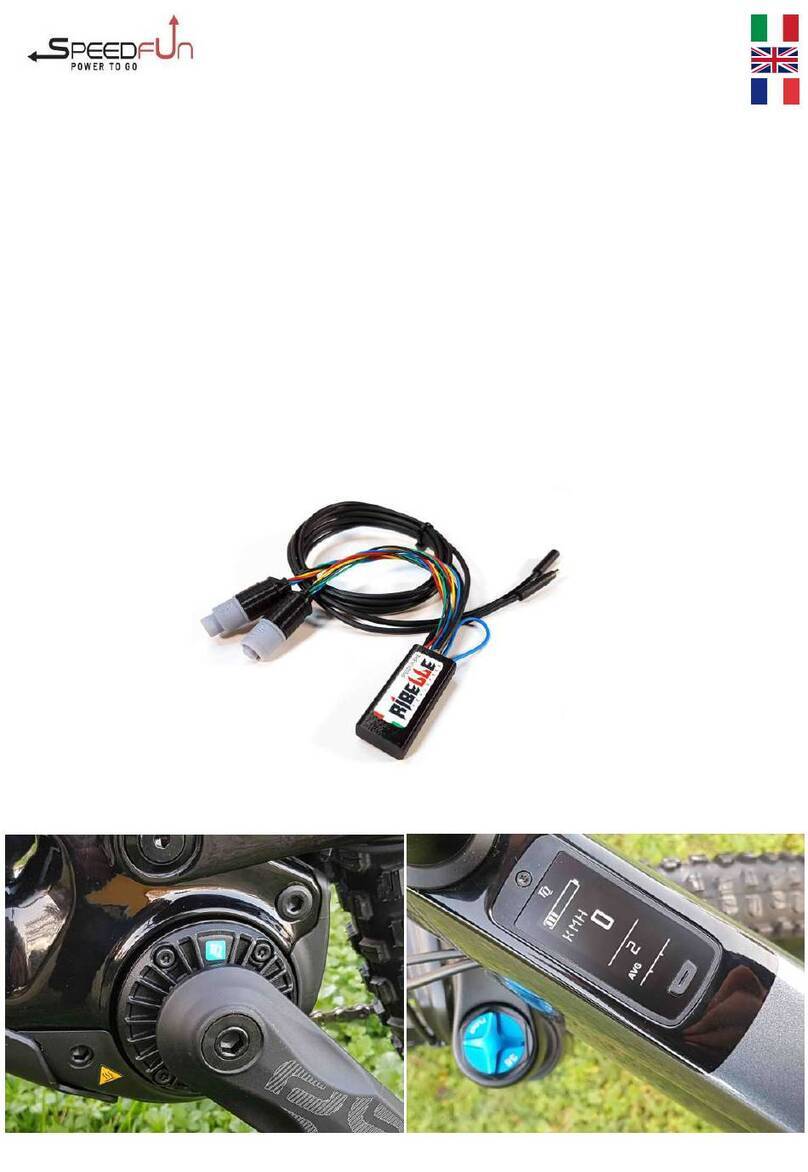
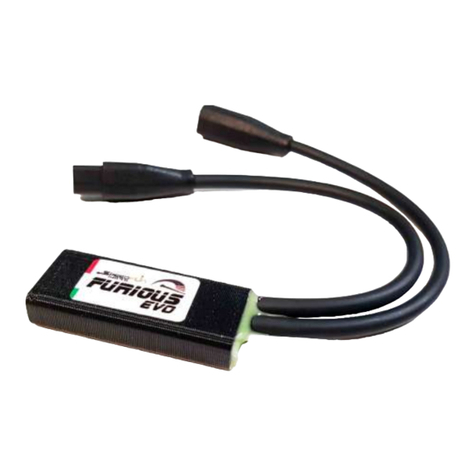
Ribelle è un dispositivo elettronico progettato per raggirare il limite di velocità dei 25 kmH per E-bike Flyon con motore
TQ HPR 12 S e Haibike HMI Display.
La velocità massima sarà limitata solo dal limite di potenza del motore sommato alla forza delle proprie gambe.
L'installazione è completamente invisibile e l'apprendimento delle caratteristiche della ebike è automatico.
Sul display vengono mostrati dati reali e le funzioni dell'ebike rimangono inalterate.
Attivazione e disattiva zione dello sblocco velocità.
Si ottiene in modo alternato inserendo una sequenza sulla levetta che normalmente serve a modulare il livello di
assistenza: Giù – Su -Giù -Su (sinistra – Destra – Sinistra – Destra)
Sul display compare una animazione sui livelli della batteria: una sequenza a scendere indica che la velocità viene
limitata a 25 kmH (come originale) mentre una sequenza a salire indica che la velocità viene sbloccata.
Aggiornamenti Software dell'ebike
Qualsiasi aggiornamento software dell'ebike ne può modificare i sistemi di comunicazione o di funzionamento e può
causare malfunzionamenti di Ribelle. Tali malfunzionamenti non sono in garanzia.
Per motivi di necessità si può chiedere a Speedfun se è a conoscenza di agiornamenti dannosi per il funzionamento di
Ribelle. In ogni caso il dispositivo Ribelle va rimosso prima dell'aggiornamento e il suo funzionamento non viene
garantito.
Giù - Down
Description and compatibility
Ribelle is an electronic device designed to circumvent the 25 kmH speed limit for Flyon E-bikes with TQ HPR 12 S
engine and Haibike HMI Display.
The maximum speed will be limited only by the engine power limit added to the strength of your legs.
The installation is completely invisible and the learning of the characteristics of the ebike is automatic.
The display shows real data and the ebike functions remain unchanged.
Activation and deactivation of the speed release.
It is obtained alternately by inserting a sequence on the lever that normally serves to modulate the assistance level:
Down - Up-Down-Up (left - Right - Left - Right)
An animation of the battery levels appears on the display: a descending sequence indicates that the speed is limited to
25 kmH (as original) while an ascending sequence indicates that the speed is unlocked.
Ebike software updates
Any software update of the ebike can modify its communication or operating systems and can cause Ribelle
malfunctions. Such malfunctions are not under warranty.
For reasons of necessity you can ask Speedfun if it is aware of updates that are harmful to the functioning of Ribelle. In
any case, the Rebel device must be removed before the update and its operation is not guaranteed.
Uso e Funzionamento
Use and Operation
Other manuals for Ribelle
2
Table of contents
Other SpeedFun Bicycle Accessories manuals
