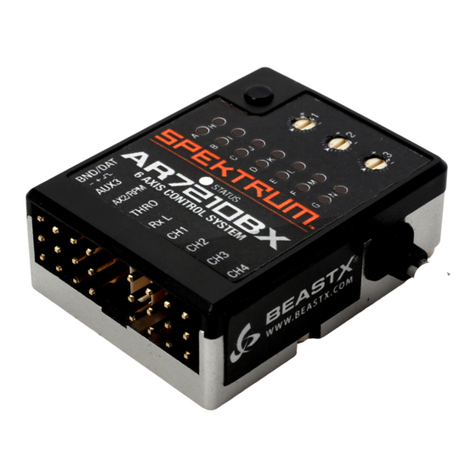
Spektrum AR635 User manual

1
AR635 User Guide
AR635 Bedienungsanleitung
Guide de l‘utilisateur - AR635
AR635 Guida dell‘utente

EN
2
The following terms are used throughout the product literature to indicate
various levels of potential harm when operating this product:
NOTICE: Procedures, which if not properly followed, create a possibility
of physical property damage AND a little or no possibility of injury.
CAUTION: Procedures, which if not properly followed, create the prob-
ability of physical property damage AND a possibility of serious injury.
WARNING: Procedures, which if not properly followed, create the prob-
ability of property damage, collateral damage, and serious injury OR
create a high probability of superficial injury.
NOTICE
All instructions, warranties and other collateral documents are subject
to change at the sole discretion of Horizon Hobby, Inc. For up-to-date
product literature, visit horizonhobby.com and click on the support tab
for this product.
Meaning of Special Language
WARNING: Read the ENTIRE instruction manual to become familiar
with the features of the product before operating. Failure to operate
the product correctly can result in damage to the product, personal prop-
erty and cause serious injury.
This is a sophisticated hobby product. It must be operated with caution
and common sense and requires some basic mechanical ability. Failure to
operate this Product in a safe and responsible manner could result in injury
or damage to the product or other property. This product is not intended
for use by children without direct adult supervision. Do not attempt disas-
sembly, use with incompatible components or augment product in any way
without the approval of Horizon Hobby, Inc. This manual contains instruc-
tions for safety, operation and maintenance. It is essential to read and
follow all the instructions and warnings in the manual, prior to assembly,
setup or use, in order to operate correctly and avoid damage or
serious injury.
WARNING AGAINST COUNTERFEIT PRODUCTS
Always purchase from a Horizon Hobby, Inc. authorized dealer
to ensure authentic high-quality Spektrum product. Horizon Hobby,
Inc. disclaims all support and warranty with regards, but not limited to,
compatibility and performance of counterfeit products or products claiming
compatibility with DSM or Spektrum technology.
Age Recommendation: Not for children under 14 years.
This is not a toy.
NOTICE: This product is only intended for use with unmanned, hobby-
grade, remote-controlled vehicles and aircraft. Horizon Hobby disclaims
all liability outside of the intended purpose and will not provide warranty
service related there to.
WARRANTY REGISTRATION
Visit www.spektrumrc.com/registration today to register your product.
EN
3
AR635 User Guide
The AR635 combines the breakthrough performance of AS3X®technology
with a Spektrum™6-channel, 2048 receiver. This combination along with
Quique Somenzini’s perfection of simple programming logic and tuned flight
stabilization provides the ultimate in performance and simple installation.
The AR635 is perfect for Park flyer aircraft to 90-sized electric aircraft. The
AR635 is not to be used with nitro, gas, or turbine-powered aircraft. While the
AR635 provides maximum agility and precision for intermediate and profes-
sional pilots, it is not a flying aid for beginners. The AR635 AS3X electronic
enhancement system makes it possible for you to experience super-smooth
fight performance, yet still have full control authority for sport or 3D fight.
Turbulence, torque and tip stalls are just some of the many complications
to assess when trying to achieve smooth fight. The AS3X System invisibly
helps with complicated corrections, allowing you to experience ultra smooth
flight performance that feels so natural, you’ll quickly build confidence in the
capability of the airplane. The AR635 setup is easy. Just bind your compat-
ible Spektrum, JR®or 2.4GHz DSM2®/DSMX®technology transmitter to your
AR635 to innovate the way you’ll want to fly now and in the future.
NOTICE: The AR635 receiver is not compatible with the DX6 park flyer
radio system.
Features
• A unique design in cooperation with Spektrum and Quique Somenzini
• Integrated AS3X technology
• Simple programming logic
• Flight stabilization programming tuned by Quique Somenzini
• 3-axis gain adjustment
• Computer and non-computer radio compatible
• 2048 Resolution)
• 22 ms operation
Applications
Park flyer - .90 size Electric Aircraft ONLY.
CAUTION: Do not use the AR635 receiver in nitro, gas or turbine-
powered aircraft or in electric aircraft larger than .90-size. Doing so may
cause damage to the aircraft and result in property damage or injury.
Always read and follow all instructions to properly program the AS3X
system.
Red LED Ailerons
(Roll) Hold LED
Antenne
Bind LED (internal)
Antenne
Blue LED Elevator
(Pitch)
Green LED Rud-
der (Yaw)

EN
4
ReceiverInstallation
Make sure the receiver is mounted firmly and cannot move during aircraft
maneuvers or loosen in the event of harmonic vibration. We recommend
securing the receiver with high-quality, double-sided tape.
You can install the receiver longitudinally (inverted or upright) in a low
vibration position; however, the servo connector pins must always point
toward the front or rear of the aircraft.
ONLY install the receiver into your aircraft in the
following oriantations.
CAUTION: If AS3X is active and the receiver is not installed correctly,
the aircraft will crash.
Antenna Polarization
For optimum RF link performance, mount the antennas in an orientation
that allows for the best possible signal reception when the aircraft is in
all possible attitudes and positions. Orient the internal receiver antennas
perpendicular to each other.
AR635 Specifications
Type: .................................................................DSM2/DSMX AS3X receiver
Channels: ..........................................................6
Modulation: ......................................................DSM2/DSMX
Dimension: .......................................................(WxLxH): 22 x 56 x 14 mm
Weight: ..............................................................13.2 g
Input Voltage Range: .......................................3.5 to 8.5V
Resolution: .......................................................2048
Compatibility: ...................................................All DSM2/DSMX aircraft
transmitters

EN
5
Hold Indicator
The AR635 features a red LED (Indicated by H). This LED
indicates the number of holds that have occurred since
the receiver was last powered on. The LED will flash the
number of holds, then pause (e.g., flash, flash, flash, pause,
flash, flash, flash, pause) This indicates three holds. Holds
are reset to zero when the receiver is turned off.
During the first flights of a new airplane, it’s recommended
to check the red LED hold indicator.
If it’s flashing, it’s important to optimize the installation
(move or reposition antennas) until no hold occurs. On later
flights, the LED Hold Indicator can be used to confirm RF
link performance.
Servo Selection
Select servos that are adequate for AS3X operation. The servos must be
digital, high speed and high resolution. A poor servo/linkage geometry
combination will cause several issues, including oscillations and
unwanted reaction.
Y-Harnesses and Servo Extensions
Do not use amplified Y-harnesses and servo extensions with Spektrum
equipment. Only use standard, non-amplified Y-harnesses and servo exten-
sions. When converting existing models to Spektrum devices, replace all
amplified Y-harnesses and servo extensions.
Setting Up the Transmitter
Non-Computer Transmitter
We recommend enabling Exponential (if available) and using high rates with
Non-Computer transmitters for the best performance. If you need to use
low rates, or need to disable Exponential to match your flying style, you can
do so without affecting the performance of the AS3X system.
Computer Transmitter
Total Servo travel MUST be set to 125%. Changing the servo total travel
from 125% will affect the tuning and performance of the AS3X technology.
Always mechanically adjust the aircraft linkages for less control surface
throw while maintaining 125% servo travel.
If you choose to use transmitter Dual Rates, NEVER use a value lower than
50%. Doing so will severely affect the performance of the receiver. If you are
using a computer transmitter, we recommend using the following values:
• Servo Travel: 125% on Aileron, Elevator and Rudder
• Dual Rate: Maximum of 100% and a minimum of 50%
• Exponential: 20% on Aileron, Elevator and Rudder
CAUTION: The AR635 is not compatible with Delta, V-tail, or Flaperon
mixing. If using dual ailerons, elevator or rudder, a Y harness must be used.
IMPORTANT: The Dual Rate value must be between 50% and 100%. Expo-
nential can be adjusted to best fit your flying style.
H

EN
6
Binding
You must bind the receiver to the transmitter before the receiver will oper-
ate. Binding is the process of programming the receiver to recognize the
GUID (Globally Unique Identifier) code of a single specific transmitter. To
bind the AR635 receiver to a DSM2 or DSMX transmitter:
1. Insert the bind plug in the BIND port on the
receiver.
2. Power on the receiver. The receiver can be powered
through any open port. The bind LED on the receiver
flashes, indicating the receiver is in bind mode.
To bind the receiver using an electronic speed
controller, insert the bind plug into the BIND port in
the receiver and the ESC lead into the throttle
(THRO) port.
3. Keep the plane motionless for 5 seconds.
4. Move the throttle stick to the low throttle position.
5. Put your transmitter in Bind Mode. The system connects within a few
seconds. Once connected, the orange LED light turns solid and the
AR635 receiver begins the initialization process. At this point, the gain
lights should be flashing at the preset gain values.
6. After setting up your model, rebind the system so the true low throttle
position is set in the failsafe.
7. Remove the bind plug from the BIND port on the receiver before you
power off the receiver and transmitter. Store the bind plug in a
convenient place.
NOTICE:
Always remove the bind plug to prevent the system from entering
bind mode the next time you power on the receiver.
The ESC will not arm if the throttle control is not put at the lowest position.
If you encounter problems, follow the binding instructions and refer to the
transmitter troubleshooting guide for other instructions. If needed, contact the
appropriate Horizon Product Support office.
AR635 with bind plug
inserted

EN
7
Receiver Setup Procedure
The Spektrum AR635 receiver offers LED programming and the following
adjustable features:
• 3D Airplane: Non-Computer transmitter
• 3D Airplane: Computer transmitter
• Sport Airplane: All Transmitters
If you select a 3D Airplane transmitter, 5 channels are available for aircraft
controls. The Gear channel is reserved for Flight Modes. The Sport Airplane
transmitter selection enables you to use all 6 channels; Flight Modes for
Gear Up and Gear Down are activated by the Gear channel.
After you select the transmitter type, complete a control direction test
to ensure the control surfaces are moving in the correct direction. Any
necessary channel reversing is done at this time in the transmitter. It
is extremely important to complete the control direction test before
proceeding to gain adjustment. The gain adjustment controls are dependent
on the transmitter channel reverse values.
Once you enter the Gain Control menus, use three LED lights to navigate the
menu options. Thoroughly review the Gain Control section before attempting
to change any gain values in the receiver. The color of the LED indicates the
active axis (Aileron, Elevator or Rudder), while the LED pattern (On, Off or
Flashing) will help you navigate the menu and gain values.

EN
8
Enter Transmitter Type
Computer and Non-Computer Radios
The AR635 receiver is compatible with both “non-computer” as well as
“computer” radios. Each receiver mode (3D Non-Computer, 3D Computer
or Sport all transmitters) stores the specific gain values for each transmitter
type. The designation of “non-computer” and “computer” radio is deter-
mined by the travel adjust capabilities of the transmitter. All radios capable
of at least 125% servo travel are grouped in the “computer radio” section.
Radios with less than 125% servo travel are grouped in the “non-computer
radio” section.
NOTICE: Be sure the transmitter binds to the receiver and check basic func-
tions. Once basic function is established, the receiver can be powered off.
3D Non-Computer:
1. With the transmitter powered ON, move the throttle stick to the
middle position.
2. Hold full Left Aileron and full Down Elevator while powering on the
receiver. After 5 seconds, the red and blue LEDs in the receiver turn solid,
indicating that you have successfully entered 3D Non-Computer
Radio mode.
3. Release the transmitter stick(s).
Entering Transmitter Type by Stick Combination:
IMPORTANT: Aileron and Elevator Reversing must be set to Normal/Normal
Non-Computer Transmitters: 3D
Mode 1Mode 2
IMPORTANT: General Flight mode and 3D mode are toggled using the Gear
switch (DX4e AUX switch).
EXIT MENU: Move the controls to neutral, then throttle full down to exit the
menu. The ESC will regain control.

EN
9
3D Computer:
1. With the transmitter powered ON, move the throttle stick to the
middle position.
2. Hold full Right Aileron and full Down Elevator while powering on the
receiver. After 5 seconds, the blue and green LEDs in the receiver turn
solid, indicating that you have successfully entered 3D Computer
Radio mode.
3. Release the transmitter stick(s).
Entering Transmitter Type by Stick Combination:
IMPORTANT: Aileron and Elevator Reversing must be set to Normal/Normal
Computer Transmitters: 3D
Mode 1Mode 2
IMPORTANT: General Flight mode and 3D mode are toggled using the
Gear switch.
EXIT MENU: Move the controls to neutral, then throttle full down to exit the
menu. The ESC will regain control.
Sport Mode, All Transmitters:
1. With the transmitter powered ON, move the throttle stick to the
middle position.
2. Hold full Left Aileron and full Up Elevator while powering on the receiver.
After 5 seconds, the green, blue, and red LEDs in the receiver turn solid,
indicating that you have successfully entered Sport mode.
3. Release the transmitter stick(s).
Entering Transmitter Type by Stick Combination:
IMPORTANT: Aileron and Elevator Reversing must be set to Normal/Normal
All Transmitters: Sport
Mode 1Mode 2
IMPORTANT: Two gain banks are toggled using the Gear switch (DX4e AUX
switch).
EXIT MENU: Move the controls to neutral, then throttle full down to exit the
menu. The ESC will regain control.

EN
10
Enter Gain Control
To access the Gain Control Mode, the transmitter must use a specific stick
combination. With the transmitter powered ON, hold the sticks as shown in
the chart below while powering on the receiver.
Entering Gain Control by Stick Combination:
Aileron / Elevator
Reversing Mode 1 Mode 2
Aileron Elevator
NN
NR
RN
RR

EN
11
Gain Adjustment
The gain is grouped in steps and can be changed by moving the Aileron
stick left or right. With the transmitter servo reversing set to normal, Right
input is a Positive (+) step, while left input is a Negative (–) step. Each input
represents one 10 % gain value up to +/- 100%. There are 20 gain values;
the 0 value turns the sensor off in that axis. Every time the aileron stick
is moved to right, then released to neutral, 10% gain is added. Every time
the aileron stick is moved to the left, then released to neutral, 10% gain is
deducted. For example; if the gain value = +80% and the aileron stick is
moved one time to the left and released to neutral, the gain value will
now = +70%
NOTICE: During gain adjustment, power is still supplied to the servos. Aile-
ron, Elevator and Rudder will respond to stick movement. All other channels
(Throttle) will not be active.
Transmitter Aileron Channel Normal
10
0
%10
20
30
40
50
60
70
80
90
100
%
20 30 40 50 60 70 80 90 100
10
Transmitter Aileron Channel Reversed
10
0
%10
20
30
40
50
60
70
80
90
100
%
20 30 40 50 60 70 80 90 100
10

EN
12
Axis Selection (Roll, Pitch, Yaw)
The elevator stick selects the axis for gain adjustment. Moving the elevator
stick up or down moves the 3 LED’s in a continuous loop. From the roll axis
(Red solid), push the elevator stick once to change to pitch axis (Blue solid),
then push the elevator stick again to change to rudder axis (Green Solid). If
the elevator stick is pulled, it goes in the opposite direction.
Once you select an axis, all 3 LEDs will flash, indicating you are in the gain
setup mode for that axis.
Elevator Stick LEDs
Elevator
Aileron
Rudder
Red: Roll (Aileron)
Blue: Pitch (Elevator)
Green: Yaw (Rudder)

EN
13
Lights
All three LEDs will flash three times, indicating you have entered the
gain setup mode successfully. When an individual Axis (Roll/Pitch/Yaw)
is selected, the light assigned for that axis will turn solid. The gain value
and sensing direction will be represented by the remaining two lights. The
receiver programming lights can be seen through the transparent smoke
gray receiver case for programming:
Gain Setup: LEDs
Red: Roll (Aileron) Blue: Pitch
(Elevator) Green: Yaw (Rudder)
Gain
-/+ Sensing
Red: Roll (Aileron)
Gain
Blue: Pitch (Elevator)
-/+ Sensing
Green:
Yaw
(Rudder)
-/+ Sensing
Gain
Blinking LED Solid LED
Axis selected:
Solid Light
Axis gain value (10–100):
When the value is zero, this LED will be OFF. When a gain value is input,
the LED will start to blink. The higher the gain value, the more rapid the
blinking. A gain value of 100% will give the highest rate of blinking.
Axis sensing direction (value +/-):
When the value is Negative, the represented LED will blink very rapidly.
When the value is positive, the represented LED will blink 3 times a second.
The axis being adjusted will always remain solid. Maxing out the negative
direction and then counting ten right aileron inputs (+) will give you zero (0)
gain. The light indicating the axis gain value LED will be off. A rapid flashing
LED indicates a positive or negative gain.
EXIT MENU: Move the controls to neutral, then throttle full down to exit the
menu. The ESC will regain control.
NOTICE: During gain adjustment, power is still supplied to the servos.
Aileron, Elevator and Rudder will respond to stick movement. All other
channels (Throttle) will not be active.

EN
14
Sensor/Servo Direction and Compensation
It is extremely important to make sure that the sensors are compensating in
the desired direction prior to the first flight.
NOTICE: AS3X will not turn on until the throttle is advanced. Once the
throttle is advanced, AS3X will remain on untill the radio is turned off.
IMPORTANT: Before adjusting gain values for any axis, make sure the
servo is traveling in the correct direction (if you’re unsure, seek help
from someone more experienced). If the servo is moving in the incorrect
direction, reverse the servo in the transmitter.
Rudder
Pick up the airplane and quickly move the nose to the left. The rudder
should move to the right as shown. If it moves in the opposite direction,
enter Gain Mode and change the sensing direction to the opposite direction.
Aircraft movement AS3X Reaction
Rudder

EN
15
Aileron
Pick up the airplane and quickly move the right wing panel downward. The
right aileron should move in the same direction (down). If it moves in the
opposite direction, enter Gain Mode and change the sensing direction to the
opposite direction.
Aircraft movement AS3X Reaction
Aileron
Elevator
Pick up the airplane and quickly move the Nose of the airplane downward.
The elevator should move in the up direction. If it moves in the opposite
direction, enter Gain Mode and change the sensing direction to the
opposite direction.
Aircraft movement AS3X Reaction
Elevator

EN
16
Flight Mode
Flight modes are controlled by the gear channel on all radios (Channel 5).
On the DX4e transmitter, the flight modes are controlled by the ACT/AUX
switch. You can adjust the amount of gain on each axis for both switch
positions (0 and 1), giving you a total of 6 gain values.
3D Mode:
Aileron Elevator Rudder
3D Flight
(Gear SW Pos 1) 80% 80% 90%
General Flight
(Gear SW Pos 0) 40% 20% 30%
We recommend using higher gain values for 3D Flight (slower air speed
and larger control surface throws). Use lower gain values for General Flight
(faster air speed and smaller control surface throws).
The AR635 receiver is also pre-programmed with a set of Dual Rate values
for both 3D Flight Mode positions (Gear Switch). The pre-programmed
values in the receiver cannot be adjusted. Any TRANSMITTER Dual Rate
or Expo values you choose will be used in conjunction with the pre-
programmed values
Sport Mode:
Aileron Elevator Rudder
Gear up
(Gear SW Pos 1) 70% 70% 70%
Gear Down
(Gear SW Pos 0) 70% 70% 70%
We recommend using higher gain values for Gear Down (slower air speed).
Use lower gain values for General Flight Gear Up (faster air speed).

EN
17
Information Storage
When the user enters the gain menu, each axis will show gain values
previously entered. If the unit is new and has never been programmed, it
will show the default setting. The gain value of each axis remains the same
value that was previously entered. In this way, each axis of any of the two
Flight Modes can be changed at any time. For example, if the gain value for
pitch in the 3D flight mode needs to be changed, enter the menu and push
the elevator as many times as needed untill the pitch light is solid, then use
aileron to change the existing value. When that value is adjusted, throttle full
donw and exit the menu. All other gain settings remain as they were.
Factory Default Gain Settings
To access to factory default gain settings of the AR635, a transmitter stick
combination must be used. With the transmitter powered ON, hold full right
rudder in combination with throttle full down, then power ON the receiver.
After 5 seconds, the red and green LEDs will turn solid, indicating all gain
values have been restored to default settings. Release the rudder stick.
See the figure below for stick combinations:
Restore Gain to Factory Default Stick Combination:
Throttle/Rudder
Reversing Mode 1 Mode 2
Throttle Rudder
NN
NR
EXIT MENU: Move the controls to neutral, then throttle full down to exit the
menu. The ESC will regain control.

EN
18
Initializing the AR635
Once the AR635 receiver has been programmed and the correct sensing
direction has been selected, it is very important to power OFF the receiver,
then power it back ON to initialize the sensors. Place the aircraft on the
ground out of the wind, then power the receiver ON. Ensure the aircraft is
immobile for 5 seconds so the AS3X system initializes correctly.
The AS3X system will not activate until the throttle stick or trim is increased
for the first time. Once the AS3X is active, the control surfaces may move
rapidly on the aircraft. This is normal. AS3X will remain active until the
AR635 is powered off.
CAUTION: Always complete a control direction test with the
transmitter and make sure the sensors are correcting in the proper
directions when you roll, yaw, and pitch the aircraft.
The three LEDs will indicate the gain value for each specific axis by the rate
of the blinking light. High gain is represented by a more frequent blinking
LED, low gain by a less frequent blinking. At zero gain the LED is OFF.
Adjust the gain at the airfield
Always take off with a VERY conservative gain. Slowly increase gain untill
you reach the oscillation point. From that point, back off a step or two and
you should be in the pick of your gain. When flying a brand new airplane,
always takeoff with the flight mode set at General Flight. Partially increase
the airspeed (increase throttle) untill you see if the plane oscillates.
If you see oscillation, immediately reduce airspeed/throttle. Once you detect
oscillation, identify what axis needs to have the gain adjusted. If it’s a windy
day, take the wind factor in consideration (plane speed is relative to the air
and NOT to ground) Once you get this process right for General Flight Mode,
do the same exercise with the 3D mode.
Set your 3D mode gain higher, perhaps only to fly up to 1/2 to 3/4 airspeed.
This will give the AS3X system more authority for corrections.

EN
19
AR635 Power System Requirements
All receivers require uninterrupted power. AS3X demands more current
from the servos due to the “non-stop” activity. During even a short duration
power interruption/brownout, the AS3X sensor must reboot and re-initialize.
WARNING: If a power interruption/brownout occurs during flight, a
crash will occur. It is your responsibility to ensure the AR635 has sufficient
power without interruption.
Some of the power system components that affect the ability to properly
deliver adequate power include:
• Only use this receiver with AS3X-compatible ESCs.
• The ESC’s BEC capability to deliver current to the receiver when load is
placed on the servos. This is the #1 cause of power interruptions in
electric powered aircraft. Use only AS3X-friendly ESCs
• The switch harness, battery leads, servo leads, regulators, etc.
• Receiver battery pack (number of cells, capacity, cell type, state of charge)
The AR635 has a minimum operational voltage of 3.5 volts; it is highly
recommended the power system be tested per the following guidelines.
Recommended Power System Test Guidelines
Perform the following test with a voltmeter or servo current meter
(HAN172). Plug the Servo Current Meter (HAN172) into the Bind port in the
receiver and, with the system on, rapidly move the control sticks (stir the
sticks) with no load on the servos for 3 minutes. Monitor the voltage at the
receiver. It is important to rapidly move the control sticks for 3 minutes. If
a voltage regulator becomes hot, it can lose its ability to supply current. An
alternate method is to power on the system and load the servos by applying
pressure to the control surfaces with your hand for 3 minutes. The voltage
should remain above 4.8 volts in both cases.

EN
20
SmartSafe™Failsafe
SmartSafe technology is a safety feature on the throttle channel only that
offers the following benefits:
• Prevents electric motors from operating when the receiver only is turned
on (no transmitter signal present)
• Prevents the speed controller from arming until the throttle is moved to
low throttle position after connection is made
• Powers off electric motors and reduces gas/glow engines to idle if signal
is lost (must bind the receiver at throttle off or idle position).
• If throttle is at any position other than low, the ESC won’t arm
• If connection is lost in flight, SmartSafe technology sets the throttle to the
position it was in during the binding process (normally low throttle or idle).
How to Program SmartSafe Falilsafe
SmartSafe is automatically set when the system is bound. It’s important
to have the throttle stick in the low position to store low throttle settings
during binding.
CAUTION: For electric aircraft, always remove the propeller from the
motor before testing the failsafe.
Range Testing
Before each flying session, and especially with a new model, perform a
range check. All Spektrum aircraft transmitters incorporate a range testing
system which, when activated, reduces the output power, allowing a
range check.
1. With the model on the ground and the motor off, stand 30 paces (approx.
90 feet/28 meters) away from the model.
2. Face the model with the transmitter in your normal flying position and
place your transmitter into range check mode. This causes reduced
power output from the transmitter.
3. You should have total control of the model in range test mode at
30 paces (approx. 90 feet/28 meters)
4. If control issues exist, call the Horizon Product Support office.
Other manuals for AR635
1
Table of contents
Other Spektrum Remote Control manuals

Spektrum
Spektrum DSM User manual

Spektrum
Spektrum DX6R User manual

Spektrum
Spektrum DX3C User manual

Spektrum
Spektrum DX5e User manual

Spektrum
Spektrum TM1000 User manual

Spektrum
Spektrum DX8 User manual

Spektrum
Spektrum PowerSafe AR9130T User manual

Spektrum
Spektrum DX 4e User manual

Spektrum
Spektrum DX8 User manual

Spektrum
Spektrum DX2E ACTIVE User manual

Spektrum
Spektrum NX7e User manual

Spektrum
Spektrum DX8 Manual

Spektrum
Spektrum DX5C User manual

Spektrum
Spektrum DX3R User manual

Spektrum
Spektrum DX9 User manual

Spektrum
Spektrum DX6 User manual

Spektrum
Spektrum DX6 User manual

Spektrum
Spektrum DX2S User manual

Spektrum
Spektrum DX3S User manual

Spektrum
Spektrum DX3E User manual