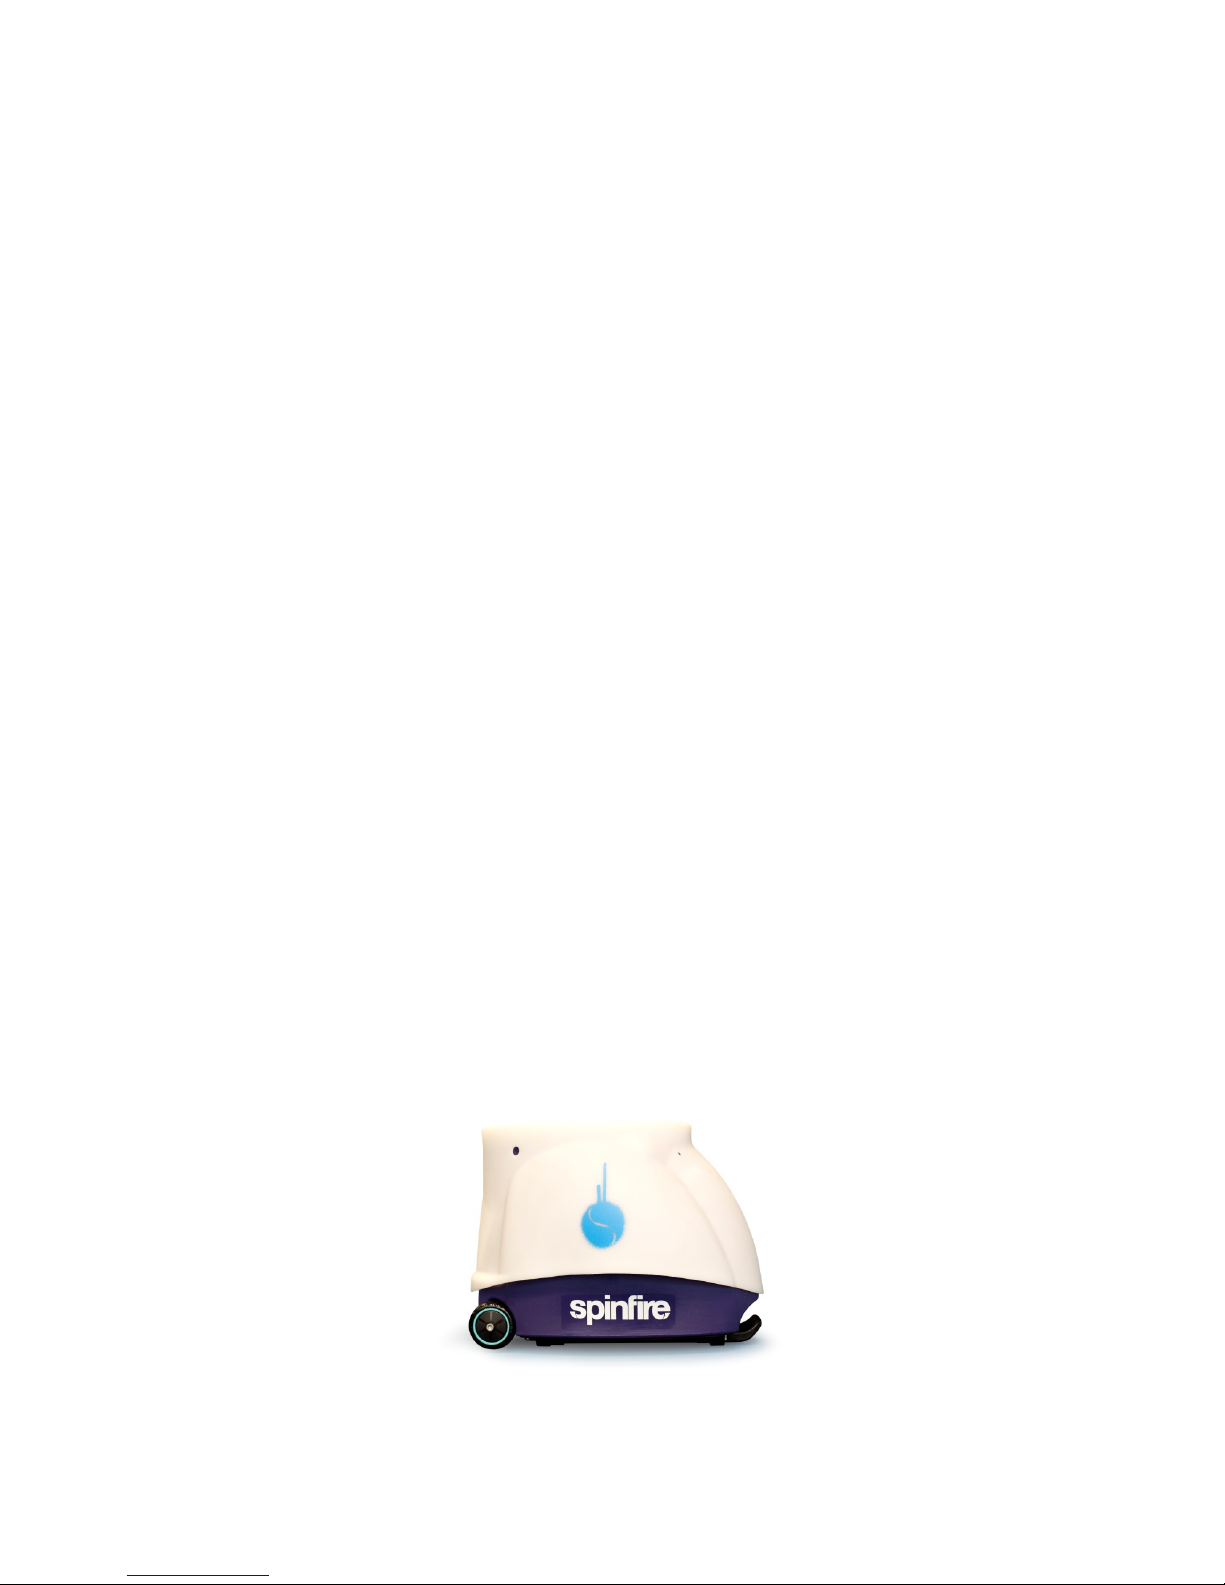
Spinfire Pro 2 User manual

Pro 2 Manual

Page 2 Manual Revision 3.5.0
TABLE OF CONTENTS
BEFORE FIRST USE ...................................................................................... 3
ASSEMBLY...................................................................................................... 3
Packaging ................................................................................................................. 4
BATTERY AND CHARGING............................................................................ 4
Internal Battery ......................................................................................................... 4
External Battery ........................................................................................................ 4
Standard Charger ..................................................................................................... 4
Optional Fast Charger .............................................................................................. 5
AC ADAPTOR .................................................................................................. 5
CUSTOMER CARE ......................................................................................... 5
Caution ..................................................................................................................... 5
Maintenance ............................................................................................................. 5
Storage ..................................................................................................................... 6
TRANSPORTATION ........................................................................................ 6
USAGE ............................................................................................................ 7
CONTROL PANEL ........................................................................................... 7
REMOTE CONTROL ..................................................................................... 10
EXAMPLE SETTINGS ................................................................................... 11
TENNIS BALLS .............................................................................................. 11
Low Compression Balls .......................................................................................... 11
HIDDEN FEATURES ..................................................................................... 12
Manual Mode .......................................................................................................... 12
30 Second Safety (Feeder) .................................................................................... 12
Feeder Speed Calibration ....................................................................................... 12
Slower Interval Mode .............................................................................................. 13
Paddle Software ..................................................................................................... 13
TROUBLESHOOTING ................................................................................... 13
Machine won’t turn on ............................................................................................ 13
Machine fails to initialize (VCAL or HCAL error) ..................................................... 13
Machine will only turn to the right ........................................................................... 13
Clearing Ball Jams .................................................................................................. 14
Balls are jamming too regularly .............................................................................. 14
Throwing wheels aren’t spinning ............................................................................ 14
Balls inside the machine ......................................................................................... 14
Balls don’t feed fast enough ................................................................................... 15
Battery does not last 3 hours .................................................................................. 15
The feeder keeps pausing during play ................................................................... 15
The remote control does not work .......................................................................... 15
The two line drill will only fire to one side ............................................................... 16
Horizontal oscillation only fires to the sides, or just to one spot ............................. 16
Top or bottom wheel spins at high speed when the machine is off ........................ 16
Top or bottom wheel motor error ............................................................................ 16
Example settings in this manual don’t work well for me ......................................... 17
Control panel buttons are not responding properly ................................................ 17
The machine is not accurate or consistent enough ................................................ 17
The feeder motor is not working ............................................................................. 17
SUBMITTING A SUPPORT REQUEST ......................................................... 18
WARRANTY .................................................................................................. 18
Warranty Administration ......................................................................................... 18
Not Covered ........................................................................................................... 18
Conditions of Warranty ........................................................................................... 19

Page 3 Manual Revision 3.5.0
BEFORE FIRST USE
To protect the machine in transport, the internal pivot plate may have been
secured to prevent it from moving. Please remove any cable ties prior to
turning the machine on. You can locate these by following the ribbons tied to
the transport handle back to their locations. If there are no ribbons, then these
may have been removed by the distributor on your behalf.
There is also a 3 position master power switch under the machine which is
turned off for transport. This will need to be turned on before you can power
on the machine. The 3 positions are:
0 Off
I Internal Battery
II External Battery or AC Adaptor
ASSEMBLY
To assemble your machine, first simply remove it from the box. To do this,
start by removing the hopper, followed by the machine. You can safely pick up
the machine by placing one hand inside the mouth at the front and using the
handle located at the rear of the machine above the control panel.
You should find this manual, a charger, remote and the carousel in the box. If
you have ordered an external battery, AC adaptor or fast charger, they may
also be in the box. The carousel is the white 5 fingered device which stirs the
balls when they are sitting in the hopper. You need to attach this to the top of
the machine on the rod, noting the flat side of the rod needs to align with the
hole in the carousel. If you cannot insert the carousel due to an obstruction,
you may need to turn the machine on and rotate the rod to find a suitable
location to attach the carousel. You can do this by pressing the Feed
Start/Pause button. Never bend the wire which floats above the drop hole, as
this can result in ball jams. It is also possible that the carousel may already be
attached when you receive your machine, so nothing will need to be done.
You can attach the hopper either upright for play mode, or upside down for
portability/storage (note you can remove the carousel too if you need to). To
attach the hopper, simply align it correctly and then push down on it until it
locks into place.
Hopper upside down for portability/storage

Page 4 Manual Revision 3.5.0
Packaging
We recommend you keep your box in case you need to ship your machine
back to the supplier at a future point in time.
BATTERY AND CHARGING
Your machine should last between 3-8 hours, depending on the settings you
are using.
The machine should arrive to you fully charged, however, if you have time, we
encourage you to charge the machine before its first use.
Internal Battery
If you have an internal battery, simply plug the charger into the charger jack
on the rear of the machine (swivel the jack cover to expose it) and plug the
other end into a wall socket. Any master switch position will work.
External Battery
If you’ve ordered your machine with an external battery, you have the
advantage of easily charging the battery separately from the machine (your
machine is also 6 kg lighter than internal battery machines). Your external
battery has two plugs, one for connecting to the machine (male) and the other
is for connecting to the charger (female).
Your battery should be charged at least once per month, even if it has not
been used. This will maintain the life of the battery.
Standard Charger
Your machine comes with a standard charger which charges the machine
safely in 11 hours. This charger is the safest charger to use for your machine
and will provide the longest battery life. It is also a “smart” charger, meaning it
will not damage your battery if left on for long periods of time.
The charger has a red light when charging and a green light when charging is
complete. If after 11 or more hours, your charger light does not turn green,

Page 5 Manual Revision 3.5.0
please disconnect the charger and turn on your machine. If the battery bar
indicator shows 4 bars, then your machine is charged and ready to play. You
do not need to worry about the light on the charger.
Optional Fast Charger
The fast charger can charge your machine in 4 hours and also has the added
benefit of allowing you to charge your battery while playing with the machine
on court. This means you will have unlimited play time while using your
machine and is very similar to running your machine off AC. Please note
though that the battery must have at least a small amount of charge in it
before plugging in the fast charger if you wish to use it while playing with the
machine. The fast charger will not be able to give you extra time if plugged in
when the battery is completely flat.
The fast charger is a “smart” charger, meaning it will not damage your battery
if left on for long periods of time. However, as a precautionary measure, we
recommend you unplug the charger once charging is complete. If after 4 or
more hours, your charger light does not turn green, please disconnect the
charger and turn on your machine. If the battery bar indicator shows 4 bars,
then your machine is charged and ready to play. You do not need to worry
about the light on the charger.
AC ADAPTOR
The AC Adaptor is an optional accessory, but it can be used as your primary
power source (you can order a machine without any internal or external
battery). Simply plug the AC Adaptor into your machine and turn the master
switch to position II.
Note, if you do have an internal battery, the AC Adaptor can still be used. It
will not damage the internal battery.
CUSTOMER CARE
Caution
This machine was designed to be used on a tennis court and in no other
circumstances. Only tennis balls must be used, no other balls should be
ejected from the machine. Never stand in front of the machine unless you are
on the other side of the net (more than 7 meters (8 yards) away). Even when
the machine is paused, never stand in front of it as balls can eject at any time.
Children should be supervised at all times and taught never to stand in front of
the machine.
Do not use the machine in rain and avoid using wet balls. We recommend the
use of pressureless balls to give your machine the best performance. Using a
combination of new and old balls will give inconsistent results.
Maintenance
You can vacuum out the inside of your machine to remove ball fluff. The
outside of the machine can be wiped down with a mild detergent, however,
please be careful not to get water inside the machine. The throwing wheels

Page 6 Manual Revision 3.5.0
should be wiped down after every use to prevent any buildup of residue from
the balls.
Due to vibrations, the screws in the control panel and on the base of the
machine can become loose over time, so please check these regularly and
tighten them if required. If you do need to purchase replacement control panel
screws from the local hardware store, they are 304 Stainless Steel Phillips
Head screws, M4 x 10mm with a 9mm head diameter. You can contact your
local distributor for spares if you need them.
Storage
We recommend that your machine is stored inside/under cover and preferably
in a Spinfire cover to protect it from debris. Do not leave your machine on
court even with the protection of a cover as heavy rain may damage your
machine. Do not store your machine in direct sunlight and always keep it
upright.
TRANSPORTATION
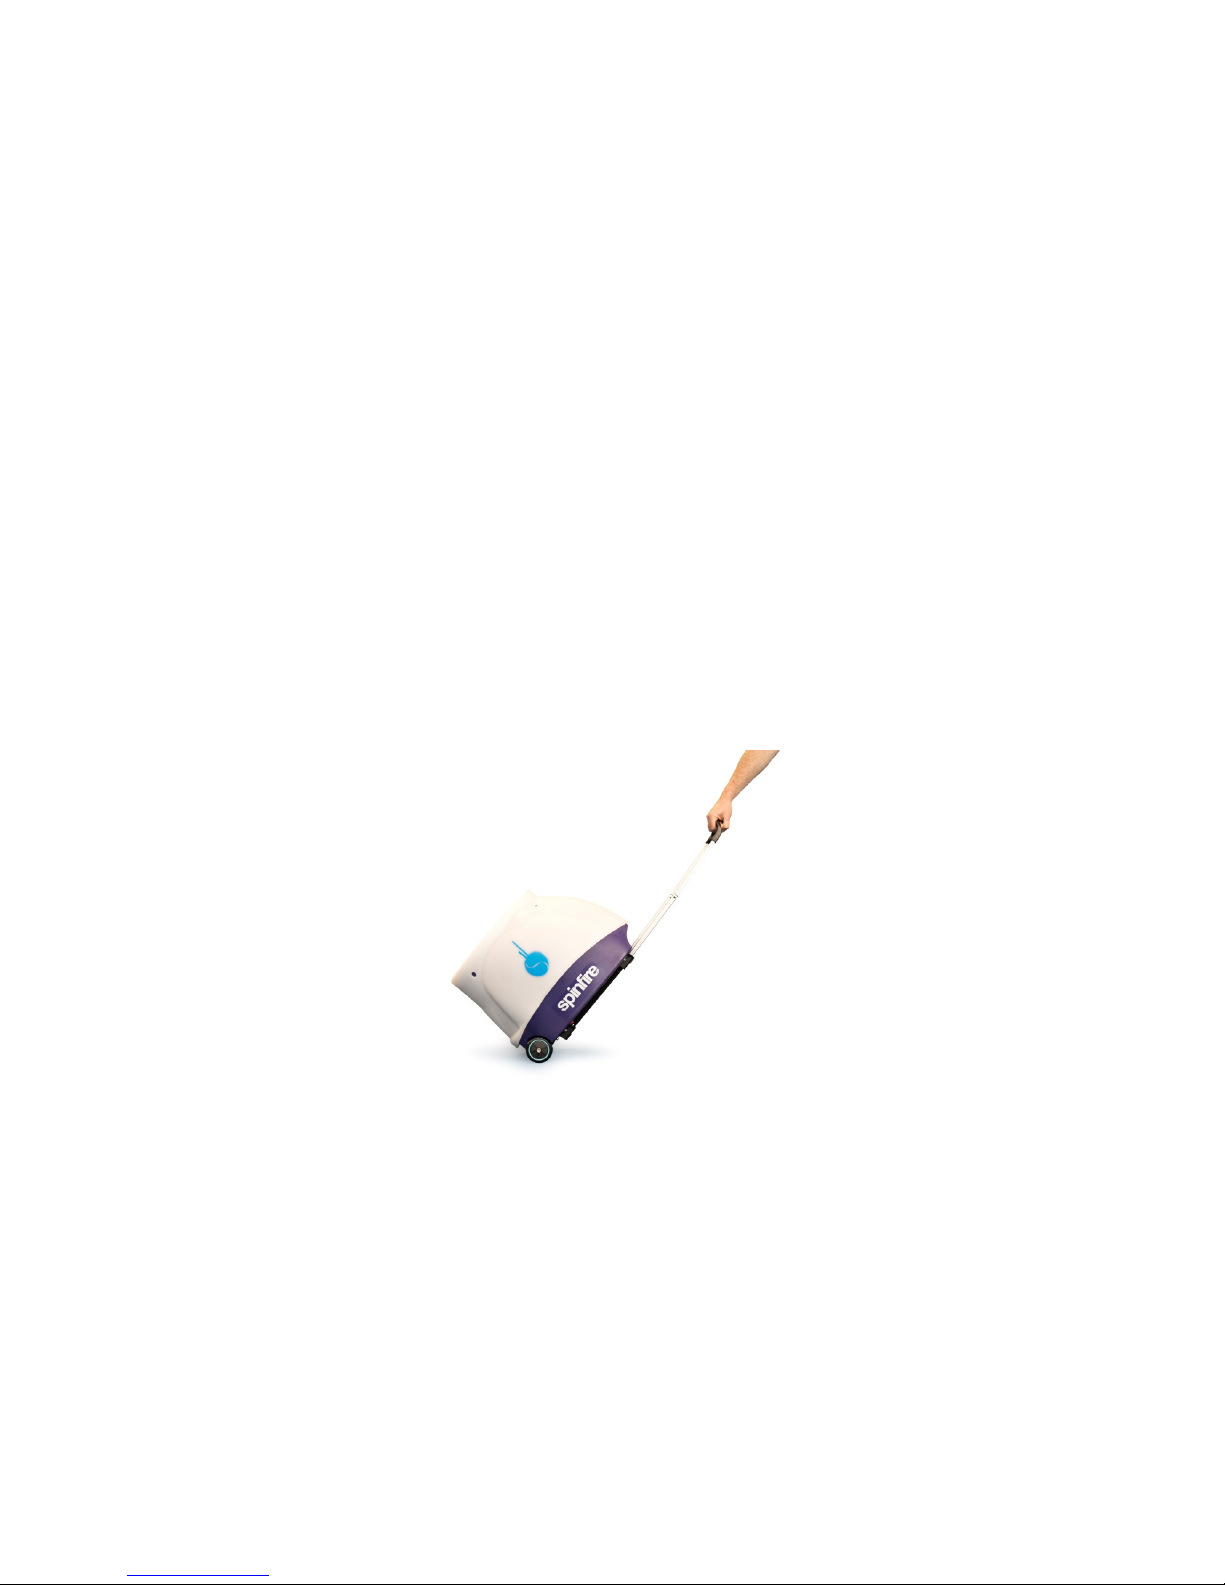
To transport the machine, simply slide out the handle at the front of the
machine (underneath). Lift the machine by the handle until it rests on the rear
wheels. Make sure that the machine is tilted enough not to drag the bottom of
the machine. Simply pull the machine to your destination. Never move the
machine while it is on.
To transport in your car, you may need to remove the carousel. Please make
sure the machine is always kept upright. Laying it on its side can cause
internal damage and void your warranty. Do not store the machine in your car
when external temperatures exceed 30 degrees Celsius (86 degrees
Fahrenheit). The machine weighs 24 kg (50lbs) (or 18 kg (40lbs) with an
external battery) and should be lifted carefully with the use of the handles. We
recommend removing the hopper before lifting the machine and gripping it by
the top of the mouth and the handle at the rear (above the control panel).
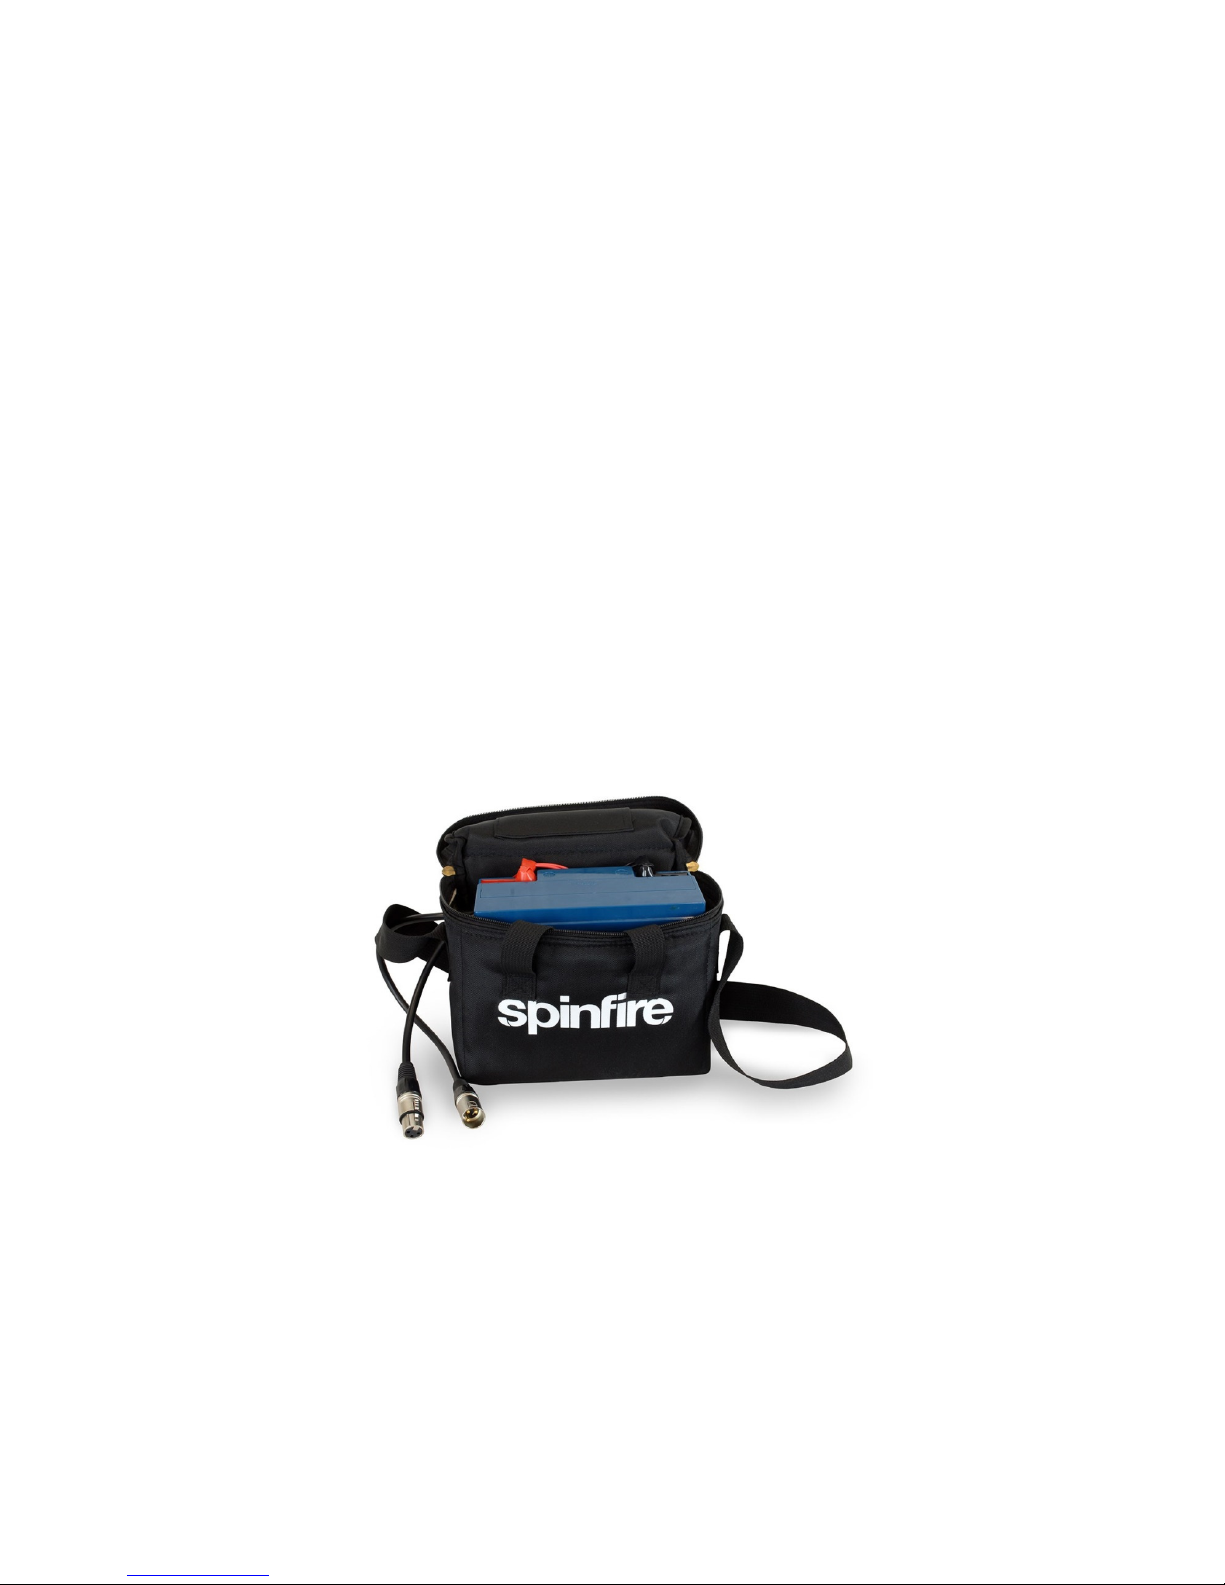
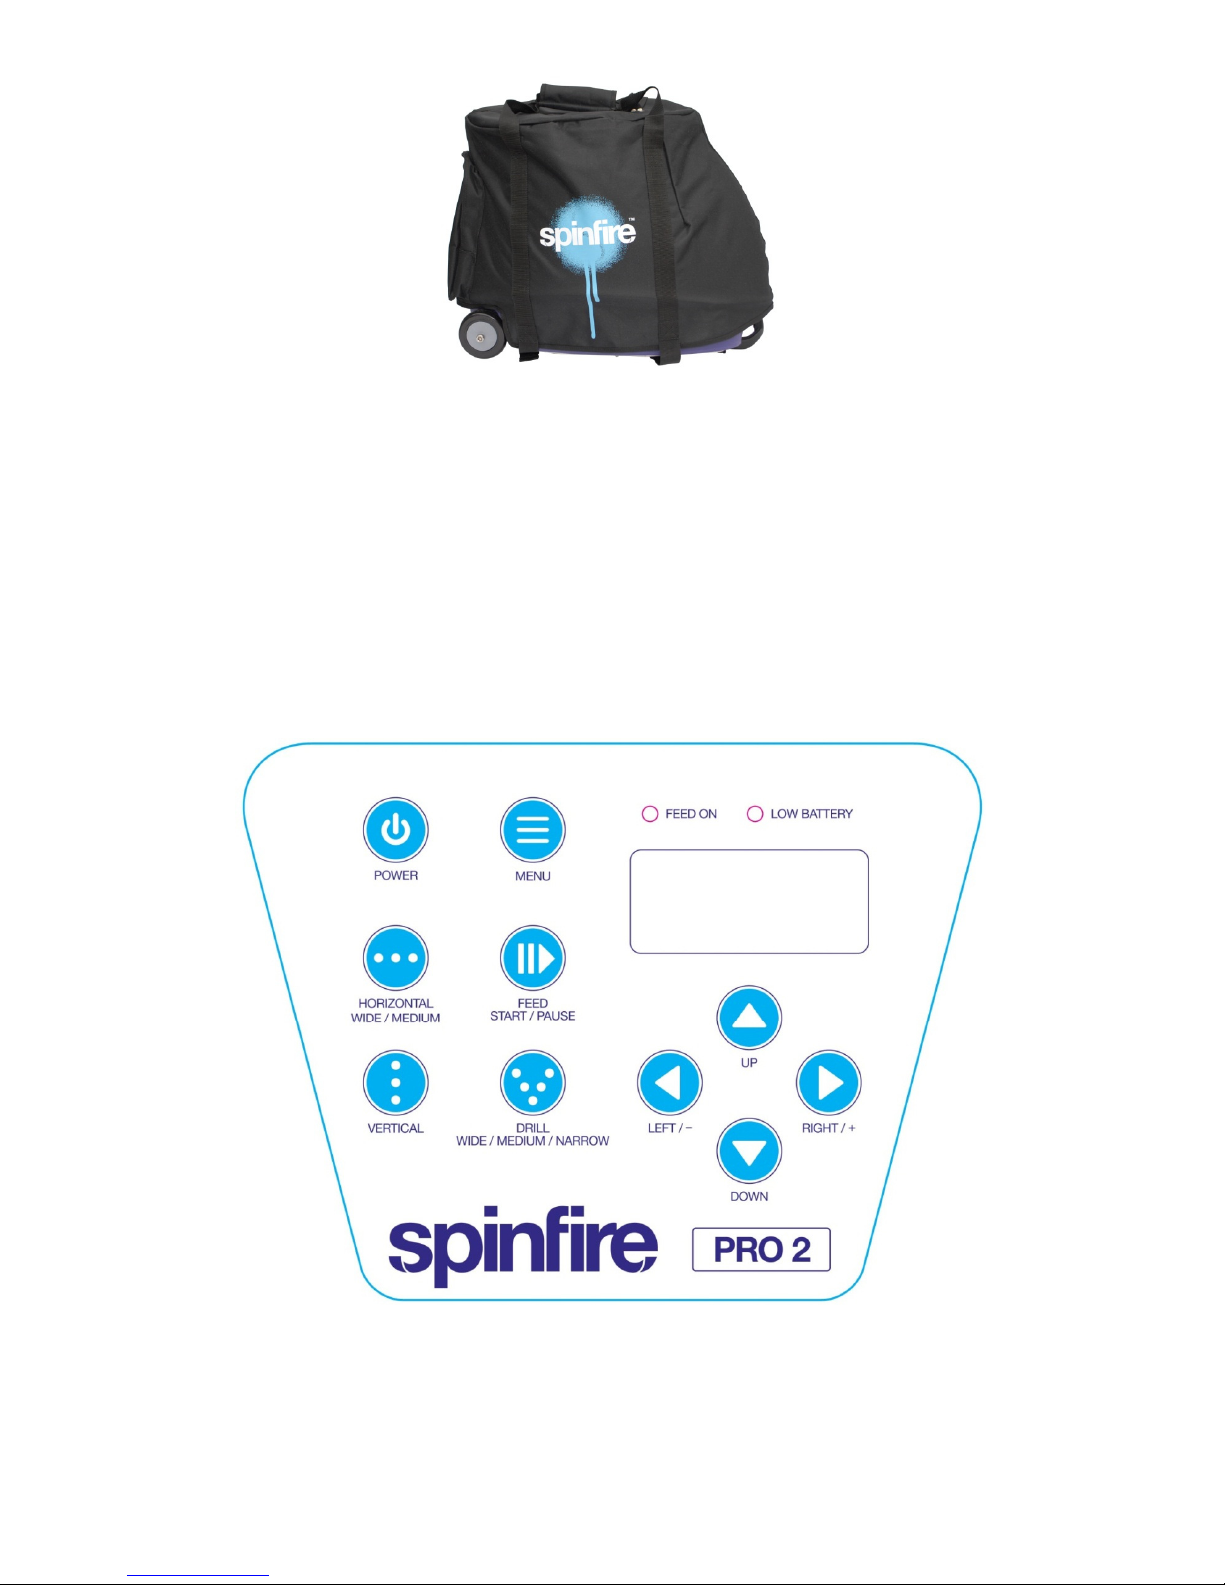
To assist with transporting your machine, you can purchase a Spinfire Carry
Case which has handles and pockets for storing your charger, remote control
and accessories.

Page 7 Manual Revision 3.5.0
USAGE
The machine should be placed on the baseline of the court, preferably in the
center, however you can place it in varying locations if you wish (note features
like oscillation may not work as well when the machine is not positioned in the
center). Please add the balls into the hopper before you begin, do not add
them while the carousel is turning as this can cause ball jams. The maximum
capacity is 200 balls. Please do not overfill the hopper as the excess weight
can damage the feeder motor.
CONTROL PANEL
Power: Press this button to start the machine (hold it for 3
seconds). Please note that there is a main power
switch underneath the machine. Please make sure
this is on before operating your machine (I =
internal battery, II = external battery or AC
Adaptor). The main power switch should be

Page 8 Manual Revision 3.5.0
switched off when transporting or storing the
machine.
Menu: To adjust the interval, ball speed, or spin you need
to press the menu button. Once pressed, a menu
option will begin to flash (it will stop flashing after
30 seconds if no selection is made). You can
move between the 3 top menu items by using the
up and down buttons. You can adjust the settings
of each item by pressing the left and right
buttons. Note: you cannot adjust the elevation
from within the menu. Once you have finished
making your adjustments, press the menu button
again to complete your selection.
Interval:
This sets how often the balls are ejected from the
machine. It can be adjusted from 0 – 20 with 20
being the fastest (approximately 1 ball every 2-3
seconds). The maximum interval during the “2 line
drill - wide” setting is 15. Note that the balls will not
start ejecting from the machine until you press the
feed (start/stop) button.
Ball Speed:
This sets the speed at which the balls are
propelled. It can be set from 0 – 20 with 20 being
the fastest speed (approximately 80mph or
130km/h).
Spin: Using this setting, you can add topspin or slice to
each ball. It can be set from -10 to +10. When set
to -10 you will achieve the highest level of slice.
When set to 0 you will have flat balls while +10
represents the highest level of topspin. You can
also set mild levels of spin.
Elevation:
By pressing the up and down buttons you can
adjust the level of elevation. It can be set from 0 –
200 with the highest elevation being 200 (use this
setting for lobs). Note: you can only adjust the
elevation when the menu is not flashing.
Horizontal Angle: You can vary the horizontal angle that balls are
ejected to by pressing the left and right buttons.
Note: you can only adjust the horizontal angle
when the menu is not flashing.
Feed start/stop:
This allows you to start and stop the feeding of
balls from the machine.
Vertical Oscillation:
Once pressed, the machine will internally oscillate
up and down approximately 4 degrees causing the
depth of each ball to vary. Press this button again
to cancel the vertical oscillation.

Page 9 Manual Revision 3.5.0
Note: to use this properly, you must set your
machine to fire short balls first (eg, service line),
and then activate vertical oscillation. Balls will then
oscillate deeper into the court and then back to
their original short position. If you try to activate
this setting when balls are already firing deep into
the court, you will find that the balls will fire outside
the baseline.
Horizontal Oscillation:
Once pressed, the machine will internally oscillate
from side to side in its wide setting, firing balls to
any horizontal angle on the court randomly (within
the singles lines). Press this button a second time
to enter the medium setting which provides the
same random feature with less width (making it
easier). Press this button a 3rd time to cancel the
horizontal oscillation and the machine will
automatically return to the center of the court.
Once you press this button, a message will display
on the LCD to let you know whether you are in
wide, medium or off mode.
2 Line Drill:
By pressing this button once you will enter the 2
line drill wide mode which will alternate between
hitting you a wide forehand then a wide backhand.
If you press it again, you will enter the 2 line drill
medium mode which alternates between a
medium forehand and a medium backhand
(easier). Pressing the button a 3rd time will enter
the 2 line drill narrow mode which alternates
between a narrow forehand and narrow backhand
(easiest). Press this button a 4th time to turn off
the 2 line drill. Note that the maximum interval
setting when using the “2 line drill – wide” is 15, it
can be set up to 20 for the “2 line drill – narrow
and medium”
Feed On: When illuminated, the machine is currently feeding
balls (ie, more caution should be used when
standing in front of the machine). If no balls are
fired from the machine for approximately 30
seconds, the feeder will pause as a safety
precaution. This safety feature can be turned off if
required, please see the troubleshooting section.
Low Battery: The low battery light will illuminate when the
battery’s charge is getting low. You will have
limited time left once this illuminates and you
should charge your battery. You also have the 4
bar battery indicator on the right hand side of the
LCD. Note, the battery should be charged after
every use.

Page 10 Manual Revision 3.5.0
REMOTE CONTROL
The remote control has been designed to be as small as possible to fit easily
into your pocket.
FEED Feed on/off
SLEEP Sleep mode to conserve battery while collecting balls
UP Elevation Up
DOWN Elevation Down
LEFT Swivel Left
RIGHT Swivel Right
RESET Cancels oscillations (horizontal, vertical & 2 line drill)
INTERVAL Increase or decrease the frequency of deliveries
SPEED Increase or decrease the speed of deliveries
SPIN Increase or decrease the spin level
HORIZONTAL Horizontal Oscillation (1 = wide, 2 = medium, 3 = off)
VERTICAL Vertical Oscillation
DRILL 2 line drill (1 = wide, 2 = medium, 3 = narrow, 4 = off).
The remote control uses a radio frequency of 433Mhz to communicate with
the machine. It has been designed to work from a range that easily extends
the length of a tennis court. If you are experiencing issues with the range of
your remote, please try replacing the battery. The main cause of range issues
(other than battery) is interference from other radio frequencies in the area. If
you are able to try another public court at the facility, you may find improved
results.

Page 11 Manual Revision 3.5.0
EXAMPLE SETTINGS
When first using your machine, it can take a while to get used to the settings.
By adjusting one setting, you may find you need to adjust others to
compensate. We recommend reducing the interval setting while you are
experimenting. You can speed it back up again once you have found the
settings that you like. To help get you started, here are some example settings
that you might like (please note, you will most likely need to adjust them
slightly to suit your machine).
With your machine placed just behind the base line in the center, please enter
the four settings of your choice into your control panel:
Interval Speed Spin Elevation
Beginner topspin 9 10 +2 55
Beginner flat 9 8 0 64
Beginner slice 9 9 -3 68
Beginner lob 13 6 0 150
I/mediate topspin 13 14 +4 50
Intermediate flat 13 12 0 30
Intermediate slice 13 15 -5 16
Intermediate lob 13 9 +2 200
Advanced topspin 16 18 +6 47
Advanced flat 13 18 0 10
Advanced slice 16 18 -6 47
Advanced lob 13 12 -3 200
*Settings may vary slightly between machines, please alter accordingly.
TENNIS BALLS
Your machine can hold 200 balls. Whilst the hopper can possibly take a larger
quantity than this, we recommend you restrict it to 200 balls, which puts less
weight on the carousel motor.
We strongly recommend the use of pressureless balls, preferably from a
reputable brand. Balls can contain an oily coating in the felt which can cause
damage to the throwing wheels rendering them useless. Please choose
carefully when determining which balls to use in your machine. We
recommend the use of Spinfire Juice balls or a brand thoroughly tested and
recommended by your distributor (we do not recommend mixing brands).
Pressureless balls will also allow your machine to perform at its best. Each
ball will have a consistent bounce allowing you to consistently hit the spots on
the court that you want. Normal pressurized balls go flat quickly when used in
conjunction with a ball machine.
Low Compression Balls
Our machine can handle both orange (stage 2) and green (stage 3) low
compression balls. It cannot work with red (stage 1) balls due to their larger
size.

Page 12 Manual Revision 3.5.0
HIDDEN FEATURES
Manual Mode
If you experience any alignment (eg, shooting too far to the right) or
initialization (HCAL or VCAL errors) issues, it is likely you can resolve them by
starting the machine in manual mode. To do this, please follow these 3 steps:
1. Make sure your machine is turned off (you may need to use the master
switch under your machine).
2. Manually move the internal mechanism of your machine to the lowest
possible elevation and to the center of the opening.
3. With the master switch on, hold both the power and menu buttons at
the same time for 5 seconds to turn on your machine. The LCD should
display a message to let you know you have entered “manual mode”.
If this resolves your problem, then you can continue to use your machine this
way until a permanent solution can be obtained from your Spinfire dealer.
Please note that this solution relies on you performing step 2 above correctly.
If you do not set the machine to the correct position before turning on the
machine, you will find that the calibration may be off target. You will either
need to turn the machine off to try again, or physically point your machine in a
direction that will achieve the desired results.
30 Second Safety (Feeder)
By default, your feeder is designed to turn off automatically after 30 seconds if
no balls are fired. This is to prevent balls firing unexpectedly at the user.
However, sometimes this feature can cause the feeder to stop, even when
balls are firing. The solution is to simply disable this feature, which you can do
by following these steps:
1. Start with your machine off
2. Turn it on by pressing “power” and “down” simultaneously
3. You can now toggle this setting by pressing “up”.
4. Press “menu” to save the new setting.
Your machine will remember this setting for all future uses (until changed
again).
Feeder Speed Calibration
Your machine should be able to fire one ball every 2 seconds at the fastest
interval. If you feel that it is not calibrated correctly, you can recalibrate it by
following these steps:
1. Start with the machine turned off
2. Turn it on by pressing “power” and “up” at the same time for 3-5
seconds.
3. You will see a screen showing "Interval 20" and "Feed Base 50"
(settings may vary).
4. You can adjust the feed base from 20 (slower) to 120 (faster) to change
the default speed when the interval is set to 20 (the ideal setting is 30
balls per minute – one carousel revolution in 10 seconds).

Page 13 Manual Revision 3.5.0
5. To save the new setting, simply press "menu".
6. Once saved, you can turn off the machine with the power button (then
turn it back on again).
Warning, if you increase this base speed too much, the throwing wheels will
not be able to recover quickly enough before a 2nd ball is fired when the
interval is at 20. This can cause speed problems and also issues with your 2
line drill WIDE settings. Please only alter this setting if it is necessary and
consult your dealer if you are unsure.
Slower Interval Mode
A second interval mode has been added which will allow you to achieve much
longer interval settings should you wish to activate it. To do so, simply turn on
the machine by pressing "power + right". You will then see a menu where you
can make "Interval mode 2" the default. Once activated, the feeder will spin at
a faster speed, it will recognize when balls are fired and it will pause after
each ball is fired. The length of the pause will vary depending on the interval
setting selected by the user. The maximum interval setting on 2 line drill wide
is 17 for this 2nd interval mode.
Paddle Software
Paddle software (used in Spain and countries where Paddle Tennis is played)
can now be activated by simply pressing POWER + DOWN + RIGHT when
turning on the machine. Once activated, a 2nd vertical oscillation is added,
ranging from 70 to 190.
TROUBLESHOOTING
Machine won’t turn on
Please check that the master switch has been turned on under the machine (I
= internal battery, II = external battery or AC adaptor) and that you are holding
the on button for at least 5 seconds. If it still won’t turn on, please try charging
it for at least 1 hour before testing it again (ideally a full 11 hour charge would
be desirable).
Machine fails to initialize (VCAL or HCAL error)
If you experience a failure when turning on your machine, please check for a
ball jam (remove if one exists) and then try pressing the “reset” switch under
your machine (next to the master power switch). If you feel the reset switch
“click”, then this will most likely resolve the issue. If it does not click, then there
may be a problem with a sensor inside your machine. As a short term fix,
please try starting your machine in “manual mode” (as described earlier in this
manual under “hidden features”). You may be able to operate perfectly in
manual mode.
Machine will only turn to the right
Sometimes the machine will only shoot to the right (when standing behind the
machine, looking forward). It may even shoot inside the purple case.

Page 14 Manual Revision 3.5.0
This issue is caused by a fault with the horizontal sensor (it may simply have
become unplugged through vibrations). To resolve this issue temporarily,
please start your machine in “manual mode” (as described earlier in this
manual under “hidden features”). You should be able to use your machine
perfectly in manual mode.
Clearing Ball Jams
If you find that a ball gets stuck behind the two throwing wheels, the machine
may shut down to prevent damage to the circuit board. Please turn the
machine off at the master switch under the machine, remove the carousel
(never bend the wire to remove the carousel unless necessary and be sure to
bend it back after you have finished) and clear the ball jam. Once the machine
is clear again, please check the reset switch next to the master switch on the
base of the machine. If the switch is solid, please press it, then turn on the
master switch and turn your machine back on.
If you find that the throwing wheels don’t turn, it is because the reset switch
under the machine has not been pressed. Once pressed the wheels will start
turning again.
Balls are jamming too regularly
If you are finding regular jamming, please check the wire that hovers above
the drop hole (the 5 fingers of the carousel pass underneath it). This wire
should prevent more than one ball falling down the chute at any time. Over
time, sometimes this wire bends towards the front of the machine, allowing
multiple balls to drop into the hole which will cause ball jams. Simply bend this
wire back towards the center of the carousel and check that it adequately
prevents balls falling into the drop hole.
If this is not the issue, then please consider the tennis balls that you are using.
We strongly recommend the use of Spinfire Juice which we know are trouble
free. Old balls and inexpensive balls are more prone to jamming and could be
the cause of your problem. Some balls can also make the throwing wheels
slippery, so please check if the throwing wheels have the necessary grip to
eject the balls. If you feel they are too slippery, you may need to contact your
distributor for assistance (the wheels may need to be replaced).
Throwing wheels aren’t spinning
Please see the heading “Clearing Ball Jams” for information on how to resolve
this.
Balls inside the machine
If you find balls inside your machine, please do not attempt to retrieve them
while the machine is on. Turn your machine off at the control panel and then
at the master switch under the machine. Manually swivel the internal firing
mechanism to either side to allow access so that you can reach inside and
retrieve the ball(s).

Page 15 Manual Revision 3.5.0
Balls don’t feed fast enough
It is possible to adjust the feed speed of this machine. If you are finding that
interval “20” is not fast enough to suit your practice sessions, please see the
“feeder speed calibration” heading earlier in this manual.
Battery does not last 3 hours
If the battery is fully charged, your machine should last a minimum of 3 hours
(and can last up to 8 hours on basic settings). If you are not achieving 3
hours, it may be time to replace the battery. Please contact your local dealer
for instructions on how to open the machine casing. Our batteries come with a
6 month warranty. The battery specifications are 12V, 20AH, 181.5mm (L) x
77mm (W) x 167mm (H). The weight should be approximately 6 kg and the
terminal type is T3. These are a common battery and should be available
locally.
The feeder keeps pausing during play
By default, your feeder is designed to turn off automatically after 30 seconds if
no balls are fired. This is to prevent balls firing unexpectedly at the user.
However, sometimes this feature can cause the feeder to stop, even when
balls are firing. The solution is to simply disable this feature, which you can do
by:
1. Start with your machine off
2. Turn it on by pressing “power” and “down” simultaneously
3. You can now toggle this setting by pressing “up”.
4. Press “menu” to save the new setting.
Your machine will remember this setting for all future uses (until changed
again).
The remote control does not work
Please try inserting a new battery and confirm that the remote LED is
illuminating when buttons are pressed. If the machine is still not reacting to the
remote, it is likely that the remote control receiver chip has fallen off the
motherboard. This can happen due to vibrations over time. Please undo the 4
screws on the control panel and gently pull the control panel off the back of
the machine. Check your motherboard to see if the receiver chip is still
plugged in, it looks like this:

Page 16 Manual Revision 3.5.0
If it is not present, you may find it loose at the bottom of your machine. Please
see if you can locate it and then plug it back on to the motherboard.
The two line drill will only fire to one side
In order for the two line drill to move from side to side, it needs to detect that a
ball has been fired. It does this by measuring the change in electrical current.
However, sometimes this current change cannot be detected. Often it is due
to very slow settings or perhaps soft/flat tennis balls being used. Please try
increasing the speed or using new tennis balls.
If this does not resolve the problem, please contact your local dealer and they
may need to send you a replacement motherboard (which you can change
yourself). Please be sure to provide your dealer with the serial number of your
machine (located on the base) as they will need to make sure the software
installed on the motherboard matches your machine.
Horizontal oscillation only fires to the sides, or just to one spot
Horizontal oscillation will move from side to side at a set speed. Depending on
the speed/timing of the feeder, it is possible for balls to fire out in patterns (eg,
one to each side, or all balls to one spot). To resolve this, simply alter the
feeder speed (interval) to be faster or slower and you may find that balls fire
out much more randomly.
Top or bottom wheel spins at high speed when the machine is off
If either your top or bottom wheel is spinning at high speed when your
machine is turned off, you will be able to stop it by turning off the master
switch under the machine. This usually happens when certain components on
the motherboard have broken (can be caused by a major ball jam). The only
way to repair this problem is to contact your local dealer for a replacement
motherboard, or ask your local electronics expert to repair it. The components
on the motherboard are Q2 (bottom) and Q3 (top) and the replacement
component part number is IRFB3206.
Top or bottom wheel motor error
With the machine off and elevation at its lowest, please do the following:
• Check to see if there are any obstructions to the wheels.
• Make sure that the wheels can spin freely (try turning them by hand to
see if they are rubbing on anything).
• Check the reset switch under your machine (next to the master power
switch) and press it (if it doesn’t click, then this was not the problem).
• Check each of the tyres on the throwing wheels to see if they are in
good condition. If they get damaged, they can throw out the balance of
the wheels which will cause a throwing motor error. Check to see if the
tyre is coming away from the core of the wheel (see if you can pry it
away on both sides).
If this does not help you, please contact your local distributor with your serial
number (on the base of your machine) so that they can assist you with the
repair.

Page 17 Manual Revision 3.5.0
Example settings in this manual don’t work well for me
All of our machines are slightly different due to manufacturing tolerances and
therefore the correct settings on one machine may be slightly different on
another. Please try adjusting your settings a little bit until the balls are landing
where you want them to.
Control panel buttons are not responding properly
Please check that your remote control is not accidentally sending signals
without you knowing (try removing the battery). If this is not the case, please
unscrew the 4 screws on the control panel and gently pull it outwards
(wiggling it from side to side as you do). Check the flat ribbon cable to see that
it is connected properly to the motherboard (try disconnecting it and blowing
on it). Also check that the flat ribbon cable wasn’t crimped when fixed to the
machine. Carefully replace the control panel, making sure not to crimp any
cables in the process. If this does not resolve your issue, please contact your
local dealer for support.
The machine is not accurate or consistent enough
To achieve the most accurate results, you must use “pressureless balls” with
your machine. You cannot mix brands or ball types. All balls must be identical
to achieve the highest level of consistency. Factors such as wind can also
reduce the accuracy.
The feeder motor is not working
The feeder motor is the motor which turns the carousel to stir the balls and
feed them into the throwing wheels. The most common cause for this not
working is if the cable has become unplugged from the motherboard. This can
happen due to vibrations over time. Simply undo the 4 screws on your control
panel and gently remove the control panel. You should find a two wire (black
and red) cable hanging from the feeder motor. Please make sure it is firmly
connected to the motherboard on the connector shown below:

Page 18 Manual Revision 3.5.0
SUBMITTING A SUPPORT REQUEST
When contacting us or any of our dealers for support, please be sure to
provide us with the serial number which is located on the base of your
machine.
Furthermore, any video footage you can supply showing the problem will
greatly assist us in resolving your issue.
If you can hear any unusual noises, please be sure to notify us of these and
where you believe they are originating from.
WARRANTY
Should any part fail due to defective workmanship or faulty materials within
the warranty period purchase of date from years 2 of Spinfire will repair ,or
option, its at
replace the defective part free of charge. The throwing wheels
& battery are only warranted for 6 months from the date of purchase.
Warranty Administration
Warranty is administered by Spinfire
Canada in
.
and States nitedU the in Inc. USA
To ensure speedy processing of your warranty service claim, ensure that you
inform us of all specific details about your machine including the serial number
& model as well as a detailed description of the fault. Any videos you can
provide us are considered very helpful.
Not Covered
Exposure of the ball machine to the elements should be minimized. Upon
completion of play, please store the machine under cover. Damage caused to
your machine from being exposed to the elements is not covered under
warranty.
This warranty does not cover the purchaser or any other person for damage,
malfunction or loss due to the following:
Lack of maintenance, abuse, neglect, misuse, accident or improper usage
of this appliance.
• Scratches, dents, corrosion or general wear & tear on the machine.
• Exposure to the elements, insects, weather or hail.
• Unauthorized repairs during the warranty period.
• Acts of God.
• Use on power voltages other than that specified for your machine.
Servicing of this nature is chargeable.
Under no circumstances will Spinfire be liable to the Customer or any
other person for incidental or

Page 19 Manual Revision 3.5.0
consequential damages of any nature, including but not limited to,
damage for personal injury or damages to property.
Conditions of Warranty
1.
accept
be ed
not be not will return the or box the of outside
the on label
mailing the on written be must number This instructions.
address
delivery and
.
#) (RMA # Authorization Material Return a
for below numbers theat Spinfire call please service warranty require you If
The machine
must
b e delivered to Spinfire and freight charges both ways
must be paid by
the owner. No liability is accepted for loss or damage during transit.
carrier. the from shipment our of value the for insurance secure
Please
2. The machine must always be operated and maintained in accordance with
the instructions supplied.
3. No alterations or repairs can been carried out without obtaining Spinfire's
prior consent. Such repair or any replacement does not extend the
warranty period.
4. Proof of purchase must be provided to verify purchase date and establish
the warranty period. Only the original purchaser is covered under this
warranty.
5. The warranty period is calculated from the date of purchase only.
6.
Parts installed from other manufacturers’ products will void this warranty.
Spinfire
in
647-479-6921
ON:Toronto,
888-299-2021,Toll-Free
Canada:
716-462-6145 NY: Buffalo, 244-0003,888- Toll-Free
Inc.
USA
Other manuals for Pro 2
3
Table of contents
Other Spinfire Accessories manuals
Popular Accessories manuals by other brands

Graco
Graco Husky 716 series instructions

Poweradd
Poweradd Pilot 4GS Pro user manual

Kenton
Kenton TB-303 Instructions for using

Philips
Philips WelcomeEye Connect 2 manual

Ningbo Pdlux Electronic Technology CO.,Ltd
Ningbo Pdlux Electronic Technology CO.,Ltd PD-V19 instructions

Iritech
Iritech IRISHIELD-UART MO 2120 Hardware manual

Panasonic
Panasonic MCO-230AIC operating instructions

Festo
Festo AS-i Series Brief description

elero
elero VariEco+ L-868 operating instructions

ROSE DISPLAYS
ROSE DISPLAYS ANOGOTCHA ROUND WITH CABLE CLIP AND CABLE AND... manual

Renkforce
Renkforce RS2W operating instructions

Robus
Robus connect RCCHIME-01 quick start guide