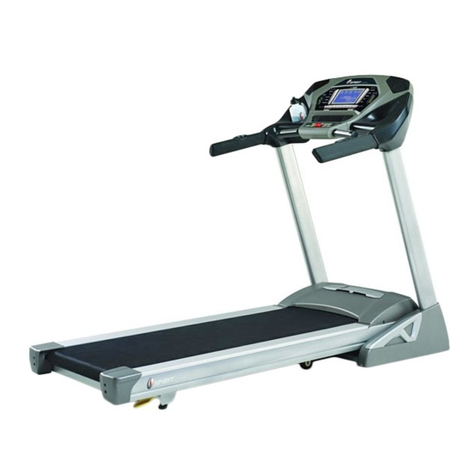
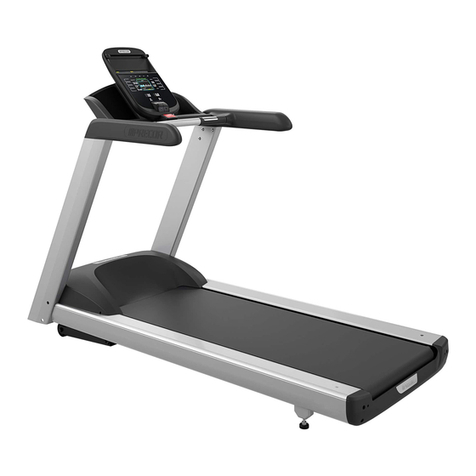
Spirit XT385 User manual

Retain For Future Reference
Owner’s Manual
Model No.
16007603850-1
XT385
- Assembly
- Operation
- Adjustments
- Parts
- Warranty
CAUTION:
Read and
understand this
manual before
operating unit

Customer Service 1-888-707-1880 Dyaco Canada Inc. 2016
Email: customerservice@dyaco.ca
2
TABLE OF CONTENTS
Product Registration…………………………………………………………………………... 3
Important Safety Instructions………………………………………………………………….. 4
Important Electrical Instructions………………………………………………………………. 6
Assembly Instructions………………………………………………………………………….. 8
Transportation Instructions…………..……………………………………………………….. 13
Operation of Your New Treadmill…………………………………………………………….. 14
Using the Spirit Fit App.……………………………………………………….……................ 18
Programmable Features………………………………………………………………………. 19
Target Heart Rate………………………………………………………………………………. 25
Using a Heart Rate Transmitter ……………………………………………………….……... 27
Heart Rate Control Operation…………………………………………………………………. 28
Diagram .................………….……………………………………………………………………29
Parts List ………………....................………….……………………………………….…..… 30
General Maintenance.……………….…………………………………………………………. 34
Manufacturer’s Limited Warranty .……………………………………………………..……….39

Customer Service 1-888-707-1880 Dyaco Canada Inc. 2016
Email: customerservice@dyaco.ca
3
Thank you for your purchase of this quality treadmill from Dyaco Canada Inc. Your new treadmill
was manufactured by one of the leading fitness manufacturers in the world and is backed by
one of the most comprehensive warranties available. Through you dealer, Dyaco Canada Inc.,
will do all we can to make your ownership experience as pleasant as possible for many years to
come. The local dealership where you purchased this treadmill is your administrator for all
warranty and service needs. Their responsibility is to provide you with the technical knowledge
and service personnel to make your experience more informed and any difficulties easier to
remedy.
Please take a moment at this time to record the name of the dealer, their telephone number,
and the date of purchase below to make any future, needed contact easy. We appreciate your
support, and we will always remember that you are the reason that we are in business. Please
go to www.dyaco.ca/warranty.html and complete the online warranty registration.
Name of Dealer:
Telephone Number of Dealer:
Purchase Date:
RECORD YOUR SERIAL NUMBER
Please record the Serial Number of this fitness product in the space provided below.
Serial Number:
REGISTER YOUR PURCHASE
Please visit us at www.dyaco.ca/warranty.html to register your purchase.
CONGRATULATIONS ON YOUR
NEW TREADMILL
Product Registration

Customer Service 1-888-707-1880 Dyaco Canada Inc. 2016
Email: customerservice@dyaco.ca
4
IMPORTANT SAFETY INSTRUCTIONS
THIS UNIT IS INTENDED FOR HOUSEHOLD USE ONLY
READ ALL INSTRUCTIONS BEFORE USING THIS TREADMILL
CAUTION: Before starting any exercise program, it is recommended that you consult your
physician.
WARNING: Connect this unit to a properly grounded outlet only.
DANGER: To reduce the risk of electric shock, always unplug the treadmill from the electrical
outlet immediately after using and before cleaning.
WARNING
TO REDUCE THE RISK OF BURNS, FIRE, ELECTRIC SHOCK, OR INJURY TO
PERSONS: Grounding Instructions
This product must be grounded. If it should malfunction or breakdown, grounding provides a
path of least resistance for electric current to reduce the risk of electric shock. This product is
equipped with a cord having an equipment-grounding conductor and a grounding plug. The plug
must be plugged into an appropriate outlet that is properly installed and grounded in
accordance with all local codes and ordinances. See diagram below for grounding methods.
1. Use 110 volt a.c. household current on a dedicated circuit.
2. It is the responsibility of the owner to ensure that all users of this treadmill are adequately informed of
all warnings and precautions.
3. The use of an extension cord with this product is not recommended. If an extension cord is needed,
use a short (less than 10 feet) heavy gauge (14 gauge or better) extension cord with a three prong
(grounded) plug and receptacle.
4. Never leave the treadmill unattended when plugged in. Remove the safety key and unplug the unit
from the outlet when not in use and before removing or replacing parts.
5. Never operate the treadmill if it has a damaged cord or plug, if it is not working properly, if it has been
dropped, damaged, or exposed to water. Never move the treadmill belt while the power is turned off.
6. Do not pull the treadmill by the power supply cord or use cord as a handle. Keep cord away from
heated surfaces and open flames.
7. Fitness equipment must always be installed and used on a flat surface. Do not use outdoors or near
water. Do not place the unit on a loose rug or uneven surface. It is recommended to use an
equipment mat to prevent the unit from moving while it is being used, which could possibly scratch or
damage the surface of your floor. It is recommended to have a minimum of 3 meters safe clearance
on all sides of the treadmill while in use.

Customer Service 1-888-707-1880 Dyaco Canada Inc. 2016
Email: customerservice@dyaco.ca
5
8. Keep the treadmill indoors, away from moisture and dust. Do not put the treadmill in a garage,
covered patio or near water.
9. Do not operate the treadmill where aerosol products are used or where oxygen is being
administered.
10. Read, understand and test the emergency stop procedure before using the treadmill.
11. Do not insert any objects into any openings.
12. Inspect and properly tighten all parts of the treadmill regularly.
13. Keep children and pets away from this equipment at all times while exercising.
14. Handicapped individuals should have medical approval and close supervision when using this
treadmill.
15. Do not place hands or feet under the treadmill. Always keep hands and legs off of the treadmill
when others are using it.
16. Never turn on treadmill while standing on tread-belt. Always hold the handrails while using the
treadmill. Always return the treadmill to the slowest speed to provide for safe dismount and low
speed restart.
17. To disconnect, turn all controls to the off position, then remove plug from outlet.
18. Do not attempt to raise, lower or move the treadmill until it is properly assembled. See page 13.
on how to move the treadmill. Care must be taken when lifting or moving the equipment, so as not
to injure your back. Always use proper lifting techniques. You must not use any attachments that
are not recommended by the manufacturer.
19. Use the treadmill only for its intended use as described in this manual. Do not use any
attachments that are not recommended by the manufacturer.
20. User weight should not exceed 375 lbs (170 kgs).
21. Never allow more than one person on the treadmill at once.
22. Warm up 5 to 10 minutes before each workout and cool down 5 to 10 minutes afterward. This
allows your heart rate to gradually increase and decrease and will help prevent straining muscles.
23. Never hold your breath while exercising. Breathing should remain at a normal rate in conjunction
with the level of exercise being performed.
24. Start your program slowly and very gradually increase your speed and distance.
25. Always wear suitable clothing and footwear while exercising. Do not wear loose fitting clothing
that could become entangled with the moving parts of your treadmill. Do not walk or jog barefoot,
in stocking feet or loose fitting shoes or slippers.
▲WARNING: Before beginning any exercise program consult your physician. This is
especially important for individuals over the age of 35 or persons with pre-existing
health problems. Read all instructions before using any fitness equipment. We assume
no responsibility from personal injury or property damage sustained by or through the
use of this product.
SAVE THESE INSTRUCTIONS

Customer Service 1-888-707-1880 Dyaco Canada Inc. 2016
Email: customerservice@dyaco.ca
6
IMPORTANT ELECTRICAL INSTRUCTIONS
WARNING!
NEVER remove any cover without first disconnecting AC power. If voltage varies by ten percent (10%)
or more, the performance of your treadmill may be affected. Such conditions are not covered under
your warranty. If you suspect the voltage is low, contact your local power company or a licensed
electrician for proper testing.
NEVER expose this treadmill to rain or moisture. This product is NOT designed for use outdoors, near
a pool or spa, or in any other high humidity environment. The temperature specification is 40 degrees
C, and humidity is 95%, non-condensing (no water drops forming on surfaces).
Circuit breakers: Avoid AFCI/GFCI circuit breakers if possible. These breakers may trip occasionally
during use because of the high inrush currents from the treadmill drive motor. This condition is an issue
with all treadmills and other products with large motors or electric heating elements like ovens.
New laws in your area may require these breakers. If you do have these breakers and outlets in your
home and are experiencing nuisance tripping, you should check to see if there are any other devices
plugged into the same circuit like fluorescent lights with electronic ballasts, coffee maker, space heater,
etc. Optimally the treadmill should be the only device plugged into the circuit.
Our treadmills have surge suppressors built in to help avoid nuisance tripping. We have tested several
AFCI/GFCI breakers and outlets with our products that do not trip when only the treadmill is connected.
Brands we have tested are: Eaton (Cutler Hammer Series), Leviton (Smart lock pro) and Schneider
Electric (Canadian home series).
This product must be grounded. If the treadmill should malfunction or breakdown, grounding
provides a path of least resistance for electric current, reducing the risk of electric shock. This product
is equipped with a cord having an equipment-grounding plug. The plug must be plugged into an
appropriate outlet that is properly installed and grounded in accordance with all local codes and
ordinances.
DANGER - Improper connection of the equipment-grounding conductor can result in a risk of
electric shock. Check with a qualified electrician or serviceman if you are in doubt as to whether
the product is properly grounded. Do not modify the plug provided with the product if it will not
fit the outlet; have a proper outlet installed by a qualified electrician.
●NEVER operate this treadmill without reading and completely understanding the results of any
operational change you request from the computer.
●Understand that changes in speed and incline do not occur immediately. Set your desired work level
on the computer console and release the adjustment key. The computer will obey the command
gradually.
●NEVER use your treadmill during an electrical storm. Surges may occur in your household power
supply that could damage treadmill components.
●Use caution while participating in other activities while walking on your treadmill, such as watching
television, reading, etc. These distractions may cause you to lose balance or stray from walking in the
center of the belt; which may result in serious injury.
●NEVER mount or dismount the treadmill while the belt is moving. Spirit treadmills start with at a very
low speed and it is unnecessary to straddle the belt during start up. Simply standing on the belt during
slow acceleration is proper after you have learned to operate the unit.
●Always hold on to a handrail or hand bar while making control changes (incline, speed, etc.).
Do not use excessive pressure on console control keys. They are precision set to function properly
with little finger pressure. Pushing harder is not going to make the unit go faster or slower. If you
feel the buttons are not functioning properly with normal pressure, contact your Spirit dealer..
Customer Service 1-888-707-1880 Dyaco Canada Inc. 2016
Email: customerservice@dyaco.ca
7
SAFETY TETHER CORD
A safety tether cord is provided with this unit. It is a simple magnetic design that should be
used at all times. It is for your safety should you fall or move too far back on the tread-belt.
Pulling this safety tether cord will stop tread-belt movement.
To Use:
1. Place the magnet into position on the round metal portion of the console control head.
Your treadmill will not start and operate without this. Removing the magnet also secures the
treadmill from unauthorized use.
2. Fasten the plastic clip onto your clothing securely to assure good holding power.
Note: The magnet has strong enough power to minimize accidental, unexpected stopping.
The clip should be attached securely to make certain it does not come off. Be familiar with
its function and limitations. The treadmill will stop, depending on speed, with a one to two
step coast anytime the magnet is pulled off the console. Use the red Stop/Pause switch in
normal operation.

Customer Service 1-888-707-1880 Dyaco Canada Inc. 2016
Email: customerservice@dyaco.ca
8
ASSEMBLY INSTRUCTIONS
!!ATTENTION: IMPORTANT UNPACKING INSTRUCTIONS.
PLEASE READ BEFORE UNPACKING YOUR FOLDING TREADMILL!!
Serious injury could occur if this folding treadmill is not unpacked properly.
There is a Velcro strap installed around the treadmill base that prevents the treadmill from
unfolding accidentally during shipping. If this strap is not removed properly the treadmill could
spring open unexpectedly and cause injury if someone is standing near the treadmill when the
strap is removed.
To ensure your personal safety during removal of the shipping strap please make sure the
treadmill is positioned flat on the ground, in the orientation it would be in if you were using
the treadmill. Do not turn the treadmill up on its side while removing the shipping strap. This
could cause the treadmill’s folding mechanism to spring open. If the end of the Velcro strap
(that you need to grab to remove it) happens to be under the treadmill deck, reach under the
deck to grab it, but do not tilt the treadmill up to gain access to the strap end.
Cut the banding straps with a short box cutter (razor knife); separate the carton from the one
underneath it by prying up on the staples (if applicable). Pull the carton over the treadmill
parts and locate the hardware pack. The hardware pack is separated into five sections; one
section containing tools and four sections labeled steps 1-4 which contain the hardware
needed for assembly of each step. The assembly steps below are numbered one through
four and correspond to the hardware in the numbered sections of the hardware pack.
Remove only the hardware for the step you are currently assembling to avoid confusion and
mix ups.
Then remove the treadmill from the carton and lay it on a level surface.
ASSEMBLY TOOLS
#131. Combination M5 Allen Wrench
& Phillips Head Screwdriver
#148. Phillips Head Screwdriver
#132. M6Allen Wrench

Customer Service 1-888-707-1880 Dyaco Canada Inc. 2016
Email: customerservice@dyaco.ca
9
'
STEP 1
1. Gather HARDWARE FOR STEP 1.
2. Take 6 Speed NUT CLIPS (128) and attach them at the front and each side of the unit as
shown left.
3. Guide the right upright through FRAME BASE COVER RIGHT (62) and CONSOLE MAST
COVER RIGHT (67).
4. Next take the RIGHT UPRIGHT (4) and attach the MIDDLE COMPUTER CABLE (50) to
the LOWER COMPUTER CABLE (49). Be careful not to pinch the cable or damage may
occur to the system.
5. Slide the right upright (4) to sit into the frame base.
6. Repeat from step 3 for the left side.
7. Having inserted RIGHT AND LEFT UPRIGHTS (4, 5) into the FRAME BASE (2), use the
COMBINATION M5 ALLEN WRENCH AND PHILLIPS HEAD SCREWDRIVER (131) to
tighten 8 BUTTON HEAD SOCKET BOLTS (130) securing the uprights to the frame base.
HARDWARE
#130. 5/16” × 15mm
Button Head Socket
Bolt (8 pcs)
#128. M5 Speed Nut
Clip (6 pcs)

Customer Service 1-888-707-1880 Dyaco Canada Inc. 2016
Email: customerservice@dyaco.ca
10
STEP 2
1. Gather HARDWARE FOR STEP 2
2. Connect the SPEED ADJUSTMENT SWITCH W/ CABLE (54) with the UPPER SPEED
CABLE (37).
3. Connect the INCLINE ADJUSTMENT SWITCH W/ CABLE (55) with the UPPER INCLINE
CABLE (38).
4. Connect the MIDDLE COMPUTER CABLE (50) to the UPPER COMPUTER CABLE (48).
5. Be sure not to pinch any of the cables or damage may occur to the system.
6.
Insert the CONSOLE ASSEMBLY (52) onto the RIGHT AND LEFT UPRIGHTS (4, 5) and
secure with 4 BUTTON HEAD SOCKET BOLTS (133) and 4 SPLIT WASHERS (113). Use
the ALLEN WRENCH (132) to tighten.
HARDWARE
#113. Ø10 × 2.0T
Split Washer (4 pcs)
#133. 3/8" × 1-1/2"
Button Head Socket
Bolt (4 pcs)

Customer Service 1-888-707-1880 Dyaco Canada Inc. 2016
Email: customerservice@dyaco.ca
11
STEP 3
1. Gather HARDWARE FOR STEP 3.
2. Install FRAME BASE COVER RIGHT AND LEFT (62, 61) onto the FRAME BASE (2)
using 6 TAPPING SCREWS (120). Tighten with the PHILLIPS HEAD SCREWDRIVER
(122).
HARDWARE
#120. 5 × 16mm
Self Tapping Screw
(6 pcs)

Customer Service 1-888-707-1880 Dyaco Canada Inc. 2016
Email: customerservice@dyaco.ca
12
STEP 4
1. Gather HARDWARE FOR STEP 4.
2. Slide CONSOLE MAST COVER RIGHT AND LEFT (67, 66) up the uprights. Secure them
with 8 SHEET METAL SCREWS (142) using the PHILLIPS HEAD SCREWDRIVER (148).
3. Place the HANDRAIL SUPPORT (119) between the LEFT AND RIGHT UPRIGHTS (5, 4)
and use the COMBINATION ALLEN WRENCH & PHILLIPS HEAD SCREWDRIVER (131)
to tighten 4 BUTTON HEAD SOCKET BOLTS (150).
Note: Please tighten all screws after all components have been assembled.
HARDWARE
#150. 5/16” x 3/4”
Button Head Socket
Bolt (4 pcs)
#142. 3.5 x 16mm
Sheet Metal Screw
(8 pcs)

Customer Service 1-888-707-1880 Dyaco Canada Inc. 2016
Email: customerservice@dyaco.ca
13
FOLDING INSTRUCTIONS
Do not attempt to move the unit unless it is in the folded and locked position. Be sure the
power cord is secured to avoid possible damage. Use both handrails to maneuver the unit
to the desired position.
TO FOLD THE TREADMILL
Make certain the treadmill is at minimum
incline. Lift the treadmill running deck until it
is secured by the locking telescoping tube
assembly in center back of base.
TO UNFOLD THE TREADMILL
Apply slight forward pressure* on the treadmill
running deck with one hand. Pull down on the
unlocking lever and slowly lower the running deck
to the floor. The deck will lower unassisted when it
reaches about waist high.
*At the rear roller area to relieve pressure on the
Locking system.
TRANSPORT INSTRUCTION
The treadmill is equipped with four transport wheels that are engaged when the
treadmill is folded. After folding simply roll the treadmill away.

Customer Service 1-888-707-1880 Dyaco Canada Inc. 2016
Email: customerservice@dyaco.ca
14
OPERATION OF YOUR TREADMILL
GETTING FAMILIAR WITH THE CONTROL PANEL
FEATURES
HANDRAIL ADJUSTMENTS
The treadmill allows you to make speed and incline changes on the side handrails. You can
also choose to turn these off if you frequently hold on to these rails. This is achieved by
pressing the disable button on the right side of the lower portion of the console.
QUICK SPEED AND INCLINE BUTTONS
You are able to set your speed and incline settings quickly by using the quick keys on the
console. Just press either Speed or Incline, then select either 2, or 3 digits and the treadmill will
automatically adjust to that value. This saves time because you don’t have to press and hold or
hold a button down until reaching the desired value. The maximum value you may input for
speed is 12.0 MPH (18.0 KPH) and incline 15.0%
Examples: Press the Quick Incline button, then 1, 0 = Incline Level 1.0
Press the Quick Incline button, then 3, 5 = Incline Level 3.5
Press the Quick Speed button, then 8, 0 = 8.0 MPH or KPH
Press the Quick Speed button, then 0, 8 = 0.8 MPH or KPH
Muscle
Activation Profile
Large LCD with
scrolling feedback and
scrolling message center
Quick Keys Control
Speed & Incline
Heart Rate % Pr
ofile
Integrated Speakers
for MP3 Player
Ten innovative
programs offer a
variety of work-outs
Swivel Fan to
keep you cool
Easy-Touch
Control Keys
Audio Jack

Customer Service 1-888-707-1880 Dyaco Canada Inc. 2016
Email: customerservice@dyaco.ca
15
CONSOLE
MUSCLE ACTIVATION FIGURE
There is an anatomical figure located at the top of the console. This figure will light all areas that
are activated when using the treadmill. These will light up during any of the programs. You can
control which muscles are activated by changing the incline and swinging your arms. The pre-
set programs will determine which lower body muscles will be activated by automatically
adjusting the incline. Generally the following guidelines hold true:
• The upper body LED’s will light any time your hands aren’t in contact with the pulse grip sensors
• The lower body lights will activate in three degrees of engagement: Green represents minimal muscle
involvement, Amber represents medium involvement, and Red represents full or heavy activation.
• 0-4.5% Elevation: even muscle distribution, all four muscle groups will be Amber
• 5-15% Elevation: Quads are Amber and Glutes, Hamstrings, and Calves are Red
MESSAGE CENTER
The console will display Pace, Calories burned, Time (elapsed or countdown), Distance
traveled, Pulse, Speed, Incline, Program Name, # of Laps completed, and Segment Time.
There is also a Speed & Incline profile graph that lets you see how hard you have worked and
how challenging the upcoming segments will be.
HEART RATE % PROFILE
The console LCD screen will display your current heart rate anytime a pulse is detected. The
Bar Graph, located to the right of the LCD screen, will show your current heart rate % in relation
to your projected maximum heart rate, which is determined by your age that you entered during
the programming phase of any of the 10 programs. The significance of the bar graph colors are
as follows:
• 50-60% of maximum is Amber
• 65-80% of maximum is Amber and Green
• 85-90% or more is Amber, Green, and Red
QUICK START
1. Press and release the Start key to wake display up (if not already on).
Note:Installing the tether key will also wake up the console.
2. Press and release the Start key to begin belt movement, at 0.5MPH(1.0KPH), then adjust
to the desired speed using the Speed + / – or Fast/Slow keys (console or hand rail). You
may also use the quick speed key, then 0 through 9 to adjust the speed.
3. To slow the tread-belt press and hold the “–” key (console or hand rail) to the desired
speed. You may also press the quick speed adjust keys, 0 through 9.
4. To adjust the Incline level, pressed and hold the Incline + / – or Up/Down keys; you may
also adjust to the desired incline by pressing the Quick Incline key and then 0 through 9.
5. To stop the tread-belt press and release the Stop key.
PAUSE/STOP/RESET FEATURE
1. When the treadmill is running the pause feature may be utilized by pressing the Stop key
once. This will slowly decelerate the tread-belt to a stop. The incline will go to zero percent.
The Time, Distance and Calorie readings will hold while the unit is in the pause mode.
After 5 minutes the display will reset and return to the start-up screen.

Customer Service 1-888-707-1880 Dyaco Canada Inc. 2016
Email: customerservice@dyaco.ca
16
2. To resume your exercise, when in Pause mode, press the Start key. The speed and
incline will return to their previous settings.
•Pause is executed when the Stop button is pressed once. If the Stop key is pressed a
second time, the program will end and a workout summary will be displayed. If the Stop
button is pressed a third time, the console will return to the idle mode (start up) screen. If
the Stop button is held down for more than 3 seconds the console will reset.
INCLINE FEATURE
• Incline may be adjusted any time after belt movement.
• Press and hold the Incline + / – or Up/Down keys (console or hand rail) to achieve desired
level of effort. You may also choose a more rapid increase/decrease by selecting the Quick
Incline key, then 0 through 9.
• The display will indicate incline percent in increments of .5 as adjustments are made.
• The incline will return to zero unless the main power switch or safety key are turned off while
incline is at a higher setting.
DOT MATRIX CENTER DISPLAY
Twenty columns of boxes (10 high) indicate each segment of a workout. The boxes only show
an approximate level (resistance) of effort. They do not necessarily indicate a specific value -
only an approximate percent to compare levels of intensity. In Manual Operation the resistance
dot matrix window will build a profile “picture” as values are changed during a workout. The
speed and incline profiles will display half of the program at one time (10 columns). They will
both scroll right to left.
1/4 MILE TRACK
The 1/4-mile track (one lap) will be displayed around the dot matrix window. The flashing
segment indicates your progress. Once the 1/4-mile (Metric - 0.4km) is complete this feature will
begin again. The Lap track will move in a counterclockwise direction. There is a lap counter in
the message window for monitoring your distance.
PULSE GRIP FEATURE
The Pulse (Heart Rate) window will display your current heart rate in beats per minute during
the workout. You must use both stainless steel sensors on the stationary grips or the heart rate
transmitter chest strap to display your pulse. Pulse value displays anytime the upper display is
receiving a Pulse signal. You may not use the Pulse Grip feature while in Heart Rate Programs.
CALORIE DISPLAY
Displays the cumulative calories burned at any given time during your workout.
Note: This is only a rough guide used for comparison of different exercise sessions, and is not to be
used for medical purposes.
SPEAKERS
The console has built-in Speakers and an audio input jack. There is no volume control on the
console. The volume must be controlled on the Audio Source.
HANDRAIL BUTTONS DISABLE SWITCH
To the right of the Enter button there is a Handrail control switch and an indicator light next to it
when the indicator light is lit, the handrail switches are disabled. This allows you to use the full
length of the handrails without fear of activating the speed or elevation controls.

Customer Service 1-888-707-1880 Dyaco Canada Inc. 2016
Email: customerservice@dyaco.ca
17
TO TURN TREADMILL OFF
1. Display will automatically turn off (go to sleep) after 30 minutes (no key operations). The
treadmill will draw very little current in display mode (about as much as your television
when it is turned off).
2. Remove the tether cord.
3. Turn off the main switch on the front of the treadmill, below the motor cover.
PROGRAM KEYS
The program keys are used to preview each program. When you first turn the console on you
may press each program key to preview what the program profile looks like. If you decide that
you want to try a program, press the corresponding program key and then press the Enter key
to select the program and enter into the data-setting mode.
The treadmill has a built in heart rate monitoring system. Simply grasping the hand pulse
sensors on the stationary handle bars or wearing the heart rate transmitter (see Using Heart
Rate Transmitter section) will start the Heart Icon blinking (this may take a few seconds). The
Pulse Display Window will display your heart rate, or Pulse in beats per minute.
The console includes a built-in fan to help keep you cool. To turn the fan on, press the key on
the left side of the console.

Customer Service 1-888-707-1880 Dyaco Canada Inc. 2016
Email: customerservice@dyaco.ca
18
USING THE SPIRIT FIT APP
In order to help you achieve your exercise goals, your new exercise machine comes equipped
with a Bluetooth® transceiver that will allow it to interact with selected phones or tablet
computers via the Spirit Fit App.
Just download the free Spirit Fit App from the Apple Store or Google Play, and then follow the
instructions in the App to sync with your exercise machine. Now you can view current workout
data in three different Display screens on your device. You can also easily switch back and forth
from the workout display view to internet/social media/email sites via icons on the display
screen. When your workout is finished, the data is automatically saved to the built-in personal
calendar for future reference.
The Spirit Fit App also allows you to sync your workout data with one of many fitness cloud
sites we support: iHealth, MapMyFitness, Record or Fitbit, with more to come.
Syncing the App with your exercise machine:
1. Download the App.
2. Open the App on your device (phone or tablet) and make sure Bluetooth® is enabled on your
device (phone or tablet).
3. In the App click the icon in the top left corner to search for your Spirit equipment (shown right).
4. After the equipment is detected, click Connect. When the App and equipment are synced, the
Bluetooth® icon on the equipment’s console display will light up. You may now start using
your new Spirit Fitness product.
5. When you work out is finished, the data is automatically saved and you will be prompted to
sync your data with each available fitness cloud site. Please note you will have to download
the applicable compatible fitness App, such as iHealth, MapMyFitness, Record, Fitbit, etc, in
order for the icon to be active and available.
*Note: Your device will need to be running on a minimum operating system of iOS 7 or
Android 4.4 for the Spirit Fit App to operate properly.

Customer Service 1-888-707-1880 Dyaco Canada Inc. 2016
Email: customerservice@dyaco.ca
19
PROGRAMMABLE FEATURES
SELECTING A PROGRAM
The treadmill offers seven factory preset-programs, two user defined programs and one Manual
program. Each preset program has a maximum speed level that is displayed when a desired
workout is chosen. The maximum speed that the particular program will achieve will be
displayed in the Speed window. Also included are two user programs (User 1 and User 2) for
custom workouts.
1. Press the desired Program (Hill, Fat burn, Cardio, Strength, or Interval) key. Press Enter
to select the program. The display will prompt you through the programming or you can just
press Start to begin the program with default values.
2. If Enter was pressed, the Message center will now be blinking a value, indicating your Age
(default is 35). Entering your correct age affects the heart rate Bar Graph Display and the
Heart Rate programs. Use the + or – keys to adjust, then press Enter. Your age determines
your recommended maximum heart rate. Since the Bar Graph Display and the Heart Rate
features are based on a percentage of your maximum heart rate, it is important to enter the
correct age for these features to work properly.
3. The Message center will now be blinking a value, indicating your Body Weight (default is
150 lbs/ 70kgs.). Entering the correct body weight will affect the calorie count. Use the +
or – keys to adjust, then press Enter.
A note about the Calorie display: No exercise machine can give you an exact calorie count because there are
too many factors which determine exact calorie burn for a particular person. Even if someone is the exact
same body weight, age and height, their calorie burn may be very different than yours. The Calorie display is to
be used as a reference only to monitor improvement from workout to workout.
4. The Message Center will be blinking a value, indicating Time (the default value is 30
minutes). You may use any of the + or -keys to adjust the time. After adjusting, or to
accept the default, press Enter.
(Note: You may press start at any time during the programming to start the program).
5. The Message Center will now be blinking the preset top speed of the selected program (3
MPH or 5 KPH). Use the Speed + or – keys to adjust, then press Enter. Each program has
various speed changes throughout; this allows you to limit the highest speed the program
can reach.
6. The Message Center will be blinking the preset top incline of the selected program. Use the
Incline + / - keys to adjust, then press Enter. You are now done programming data and
may press Start to begin your workout or Stop to go back one level to change data entered
in the programming phase.

Customer Service 1-888-707-1880 Dyaco Canada Inc. 2016
Email: customerservice@dyaco.ca
20
CUSTOM USER DEFINED PROGRAMS
1. Select User 1 or User 2 program key then press Enter. Note that the dot matrix display
portion will have a single row of segments at the bottom (Unless there is a previously
stored program).
2. If there is a program stored under the button that is pressed, it will be retrieved. If not, you
have the option of programming in your first name. The message window will display and
flash the letter “A”. To change it, press the Speed + key, then “B” will be displayed; if the
Speed - key is pressed, the letter “Z” will be displayed. After selecting the appropriate letter,
press enter. The letter “A” will again be displayed and blinking. Repeat the procedure until
all letters of your first name are programmed (7 characters maximum). When your name is
displayed, press Stop and it will be stored under either User 1 or User 2.
3. The Message Center will now be blinking an Age value. Adjust the age and press Enter.
4. The Message Center will now be blinking a bodyweight value. Enter your bodyweight and
press Enter.
5. Note the clock/Message Center is flashing. Use the + / - keys to adjust up from 30 minutes
(if desired). Press the Enter key. This is a must to continue even if time is not adjusted.
6. The first column (segment) will now be blinking. Using the + / - keys, adjust the speed level
to your desired effort for the first segment then press Enter. The second column will now
be blinking. Repeat the above process until all 18 segments have been programmed. The
first column will be blinking again. This is for the incline programming. Repeat the above
process to program all 18 segments for incline.
• Note: While in a User program, if you change the speed, all segment speeds from there on will
also change.
Examples: If you increase your current speed 1 MPH, the remaining segment speeds will
increase by 1 MPH. If you decrease your current speed .5 MPH, the remaining segment
speeds will decrease by .5 MPH, etc.
7. Press the Start button to begin the workout and also save the program to memory. The
profile picture will be re-scaled to fit in the window, but the actual speed and incline settings
will remain the same as programmed.
Other manuals for XT385
9
This manual suits for next models
1
Table of contents
Other Spirit Treadmill manuals

Spirit
Spirit XT375 User manual

Spirit
Spirit ESP0030 -Esprit CT100 User manual

Spirit
Spirit XT685ENT User manual

Spirit
Spirit XT685 User manual

Spirit
Spirit CT 800 User manual

Spirit
Spirit Esprit CT80 User manual

Spirit
Spirit XT10 User manual

Spirit
Spirit XT185 User manual

Spirit
Spirit XT485 User manual

Spirit
Spirit CT850 User manual

Spirit
Spirit XT685 User manual

Spirit
Spirit Z8 User manual

Spirit
Spirit Z100-A81 User manual

Spirit
Spirit CT900ENT User manual

Spirit
Spirit XT485 User manual

Spirit
Spirit XT385 User manual

Spirit
Spirit SPT0061 User manual

Spirit
Spirit 1610800 User manual

Spirit
Spirit 1611385 User manual

Spirit
Spirit CT850 ENT User manual