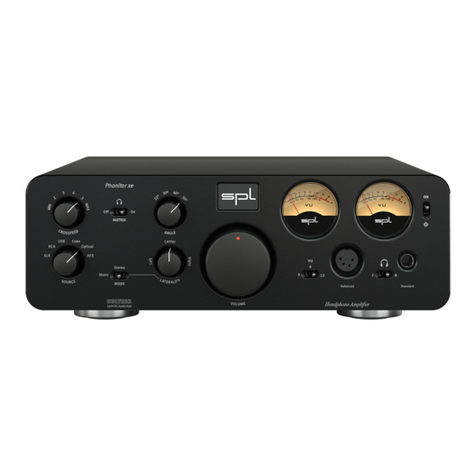
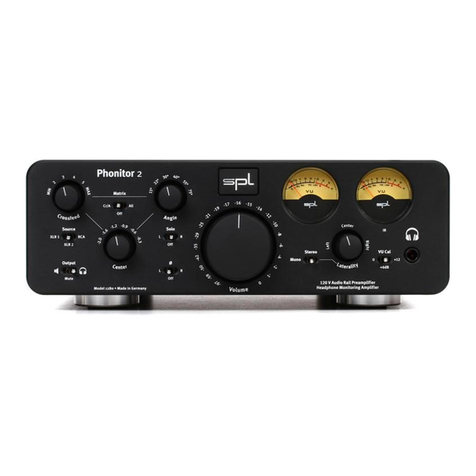
SPL Phonitor 2 User manual

VU Cal
L
a
t
e
r
a
l
i
t
y
+6dB
+12
Mono
Stereo
IR
0
V
o
l
u
m
e
M
I
N
2
3
4
5
M
A
X
Cr/A All
Output
120 V Audio Rail Preamplifier
Headphone Monitoring Amplifier
Matrix
Ø
L R
OffMute
L R
Off
Off
-
9
7
-
5
9
-
5
0
-
4
2
-
3
5
-
2
9
-
2
5
-
2
1
-
1
9
-
1
7
-
1
6
-
1
5
-
1
4
-
1
2
-
1
0
-
8
-
6
-
4
-
2
-
1
0
Source
RCA
XLR 1
XLR 2
C
e
n
t
e
r
-
2
.
0
-
1
.
6
-
1
.
2
-
0
.
9
-
0
.
6
-
0
.
3
C
r
o
s
s
f
e
e
d
1
5
°
2
2
°
3
0
°
4
0
°
5
5
°
7
5
°
A
n
g
l
e
L
e
f
t
C
e
n
t
e
r
R
i
g
h
t
Solo
Model 1280 • Made in Germany
Phonitor
2
User Manual
Phonitor
Headphone Monitoring Amplier
This User Manual is optimized for
Acrobat Reader.
Interactive buttons may not
appear in other applications.

2
Welcome
and thank you for choosing the Phonitor.
The Phonitor is the ultimate headphone monitoring amplifier and delivers up to . W output power.
The Phonitor is also an excellent preamplifier that can drive power amplifiers or active speakers.
The SPL V Rail Technology makes the Phonitor an outstandig device in terms of dynamic range, signal-to-noise
ratio and headroom delivering an exceptional sound experience with invincible serenity, transparancy and realness.
VU Cal
L
a
t
e
r
a
l
i
t
y
+6dB
+12
Mono
Stereo
IR
0
V
o
l
u
m
e
M
I
N
2
3
4
5
M
A
X
Cr/A All
Output
120 V Audio Rail Pre amplifier
Headphone Monitoring Amplifier
Matrix
Ø
L R
OffMute
L R
Off
Off
-
9
7
-
5
9
-
5
0
-
4
2
-
3
5
-
2
9
-
2
5
-
2
1
-
1
9
-
1
7
-
1
6
-
1
5
-
1
4
-
1
2
-
1
0
-
8
-
6
-
4
-
2
-
1
0
Source
RCA
XLR 1
XLR 2
C
e
n
t
e
r
-
2
.
0
-
1
.
6
-
1
.
2
-
0
.
9
-
0
.
6
-
0
.
3
C
r
o
s
s
f
e
e
d
1
5
°
2
2
°
3
0
°
4
0
°
5
5
°
7
5
°
A
n
g
l
e
L
e
f
t
C
e
n
t
e
r
R
i
g
h
t
Solo
Model 1280 • M ade in Germany
Phonitor
2
IR REMOTE
IR REMOTE
OUTPUT
OUTPUT
L
R
R
L
LEARN
RLRLRL
SOURCES
SOURCES
2
2
LR 1
1
LR
Learning Volume Up/Down:
1. Press LE ARN butto n below
2. Point you r remote at VUs
and press a but ton for
VOLUME DOWN (LEDs f lash 1x)
3. Repeat unt il LEDs fla sh 3x
4. Press a bu tton for
VOLUME U P (LEDs fla sh 1x)
5. Repeat unt il LEDs fla sh 3x
XLRs: balanced , Pin 2 = Hot (+)
For unbalanced operation
bridge Pi n 3 to GND.
RCAs: Unbalanced, T ip = Hot (+)
AVIS: RISQ UE DE CHOC ÉLEC TRIQUE • NE PA S OUVRIR
RISK OF ELE CTRIC SHOCK
DO NOT OPEN
CAUTION
ON BOT TOM SIDE:
DIP SWITCH WIRING
This output can also drive balancedheadphones
(Gender changer may be required). 3
3
Phonitor
2
~ 115V AC / ~230V AC
50Hz / 60 Hz, P ma x. 35 W
Fuses:
Voltage Selection:
115V AC: T 1 A L 250 V
230V AC: T 500 m A L 250 V
1. Remove Fus e Holder
2. Flip O ver 3. Reinsta ll 1 ON: Output +12dB
2 ON: Outpu t + 6dB
3 ON: RCA -10dBV t o +4dBu
4 ON: Source s 1:1t o Output
Serial
Number
Made in Germany
PGM
With the optional Expansion Rack you can mount the Phonitor into a inch rack and switch between four dif-
ferent audio outputs (see more information here).
Content
Getting started
Front view
Rear view
Bottom view
DIP switches
V Rail Technology
Comparisons
Phonitor Matrix
Basics of stereo listening
Stereo listening with an “traditional“ headphone preamplifier
How does the Phonitor Matrix work?
Angle
Crossfeed
Setting of Crossfeed and Angle
Adjustment of the Phonitor Matrix
Matrix On/Off
Source selection
Output selection
Solo
Phase Ø
Stereo switch
Laterality
VU meters
Attenuate the sensitivity of the VU meters
IR Remote control
DIP switches
Level increase of the outputs
RCA input HiFi level / Studio level
Slave Thru
Phonitor Matrix activation for the XLR outputs
Specifications
Inputs
Outputs
Internal operating voltages
Power supply
Dimensions (incl. feet)
Weight
Important Notes
Declaration of CE Conformity

4
Getting started
Read thoroughly and follow the instructions as well as the security advices of the Quickstart
which is enclosed in the scope of delivery! You can also download the Quickstart here.
By pressing the -Button you get to the table of contents.
By pressing the -Button you get to the front view of the unit.
By pressing the -Button you get to the rear view of the unit.
By pressing the -Button you get to the bottom view of the unit.
By pressing the -Button you get to the previous content.

5
Front view
VU Cal
L
a
t
e
r
a
l
i
t
y
+6dB
+12
Mono
Stereo
IR
0
V
o
l
u
m
e
M
I
N
2
3
4
5
M
A
X
Cr/A All
Output
120 V Audio Rail Preamplifier
Headphone Monitoring Amplifier
Matrix
Ø
L R
OffMute
L R
Off
Off
-
9
7
-
5
9
-
5
0
-
4
2
-
3
5
-
2
9
-
2
5
-
2
1
-
1
9
-
1
7
-
1
6
-
1
5
-
1
4
-
1
2
-
1
0
-
8
-
6
-
4
-
2
-
1
0
Source
RCA
XLR 1
XLR 2
C
e
n
t
e
r
-
2
.
0
-
1
.
6
-
1
.
2
-
0
.
9
-
0
.
6
-
0
.
3
C
r
o
s
s
f
e
e
d
1
5
°
2
2
°
3
0
°
4
0
°
5
5
°
7
5
°
A
n
g
l
e
L
e
f
t
C
e
n
t
e
r
R
i
g
h
t
Solo
Model 1280 • Made in Germany
Phonitor
2
Volume
7
Crossfeed 3Angle 4
Headphone Connector
13

6
Rear view
IR REMOTE
IR REMOTE
OUTPUT
OUTPUT
L
R
R
L
LEARN
RLRLRL
SOURCES
SOURCES
2
2
LR 1
1
LR
Learning Volume Up/Down:
1. Press LEARN button below
2. Point your remote at VUs
and press a button for
VOLUME DOWN (LEDs flash 1x)
3. Repeat until LEDs flash 3x
4. Press a button for
VOLUME UP (LEDs flash 1x)
5. Repeat until LEDs flash 3x
XLRs: balanced, Pin 2 = Hot (+)
For unbalanced operation
bridge Pin 3 to GND.
RCAs: Unbalanced, Tip = Hot (+)
AVIS: RISQUE DE CHOC ÉLECTRIQUE • NE PAS OUVRIR
RISK OF E LECT RIC SHOCK
DO NOT OPEN
CAUTION
ON BOTTOM SIDE:
DIP SWITCH WIRING
This output can also drive balanced headphones
(Gender changer may be required). 3
3
Phonitor
2
~ 115 V AC / ~230VAC
50Hz / 60 Hz, P max. 35 W
Fuses:
Voltage Selection:
115V AC: T 1 A L 250 V
230V AC: T 500 mA L 250 V
1. Remove Fuse Holder
2. Flip Over 3. Reinstall 1 ON: Output +12dB
2 ON: Output + 6dB
3 ON: RCA -10dBV to +4dBu
4 ON: Sources 1:1 to Output
Serial
Number
Made in Germany
PGM
Mains Switch 15
Mains Voltage 16
Analog Audio Inputs
17
Audio Outputs
19

7
Bottom view
DIP switches
Factory setting

8
V Rail Technology
In our V Rail Technology the audio signals are processed with an unequalled +/-V DC, which corresponds to
twice that of discrete operational amplifiers and four-times that of semiconductor operational amplifiers.
The V Rail Technology reaches outstanding technical and sonic performances. Technically especially in terms
of dynamic range and headroom and sonically especially in reproducing the finest details and delivering a totally
relaxed sounding audio experience. Music sounds absolutely natural.

9
Comparisons
These diagrams show how our V Rail Technology compares to other circuits.
The direct relation between operating level and maximum level is fundamental for the classification: the higher
the operating level, the higher the maximum level a circuit can handle. And since virtually all essential acoustic
and musical parameters depend on this relation, a higher operating voltage also has a positive impact on the
dynamic range, distortion limit and signal-to-noise ratio.
0
20
40
60
80
100
120
Volt
30 V 36 V
120 V
+ / - Volt + / - Volt + / - Volt
Operating Voltage
120
125
130
135
140
145
dBu
124,2
129,1
141,4
OPA @ V OPA @ V SP L- OP@ V
Max. Audio Level

10
Do bear in mind that dB scales do not represent linear but rather exponential increases. A dB increase corresponds
to doubling the acoustic power, +dB correspond to twice the sound pressure level, and +dB correspond to twice
the perceived loudness.
When it comes to volume, the V Rail Technology exhibits a performance, in regard to maximum level and dynamic
range, that is twice that of common components and circuits given that its values are approximately dB higher.
THD measurements show a difference of more than dB compared to the OPA at V — in terms of sound
pressure level, that corresponds to an improvement of more than %. The operating level most commonly used for
audio equipment is +/- volts.
Dynamic Range
OPA @ V OPA @ V SPL-OP@ V
0
5
10
15
20
25
30
35
dBu
21,5 22,5
33,2
TL @ V OPA @ V SPL-OP@ V
-115
-113
-111
-109
-107
-105
dBu
-106
-111,7
-114,2
THD&N

11
Phonitor Matrix
Basics of stereo listening
When listening to speakers sound coming from the right is not only perceived with the right ear (red line) but it is
also perceived with the left ear (green line). The sensation is time delayed, lower in level and has a reduced fre-
quency range (this applies to the left speaker accordingly).
Sound from the right side Sound from the left side
It arrives later because the signal travels a distance of approx. meters per second and the distance from the right speaker to the left ear is
longer than it is to the right ear. It is quieter and does not deliver the full frequency range, because the signal of the right speaker does not directly
arrive at the left ear but is partially reflected and absorbed by the head.

12
Stereo listening with an “traditional“ headphone preamplier
When listening to music with a traditional headphone amplifier, the right ear only perceives the right signal (red
line) and the left ear only perceives the left signal (green line).
In contrast to listening to speakers the delayed and quieter signal of the
respective opposite side is missing.
As a result to this super-stereo-effect reverb and delay effects as well
as EQ and panorama adjustments are perceived more intense on
headphones.

13
How does the Phonitor Matrix work?
The Phonitor Matrix calculates the interaural time difference (Speaker Angle) and interaural level difference (Cross-
feed) with their specific frequency responses to deliver a speaker-like listening experience on headphones.
The super-stereo-effect is eliminated and all reverb and delay effects
as well as EQ and panorama adjustments are perceived correctly on
headphones.
The headphone mix therefore translates well to speakers.

14
In Detail
An analog filter design creates interaural time and level differences for six different speaker placements. This ana-
log filter design is controlled by the crossfeed and angle parameters.
Angle
With the ANGLE switch you adjust the inter-
aural time difference which is related to the
placement of the speakers.
22°22°
15°15°
30°
30°
40°
40°
55°
75°
55°
75°

15
Crossfeed
Crossfeed defines the interaural level difference. The six crossfeed values approximate the influences of room
size, reflection and absorption characteristics.
The interaural level difference and the interaural time difference are frequency-corrected because the sound is
reflected and absorbed by the head in a non-linear fashion.
10
0
0,2
0,4
0,6
0,8
1
100 1 k 10 k Hz
Frequency corrected level difference at max. Crossfeed and ° Angle of
the right channel (red = right signal, green = left signal)
10
0
50
100
150
200
µs
100 1 k 10 k Hz
Frequency corrected time difference at max. Crossfeed and ° Angle of
the right channel (red = right signal, green = left signal)

16
Setting of Crossfeed and Angle
Both parameters (Crossfeed and Angle) define the interaural level difference and the interaural time difference. To
reproduce the exact placement of the loudspeakers, first choose the Angle parameter closest to your real speaker
placement. Afterwards choose the recommended Crossfeed Parameter (see table on page, e.g.: Angle: °,
Crossfeed: ).
A vast number of factors, e.g. type of loudspeakers, room acoustics or the individual perception, influence the ste-
reo-listening. This is why the Phonitor offers six different switch positions to finely adjust the Crossfeed and to
best match to your speaker playback.
20
0
%
–+
30 50 70 100
10 75 3 1035
VU
20
0
%
–+
30 50 70 100
10 75 3 1035
VU
VU Cal
L
a
t
e
r
a
l
i
t
y
+6dB
+12
Mono
Stereo
IR
0
V
o
l
u
m
e
M
I
N
2
3
4
5
M
A
X
Cr/A All
Output
120 V Audio Rail Preamplifier
Headphone Monitoring Amplifier
Matrix
Ø
L R
OffMute
L R
Off
Off
-
9
7
-
5
9
-
5
0
-
4
2
-
3
5
-
2
9
-
2
5
-
2
1
-
1
9
-
1
7
-
1
6
-
1
5
-
1
4
-
1
2
-
1
0
-
8
-
6
-
4
-
2
-
1
0
Source
RCA
XLR 1
XLR 2
C
e
n
t
e
r
-
2
.
0
-
1
.
6
-
1
.
2
-
0
.
9
-
0
.
6
-
0
.
3
C
r
o
s
s
f
e
e
d
1
5
°
2
2
°
3
0
°
4
0
°
5
5
°
7
5
°
A
n
g
l
e
L
e
f
t
C
e
n
t
e
r
R
i
g
h
t
Solo
Model 1280 • Made in Germany
Phonitor
2

17
Table: Settings of Crossfeed and Angle
Angle parameter Crossfeed parameter Interaural level difference Interaural time difference (µs) Speaker angle
°
MAX , °
, °
, °
, °
, °
MIN , °
°
MAX , °
, °
, °
, °
, °
MIN , °
°
MAX , °
, °
, °
, °
, °
MIN , °
°
MAX , °
, °
, °
, °
, °
MIN , °
°
MAX , °
, °
, °
, °
, °
MIN , °
°
MAX , °
, °
, °
, °
, °
MIN , °

18
Adjustment of the Phonitor Matrix
By using the Crossfeed switch () and the Angle switch () you can adjust the headphone playback through the
Phonitor to your room with your loudspeaker setup.
• Play some audio material you know well with the Phonitor and go to a place where you usually listen to
music through speakers.
• Place the Matrix switch in position Cr/A.
• Toggle between headphones and loudspeakers by using the Output switch ().
• Set the Angle switch according to your loudspeaker placement (see page).
• Then set the Crossfeed switch to the value that comes closest to your familiar loud-
speaker-listening sound.
Listen to the instruments panned in the stereo field. These instruments shall have
the same positions on headphones.
20
0
%
–+
30 50 70 100
10 75 3 1035
VU
20
0
%
–+
30 50 70 100
10 75 3 1035
VU
VU Cal
L
a
t
e
r
a
l
i
t
y
+6dB
+12
Mono
Stereo
IR
0
V
o
l
u
m
e
M
I
N
2
3
4
5
M
A
X
Cr/A All
Output
120 V Audio Rail Preamplifier
Headphone Monitoring Amplifier
Matrix
Ø
L R
OffMute
L R
Off
Off
-
9
7
-
5
9
-
5
0
-
4
2
-
3
5
-
2
9
-
2
5
-
2
1
-
1
9
-
1
7
-
1
6
-
1
5
-
1
4
-
1
2
-
1
0
-
8
-
6
-
4
-
2
-
1
0
Source
RCA
XLR 1
XLR 2
C
e
n
t
e
r
-
2
.
0
-
1
.
6
-
1
.
2
-
0
.
9
-
0
.
6
-
0
.
3
C
r
o
s
s
f
e
e
d
1
5
°
2
2
°
3
0
°
4
0
°
5
5
°
7
5
°
A
n
g
l
e
L
e
f
t
C
e
n
t
e
r
R
i
g
h
t
Solo
Model 1280 • Made in Germany
Phonitor
2
20
0
%
–+
30 50 70 100
10 75 3 1035
VU
20
0
%
–+
30 50 70 100
10 75 3 1035
VU
VU Cal
L
a
t
e
r
a
l
i
t
y
+6dB
+12
Mono
Stereo
IR
0
V
o
l
u
m
e
M
I
N
2
3
4
5
M
A
X
Cr/A All
Output
120 V Audio Rail Preamplifier
Headphone Monitoring Amplifier
Matrix
Ø
L R
Off
Mute
L R
Off
Off
-
9
7
-
5
9
-
5
0
-
4
2
-
3
5
-
2
9
-
2
5
-
2
1
-
1
9
-
1
7
-
1
6
-
1
5
-
1
4
-
1
2
-
1
0
-
8
-
6
-
4
-
2
-
1
0
Source
RCA
XLR 1
XLR 2
C
e
n
t
e
r
-
2
.
0
-
1
.
6
-
1
.
2
-
0
.
9
-
0
.
6
-
0
.
3
C
r
o
s
s
f
e
e
d
1
5
°
2
2
°
3
0
°
4
0
°
5
5
°
7
5
°
A
n
g
l
e
L
e
f
t
C
e
n
t
e
r
R
i
g
h
t
Solo
Model 1280 • Made in Germany
Phonitor
2
20
0
%
–+
30 50 70 100
10 75 3 1035
VU
20
0
%
–+
30 50 70 100
10 75 3 1035
VU
VU Cal
L
a
t
e
r
a
l
i
t
y
+6dB
+12
Mono
Stereo
IR
0
V
o
l
u
m
e
M
I
N
2
3
4
5
M
A
X
Cr/A All
Output
120 V Audio Rail Preamplifier
Headphone Monitoring Amplifier
Matrix
Ø
L R
OffMute
L R
Off
Off
-
9
7
-
5
9
-
5
0
-
4
2
-
3
5
-
2
9
-
2
5
-
2
1
-
1
9
-
1
7
-
1
6
-
1
5
-
1
4
-
1
2
-
1
0
-
8
-
6
-
4
-
2
-
1
0
Source
RCA
XLR 1
XLR 2
C
e
n
t
e
r
-
2
.
0
-
1
.
6
-
1
.
2
-
0
.
9
-
0
.
6
-
0
.
3
C
r
o
s
s
f
e
e
d
1
5
°
2
2
°
3
0
°
4
0
°
5
5
°
7
5
°
A
n
g
l
e
L
e
f
t
C
e
n
t
e
r
R
i
g
h
t
Solo
Model 1280 • Made in Germany
Phonitor
2
20
0
%
–+
30 50 70 100
10 75 3 1035
VU
20
0
%
–+
30 50 70 100
10 75 3 1035
VU
VU Cal
L
a
t
e
r
a
l
i
t
y
+6dB
+12
Mono
Stereo
IR
0
V
o
l
u
m
e
M
I
N
2
3
4
5
M
A
X
Cr/A All
Output
120 V Audio Rail Preamplifier
Headphone Monitoring Amplifier
Matrix
Ø
L R
OffMute
L R
Off
Off
-
9
7
-
5
9
-
5
0
-
4
2
-
3
5
-
2
9
-
2
5
-
2
1
-
1
9
-
1
7
-
1
6
-
1
5
-
1
4
-
1
2
-
1
0
-
8
-
6
-
4
-
2
-
1
0
Source
RCA
XLR 1
XLR 2
C
e
n
t
e
r
-
2
.
0
-
1
.
6
-
1
.
2
-
0
.
9
-
0
.
6
-
0
.
3
C
r
o
s
s
f
e
e
d
1
5
°
2
2
°
3
0
°
4
0
°
5
5
°
7
5
°
A
n
g
l
e
L
e
f
t
C
e
n
t
e
r
R
i
g
h
t
Solo
Model 1280 • Made in Germany
Phonitor
2

19
Center function
When activated (Matrix switch = All) you control the intensity of the center signal with the Cen-
ter switch () .
If the stereo width is narrowed through changes in Crossfeed and Angle (so as to correspond
to your actual loudspeaker setup), the phantom center may likely sound too intense while
mixing under headphones. You normally would counteract by lowering the mid signals in the
mix. However, listening to that mix on loudspeakers the phantom center appear to quiet.
Thanks to the possibility to lower the headphone center level of the Phonitor between .
to . dB you can adjust the center signal to the correct volume in relation to the L/R stereo
image. Therefore the phantom center gains the correct volume in relation to the L/R stereo
image on loudspeakers too.
Matrix On/O
With the Matrix switch () you can activate the Phonitor Matrix – with Center control (All) or
without (Cr/A). In Off position the Phonitor Matrix is deactivated .
By default the Phonitor Matrix is available for headphone outputs only. The Speaker Out-
puts() at the rear of the unit are not fed by the Phonitor matrix. You can activate the Phoni-
tor Matrix for the speaker outputs at the rear by setting the DIP switch on the bottom of the Phonitor to ON
(see ”DIP switches“ on page).
Output
Mute
Cr/A All
Matrix
Off
20
0
%
–+
30 50 70 100
10 75 3 1035
VU
20
0
%
–+
30 50 70 100
10 75 3 1035
VU
VU Cal
L
a
t
e
r
a
l
i
t
y
+6dB
+12
Mono
Stereo
IR
0
V
o
l
u
m
e
M
I
N
2
3
4
5
M
A
X
Cr/A All
Output
120 V Audio Rail Preamplifier
Headphone Monitoring Amplifier
Matrix
Ø
L R
OffMute
L R
Off
Off
-
9
7
-
5
9
-
5
0
-
4
2
-
3
5
-
2
9
-
2
5
-
2
1
-
1
9
-
1
7
-
1
6
-
1
5
-
1
4
-
1
2
-
1
0
-
8
-
6
-
4
-
2
-
1
0
Source
RCA
XLR 1
XLR 2
C
e
n
t
e
r
-
2
.
0
-
1
.
6
-
1
.
2
-
0
.
9
-
0
.
6
-
0
.
3
C
r
o
s
s
f
e
e
d
1
5
°
2
2
°
3
0
°
4
0
°
5
5
°
7
5
°
A
n
g
l
e
L
e
f
t
C
e
n
t
e
r
R
i
g
h
t
Solo
Model 1280 • Made in Germany
Phonitor
2
20
0
%
–+
30 50 70 100
10 75 3 1035
VU
20
0
%
–+
30 50 70 100
10 75 3 1035
VU
VU Cal
L
a
t
e
r
a
l
i
t
y
+6dB
+12
Mono
Stereo
IR
0
V
o
l
u
m
e
M
I
N
2
3
4
5
M
A
X
Cr/A All
Output
120 V Audio Rail Preamplifier
Headphone Monitoring Amplifier
Matrix
Ø
L R
OffMute
L R
Off
Off
-
9
7
-
5
9
-
5
0
-
4
2
-
3
5
-
2
9
-
2
5
-
2
1
-
1
9
-
1
7
-
1
6
-
1
5
-
1
4
-
1
2
-
1
0
-
8
-
6
-
4
-
2
-
1
0
Source
RCA
XLR 1
XLR 2
C
e
n
t
e
r
-
2
.
0
-
1
.
6
-
1
.
2
-
0
.
9
-
0
.
6
-
0
.
3
C
r
o
s
s
f
e
e
d
1
5
°
2
2
°
3
0
°
4
0
°
5
5
°
7
5
°
A
n
g
l
e
L
e
f
t
C
e
n
t
e
r
R
i
g
h
t
Solo
Model 1280 • Made in Germany
Phonitor
2

20
Source selection
The Phonitor is not just a headphone monitor amplifier. It is also a preamplifier three audio sources, XLR,
XLR and RCA.
The chosen source feds he headphone output on the front as well as the XLR audio outputs
on the rear of the Phonitor.
Output selection
With the Output switch () you send an input signal to a selected output – headphones or
loudspeakers (XLR audio outputs on the rear).
In the Mute position no signal passes through to the outputs. The VU meter are illuminated in red.
Warning: Never connect a mono jack cable to the headphone output (front panel stereo jack). Make sure
that the stereo jack is fully inserted, otherwise a short circuit might damage the headphone amplifier!
20
0
%
–+
30 50 70 100
10 75 3 1035
VU
20
0
%
–+
30 50 70 100
10 75 3 1035
VU
VU Cal
L
a
t
e
r
a
l
i
t
y
+6dB
+12
Mono
Stereo
IR
0
V
o
l
u
m
e
M
I
N
2
3
4
5
M
A
X
Cr/A All
Output
120 V Audio Rail Preamplifier
Headphone Monitoring Amplifier
Matrix
Ø
L R
OffMute
L R
Off
Off
-
9
7
-
5
9
-
5
0
-
4
2
-
3
5
-
2
9
-
2
5
-
2
1
-
1
9
-
1
7
-
1
6
-
1
5
-
1
4
-
1
2
-
1
0
-
8
-
6
-
4
-
2
-
1
0
Source
RCA
XLR 1
XLR 2
C
e
n
t
e
r
-
2
.
0
-
1
.
6
-
1
.
2
-
0
.
9
-
0
.
6
-
0
.
3
C
r
o
s
s
f
e
e
d
1
5
°
2
2
°
3
0
°
4
0
°
5
5
°
7
5
°
A
n
g
l
e
L
e
f
t
C
e
n
t
e
r
R
i
g
h
t
Solo
Model 1280 • Made in Germany
Phonitor
2
20
0
%
–+
30 50 70 100
10 75 3 1035
VU
20
0
%
–+
30 50 70 100
10 75 3 1035
VU
VU Cal
L
a
t
e
r
a
l
i
t
y
+6dB
+12
Mono
Stereo
IR
0
V
o
l
u
m
e
M
I
N
2
3
4
5
M
A
X
Cr/A All
Output
120 V Audio Rail Preamplifier
Headphone Monitoring Amplifier
Matrix
Ø
L R
Off
Mute
L R
Off
Off
-
9
7
-
5
9
-
5
0
-
4
2
-
3
5
-
2
9
-
2
5
-
2
1
-
1
9
-
1
7
-
1
6
-
1
5
-
1
4
-
1
2
-
1
0
-
8
-
6
-
4
-
2
-
1
0
Source
RCA
XLR 1
XLR 2
C
e
n
t
e
r
-
2
.
0
-
1
.
6
-
1
.
2
-
0
.
9
-
0
.
6
-
0
.
3
C
r
o
s
s
f
e
e
d
1
5
°
2
2
°
3
0
°
4
0
°
5
5
°
7
5
°
A
n
g
l
e
L
e
f
t
C
e
n
t
e
r
R
i
g
h
t
Solo
Model 1280 • Made in Germany
Phonitor
2
Other manuals for Phonitor 2
1
Table of contents
Other SPL Amplifier manuals

SPL
SPL Professional Fidelity Phonitor x User manual

SPL
SPL Phonitor One User manual

SPL
SPL Professional Fidelity Elector User manual

SPL
SPL Phonos User manual

SPL
SPL Perfomer s800 User manual

SPL
SPL 1320 User manual

SPL
SPL Cabulator 2930 User manual

SPL
SPL Elector User manual

SPL
SPL Director User manual

SPL
SPL Director User manual

SPL
SPL Phonitor 2 1280 User manual

SPL
SPL Phonitor x User manual

SPL
SPL Track One 2960 User manual

SPL
SPL GainStation 8 Mk2 User manual

SPL
SPL HPM User manual

SPL
SPL Amplifiers User manual

SPL
SPL performer s800 User manual

SPL
SPL Channel One Mk3 User manual

SPL
SPL performer s800 User manual

SPL
SPL Phonitor 2 User manual