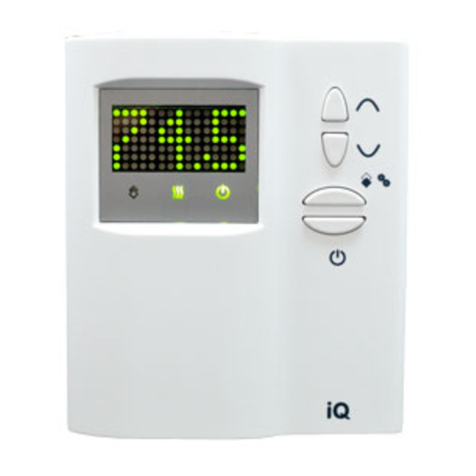
S+S Regeltechnik RYMASKON 500 - BACnet User manual

S+S REGELTECHNIK GMBH |THURN-UND-TAXIS-STR. 22 |D-90411 NÜRNBERG |GERMANY |FON +49 (0) 911 51947- 0 |www.S plusS.de
Operating instructions
RYMASKON®500 - BACnet
RYMASKON®500 - Modbus
Room control unit with colour touch screen,
with BACnet or Modbus connection
Thermostat for controlling and regulating
temperature, light, air conditioning and blind (1 zone)
D
MOD6.201 |Rev. 2022 - V12 DE | 17. 05. 2022

S+S REGELTECHNIK GMBH |THURN-UND-TAXIS-STR. 22 |D-90411 NÜRNBERG |GERMANY |FON +49 (0) 911 51947- 0 |www.S plusS.de
2
Operating instructions
RYMASKON®500 - BACnet
RYMASKON®500 - Modbus
INSTALLATION AND
COMMISSIONING
IMPORTANT NOTES
Commissioning is mandatory and may only be performed by qualified personnel! Please read these instruc-
tions prior to installation and commissioning, and comply with the specifications that they contain!
Mounting shall take place while observing all relevant regulations and standards applicable for the place of
measurement (e.g. such as welding instructions, etc.). It is particularly important to comply with the
following:
- VDE ⁄ VDI technical temperature measurements, directives, measurement set-ups for
temperature measurements.
- EMC directives
- It is imperative to avoid parallel routing of current-carrying lines
- We recommend the use of shielded cables with the shielding attached to the DDC/PLC at one side.
Before mounting, make sure that the existing technical parameters of the measuring instrument comply
with the actual conditions at the place of utilization, particularly with regard to:
- the measuring range
- the maximum permissible temperature and humidity
- the protection type and protection class
- oscillation, vibration and impacts must be avoided (< 0.5 g)
Only the valid edition of our conditions and the valid “General Conditions for the Supply of
Products and Services of the Electrical and Electronics Industry” (ZVEI conditions) and
the supplementary clause “Extended Retention of Title” apply as the terms and conditions
regulating this purchase.
The following points must also be complied with:
- These instructions must be read before installation and commissioning,
and all of the specifications that they contain must be complied with.
- The units must only be connected to an extra-low safety voltage in a de-energised condition.
Use shielded cables to avoid damage to the unit and faults (e.g. resulting from voltage induction),
avoid parallel routing with live lines, and comply with the EMC directives.
- This unit must only be used for its intended purpose, whereby the applicable VDE safety regulations and
all regulations issued by the regional and national regulatory authorities, TÜV and local energy providers
must be complied with. The purchaser must ensure that the relevant building and safety regulations are
complied with, and must avoid hazards of all kinds.
- No warranty or liability whatsoever will be accepted for defects and damage arising from improper
use of this unit.
- The warranty and liability excludes consequential damage caused by a fault in this unit.
- The units must only be installed and commissioned by qualified personnel.
- Only the technical data and connecting conditions specified by the installation and operating instructions
which are included in the scope of delivery of the unit apply. Deviations from the depictions contained in
the catalogue are not additionally listed, and are possible as a result of technical progress and the
continuous improvement of our products.
- Any alterations made to the unit by the user will void the warranty.
- This unit must not be installed close to sources of heat (e.g. radiators) or their heat flow. Avoid direct
solar irradiation or heat radiation from similar sources (powerful lamps, halogen spotlights).
- Operating this unit close to other devices that do not comply with EMC directives may influence the
functionality thereof.
- This unit must not be used for monitoring purposes which serve the purpose of protecting persons
against hazards or injury, as an Emergency Stop switch on systems or machinery, or for any other
similar safety-related purposes.
- The housing dimensions and the dimensions of accessories may differ slightly from the specifications
of these instructions.
- Changes to these documents are not permitted
- In cases of complaint, we will only accept complete units returned in their original packaging.

S+S REGELTECHNIK GMBH |THURN-UND-TAXIS-STR. 22 |D-90411 NÜRNBERG |GERMANY |FON +49 (0) 911 51947- 0 |www.S plusS.de
3
Operating instructions
RYMASKON®500 - BACnet
RYMASKON®500 - Modbus
INSTALLATION
CONFIGURATION
Terminating resistors may only be installed at the ends of the bus line.
No more than two line terminators are permitted in networks without repeaters.
The bias resistors for bus level definition in the idle state are usually activated at the
Modbus master / repeater.
The maximum number of subscribers per Modbus segment is 32 devices.
With a greater number of subscribers, the bus must be subdivided into several
segments separated by repeaters. The subscriber address can be set from 1 to 247.
A cable with a twisted-pair data line / power supply line and copper shielding braid must be
used for the bus line. The line capacitance should be less than 100 pF/m (e.g. Profibus cable).
The communication interface must be configured from the unit (see parameter table - System page 22).
All other parameters can also be changed via the Modbus master.
Changed communication parameters are activated when Setting Mode is exited; the unit performs a soft
reset. Alternatively, the new settings can also be activated by switching the unit off and on again (deacti-
vate and reactivate supply voltage).
The configuration parameters are stored in the non-volatile memory of the controller.
After changing the configuration via the display, the new parameters are saved when the controller
returns to Normal Display Mode.
If the changes were made via the bus (Modbus), the parameter for updating the non-volatile memory is
required in order to force saving. If configuration takes place via the display, the parameters are saved
after an expiry time or when the settings menu is closed.
An
existing configuration
can be
transferred
to other units using the
RYMASKON USB-CT
configuration tool (see next page).
General layout of bus structure
Bus topology with terminating
and bias resistors
Slave n
MODBUS
RTU-Master
RS-485
Line
termination
Line
termination
Active
branch
Passive
branch
Stub line
Trunk line
Stub line:
shorter 20m
Multiple branch n:
shorter 40m/n
General layout of bus structure
Slave 1 Slave 2
LA LA
Bus topology with terminating and bias resistors
A (D1) D+
B (D0) D–
MODBUS
RTU-Master
Slave 1 Slave 2
5 V
Common
(GND)
Line
termination
Pull-down /
bias resistor
Pull-up /
bias resistor
RBIAS
RBIAS
RAB
Line
termination
RAB

S+S REGELTECHNIK GMBH |THURN-UND-TAXIS-STR. 22 |D-90411 NÜRNBERG |GERMANY |FON +49 (0) 911 51947- 0 |www.S plusS.de
4
Operating instructions
RYMASKON®500 - BACnet
RYMASKON®500 - Modbus
PC/Laptop
System
USB
RYMASKON
USB CT
RYMASKON
500/600/700
KEY FEATURES
Basic model type 510 • 24 V AC/DC voltage supply
• 3.5 inch touch display with background lighting
• Modbus or BACnet
• Wall mounting on standard in-wall flush boxes
• Integrated temperature sensor (basic equipment)
• Integrated humidity sensor
• Regulation of heating or cooling
via relay (2-point regulator)
• Operation of temperature,
light, air conditioning and sun protection (1 zone)
via touch display
• 2 resistance inputs (NTC10K)
for external temperature sensors
• 1 digital input (potential-free)
• 1 relay output (7A), (2-point regulation)
• Operating modes Comfort (Normal),
OFF, Boost, ECO, Holiday, Frost Protection
RYMASKON USB-CT
Configuration tool
for rapid transfer of the
unit configuration
A configuration can be transferred to other units.
To do so, a unit must first be configured using the display via the bus.
After which the
RYMASKON USB-CT
and software on the PC can be used to transfer the configuration to other units.
The current software and detailed information are available in the
RYMASKON USB-CT
download area (spluss.de/r/2L6VM.htm).
Connection plan of the configuration tool

S+S REGELTECHNIK GMBH |THURN-UND-TAXIS-STR. 22 |D-90411 NÜRNBERG |GERMANY |FON +49 (0) 911 51947- 0 |www.S plusS.de
5
Operating instructions
RYMASKON®500 - BACnet
RYMASKON®500 - Modbus
The
RYMASKON
®
500
/
600
/
700
series of room control units are designed for controlling the climatic
zone in residential, hotel and office rooms and individually regulate the heating/cooling steps of the internal
rooms. A colour touch display with modern icons is used for the visual display and operation at the location.
The product range is characterised by the variety of combination options of the individual components.
The
RYMASKON
®
500
Thermostat
series regulates a
heating or cooling valve
directly through a relay.
The
sun protection
(blinds, shutters) can be controlled in one zone via the bus. Through the appropriate
symbols, it is possible to control the light and air conditioning instead of the sun protection. In addition
to
the integrated temperature sensor, two external temperature sensors (NTC10K) can also be connected.
A
measuring element for relative humidity is also available. The devices are used in room climate technology
and heating/cooling systems, such as cooling ceilings and floor heating. Wall mounting is performed on
standard in-wall flush boxes. The devices are optionally available with a Modbus or BACnet communication
interface (optionally without communication) and in various type versions (see number key).
The basic model
RYMASKON
®
510
Thermostat
with colour touch display (3.5"), in a white housing,
possesses an integrated temperature and humidity sensor, 2 resistance inputs (for external NTC10K
temperature sensors), 1 digital input, 1 relay output (7A) and optionally with a Modbus or BACnet
connection. The room control units are used for controlling heating/cooling directly through the relay
(2-point regulation) light, air conditioning and the sun protection (1 zone) via the bus.
TECHNICAL DATA (Basic model)
Device type: room control unit with 2-point regulation
Functions: temperature, light, air conditioning
and sun protection (1 zone)
Communication:
Modbus RTU Slave
address range can be configured between 1...247
or
BACnet MS
/
TP
device ID 65100 (default) and MAC address can be configured between
1...127
RS 485 interface, max. 63 devices,
9600 / 19200 / 38400 / 57500 / 76800 Baud,
none / even / odd parity, 1 / 2 stop bits
Power supply: 24 V AC/DC (± 15 %)
Power consumption: max. 1.92 W
Inputs: 2 resistance inputs (NTC10K)
for external temperature sensors
1 digital input (potential-free), impedance <1kOhm
Outputs: 1 relay output (2-point regulation)
7A at 230V AC (resistive load);
2.2 / 1.3A at 230 / 115 V AC (inductive load)
Operating mode: Comfort, ECO, OFF, Boost, Holiday, Frost Protection
Control element:
3.5" touch display
with background lighting,
cut-out approx. 50 x 75 mm, resolution 320 x 480 pixels, 255,000 colours
TEMPERATURE
Sensor: integrated temperature sensor
Measuring range: –40...+125 °C
Accuracy: typically ±0.5 °C at +25 °C
HUMIDITY
Sensor: integrated humidity sensor
Measuring range: 0...100 % r.H.
Accuracy: typically ±2 % r.H. (20...80 % r.H.) at +25°C
Electrical connection: 0.14 - 1.5mm², via screw terminals
Housing: plastic, polycarbonate material, self-extinguishing,
white colour (optionally black or chrome), weight approx. 220 g
Housing dimensions: approx. 88 x 112 x 14.5 mm (on-wall)
approx. 52 x 53 x 28.5 mm (in-wall)
Mounting: wall mounting on in-wall flush box, Ø 55mm
Ambient temperature: 0...+50°C (operation); –30...+70°C (storage)
Permitted humidity: 0...95 % r. H., (non-precipitating air)
Protection type:
IP 20
(according to EN 60 529)
Standards: CE conformity,
according to EMC directive 2004/108/EU, Low-Voltage directive 2006/95/EU,
according to EN 61000-6-1/3, EN 60730-1, EN 6100-4-2/4/5/11
DESCRIPTION
Introduction and
technical data

S+S REGELTECHNIK GMBH |THURN-UND-TAXIS-STR. 22 |D-90411 NÜRNBERG |GERMANY |FON +49 (0) 911 51947- 0 |www.S plusS.de
6
Operating instructions
RYMASKON®500 - BACnet
RYMASKON®500 - Modbus
6MYR 000xxx2xC0x
P o s . 5
RI
Resistance input (NTC10K) for external temperature sensors
DI
Digital input (potential-free)
RO
Relay output (7A), (2-point regulation)
P o s . 10
*
The
temperature sensor
forms
part of the basic equipment and
is included in the option "without"
additional measuring elements.
RYMASKON
®
500
Thermostat (series)
Number key for type versions 5MYR 000x0xxxT01
Pos. 1–4 Type name
RYMASKON 500 RYM5
Pos. 5 Channel configuration
Type 510
2RI
,
1DI
,
1RO
7A 1
Pos. 7 Device type
Thermostat T
Pos. 8 Communication
without A
Modbus M
BACnet B
Pos. 9 Voltage supply
12V DC 1
24V AC/DC 2
90–250V AC M
Pos. 10 Additional measuring elements
without
*
0
RH
(rel. humidity) 1
Pos. 11 Extra options
without 0
Pos. 12 Housing colour
black 1
white 2
chrome 3
RYMASKON
®
510
Thermostat (basic model),
Type ⁄ WG02 Communi-
cation
Measuring
element
Control system Colour
Display
Item No.
Rymaskon 512-MOD-RH Modbus
T
|
RH T
|
S
|
L
|
K
white ■RYM5-10TM-2102-000
Rymaskon 512-BAC-RH BACnet
T
|
RH T
|
S
|
L
|
K
white ■RYM5-10TB-2102-000
Measuring element /
control system:
T
= Temperature sensor
(basic equipment)
RH
= Humidity sensor
T
= Temperature heating / cooling
S
= Sun protection
L
= Light
K
= Air Conditioning (AC)
Channel configuration:
2RI
2 resistance inputs (NTC10K) for external temperature sensors
1DI
1 digital input (potential-free)
1RO
1 Relay output (7A), (2-point regulation)
Type variants: Basic model
Type 510
available from stock – freely configurable model variants available upon request!
See number key (above) for configuration options.
ACCESSORIES
RYMASKON USB_CT
Configuration tool
for rapid transfer of the unit configuration from the PC to all
units in the building
1901-51Z3-0002-000

S+S REGELTECHNIK GMBH |THURN-UND-TAXIS-STR. 22 |D-90411 NÜRNBERG |GERMANY |FON +49 (0) 911 51947- 0 |www.S plusS.de
7
Operating instructions
RYMASKON®500 - BACnet
RYMASKON®500 - Modbus
28.5 14.5
88
52
53
112
TOUCHSCREEN
50 x 75
DIMENSIONAL DRAWING
Dimensional drawing
[mm]
WIRING
Connection diagram
Typ 510
(
Basic model)
WARNING:
Switch off the power supply before commencing the wiring work!
RI2
RI1
DI1
G0
B–
A+
RLY COM
7A 250V
RLY OUT
0V
24V
RYMASKON 510
RLY 250V AC / 30V DC 7A(res)/2.2(ind)
OUT Rated Relay Output
COM Relay Common Terminal
24V 24V AC/DC Supply
0V 0V Supply
Inputs
NTC10K Temperature Sensor
RI1 Input 1 (External Sensor)
RI2 Input 2 (External Sensor)
DI1 Digital Input
(Potential-free)
Modbus / BACnet MS/TP
A+
RS485 A+
B–
RS485 B–
G0 GND
(internally linked with 0V Supply)

S+S REGELTECHNIK GMBH |THURN-UND-TAXIS-STR. 22 |D-90411 NÜRNBERG |GERMANY |FON +49 (0) 911 51947- 0 |www.S plusS.de
8
Operating instructions
RYMASKON®500 - BACnet
RYMASKON®500 - Modbus
The following diagrams are typical display options for the
RYMASKON
®
500
Thermostat
.
All icons and functions can be revealed and hidden individually.
The multicolour touch screen visualizes the actual state of the system.
The
large ring
(red/blue/white) shows the current temperature setpoint.
The colour of the large ring can be set via the bus. The intensity of the ring colour changes
depending on the difference between the target temperature and the actual temperature.
The small
action circle
(grey) alternately displays the current sensor values (if enabled).
USER INTERFACE
Screens, lighting
and calibration
Screen backlighting (standby)
If the display of the main screen is not touched for 30 sec., the display will be dimmed to
the configured standby value (default 5 / max. 20).
The brightness of the touch display in standby can be adjusted in the settings (display - brightness).
If this value is configured to 0, the display is completely dark when it is inactive.
Touch the display to automatically re-enable the backlighting.
Tapping the icon on the
main screen
to immediately dim the display to the set value.
Tapping the icon again in standby to completely switch off backlighting.
Screen calibration
The touch display can be re-calibrated during a unit reset.
The unit performs the following two types of resets:
1. When the unit starts up (power supply present)
2. After completing parameter configuration in setting mode and returning to the main screen.
During reset (dark screen), swipe in the direction of all four edges of the display and then follow the
instructions. Confirm recalibration with “OK”.
Fig. 1a
Main screen
Room
23
.5
°C
21
.
0
°C
MAIN SCREEN
Fig. 1b
Auxiliary screen
(opens by tapping the grey action circle
on the main screen)
AUXILIARY SCREEN
Fig. 1c
Blind screen
(opens by tapping the blind icon
on the main screen
BLIND SCREEN

S+S REGELTECHNIK GMBH |THURN-UND-TAXIS-STR. 22 |D-90411 NÜRNBERG |GERMANY |FON +49 (0) 911 51947- 0 |www.S plusS.de
9
Operating instructions
RYMASKON®500 - BACnet
RYMASKON®500 - Modbus
The
main screen
of the room control units has four touch-sensitive areas for changing system settings.
All parameter values are provided as Modbus or BACnet variables.
• Arrow keys
UP ▲
and
DOWN ▼
to change the current setpoint (temperature).
• Small
action circle
for displaying the measured temperature (internal or external via RI1/2),
the moisture content in the air (devices with RH option) and as a button to access
the auxiliary screen.
• Function-based switching icon in
Holiday Mode
shows the holiday icon, in
Boost Mode
(Boost)
shows the boost icon and in
OFF Mode
shows the off icon, with which the respective mode can
be activated and aborted.
•
ECO
and
frost protection
icon, is shown under the target temperature when active.
•
Air conditioning
icon for activation/deactivation of the air conditioning control if enabled.
•
Light
icon for activation/deactivation of the room lighting if enabled.
•
Blind
icon as a button to access the blind screen to control the blinds
(OPEN/CLOSE and the slats’ angle of inclination), if enabled.
MAIN SCREEN
ICONS
Screen areas and
explanation of icons
Arrow key
UP
Arrow key
DOWN
Room
23
.5
°C
21
.
0
°C
°C°F
RED RING
(heating)
BLUE RING
(cooling)
WHITE RING
(setpoint %)
STATUS BAROPERATING MODE
SETPOINT RING
BUS
NOTIFICATION
DISPLAY
LOCK (active)
TEMPERATURE
UNITS
ALARM
INFORMATION
MEASURED VALUE DISPLAY
Sensor value + Designation
(languages EN/DE/FR/ES/IT)
ACTION CIRCLE
Outside
10
.5
°C
Humidity
45
%RH
MAIN SCREEN
Fig. 2
OPERATING MODE
FROST PROTECTION
(active)
ECO MODE
(active)
TEMPERATURE
LIMITING
CONTROL BAR
BRIGHTNESS
DISPLAY
LIGHT
(1 zone)
AIR CONDITIONING
(1 zone)
BLIND
(1 zone)
OFF MODE
(setpoint)
BOOST MODE
CONTROL
Button for
AUXILIARY SCREEN
(→ page 18)
for further settings such as
parameter configuration via the display (→ page 21)
Floor
20
.1
°C

S+S REGELTECHNIK GMBH |THURN-UND-TAXIS-STR. 22 |D-90411 NÜRNBERG |GERMANY |FON +49 (0) 911 51947- 0 |www.S plusS.de
10
Operating instructions
RYMASKON®500 - BACnet
RYMASKON®500 - Modbus
The
RYMASKON
®
500
Thermostat
can show up to three temperatures and the
relative humidity (RH option) in the grey action circle.
Room, zone 1, main control circuit
The room temperature is used together with the target temperature in the
main
control circuit
to regulate the temperature. The internal temperature sensor is
connected by default. Alternatively, an external temperature sensor (NTC10K)
connected to RI1
⁄
RI2 can be used (Settings - Inputs - RI1
⁄
RI2 Mode - Control).
The temperature value is always displayed and cannot be hidden. The name can be
changed (Settings - Display - Zone 1 Text).
Floor, zone 2, auxiliary control circuit, MIN - MAX
With the floor temperature, the temperature of a floor heating system can be
regulated via configurable temperature limits (min. limit/max. limit), for example.
The function and display is active if an external temperature sensor (NTC10K) is
connected to RI1
⁄
RI2 and the connected channel is configured to "
MIN - MAX
"
(Settings - Inputs - RI1
⁄
RI2 Mode - MIN-MAX).
The floor temperature is shown in the action circle. The name can be changed
(Settings - Display - Zone 2 Text ). If "Zone 2 Tex t " is configured to disabled,
the temperature is not displayed.
Outside, zone 3, simple display
The outside temperature is displayed in the action circle if an external temperature
sensor (NTC10K) is connected to RI1 ⁄ RI2 and the connected channel is configured to
"
Outside
" (Settings - Inputs - RI1 ⁄ RI2 Mode - Outside). Alternatively, the unit can be
configured so that the outside temperature is transmitted via the bus to the unit
(Settings - Inputs - outside temperature source - network).
The
name
can be changed (Settings - Display - Zone 3 Text).
If "Zone 3 Te xt " is configured to disabled, the temperature is not displayed.
NOTE:
For explanations regarding
RI1 ⁄ RI2
see chapter
MODES FOR INPUTS RI1 & RI2
For explanations regarding
Auxiliary control circuit (floor
) see chapter
AUXILIARY CONTROL CIRCUIT
TEMPERATURE
MEASUREMENT
Sensor assignment
and designations
of the temperature zone
MAIN CONTROL CIRCUIT
(Changeover)
Heating or cooling
The thermostat regulates the target temperature through the switching on and off of the relay, as required. In
this process, a hysteresis in the control program causes – in heating mode, for example – the target temperature
and the hysteresis to require being exceeded before the relay switches off. In cooling mode, the hysteresis
functions the other way around. This prevents switching on or off too quickly. The diagram below illustrates this
principle. The main temperature control circuit can be forcibly changed via the bus or through the digital input
(DI1) to heating or cooling mode (changeover). This makes it possible to use the same pipe for heating and cooling
in different seasons (summer/winter mode).
The target temperature can be adjusted by the user using the arrow keys
UP
and
DOWN
and it
changes depending on the operating conditions:
•
In
COMFORT MODE
(standard mode), the target temperature (room)
can be adjusted by the
user or via the bus.
•
In
ECO MODE
, the target temperature is switched over to t
he ECO set
point.
•
In
OFF MODE
, the target temperature is switched over to t
he frost protection s
etpoint.
Relay
Output
Target
Temperature
ON
OFF
+-
TARGET
SETPOINT e.g 21°C / 69°F
HYS HYS = Hysteresis
e.g. 1.0°C / 1.8°F
HEATING
Relay
Output
Target
Temperature
ON
OFF
+-
TARGET
SETPOINT e.g 22°C / 71°F
HYS
HYS = Hysteresis
e.g. 1.0°C / 1.8°F
COOLING
Room
20
.1
°C
Floor
20
.1
°C
Outside
10
.5
°C

S+S REGELTECHNIK GMBH |THURN-UND-TAXIS-STR. 22 |D-90411 NÜRNBERG |GERMANY |FON +49 (0) 911 51947- 0 |www.S plusS.de
11
Operating instructions
RYMASKON®500 - BACnet
RYMASKON®500 - Modbus
AUXILIARY CONTROL
CIRCUIT
(Floor, min-max)
Regulation of
floor heating /
floor cooling
If a temperature sensor is connected to RI1/2 and the input is configured to
auxiliary control circuit (Settings - Inputs - RI1/2 - Min-Max), the thermostat
monitors the floor temperature.
For
heating control
i
n Comfort/ECO/Boost mode:
• The relay is switched off when the upper limit of the floor
temperature is exceeded.
• The relay is switched on again if the floor temperature drops
by 1°C (hysteresis) below the upper limit.
• The relay is switched on when the lower limit of the floor tempera-
ture is undershot. This priority switching is overridden if the floor
temperature is once again 1°C above the lower limit (hysteresis).
The monitoring of the upper limit is typically used for protecting the floor
surface. The monitoring of the lower limit is primarily suited for bathers
to improve comfort when walking on the floor in bare feet or to dry damp
floor surfaces.
For
cooling control
in Comfort/ECO/Boost mode:
• The relay is switched off if the floor temperature drops
below the lower limit.
• The relay is switched on if the floor temperature is 1°C
above the lower limit (hysteresis).
The monitoring of the lower limit is usually used for preventing condensation.
Upper limit, lower limit and hysteresis are configurable.
(Settings - Control Settings - Min. Limit / Max. Limit / Limit Hysteresis)
The temperature limiting icon is displayed on the main screen to indicate
that the limit value control is active.
Floor
23
.5
°C
21
.
0
°C
Fig. 3
TEMPERATURE
LIMITING
The icon shows the active
limit value control.
INPUTS
RI1 & RI2
for two external
temperature sensors
(NTC10K)
Can also be
configured as
digital inputs (DI)
An external NTC10K sensor can be connected to these inputs for temperature control and monitoring.
Configuration options:
•
Deactivated (default)
•
Main control circuit (room, zone 1)
RI is used for the main control of the temperature.
The name can be changed (Settings - Display - Zone 1 Text). If "Zone 1 Text" is configured to
disabled, the temperature is not displayed.
•
Auxiliary control circuit, Min-Max (floor, zone 2)
RI is used for regulating the upper/lower limit values of the temperature of the floor heating/cooling.
The name can be changed (Settings - Display - Zone 2 Text).
If "Zone 2 Text" is configured to disabled, the temperature is not displayed.
•
Outside (outside, zone 3)
RI is used for displaying the outside temperature in the action circle of the display.
The name can be changed (Settings - Display - Zone 3 Text). If "Zone 3 Text" is configured to disabled,
the temperature is not displayed.
•
Bus
RI is available for temperature recording using the connected NTC10K sensor via the bus
(no control function). The temperature value is not displayed.
The inputs can also be used as voltage-free contacts for priority switching with respect to the operating
mode or for messages via the bus. The following additional options can be configured:
•
Close for ECO
Voltage-free digital input for priority switching to ECO if closed.
•
Open for ECO
Voltage-free digital input for priority switching to ECO if open.
•
Close for OFF
Voltage-free digital input for priority switching to OFF if closed.
•
Open for OFF
Voltage-free digital input for priority switching to OFF if open.
•
Bus
Voltage-free digital input for reading via the bus.
NOTE:
If both RI1 and RI2 are configured as an outside temperature input, RI2 has priority.

S+S REGELTECHNIK GMBH |THURN-UND-TAXIS-STR. 22 |D-90411 NÜRNBERG |GERMANY |FON +49 (0) 911 51947- 0 |www.S plusS.de
12
Operating instructions
RYMASKON®500 - BACnet
RYMASKON®500 - Modbus
DIGITAL INPUT
DI1
(voltage-free)
The voltage-free digital input can be used for priority switch-on of the ECO,
OFF and FROST modes, as a changeover or only for monitoring purposes.
Configuration options:
• Close for ECO Mode
• Open for ECO Mode
• Close for OFF/frost protection mode
• Open for OFF/frost protection mode
• Changeover between heating and cooling
• Alarm
• Bus
Configuration of "
Close for
": the voltage-free digital contact can be linked to an external timer,
for example, to switch the unit to ECO/OFF mode when the timer has elapsed. In the case of a
changeover from open (comfort mode) to closed (ECO/OFF mode), the operating mode only
changes once the time configured in the parameter "Digital Input Delay" has elapsed.
Configuration of "
Open for
": voltage-free digital input can be used to activate the ECO/OFF mode
when the contact opens. In this operating mode, it is suitable for the connection of a window
switch, door card switch or PIR sensor. During a transition from closed to open, the operating
mode only changes once the time configured in the parameter "Digital Input Delay" has elapsed.
Configuration of "
Changeover
":
the digital input can be used for the priority switching of heating
and cooling mode. The unit works in heating mode when the contact is open and in cooling mode
when the contact is closed.
Configuration of "
Alarm
": when the digital input closes, a "DI Contact Alarm" message is displayed
on the display.
Configuration of "
Bus
": the digital input is used for monitoring purposes via the bus.
No further effects on the regulation of the unit.
Units with an RH option can detect the relative humidity in the room with an accuracy of
2 % using an internal sensor.
The measured value is shown on the display in the small grey action circle.
The RH display is enabled by default and can be deactivated in the configuration settings.
The RH value can be accessed as a variable via the bus.
RH OPTION
Determining the
relative humidity [% RH]
in the room air

S+S REGELTECHNIK GMBH |THURN-UND-TAXIS-STR. 22 |D-90411 NÜRNBERG |GERMANY |FON +49 (0) 911 51947- 0 |www.S plusS.de
13
Operating instructions
RYMASKON®500 - BACnet
RYMASKON®500 - Modbus
Depending on the system configuration, the unit can be switched
to
OFF mode
via the display, the voltage-free digital input (e.g. with
an external timer) or the bus (under normal conditions, the relay
switches off).
OFF mode can be aborted by tapping on the OFF icon. The system is
designed so that the last command always determines the current
status. Example: if the unit has been set to OFF mode through priority
switching via the bus or via the digital input, the user can abort OFF
mode by tapping on the OFF icon. On the other hand, a networked unit
which the user has switched to OFF mode can be switched back to the
normal operating mode by the bus master.
If the unit changes to
OFF mode
and then goes back into
Comfort mode
(standard mode), the target temperature is reset to the nominal value.
The reset can be deactivated (Settings - Control Settings - Setpoint Reset).
NOTE:
The availability of the OFF icon on the main screen
can be deactivated (Settings - Display - Show Off Icon).
FROST PROTECTION
In
OFF mode
, the
frost protection function
is activated, and the set frost
protection target temperature is displayed (greyed-out). The frost
protection target temperature can be configured (Settings - Control
Settings- Frost Setpoint). If the room temperature in OFF mode drops
below the frost protection setpoint, the relay is switched on. The snow-
flake icon appears on the display . Once the temperature is 2°C above
the frost protection setpoint again, the relay is switched off.
The unit can be switched to ECO mode via the bus or the digital input.
ECO mode is also activated if Holiday mode is configured to ECO mode
(cf. section Holiday mode).
The ECO icon is shown on the display. Tapping the ECO icon in the main
screen to abort ECO Mode.
The last command applies, i.e. if was switched to ECO via the bus or
the digital input, the user can cancel the mode by tapping the ECO icon.
OFF MODE
Display and setting
of OFF mode
ECO MODE
Display and setting
of the ECO mode
Room
20
.1
°C
8
.
0
°C
Target
Fig. 4
TAPPING THE ICON
TO END
THE MODE
OFF ICON
(active)
Fig. 5
Room
20
.1
°C
16
.
5
°C
Target
TAPPING THE ICON
CANCELS THE MODE
ECO ICON
(mode active)

S+S REGELTECHNIK GMBH |THURN-UND-TAXIS-STR. 22 |D-90411 NÜRNBERG |GERMANY |FON +49 (0) 911 51947- 0 |www.S plusS.de
14
Operating instructions
RYMASKON®500 - BACnet
RYMASKON®500 - Modbus
TEMPERATURE UNIT
Selection of degrees Celsius (
°C )
or degrees Fahrenheit (
°F)
WARNING!
Changing the default setting for
the temperature unit will set the
defaults for all other parameters.
Changing the default setting for the
temperature unit is intended to be
performed as necessary at the start
of commissioning.
Fig. 7a
Temperature in °C
Fig. 7b
Temperature in °F
Room
26
.3
°C
21
.
0
°C
Target
°C°F
Room
79
.4
°F
70
.
0
°F
Target
°C°F
If the icon for switching between °C /°F is enabled (Settings - Display - Show Unit Swap - Enabled),
the temperature displays can be switched between degrees Celsius and Fahrenheit by tapping the
icon on the main screen.
This option is especially useful for applications in hotels etc. with international guests.
You can also determine which temperature unit (°C /°F) is set as the default value on
the unit in the settings (Systems, Native Units).
If the unit default setting is changed, the unit will reload the factory default settings
with the changed unit for all temperature displays.
BOOST
Display and setting
of the boost mode
(boost function)
Activating the
boost function
(Settings - Operating Modes - Boost Time)
allows the relay of the thermostat to be switched on for the configured
duration. Boost has priority over the automatic temperature regulation
and switches the output capacity on. In the default settings, the boost
time is set to the value 0 (deactivated).
Fig. 6a
Fig. 6b
Room
26
.3
°C
21
.
0
°C
Target
Room
23
.5
°C
1
Mins.Boost

S+S REGELTECHNIK GMBH |THURN-UND-TAXIS-STR. 22 |D-90411 NÜRNBERG |GERMANY |FON +49 (0) 911 51947- 0 |www.S plusS.de
15
Operating instructions
RYMASKON®500 - BACnet
RYMASKON®500 - Modbus
LANGUAGE SELECTION
Release of language selection
(EN/DE/FR/ES/IT)
to change the language on the
main and auxiliary screen
Different languages are available for the main and auxiliary screen and can be set in the system
configuration (Settings -> System -> Language).
The user of the thermostat can also be allowed to select the language themselves.
To this end, a switching icon can be released in the settings as an acronym at the bottom left of
the
main screen
for the active language (Settings -> System -> Show Language Swap) (Fig. 8a).
Tapping the acronym to display the available languages, and the operator can directly change the
language on the screen. (Fig. 8b)
Fig. 8a
Language abbreviation
(opens by tapping the selection
of the language options)
Fig. 8b
Language options
Room
20
.7
°C
EN
22
.
5
°C
Target
IT
ES
FREN
DE

S+S REGELTECHNIK GMBH |THURN-UND-TAXIS-STR. 22 |D-90411 NÜRNBERG |GERMANY |FON +49 (0) 911 51947- 0 |www.S plusS.de
16
Operating instructions
RYMASKON®500 - BACnet
RYMASKON®500 - Modbus
Fig. 9a
Air conditioning and light enabling
Fig. 9b
Air conditioning (1 zone)
Fig. 9d
Blind enabling
Fig. 9c
Lights (1 zone)
Fig. 9e
Blind (1 zone)
Room
23
.5
°C
21
.
0
°C
Target
Room
23
.5
°C
21
.
0
°C
Target
Room
23
.5
°C
21
.
0
°C
Target
Room
23
.5
°C
21
.
0
°C
Target
Room
23
.5
°C
21
.
0
°C
Target
To operate the
air conditioning
and
room lighting
, the
switching icons
for air conditioning and lights
can be enabled for display on the
main screen
.
Tapping the respective icon switches the function
ON
or
OFF
.
The status of the switching icons can be accessed and changed via the bus.
The switching icons are enabled in the settings (Display, AC / Lights).
NOTE:
Only
1 zone
at a time can be switched for the light, air conditioning and blind functions.
A configuration for 2 light zones, 2 air conditioning zones or 2 blind zones is not possible.
The
light
,
climate
and
blind
functions share two
icon positions
on the main screen.
All possible configurations are displayed in Fig. 9a - 9e.
CONTROL
LIGHT
AIR CONDITIONING
Display and
settings
(1 zone)
ICONS
BLIND
LIGHT
AIR CONDITIONING
LIGHTS
(1 zone)
ON OFF
CLOSE OPEN
MAIN SCREEN
MAIN SCREEN
ON OFF
AIR CONDITIONING (AC)
(1 zone)
TAPPING ON THE ICON ENABLES
SWITCHING
ON
OR
OFF
BLIND
(1 zone)

S+S REGELTECHNIK GMBH |THURN-UND-TAXIS-STR. 22 |D-90411 NÜRNBERG |GERMANY |FON +49 (0) 911 51947- 0 |www.S plusS.de
17
Operating instructions
RYMASKON®500 - BACnet
RYMASKON®500 - Modbus
To operate the blind zones, the switching icon is enabled on the
main screen
.
(1 zone).
The switching icon is enabled in the setting (Display - Lights/Blind).
NOTE:
Only
1 zone
at a time can be switched for the light, air conditioning and blind functions.
A configuration for 2 light zones, 2 air conditioning zones or 2 blind zones is not possible.
The
light
,
climate
and
blind
functions share two
icon positions
on the main screen.
All possible configurations are
displayed in Fig. 9a - 9e.
Tapping the icon so that the unit displays the
blind screen
.
Depending on the configuration in the settings menu, an adjustment of the blind can be made on the blind
screen using the arrows with different increments and movement types. The step size and movement types
can be configured as follows (Settings - Display).
Blind mode (increments):
• 2 positions (On/Off)
• 5 positions (4 increments)
• 11 positions (10 increments)
• Infinite/1% increments
The positions are distributed equally from 0–100%.
Blind configuration (movement type, graphical illustration):
• translatory movement "Level" (Fig.10a)
• rotary movement "Tilt" (Fig. 10b)
• translatory + rotary movement "Level + Tilt" (Fig. 10c)
Briefly tapping one of the arrows on the
blind screen
to change the displayed value (0–100%) by the
configured increment. Use the bus to retrieve and change the value (blind position).
If
infinite increment
is set, the control responds to display actions as follows:
• Briefly tapping the arrow to change the value by 1%.
• tapping an arrow for longer than 0.6s to change the value automatically; then let go of the arrow.
Automatic change stops by briefly tapping the arrow or when the minimum / maximum value
(0% / 100%) is reached.
The valid command is always the latest one. That means that if the blind position has been changed
via the bus, the user can change the mode value again, and vice versa.
BLIND
CONTROL
Display and
settings
(1 zone)
Fig. 10c
'Level + Tilt'
Fig. 10a
'Level'
Fig. 10b
'Tilt'
BLIND SCREEN (display options)

S+S REGELTECHNIK GMBH |THURN-UND-TAXIS-STR. 22 |D-90411 NÜRNBERG |GERMANY |FON +49 (0) 911 51947- 0 |www.S plusS.de
18
Operating instructions
RYMASKON®500 - BACnet
RYMASKON®500 - Modbus
HOLIDAY MODE
TAPPING THE ICON
TO ENABLE THE MODE
(→ Page 20)
AUXILIARY SCREEN
Other operating icons
and information
The
auxiliary screen
can be accessed by touching the small grey action circle on the main screen.
If necessary, protect access to the auxiliary screen using a
PIN
code
(“Staff Code”, default: 0000 = no PIN required).
The auxiliary screen has several touch-sensitive areas to change the settings.
•
Alarm icon
to get warnings (error messages).
•
Cleaning icon
to enable clearing mode (30 s timer).
•
Lock icon
to activate and deactivate LOCK mode (display lock);
multiple access levels are available.
•
Holiday icon
for activating HOLIDAY mode.
•
OFF icon
to enable OFF mode; disable it via the main screen.
•
Gearwheel icon
to open setting mode
(see “Parameter configuration”).
OFF MODE
TAPPING THE ICON
TO ENABLE THE MODE
(→ Page 13)
AUXILIARY SCREEN
ICONS
CLEANING MODE
TAPPING THE ICON TO
ENABLE THE MODE
with 30 s counting down to
clean the display when all
other switching icons and
buttons are disabled
(→ Page 19)
TAPPING THE ICON
TO RETURN TO
THE MAIN SCREEN
ESC ICON
(home screen)
TAPPING THE ICON TO OPEN THE
MODE FOR CONFIGURING PARAMETERS
DIRECTLY ON THE DISPLAY. (→ Page 21)
GEARWHEEL ICON /
SETTING MODE
ALARM ICON
TAPPING THE ICON FOR
MORE INFORMATION
(→ Page 19)
AUXILIARY SCREEN
Fig. 11
LOCK ICON
TAPPING THE ICON
TO LOCK VARIOUS
CONTROL ELEMENTS
(→ Page 19)

S+S REGELTECHNIK GMBH |THURN-UND-TAXIS-STR. 22 |D-90411 NÜRNBERG |GERMANY |FON +49 (0) 911 51947- 0 |www.S plusS.de
19
Operating instructions
RYMASKON®500 - BACnet
RYMASKON®500 - Modbus
Tapping the cleaning icon on the
auxiliary screen
to enable
cleaning mode.
The unit changes into “display cleaning” mode, all switching
icons and buttons are disabled and a 30s timer is displayed.
The display can be cleared during this time without accidental
entries.
CLEANING MODE
Enabling
cleaning mode
(to clean the display)
0000
8 9
5 6 -
2 3 Esc
OKDel
Lock Code
Enter Code
7
4
1
0
LOCK MODE
Enabling the
display lock
Tapping the lock icon on the
auxiliary screen
to lock the unit
against unauthorised access.
Define a
PIN
code to enable/disable the locking state
(“Lock Code”, default: 0000 = no PIN required).
NOTE:
The display lock is retained when the unit is switched off and
back on.
The following configurations are available (see table).
ACTIVE SWITCHING ICONS
LOCK MODE
LOCK
▲ ▼
UP ⁄ DOWN
BOOST ⁄
OFF MODE
ECO ⁄HOLIDAY
CLEANING
MODE
AIR CON
AC LIGHT BLIND
Deactivated
–▯ ▯ ▯ ▯ ▯ ▯
Only ON / OFF
▯–▯–▯▯ ▯
Only adjustment
▯ ▯ – – – – –
No input
▯– – – – – –
30
Clean Screen
Notifications
Internal Sensor Failure
External Sensor 1 Fault
External Sensor 2 Fault
Digital Contact Fault
Time Lost
ALARM DISPLAY
Access to
alarm notifications
Tapping the alarm icon on the
auxiliary screen
to access the
warnings on the unit.
NOTE:
If “Bus” is set as the sensor source, the alarm will be suppressed.
Typical causes of alarm notifications:
•
External sensor 1 (RI1) error
(if enabled but not connected)
•
External sensor 2 (RI2) error
(if enabled but not connected)
•
Integrated sensor error
•
Digital contact error
Fig. 13
Fig. 12
Fig. 14

S+S REGELTECHNIK GMBH |THURN-UND-TAXIS-STR. 22 |D-90411 NÜRNBERG |GERMANY |FON +49 (0) 911 51947- 0 |www.S plusS.de
20
Operating instructions
RYMASKON®500 - BACnet
RYMASKON®500 - Modbus
Tapping the
Holiday icon
on the auxiliary screen to set the number of days'
holiday from 1 to 31.
After confirming with OK, the thermostat immediately switches to OFF or ECO mode
depending on the configuration (Settings - Operating Modes - Holiday Mode).
If you set the days to 0, or tapping the OK button, the thermostat permanently changes
to holiday mode. Holiday mode can be cancelled by tapping on the holiday icon.
HOLIDAY MODE
Activating
Holiday mode
Fig. 15a
Tapping on the Holiday icon on
the auxiliary screen
Fig. 15b
Setting the days of holiday
8 9
5 6
2 3 Esc
EnterDel
Holiday
Enter 0 to 31 Days
7
4
1
0
Fig. 15c
Holiday OFF display
Fig. 15d
Holiday ECO display
7 Days
Remaining
8
.
0
°C
Target
7 Days
Remaining
Target
16
.
0
°C
This manual suits for next models
1
Table of contents
Other S+S Regeltechnik Thermostat manuals
S+S Regeltechnik
S+S Regeltechnik THERMASGARD RTM1-U LCD Repair manual

S+S Regeltechnik
S+S Regeltechnik THERMASGARD RTM1 User manual
S+S Regeltechnik
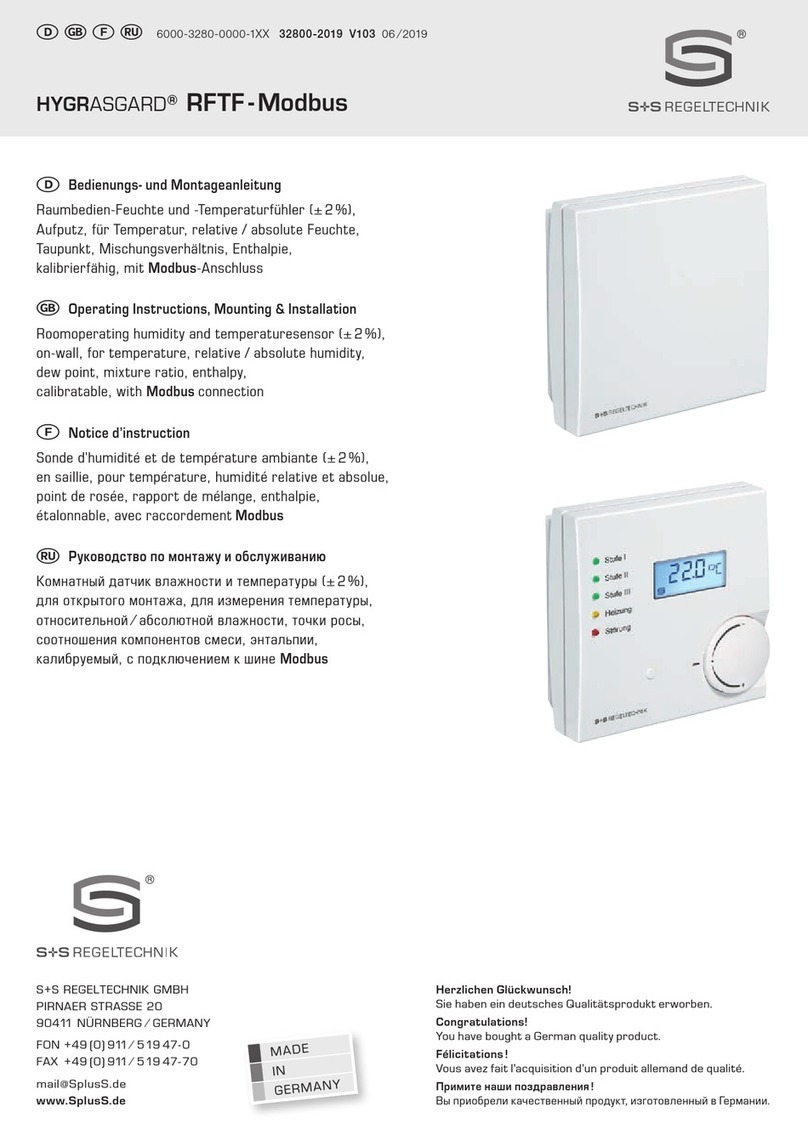
S+S Regeltechnik HYGRASGARD RFTF-Modbus Repair manual
S+S Regeltechnik
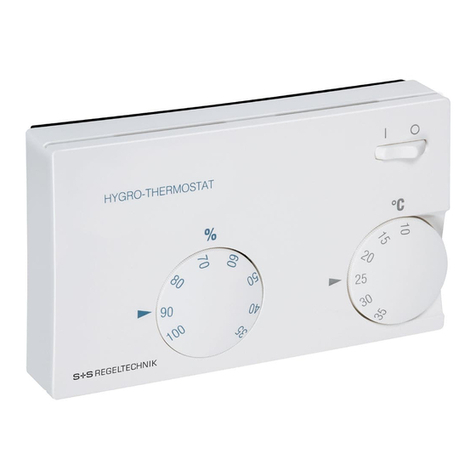
S+S Regeltechnik HYGRASREG RH-2 Repair manual

S+S Regeltechnik
S+S Regeltechnik HYGRASREG RH-2 Repair manual
S+S Regeltechnik
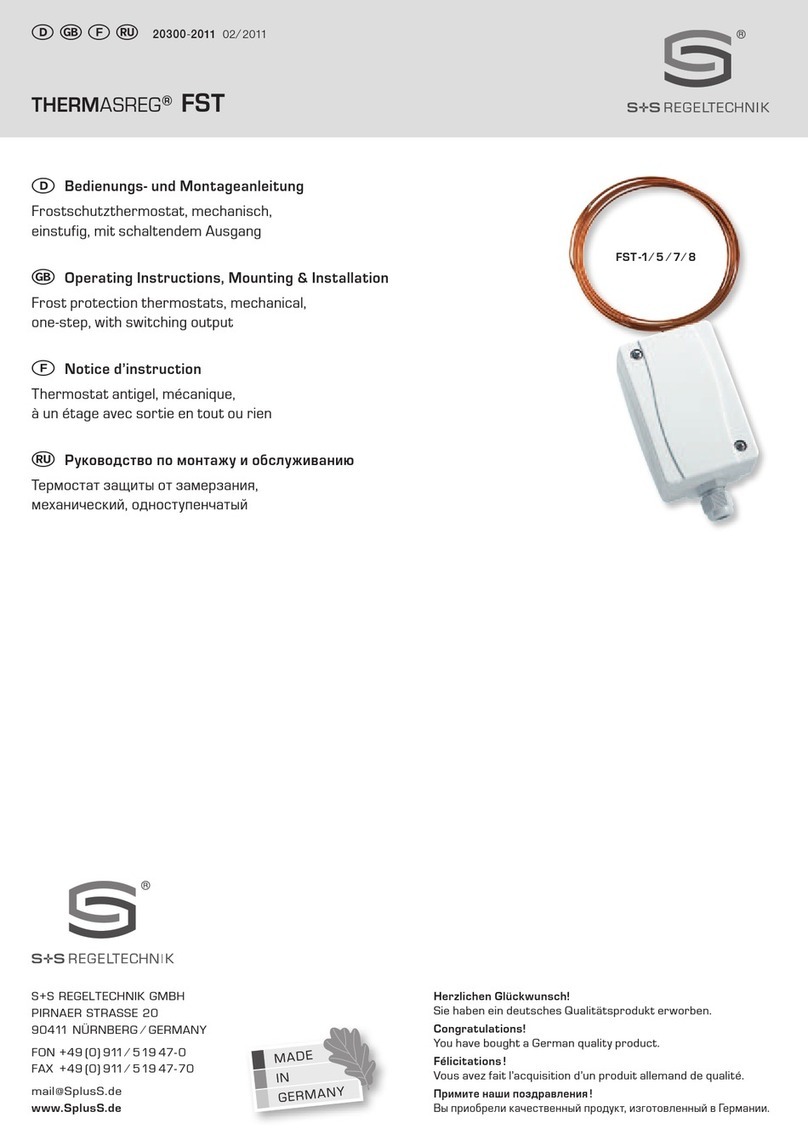
S+S Regeltechnik THERMASREG FST Repair manual
S+S Regeltechnik
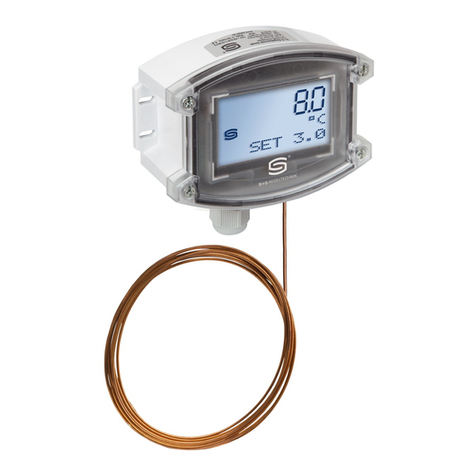
S+S Regeltechnik ThermAsreg FS-20 Repair manual
S+S Regeltechnik
S+S Regeltechnik FST-3 Repair manual
S+S Regeltechnik
S+S Regeltechnik RF 642 2-00 Series User manual
S+S Regeltechnik
S+S Regeltechnik RB 742 2-00 Series User manual
