Spruce PS-SPRWIFI16-01 User manual

Setup Guide
support.spruceirrigation.com
FCC Compliance Statement
This device complies with Part 15 of the FCC Rules. Operation is subject to the following two conditions: (1) this device may
not cause harmful interference, and (2) this device must accept any interference received, including interference that may
cause undesired operation.
Note: This equipment has been tested and found to comply with the limits for a Class B digital device, pursuant to part 15 of
the FCC Rules. These limits are designed to provide reasonable protection against harmful interference in a residential
installation. This equipment generates, uses, and can radiate radio frequency energy and, if not installed and used in
accordance with the instructions, may cause harmful interference to radio communications. However, there is no guarantee
that interference will not occur in a particular installation. If this equipment does cause harmful interference to
radio or television reception, which can be determined by turning the equipment off and on, the user is encouraged to try to
correct the interference by one or more of the following measures:
- Reorient or relocate the receiving antenna.
- Increase the separation between the equipment and receiver.
- Connect the equipment to an outlet on a circuit different from that to which the
receiver is connected.
- Consult an experienced radio/TV technician for help.
Changes or modifications to this product not authorized by Plaid Systems could void the electromagnetic compatibility and
wireless compliance and negate your authority to operate the product.
Canada Statement
This Class B digital apparatus complies with Canadian ICES-003. This device complies with Industry Canada license-
exempt RSS standard(s). Operation is subject to the following two conditions: (1) this device may not cause interference,
and (2) this device must accept any interference, including interference that may cause undesired operation of the device.
www.spruceirrigation.com/terms
© 2018 Plaid Systems
Spruce and the Spruce Logo are trademarks of
Plaid Systems. App guidance is for instructional
purposes only and may differ from actual
product. Subject to change without notice.
Spruce™ WiFi Smart Irrigation Controller 16
Model Number: PS-SPRWIFI16-01
Contains FCC IDs:
XFF-Z357PA20
COFWMNVM11

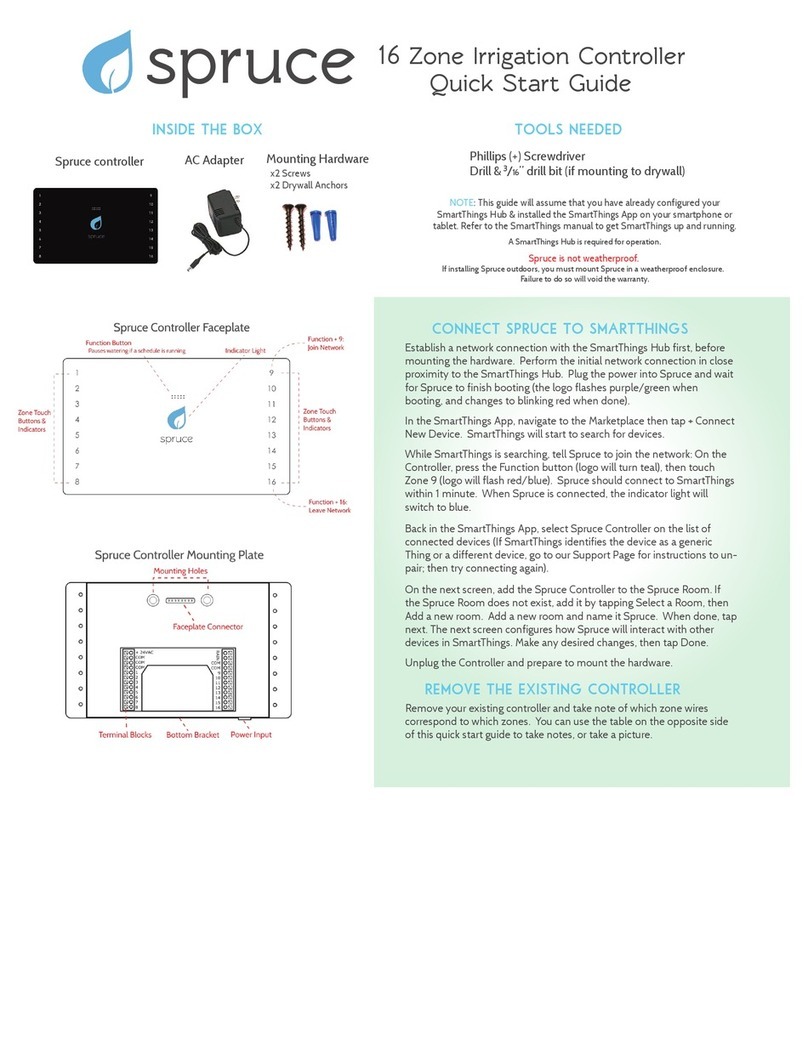
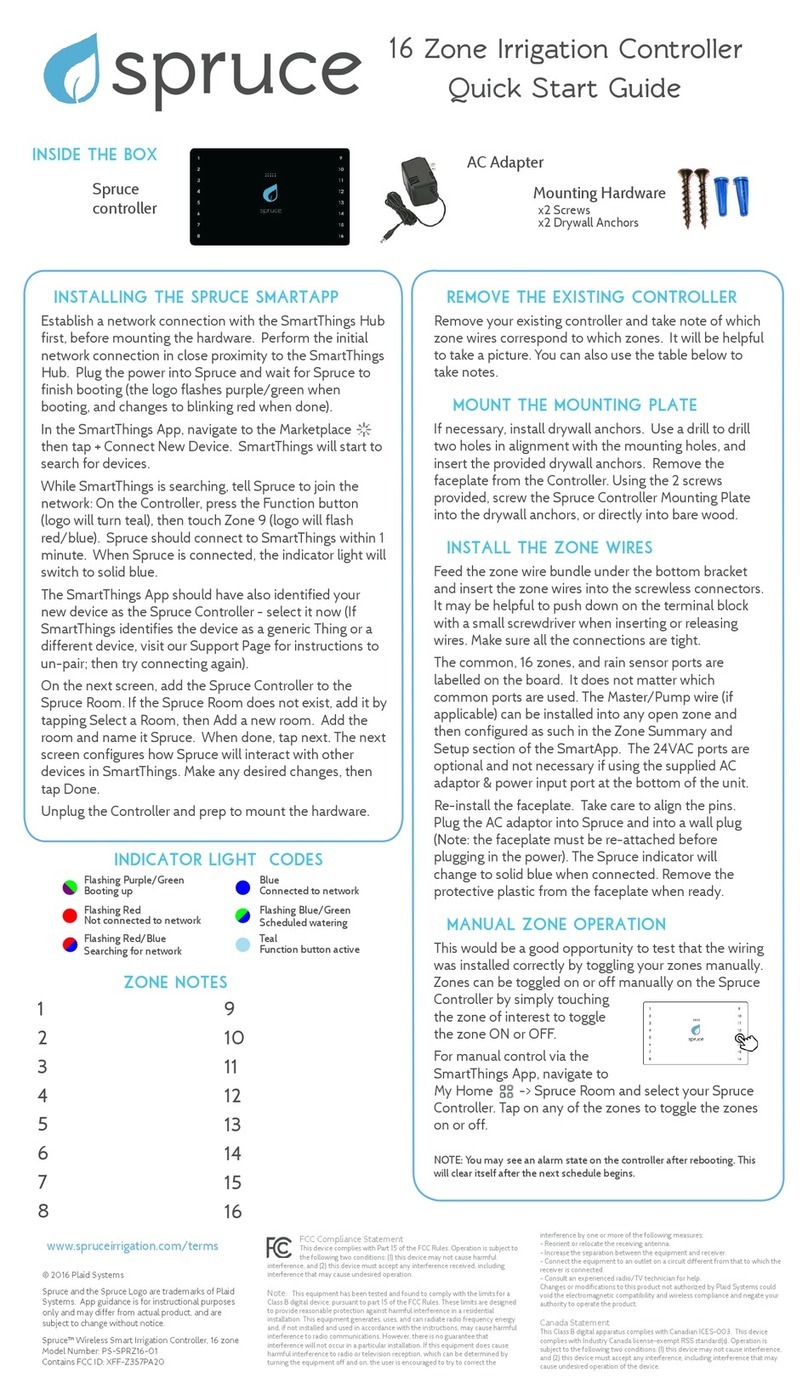
Inside the box
Download the Spruce Irrigation app
or go to app.spruceirrigation.com
Create an account
Prepare
2.4GHz Wi-Fi access point
(within range), Network ID
(SSID) and password
Phillips (+) Screwdriver
& 3/16” drill bit (if mount-
ing to drywall)
Mobile device, tablet or
computer
Then, create an
account and log in
Remove The Old Controller
Mount the Base
Install the Zone Wires
Test your existing system to ensure all valves work
before disconnecting.
Go to Power up & WIFI before proceeding to confirm
the final location is in range
Take a picture of the existing wiring. Take note of
which zone wires correspond to which zones.
Remove the faceplate from the Controller. If neces-
sary, install drywall anchors: drill holes in alignment
with the mounting holes, and insert the provided
drywall anchors.
Using the screws provided, screw the Spruce Control-
ler Base into the drywall anchors, or directly into bare
wood.
See next page for additional instructions.
Feed the zone wire bundle through the wire feed
through and insert each zone wire into a screwless
connector. Make sure all the connections are tight.
The Common ports are labeled with C, and the Master
or Pump Valve port is labeled with M.
24VAC and Common ports on the right side of the
controller are for external inputs only. Using these ports
to power the controller (instead of the supplied AC
adaptor) will void the warranty.

wire 1 M terminal
wire 2 common
red wire S1 or S2
black wire C below S2
wire 1 M terminal
wire 2 common
Pumps require a 24VAC pump
relay to switch on the
120/240VAC pump. Pumps are
typically used with a well and are
not used with city water.
Flow sensors are installed on the
main line close to the water
source. They measure GPM
(gallons per minute) to monitor
water use and detect leaks.
Master valves are installed on the
main line close to the water
source. They provide additional
insurance that no water is flowing
when the valves are off. They
open anytime another valve is
opened.
Pump
(optional)
Flow Sensor
(optional)
Master Valve
(optional)
M
Pump Relay
Water Source
City, well or pump
Wiring and valve instructions
Standard 24VAC valves are the only required component, all
other parts are oponal. Typical sprinkler wiring uses a single
common, or shared, wire for all valves, as shown below with the
gray wire.
wire 1 S1 or S2
wire 2 C below S2
wire 1 1-16 terminals
wire 2 common
wire 1 S1 or S2
wire 2 C below S2
wire 3 24V
wire 4 C below S2
Up to 16 valves can be inde-
pendently wired and controlled.
Each valve will control the water
to a specific irrigation zone. The
valves must be 24VAC and below
750 milliamps each.
2-wire rain sensors are used to
detect rain and will disable water-
ing when enabled. They will
slowly dry out after the rain stops
and eventually enable watering.
Wireless rain sensors are still wired to
the controller, but do not require wire
out to the sensor. Instead the signal is
transmitted wirelessly. The receiver
has 4 wires, 2 for power and 2 that
attach similar to a wired rain sensor.
Valves
Up to 16
Rain Sensor
(optional)
Wireless Rain
(optional)
1
2
Wireless
Sensor
Receiver
Right side terminals
S1, S2, C and 24V
are for sensor use

Power up & WIFI
6. At the end of the wizard, your controller should
now breathe blue
7. Verify the connection, you are now ready to setup
the system
3. Login to your Spruce account on your phone or
PC. If you do not have an account, register now.
Look for email notification.
4. Go to “Add Device” or the Devices page from the
upper left drop down menu. Select controller to
add a new controller
5. Follow the setup wizard to connect your system
to your WIFI network
1. Plug the barrel connector into the power port and
plug the transformer into the wall.
2. The Spruce logo will flash blue indicating it is not
connected to a network
+
App setup
The wizard will walk you through the following setup:
Controller Setup
1. Enabled Zones - These zones will show up for configura-
tion and in the manual control page. Only these zones
may be selected with the arrow keys on the controller.
2. Sensor inputs - Only set these if you have a sensor wired
directly to the S1 or S2 sensor terminals. Select Rain for a
rain sensor or Flow for a flow sensor.
3. Manual run time - This sets the automatic shutoff time for
a valve that is turned on from the physical controller but-
tons. This does not effect any control from the app.
4. Pump Delay - This sets the delay between valves turning
on in a schedule and will provide time for a water tank to
refill.
Weather Settings
5. Location - The location is detected automatically, and will
be used for weather adjustments and time including day
light saving. Dragging the pin will change the location.

Zone conguration
Go to Add Wireless Devices first if you have Spruce moisture sensors
Zone configuration is the first step in creating a water friendly schedule. These param-
eters will be used to calculate how much water each area of your yard needs. Then
using hyper-local weather, and calculating evapotranspiration, those watering times
will be adjusted on a daily basis
1. Go to “Device Settings” then “Zones”
2. Select each zone and choose the parameters that best represent the area that
will be watered. The parameters are described below:
Name - Give each zone a name that makes sense to you, if you plan to integrate
a voice assistant, keep the names unique and simple
Nozzle - Each nozzle has specific characteristics and watering rates and will
effect how long the calculated watering time will be
Soil - Different soils absorb water at different rates, this will effect how many
cycles each watering period is broken in to
Landscape - This will determine how much water is needed based on the crop
coefficient, each plant type has specific water needs and depletion rates
Sun - Water needs increase with more sun
Slope - On higher slopes, the watering times will be broken up into shorter
cycles to allow absorption instead of runoff
GPM - The value entered will replace the estimated value provided and will be
used to calculate how many gallons of water are used. An attached flow meter
will supersede both values.
A
Connected Schedule setup
Connected Schedule - This schedule uses the zone configurations to calculate a
water friendly schedule. The water times and days will adjust based on weather
and meet requirements for irrigation adequacy and efficiency.
3. Days - Set to “Allowed” and select all days that are permitted, the sys-
tem will adjust watering within the allowed days. Alternatively, “Always”
will water on each day except during rain delay.
4. Time - Specific time, or offset from Sunset or Sunrise
5. Weather - This sets the precipitation delay for the specific schedule
6. Zones - The zone parameters are calculated from the zone configuration.
Not all options listed will always be available. You may modify the val-
ues, but it may no longer meet the water efficiency requirements.
• Depth of watering - The targeted water time per day, effects how
many days per week based on weekly water time
• Weekly Watering time - Estimated water time per week
• Cycles - Splits each water application into shorter periods
• Climate Adjust - Adjust water times based on weather
• Rain Delay - Delay based on forecasted and received rainfall
Before setting up a connected schedule, complete the controller and zone configura-
tions, this will enable the system to calculate water times and provide a schedule.
1. Go to “Schedules” then select to add a new schedule
2. Select the schedule type and follow setup instructions below:
+
7. Save and enable the schedule

Other Schedule types
Basic Schedule - This is an automatic schedule with specific times on specific
days set by the user.
2. Enter specific times for each day
3. Time - Specific time, or offset from Sunset or Sunrise
4. Weather adjustments
• Climate Adjust - Adjust water times based on weather
• Rain Delay - Delay based on forecasted and received rainfall
• Rain Sensor - Delay when wired rain sensor is active
Manual Schedule - This is a schedule that must be initiated by the user.
2. Enter specific times for each day
Basic and manual schedules are similar schedules that use specific times entered.
The Basic schedule is an automatic schedule, while the Manual schedule can only be
started from the app or a 3rd party integration.
1. Go to “Schedules” then select to add a new schedule
+
Save and enable the schedule
Add Wireless Devices
The Spruce controller uses a mesh wireless network to
connect with Spruce Soil Moisture sensors and other
devices. The wireless protocol uses the 802.15.4 stand-
ard and can connect with specific Zigbee devices. Most
Zigbee plug-in outlets will connect and can be used to
extend the range of the sensor network. Additional
information can be found at:
support.spruceirrigation.com
1. Go to “Add Device” or the Devices page from the
upper left drop down menu. Select sensor to start
the wizard to add a new sensor or outlet
2. The controller will flash red indicating it is searching
for devices
3. Follow the instructions provided with the device to
initiate and complete the pairing process
4. The wizard will indicate when the device has been
added successfully. It is now ready for use in sched-
ules or analytics
+

Troubleshooting
No Power
• Remove all wires from the right side S1, S2, C, and 24V
terminal, if this resolves the issue, check the support
page for additional instruction on wiring sensors
• Remove the common wires from all C terminals, if this
resolves the issue, verify common and zone wire colors
at the valves and confirm they match at the controller
Trouble connecting to WIFI
• Hold down both arrow keys until the indicator flashes
rapid blue, power off and back on the controller. Turn
off WIFI on your device, then back on. Follow the con-
nection steps in Power up & WIFI
• Disable cellular data until the verify step
• Verify your WIFI password is correct, this must be the
2.4GHz password and may be different than your 5GHz
password.
Tip: entering the wrong password over and over again will not work
Addional help available at support.spruceirrigaon.com
No zones turn on
• Check the common wire is correct, try moving it to a new
terminal, normally it is not fully inserted in the terminal
• If you have a master valve or pump, check it is turning on
• Is the water turned on?
Specific zones don’t turn on
• Check zone wires match the specific zone, try swapping
zone wires and see if the issue moves or changes
• Check app Log for overcurrent message, this would indi-
cate a short or valve drawing too much current. This can
also be a result of manually turning on too many valves at
once.
Controller is offline
The app says Offline or the indicator breathes blue and red.
• Check again in 5 minutes to see if it has reconnected
• Check other devices are connected to WIFI
• Restart your controller and check if it immediately goes
online
• Check the WIFI strength indicator is between 0 & –65

Buttons, LEDS, Reset
Main System Status
Indicator
Toggling Zones with
Buttons
Enter Listen Mode or
Factory Reset
Zone Number
Illumination
Use arrows to select
zone number to activate
Circle will turn on and
off the selected zone
Hold down both arrow
buttons for 10 seconds
to initiate WIFI search
mode, indicator will flash
blue
Continuing to hold both
buttons for 20 seconds
will perform a factory
reset, and the indicator
will flash rapidly blue
Solid indicates zone
is active
Flashing indicates
zone is selected
Rapid Flashing indi-
cates zone is selected
and active
Indicator Manual Control Wi-Fi ResetZone LEDS
Breathing Blue
Connected to network, idle
Flashing Blue
Not connected to a
network, no WIFI creden-
tials stored
Flashing Red
Listening for devices to join
Breathing Green
Scheduled watering
Solid Green
Manual watering
Solid Yellow
Schedule paused
Specications
Features
16 Zone WiFi cloud connected irrigation controller with wireless
mesh network connectivity. EPA WaterSense® certied hyper-
local evapotranspiration weather adjust.
Accessibility Android, iPhone mobile apps & web-app
Valve terminals 16x Zones, AWG 14-22,
Additional Terminals 1x Master / Pump, 3x common
Wired Sensors 2x Rain or Flow Sensor, 24VAC output and common
Connectivity WiFi 2.4GHz 802.11 b/g/n, 802.15.4 (Zigbee HA compatible)
Mesh Specication 802.15.4, 2.4GHz wireless mesh. Connect 16 Spruce Soil Moisture
Sensors, also compatible with select Zigbee HA devices.
Valve Detection Monitors valve current for disconnects or over-current
Installation Indoors: -5F to 140F
Outdoors: non-condensing enclosure required, not to exceed
indoor temperature and humidity specs
Included 1 Amp 120/24VAC 60Hz power adapter, 4x mounting screws &
drywall inserts, quick start guide
Dimensions 6.5 x 6.5 x 1.4 in (165 x 165 x 35 mm)
Weight 0.75 lbs (340g)
Certication FCC, IC
Warranty 1 Year standard warranty
Table of contents
Other Spruce Controllers manuals
Popular Controllers manuals by other brands
Weathermatic
Weathermatic SmartLine owner's manual

Nos
Nos Launcher 15975NOS Installation and operation instructions
Antec controls
Antec controls VENTURI FX manual
HP
HP 9000 Series 300 owner's guide
ICM Controls
ICM Controls ICM326HN General Installation, Operation and Maintenance Instructions
WAREMA
WAREMA KNX secure Series installation instructions
