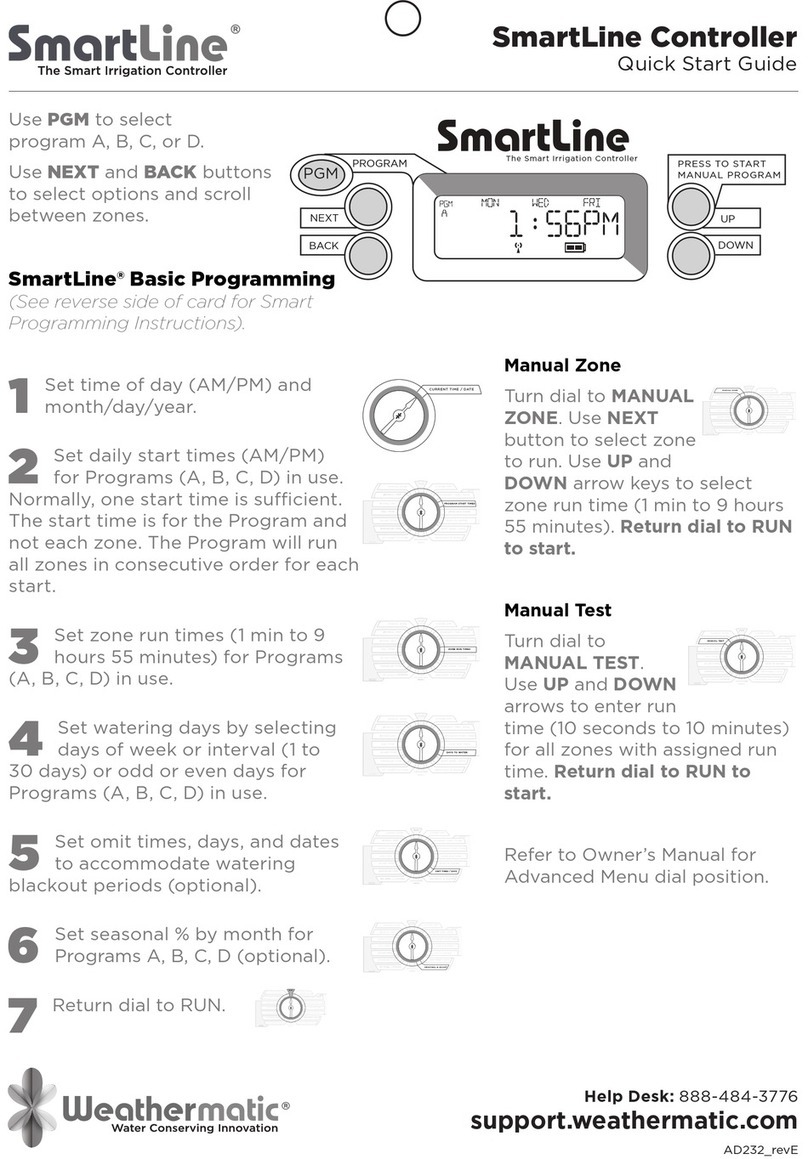
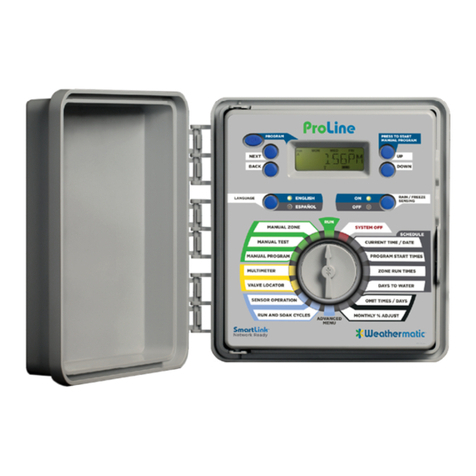
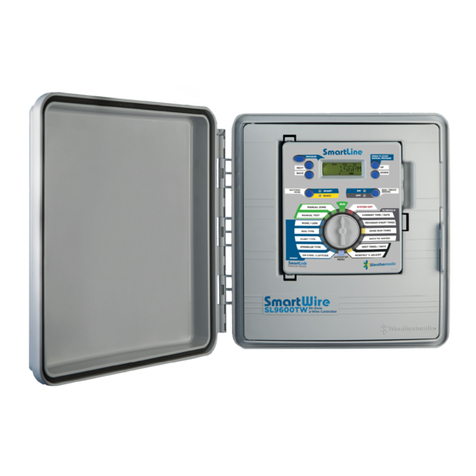
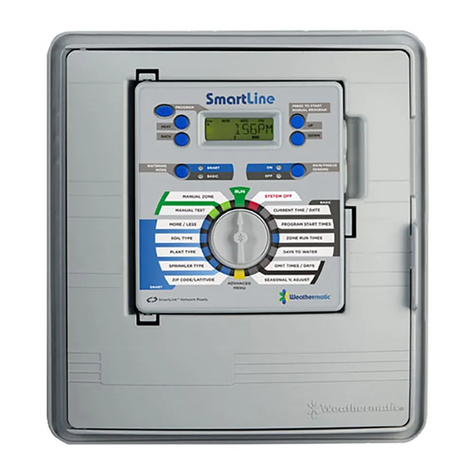
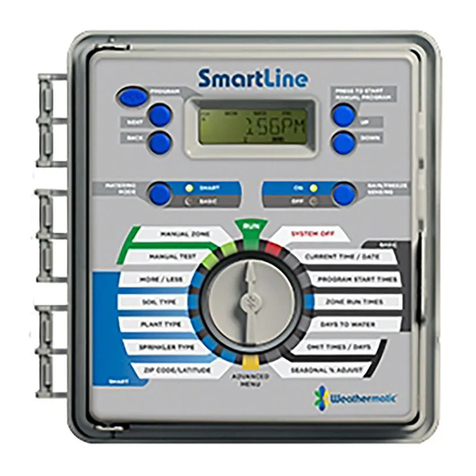
Weathermatic SmartLine User manual

SmartLine Controller Owner’s Manual (vG5)
Controller Program Template
Controller Basic Watering Schedule Template
Controller Smart Watering Schedule Template
1.0 Getting Acquainted With
YourSmartLine® Controller
SmartLine® is the smart choice for water conservation andbeautiful landscaping. The “get acquainted”
information in thissection will make programming your unit easier and faster.
1.1 Getting Acquainted With Your Control Panel
The SmartLine® Controller LCD Display provides the followinginformation when the controller is set to
RUN, SYSTEM OFF, orwhen there is no active watering operation underway (displaywith program in IDLE
mode):
SmartLine Owner’s Manual

Time of Day:
SmartLine® Controllers use a Real Time Clock/Calendar instead of a backup battery to
maintain correct timeduring a power outage. For the SL1600 and SL4800, the displaywill show a blank
battery icon in the display, this is used for viewing the RFS5 and SLW5 when testing the battery levels from
the ADVANCED MENU of the control panel.
Next Watering Day or Days:
The display will show the wateringdays in the current week for Program A. To
view watering daysfor Program B, C or D just press the PGM button.
Fault Indicator:
Appears ONLY when a fault is detected. Turn dialto Advanced Menu and press the DOWN
then NEXT button toview faults. Once you turn the dial to Advanced Menu the faultindicator will stop
ashing but will continue to appear on thescreen until the fault is removed or user clears fault in
AdvancedMenu. If fault is cleared in Advanced Menu, it will appear againthe next time the program runs if
the problem is not corrected.
No AC:Appears when there is no AC supply to the controller.
PGM Button:
The SmartLine® controller has4 watering programs (A, B, C, and D).Thisis like
having 4 controllers in one. You canassign zones to any of the 4
programs,allowing for complete exibility of your irrigation
schedule.Programs A, B, C, and D can be programmed
tooperateconcurrently. The display will alternately show all active running
programs when in use. Sprinkler zones should be assigned to Programs A, B
and C as Program D is intended for micro irrigation with low ow and long run times. Sprinkler zones should
be assigned to A, B, or C.
Care must be taken when programming. In order to not exceedyour irrigation system’s hydraulic capacity,
double check thestrength of your piping and points of connection. Exceeding thiscapacity could lead to
fault indications and interrupted irrigationschedules. The electrical capacity is limited, depending on
yourmodel. A pump start relay may require more mA than a solenoid.Keep aware of these boundaries
when scheduling programs toinitiate and operate simultaneously.
START MANUAL PROGRAM Button:
Pressto initiate a watering operation
when theprogramming dial is set to the RUN position.The SmartLine®
controller will run ProgramA. Or, you can push the PGM button beforeyou
push the START MANUAL PROGRAMbutton to select the program you want to
run. You can use theNEXT button to advance to other zones in a program that
youhave started. Start Manual Program will override any omits ordelays.
Display With Program Running:
When a
program is running, thescreen will display:
program thatis operating; zone number that isoperating; and run time
remaining.An ORANGE LED indicates program is in PAUSE mode waitingfor a
programmed delay in the controller to expire (run/soak,master valve delay, zone to zone delay, omit time).
The displaywill show the reason for the pause.
Display With Dial In SYSTEM OFFPosition:
When the SmartLine®controller
dial is in the SYSTEMOFF position, the processor andclock continue to operate
and allprogram values are retained in the non-volatile memory. In theSYSTEM

OFF position no automatic watering will occur. TheMode Selection LED will
display red when controller is turned toSYSTEM OFF.
If you move the dial to any position other than RUN or SYSTEMOFF, and there is no control panel activity for
1 hour, thecontroller will return to the RUN mode, and the display screenwill show the idle default screen
or will return to a program inprogress that was interrupted.
Watering Mode Button:
Usedto select SMART or BASICwatering.
During normaloperation the MODE LEDwill display GREEN. It will
change to ORANGE during a pause inoperation and will display RED
when SmartLine® controller dial isturned to SYSTEM OFF.
Rain/Freeze Sensing Button:
Used to activate or bypassoptional
sensors for rain,freeze, or wind. If thesesensors are connected to your
SmartLine® controller, they willoverride watering operations if the ON
LED is selected. If yoursensor/s have paused your system operation, the ON LED willbe RED until the
sensors allow watering to resume. In the eventof a “rain” pause, the LED will change from RED to
ORANGEfor an additional pause time before the LED displays GREENand system operation resumes. Smart
Watering decits willdecrement to 0 at the rate of 1″ per hour. The sensor LED willdisplay GREEN again
when the sensor/s are no longer pausingyour system operation.
Note:
No watering will take place when the RAIN/FREEZE SENSING LED is RED. This indicates aRain,
Freeze or other type sensor has tripped,and programs are prevented from running. AnORANGE
MODE LED means watering is pausedtemporarily due to: run/soak, master valve delay, zone tozone
delay, or omit time. A program in operation will alsopause if you turn the dial to any position other
than RUN orSYSTEM OFF. The program in operation will resume whenyou return the dial to RUN or
if there is no programmingactivity for 60 minutes.
Note
: The SLW Delay dryout period is factory set for 48 hours.To change the delay period, see SLW
in Advanced Menu.
If you wish to deactivatethe sensors, use the RAIN/FREEZE SENSING buttonto light the green OFFLED.
Example: You wishto water after fertilizingand your rain sensor is stillpausing the watering program. As
long as the OFF LED is on,the sensors will not pause your system operation.Note: You may have zones you
want to omit from rain/freezeshutdown. Example: Potted plants under cover. If you areusing an SLW
Weather Sensor or the RFS5 rain/freeze sensorcommunicating with your controller through an SLHUB,
seeSLW in Advanced Menu for instructions. If you are using a rain/freeze sensor connected to your
controller at the SEN terminals,see SENSOR in Advanced Menu for instructions.
Note:
The RAIN/FREEZE SENSINGbutton can be usedto bypass rain andfreeze sensors.
1.2 Quick-View

With the dial in the RUN or OFF position and FLOW is enabled through SmartLink Network, press the down
button once to reveal REAL-TIME FLOW. It will display the current ow rate from active running zone valve(s)
or mainline activities such as Quick Coupler Valves or Hose Bibs through the LEAK DETECT function.
2.0 Programming the Controller
Your SmartLine® controller has two operating modes: BASIC mode or Weathermatic’s patented SMART
mode. The BASICmode uses user assigned zone run times. The SMART modeoverrides user assigned zone
run times and calculates zonerun times based on the location of the site, inputs by zone, andweather
readings from the SLW Weather Sensor. Note: SMARTrequires the optional SLW Weather Sensor.
Smart watering calculates ET (evapotranspiration), thelandscape’s daily water loss, and schedules the
correct amountof irrigation to replace the loss. When combined with aWeathermatic SLW Weather Sensor,
Smart mode gives you thepower to reduce water waste. Many water districts are oeringrebates for Smart
mode users. Check with your local district.
Both the BASIC mode and SMART mode operate based on theuser’s programmed start times, watering
days, omit times/days,and several Advanced Menu features (rain delay, zone to zonedelay, and master
valve settings).
Important Note: Zone run times must be entered for every zonein use for the controller to recognize the
zone in either BASIC orSMART modes.
2.1 Using the Programming Buttons
A FLASHING DISPLAY indicates that user choices are available.The UP and DOWN Adjust Value buttons are
used to scrollthrough numeric values or to make a choice of menu options.
NEXT and BACK Buttons:
When watering zonesare being programmed, the left side of thedisplay will
indicate the zone number. The NEXTand BACK buttons are used to scroll throughthe zones. If the ashing
display indicates amenu selection rather than a numeric value,the NEXT button will open the menu for
furtherprogramming. The BACK button will exit the menu and causethe chosen value to be saved in
memory.

RAPID ADVANCE:
While programming, holdingdown the UP or DOWN button will cause theashing display
value to rapidly advance. Rapidadvance can also be used with the NEXT andBACK buttons to rapidly
advance throughzones.
MENUS WITHIN MENUS:
In cases where there are menus withinmenus, each press of the BACK button will
return to the nexthigher menu until the top level menu of the dial position isreached.
A VALUE CHANGE:
Saves after 30 sec of inactivity or dialposition changed to RUN or OFF.
2.2 Current Time/Date
Use UP and DOWN buttons to changethe ashing value for
the hour.Scrolling past 12 will automatically change
AM/PM. Remember holdingdown the UP or DOWN button
will rapidly advance through theashing menu.
Use NEXT button to ash minutes. Use UP and DOWN
buttonsto set minutes. Push NEXT to access calendar
setting. UseUP and DOWN buttons to set month/day/year.
(Note: Forinternational users, the display will read
day/month/year.)Your SmartLine® controller has a 100-year calendar, so whenyou have entered the
correct date, the SmartLine® controllerwill automatically display the correct day of the week.
YourSmartLine® controller will automatically adjust for leap years andUSA daylight savings time. See DS
TIME, in Advanced Menu toto turn the feature on/o and change the DST schedule.
2.3 Program Start Times
Set Start Time for each program tobe used (A, B, C and D).
If more thanthree program start times are desired,refer to
NUM STRT, in Advanced Menu.The program will start at the
time youdesignate and will water all zones withset Zone
Run Times for that program.
For most watering programs set only Start Time #1. The#1
Time will water all zones with Zone Run Times setin that
program in consecutive order. Extra start timeswill re-run
all zones. Extra start times may be used fornew planting grow-in or other special local conditions.Unused
start times must be set in the OFF position. Toset a start time at OFF, press on either UP or DOWNbutton
until you reach the OFF position located between11:50 PM and Midnight.

When setting program start times, check the program iconin the display to see whether you are working in
A, B, C or D.Use PGM button to move between programs. Use NEXT andBACK buttons to move between
start times. Use UP and DOWNbuttons to set each start time desired. Start times are selectable
in 10-minute increments.
Push PGM button to assign zone time in one or more programs.Care has to be taken when programming.
You need to haveawareness of the hydraulic capacity of the irrigation systempiping and points of
connection so that they are not exceeded.Further care should be taken so the electrical capacity of
thecontroller is not exceeded. The electrical capacity is 750 mAor 3 irrigation solenoids. A pump start relay
may require moremA than a solenoid. Keep aware of these boundaries whenscheduling stations to initiate
and operate simultaneously.
Note
: Be sure you select the AM/PM time as desired byscrolling past 12. (For international users, the
display will showinternational hours instead of AM/PM.)
2.4 Zone Run Times
Your SmartLine® controller will displayremaining hours,
minutes and secondswhen a zone is watering. However,
inthis position you are only required toset minutes (or
hours and minutes)for each zone as desired for
operationtime. Seconds are not selectable.
Use NEXT and BACK buttons to select zone for run
timesetting. All zones are selectable from 1 minute to 9
hours and 55minutes. Run times of OFF to 59 minutes are
selectable in oneminute increments. Run times of 1 hour to 9 hours 55 minutesare selectable in 5-minute
increments. Use UP or DOWN buttonsto set ashing time values for each zone. If a zone is not to beused,
set it to OFF.Caution: If an unused zone is turned on and activates a pumpstart relay, the pump may
overheat or cause a pipe to burst. Toprevent operating a pump with no ow (dead heading), makesure all
unused zones are set to OFF.
Note
: Run/Soak feature can reduce the need to setmultiple start times for the purpose of
preventingruno. Using the combination of multiple starttimes and Run/Soak cycles can lead to
extendedwatering windows since Run/Soak cycles are applied to eachstart time. See Soil Type, page
9 section 4.2.3.
2.5 Days to Water
In this dial position you can select DAYS, EVEN, ODD and
INTERVAL watering schedules. Use UP and DOWN buttons
to select which type of schedule youwant in your
SmartLine® controller.Remember to check the
Program(PGM) selection showing in the display. You can

select adierent watering schedule for each program if you
wish.
If you select DAYS, then use the NEXT button to step
througheach day of the week and the UP and DOWN
buttons to selectON or OFF status for each day. Days
selected to water will bedisplayed at the top of the display.
If you select an INTERVAL schedule, push NEXT button.The
ashing number indicates the day interval for
watering.SmartLine® controller will allow an interval of 1 (every day) to 30(water once every 30 days). After
you have selected the intervalyou want, push NEXT to set the day you want the intervalschedule to start
on. Use UP and DOWN buttons to select startday at top of display. The controller will begin on the
nextupcoming start day.
Note
: The display will only show the upcoming watering days for the current week.
To select EVEN or ODD watering days, simply press the UP or the DOWN button when viewing the panel
option DAYS TO WATER. If ODD is ashing on the display whenyou turn the dial to another position, you
have selected ODD.The same is true for EVEN. When you return the dial to RUN,you can view the next day
that your schedule will run. TheSmartLine® Controller will run ODD or EVEN programming atthe next
available start time, even if it is on the same day thatyou set up the schedule. If you are using an ODD
schedule, theSmartLine® controller will not water on the 31st day of a monthand February 29th of a leap
year to prevent two consecutivewatering days (31st and 1st or 29th and 1st).
2.6 Omit Times/Days/Dates (Optional)
The omit settings are used to seta watering blackout
period. Forexample, if you live in a municipalitythat
restricts outdoor wateringbetween 10:00 am and 6:00
pm,you can blackout that time period.If a watering
program in progressis paused for a blackout period, the
ORANGE LED will displayduring the pause. The watering
cycle will automatically resumeat the end of the blackout
period. Use the UP and DOWNbuttons to select OMIT:TIME,
OMIT:DAYS, and OMIT:DATES. Youmay choose any or all of these omit options.
If you want a watering blackout for the same period eachday, select OMIT:TIME. Then push NEXT. A forward
(>) arrowindicates the beginning time for the blackout. Use UP andDOWN buttons to set beginning time.
Then push NEXT. Areverse arrow (<) indicates the end time for the blackout. UseUP and DOWN buttons to
set ending time. The OMIT:TIMEfunction will pause any active watering program until theblackout period
has expired.
If you want to omit a specic day or days each week fromwatering schedules, select OMIT:DAYS with the UP
and DOWNbuttons. Then push NEXT. Display will show a day of the weekwith Omit or Allow ashing. Use
UP and DOWN buttons toselect Omit or Allow. Use NEXT or BACK to scroll betweendays of the week.
Omitted days will be visible at the top of thedisplay. Any running user program will be stopped at
midnightin order to honor omit days or dates. Programs scheduled tostart on an omit day will be skipped.

If you want to omit specic dates during the year, select OMIT:DATES. Then push NEXT. Enter the month
and date. Push NEXTto enter up to 15 dates. Scrolling the month value between 12and 1 causes mm/dd to
appear and clears the omitted date/s.Any running user program will be stopped at midnight in order
to honor omit days or dates.
2.7 Monthly % Adjust (Optional)
The Monthly % Adjust feature allowsthe user to modify
zone run timesby program for each month to easilyadjust
watering for seasonal climatechanges. The time
programmed foreach zone in ZONE RUN TIMES isalways
the value for the 100% settingin Monthly % Adjust. When
you use the Monthly % Adjust, youare increasing or
decreasing the 100% time value. % settings inthis mode are
0 to 300% in 5% increments. Use UP and DOWNbuttons to
select % desired. Press PGM to choose program. A0% setting will adjust zones to a zero second runtime.
PROGRAMMING IS COMPLETE FOR BASIC OPERATION.RETURN THE DIAL TO THE RUN POSITION.
Note
: When the SmartLine®controller is in SMART mode thisfeature is voided. SMART mode
willchange zone watering times daily.
3.0 Manual Start Functions
The SmartLine® controller has two dial positions for manualsystem starts:
3.1 Manual Zone
Manual Zone allows user to water asingle zone for
specied period of time.Use NEXT and BACK buttons to
selectzone. Use UP and DOWN to selectrun time for the
zone. A zone can beoperated with the Manual Zone
functionregardless of whether the zone has an assigned
run time. Youmust return dial to RUN for Manual Zone
operation to begin. Allmanual watering operations will
override watering day settings,omit settings, and
rain/freeze events.
3.2 Manual Test
The Manual Test can be used to seta test run time for all
zones whichhave an assigned zone run time inany
program. Any zone without anassigned zone run time will
NOT runin the Manual Test. Use UP and DOWNbuttons to
set Manual Test run time.The Manual Test can be set to run
a minimum of 10 seconds or amaximum of 10 minutes.

You must return dial to RUN for ManualTest operation to
begin.
Manual Test will detect open circuits (less than 30 mA draw)
onany used zone or a short on any output (master valve or
zone). Ifthe display indicates FAULT while running a Manual
Test, refer toAdvanced Menu to identify the FAULT.
4.0 Programming for
Smart Watering Mode
Weathermatic’s patented SMART mode overrides user-assignedzone run times and calculates zone run
times based on thelocation of the site, inputs by zone, and weather readingsfrom the SLW Series On-Site
Weather Sensor. SMART mode isdesigned to help you protect your landscaping, reduce wastefulrun-o,
and minimize your water costs.
Warning: Smart mode positions on the dial canonly be selected when an optional SLW SeriesOn-Site
Weather Sensor accessory is installed.Additionally, Basic Program Function must beset up completely
before setting up SMART mode. SMARTMode replaces the Zone Run Times with a calculated valueusing the
SMART settings.
4.1 Set ZIP Code or Latitude
SMART operation rst requires thatthe SmartLine®
Controller know “wherein the world” it is located. Users in
theUSA can set location by ZIP Code.Users outside of the
USA can setlocation by latitude. Use UP and DOWN buttons
to select ZIPCode (USA) or LATITUDE. To nd your latitude,
see WorldLatitudes in the Reference section.
If you are setting a ZIP Code, push NEXT. Display will show
5numerical positions for ZIP Code settings. Use UP and
DOWNbuttons to set the ashing number. Then push NEXT to ash thenext number. Use UP and DOWN
buttons to set second number.Continue process until all 5 numbers of your ZIP Code are set.
If you are outside the USA, you will enter LATITUDE. You canuse the UP and DOWN buttons to choose any
latitude between60 degrees south and 60 degrees north. 0 degrees setting ismarked as EQUATOR.
Find your Latitude/Longitude
4.2 Enter Smart Data for Zones
Enter SMART data for zones: Sprinkler Type, Plant Type, SoilType, and MORE/LESS. The SmartLine®
controller cannotcalculate run times without SMART data for each zone andwithout Zone Run Times
assigned to each operational zone,which serve to back up SMART mode.
4.2.1 Sprinkler Type

In order to calculate run time, the controller must know
theexpected precipitation rate for eachzone. Use NEXT
and BACK buttonsto move between zones. Use UP
andDOWN buttons to set zone to OFF or to
specify the precipitation rate.
Precipitation
rate can be
entered
twoways: by sprinkler type or by specicprecipitation rate. If
youdo not know the specicprecipitation rate forthe zone,
you can selectthe sprinkler type, orwatering equipmentused
on that zone: Spray,Rotor, Drip, or Bubblerirrigation. The
SmartLine®controller will apply adefault precipitation rate for
the sprinkler type selected. If youknow the specic
precipitation rate expected for the zone,stated by the sprinkler manufacturer, you can use the UP
andDOWN buttons to scroll past the sprinkler types and select thatnumber. For USA users, inches per hour
will be displayed (.2 to3.0 inches per hour). Numeric precipitation rate resolution is0.01 in/hr below the 2.0
in/hr setting. For international users, thecontroller will display precipitation numbers in centimeters
perhour. As a rule in SMART mode, the lower the precipitation rateentered, the longer the zone run time
will be to achieve requiredplant life needs. For zones selected to use set Zone Run Timesrather than
SMART run times, select STD setting Sprinkler Type.Program features and operations are supported with
STD zones, including Run/Soak, and STD zones may run within SMARTprograms or separately.
4.2.2 Plant Type for Zones
This position is used to specify thetype of plant material to
be watered byeach zone as an important componentof
determining the watering needsfor each zone. Use the UP
and DOWNbuttons to select plant type or percentfor each
zone. Press NEXT and BACKbuttons to access each zone.
Plant type selections are:
CTurf(cool turf like
bluegrass); WTurf(warm
turf like St. Augustine);Shrubs; Annuals (oral beds); Trees;and Native
plants. The SmartLine®controller formula uses cool turfmowed at 4 to 6
inches tall as thebase watering number (100%) orcrop factor. The cool turf
default is80% considering average mowingheights of 2 to 3 inches, which
resultin less transpiration and lower waterrequirements. If you prefer
more specic input, you can scrollpast the plant types and use %
designations of 10 to 300%. For
example, a Native plant zone might be assigned 30% rather thedefault of
25%. As a rule in SMART mode, the higher the planttype percentage entered, the longer the zone run time
will be toachieve required plant life needs.
For maximum water savings, it is recommended that yoursprinkler system be zoned with a separate valve
for each typeof plant material. If you have mixed types of plants in a singlezone, you will need to select
which type of plant to use in thedetermination of water requirements.

4.2.3 Soil Type for Zones
Soil settings for soil type and degree of slope are used
toenable your SmartLine® controller to automatically
calculatethe maximum length of a zone runtime before
pausing watering for acalculated period to allow the
waterto soak into the soil. These Run/Soak(also called
Cycle/Soak) periods basedon industry BASIC formulas
reducewasteful runo caused by wateringmore than the
soil can absorb. TheRun/Soak feature included inAdvanced
Menu can be manuallyentered for use with the
BASICmode. However, in the SMARTmode, the SmartLine® controllerwill automatically calculate Run/Soak
times with soil inputs madeat the soil type position on thedial. Run/Soak settings made inAdvanced Menu
are not activewhen controller is in SMARTsoak schedules can be viewedby selecting Advanced
Menu,Review and Run/Soak.
Use the UP and DOWN buttonsto select Clay, Loam or Sandysoil type
for each zone. After you have selected a soil type fora zone, push NEXT
button to advance to the next zone. Slopefor each zone can also be set
in the Soil Type menu. From theSoil Type menu, use the UP and DOWN
buttons to select Slope.Using the NEXT button select the degrees of
slope (elevationchange) for each zone. Set each zone for 0 to 25
degrees ofslope based on the chart provided.
Use NEXT button to move between zones.
Note
: Factorydefault settingsare clay soiland zero slope.
4.2.4 More/Less (optional)
Note
: Run/Soak period can reduce the need toset
multiple start times for purpose of preventing runo.
Using the combination of multiple starttimes and
Run/Soak cycles can lead to extendedwatering
windows since Run/Soak cycles are applied toeach
start time.
When your SmartLine® controller is setin SMART mode, the
Seasonal% Adjustin the BASIC mode is inactivated sincethe
automatic adjustments are madedaily rather than monthly.
You can useMORE/LESS to ne tune the run timecalculation by
zone in the SmartLine®controller by –50 to +25%.

Use UP and DOWNbuttons to select %adjustment. Use
NEXTand BACK buttons tomove between zones.
This feature can beuseful to reduce run timeadjustments for
shadyand partially shaded zones. The table provided may be
used forgeneral shade guidelines. Other factors may result in
needingto use MORE/LESS for ne tune adjustments including
sprinklereciency, zone eciency, and wind. Sprinkler
eciency variesbetween types of sprinklers and the manufacturer’s design. Zoneeciency varies based on
the design layout of sprinklers in azone, sometimes overlapping or sometimes not. High winds can
serve to dry out plant and soil to increase the need for water.For optimum results considering the many
unique variables ineach zone, users should periodically monitor plant life health andwater usage,
especially after initial controller setup, so properadjustments can be made.
THIS COMPLETES PROGRAMMING FOR SMART WATERING.RETURN THE DIAL TO THE RUN POSITION.
4.2.5 Activating the SLW Series On-Site Weather Sensor
SLW5 wireless and SLW1 wired weather stations bothcommunicate with the
controller via anSLHUB transceiver. Install the SLHUB byinserting the pins of
the HUB into theconnector located at the top right of thecontroller cabinet.
On the SLW WeatherSensor, press and hold down the RainSense test tab in
the center of the rainsensor for 15 seconds.
4.2.6 WATERI G MODE Button
Press the WATERINGMODE button onthe
control panel toplace the
SmartLine®controller in the SMART mode. A GREEN LED on the
SMARTposition will conrm that you have communicated with the SLWWeather Sensor. If there is no SLW
Weather Sensor installed orZIP Code or Latitude or time/date setting and at least one zonewith a sprinkler
type set, pressing the WATERING MODE buttonwill ash the SMART LED to RED and then return to the
BASICmode. When this occurs, you can press the MODE button to seea scrolling message indicating the
reason SMART mode is notavailable.
5.0 Advanced Menu
Advanced Menu provides additionalinformation and allows
more technicalinputs commonly used by
professionalinstallers. Advanced Menu contains
menuswithin menus. To advance to a sub-menu,press the
NEXT button. Each press of theBACK button will return you
to a higherlevel until the top level of the AdvancedMenu
dial position is reached.
Refer to the chart below for the location of features within
the menus.

5.1 TESTS
Your SmartLine® controller can assist you with several diagnosticfunctions by pressing NEXT when TESTS
appears.
5.1.1 OUTPUTS
Use the UP to select OUTPUTS function.Then use NEXT and BACK buttons
toscroll through MV and Zone Valves toview AC Amp reading for each
valve.Scroll BACK to OUTPUTS display tomove to next diagnostic
function.Typical range is .15 to .35 Amps pervalve with a valve connected.
An OPENor SHORT message indicates a problem with a zone. Note: If
youhave more than one valve on a zone, the SmartLine® controller
willmeasure total current for the combined valves.
5.1.3 24V PWR
Use the UP button to select 24V PWR. Push Next button once toread output voltage for the transformer.
Normal reading is 24 to30 volts AC.

5.1.4 LOCATOR
This feature will create a “chatter” for a selected valve as aconvenient method of locating buried valves. Use
NEXT button toscroll to the valve you want to “chatter.”
Note
: In order for the locator feature to work, youwill need to turn o the system water pressure
atthe manual cut-o valve or water meter. Pressuremust be o while attempting to “chatter” a
valve. The SmartLine® controller will automatically sequence "chatter"to each valve including the
master valve(s).
5.2 FAULTS
This feature is used to identify problems that may require attentionor repair to insure proper operation of
the system. Use NEXTbutton to view the type of fault. If more than one fault exists, youcan use the UP and
DOWN buttons to search for additional faults.Use the NEXT button to view the type of fault. If more than
onefault exists, you can use the UP and DOWN buttons to search foradditional faults. Use the NEXT button
on the fault descriptioncurrently displayed and the screen will read CLEAR, press theNEXT button to CLEAR
the fault and the fault icon on the displaywill disappear. However, if the cause of the fault is not
corrected,the controller will continue to skip watering a zone with a faultand will resume the ashing
FAULT icon on the display each timethat zone is operated. If additional faults are present repeat the
procedure to remove them from the panel. Once the faults havebeen cleared the screen will read, no faults
present. However, ifthe cause of the fault is not corrected, the controller will continueto skip watering a
zone with a fault and will resume the ashingFAULT icon on the display each time that zone is operated.
Faults
5.3 OPEN CIRCUIT FAULT
This is a user selectable feature that sends a fault message for zones that detect no electrical load. From the
ADVANCED MENU dial position press the UP button until the “OPEN FLT” menu is displayed. Press the NEXT
button to enter the menu and the UP or DOWN buttons to select on or o for the alert.
5.4 LANGUAGE
English, Espanol (Spanish), Italiano (Italian), Portuguese, or Francais (French) may be selected.
5.5 UNITS
This setting allows for you to choose either STANDARD (United States customary units) or METRIC. Press the
BACK button when the display reads your desired selection.
FAULT: ZONE XX INSUFFICIENT WATERING OPPORTUNITY
FAULT: REMOTE BATTERY FAILURE
FAULT: NO RECENT CONTACT WITH WEATHER SENSOR
FAULT: ZONE XX OPEN, MV1 OPEN, MV2 OPEN
FAULT: ZONE XX SHORT, MV1 SHORT, MV2 SHORT

Step 1
: Set up your long-term SMART or BASIC watering program.
Step 2
: Go to Advanced Menu and select DEFAULT. Press NEXT and STORE will appear on the display.
Press the NEXT button and the screen will display CONFIRM, press the NEXT button once more and
within a few seconds the display will read COMPLETE to conrm that you have successfully stored
your program.
Step 3
: Set up your temporary Grow-In program.
Step 4
: Go to Advanced Menu and select GROW IN. Press NEXT once to view default days for grow in.
Use UP and DOWN buttons to select 1 to 99 days for the grow in period. At the end of your grow in,
the controller will automatically retrieve the long-term program stored in Step 2. Return dial to Run.
5.8 ABOUT
Provides information on software version in the SmartLine® controller.
5.8.1 MODEL Displays the model name of the controller.
5.8.2 VERSION Displays current version of the controller’s software.
5.8.3 BUILD Displays current build version of the controller.
5.8.4 SER NUM Displays the controller’s serial number.
5.8.5 HW
VERSION Displays the hardware version of the controller.
5.8.6 NUM
ZONES Displays the maximum number of zones that can be created.
5.8.7 EEPROM Displays the amount of EEPROM available in bytes.
5.8.8 SLHUB VER Displays the version of the RFS weather sensor. NI is show if this is not
installed.
5.8.9 SLHUB
BLD
Displays the build version of the RFS weather sensor. NI is show if this is not
installed.
5.8.10 SLAC B
VER Displays the version of the aircard. NI is show if this is not installed.
5.8.11 SLAC B
BLD Displays the build version of the aircard. NI is show if this is not installed.
5.8.12 Z96 TYPE Displays the decoder manager type if SmartWire equipped.
5.8.13 Z96 VERS The display reads Z96 VERS here.
5.9 MODBUS

5.9.1
SHORT ADD
This displays a static address along with a user programmable address to integrate
with third party software.
5.10 CLR ALL
This feature is similar to CLR PGM except that it clears all user programmed data for all four programs and
returns most Advanced Menu changes to factory defaults. Turn the dial to Advanced Menu and use and use
the UP button to navigate to CLR ALL. Press the NEXT button and the screen will display CONFIRM. Press the
NEXT button once more and the display will show CLEARING when nished to conrm that all programs
have been cleared.
5.11 CLR PGM
This feature allows the user to clear all programmed values specic to a selected program. All zone run
times and daily start times will be set to OFF; watering days will default to Days of the Week (all on); Season
% will equal 100% for all months and Run/Soak will be OFF. Omit times/days are not reset when clearing a
program.
Turn the dial to Advanced Menu and use the UP button to navigate to CLR PGM. Press the NEXT button and
the display will read CONFIRM. Use the PGM button to select the program (A, B, C or D) to be cleared. Press
the NEXT button and when the selected program has been cleared from the panel the display will read
COMPLETE. Repeat these steps to clear each individual program to be reset.
5.12 CON PGM
Programs will prioritize in the order of Programs Start Times, unless they are all set to start at the same
time. In this example the priority would be pgm D, and then A, B and C. Program D is set to the highest
priority
5.13 NC/NO MV
Enter this menu to select between normally open or normally closed master valves for MV1 and MV2. Check
with your valve manufacturer on the Model that has been installed to ensure the correct selection has been
made. Maybe we should dene the MV Types as; Normally Closed Master Valve requires the controller to
send a 24VAC signal to activate the solenoid and open the valve to deliver water downstream to the zone
valves. A Normally Open Master Valve will remain open at all times on the system without requiring a 24VAC
signal to allow access to water in the mainline for Quick Coupler Valves or Hose Bibs connected throughout
the system.
5.14 MV/ZONE
This feature allows you to select which master valve(s) to be assigned for each zone operation. The default is
MV1. The other options are MV2, BOTH, OFF.
Caution: If an unused zone is turned on and activates a pump start relay, the pump may overheat or cause a
pipe to burst. To prevent operating a pump with no ow (dead heading), make sure all unused zones are set
to OFF.
5.15 MV/ZN DLY
This function allows the user to set a delay time between the opening of the master valve and the opening
of the rst zone valve as well as a delay between the closing of the last zone valve and the closing of the

master valve.
Use the NEXT button to enter menu. Select setting for the ON Delay or OFF Delay by pressing NEXT. Use UP
and DOWN buttons to select delay time. Use UP and DOWN buttons to set ON Delay time from 0 seconds to
1 minute in 1 second increments. OFF Delay can be set from 0 seconds to 3 minutes in 1 second increments.
5.16 MV2 ZONE
A second master valve circuit can be enabled in this menu by designating a zone valve to be MV2
5.17 ZN/ZN DLY
This function allows user to set delay times between zone starts for use in systems with slow closing valves
or pump systems that are operating near maximum ow or have slow well recovery. Use UP and DOWN
buttons to change value. Adjustable in one-minute increments from 0 (the SmartLine® controller default
setting) to 30 minutes; adjustable in 10 minute increments from 30 minutes to 3 hours.
5.18 NUM START
This SmartLine® feature allows you to select the number of Watering Program Start Times that you want to
appear at Program Start Times on the dial. The default number of start times shown is 3. To select 1 to 8
start times, go to Advanced Functions, NUM STRT. Press Next to view the default of 3 start times. Scroll the
UP/DOWN buttons to select 1 to 8 start times to be visible on the dial. Return the dial to Run.
5.19 DS TIME
Your SmartLine® controller can automatically adjust the time for daylight saving time (DST). The factory
default setting is OFF and has been preset for the current USA schedule. To turn DST adjust ON, press the
next button at DS TIME, the NEXT button at ON/OFF then select ON.
The DS Time feature can be customized to match any international DST schedule. Press the NEXT button at
DS TIME in advanced functions. Select DS SETUP and press the NEXT button again. You will be prompted to
enter the START schedule (time of day is moved ahead 1 hour per START schedule), and the STOP schedule
(time of day is moved back 1 hour per STOP schedule). DST start and stop are formatted with the the Week
(rst, second, third, last), the Day (Sun-Sat) and the Month (Jan-Dec). All DS Time adjustments are made at 2
am. To return the DS Time schedule back to the USA factory default, use the US DEFLT option.
5.19.1
DST
ON/OFF
If you would like for your controller to automatically set the time of day on the
occurrence of Daylight Saving Time, make sure it is turned on in this menu
5.19.2
DS
SETUP
Your controller is programmed with the a default of starting Daylight Saving Time
starting on the second Sunday in March and ending on the rst Sunday in November. If
you would like to adjust these settings, you may do so in this menu.
5.20 RUN/SOAK
The purpose of Run/Soak is to break up long run times that often cause wasteful runo. The Run/Soak is
programmable for each program if you are using the BASIC watering mode. Note: If you are using SMART,
these inputs are not used since the Run/Soak period is automatically calculated.

Turn the dial to Advanced Menu and use the UP button to navigate to RUN/SOAK. Press the NEXT button
and the screen will display RUN, now press the PGM button to select the program you wish to set the RUN
feature. After the program has been selected, press the NEXT button and then using the UP or the DOWN
button adjust the RUN value. **NOTE: the RUN time can be set from OFF to 30 minutes (SmartLine®
controller default is OFF). Once completed, press the BACK button and the screen will again display RUN,
now press the UP or the DOWN button and the screen will display SOAK. Press the NEXT button to enter the
SOAK feature and then using the UP or the DOWN button adjust the SOAK value. **Note: the SOAK time can
be set from OFF to 2 hours in one-minute increments. Repeat these steps for adjusting multiple programs
within the panel.
5.21 SENSOR
Sensor is an ON/OFF toggle to override the SEN terminals rain/freeze functions on selected zones. Factory
default is ON.
5.22 MIN DEF
This feature allows a Minimum Decit to be set. The feature requires that a zone decit be greater than the
MIN DEF setting in order to run during a scheduled program. The setting is global for all zones in SMART.
The range for the global setting is 0.00 to 0.50 inches. The factory default is 0.15 inches.
5.23 FLOW
The Flow menu must be accessed by rst activating a SmartLink Flow Aircard connected to the controller.
5.23.1 HIGH PK Shows the highest ow value for each individual zone, can scroll through each
zone for a 7-day history.
5.23.2 CLR
FLOW Clears All ow data from the controller.
5.23.3
SETTINGS Allows the user to set Flow parameters.
> 5.23.3.1 FLOW
PPG
A settable value that lets the controller know how many pulses to expect per
gallon.
> 5.23.3.2
SENSOR Lets the user select a custom sensor or one of our preset ow sensor types.
> 5.23.3.3
SHUTDOWN
Allows the user to select if the controller should shut down operation per zone
or by system.
> 5.23.3.4
LINEFILL The time it takes for the system to completely ll the line.
> 5.23.3.5
SAMPLE T How often the controller reads ow pulses from the Aircard.

> 5.23.3.6 LEAK
DET
A settable value that determines when the controller will produce a Leak
Detect fault.
> 5.23.3.7 LOW
LMT The lowest ow value the controller can sense without producing a fault.
> 5.23.3.8 HIGH
LMT The highest ow value the controller can sense without producing a fault.
5.23.4 TOT
FLOW
Shows the daily total ow for each zone. Can scroll through each zone for a 7-
day history.
5.23.5 LOW PK Shows the lowest ow value for each individual zone, can scroll through each
zone for a 7-day history.
5.24 SLW
5.24.1
RAIN
The rain selection is on/o toggle to override the SLW sensor feature for selected zones.
Factory default is ON for all zones.
5.24.2
FREEZE
The freeze selection is on/o toggle to override the SLW freeze sensor feature for
selected zones. Factory default is ON for all zones.
5.24.3
DELAY
This feature allows the user to adjust the factory set 48 hour watering delay that will
occur after a rain event shutdown if you are using an SLW Weather Sensor. To eliminate
the delay or to reduce or increase the factory default hours, turn the dial to Advanced
Menu and use an UP and DOWN button to select SLW DLY. Press the NEXT button and
48 hours will show in the display. Use the UP and DOWN buttons to eliminate the delay
or to select a dierent number of hours (0–99 hours). Note: The SLW DLY begins after
the SLW rain sensor has reset following a rain event. Accumulation of new water decits
will not begin until after the SLW DLY has cleared.
5.25 RAIN DLY
The rain delay feature allows user to globally suspend watering operations for all programs for a selected
number of days in either the BASIC or SMART watering modes.
Use UP or DOWN buttons to select 1 to 14 days for watering suspension. The watering blackout will
automatically be cleared from the SmartLine® controller after the assigned days have expired and watering
will resume at the next available start time. SMART watering decits will reset at zero and will not resume
accumulation until the delay has ended.
5.26 SKIP CUR
You can increase the skip circuit threshold here. Some accessories, like pump start relays, In rush currents
exceed the factory setting of 1.0 Amp for SL800 and 1.5A for all other controllers. The maximum setting is
2.5A.
5.27 REVIEW

Turn dial to Advanced Menu. Push NEXT button to access review functions. Use UP/DOWN buttons to select
review functions you wish to view.
5.27.1
TEMP/DATA
TEMP/DATA provides the daily high/low temperature readings in Fahrenheit
(Celsius for 230V applications. Celsius is set using METRIC under UNITS menu) from
the SLW Weather Sensor for the past 5 days. Press NEXT to view daily high and low
readings for the prior day. Continue pressing NEXT to view up to 7 days of
temperature history.
5.27.2 SLW
> 5.27.2.1
LASTCOM
This feature records time elapsed since last successful communication between the
weather station and control panel.
> 5.27.2.2
BATTERY Check the battery status in your wireless weather station here.
5.27.3 NEXT
RUN
NEXT RUN is the total amount of run time SMART has calculated for each zone
based on ET decits and SMART system audit information entered on the SMART
side of the dial. NEXT RUN is calculated and revised each night at midnight 365
days per year. The cumulative run time will carry forward until the next scheduled
watering cycle. NEXT RUN times will return to zero after each watering cycle. To
review NEXT RUN, turn the dial to Advanced Menu. Use the UP arrow button to
access Review and then use the NEXT and BACK buttons to scroll through the
zones.
5.27.4
RUN/SOAK
This feature allows the user to review expected Run/Soak schedules that will occur
when the controller is in the SMART mode. Turn the dial to Advanced Menu. Use
the UP button to go to REVIEW and press the NEXT button. Use the UP button to
advance to RUN/SOAK. Press the NEXT button and zone 01 will show in the display.
Press NEXT again and RUN with a time will show. This is the maximum RUN time
the controller can do in SMART before going to SOAK. Press NEXT again and SOAK
will show in the display with a time. This is the minimum time the zone must soak
before it is ready to run again. SMART Run/Soak times can be changed by adjusting
the soil and slope settings at SOIL TYPE on the programming dial. The times are
also aected by adjusting the SPRINKLER TYPE setting on the dial for precipitation
rate.
5.27.5
DEFICIT
Decit is the amount of water (displayed in inches) that needs to be replaced for
your plant material due to water loss through evapotranspiration – evaporation
from soil and transpiration from plants. Your SmartLine® controller will calculate
the water decit each day at midnight based on data communicated to it by the
SLW series Weather Sensor. The water decit will continue to accumulate until the
next scheduled watering cycle and will return to a zero reading when watering is
nished. The SmartLine® controller uses an internationally recognized formula
called the Hargreaves formula for calculating evapotranspiration.
During a rain event, decits will decrease to zero. SmartLine® will not begin
Other manuals for SmartLine
1
Table of contents
Other Weathermatic Controllers manuals

Weathermatic
Weathermatic smartline SL800 User manual

Weathermatic
Weathermatic smartline SL800 User manual

Weathermatic
Weathermatic ProLine 800 Series User manual

Weathermatic
Weathermatic SmartWire 9600TW User manual

Weathermatic
Weathermatic PROLINE PL800 User manual

Weathermatic
Weathermatic PROLINE PL800 User manual

Weathermatic
Weathermatic SoloRain 8014 Series User manual

Weathermatic
Weathermatic smartline SL800 User manual

Weathermatic
Weathermatic SmartLine User manual

Weathermatic
Weathermatic SoloRain 8024 DC Series User manual