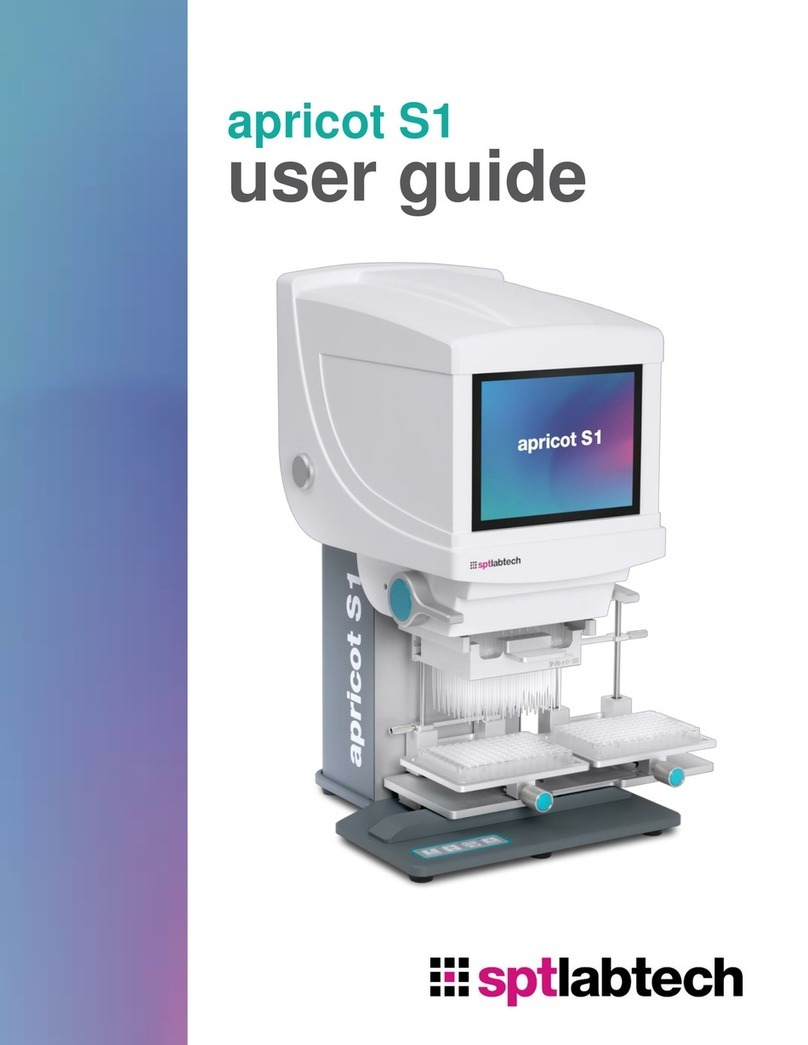
SPT Labtech Apricot S3 User manual


© 2021 SPT Labtech Ltd
2
Notes:

© 2021 SPT Labtech Ltd
3
Thank you for purchasing the apricot S3, part of the S-Pipette series, by SPT Labtech.
The S-Pipette series multi-channel liquid handling pipettors bring automated liquid
handling within reach of any lab that needs to routinely perform pipetting operations
onto microplates.
The S3 Pipettor adds greater exibility with automated X, Y & Z positioning,
automated 24 to 96 and 96 to 384 indexing. Automated open clamp and LED display
light the stage. Plus, access to the S3 Pipettor core is quick and easy for additional
exibility in pipettor operation. Just determine the pipetting con uration that best
matches the applications you want to perform. Then, load a 96 or 384 channel core
into the pipettor (without tools!), and you’re ready to go.
This manual is your ready reference to the care, maintenance, and operation of the
instrument, so you should store it in a convenient place. With proper handling and
maintenance, as detailed in this manual, this instrument will provide years of
eient and reliable service. Failure to adhere to proper care, maintenance, and
operation of the instrument may lead to poor experimental results, reduced
equipment life, and the possibility of injury to the operator.
Our ongoing commitment is to help you get the best results. We truly appreciate
your business and the trust you have placed in us. Should you have any questions,
comments, or suggestions regarding this instrument, please feel free to contact us at
apricotsupport@sptlabtech.com
There are a variety of external causes for frequency interference and/or
interruptions in connectivity or loss of data/information.
Frequency interference can occur when another signal passes through your location
corrupting the signal.
Frequency interference is location speci c and not device dependent and may result
from the location of the device and nearby competing signals.
SPT Labtech sta does not provide any technical support relating to troubleshooting
or identifying frequency interference.
SPT Labtech is not responsible and assumes no liability for interruptions in
connectivity or loss of data/information due to frequency interference.

© 2021 SPT Labtech Ltd
4
1. Speci cations .............................................................................................. 7
1.1 – Software Specs and Requirements ................................................................... 8
2. Unpacking the Instrument ........................................................................ 9
2.1 – Unboxing the Instrument................................................................................... 9
2.2 – Inspecting the Instrument................................................................................ 10
2.3 – Moving the Instrument..................................................................................... 10
3. Features / Accessories.............................................................................. 11
3.1 – System Overview .............................................................................................. 11
3.2 – Applications....................................................................................................... 11
3.3 – Pipettor+Head+Tips = Repeatable Results ..................................................... 11
3.4 – Compatibility for Core, Tip, and Head............................................................. 13
3.6 – EZ-Load Tip Technology ................................................................................... 14
3.7– Accessing the Pipetting Core ............................................................................ 14
3.8 – Personalize Operation Functions
.............................................................. 18
Functions Available by Core, Head & Tips............................................................ 19
Plate & Head Compatibility ................................................................................... 19
4. Safety Warning.......................................................................................... 20
4.1 – Safety Precautions ............................................................................................ 20
5. Setup .......................................................................................................... 21
5.1
–
User Login
........................................................................................................ 22
5.1.1 – Language Selection.................................................................................... 22
5.1.2 – Login Software with Three Level Account................................................ 23
5.1.3 – Admin Account ........................................................................................... 25
5.1.4 – Super User Account ................................................................................... 26
5.1.5 – User Account .............................................................................................. 27
5.2 – Setup for Protocol............................................................................................. 30
5.2.1 – Step 1: Connect S3 to Tablet ..................................................................... 30
5.2.2 – Step 2: De e Head/Plate Type ................................................................ 35
5.2.3 – Step 3: Calibrate Plate................................................................................ 39
5.3 – Main Menus....................................................................................................... 42
5.3.1 – Setup Main Menu....................................................................................... 42
5.3.2 – Function Main Menu.................................................................................. 45
5.3.3 – Manual Operation Main Menu.................................................................. 47

© 2021 SPT Labtech Ltd
5
6. Create Protocol ..........................................................................................49
6.1 – Aspirate ..............................................................................................................50
6.1.1 – Varieties of Menus......................................................................................50
6.1.2 – Station..........................................................................................................51
6.1.3 – Variables......................................................................................................51
6.1.4 – Pause ...........................................................................................................52
6.1.5 – Pre-Airgap and Post-Airgap .......................................................................52
6.1.6 – Increased Steps...........................................................................................52
6.1.7 – Preview Position .........................................................................................53
6.2 – Dispense.............................................................................................................54
6.2.1 – Multi-Dispensing Quadrant .......................................................................54
6.2.2 – Dispense Speed Over 60uL........................................................................54
6.2.3 – Dispense Location in Well..........................................................................54
6.2.4 – Side Touch...................................................................................................54
6.2.5 – Bottom Touch .............................................................................................55
6.2.6 – Decremental Steps .....................................................................................55
6.3 – Empty .................................................................................................................56
6.4 – Mix ......................................................................................................................57
6.4.1 Volume Retained ...........................................................................................57
6.4.2 Mix at Corners ...............................................................................................57
6.5 – Transfer..............................................................................................................58
6.6 – Serial Dilution
.................................................................................................60
6.6.1 – Start Column and End Column..................................................................60
6.6.2 – Interval.........................................................................................................60
6.6.3 – Preview Position .........................................................................................60
6.7 – Fill Plate ..............................................................................................................62
6.7.1 – Maximum Aspirate Volume .......................................................................62
6.7.2 – Remain Volume...........................................................................................62
6.7.3 – Preview Position .........................................................................................63
6.8 – Pooling................................................................................................................64
6.9 – Wash...................................................................................................................65
6.9.1 – Using Pump.................................................................................................66
6.9.2 – Pre-Fill Period..............................................................................................66
6.9.3 – Post Wash Period........................................................................................66
6.10 – Pause................................................................................................................67

© 2021 SPT Labtech Ltd
6
6.10.1 – Comment.................................................................................................. 67
6.10.1 – Change Tips .............................................................................................. 67
6.11 – Comment......................................................................................................... 68
6.12 – Set Parameter ................................................................................................. 69
6.13 – Loop ................................................................................................................. 70
7. Settings
.................................................................................................... 72
7.1 – Con rm Head Volume...................................................................................... 72
7.2 – Leave Plate Slow ............................................................................................... 73
7.3 – Enable GLP (21 CFR Part 11)............................................................................. 73
7.3.1 – Text File Edit ............................................................................................... 73
7.4 – Using CVTC ........................................................................................................ 76
7.5 – Change Core...................................................................................................... 76
7.6 – Con ration .................................................................................................... 77
8. Pipetting Technique.................................................................................. 78
8.1 – Training Plates................................................................................................... 78
8.2– Improving Accuracy ........................................................................................... 79
9. Emergency Stop......................................................................................... 81
10. Care and Maintenance ........................................................................... 82
11. Troubleshooting...................................................................................... 83
Technical Support Contact Information..................................................... 85
Version 1.00

© 2021 SPT Labtech Ltd
7
The following is a list of the ideal operating parameters for the S3. This instrument
will perform optimally and safely under standard laboratory settings. The use of this
instrument in other environments is not recommended, and results may prove
unsatisfactory.
Model
S3
DispensingPrecision
(1250) <3% CV at 10µL *Note: 1250µL Aluminum Core
(1000) <3% CV at 10µL
(500) <3% CV at 5µL
(125) <3% CV at 1µL
Dispensing Accuracy (1250) +/– 2% error at 10µL
(1000) +/– 2% error at 10µL
(500) +/– 2% error at 5µL
(125) +/– 2% error at 1µL
Resolution
(1250/1000/500) 1µL
(125) 0.1µL
Volume
Max channel capacity 1250µL
Dispense range
(1250) 5–1000µL
(1000) 5–1000µL
(500) 1–500µL
(125) 0.5–125µL
ParticleSize
< 0.032” diameter to prevent p blockage
Current
3 Amp
Power
(Input)
100 – 240VAC, 50 – 60Hz
Power Consumption (MAX)
130W
Power Consumption Idle
60W
Operating Temperature
40 –104°F, 5 – 40°C
Relative Humidity
(MAX)
80% (non-condensing)
Equipment Ratings
Indoor use only, temperature regulated, non-dusty
Altitude
Up to 2000m
Pollution Degree
2
Power Supply Voltage
Flu ons not exceeding ± 10% of the nominal voltage
Transient Over Voltage
According to Category II (In on Category)
Dimensions
18” W x 16” D x 23” H
(457mm W x 406mm D x 584mm H)
Weight
Approx. 60lbs (27kg)

© 2021 SPT Labtech Ltd
8
oCompatible with Windows 10/8/7
oi5 CPU Processor, 4gb RAM, 1gb HD
oUSB cable, type B to type A
oPower cord
oAccess -> AccessDatabaseEngineFor2007up.exe
oThis is included in the SPTLabtech folder after installation. No need for further
steps.
oScreen resolution needs to be 1920 x 1080
oChange Display size to 100% ratio
oNote: Both of these requirements can be found in Control Panel->Display.
oTaskbar needs to autohide

© 2021 SPT Labtech Ltd
9
:
With a Phillips screwdriver, remove the 28 packaging screws from all four sides of the crate.
Lift off the top of the crate and remove any boxes and accessories.
Lift thesides of the crate up and off the base and remove the tool kit.
With the 14mm open-ended wrench, remove all four bolts that secure theinstrument to the bottom of the crate.
Remove thetransit blocks by pushing in, then pull down and out.
1
2
3
4
5
4
1
2
3
5

© 2021 SPT Labtech Ltd
10
After unboxing the instrument, inspect for any visible
damage that may have occurred during shipping such
as scratches or dents.
After con rming that there is no damage you can
proceed.
oRe-assemble and save the shipping crate for
future use.
The instrument is now ready for relocating.
Note: The instrument is quite heavy and requires multiple people to move it. Keep
your back straight and lift with your legs to avoid possible injury.
oLift the instrument by placing hands under the base plate of the instrument at
each corner.
oWhen moving the instrument - be sure to lift only from the base of the
instrument.
oPlace the instrument on a steady, sturdy, at and level surface.
The instrument is now ready for installation.
Note: We recommend that you read through the Operating Instructions Manual
before you start the install process.
oUse appropriate caution when operating this instrument.
oVerify that the ON/OFF switch is in the OFF position.
oUsing the power cord provided, connect the instrument entry connector and
connect the opposite end to a power outlet with a ground connection.
oThe instrument is ready to turn on. Press the ON/OFF switch to the ON position.
Contact SPT Labtech immediately –
take a picture of the damage and
send it to
apricotsupport@sptlabtech.com, and
contact the freight carrier.

© 2021 SPT Labtech Ltd
11
oHigh-performance instrument – easily con red for a variety of applications
oAutomated pipetting into all wells of a 96-well plate with the 96 core
oAutomated pipetting into all wells of a 384-well plate with the 384 core
oAutomated pipetting 24-96, or 96-384
o12x faster than an 8-channel handheld pipettor – pipette into all 96 wells without
having to replace tips 12 times
oPipette 24, 96 and 384 full plate
oSerial dilution by column: 8, 16
oAutomated plate elevators for plate sampling – automatically raise or lower
plate/reservoir to programmable height
oEZ-Load tip technology to load disposable tips quickly and easily, without tools!
oControl via easy to use interface – Microsoft Surface Pro™ Tablet (Bluetooth-
enabled)
o2 or 3-position shuttle with programmable serial dilution indexing
oSmall footprint maximizes bench space and ts suitable hoods
oPlate replication
oPlate reformatting
oReagent addition
oCompound addition
oSerial dilution by column
The S3 Pipettor, pipetting head, and tips in a variety of volumes is a triad that works
together to help you get the best results.

© 2021 SPT Labtech Ltd
12
The “pipette head” is separate from the pipetting
mechanism, allowing easy and economical
recon ration in the lab.
Changing heads only takes a few seconds – easily
recon re as needed!
For best pipetting results – consider pipette tip
selection along with the “pipette head” that will be
used.

© 2021 SPT Labtech Ltd
13
The S3 base unit is compatible with ve di erent pipetting cores (96/1250, 96/1000,
96/500, 96/125, and 384/125). Each Core is designed to work optimally within its
volume range and requires a speci c Head and Tip combination.
The system is also capable of Serial Dilution. Speci c Heads or Inserts and Tips are
required. Tips are available in Non-Sterile (NS), Sterile (S), and Filter Sterile (FS).
Please see the matrix below for complete Core/Head/Tip compatibility. The part
numbers listed are for your convenience in ordering.
*Please contact your SPT Labtech Sales Representative or email
apricotsupport@sptlabtech.com for assistance.
384/125 Volume Range Heads Tips
(384 channel) Serial Dilution
Heads/Inserts
Serial Dilution Tips
(Strip Tips)
SP-C-384-125
.5-125
µ
L
SP-384-A-01-0125
125-384-EZ-NS/S/FS
SP-384-A-01-125-SC
125-016-EZ-NS/S/FS
050-384-EZ-NS/S/FS
050-016-EZ-NS/S/FS
015-384-EZ-NS/S
96/125 Volume Range Heads Tips
(096/024 channel)
Serial Dilution
Heads/Inserts
Serial Dilution Tips
(Strip Tips)
SP-C-096-125
.5-125
µ
L
SP-096-A-01-0125
125-096-EZ-NS/S/FS
SP-096-A-01-0125-SC
125-008-EZ-NS/S/FS
050-096-EZ-NS/S/FS
050-008-EZ-NS/S/FS
015-096-EZ-NS/S
96/550 Volume Range Heads Tips
(096/024 channel)
Serial Dilution
Heads/Inserts
Serial Dilution Tips
(Strip Tips)
SP-C-096-500
1-500
µ
L
SP-096-A-01-0500
550-096-EZ-NS/S/FS
096-A-01-EZL-550-SC
550-008-EZ-NS/S/FS
250-096-EZ-NS/S/FS
(w/SP-096-01-0500)
250-008-EZ-NS/S/FS
550-024(OS)-EZ-NS/S/FS
1-125
µ
L
SP-096-A-01-0125
125-096-EZ-NS/S/FS
SP-096-A-01-0125-SC
125-008-EZ-NS/S/FS
050-096-EZ-NS/S/FS
050-008-EZ-NS/S/FS
015-096-EZ-NS/S
96/1000 Volume Range Heads Tips
(096/024 channel)
Serial Dilution
Heads/Inserts
Serial Dilution Tips
(Strip Tips)
SP-C-096-1000
5-1000
µ
L
SP-096-A-01-1000
1000-096-EZ-NS/S/FS
096-A-01-EZL-1000-SC
1000-008-EZ-NS/S/FS
(w/SP-096-01-1000)
5-500
µ
L
SP-096-A-01-0500
550-096-EZ-NS/S/FS
096-A-01-EZL-0500-SC
550-008-EZ-NS/S/FS
250-096-EZ-NS/S/FS
(w/SP-096-A-01-0500)
250-008-EZ-NS/S/FS
550-024(OS)-EZ-NS/S/FS
5-125
µ
L
SP-096-A-01-0125
125-096-EZ-NS/S/FS
SP-096-A-01-0125-SC
125-008-EZ-NS/S/FS
050-096-EZ-NS/S/FS
050-008-EZ-NS/S/FS
015-096-EZ-NS/S

© 2021 SPT Labtech Ltd
14
The S3 Pipettor uses the exclusive EZ-Load tips to simplify pipettor operation with
disposable tips. This patented technology is the only system using disposable tips
that do not need to be “pressed on” with excessive downward force in order to
create a reliable seal. Load disposable tips into the head quickly and easily. No tools
required for a consistent seal!
The S3 Pipettor features an interchangeable pipetting core. To change the core:
Step 1
Enter Settings and select “Change Core” from the Settings.

© 2021 SPT Labtech Ltd
15
Step 2
Unscrew silver screws on both
sides.

© 2021 SPT Labtech Ltd
16
Step 3
Raise the hood, pull out the
support rod to place the hood.

© 2021 SPT Labtech Ltd
17
Step 4
Adjust the plunger position by
using the software.
Step 5
Exchange the core and select “OK”
and “Apply” to return to the main
menu.

© 2021 SPT Labtech Ltd
18
The function operation menus will vary depending on the type of plate, full head or
single column head, and channel tip the user selects.
For example, here are the di erent types of menu for Aspirate function of a 96-
500uL core:

© 2021 SPT Labtech Ltd
19
96 Core
384 Core
96
Channel
24 Ch-
O et
8
Channel
4 Ch-
O et
384
Channel
96 Ch-
O et
16
Channel
8 Ch-
O et
Aspirate
Dispense
Empty
Mix
Transfer
Serial
Dilution
Fill Plate
Pooling
96 Core
384 Core
96
Channel
24 Ch-
O et
8
Channel
4 Ch-
O et
384
Channel
96 Ch-
O et
16
Channel
8 Ch-
O et
Reservoir
24 Wells
96 Wells
384 Wells

© 2021 SPT Labtech Ltd
20
The S3 Pipettor is designed and engineered with your safety in mind. However,
failure to adhere to proper care, maintenance, and operation of the instrument may
lead to poor experimental results, reduced equipment life, and the possibility of
injury to the operator.
Please adhere to the following safety guidelines when working with the S3
Pipettor:
oOpen the hood to exchange cores only!
oDo not attempt to make an adjustment or try to repair something that is not
working correctly – this could result in injury and will void the warranty. If you
encounter a problem with the instrument, please contact SPT Labtech. or your
distributor.
oOperate the instrument in an indoor environment only!
oAvoid exposure to direct sunlight and excessive humidity. Also, for safe
operation, do not operate the instrument with wet hands.
oAlways connect the instrument via a grounded power outlet.
oUse only SPT - Apricot Designs optional tools, equipment, and peripherals!
oOur optional tools, equipment, and peripherals will enhance the performance of
the manufactured instrument to help you get the best results.
oIt is highly recommended that you use disposable tips manufactured by SPT -
Apricot Designs because they are designed to perform optimally with our
instruments.
oUsing add-on products or modi tions not supplied by SPT - Apricot will void
the warranty and likely a ct the performance of the instrument as well as lead
to poor experimental results, reduced equipment life, and the possibility of
injury to the operator.
oUnder no circumstances should any part of the operator’s body or any foreign
object(s), except the labware in use, enter the area directly under the pipetting
tips and above the elevator. In case of emergency, turn the power o
immediately.
oPlace the instrument on a sturdy and level surface. Use appropriate caution
when operating this instrument.
oWear protective clothing/goggles when dealing with dangerous, corrosive, or
radioactive substances.
oThis instrument is designed to t inside a suitably sized fume hood when
working with volatile organic solvents.
For full instructions regarding the handling of pathogens or biological hazards in Risk
Group 2 or higher, please refer to the current edition of the Laboratory Biosafety
Manual, published by the World Health Organization.
Table of contents
Other SPT Labtech Laboratory Equipment manuals
