Stairville LED-Commander 16/2 User manual

LED-Commander 16/2
DMX controller
user manual

Musikhaus Thomann
Thomann GmbH
Hans-Thomann-Straße 1
96138 Burgebrach
Germany
Telephone: +49 (0) 9546 9223-0
E-mail: [email protected]
Internet: www.thomann.de
20.02.2018, ID: 251852 | SW V1.2 (V4)

Table of contents
1 General notes............................................................................................................................ 4
2 Safety instructions................................................................................................................. 5
3 Features....................................................................................................................................... 6
4 Installation................................................................................................................................. 7
5 Starting up................................................................................................................................. 8
6 Connections and operating elements.......................................................................... 9
7 Operation................................................................................................................................. 13
8 Technical specifications.................................................................................................... 22
9 Protecting the environment........................................................................................... 23
Table of contents
LED-Commander 16/2
3

1 General notes
This user manual contains important information on safe operation of the device.
Read and follow all safety notes and all instructions. Save this manual for future refer-
ence. Make sure that it is available to all persons using this device. If you sell the
device, include the manual for the next owner.
Our products are subject to a process of continuous development. We therefore
reserve the right to make changes without notice.
This section provides an overview of the symbols and signal words used in this user
manual.
Signal word Meaning
DANGER! This combination of symbol and signal word indicates
an immediate dangerous situation that will result in
death or serious injury if it is not avoided.
NOTICE! This combination of symbol and signal word indicates
a possible dangerous situation that can result in mate-
rial and environmental damage if it is not avoided.
Warning signs Type of danger
Warning – danger zone.
Symbols and signal words
General notes
DMX controller
4

2 Safety instructions
This device is intended to be used to control spot lights, dimmers, light effects,
moving heads or other DMX-controlled devices. Use the device only as described in
this user manual. Any other use or use under other operating conditions is consid-
ered to be improper and may result in personal injury or property damage. No lia-
bility will be assumed for damages resulting from improper use.
This device may be used only by persons with sufficient physical, sensorial, and intel-
lectual abilities and having corresponding knowledge and experience. Other persons
may use this device only if they are supervised or instructed by a person who is
responsible for their safety.
DANGER!
Danger for children
Ensure that plastic bags, packaging, etc. are disposed of properly and
are not within reach of babies and young children. Choking hazard!
Ensure that children do not detach any small parts (e.g. knobs or the
like) from the unit. They could swallow the pieces and choke!
Never let children unattended use electrical devices.
NOTICE!
External power supply
The device is powered by an external power supply. Before connecting
the external power supply, ensure that the input voltage (AC outlet)
matches the voltage rating of the device and that the AC outlet is pro-
tected by a residual current circuit breaker. Failure to do so could result
in damage to the device and possibly the user.
Unplug the external power supply before electrical storms occur and
when the device is unused for long periods of time to reduce the risk of
electric shock or fire.
NOTICE!
Risk of fire
Do not block areas of ventilation. Do not install the device near any
direct heat source. Keep the device away from naked flames.
NOTICE!
Operating conditions
This device has been designed for indoor use only. To prevent damage,
never expose the device to any liquid or moisture. Avoid direct sunlight,
heavy dirt, and strong vibrations.
Intended use
Safety
Safety instructions
LED-Commander 16/2
5

3 Features
n16 devices controllable via DMX-512
n2 × 8 memory slots each for scenes and chases
nFaders for fade and scene time and speed, dimmer etc.
nOperation modes: automatic, sound controlled and manual
nBlackout and Full-on-function
nSeparate channel assignment
nBackup and firmware update via USB
nUSB port for desk light
n19" housing, 4 RU
Features
DMX controller
6

4 Installation
Unpack and carefully check that there is no transportation damage before using the
unit. Keep the equipment packaging. To fully protect the device against vibration,
dust and moisture during transportation or storage use the original packaging or
your own packaging material suitable for transport or storage, respectively.
The unit has been designed for rack mounting in a standard 19-inch rack. It occupies
four rack units (RU).
A 3-pin XLR socket is used as DMX output. The following diagram and table show the
pin assignment of the XLR socket.
1 Ground
2 DMX data (–)
3 DMX data (+)
Rack mounting
DMX connection
Installation
LED-Commander 16/2
7

5 Starting up
Create all connections while the device is off. Use the shortest possible high-quality
cables for all connections. Take care when running the cables to prevent tripping
hazards.
Connect the included power adapter to the 9V connector of the unit and then plug
the power adapter into a wall outlet.
Turn on the device using the main switch on the rear panel. After turning the device
on, the display shows the operating mode and the related display LED lights up.
Connecting the power adapter
Turning the unit on
Starting up
DMX controller
8

6 Connections and operating elements
1[FIXTURE]
Buttons 1 to 16 to select the control channels. The associated indicator LED shows whether the respective channel
is switched (LED on) or deactivated (LED off).
2[SCENE]
Eight buttons with double assignment for switching on / off up to 16 scenes. The indicator LEDs show which
scenes are switched on (LED lights up). Switching between the button groups (banks) 1…8 and 9…16 is done via
the shift button (3).
3 Shift button [SCENE]
Button to switch the SCENE buttons. The two indicator LEDs show which button group (banks) 1…8 (red) or 9…16
(green) is currently active.
4[CHASE]
Eight buttons with double assignment for switching on / off up to 16 chasers. The indicator LEDs show which
chasers are switched on (LED lights up). Switching between the button groups (banks) 1…8 and 9…16 is done via
the shift button (5).
5 Shift button [CHASE]
Button to switch the CHASE buttons. The two indicator LEDs show which button group (banks) 1…8 (red) or 9…16
(green) is currently active.
6 Device display
7Buttons and
Navigation buttons to scroll within the display and to select options.
Front panel
Connections and operating elements
LED-Commander 16/2
9

8 Shift button [MODE]
Button to switch the operating mode. The associated LED indicates the active operating mode: Auto, music or
manual.
9 Slider [SPEED]
Slider to manually adjust the chase speed during playback.
10 Slider [FADE]
Slider to manually adjust the fade speed during playback.
11 Button [BLACKOUT]
Button to turn the BLACKOUT function on and off. The associated indicator LED shows whether the respective
channel is active (LED flashes) or deactivated (LED off).
12 Button [FULL ON]
Button to turn the FULL ON function on and off. The associated indicator LED shows whether the respective
channel is active (LED flashes) or deactivated (LED off).
13 Button [PATCH | CLEAR]
Press this button for three seconds to change the channel assignments. As soon as the associated indicator LED
lights up, the channels can be reassigned. Press the button again for three seconds to exit the mode. Press this
button briefly to zero all applied DMX values.
14 Button [PROGRAM | RECORD]
Press this button for three seconds to enable the Programme mode. The associated indicator LED shows whether
the mode is active (LED flashes) or deactivated (LED off). Press the button again for three seconds to exit the mode.
15 Button [MIDI | IN SET]
Press this button for three seconds to open the menu for assigning the MIDI inputs. As soon as the associated indi-
cator LED lights up, the MIDI inputs can be assigned using the SPEED control or the and buttons. Press the
button again for three seconds to exit the mode.
16 Button [TAP | DEL]
With this key you can delete and undo entries.
17 Button [TILT]
Press this button to control the inclination of assigned moving heads with the joystick (18). The associated indi-
cator LED flashes as long as the TILT mode is active.
18 Joystick for controlling the connected moving heads. To activate the joystick function, either the TILT (18) or the
PAN mode (19) must be activated.
19 Button [PAN]
Press this button to control the rotation of assigned moving heads with the joystick (18). The associated indicator
LED flashes as long as the PAN mode is active.
20 Buttons [AUX1 | AUX2]
These buttons let you switch the AUX channels on (associated LED lights up) or off (LED off).
21 Slider [DIMMER]
Controller with associated flash or selection button for manual setting of the virtual DIMMER function (if activated),
or channel control for the assigned DMX channel.
Connections and operating elements
DMX controller
10

22 Slider [STROBE]
Controller with associated flash or selection button for manual setting of the STROBE function (if assigned), or
channel control for the assigned DMX channel.
23 Slider [SCENE]
Controller with associated flash or selection button for manual setting of the SCENE function (if assigned), or
channel control for the assigned DMX channel.
24 Slider [SPEED]
Controller with associated flash or selection button for manual setting of the SPEED function (if assigned), or
channel control for the assigned DMX channel.
25 Slider [BLUE]
Controller with associated flash or selection button for manual setting of the colour intensity BLUE (if assigned), or
channel control for the assigned DMX channel.
26 Slider [GREEN]
Controller with associated flash or selection button for manual setting of the colour intensity GREEN (if assigned),
or channel control for the assigned DMX channel.
27 Slider [RED]
Controller with associated flash or selection button for manual setting of the colour intensity RED (if assigned), or
channel control for the assigned DMX channel.
28 Slider [FUNCTION]
Controller with associated flash or selection button for manual setting of the function channel (if assigned), or
channel control for the assigned DMX channel.
Connections and operating elements
LED-Commander 16/2
11

29 Lockable DMX output socket
30 DMX polarity switch
31 USB port
32 Audio input (line level, 100 mV to 1 Vpp)
33 Output socket MIDI OUT
34 Through socket MIDI THRU
35 Input socket MIDI IN
36 Connection socket for the 9 V power supply unit.
37 Main switch to turn the device on and off.
Rear panel
Connections and operating elements
DMX controller
12

7 Operation
After switching on, the device performs a short self test. The device then automati-
cally switches to "Manual" operating mode and is ready for use.
The LED Commander 16/2 works in three different operating modes. Press the
[MODE] button until the required operating mode appears in the display and the
associated display also LED lights up.
n‘Auto’
In this operating mode, the [FADE] and [SPEED] sliders can be used to control the
fade-in and fade-out time and speed, and the and buttons can be used to
control the chaser light speed (setting range: 1 to 200 s).
n‘Music’
In this operating mode, the and buttons can be used to set the sound sensi-
tivity (setting range: 0 to 100 %). The [FADE] slider can be used to set the fade-in
and fade-out time.
n‘Manual’
In this operating mode, the and buttons can be used to call up every pro-
gram step of a chaser sequence (Chase). The [FADE] slider can be used to set the
fade-in and fade-out time.
In factory state, the device is pre-configured with a virtual dimmer for every
[FIXTURE]. This is useful if you have LED spotlights without their own master dimmer
channel and wish to control them. In this case, fader 8 [DIMMER] controls the overall
intensity of the [RED], [GREEN] and [BLUE] channels. You can deactivate this function
for every [FIXTURE] and use the fader for channel 8 as a normal channel fader for a
DMX channel of your choice. It is also possible to change the channel that the virtual
dimmer on channel 8 accesses and influences accordingly.
To deactivate the virtual dimmer, proceed as follows:
1. Hold the [PATCH
½
CLEAR] button down for three seconds.
2. Select the [FIXTURE] button for fixtures 1 to 8 that you want to deactivate the
dimmer for.
3. Press and hold the button for fader 8 [DIMMER] for three seconds. To be able to
use channel 8 of this fixture as a regular channel fader, you must now assign it
to a DMX channel. To do this, proceed as described in "Assigning device chan-
nels".
ðIn the display, as an example, next to the [FIXTURE] button, the following
appears: ‘Fixture01 dimmer Clear ok’. If the display shows ‘Fixture01 dimmer
Set ok’, the virtual dimmer for this fixture has already been deactivated. In
this case, press and hold the [DIMMER] button again for three seconds.
4. Hold the [PATCH
½
CLEAR] button down for three seconds to exit this mode.
Mode selection
Virtual dimmer
Operation
LED-Commander 16/2
13

1. Hold the [PATCH
½
CLEAR] button down for three seconds.
2. Press the [FIXTURE] (1 to 16) button to select the required FIXTURE channel on
which you wish to change the assignment of the virtual dimmer.
3. Hold the button of the required channel controller down for 3 seconds to
assign it to the virtual dimmer of the selected [FIXTURE] (display: ‘Set dimmer
ok’) or to remove the assignment (display: ‘Clear dimmer ok’).
4. Hold the [PATCH
½
CLEAR] button down for three seconds to exit this mode.
During assignment, one or more DMX channels (1 to 512) can be assigned to a fix-
ture's specific fader. As an example, DMX channel 3, 13 and 23 can be assigned to the
second channel fader of fixture 2.
1. Hold the [PATCH
½
CLEAR] button down for three seconds.
2. Press the [FIXTURE] button (1 to 16) to select the required FIXTURE channel.
3. Select the required channel range with the [SPEED] slider.
4. Select the required DMX channel with the [FADE] slider.
5. Press the Flash button of the function you wish to assign.
6. Repeat steps 2 to 5 in order to assign functions to the remaining sliders.
7. Hold the [PATCH
½
CLEAR] button down for three seconds to exit this mode.
Example: If the RED function (Flash button 2) is stored to DMX channel 21, the display
shows the following values:
1. Hold the [PATCH
½
CLEAR] button down for three seconds.
2. De-select all active FIXTURE channels (all blue FIXTURE LEDs off).
3. Using the [FADE] and [SPEED] sliders, select the DMX channel whose assign-
ment you wish to clear.
4. Press the relevant Flash button (1) to clear the channel assignment.
5. Hold the [PATCH
½
CLEAR] button down for three seconds to exit this mode.
The channel assignment has been removed.
Setting the dimmer channel
Assigning device channels
Clear channel assignment
Operation
DMX controller
14

1. De-select all active FIXTURE channels.
2. Press the [PATCH
½
CLEAR] button briefly to delete the starting values of the
fader function.
3. Use the [SCENE] buttons to select the required scene. To do this, switch
between the two memory banks using the toggle button if need be.
You can link multiple scenes so that they run in parallel. Using the [FADE]
slider, you can control the fade-in and fade-out time for all scenes. The LEDs
of all selected scenes light up blue.
1. Keep the [PROGRAM
½
RECORD] button pressed for three seconds to switch to
Program/Record mode.
2. Use the [FIXTURE] buttons to select the channel you wish to program.
3. Use the Flash controllers 1 to 8 to set the required values.
4. Press the [PROGRAM
½
RECORD] button and then for around one second the
button of the scene you wish to overwrite.
ðAll device LEDs flash briefly.
5. Hold the [PROGRAM
½
RECORD] button down for three seconds to exit
recording mode.
Scenes that are already allocated are indicated by the LED lighting up blue
next to the relevant scene button. These can also be overwritten if required.
1. De-select all active FIXTURE channels (all blue FIXTURE LEDs off).
2. Press the [PATCH
½
CLEAR] button briefly to delete the starting values of the
fader function.
3. Use the [CHASE] buttons to select the required sequence. To do this, switch
between the two memory banks using the toggle button if need be.
You can activate multiple chasers simultaneously which are then played
back in sequence. The output value of scenes that may be active always has
priority.
Playing back scenes
Programming scenes
Playing back chaser sequences
Operation
LED-Commander 16/2
15

1. Keep the [PROGRAM
½
RECORD] button pressed for three seconds to switch to
Program/Record mode.
2. Use the [CHASE] buttons to select the required sequence. To do this, switch
between the two memory banks using the toggle button if need be.
ðThe associated CHASE LED lights up.
3. Use the [FIXTURE] buttons to select the channel you wish to program.
4. Use the Flash controllers 1 to 8 to set the required values.
5. Press the [PROGRAM
½
RECORD] button to save the new values.
ðAll of the device LEDs flash briefly and the following values appear on the
display:
6. Repeat steps 2 to 5 to add further program steps.
7. Hold the [PROGRAM
½
RECORD] button down for three seconds to exit
recording mode.
1. Keep the [PROGRAM
½
RECORD] button pressed for three seconds to switch to
Program/Record mode.
2. Use the [CHASE] buttons to select the sequence you wish to expand. To do this,
switch between the two memory banks using the toggle button if need be.
3. Briefly press the [MIDI
½
IN SET] button.
ðThe associated display LED flashes.
4. If necessary, use the and buttons to select the step number under which
you wish to insert the program step.
5. Use the [FIXTURE] buttons to select the channel you wish to program.
6. Use the Flash controllers 1 to 8 to set the required values.
7. Press the [PROGRAM
½
RECORD] button to save the new values.
ðAll display LEDs flash three times.
8. Repeat steps 4 to 7 to add further program steps. The 16 memory locations can
be assigned a total of 2,000 program steps.
9. Hold the [PROGRAM
½
RECORD] button down for three seconds to exit
recording mode.
Programming chaser sequences
Inserting a program step
Operation
DMX controller
16

1. Keep the [PROGRAM
½
RECORD] button pressed for three seconds to switch to
Program/Record mode.
2. Use the [CHASE] buttons to select the sequence you wish to delete a program
step from. To do this, switch between the two memory banks using the toggle
button if need be.
3. Press the [MIDI
½
IN SET] button and then select using the and buttons the
step number you wish to delete.
4. Press the [TAP
½
DEL] button to delete the program step.
ðAll LEDs flash three times.
5. Hold the [PROGRAM
½
RECORD] button down for three seconds to exit
recording mode.
1. De-select all active FIXTURE, SCENE and CHASE channels (all blue LEDs off).
2. Keep the [PROGRAM
½
RECORD] button pressed for three seconds to switch to
Program/Record mode.
3. Switch between the two memory banks "CHASE" and "SCENE" using the toggle
button if need be.
4. Press the [TAP
½
DEL] button and simultaneously the chase button of the
sequence or scene you wish to delete.
Wait a few seconds until the LEDs have gone out.
5. Hold the [PROGRAM
½
RECORD] button down for three seconds to exit
recording mode.
1. Hold the [Patch
½
Clear] button down for three seconds to switch to Program /
Record mode.
2. Using the [FADE] and [SPEED] sliders, select the DMX channel you wish to
assign.
3. Press the [AUX1] or [AUX2] button to assign the DMX channel to the corre-
sponding AUX channel.
4. Repeat steps 2 and 3 to assign as many other DMX channels as you wish.
5. Hold the [Patch
½
Clear] button down for three seconds to exit recording mode.
As soon as DMX channels are assigned to an [AUX] button, the value of the
assigned channels is set to 255 whenever this button is activated.
Deleting a program step
Deleting chaser sequences or a scene
Assigning DMX channels to AUX chan-
nels
Operation
LED-Commander 16/2
17

1. Switch off the device.
2. Hold the [PROGRAM
½
RECORD], [DIMMER] and [PATCH
½
CLEAR] buttons down
simultaneously and switch the device back on.
ðAfter two seconds, the following message appears on the display:
3. Press the Flash button of the function you wish to rename.
4. On the display, the name can now be changed using the joystick (move to the
right/left moves the cursor, move up/down changes the relevant letters of the
alphabet).
5. Repeat steps 3 and 4 to rename any other Flash functions.
6. Confirm the new designation(s) with [PROGRAM
½
RECORD].
7. Switch the device off and back on again to work with the new settings.
The MIDI function allows you to connect two DMX controllers or to control the con-
troller via a MIDI keyboard.
1. Hold the [MIDI
½
IN SET] button down for three seconds to switch to MIDI
mode.
2. Use the and buttons to select a MIDI channel (1 to 16).
3. Hold the [MIDI
½
IN SET] button down for three seconds to exit MIDI mode.
MIDI value Function Explanation
0-15 SCENE1-16 Switch scenes 1-16 on/off
16-31 CHASE1-16 Switch chaser sequences 1-16
on/off
32 MANUAL Manual sequence control
33 MUSIC Music-controlled sequence
34 AUTO Automatic sequence control
35 AUX1 Switch AUX1 on/off
36 AUX2 Switch AUX2 on/off
37 Manual sequence control
38 Manual sequence control
39 TAP Automatic sequence control
Renaming Flash functions
MIDI functions
Operation
DMX controller
18

MIDI value Function Explanation
… … …
126 BLACK OUT BLACK OUT function active
You can save various device settings to a USB drive.
1. Connect your USB drive to the device's USB port.
2. Hold the [MODE] and buttons for two seconds until the display shows ‘Press
fixture
½
key save file’.
3. Press the button of the FIXTURE channel whose settings you wish to save.
ðThe progress of the saving operation is shown on the display.
All channel settings are stored together in the file "led-commander 16-2" on
the USB drive.
You can load saved device settings from a USB drive to the device memory.
1. Connect your USB drive containing the saved settings values to the device's
USB port.
2. Hold the [MODE] and buttons for two seconds until the display shows ‘Press
fixture
½
key loader file’.
ðThe LEDs of the channels for which settings were found on the USB drive
light up.
3. Press the button of the FIXTURE channel whose settings you wish to load.
ðThe progress of the loading operation is shown on the display. The display
then returns to its previous state.
Saving settings externally
Loading saved settings
Operation
LED-Commander 16/2
19

1. Turn off the device using the main switch.
2. Simultaneously press the [PROGRAM
½
RECORD], [TAP
½
DEL] and
[PATCH
½
CLEAR] buttons and switch the device back on.
ðAfter two seconds, the following message appears on the display:
After resetting to the factory defaults, the FIXTURE channels are set up as follows:
FIXTURE 1 FIXTURE 2 FIXTURE 3 … FIXTURE 16
FUN CH1 FUN CH11 FUN CH21 FUN CH151
Red CH2 Red CH12 Red CH22 Red CH152
Green CH3 Green CH13 Green CH23 Green CH153
Blue CH4 Blue CH14 Blue CH24 Blue CH154
SPEED CH5 SPEED CH15 SPEED CH25 SPEED CH155
COLOUR CH6 COLOUR CH16 COLOUR CH26 COLOUR CH156
STROBE CH7 STROBE CH17 STROBE CH27 STROBE CH157
DIMMER CH8…CH158: Acts as a virtual dimmer for the red, green and blue channel.
PAN CH9 PAN CH19 PAN CH29 PAN CH159
TILT CH10 TILT CH20 TILT CH30 TILT CH160
Reset to factory defaults
Operation
DMX controller
20
Table of contents
Other Stairville Controllers manuals
Popular Controllers manuals by other brands
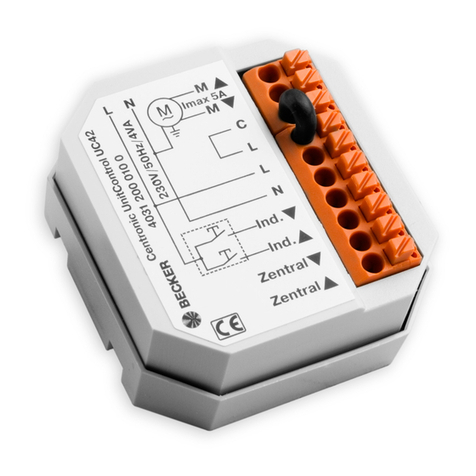
Becker
Becker Centronic UnitControl UC42 Assembly and operating instructions
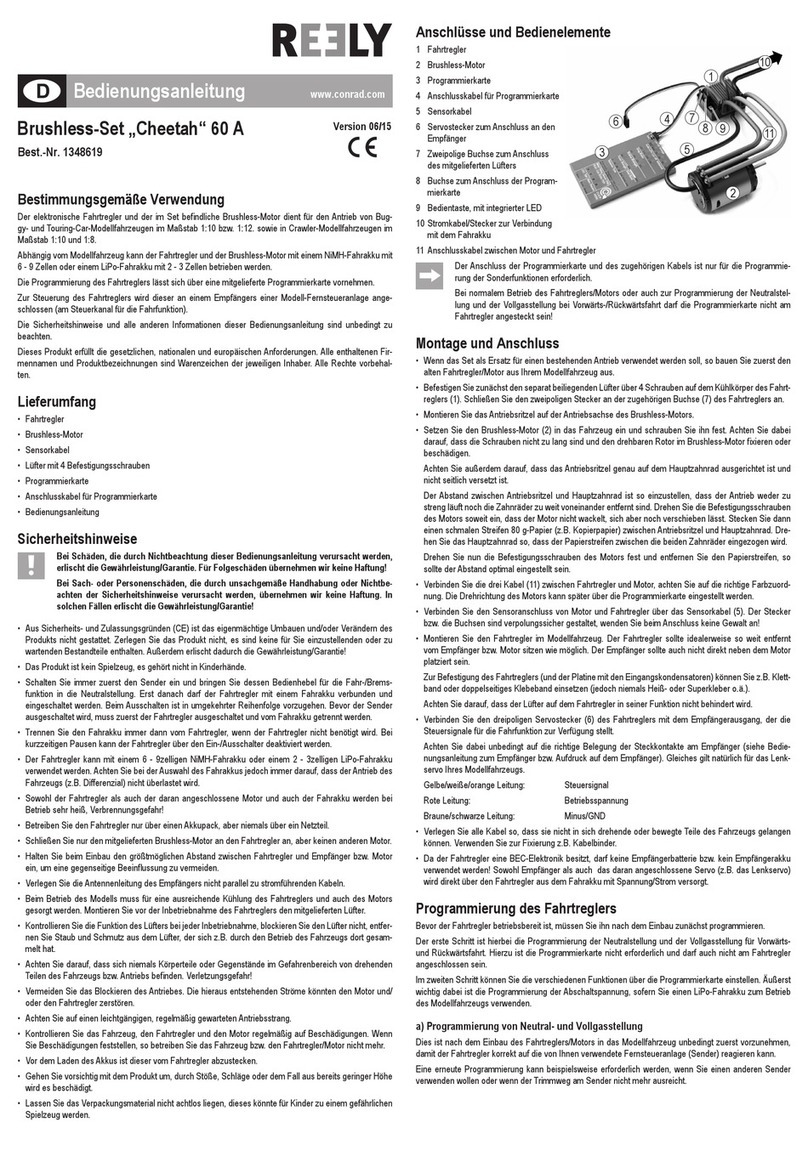
Reely
Reely Cheetah operating instructions
HALOGEN VALVE SYSTEMS
HALOGEN VALVE SYSTEMS Terminator Installation, operation and maintenance manual
elco
elco ELK 38 operating instructions
Extron electronics
Extron electronics MediaLink MLC 104 Plus Series Setup guide
HK Instruments
HK Instruments DPT-Ctrl Series installation instructions

