SOHORAID ST2-B31 User Manual
2
Front and rear view
3. Hardware Requirements and Precautions
1. This system can only transfer data to one computer through one interface at a time.
2. After the hard disk is formatted, the actual total capacity of the ST2-B31 detected by the computer
operating system will vary from the sum of all hard disk capacities stated by the manufacturer.
3. All existing data will be deleted when this product is set up for the rst time. Please ensure that all
data on the hard disk has been backed up before installation to avoid data loss.
4. Before a new HDD is installed in the ST2-B31, please make sure that there are no bad tracks or
defects to avoid data loss.
5. If the ST2-B31 needs to be shut down or disconnected, please ensure the HDD is safely removed
through your operating system before turning o the power.
6. To prevent data loss, do not remove any of the hard disks while the system is running.
7. Once the system has been initialized, do not switch hard disks around during use. Doing so may
prevent the RAID from being recognized by the system.
8. Once RAID mode has been set up, the switching of hard drives will lead to the removal of data
from the hard disks. Please be sure to backup the data on the hard disk before making any
switches.
9. Please always connect the USB cable to the computer to ensure the energy saving function
operating normally.
10.If the ST2-B31 needs to be shut down or disconnected, please ensure the HDD is safely removed
through your operating system before turning o the power.
11.Once the computer turn to “Standby” or “Sleep” mode, ST2-B31 will still complete the rebuilding
function. However, it will not change to “Standby” mode after rebuilding. You need to shut down
the ST2-B31 manually or wake up the computer to synchronize “Standby ” or “Sleep” mode
together.
Front View Rear View
A. HDD access light
B. HDD enclosure handle
C. HDD enclosure keyhole
D. Power switch
E. Power socket
F. USB 3.1 port (GEN2 10Gbps)
G. RESET hole
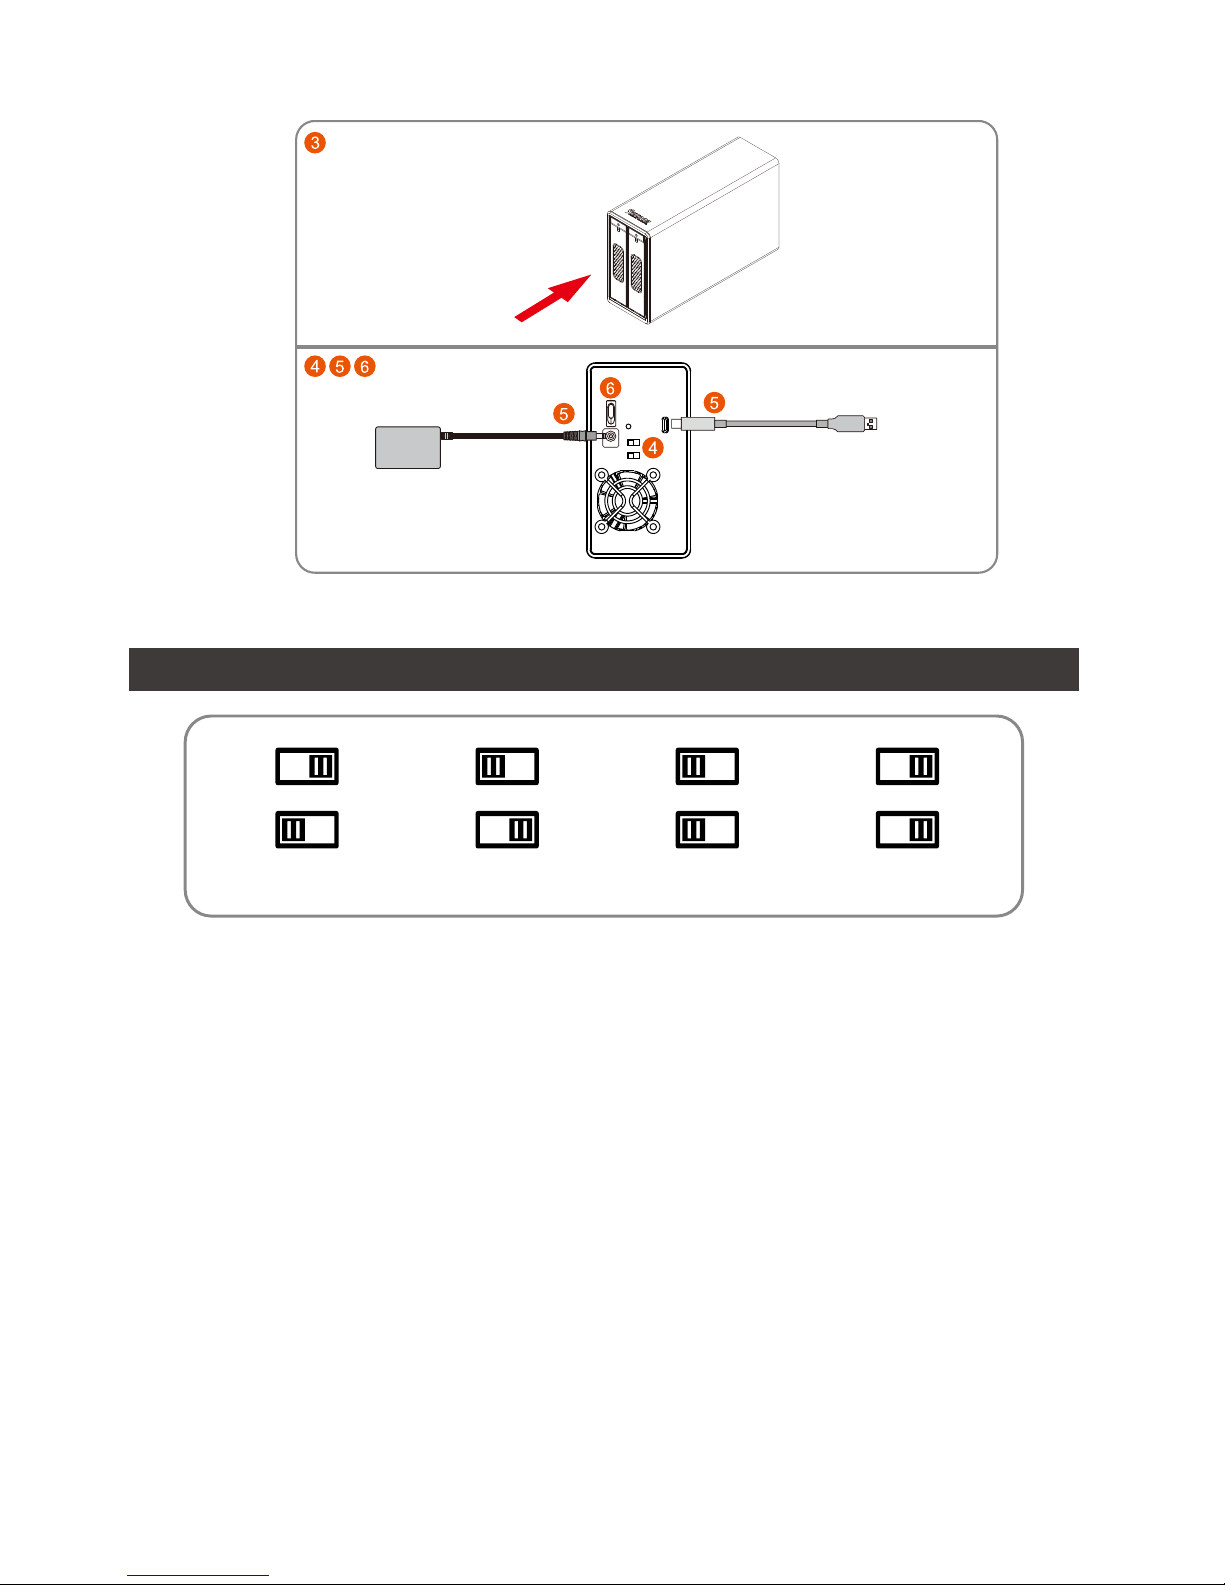
H. RAID switch
I. Fan