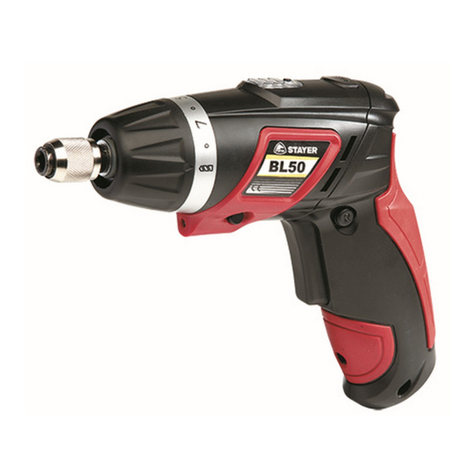
stayer PBL122BK User manual

es
it
gb
de
p
fr
tr
cz
Manual de instrucciones
Área Empresarial Andalucía - Sector I
Calle Sierra de Cazorla nº7
C.P: 28320 Pinto (Madrid) SPAIN
info@grupostayer.com www.grupostayer.com
PBL122BK
Istruzioni d’uso
Operating instructions
Bedienungsanleitung
Manual de instruções
Instructions d’emploi
Kullanma Kılavuzu

5
9
2 3 4
5
1
6
7
8
9
FIG.1
11
10

5
2 x Li-on
Vcd 12
Ah 2.0
min 60
n0min-1 0-350 / 0-1350
Nm 0-32
UNF 1/2”x20
Ømm 20
Ømm 10
Kg 0.9
Lpa dB(A) 87
dB(A) 98
m/s2<2,5
PBL 122 B
x
x
s
m
LwA
EN60745, K = 3dB (L , L ) K = 1,5 m/s2 (a )

/4 /
es
1_INSTRUCCIONES ESPECIFICAS DE
SEGURIDAD
Sujete la herramienta eléctrica por las superficies
de agarre aisladas al realizar trabajos en los que el
tornillo pueda llegar a tocar conductores eléctricos
ocultos.
Asegure la pieza de trabajo.
Antes de depositarla, esperar a que se haya
detenido la herramienta eléctrica.
No intente abrir el acumulador.
Solamente utilice acumuladores originales STAYER
de la tensión indicada en la placa de características
de su herramienta eléctrica.
2_INSTRUCCIONES DE PUESTA EN
SERVICIO
COLOCACIÓN
Lea íntegramente estas advertencias de
peligro e instrucciones. En caso de no
atenerse a las advertencias de peligro e
instrucciones siguientes, ello puede ocasionar
una descarga eléctrica, un incendio y/o lesión grave.
MONTAJE
En caso de una desconexión automática de
la herramienta eléctrica no mantenga
accionado el interruptor de conexión
desconexión.
CONEXIÓN ELÉCTRICA
Carga del acumulador
Únicamente use los cargadores que se detallan
en la página con los accesorios. Solamente estos
cargadores han sido especialmente adaptados a
los acumuladores de iones de litio empleados en su
herramienta eléctrica.
El acumulador se suministra parcialmente
cargado. Con el fin de obtener la plena
potencia del acumulador, antes de su primer
uso, cárguelo completamente en el cargador.
El acumulador de iones de litio va protegido contra
altas descargas. Si el acumulador está descargado,
un circuito de protección se encarga de desconectar la
herramienta eléctrica. El útil deja de moverse.
Indicador del estado de carga
El indicador de estado de carga 10 del cargador, está
compuesto por dos LED:
-Verde: Se muestra cuando el acumulador está cargado.
-Rojo: Se muestra cuando el acumulador se está
cargando.
Protección contra sobrecarga térmica
La herramienta eléctrica no puede sobrecargarse
si ésta se utiliza de forma reglamentaria. En caso de
una solicitación excesiva, o al salirse del margen de
temperatura admisible del acumulador de 0–50 °C, se
reducen las revoluciones.

/5 /
es
it
gb
fr
p
tr
de
cz
es
DESCRIPCIÓN ILUSTRADA
3_INSTRUCCIONES DE
FUNCIONAMIENTO
Solamente utilice acumuladores de iones de
litio originales Stayer de la tensión indicada en
la placa de características de su herramienta
eléctrica. El uso de otro tipo de acumuladores
puede provocar daños e incluso un incendio.
Puesta en marcha
Ajuste del sentido de giro
Giro a derechas:
Preselección del par de giro / Ajuste del modo de
operación
Taladrar
COLOCACIÓN Y PRUEBAS
Selector de velocidad mecánico
Solamente accione el selector de velocidad 4
con la herramienta eléctrica detenida
El selector de velocidad 4 permite ajustar 2
campos de revoluciones.
Velocidad I
Campo de bajas revoluciones; para
atornillar o realizar perforaciones grandes.
Velocidad II
Campo de altas revoluciones, para
perforaciones pequeñas.
Si el selector de velocidad 4 no pudiese girarse hasta el
tope, gire ligeramente a mano el husillo.
CAMBIO DE HERRAMIENTAS
Antes de cualquier manipulación en la herramienta
eléctrica (p.ej. en su mantenimiento, cambio de útil,
etc.), así como al transportarla o guardarla, colocar
en posición central el selector de sentido de giro.
Solamente aplique la herramienta eléctrica
desconectada contra el tornillo. Los útiles en
rotación pueden resbalar.
Consejos prácticos
STAYER
4_INSTRUCCIONES DE
MANTENIMIENTO Y LIMPIEZA
LIMPIEZA Y MANTENIMIENTO
Antes de cualquier manipulación en la herramienta
eléctrica, sacar el enchufe de red de la toma de
corriente.
Mantenga limpia la herramienta eléctrica y las rejillas
de refrigeración para trabajar con eficacia y
seguridad.

/6 /
es
Transporte
LIMPIEZA
STAYER.
STAYER.
SERVICIO DE REPARACIÓN
info@grupostayer.com
GARANTÍA
Tarjeta de Garantía
¡NOTA! Si faltara esta tarjeta pídasela de inmediato a
su revendedor.
ELIMINACIÓN
Sólo para los países de la UE:
Reservado el derecho de modicación.
Acumuladores / pilas:
Iones de Litio:
Sólo para los países de la UE:
5_MARCADO NORMATIVO
CARACTERÍSTICAS TÉCNICAS
LWA
L
s
m
x
x

/7 /
es
it
gb
fr
p
tr
de
cz
¡Usar unos protectores auditivos!
DECLARACIÓN DE
CONFORMIDAD CE
El que suscribe:
STAYER IBERICA, S.A.
Con dirección:
CERTIFICA
20

/8 /
it
1_DI SICUREZZA SPECIFICHE
Tenere l’apparecchio per le superfici isolate
dell’impugnatura qualora venissero effettuati lavori
durante i quali la vite potrebbe venire a contatto
con cavi elettrici nascosti.
Assicurare il pezzo in lavorazione.
Prima di posare l’elettroutensile, attendere sempre
fino a quando si sarà fermato completamente.
Non aprire la batteria. Vi è il pericolo di un corto
circuito. Proteggere la batteria ricaricabile dal
calore, p. es. anche dall’irradiamento solare
continuo, dal fuoco, dall’acqua e dall’umidità.
In caso di difetto e di uso improprio
della batteria ricaricabile vi è il pericolo
di una fuoriuscita di vapori. Far entrare
aria fresca e farsi visitare da un medico
in caso di disturbi.
Utilizzare la batteria ricaricabile esclusivamente
insieme all’elettroutensile STAYER.
Utilizzare esclusivamente batterie ricaricabili
originali STAYER dotate della tensione indicata sulla
targhetta di identificazione dell’elettroutensile.
2_ISTRUZIONI PER LA MESSA
POSIZIONAMENTO
Leggere tutte le avvertenze di pericolo e
leistruzioni operative. In caso di mancato
rispetto delle avvertenze di pericolo e delle
istruzioni operative si potrà creare il pericolo
di scosse elettriche, incendi e/o incidenti
gravi.
MONTAGGIO
La batteria ricaricabile potrebbe subire dei danni.
5
9
ACCENSIONE ELETTRICA
Caricare la batteria
Utilizzare esclusivamente stazioni di ricarica per
batterie riportate sulla pagina con gli accessori.
Soltanto queste stazioni di ricarica per batterie
sono adattate alle batterie in ioni di litio utilizzate
nell’elettroutensile in dotazione.
La batteria ricaricabile viene fornita
parzialmente carica. Per garantire l’intera
potenza della batteria ricaricabile, prima del
primo impiego ricaricare completamente la
batteria ricaricabile nella stazione di ricarica.
La batteria ricaricabile agli ioni di litio non è protetta.
In caso di batteria scarica l’elettroutensile si spegne
attraverso un interruttore automatico: Il portautensile od
accessorio non si muove più.
Indicador del estado de carga
El indicador de estado de carga 10 del cargador, está
compuesto por dos LED:
-Verde: Se muestra cuando el acumulador está cargado.
-Rojo: Se muestra cuando el acumulador se está
cargando.
Indicatore dello stato di carica
L’indicatore di stato di carica 10 della rivista, si compone
di due LED:
Verde: visualizzato quando la batteria è carica.
Rosso: visualizzato quando la batteria è in carica.
Protezione termosensibile contro sovraccarichi

/9 /
es
it
gb
fr
p
tr
de
cz
DESCRIZIONE ILLUSTRATED
3_ISTRUZIONI PER L’USO
Utilizzare esclusivamente batterie agli ioni di
litio originali Stayer dotate della tensione
riportata sulla targhetta di costruzione
dell’elettroutensile in dotazione. L’impiego di
batterie diverse da quelle consigliate potrà
comportare il pericolo di lesione o d’incendio.
Messa in funzione
mpostazione del senso di rotazione
Rotazione destrorsa:
Preselezione della coppia / Regolazione del modo
operativo
Foratura
IL POSIZIONAMENTO E TEST
Commutazione meccanica di marcia
Azionare il commutatore di marcia 4 solo
quando l’elettroutensile è fermo.
Con il commutatore di marcia 4 è possibile
preselezionare 2 campi di velocità.
Marcia I:
Bassa velocità; per avvitare oppure per
lavori con grandi diametri di foratura.
Marcia II:
Alta velocità; per lavori con piccolo
diametro di foratura.
In caso non fosse possibile spostare il commutatore di
marcia 4 fino alla battuta, girare leggermente il
mandrino di
trasmissione tramite la punta.
CAMBIO UTENSILE
Prima di effettuare lavori all’elettroutensile (ad es.
lavori di manutenzione, cambio d’utensile, ecc.),
nonché in caso di trasporto e di conservazione dello
stesso, avere sempre cura di portare in posizione
media il commutatore per la reversibilità.
Applicare l’elettroutensile sulla vite soltanto
quando è spento. Utensili accessori in
rotazione possono scivolare.
Suggerimenti
STAYER.

/10 /
it
4_ISTRUZIONI PER LA
MANUTENZIONE E PULIZIA
PULIZIA E MANUTENZIONE
Prima di qualunque intervento sull’elettroutensile
estrarre la spina di rete dalla presa.
Per poter garantire buone e sicure operazioni di
lavoro, tenere sempre puliti l’elettroutensile e le prese
di ventilazione.
Trasporto
PULIZIA
STAYER
STAYER
SERVIZIO DI RIPARAZIONE
info@grupostayer.com
GARANZIA
Carta di garanzia
SMALTIMENTO E RICICLAGGIO
Solo per i Paesi della CE:
Con ogni riserva di modiche tecniche.
Batterie ricaricabili/Batterie:
Li-Ion:
Solo per i Paesi della CE:

/11 /
es
it
gb
fr
p
tr
de
cz
5_NORMATIVE
DATI TECNICI
LWA
L
Informazioni sulla rumorosità e sulla vibrazione
Usare la protezione acustical!
DICHIARAZIONE DICONFORMITA CE
II sottoscritto:
STAYER IBERICA, S.A.
Con indirizzo a:
CERTIFICA
20
s
m
x
x

/12 /
gb
Power tools PBL122BK are designed for tightening
and loosening screws, for drilling in wood, metal,
ceramic and plastic, and impact drilling in brick,
concrete and stone.
1_SPECIFIC SAFETY INSTRUCTIONS
Hold power tool by insulated gripping surfaces,
when performing an operation where the fastener
may contact hidden wiring.
Secure the workpiece.
Always wait until the machine has come to a
complete stop before placing it down.
Do not open the battery. Danger of
short-circuiting.
Protect the battery against heat, e. g.,
against continuous intense sunlight, fire,
water, and moisture. Danger of explosion.
In case of damage and improper use of the battery,
vapours may be emitted. Provide for fresh air
and seek medical help in case of complaints.
Use the battery only in conjunction with your
STAYER power tool.
Use only original STAYER batteries with the voltage
listed on the nameplate of your power tool.
2_INSTRUCTIONS FOR USE
PLACEMENT TOOL
Read all safety warnings and all instructions.
Failure to follow the warnings andinstructions
may result in electric shock, fire and/or
serious injury.
ASSEMBLY
Do not continue to press the On/Off switch
after the machine has been automatically
switched off.
.
Observe the notes for disposal.
ELECTRICAL CONNECTION
Battery Charging
Use only the battery chargers listed on the accessories
page. Only these battery chargers are matched to the
lithium ion battery of your power tool.
The battery is supplied partially charged. To
ensure full capacity of the battery, completely
charge the battery in the battery charger
before using your power tool for the first
time.
The lithium-ion battery is protected against deep
discharging. When the battery is empty, the machine is
switched off by means of a protective circuit: The inserted
tool no longer rotates.
Charge status indicator
The charging status indicator 10 of the magazine, is
composed of two LEDs:
Green: Displayed when the battery is charged.
Red: Displayed when the battery is charging.
Temperature Dependent Overload Protection
ILUSTRATED DESCRIPTION
1 Screwdriver bit
2 Tool holder
3 Ring preset torque setting for
4 Speed selector
5 Battery
6 Bulb
7 On/Off switch
8 Rotational direction switch
9 Battery unlocking button
10 Battery charge-control indicator
11 Charger

/13 /
es
it
gb
fr
p
tr
de
cz
3_OPERATING INSTRUCTIONS
START
Use only original Stayer lithium ion batteries
with the voltage listed on the nameplate of
your power tool. Using other batteries can lead
to injuries and pose a fire hazard.
Starting Operation
Set the rotational direction switch 8 to the centre position in
order to avoid unintentional starting. Insert the charged
battery 5 into the handle so that it can be felt to engage and
Reversing the Rotational Direction
The rotational direction switch 8 is used to reverse the
rotational direction of the machine. However, this is not
Right Rotation: For drilling and driving in screws, push the
Setting the Torque / Setting the Operating Mode
The required torque can be preselected in 10 steps with the
torque preselection ring 3. With the correct setting, the
insert tool is stopped as soon as the screw is screwed flush
into the material or when the set torque is reached.
Select a higher setting when driving out screws, or set to the
Drilling
Set the preselection ring 3 to the “Drilling without impact”
symbol. The safety clutch is deactivated in the “Drilling”
position.
PLACEMENT AND TESTING
Gear Selection, Mechanical
Actuate the gear selector 4 only when the
machine is at a standstill.
Two speed ranges can be preselected with the gear
selector 4.
Gear I:
Low speed range; for sc rewdriving or
working with large drilling diameter.
Gear II:
High speed range; for working with small
drilling diameter.
If the gear selector 4 cannot be fully engaged, lightly
rotate the drive spindle with the drill bit by twisting the
drill chuck.
ADJUSTMENT OPERATION
Before any work on the machine (e. g.,
maintenance, tool change, etc.) as well as during
transport and storage, set the rotational direction
switch to the centre position. Unintentional
actuation of the On/Off switch can lead to injuries.
Tips
4_MAINTENANCE AND SERVICE
INSTRUCTIONS
Before any work on the machine itself, pull the
mains plug.
For safe and proper working, always keep the
machine and ventilation slots clean.
Transport
CLEANING
STAYER
STAYER

/14 /
gb
REPAIR SERVICE
info@grupostayer.com
WARRANTY
Warranty card
Note: lf you cannot nd the warranty card within
the documentation,you must ask for it through
your supplier.
DISPOSAL AND RECYCLING
Only for EC countries:
Subject to change without notice.
Battery packs/batteries:
Li-Ion:
Only for EC countries:
5_REGULATIONS
TECHNICAL DATA
LWA
L
Noise/Vibration Information
s
m
x
x

/15 /
es
it
gb
fr
p
tr
de
cz
Wear hearing protection!
DECLARATION OF CONFORMITY
The undersigned: STAYER IBERICA, S.A.
With address at:
CERTIFIES
20

/16 /
fr
1_DES INSTRUCTIONS SÉCURITÉ
SPÉCIFIQUES
Tenir l’outil par les surfaces de préhension isolées,
lors de la réalisation d’une opération au cours
de laquelle le dispositif de serrage peut entrer en
contact avec un câblage non apparent
Bloquer la pièce à travailler
Avant de déposer l’outil électroportatif, attendre
que celui-ci soit complètement à l’arrêt.
Ne pas ouvrir l’accu
Protéger l’accu de toute source de
chaleur, comme p. ex. l’exposition directe
au soleil, au feu, à l’eau et à l’humidité.
En cas d’endommagement et d’utilisation
non conforme de l’accu, des vapeurs peuvent
s’échapper. Ventiler le lieu de travail et, en
cas de malaises, consulter un médecin.
N’utiliser l’accu qu’avec votre outil électroportatif
STAYER.
N’utiliser que des accus d’origine STAYER qui ont
la tension indiquée sur la plaque signalétique de
l’outil électroportatif.
2_INSTRUCTIONS POUR
L’UTILISATIONS
OUTIL DE PLACEMENT
Il est impératif de lire toutes les consignes de
sécurité et toutes les instructions. Le nonrespect
des avertissements et instructions indiqués ci-
après peut conduire à une électrocution, un
incendie et/ou de graves blessures.
MONTAGE
Après la mise hors fonctionnement
automatique de l’outil électroportatif,
n’appuyez plus sur l’interrupteur Marche/
Arrêt.
RACCORDEMENT ÉLECTRIQUE
Chargement de l’accu
N’utilisez que les chargeurs indiqués sur la page
des accessoires
L’accu est fourni en état de charge faible.
Afin de garantir la puissance complète de
l’accu, chargez complètement l’accu dans
le chargeur avant la première mise en
service.
Indicateur de l’état de charge
Vert:
Rouge:
Protection contre surcharge en fonction de la
température

/17 /
es
it
gb
fr
p
tr
de
cz
DESCRIPTION ILUSTRÉE
1 Embout avec
2 Porte-outil
3 Bague de réglage de couple prédéfinie pour
4 Sélecteur de vitesse
5 Accu
6 Lampe
7 Interrupteur Marche/Arrêt
8 Commutateur du sens de rotation
9 Touche de déverrouillage de l’accumulateur
10 Voyant lumineux indiquant l’état de charge de
l’accu
11 Chargeur
3_FONCTIONNEMENT
N’utiliser que des accus à ions lithium d’origine
Stayer dont la tension correspond à cette
indiquée sur la plaque signalétique de l’outil
électroportatif.
Mise en service
Régler le sens de rotation
Rotation à droite
Présélection du couple / Régler le mode de service
Perçage
PLACEMENT ET LES TESTS
Sélection mécanique de la vitesse
N’actionner le commutateur de vitesse 4 qu’à
l’arrêt total de l’appareil électroportatif.
Vitesse I:
Vitesse II:
CHANGEMENT D’OUTIL
Avant d’effectuer des travaux sur l’appareil (p. ex.
travaux d’entretien, changement d’outils, etc.) et
avant de le transporter ou stocker, toujours mettre
le commutateur de sens de rotation en position
médiane
Poser l’outil électroportatif sur la vis
seulement lorsque l’appareil est éteint. Les
outils de travail en rotation peuvent glisser.
Conseils
STAYER vous
4_INSTRUCTIONS DE MAINTENANCE
ET DE SERVICE
Avant d’effectuer des travaux sur l’outil électroportatif,
retirez la fiche de la prise de courant.
Tenez toujours propres l’outil électroportatif ainsi que
les ouïes de ventilation afin d’obtenir un travail
impeccable et sûr.
Transport

/18 /
fr
NETTOYAGE
STAYER
STAYER.
SERVICE DE RÉPARATION
info@grupostayer.com
GARANTIE
Carta de Garantie
Remarque: Si cette carte est manquante les de-
mander immédiatement a votre revendeur.
ELIMINATION ET LE RECYCLAGE
Seulement pour les pays de I’UnionEuropéenne:
Sous réserve de modications.
Accus/piles :
Ion lithium :
Veuiller respecter les indications do
nées dans le chapitre « T ransport »
Ne pas jeter les accus/piles dans les or-
dures ménagères, ni dans les fla mes
ou l’eau. Les accus/piles doivent être co
llectés, recyclés ou éliminés en conformité avec les régl
mentations se rapportant à l’environnement.
Seulement pour les pays de l’Union Européenne :
Les accus/piles usés ou défectueux doivent être recyclés
conformément à la directive 91/157/CEE.
5_CADRE RÉGLAMENTAIRE
CARACTÉRISTIQUES TECHNIQUES
LWA
L
s
m
x
x

/19 /
es
it
gb
fr
p
tr
de
cz
Niveau sonore et vibrations
Porterune protection acoustique!
DÉCLARATION DE CONFORMITÉ CE
Le soussigné:
STAYER IBERICA, S.A.
Dont l’adresse est:
CERTIFIE
20

/20 /
p
1_INSTRUÇÕES ESPECÍFICAS DE
SEGURANÇA
Ao executar trabalhos durante os quais possam ser
atingidos cabos eléctricos, deverá sempre segurar
a ferramenta eléctrica pelas superfícies isoladas
do punho.
Fixar a peça a ser trabalhada.
Espere a ferramenta eléctrica parar completamente,
antes de depositá-la.
Não abrir o acumulador.
Proteger o acumulador contra calor, p.
ex. também contra uma permanente
radiação solar, fogo, água e humidade.
Em caso de danos e de utilização incorrecta do
acumulador, podem escapar vapores. Arejar bem o
local de trabalho e consultar um médico se forem
constatados quaisquer sintomas.
Só utilizar o acumulador junto com a sua
ferramenta eléctrica STAYER.
Só utilizar acumuladores STAYER com a tensão
indicada na placa de características da sua
ferramenta eléctrica.
restaurados ou acumuladores de outras marcas,
há perigo de lesões, assim como danos materiais
devido a explosões de acumuladores.
2_INSTRUÇÕES DE USO
COLOCAÇÃO DA FERRAMENTA
Devem ser lidas todas as indicações de
advertência e todas as instruções. O
desrespeito das advertências e instruções
apresentadas abaixo pode causar choque
eléctrico, incêndio e/ou graves lesões.
MONTAGEM
Não continuar a premir o interruptor de
ligardesligar após o desligamento
automático da ferramenta eléctrica.
CONEXÃO ELÉTRICA
O acumulador é fornecido parcialmente
carregado. Para assegurar a completa
potência do acumulador, o acumulador
deverá ser carregado completamente no
carregador antes da primeira utilização.
Indicador de status de carga
Verde:
Vermelho:
Protecção contra sobrecarga em dependência da
temperatura
This manual suits for next models
1
Table of contents
Languages:
Other stayer Power Screwdriver manuals

stayer
stayer BHL111 User manual

stayer
stayer BHL111K User manual

stayer
stayer B48PRK User manual

stayer
stayer BHL114K User manual

stayer
stayer 384B User manual

stayer
stayer BL50K User manual

stayer
stayer BL50CK User manual

stayer
stayer BL50CK User manual

stayer
stayer BH12 User manual

stayer
stayer BHL 111 B User guide
Popular Power Screwdriver manuals by other brands

Black & Decker
Black & Decker Scrugun 2020-10 owner's manual

Ingersoll-Rand
Ingersoll-Rand QA1L High Torque Series Product information

Black & Decker
Black & Decker KC9038 manual

MYTORQ
MYTORQ MYBT-NR2560 Series Operation and maintenance manual

Ferm
Ferm CDM1136 Original instructions

Ryobi
Ryobi R4SD Original instructions