stayer HL160 User manual

www.grupostayer.com
Manual de instrucciones
ES
Istruzioni d’uso
IT
Operating instructions
GB
Bedienungsanleitung
DE
Instructions d’emploi
FR
Manual de instruções
P
Kullanma Kılavuzu
TR
Área Empresarial Andalucía - Sector I
Calle Sierra de Cazorla nº7
C.P: 28320 Pinto (Madrid) SPAIN
Email: sales@grupostayer.com
Email: info@grupostayer.com
HL105
HL160-HL190
HL220
HL2000
HL2200IND
HL2700IND
HL3000IND

HL105
HL160
HL190
HL220
W1
W
1650
1800
2500
3000
Q
l/min
5.5
6.5
7
7.5
P
2
bar
105
165
195
200
P1
bar
4
4
4
4
IP
IP
IPX5
IPX5
IPX5
IPX5
T1
ºC
5-50
5-50
5-50
5-50
M
kg
6
20
22
22
ahw
2
m/s
<2.5
<2.5
<2.5
<2.5
LPA
dB (A)
81
76
79
79
LWA
dB (A)
96
93
97
97
2
UNE EN 60335-2-79:2009 Annex ZAA, K = 3 dBA (L , L ) K = 2,1 m/s (a )
pA WA h
6.1.
HL2000
HL2200IND
HL2700IND
W1
W
2000
2500
Q
l/min
6.5 / 7
7.5
P
2
bar
150
160
P1
bar
4
4
IP
IP
IPX5
IPX5
T1
ºC
5-50
5-50
M
kg
19.5
21.3
ahw
2
m/s
<2.5
<2.5
LPA
dB (A)
78
79
LWA
dB (A)
96
87
HL3000IND
3000
9
200
4
IPX5
0-40
25
<2.5
77
86

12
3
4
5
12
6
9

4
3
9
3
10
713
13
7
11
11

5
5
ENGLISH
The device has been designed to clean surfaces and
objects in the elements, tools, vehicles and boats. With
special accessories can be mixed for the cleaning
products recommended by STAYER, unclogging pipes
and loosen rust or paint.
This product is not suitable for industrial use. Regulatory
use also involves the use at an ambient temperature
between 5 ° C and 50 ° C.
This manual includes instructions on
proper installation and safe use of
machinery. It is very important to read
carefully these instructions.
1. List of contents Page
2. Special safety instructions...................................12
3. Machine-specific Safety Warnings.......................13
3.1. Placing or fixing the tool........................................13
3.2. Assembling..........................................................13
3.3. Electrical connection............................................13
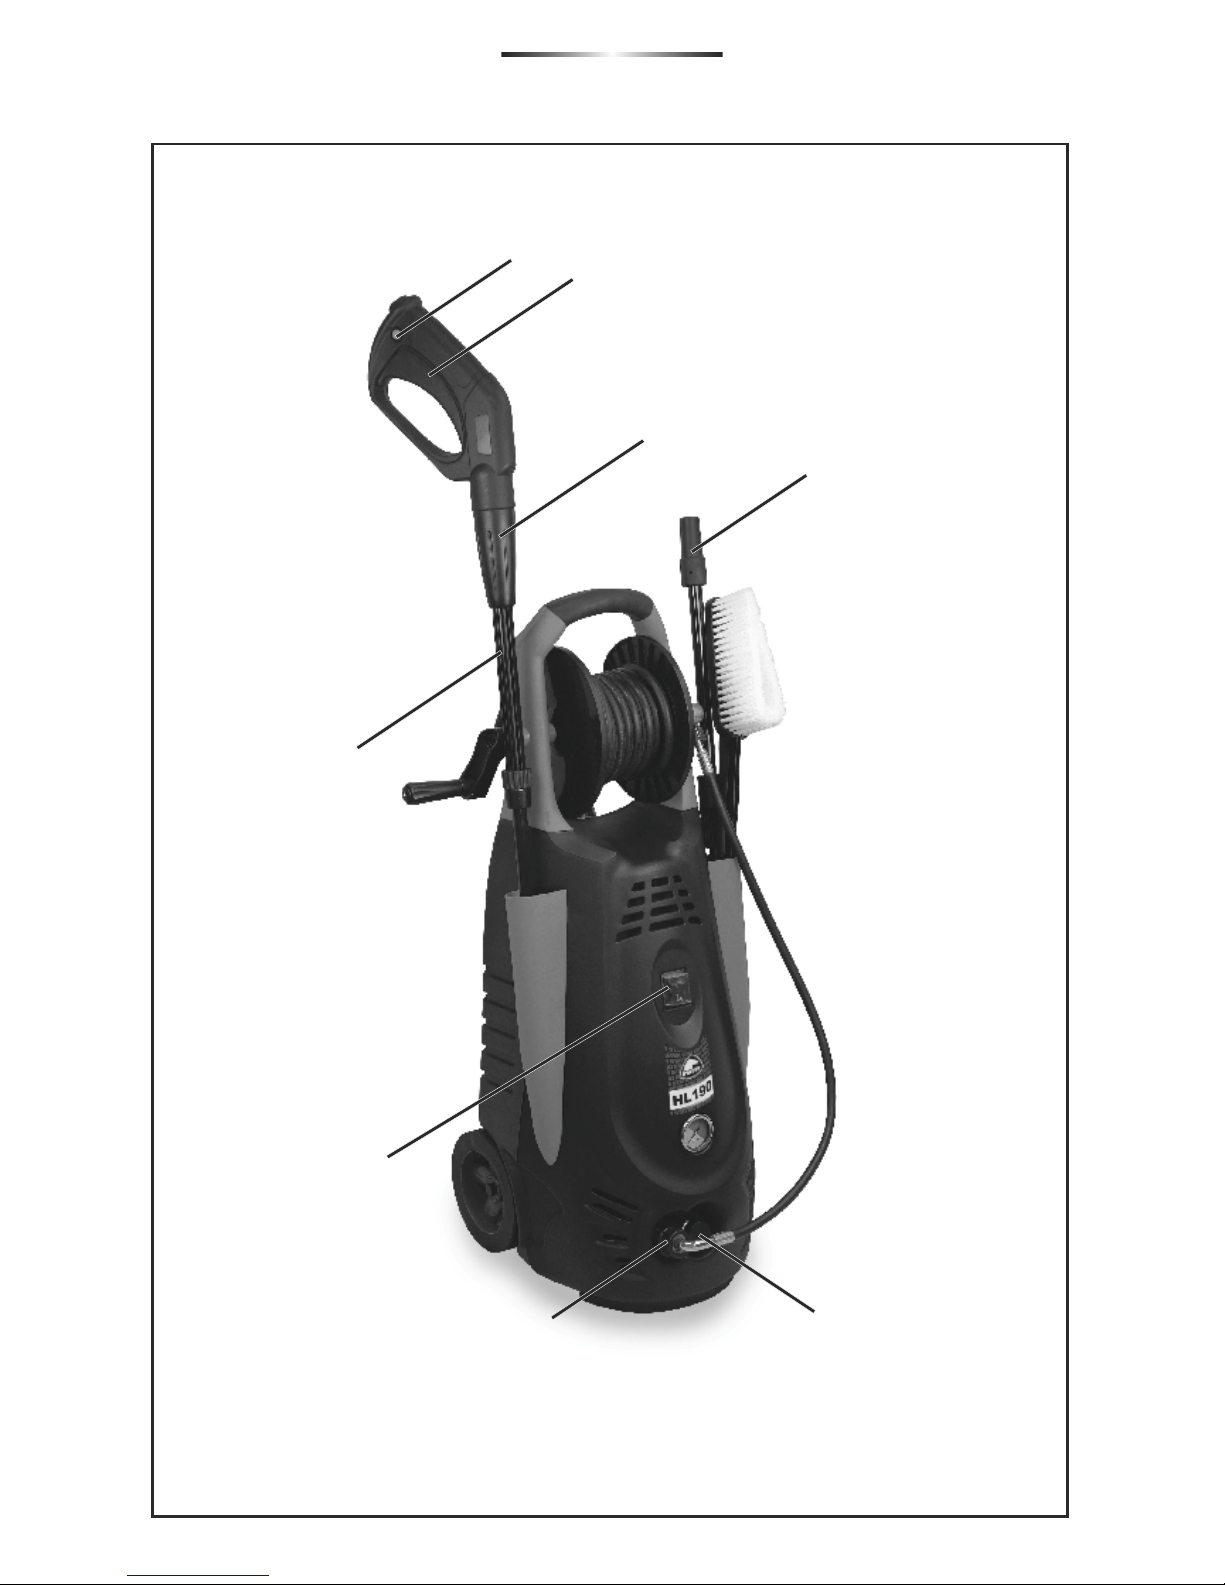
3.4. Illustrated description...........................................13
4. Operating instructions..........................................13
4.1. Placement and testing..........................................13
4.2. Instructions for use...............................................14
5. Maintenance instructions.....................................14
5.1. Cleaning, maintaining, lubricating, sharpening.....14
5.2. Repair service......................................................15
5.3. Guarantee............................................................15
6. Legal Regulations.................................................15
6.1. Technical features................................................15
6.2. EC Declaration of Conformity...............................15
2. Machine-specific Safety Warnings
Before start-up please read these instructions!
Before using the machine please read the
operating instructions for your unit and
comply in particular with these safety
instructions. Please keep the instructions
safe for later use.
The warning and information signs
attached to the unit provide important
information for safe operation.
Apart from the information in the operating
instructions comply with the general safety
regulations and regulations for the prevention of
accidents.
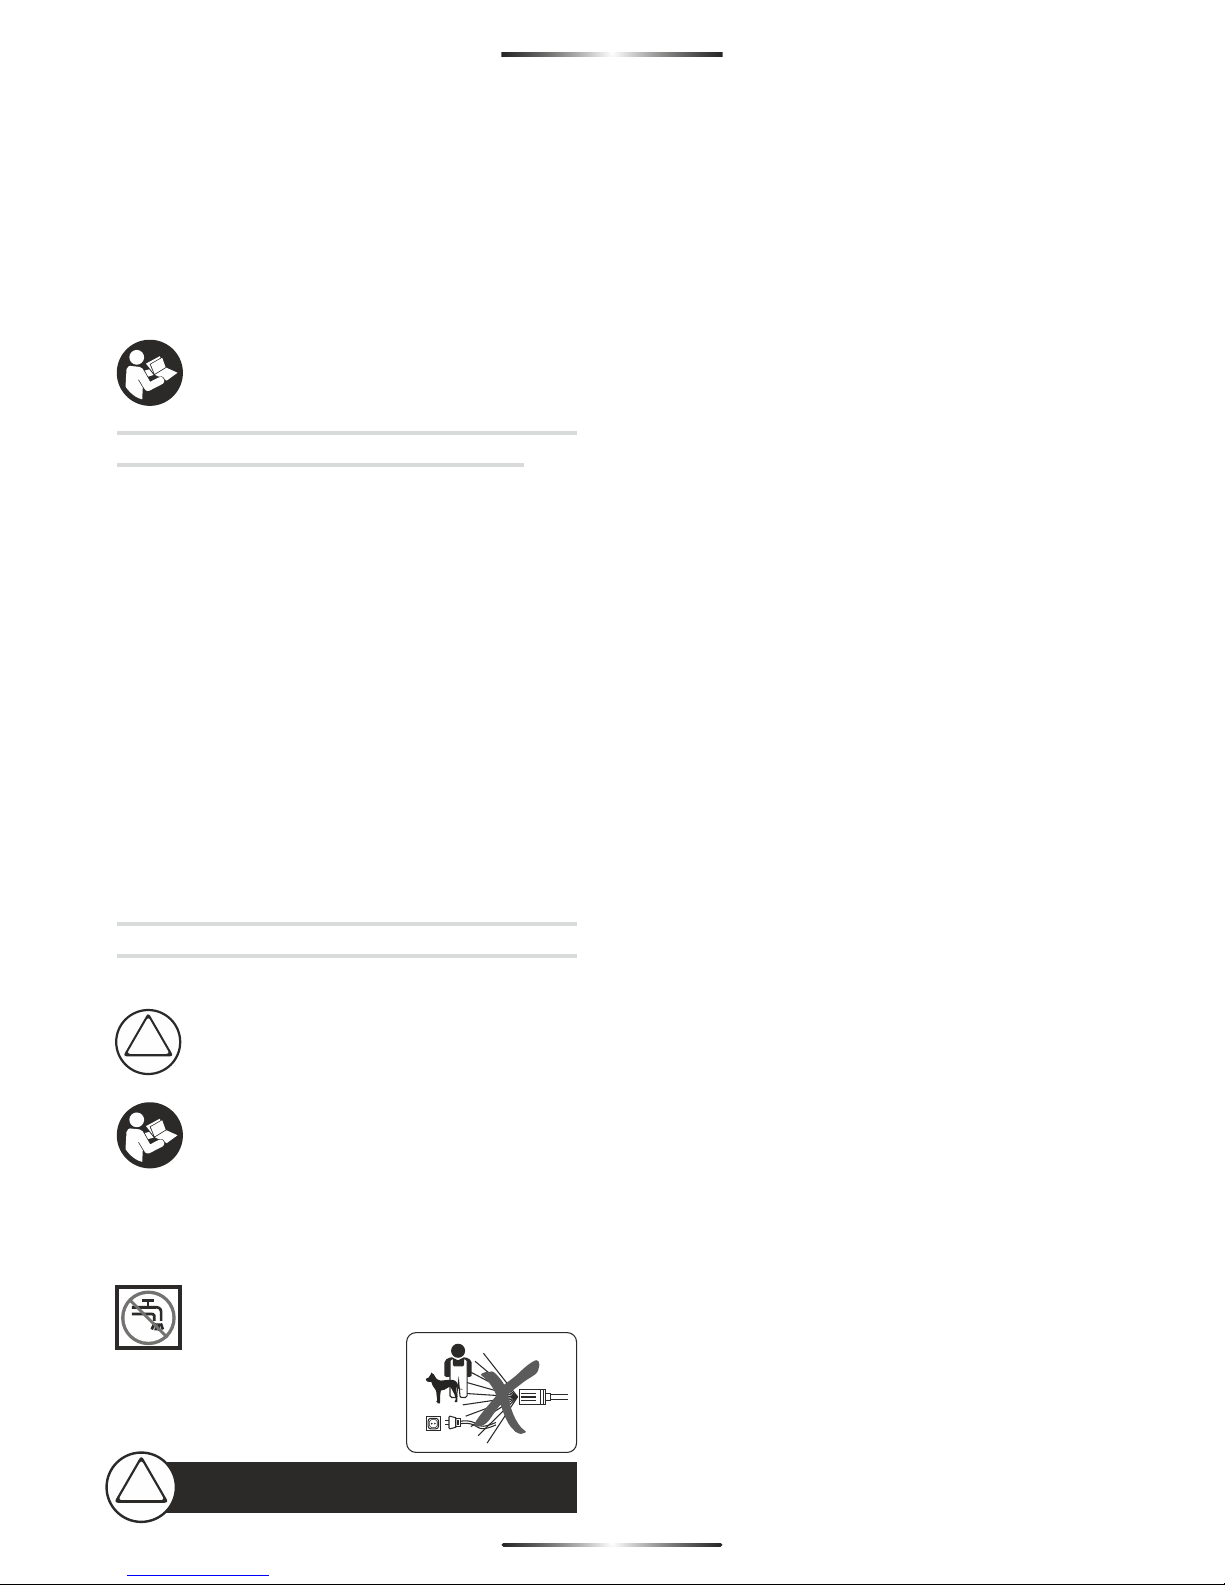
Machine not suitable for connection to the
potable water mains.
Never direct the water jet at
people, animals, the unit or
electric components.
Power suply
The voltage indicated on the rating plate must correspond
to the voltage of the power source.
Class 1 units may only be connected to properly earthed
power sources.
This equipment is only connected into a socket which is
protected by a circuit-breaker that would be actuated by a
30 mA residual current. If an extension cord is used, the
plug and socket must be of a water tight construction.
Warning. Inadequate extension cords can be
dangerous. Never touch the mains plug with wet
hands.
Do not run over, crush or pull the power supply cable or
extension lead, otherwise it may be damaged. Protect the
cable from heat, oil and sharp edges.
The extension lead must have a cross section in
accordance with the operating instructions and be
protected against splashed water. The connection must
not be in water.
Water connection
Comply with the regulations of your water supply
company.
All connecting hoses must have properly sealed joints.
The high-pressure hose must not be damaged (danger of
bursting). A damaged high-pressure hose must be
replaced immediately. Only use hoses and connections
recommended by the manufacturer.
Application
Before use, check that the unit and operating equipment
are in perfect condition and are safe to operate. Do not use
the unit if it is not in perfect condition.
Never draw in solvent-containing liquids, undiluted acids
or solvents! This includes petrol, paint thinners heating oil.
The sprayed vapour is highly flammable, explosive and
toxic; also acetone, undiluted acids and solvents as these
corrode the materials used on the unit.
The appropriate safety regulations must be observed
when using the unit in dangerous area (e.g. petrol
stations). It is forbidden to operate the unit in
potentially explosive locations.
The gun trigger must not be jammed in the “ON” position
during operation.
Suitable protective clothing must be worn if necessary to
protect against splashing from some parts.
Vehicle tyres/tyre valves may only be cleaned from a
minimum distance of 30 cm, otherwise the vehicle
tyre/tyre valve could be damaged by the high-pressure jet.
The first indication of this is a discoloration of the tyre.
Damaged vehicle tyres/tyre valves can be deadly
dangerous.
Materials containing asbestos and other materials which
contain substances which are hazardous to your health
must not be sprayed.
Only use detergents which have been approved by the
manufacturer of the unit.
!
High pressure jets can be dangerous if
subject to misuse.
!

ENGLISH
Detergents must not be used undiluted. The products are
safe to use as they contain no acids, alkalis or
substances which are detrimental to the environment.
We recommend that the detergents are kept out of the
reach of children. If detergent comes into contact with the
eyes wash immediately with plenty of water and if
swallowed contact a doctor immediately.
Operation
The operator must use the unit in accordance with the
regulations. He/she must take local conditions into
account and be aware of other people, especially
children, when operating the unit.
Do not use the appliance within the range of persons,
unless they wear protective clothing.
Do not direct the jet against yourself or others in order to
clean clothes or footwear.
The unit may only be used by authorised persons who
have received training or have demonstrated their ability
to operate the unit. The unit must not be operated by
children or juveniles (danger of accidents due to
incorrect use of the unit).
The unit must never be left unsupervised while the motor
is running.
The water jet from the high-pressure nozzle produces a
recoil on the gun. You should therefore hold the gun and
spray lance firmly.
Maintenance
Remove the plug from the socket:
– whenever you leave the unit unattended for any period
– before checking, cleaning or working on the unit
Repairs may only be carried out by authorised STAYER
Service Centres.
3. Machine-specific Safety Warnings
3.1. Placing or fixing the tool
The unit must be placed on solid base.
Only use detergents recommended by the manufacturer
and comply with the application, disposal and warning
instructions of the detergent manufacturers.
All current-conducting components in the working area
must be protected against splashed water.
3.2. Assembling
Water connection
- Screw inlet connector 7 onto machine water inlet
connection 11.
- Attach water supply hose (not supplied) to the mains
water supply and machine.
Connecting high pressure water supply hose/nozzle
- Securely screw high pressure hose 6 onto machine at
connection 12.
- Inserting the vario-jet/fan power lance 4 into the power
gun 3. Depress and turn the vario-jet/fan power lance 90°
clockwise to lock in place.
3.3. Electrical Connection
Your machine requires an earth connection. The operating
voltage is 230 V ac, 50 Hz (for non-EU countries 220 V,
240 V as applicable). Only use approved extension
cables. Contact your STAYER Service Centre for details.
If you want to use an extension cable when operating your
high pressure washer, only the following cable dimensions
should be used:
1.5 mm2 – max length 20 m
2.5 mm2 – max length 50 m
Note! If an extension cable is used it must be earthed
and connected through the plug to the earth cable of
your supply network in accordance with prescribed
safety regulations.
If in doubt contact a qualified electrician or the nearest
STAYER Service Centre.
WARNING! Inadequate extension cables can be
dangerous. Extension cable, plug and socket must be
of watertight construction and intended for outdoor
use. Cable connections should be kept dry and off
ground.
For increased electrical safety touse a Residual Current
Device (RCD) with a tripping current of not more than 30
mA. Always check your RCD every time you use it.
3.4. Illustrated description
1 Trigger safety lock
2 Trigger
3 Power gun
4 Vario-jet-fan power lance
5 Main switch
6 Water inlet hose
7 Inlet connector
8 Detergent nozzle and bottle
9 Roto power lance
10 Detergent Tank
11 Take water outlet
12 Fitting connections
13 Strainer
4. Operating instructions
4.1. Placement and testing
Connect the product to the mains supply ensuring that the
mains switch is in the position.
!For safety, it is essential that the mains plug
attached to the product is fitted to the power
supply cable. The couplings of connection
leads must be protected against splashes and
the coupling sockets on the leads must be made of
rubber or coated with rubber. Fixing means for the
connection leads must be used. If the supply cord is
damaged, it must be replaced by a STAYER Service
Centre.
6
6

ENGLISH
!Stop, remove plug from the power supply
and disconnect from water supply.
Recommended cleaning method
Step 1: Loosening dirt
Spray on detergent sparingly and allow to react for a short
time.
Step 2: Removing dirt
Spray off the loosened dirt with the high-pressure spray.
Note! When cleaning a vertical surface spray off
dirt/detergent from the bottom and work in an
upwards direction. Rinse from the top and work
downwards.
5. Maintenance instructions
5.1. Cleaning, maintaining, lubricating,
sharpening
Warning! Switch off, remove plug from mains before
adjusting, cleaning or if cable is cut, damaged or
entangled.
Cleaning/inspecting the strainer
Expose the strainer 13 in the machine water inlet
connection by removing the inlet connector 7.
Rinse and replace. If damaged replace.
Never use the pressure washer without the strainer or a
damaged strainer.
Maintenance
Note! To ensure long and reliable service, carry
out the following maintenance regularly.
Regularly check for obvious defects such as loose
fixings, and worn or damaged components.
Check that covers and guards are undamaged and
correctly fitted. Carry out necessary maintenance or
repairs before using.
If the pressure washer should happen to fail despite
the care taken in manufacture and testing, repair
should be carried out by an authorised service agent
for STAYER garden products.
Environmental Protection
Chemicals dangerous to the environment must not be
allowed to enter the ground, ground water or ponds,
streams, etc.
For the use of cleaning agents, observe the instructions on
the package and the prescribed concentration exactly.
For the cleaning of motor vehicles the local regulations
should be observed: Do not allow oil sprayed off to enter
into the ground water. Recycle raw materials instead of
waste disposal.
Open water tap
Press the safety lock 1 to release the trigger 2. Fully
press the trigger 2 until there is a constant flow of water to
clear the air from the machine and water supply hose.
Release trigger 2. Press the trigger safety lock 1.
Press button on main switch 5.
Point the power gun 3 downwards. Press the trigger
safety lock to release the trigger 2. Fully press the trigger
2.
Stopping
Release trigger 2. Press the trigger safety lock. The
power gun is now locked and can not be operated
accidentally. Press button on the main switch 5.
Close water tap. Unplug the machine from the electric
supply.
Press the trigger safety lock 1 to release the trigger 2.
Fully press the trigger 2 until there is no more water
pressure in the machine. Release trigger 2. Press the
trigger safety lock 1.
Disconnect water supply hose from machine and water
supply.
Fine-tuning operations
Vario-jet-fan power lance
Twist the front ring to adjust from a pencil to a fan jet and
vice versa.
HL 190 / HL220 models fit the screw. HL 105 / HL
160snap fits with half turn.
4.2 Instructions for use.
General
Ensure that the machine is on level ground.
Do not overreach with the high pressure hose or move
the pressure washer by pulling the hose, this could cause
the machine to become unstable and fall over.
Do not kink or drive a motor vehicle over the high
pressure hose. Do not expose the high pressure hose to
sharp edges or corners. Never use the roto nozzle to
clean motor vehicles.
Operating with Detergents
Only use approved detergents. Unsuitable
detergents may damage the unit and the object
being cleaned.
Fill the detergent tank 10 with detergent, dilute as
recommended.
To spray detergent move vario-jet-fan power lance to low
pressure mode.
We recommend that you use detergent sparingly for the
sake of the environment. Observe the recommended
dilution on the detergent label.
7
7

ENGLISH
!Switch off and remove plug from mains before
investigating fault.
Ramiro de la Fuente
Director General
6. Legal Regulations
6.1. Technical features
The values given are valid for nominal voltages [U]
230/240 V ~ 50/60 Hz - 110/120 V ~ 60Hz. For lower
voltage and models for specific countries, these values
can vary. Please observe the article number on the type
plate of your machine. The trade names of the individual
machines may vary.
We reserve the right to change related to
technical advance.
W = Rated input power
1
Q = Maximum flow
P = Maximum Pressure
2
P1= Max. Pressure Water Supply
IP = Protection index
T = Water temperature
1
M = weight
a = Acceleration typically evaluated in the
hw hand/arm
A
L = Acoustic pressure level
P
L = Acoustic power level
WA
The noise level when working can exceed 95 dB (A).
6.2 EC Declaration of conformity
The undersigned: STAYER IBERICA, S.A.
With address at:
Calle Sierra de Cazorla, 7
Área Empresarial Andalucía - Sector 1
28320 PINTO (MADRID)
Tel.: +34 902 91 86 81 / Fax: +34 91 691 91 72
CERTIFIES
That the machine:
Type: Hidrolimpiadoras
Models: HL105 / HL160
HL190 / HL220 / Hl2000 /
HL2200IND / HL2700IND / HL3000IND
We declare under our sole responsibility that this product
is in conformity with the following standards or
standardized documents:
EN 60335-2-79, EN 55014-1, EN 55014-2, EN 61000-3-2, EN
61000-3-3 according to EU Regulations 2006/42/CE,
2014/30/EU, 2011/65/EU.
Disposal
It is compulsory to subject electric tools, accessories and
packaging to a recovery process that respect the
environment.
For EU countries only:
Do not throw away electric tools!
In accordance with European Directive
2012/19/UE on unserviceable electric and
electronic apparatus, after its transposition
into national law, they must be collected
separately to subject them to ecologic
recycling.
The right to amendment is reserved.
5.2. Repair service
The technical service will provide you advice regarding
questions you may have on the repair and maintenance
of your product as well as on spare parts. You may also
obtain exploded views and information on spare parts on
the internet under: info@grupostayer.com
Our team of technical advisors will be glad to guide you
regarding acquisition, application and adjustment of
products and accessories.
List of Replaceable Parts
The attached table (T1-page 16) gives checks and
actions that you can perform if your machine does not
operate correctly.
If these do not identify/remedy the problem, contact your
service agent.
5.3. Guarantee
Guarantee card
Included in the documentation that accompanies this
equipment, you should find the warranty card. You
should fill out the card completely and return to vendor
with a copy of purchasing receipt or invoice and you
should receive a receipt.
Note! If you cannot find the warranty card within the
documentation, you must ask for it through your
supplier.
The warranty is limited only to manufacturing defects and
expire if pieces have been removed or manipulated or
repaired other than the manufacturer.
8
8
September 29, 2017

ENGLISH
Accessories and spare parts
Only use accessories and spare parts which have been approved by STAYER. Original accessories and spare parts
guarantee that the unit can be operated safely and without any breakdowns.
Symptom
Possible Cause
Remedy
Motor refuses to start
- Plug not connected
- Mains socket faulty
- Fuse faulty/blown
- Extension cable damaged
- Motor protector has activated
- Frozen
- Connect plug
- Use another socket
- Replace fuse
- Try without extension cable
- Allow to cool for 5 minutes
- Wait for pump/water supply hose/accessory to
thaw
Motor stops
- Fuse faulty/blown
- Wrong mains voltage
- Motor protector has activated
- Replace fuse
- Check that mains voltage corresponds to
specifications on the model tag
- Allow to cool for 5 minutes
Fuses blow
Fuses faulty/blown
Change to a mains supply higher than the
pressure washer amp consumption
Excessive working pressure
Nozzle partly blocked
Clean nozzle
Pressure pulsating
- Air in the inlet water supply hose/pump
- Inadequate water supply
- Water strainer blocked
- Water supply hoses squeezed
- High pressure hose too long
- Allow pressure washer to run with open spray
handle and nozzle at low pressure until regular
working pressure is obtained.
- Check that the water supply corresponds to
specifications. The minimum specification for
the water supply hose is 1/2" or 13 mm
diameter.
- Clean water strainer
- Straighten out kinked water supply hoses
- Dismount high pressure extension hose. Retry
(extension hose max. 7 m)
Pressure too low, but steady
Note! Several types of accessory will normally
deliver a lower pressure
- Nozzle worn
- Start/stop valve worn
- Change the nozzle
- Activate trigger five times in quick succession
Motor starts up but no working pressure
- No water supply
- Water strainer clogged up
- Nozzle clogged up
- Connect water supply
- Clean the water strainer
- Clean nozzle
The pressure washer starts irregularly by itself
Pump/power gun leaky
Contact your STAYER Service Centre
Water leaks from machine
Leaking pump
6 drops per minute are permissible. In case of
more serious leakage, you should contact your
STAYER Service Centre.
Replaceable Parts Table / T1
9
9

www.grupostayer.com
Área Empresarial Andalucía - Sector I
Calle Sierra de Cazorla nº7
C.P: 28320 Pinto (Madrid) SPAIN
Email: sales@grupostayer.com
Email: info@grupostayer.com
This manual suits for next models
7
Table of contents
Other stayer Pressure Washer manuals
Popular Pressure Washer manuals by other brands

Generac Portable Products
Generac Portable Products 2500PSI owner's manual

Briggs & Stratton
Briggs & Stratton 20275 Illustrated parts list

Craftsman
Craftsman 580.752340 Operator's manual

Shark
Shark BR Series Operating instructions and parts manual

Demon
Demon Hurricane P1 Operation manual

Scheppach
Scheppach HCE1600 Translation of original operating manual