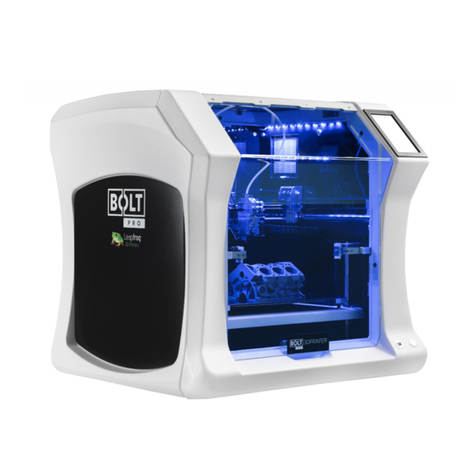
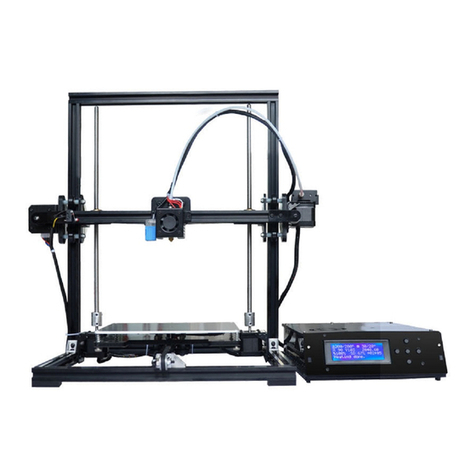
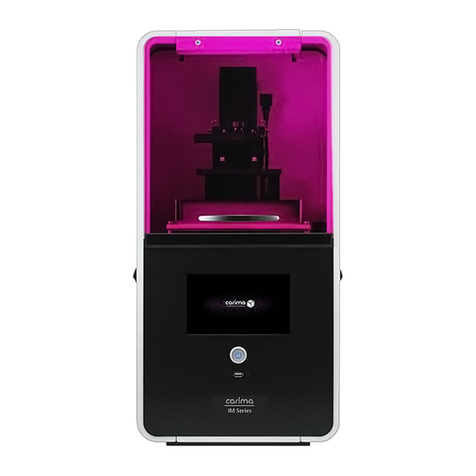
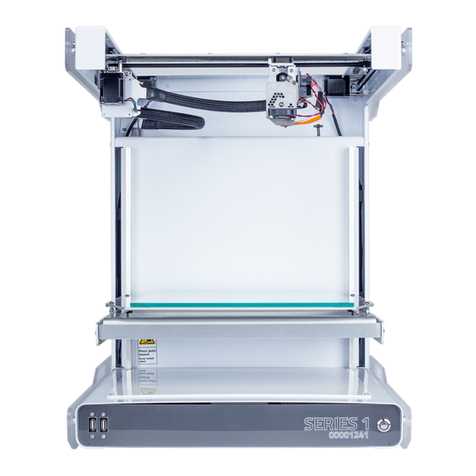
Stedi ModelSmart Pro 280 User manual

1
User Guide
ModelSmart Pro 280 • ModelSmart Pro 200

2
CONTENTS
Introducon
ST3Di 3D Printer Guarantee
Safety Instrucons
Box Contents
Set-Up
Windows Operang System
Mac Operang System
Installing Cartridges
Z Axis Sheets
How to print
Prinng via your ST3Di 3D Printer
Other LCD Funconality
Cleaning and maintenance
Technical Specicaons
Contact Details
Cercaons and Compliance
Troubleshoong
3
4
5
6
7
10
11
15
18
19
26
27
28
29
29
30
31

3
INTRODUCTION
Here at ST3Di we are passionate about 3D prinng and
have created our fantasc range of 3D printers in order
to provide you with an opportunity to step into the
wonderful world of object creaon alongside us.
This is the age of what is being labelled as the ‘prosumer’:
the merging of the producer and the consumer. Having
purchased your very own ST3Di 3D printer you now
have the ability to become just that, by creang your
own unique 3D models!
Whether you are a small business or a home user, the
applicaons of the 3D printer are limitless! If your
creave juices haven’t started owing just yet, why not
check out our Model Library to help get you started.
With your new ST3Di 3D printer you have the added
bonus of our large scale prinng areas of up to
200mm (ModelSmart Pro 200) or even 280mm wide
P.S. If you have wonderful and excing ideas about what you would like to be able to print
but are struggling to nd a model design that works for you, why not get in touch and see
if we can help you to create your object! Simply get in touch and submit your ideas!
(ModelSmart Pro 280). This gives you a great space to
create some fantasc large size models.
But don’t let the bed size limit you in what you want
to create! Here at ST3Di you will nd some amazing
models that are much larger than the actual print area….
but have been designed to be printed in smaller parts
and then assembled post-prinng to give you a much
larger nished model; prey much like everything that
is currently produced for you!
So, what are you waing for? Go ahead and jump right
into this excing and revoluonary new world and see
what you can produce!
Happy prinng!
The ST3Di 3D team

4
ST3Di 3D PRINTER GUARANTEE
1 3
4
2
ST3Di guarantees this printer against any defects in both material and workmanship for a period of 180 days from
the date of purchase.
In order to validate this guarantee you must provide your details at the point of downloading the ST3Di Edit Soware.
Should any defect(s) be discovered during this 180 day period, the product may be returned to the manufacturer
at the address below. The following informaon outlines the process you must follow in order to return a product
for repair:
Contact the ST3Di customer service team
between 8.30am to 5.30pm, Monday to
Friday during normal working hours by
emailing guaran[email protected]om. You will
be provided a Returns Transfer Number
(RTN). Your serial number and proof of
purchase will be required in order to pro-
cess your claim.
Please then clearly write this RTN on the
outside of the box or packaging, next to the
shipping label.
ST3Di will not be responsible for non-traceable packages or packages sent without a valid RTN number on the
outside of the packaging.
This guarantee is not valid if the product has been damaged by accident, electrical fault, through misuse, abuse,
or failure to provide reasonable care as outlined within the User Guide. If the product has been altered without
wrien authorisaon from the ST3Di team then the guarantee will not be valid.
All implied guarantees, including any implied guarantee of tness for any parcular purpose, are limited in
duraon to 180 days from the date of original purchase. In no event will ST3Di be responsible for consequenal
damages resulng from the use of this product.
The above limitaon or exclusion may not apply to you to the extent that applicable law may not allow the limitaon
or exclusion of liability for incidental or consequenal damages.
Should an error occur outside of the guarantee period, the ST3Di team also provide a charged repair and replace
service. Please contact our Customer Service team on guarantee@ST3Di.com for further informaon.
AFTER SALES SUPPORT
ST3Di have a dedicated team of 3D prinng specialists that are available to help with any problem or queson you
may have regarding your ST3Di 3D printer. Please contact our team on via our Contact Form at any me and we
would be happy to help.
180 DAY LIMITED GUARANTEE
Please ensure you include a copy of
your sales receipt when you return the
product.
Return Address:
ST3Di 3D Printers,
26 Chase Road, Park Royal
London NW10 6BB

5
SAFETY INSTRUCTIONS
Whilst in operaon, the extruder on your ST3Di 3D printer becomes very hot. Always allow me for
the extruder to cool down before you reach inside the printer.
If using the ST3Di ModelSmart Pro 280, please note that the glass bed can also be heated. The bed
isn’t heated on the ModelSmart Pro 200 but this may sll warm aer prinng due to the heated
lament. Always allow the beds to cool down before reaching inside to remove the bed or your
model.
This product is not to be serviced by anyone other than a ST3Di approved engineer otherwise there
may be a risk of electric shock. Any unapproved servicing will also void your Guarantee.
The ST3Di 3D printers include moving parts, which may cause injury if interfered with whilst in use.
Never reach inside your ST3Di 3D printer whilst it is in use.
Never leave your ST3Di 3D printer unaended during operaon.
Please ensure that the printer is located in an area that is:
• close to the intended power supply and that the socket is easily accessible
• well venlated
• clean and dry
• a consistent and stable temperature and humidity
• posioned away from any object that may cover the venlaon holes on the printer
• posioned away from any ammable items
• posioned away from any liquids
• a at and stable surface
Any damage caused by improper use of the printer or its component and consumable parts, which
is in contradicon with this User Guide becomes the full responsibility of the user and will void your
Guarantee.
This printer is not suitable for children. Anyone under the age of 16 must be supervised by an adult.
Never turn o your ST3Di 3D printer during prinng; please wait unl the job has completed and the
print bed and extruder(s) have returned to the Home Posion before turning o the power.
Due to the weight of this product, 2 people are required to remove the printer from the outer box
packaging and onto a suitable surface.
WARNING
(Heated surface)
WARNING
(Electrical component)
CAUTION

6
BOX CONTENTS
A
D
G
J
B
E
H
K
C
F
I
L
ST3Di 3D Printer
- ModelSmart Pro 280
- ModelSmart Pro 200 Glass bed
Filament Cartridge
(x2 for the ModelSmart Pro 280)
Cartridge Filament Holder
(x2 for the ModelSmart Pro 280)
Extra Long 3m USB Cable
Filament tubes
(x2 for the ModelSmart Pro 280)
2m Power Cable
512MB SD Card
Z Axis Sheets
24v Power Adapter
4 Screws to aach the lament
holder to the ST3Di printer
(x2 for the ModelSmart Pro 280)
Quick Start Guide

7
1. Remove the printer from the double lined box. Please
note that two people are required to remove the printer
from the box.
2. Open the printer door and remove the following items
from the internal packaging:
a. Glass bed
b. Filament Cartridge(s)
c. Filament Cartridge holder(s)
d. Power Cable
e. 24V power adapter
f. USB Cable
g. 4 screws for the lament holder (x2 for the ModelSmart
Pro 280)
h. Filament tubes (x2 for the ModelSmart Pro 280)
i. Z Axis Sheets
3. Set up the lament holder cable(s):
a. Connect the A1 cable to the rear of the lament
cartridge holder. Please refer to the illustraon for
details and correct orientaon.
b. Repeat as necessary for the ModelSmart Pro 280 by
connecng the B1 cable to the rear of the second lament
holder.
4. With the 4 screws provided aach the lament cartridge
holder (x2 for the ModelSmart Pro 280).
Important note: hand ghten only.
SET-UP
Please follow the steps below to get your ST3Di 3D printer ready for prinng. Before you start, please note that
two people are required to remove the printer from the box. Once removed from the box please ensure that your
printer is posioned on a at and stable surface, this helps to minimise vibraon and produce more accurate prints.

8
5. Insert the glass bed onto the print bed area at an
angle to ensure it ts underneath the metal ridge at the
back, then lower it onto the magnets at the front to
secure it in place.
6. Check the SD card is in place. Please note that if the
printer is not connected to a computer then an SD card
must always be in place to enable prinng.
7. Connect the USB cable.
8. Connect the Power Cable and turn on the printer.
9. Download and install the ST3Di Edit Soware from
www.ST3Di.com/download/st3di-edit.
Firstly, please insert your serial number.
Your serial number can be found on the outer box pack-
aging, or on the rear of your printer.
ST280-15001-WT64R
www.st3di.com
www.st3di.com
3D Printers Consumables Guides & ToolsSoftwareModel Library
In order to validate your printer
guarantee, please register your
product.
?
Download
Enviroment Support Contact
Please enter you serial number.
?
Download
Please enter you serial number.
D
own
l
oa
d
ase e
n
n
t
t
e
e
r
r
y
y
o
o
u
u
s
s
e
e
rialnum
Enter your Printer
Serial Number and
click Download

9
In order to validate your printer Guarantee, please then enter your details. The installaon process will then
begin.
www.st3di.com
www.st3di.com
3D Printers Consumables Guides & ToolsSoftwareModel Library
In order to validate your printer
guarantee, please register your
product.
?
Download
Enviroment Support Contact
Please enter you serial number.

10
WINDOWS OPERATING SYSTEM
Please follow the on-screen pop-up messages to install the ST3Di Edit Soware as below:

11
MAC OPERATING SYSTEM
If you are installing onto a MAC operang system then please follow the process below:
Aer clicking download on the website, allow the .dmg le to download onto your computer and then double
click to open as shown above.
When the folder has opened (as above), please drag and drop the ST3Di icon onto your desktop to install.

12
Whether you are using a Windows or MAC operang system, the rst thing you will be asked to do when you
open the ST3Di Edit Soware, is select your language, as below (with the excepon of windows 7; see below):
10. If however you are using a Windows 7 operang system then before you are asked for your language selecon,
you will be asked to install the ST3Di Helpful Printer Driver® via the message below. With the Helpful Printer
Driver® you get real-me accurate lament levels, which not only show you what remains but will alert you when
you are running close to the end of the reel. The Helpful Printer Driver® also oers live and up-to-date industry
informaon. This includes elements such as new design soware or models that may be available, or 3D prinng
related applicaons, or even new print material that you can try out. You may also get unique promoonal oers
each and every me you print.
ST3DI
For help related to your
Helpful Printer Driver®
please visit the support
page.
Why Buy ST3Di?
Learn more
60%100%
40%
Fantasc and unique
offers from your
printer reseller.
Real me accurate filament
levels as you print.
Important: for full print functionality please download
and install your Helpful Printer Driver®
and get access to these amazing features!
Download
First to hear about
new features and
print materials.
Newsflashes on new
software available.
Regular updates on industry
news to keep you ahead of the
game with your 3D printing.
Print progress bar.
Easy and convenient way to buy
replacement filament, right
at the me you need it most.
PLEASE CHOOSE PREFERRED LANGUAGE
English
Deutsch
Nederlands
Português
Čeština
Español
Italiano
Suomalainen
Dansk
Français
Norsk
Svensk
Eλληνικά

13
11. Please click the ‘download’ buon to begin the installaon process. We know it can be frustrang to have to
enter the same informaon mulple mes, but in order to e your Soware to the Helpful Printer Driver® and
ensure you receive all of the fantasc benets, we will need you to enter your serial number for a second me.
Once you have done this please hit download and simply follow the installaon process as below:
www.st3di.com
www.st3di.com
3D Printers Consumables Guides & ToolsSoftwareModel Library
You need to first install the
ST3Di edit siftware to use this
software.
Download
Please enter you serial number to
download the software.*
ST3Di Helpful Printer Driver®
Helpful Printer
Driver®
ST3DI
Forhelp related to your
HelpfulPrinter Driver®
pleasevisit the support
page.
WhyBuy ST3Di?
Learnmore
S
T3D
I
Forhelp related to
y
our
Hel
pf
ulPrinter Driver
®
p
l
easev
i
s
i
tt
h
e
support
page
.
W
hyBuy
S
T3Di
?
Lea
rnm
o
r
e
60%100%
40%
offers from your
printer reseller.
Real me accurate filament
levels as you print.
Important: for full print functionality please download
and install your Helpful Printer Driver®
and get access to these amazing features!
Download
First to hear about
new features and
print materials.
Newsflashes on new
software available.
Regular updates on industry
news to keep you ahead of the
game with your 3D printing.
Print progress bar.
Easy and convenient way to buy
replacement filament, right
at the me you need it most.

14

15
INSTALLING CARTRIDGES
Before you can print you must install a lament cartridge (or two, if you have the ModelSmart Pro 280 and wish to
print with both extruders, i.e for models in two colours or a more complex model that requires support structures.
See our Model Library for examples).
In order to do this you must use the menu controls on the touchscreen LCD on the top of the printer. Please follow
the process below:
From the Main Menu please select ‘Change Filament’
If you have the ModelSmart Pro 280 please select the
cartridge that you wish to install/change. You will not be
presented with this step if you have the ModelSmart Pro
200 as there is only one extruder.
Please then wait a few moments for the selected
extruder to warm up. This is necessary because in
order to successfully load a cartridge a small amount of
material needs to be extruded through the nozzle. The
‘Connue’ buon will remain inacve unl the extruder
is warmed to the correct temperature.
1.
3. 4.
2.

16
You will then be asked if a lament cartridge is already installed. Inially this will be ‘No’ as this is the rst me a
lament cartridge has been loaded; but when changing a cartridge in future you will select ‘Yes’. Selecng ‘Yes’ will
uninstall the exisng lament before allowing you to load a new lament.
You then need to install the cartridge onto the side of the printer. Firstly, remove the lament cartridge from
the outer packaging and take out the red plug from the side of the cartridge casing. Slide the cartridge onto the
lament holder on the side of the printer and gently push unl you hear it click into place.
Next, Gently pull out sucient lament from the cartridge (5cm to 15cm). Cut o the rst 5cm of the lament and
push through the lament tube (item H). Feed the lament through the lament tube into the corresponding ng
on the side of the printer.
5.
Feed the lament into the printer unl it stops. Approximately 30cm of lament will be required.

17
Whilst maintaining pressure, please press the on-screen ‘Connue’ buon which will start the extrusion process
to ensure that the lament has been fed all the way through correctly.
You should then see lament being extruded through the nozzle. When this is complete the ‘Connue’ buon
will become acve and you can complete the process.
If no lament is extruded, ensure that the lament has been pushed all the way through and whilst maintaining
pressure please push the ‘Repeat Process’ buon.
Once the lament has been installed, push the end of the lament tube onto the top of the cartridge and into the
ng on the side of the printer, ensuring that no lament is exposed.
If removing a part-used lament, please
ensure that you do not push the end of the
lament back into the cartridge casing as
this means that you will then not be able
to aach this cartridge to the printer again
for prinng.
Please note that if using a PVA cartridge
this material needs to be kept air-ght
when not in use, in order to ensure the
quality is maintained for future prints.
Therefore please ensure that you store the
cartridge in an air ght bag or container
when not in use.

18
When prinng on a 3D printer, the rst layer of material is all-important. It absolutely has to adhere to the print
bed in a consistent and even applicaon to ensure that the rest of the model sits on top correctly and isn’t out of
alignment. Any small movement or imperfecon could cause your print to not re-produce correctly.
That’s why ST3Di have created the Z Axis sheets. These are a transparent adhesive material that is easy to apply to
the print bed before each print. Your model then prints on top and when nished, you simply remove the glass bed
from the printer (once it has cooled!) and peel o the Z Axis sheet. The model then also easily peels from the sheet
leaving you with a smooth and blemish free model.
APPLYING THE Z-AXIS SHEET
1. Please ensure that the glass bed is clean and free from grease or dirt.
2. Remove the darker yellow backing sheet to reveal the adhesive side that needs to be applied to the glass bed.
3. Apply this adhesive side to the glass bed, slowly, from one edge and taking care not to leave any air bubbles as
this will cause an uneven surface for the rst layer of the model and may cause the print to fail.
4. Once the sheet has been applied fully, please remove the pale yellow backing sheet, leaving the top adhesive
layer exposed and ready for prinng. It is recommended that you begin prinng within 15 minutes of removing the
rst darker yellow backing sheet.
Z AXIS SHEETS

19
The guide below is provided to help you get started prinng with your ST3Di 3D printer. There are two ways to print:
rstly, you can print via the ST3Di Edit Soware; alternavely you can print directly from your printer via an SD card.
The informaon below outlines both processes for you.
PRINTING VIA THE ST3Di EDIT SOFTWARE
When you rst open the ST3Di Edit Soware (aer having selected your language of choice) you will see the home
screen as below (unless you have not yet connected your computer in which case you will rst be asked to conrm
if you have a ModelSmart Pro 200 or a ModelSmart Pro 280).
The list of les on the le-hand side shows you the model samples that are provided free when you purchase a ST3Di
3D printer. Addional samples can be found by clicking the ‘Samples’ buon on the right-hand side. Alternavely
if you have your own model les located on your computer you can access these by clicking the ‘Open File’ buon.
Once you have opened your selected model you will see the ST3Di Edit Scene as shown above. Any model loaded
from the Home Screen will be placed in 0 value of the X, Y and Z axis.
HOW TO PRINT
not connected
nut.stl
bolt.stl
vase.stl
sherrifbadge.stl
Open le
Samples
RECENTLY OPENED FILES

20
VIEW MODEL SAMPLES
Clicking the buon will give you access to the available models, as you saw on the home screen.
ADD MODELS FROM COMPUTER
Clicking the buon will allow you to search for your own models on your computer.
DUAL PRINTING MODE
If you have the ST3Di ModelSmart Pro 280 you will see this buon .If you click this
buon before loading models it will merge two les that form part of the same model. For example if you are
prinng a two colour print via the dual extruders, each colour will be loaded as an individual model; clicking this
buon will merge the two together so that they print as one object.
SELECTING THE EXTRUDER
COPY MODELS
The buon allows you to replicate a selected model in its current state, mulple mes within
the same Scene.
PLACE MODEL ON THE BED
The buon resets a selected model to the bed of the Scene if it has been moved either above
or below the bed during eding.
RESET CHANGES
The buon will return the model to the exact state it was when rst loaded, undoing any eding
changes you have applied.
REMOVE SCENE
The buon will remove a selected object from the Scene.
The panel on the right hand side of the screen gives you the ability
to move, scale and rotate your object. Ticking the scale buon will
enable you to scale your model uniformly.
The dual prinng funcon on the ModelSmart Pro 280 allows you to select
which extruder you use to print each object within a Scene. If you select
dierent extruders for dierent models they will be shown on screen in
dierent colours to conrm your selecon. Please note however that the
on-screen colours are not representave of the lament colours you have
installed in the printer, and subsequently therefore are also not representave
of the colour of the nal print.
LOCATION
Name Sheri Badge
X Y Z
Position 0.00 0.00 0.00
Rotation 0 0 0
Scale 1.00 1.00 1.00
Samples
Enable dual-print mode
Select extruder to use for print
Left Right
Copy
Reset changes
DELETE
This manual suits for next models
1
Table of contents
