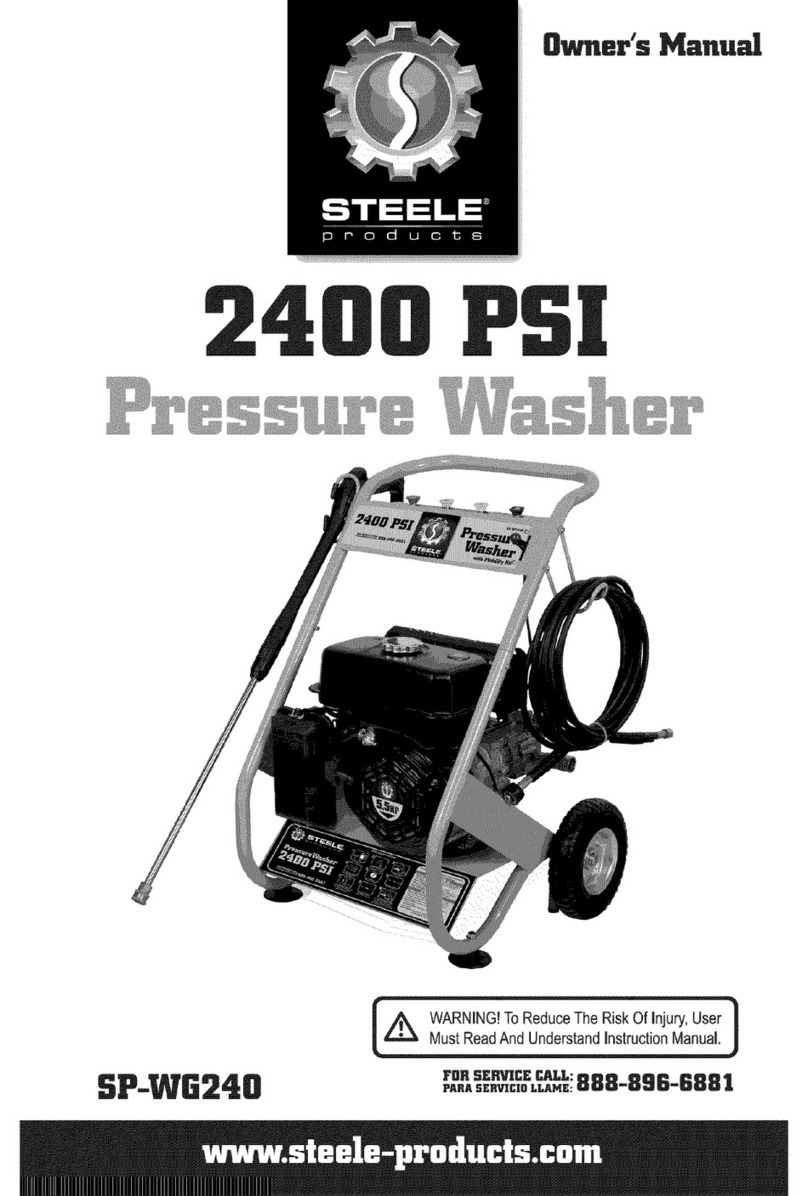
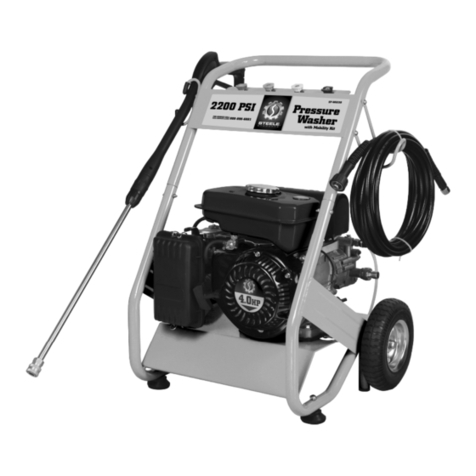
STEELE PRODUCTS SP-WG250V User manual

140cc
Presasure Washer
SP-WG250V
www.steele-products.com
WARNING! To Reduce The Risk Of Injury, User
Must Read And Understand Instruction Manual.
Owner’s Manual

1
TABLE OF CONTENTS
Page
BASIC SAFETY INFORMATION 2
EXHAUST FUMES ARE DANGEROUS 2
DO NOT OPERATE UNIT INDOORS OR IN ANY CONFINED AREA 2
SAFETY FEATURES 3
GETTING TO KNOW YOUR PRESSURE WASHER 4
ASSEMBLY & PRE-START CHECK 5
ASSEMBLY 5
PRE-START CHECK 5
START-UP PROCEDURES 6
OPERATION 7
SPRAYING WATER & NOZZLE USAGE 7
Nozzle usage 7
OPERATION & MAINTENANCE 8
DETERGENT INJECTOR (LOW PRESSURE) 8
USING THE PRESSURE WASHER TO CLEAN 8
WATER SCREEN 8
ENGINE MAINTENANCE 9
Engine Oil Replacement 9
Recommended Engine Oil 9
Inspecting, Replacing or Cleaning Spark Plug 9
PUMP MAINTENANCE 10
Pump Oil Replacement 10
Pressure Washer Storage 10
Preventing Freezing Damage 10
TROUBLESHOOTING 11
12
LIMITED WARRANTY

2
BASIC SAFETY INFORMATION
EXHAUST FUMES ARE DANGEROUS
Never operate the engine in a closed area or it may cause unconsciousness and death within a short time.
Operate in a well ventilated area.
Operate pressure washer in clean, dry, well ventilated area. Never operate unit in enclosed areas such as
garages, basements, storage, sheds, or in any location occupied by humans or animals.
Keep children, pets and others away from area of operating unit.
Breathing exhaust fumes will cause serious injury or death.
Gasoline engines produce toxic carbon monoxide exhaust fumes.
FUEL IS HIGHLY FLAMMABLE AND POISONOUS
•Always turn off the engine when refueling.
•Never refuel while smoking or in the vicinity of an open flame.
•When operating or transporting this pressure washer, be sure to keep it upright. If it tilts, fuel may leak from
the carburetor or fuel tank.
ENGINE AND MUFFLER MAY BE HOT
•Place the pressure washer in an appropriate location, away from children and pedestrians.
•Avoid placing any flammable materials near the exhaust outlet during operation.
•Keep a 4ft. clearance from buildings or other equipment around the pressure washer to prevent overheating.
WARNING! The engine muffler will be very hot after use, avoid touching the engine or muffler while they are
still hot.
ATTEMPTING TO FILL THE FUEL TANK WHILE THE ENGINE IS RUNNING
Gasoline and gasoline vapors can become ignited by coming in contact with hot components such as the
muffler, engine exhaust gases, or from an electrical spark.
Turn engine off and allow it to cool before adding fuel to the tank. Equip area of operation with a fire
extinguisher certified to handle gasoline or fuel fires.
SPARKS, FIRE, HOT OBJECTS
Cigarettes, sparks, fires, or other hot objects can cause gasoline or gasoline vapors to ignite.
INADEQUATE VENTILATION
Materials placed against or near the pressure washer or operating it in areas where the temperature exceeds
40° C ambient (such as storage rooms or garages) can interfere with its proper ventilation features causing
overheating and possible ignition of the materials or buildings.
Operate pressure washer in a clean, dry, well ventilated area a minimum of four feet from any building, object
or wall.
DO NOT OPERATE UNIT INDOORS OR IN ANY CONFINED AREA
APPLICATION
This equipment is designed for specific applications. Do not modify or use for any application other than which
it is designed.
STORAGE
Store the pressure washer in a well ventilated area with the fuel tank empty. Fuel should never be stored or
placed near the pressure washer.
SAFETY GLASSES
Always wear safety glasses while operating.
SPECIFIC SAFETY INFORMATION
NEVER OPERATE UNDER THE FOLLOWING CONDITIONS
• When a noticeable change in engine speed occurs.
• Engine misfires.
• Loss of water pressure.
• Smoke or flames in the area.
• Excessive vibration.
3
WATER SPRAY
Never direct the water spray towards ANY person, animal, electrical wiring or the pressure washer itself. Care
must be taken not to spray too close to the surface or damage could occur. Steele Products is not
responsible for damage caused during use.
HOT MUFFLER & HIGH PRESSURE HOSE
Do not touch the muffler as it becomes very hot during operation. Keep hose away from the hot muffler or it
may damage the hose. Do not use a damaged high pressure hose. Do not kink the high pressure hose.
KEEP HANDS AWAY
Do not touch the nozzle of the water spray during operation.
COLD WEATHER STARTS
Do not operate this pressure washer in temperatures below 50C. Before starting engine in cold weather, make
sure ice has not formed in any part of the equipment.
DETERGENTS
Only use recommended detergents for pressure washers.
PREVENT ACCIDENTAL WATER SPRAY
To prevent accidental water spray, the locking latch on the wand trigger should be placed in the locked position
when not in use.
PREVENT PUMP DAMAGE Do not run the pressure washer engine for more than 5 minutes without pressing
the wand trigger or damage to the pump may result.
Never let the machine run unless connected to the water supply and it is on. Never run caustic fluids or acid
through this machine.
SAFETY FEATURES
Thermal relief valve – The thermal relief valve protects the pump from overheating in case a nozzle becomes
clogged. This system should not be abused. Make every effort to prevent the pump from overheating.
Low-oil auto shut-off- This pressure washer engine is equipped with a low oil shut-off system. If the engine
oil level goes below the recommended oil level, the pressure washer engine will automatically shut-off. This
protects your engine and prevents operating without proper lubrication.

15
2
3
4
6
10
7
8
911
13
12
4
GETTING TO KNOW YOUR PRESSURE WASHER
1. Stainless steel wand.
2. Trigger locking latch.
3. Choke lever.
4. Air cleaner element/cover.
5. Recoil starter - Starts the engine.
6. High pressure hose.
7. Fuel cap - Make sure the fuel cap is always screwed on tightly.
8. Fuel tank - Unleaded gasoline only!
9. Muffler - Warning! Muffler gets hot.
10. Nozzles (00, 150,250, 400, detergent and Rotary).
11. Engine On/Off switch.
12. High pressure wand.
13. High pressure Pump.
MODEL KPW-2001FM
Maximum water pressure 2500 PSI
Maximum water volume 1.8 GPM
Maximum inlet pressure 90 PSI
Maximum temperature of pumped fluid 600C
Inlet and discharge ports 3/4 11 1/2 NH
No load speed 00 RPM
Displacement (cc) 140CC
Fuel Unleaded Gasoline
Fuel tank (L) 1.0
Oil capacity (L) 0.6

5
ASSEMBLY & PRE-START CHECK
WARNING! Before turning on your pressure washer engine, you MUST
check oil level, fuel level and air cleaner filter.
ASSEMBLY
Remove all the contents from the carton and proceed to the following assembly
instructions;
Top handle
Install the top handle (A) to the frame (B) by sliding the top handle posts
into the frame posts and secure them together using 2 pan head screws, 4 gaskets
and 2 nylon hex. nuts.
Wheels
Install the wheels to the frame by first pressing its spring loaded pin, then
insert wheel axial into frame and align spring loaded pin with hole in frame
until the pin snaps. Repeat for the other wheel.
Hose and wand supports
Assemble the hose support (C) Fig.1 to the right side of the frame using 2 pan
head screws, 4 gaskets and 2 nylon hex. nuts. Then assemble the wand
support (D) to the left side of the frame again using 2 pan head screws, 4
gaskets and 2 nylon hex. nuts.
Wand and hose
Assemble the 2 piece stainless steel wand (A) Fig.2. Lower the rubber piece
(B) to expose the threaded fitting and screw the 2 pieces together, reposition
the rubber piece. It is recommended to install Teflon tape on the threads to
prevent water leakage. Next install the hose (A) Fig.3 to the wand (B) and
install the other end of the hose (C) Fig.3 to the pump outlet (D) as shown in
Fig.4. It is recommended to install Teflon tape on the threads to prevent
water leakage.
Quick connect coupling
Install the quick connect coupling (E) Fig.4 to the water hose inlet (F). It is
recommended to install Teflon tape on the threads to prevent water leakage.
PRE-START CHECK
OIL LEVEL
WARNING! This pressure washer has been shipped from the factory
without oil or very little oil in the crankcase. Operating the unit
without the correct amount of oil can damage the engine. Oil
crankcase capacity: 0.6 litres. Always check the oil level before
starting the engine, make sure the pressure washer is on a level
surface. To check oil level;
1) Turn the oil gauge dipstick (A) Fig.5 counterclockwise, remove it and clean it
with a clean cloth.
2) Fully reinsert the oil gauge dipstick and pull it out to check the oil level.
3) If the oil level is halfway up the dipstick or below, refill with SAE 10W30 oil
through the dipstick hole until the oil level reaches 3/4 up the dipstick or until it
reaches the bottom lip of the dipstick hole as shown in illustration below.
4) Reposition the oil gauge dipstick and tighten it by turning clockwise.
A
C
D
B
fig. 2
Wand
E
fig. 4

6
PRE-START CHECK
FUEL LEVEL
WARNING! Make sure there is enough fuel in the fuel tank before
operating.
1) If it is necessary to add fuel, first make sure the engine is OFF, then
remove the fuel cap by turning it counterclockwise.
2) When refueling, keep in mind all safety precautions and make sure to add
enough fuel based on usage. Use clean unleaded gasoline with a minimum of
87 octane. Do not mix oil with gasoline.
AIR CLEANER FILTER
The air cleaner filter should be checked after prolonged storage, the following
steps should be done when checking air cleaner filter;
1) Snap the top and bottom clips backwards and remove the air cleaner cover
(A) Fig.7.
2) Remove the air cleaner filter (B) Fig.7, wash filter in kerosene, squeeze
kerosene out, soak filter in engine oil and squeeze engine oil out.
3) Replace filter and replace the air cleaner filter cover.
START-UP PROCEDURES
Follow these instructions to safely start your high pressure washer.
1) Check engine oil level, fill to recommended level if necessary.
2) Check gasoline level, fill if necessary.
3) This pressure washer comes with a pump quick connect coupling. It
allows you to quickly connect or disconnect the inlet garden hose from
the pump. Pulling the mid ring will disconnect the quick connect coupling.
Connect inlet garden hose (not supplied) to the pump quick connect coupling
AND TURN WATER ON The water supply must provide a minimum
of 4 GPM at 20 PSI or the pump may be damaged.
4) Squeeze stainless steel wand trigger. This will allow air to escape
from the hose in order to prime the pump. Squeeze trigger until there is a
steady flow of water.
fig. 7

7
Follow these instructions to safely start your high pressure
washer.
5) Turn engine switch to the “On” position. Fig.9A.
6) Close the Choke lever (A) by moving the lever towards the left.
Fig.9B.
7) Pull recoil starter to start engine. Fig.9C. Pull recoil starter slowly
until resistance is felt, then pull rapidly to start engine. Repeat if
necessary.
8) Once engine starts, open choke lever by moving the lever towards
the right. Fig.9E.
9) If motor fails to start, repeat steps 3-9.
10) Press trigger. Fig.9D.
OPERATION
SPRAYING WATER & NOZZLE USAGE
This pressure washer comes with a stainless steel wand, its tip has a
quick connect coupler (A) Fig.10 to fit different nozzles. The spray
pattern is adjusted by installing the appropriate spray pattern nozzle
to the quick connect coupler. Five nozzles are included, 00, 250, 400
and a detergent nozzle. To install a nozzle to the quick connect
coupler, pull the coupler ring (B) backwards and insert the desired
nozzle (C), release the coupler ring to lock it in place.
A
B
C
nozzles wand

8
OPERATION & MAINTENANCE
USING THE PRESSURE WASHER TO CLEAN:
1) Some cleaning jobs can be completed by using only water, but for
most, it is advantageous to use a detergent to penetrate and
remove the dirt more effectively. When using pressure washer
approved detergent, make sure the surface first is dry, wetting
the surface first is not recommended; it will dilute the detergent
and will reduce the cleaning effectiveness.
2) Avoid hot surfaces or direct sunlight; this will minimize the
chances of the detergent damaging the painted surface.
3) DO NOT let the detergent dry or it may damage the painted
surface. Allow the detergent to remain on the surface for a short
time before rinsing with clean water under high pressure.
4) Position the tip of the wand 6-8” (15-20cm) away from the
surface to clean at a 450angle. (Fig 14)
WATER SCREEN
This pressure washer is equipped with a water inlet screen (A) Fig.15. This
water screen must be kept clean at all times or else it will restrict the
water flow to the pressure washer and may damage the pump. Remove
the quick connect coupling from the water inlet, remove and clean screen.
Never operate this pressure washer without the water inlet screen in place.

9
ENGINE MAINTENANCE
Engine Oil Replacement
Engine oil should be replaced after the first 20 hours of operation or
after the first month of use, it should be replaced every 100 hours or 6
months after. To replace engine oil; loosen the oil gauge dipstick (A)
Fig.16. Lean the pressure washer and drain oil. Once all the oil has
completely drained, retighten the oil gauge dipstick (A).
Recommended Engine Oil
It is recommended to use SAE10W30 4-stroke gasoline engine oil. Fill
with clean engine oil through the oil gauge dipstick hole to recommended level.
Inspecting, Replacing or Cleaning Spark Plug
The spark plug should be checked every 100 hours of operation or every 6 months.
To replace or clean spark plug;
1) Dismantle the spark plug wire (A) Fig.17 by pulling it off the spark plug (B). Using
the supplied spark plug wrench, undo the spark plug by turning counterclockwise.
2) Check to see if there is carbon sediment build-up, if so remove it. If the carbon
sediment is excessive, replace the spark plug.
3) Measure the electrodes clearance using a feeler gauge. The spark plug
electrode clearance should be between 0.7-0.8mm. If the clearance exceeds
0.8mm, replace the spark plug. The original spark plug supplied is an LD F7TC,
you can replace it with an NGK BP6ES spark plug or equivalent.
4) Reinstall spark plug in the reverse order.

10
Pressure Washer Storage
If you plan on storing your pressure washer for an extended period of
time, the following steps should be followed;
1) Add fuel stabilizer to fuel tank to minimize the formation of fuel gum
deposits during storage.
2) Run engine at least 5 minutes after adding stabilizer to allow it to
enter the fuel system.
NOTE: If a fuel stabilizer is not used, all gasoline must be drained from
the tank and carburetor to prevent gum deposits from forming on
these parts and causing possible malfunction of the engine.
3) Turn fuel shut-off valve to the “OFF” position, remove drain hex.
bolt (A) Fig.19 from the carburetor (B).
4) Turn fuel shut-off valve to the “ON” position and drain the fuel from
the tank, carburetor and hose.
5) Reposition the carburetor drain hex bolt once the fuel is completely
drained.
6) Drain engine oil from engine as described in “Engine Oil Replacement”.
7) Pour approximately one teaspoon of engine oil through the spark plug
hole and pull the recoil starter slowly until you feel increased pressure
which indicates the piston is on its compression stroke and leave it in
this position. This closes both the intake and exhaust valves to prevent the inside of the cylinder from rusting.
8) Cover the pressure washer and store it in a clean, well ventilated and dry place.
Preventing Freezing Damage
If your pressure washer is subjected to freezing temperatures, damage could occur. This type of damage is not
covered under warranty. To avoid possible damage, a small amount of antifreeze can be used. Place the unit
on its side with the water inlet facing upwards, pour 1/4 cup of antifreeze into the water inlet. Disconnect spark
plug wire, pull recoil starter several times to circulate the antifreeze in the pump system. Reconnect spark plug
wire. It is also important to make sure the wand and all hoses are disconnected and drained of all water or they
may burst. When taking pressure washer out of storage, run water through the system until it runs clear.

11
TROUBLESHOOTING
PROBLEM
CAUSE
CORRECTION
Engine will not start or stops while
operating
1. Low-oil shutdown
2. Engine switch not in “ON” position
3. Pressure built up in the hose
1. Fill engine with oil
2. Turn switch “ON”
3. Squeeze trigger while starting
Engine is overloaded
1. Nozzle partially blocked
2. Excessive pressure
1. Clean nozzle
2. Shorten the spring coil of the
reflux valve
Pressure increases when gun is
closed
1. Bypass valve is blocked
1. Clean the bypass valve
Engine is running but pump won’t
build maximum pressure or has
irregular pressure
1. Faucet closed
2. Unit has been stored in freezing
temperatures
3. Inadequate water supply
4. Water inlet screen clogged
5. Kink in garden hose
6. Wand tip worn or damaged
7. Air in pump
8. Engine speed not set to maximum
position
9. Suction or discharge valves
clogged or worn out
10. Bypass valve not operating
effectively
1. Open faucet
2. Thaw out unit completely
including hose, gun
and wand
3. Provide a minimum of 4 GPM at
20 PSI
4. Clean screen
5. Straighten garden hose
6. Replace wand
7. Let it run with gun open and wand
removed until steady stream of
water is released
8. Set throttle to maximum position
9. Clean the suction or discharge
valves
10. Clean the bypass valve
No intake of chemicals
1. Injection tube not securely
inserted into unit
2. Tube cracked or split
3. Wrong nozzle
4. Injector turned off
5. Injection tube strainer clogged
6. Nozzle blocked
7. Dried chemicals injector
8. No chemicals in detergent tank
9. Detergent tank is turn off
1. Push firmly into injector fitting
2. Replace tube
3. Switch to low pressure nozzle
4. Turn collar counter-clockwise
5. Clean strainer
6. Clean nozzle
7. Dissolve by running warm water
8. Add chemicals
9. Turn on the detergent tank.
Trigger will not move
1. Gun safety lock engaged
1. Release safety lock
Water in crankcase
1. High humidity
2. Worn seals
1. Change oil more frequently
2. Change the oil seals
Noisy operation
1. Worn bearings
2. Air mixed with water
1. Change the bearing
2. Check inlet lines for restrictions
and/or proper
sizing
Rough/pulsating operating with
pressure drop
1. Inlet restriction
2. Air mixed with water
1. Check system for stoppages, air
leaks, correctly sized inlet, plumbing
to pump
2. Check inlet lines for restrictions
and/or proper sizing
High crankcase temperatures
1. Wrong grade of oil
2. Improper amount of oil in engine
1. Use SAE 10W30 oil
2. Adjust oil level to proper amount

12
Limited Warranty
Steele Products® warrants to the original purchaser who uses the product in a
consumer application (personal, residential or household usage) that all products
covered under this warranty are free from defects in material and workmanship for one
year from the date of purchase. All products covered by this limited warranty which are
used in commercial applications (i.e. income producing) are warranted to be free of
defects in material and workmanship for 90 days from the date of original purchase.
Products covered under this warranty include air compressors, air tools, service parts,
pressure washers and generators.
Steele Products® will repair or replace, at Steele Products’s sole option, products
or components which have failed within the warranty period. Service will be scheduled
according to the normal work flow and business hours at the service center location,
and the availability of replacement parts. All decisions of Steele Products® with regard
to this limited warranty shall be final.
This warranty gives you specific legal rights, and you may also have other rights which
vary from state to state.
RESPONSIBILITY OF ORIGINAL PURCHASER (initial User):
To process a warranty claim on this product, DO NOT return item to the retailer. The
product must be evaluated by an Authorized Warranty Service Center. For the location
of the nearest Authorized Warranty Service Center contact the retailer or place of
purchase.
Retain original cash register sales receipt as proof of purchase for
warranty to work.
Use reasonable care in the operation and maintenance of the product as described in
the Owner’s Manual(s).
Deliver or ship the product to the Authorized Warranty Service Center. Freight costs, if
any must be paid by the purchaser.
If the purchaser does not receive satisfactory results form the Authorized Warranty
Service Center, the purchaser should contact Steele Products®.

13
Limited Warranty (cont’d)
THIS WARRANTY DOES NOT COVER:
Table of contents
Other STEELE PRODUCTS Pressure Washer manuals

STEELE PRODUCTS
STEELE PRODUCTS SP-WG240N User manual

STEELE PRODUCTS
STEELE PRODUCTS SP-WE180 User manual

STEELE PRODUCTS
STEELE PRODUCTS 2200 PSI User manual

STEELE PRODUCTS
STEELE PRODUCTS 2000 PSI SP-WG200 User manual

STEELE PRODUCTS
STEELE PRODUCTS 1800 PSI Electric SP-WE175 User manual

STEELE PRODUCTS
STEELE PRODUCTS SP-WG340 User manual

STEELE PRODUCTS
STEELE PRODUCTS SP-WG240 User manual

STEELE PRODUCTS
STEELE PRODUCTS 1800 PSI Electric SP-WE175 User manual

STEELE PRODUCTS
STEELE PRODUCTS SP-WG340 User manual