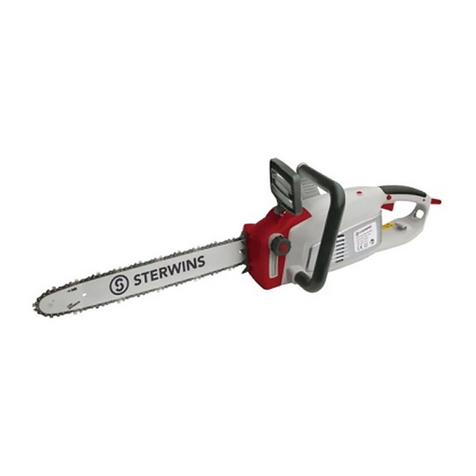
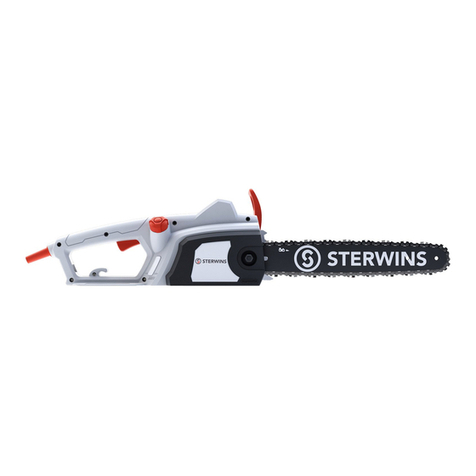
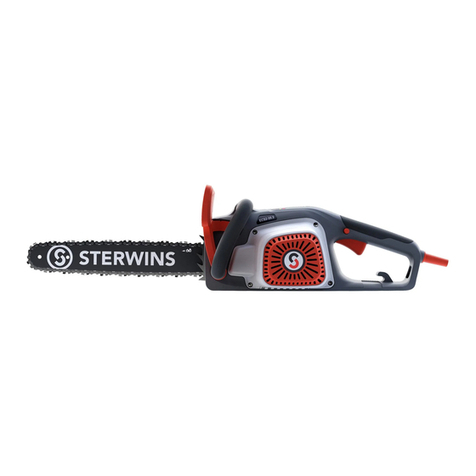
STERWINS 40ECS1-2000.1 User guide

RU xxx
KZ xxx
EN Electrical Chainsaw
40ECS1-2000.1
Electrical Chainsaw
EAN : 3276007088533
2020-1007
Перевод оригинала инструкции / Аударма - Гүпнұска нұсқаулар / Original instruction manual
RU Руководство По Сборке и Эксплуатации KZ Жннау,лайдаланужэне техникалық
қызметкөрсету нұсқаулығы EN Assemby - Use - Maintenance Manual


Руководство По Технике Безопасности и Правовым нормам / Техникасы
бойынша нусқаулығы қауіпсіздікждне құқықтық қамтамасыз ету / Legal &
Safety Instructions
XXX XXX
Сборка / Монтаждау / Assembly
XXX
Подготовка / Дайындау / Preparation
XXX
Использование / Пайдалану / Use
XXX XXX
Уход / Қызмет көрсету / Maitenance
XXX XXX
Зимний период / Қысқы мерзімде сақтау / Winter storage
XXX
1
2
3
4
5
6

4
RU
KZ
EN
Introduction
Thank you for choosing this product. Upon designing and manufacturing our products,
we place all of our eorts into ensuring an excellent quality that meets the needs of the users. Following
these instructions allow to optimize the lifetime
IMPORTANT! IN ORDER TO OBTAIN THE UTMOST SATISFACTION FROM THIS PRODUCT UPON
SETTING IT UP, USING IT, AND MAINTAINING IT, WE RECOMMEND THAT YOU CAREFULLY READ
THIS USER MANUAL BEFORE USING THE PRODUCT. PLEASE PAY ATTENTION TO BASIC WARNINGS
RELATING TO SAFETY WITHIN THIS MANUAL, AND KEEP THE MANUAL FOR LATER REFERENCE.
IMPORTANT, KEEP THE MANUAL FOR LATER REFERENCE:
READ CAREFULLY
1. INTENDED USE OF ELECTRIC CHAINSAW 40CM
This product is intended for outdoor use only, and must not be used inside a building under any
circumstances. The Electric Chainsaw is only intended for use in dry and well-illuminated conditions.
This chain saw is only intended to be used for basic limbing, woodcutting, and remove buttress roots.
All of the wooden objects intended to be cut with this chain saw should be no thicker than the guide
bar's maximum cutting capabilities. It must not be used for cutting other materials, such as plastic, stone,
metal or wood that contains foreign objects. Do not use it for others purposes. The maximum cutting
capacity must be observed. Do not cut branches exceeding the stated maximum capacity. Do not use it
for others purposes.
The product is not intended to be used by children or persons with reduced physical, mental or sensory
capabilities.
After unwrapping the packing, make sure that the product is complete with its accessories (if any). If the
product is damaged or has any defect, please do not use it and bring back it to your dealer.
If you give this tool to another people, please give him also this instruction manual.
Please note that our equipment has not been designed for use in commercial, trade or industrial
applications. Our warranty will be voided if the machine is used in commercial, trade or industrial
businesses or for equivalent purposes.This product has been designed to be used over a period of
3 years (Expected lifetime).
1
Contents
1. Intended use of Electric Chainsaw 40cm
2. Safety Instructions
3. Technical data
4. Assembly
5. Transportation
6. Wintering
7. Storage
8. Maintenance
9. End of life
10. Warranty

5
RU
KZ
EN
2. SAFETY INSTRUCTIONS
WARNING : Read all safety warnings and all instructions.
Failure to follow the warnings and instructions may result
in electric shock, re and/or serious injury.
Save all warnings and instructions for future reference.
2.1 GENERAL SAFETY WARNINGS
• Do not operate the product near glass enclosures, automobiles, trucks, window wells,
drop-os, etc. without properly adjusting the aim of the discharge.
• Do not force or overload the product. It will perform better and safer when it is used at
the rate that it was designed to work at.
• If the product is already assembled, please make sure that all screws are tightly xed
before using it. If the product requires that you assemble it, please make sure upon
opening the package that all the elements needed for setting up the product have been
provided. If the product is damaged or has defects, do not use it and take it back to the
nearest store.
• The term «power tool» in the warnings refers to your mains-operated (corded) power
tool or battery-operated (cordless) power tool.
2.2 SYMBOLS ON THE PRODUCT
Single mark of circulation of products on the market of the Member States of the Customs
Union.
Electrical products should not be discarded with household products. Used electrical
products must be collected separately and disposed of at collection points provided for this
purpose. Talk with your local authorities or dealer for advice on recycling.
Read and understand all instructions before operating the product, follow all warning and
safety instructions.
XX
Guaranteed sound power level (tested according to Directive 2000/14/EC as amended by
2005/88/EC).
Do not expose the product to rain or wet conditions.

6
RU
KZ
EN
Wear head protection.
Wear ear protection.
Wear safety glasses.
Wear protective gloves.
Wear safety boots.
Wear respiratory protection.
Remove power plug before carrying out maintenance or cleaning work.
Keep bystanders away.
This product is of protection class II. That means it is equipped with enhanced or double
insulation.
Kick-back! Tip contact may cause the guide bar to move suddenly upward and backwards
which may cause serious injury to the user.
Do not cut the trunk from the bottom.
Always use the product with two hands.
Do not use one hand when operating the product.
2.3 SYMBOLS IN THIS MANUAL
Type and source of the danger : Failure to observe this warning may result in physical injury
or death.

7
RU
KZ
EN
Type and source of the danger: This symbol indicates that damage to the appliance, the
environment or other property may occur as a result of non-observance of this warning.
Note : This symbol indicates important information for better understanding of the product.
Read the manual: This symbol indicates that you need to read the user manual carefully.
X.XX Please refer to the corresponding illustration at the end of the booklet.
®Green point : Packaging recycling.
This product is recyclable. If it cannot be used anymore, please take it to waste recycling
center.
Recycling code of paper.
2.4 WORK AREA SAFETY
• Keep work area clean and well lit. Cluttered or dark areas invite accidents.
• Do not operate power tools in explosive atmospheres, such as in the presence of
ammable liquids, gases or dust. Power tools create sparks which may ignite the dust or
fumes.
• Keep children and bystanders away while operating a power tool. Distractions can cause
you to lose control.
2.5 ELECTRICAL SAFETY
WARNING ! This product produces an electromagnetic eld
duringoperation!Thiseldmayunder somecircumstances
interfere with active or passive medical implants! To
reduce the risk of serious or fatal injury, we recommend
persons with medical implants to consult their doctor and
the medical implant manufacturer before operating this
product !

8
RU
KZ
EN
• Do not expose power tools to rain or wet conditions.Water entering a power tool will
increase the risk of electric shock.
• Power tool plugs must match the outlet. Never modify the plug in any way. Do not use
any adapter plugs with earthed (grounded) power tools. Unmodied plugs and matching
outlets will reduce risk of electric shock.
• Avoid body contact with earthed or grounded surfaces, such as pipes, radiators, ranges
and refrigerators.There is an increased risk of electric shock if your body is earthed or
grounded.
• Do not expose power tools to rain or wet conditions.Water entering a power tool will
increase the risk of electric shock.
• Do not abuse the cord. Never use the cord for carrying, pulling or unplugging the power
tool. Keep cord away from heat, oil, sharp edges or moving parts. Damaged or entangled
cords increase the risk of electric shock.
• When operating a power tool outdoors, use an extension cord suitable for outdoor use.
Use of a cord suitable for outdoor use reduces the risk of electric shock.
• If operating a power tool in a damp location is unavoidable, use a residual current.
2.6 PERSONAL SAFETY
• Stay alert, watch what you are doing and use common sense when operating a power
tool. Do not use a power tool while you are tired or under the inuence of drugs, alcohol
or medication. A moment of inattention while operating power tools may result in
serious personal injury.
• Use personal protective equipment. Always wear eye protection. Protective equipment
such as dust mask, non-skid safety shoes, hard hat, or hearing protection used for
appropriate conditions will reduce personal injuries.
• Prevent unintentional starting. Ensure the switch is in the o-position before
connecting to power source and/or battery pack, picking up or carrying the tool. Carrying
power tools with your nger on the switch or energising power tools that have the switch
on invites accidents.
• Adjusting key or wrench before turning the power tool on. A wrench or a key left
attached to a rotating part of the power tool may result in personal injury.
• Do not overreach. Keep proper footing and balance at all times.This enables better
control of the power tool in unexpected situations.
• Dress properly. Do not wear loose clothing or jewellery. Keep your hair, clothing and
gloves away from moving parts. Loose clothes, jewellery or long hair can be caught in
moving parts.
• If devices are provided for the connection of dust extraction and collection facilities,
ensure these are connemove any a

9
RU
KZ
EN
2.7 POWER TOOL USE AND CARE
• Some regions have regulations that restrict the use of the product in some operations.
Check with your local authority for advice.
• Do not allow children, persons with reduced physical, sensory or mental capabilities or
lack of experience and knowledge, or people unfamiliar with these instructions to use the
product. Local regulations may restrict the age of the operator.
• Keep in mind that the operator or user is responsible for accidents or hazards occurring
to other people or their property.
• While operating the product, always wear substantial footwear and long trousers. Do
not operate the machine when barefoot or when wearing open sandals. Avoid wearing
clothing that is loose tting or that has hanging cords or ties; they can be caught in
moving parts.
• Secure long hair so it is above shoulder level to prevent entanglement in moving parts.
• Before each use, ensure that all controls and safety devices function correctly. Do not use
the tool if the o switch does not stop the product.
• Before each use, always inspect the housing for damage. Ensure that guards and
handles are in place and properly secured.
• Always inspect the tool before use, and after any impact, check for sign of wear or
damage and repair as necessary,especially the parts of the cutting head.
• Never use the product standing on steps or a ladder. Do not work over should height.
• Never operate the product with defective guards or shields, or without safety devices,
such as debris collector, in place.
• Clear the work area before each use.
• Wear a face lter mask in dusty conditions to reduce the risk of injury associated with
the inhalation of dust.
• Do not point the product in the direction of people or pets.
• Do not operate the product near open windows, etc.
• Do not use the power tool if the switch does not turn it on and o. Any power tool that
cannot be controlled with switch is dangerous and must be repaired.
• Always inspect the tool before use, and after any impact, check for sign of wear or
damage and repair as necessary,especially the parts of the cutting head.
• Never use the product standing on steps or a ladder. Do not work over should height.
• Disconnect the plug from the power source and/or the battery pack from the power
tool before making any adjustments, changing accessories, transporting or storing
power tools. Such preventive safety measures reduce the risk of starting the power tool
accidentally.

10
RU
KZ
EN
• Store idle power tools out of the reach of children and do not allow persons unfamiliar
with the power tool or these instructions to operate the power tool. Power tools are
dangerous in the hands of untrained users.
• Maintain power tools. Check for misalignment or binding of moving parts, breakage
of parts and any other condition that may aect the power tool’s operation. If damaged,
have the power tool repaired before use. Many accidents are caused by poorly maintained
power tools.
• Keep cutting tools sharp and clean. Properly maintained cutting tools with sharp cutting
edges are less likely to bind and are easier to control.
• Use the power tool, accessories and tool bits etc. in accordance with these instructions,
taking into account the working conditions and the work to be performed. Use of the
power tool for operations dierent from those intended could result in a hazardous
situation.
• Have your power tool serviced by a qualied repair person using only identical
replacement parts. This will ensure that the safety of the power tool is maintained.
2.8 ELECTRIC CHAINSAW SAFETY WARNINGS
• Use this chain saw only for the purposes it was designed, do not aim the chain saw at
any people or animals.
• Store chain saw indoors – when not in use, chain saw should be stored indoors in dry,
locked-up place – out of reach of children.
• Keep all parts of the body away from the saw chain when the chainsaw is operating.
Before you start the chainsaw, make sure the saw chain is not contacting anything. A
moment of inattention while operating chainsaws may cause entanglement of your
clothing or body with the saw chain.
• Always hold the chainsaw with your right hand on the rear handle and your left hand on
the front handle. Holding the chainsaw with a reversed hand conguration increases the
risk of personal injury and should never be done.
• Hold the power tool by insulated gripping surfaces only, because the saw chain may
contact hidden wiring or its own cord. Saw chains contacting a "live" wire may make
exposed metal parts of the power tool "live" and could give the operator an electric
shock.
• Wear safety glasses and hearing protection. Further protective equipment for head,
hands, legs and feet is recommended. Adequate protective clothing will reduce personal
injury by ying debris or accidental contact with the saw chain.
• Do not operate a chainsaw in a tree. Operation of a chainsaw while up in a tree may
result in personal injury.

11
RU
KZ
EN
• Always keep proper footing and operate the chainsaw only when standing on a xed,
secure and level surface. Slippery or unstable surfaces such as ladders may cause a loss of
balance or control of the chain saw.
• When cutting a branch that is under tension be alert for spring back.When the tension
in the wood bers is released the spring loaded limb may strike the operator and/or
throw the chainsaw out of control.
• Use extreme caution when cutting bush and saplings.The slender material may catch
the saw chain and be whipped toward you or pull you o balance.
• Carry the chain saw by the front handle with the chainsaw switched o and away from
your body. When transporting or storing the chainsaw always t the guide bar cover.
Proper handling of the chainsaw will reduce the likelihood of accidental contact with the
moving saw chain.
• Follow instructions for lubricating, chain tensioning and changing accessories.
Improperly tensioned o lubricated chain may either break or increase the chance for kick-
back.
• Keep handles dry, clean and free from oil and grease. Greasy, oily handles are slippery
causing loss of control.
• Cut wood only. Do not use chainsaw for purposes not intended. For example: do not
use chainsaw for cutting plastic, masonry or non-wood building materials. Use of the
chainsaw for operations dierent than intended could result in a hazardous situation.
• It is recommended that rst-time users should, as a minimum practice, cut logs on a
saw-horse or cradle.
2.9 RESIDUAL RISKS
• Familiarize yourself with the use of this product by means of this instruction manual.
Memorize the safety directions and follow them to the letter. This will help to prevent
risks and hazards. Always be alert when using this product, so that you can recognize and
handle risks early. Fast intervention can prevent serious injury and damage to property.
Switch o if there are malfunctions.
• Even if all instructions are strictly followed, there are still some factors that could lead to
hazards, such as :
- Thrown out pieces of the work piece.
- Vibration injuries : use designated handles and try to reduce working time and
exposure.
- Injuries caused by noise : wear ear protection and reduce working time and exposure.
- Inhalation of dust and particles.
- Wear eye protection at all times.
If you experience any of these factors while using the machine, stop the machine consult
your doctor immediately

12
RU
KZ
EN
• Injuries may be caused or aggravated by prolonged use of a tool. When using any tool
for prolonged periods, ensure you take regular breaks.
• Prolonged use of the product exposes the user to vibrations that can cause a range of
conditions collectively known as hand-arm vibration syndrome (HAVS) e.g. ngers going
white; as well as specic diseases such as carpal tunnel syndrome.
• To reduce this risk when using the product, always wear protective gloves and keep your
hands warm.
3. TECHNICAL DATA
Model 40ECS1-2000.1
Power level 2000W
Voltage 220V
Frequency 50Hz
Machine weigh 3.6kg
Chain reference
Chain gauge
Chain pitch
Guide bar model YS16-56-507P
Guide bar length 40cm
Cutting capacity 37cm
Guide bar width 1.3mm
Oil type Anti-wear hydraulic oil
Oil control Automatic
Oil tank capacity (cm^3) 120 cm3
Chain speed (m/s) No load : 14 m/s
No-load speed (min-1) 7500
Guaranteed sound power level (dB(A))
Measured sound power level (dB(A))
No load current 5A
Maximum current
IP Degree IP2X
Max Vibration level (K=1.5m/s2)
Max Sound Pressure Level
The declared vibration total value has been measured in accordance with a standard test method and
may be used for comparing one tool with another. The declared vibration total value may also be used in
a preliminary exposure assessment. The vibration emission during actual use of the power tool can dier
from the declared total value depending on the ways in which the tool is used; and it may be necessary
to identify safety measures to protect the operator that are based on an estimation of exposure in the

13
RU
KZ
EN
actual conditions of use (taking into account all parts of the operating cycle such as the times when the
tool is switched o and when it is running idle in addition to the trigger time).
4. ASSEMBLY
WARNING! The product must be fully assembled before
operation! Do not use a product that is only partly
assembled or assembled with damaged parts !
4.1 UNBOXING
15
5
34
6
114 2
11
13
12
13
7
8
910
1. Front handle
2. Safety chain brake lever
3. Chain
4. Guide bar
5. Clamp nut
6. Chain cover
7. Metal bump spikes
8. Locking pin
9. Sprocket
10. Chain tension screw
11. Main switch
12. Safety lock-o button
13. Rear handle
14. Chain oil cap
15. Guide bar cover
16. Tensioning bolt
• Wear gloves when unboxing.

14
RU
KZ
EN
• Do not use cutter, knife, saw or any other similar tool for unboxing.
• Carry the tool only by the handle.
• Risk of re in case of dry vegetation in the neighborhood.
• The engine shall always be OFF when the machine is left on the ground.
• Keep the box for further reuse (transport and storage).
• Keep the instruction manual in a dry area for further consultation.
4.2 INSTALLATION
Assemble the guide bar and the saw chain : illustration 2.1 to 2.9
1. Place the saw body on a rm and level surface.
2. Rotate the clamp nut to remove the cover from the saw’s body.
3. Rotate the locking pin, let the tensioning bolt at the proposal position.
4. With the help of protective gloves, wrap the saw chain around the guide bar, making sure that the
teeth are aimed in the direction of rotation. The chain should be properly set in the slot running along
the entire outside edge of the guide bar.
5. Place the saw chain around the sprocket while lining up the slot in the guide bar with the internal bolt
at the base of the saw and the tensioning bolt in the guide bar’s pin hole. The chain tensioning pin may
need adjustment to properly align with the hole in the guide bar. Use the chain tensioning wheel to
adjust its location until it ts in the guide bar.
6. Turn the chain tensioning wheel to preliminarily tighten the guide bar enough that it stays in place.
While holding the bar still, place the cover back onto the saw. Make sure the tab properly lines up with
the slot on the body of the saw. Lock the cover in place with the lock screw by turning it clockwise until
it engages.
Tensioning the chain : illustration 2.5 and 2.9
Rotating the tension screw upwards increases the tension while rotating it downwards decreases tension.
A properly tensioned chain should have no sag and should only be able to be pulled 2-3 mm away from
the chain bar of the saw.
Note: The saw chain must be tensioned properly in order to
ensure safe operation.
The chain tension is optimal if the saw chain can be lifted 3 mm from the center of the guide bar. Since
the saw chain heats up during operation, its length can therefore uctuate. Check the chain tension
every 10 minutes of operation and adjust as necessary, particularly for new saw chains. Slacken the saw
chain after the work is completed since it shortens when cooling down. In doing so, you can elongate the
chain’s life and prevent damage.
4.3 PREPARATION
Before each use, check the following items to ensure safe working conditions.
Chain saw:
Before beginning work, inspect the chain saw for damage to the housing, the saw chain, the guide bar
and the power cord. Never use an obviously damaged machine.
Chain oil:
Check the ll level of the oil tank. Also check whether there is sucient oil available while working. Never
operate the saw if there is no oil or the oil level has dropped below the minimum oil level mark, in order
to prevent damage to the chain saw. On average, an oil lling is sucient for approximately 10 minutes
of cutting operation (depending the duration of pauses and the density of the work piece).

15
RU
KZ
EN
Saw chain:
Check the tension of the saw and the condition of the saw. The sharper the saw chain is, the easier and
more manageable operations will be. The same applies to chain tension. Check the tension every 10
minutes of operation to maximise safety. New saw chains in particular are subject to changes due to the
heat created by operation.
Safety equipment and protective clothing:
Make absolutely sure to wear the appropriate close-tting protective clothing such as protective pants,
gloves and safety shoes. Wear a safety helmet with integrated hearing protection and a face guard to
provide protection against falling and recoiling branches. Do secure long hair so that it is above shoulder
level. Use the following safety clothing and protective equipment when operating the product:
- Helmet with visor and neck guard
- Hearing protectors
- Breathing mask
- Gloves with approved saw protection
- Protective leggings with approved saw protection
- Steel toe cap boots with approved saw protection
- First aid kit in case of injury.
Filling the auto oil system : illustrations 3.3 and 3.4
CAUTION! The chain saw is NOT supplied lled with oil. It is essential to ll with oil before use. Never
operate the chain saw without chain oil or at an empty oil tank level, as this will result in extensive
damage to the product. Chain life and cutting capacity depends on optimum lubrication. Therefore, the
chain is automatically oiled during operation via the oil outlet. This chain saw features an auto-oiling
system to keep the chain and guide bar properly lubricated. The oil level indicator shows the remaining
oil in the chainsaw. If the oil level decreases to below one quarter capacity, rell it with the proper bar
and chain oil. To ll the oil reservoir:
1. Remove the oil cap. Fill the reservoir with bar and chain oil until the oil level has reached full capacity.
2. Put the oil cap back on. Make sure to check the oil level after every 10 minutes of use. Unplug the
chain saw before checking oil levels or lling the oil reservoir.
CAUTION ! To prevent oil leakage, ensure machine is left in a
horizontal position (oil ller cap upright) when not in use.
Use only the recommended oil to avoid damage to the
chain saw. Never use recycled/old oil.
4.4 FIRST USE
WARNING ! Read the « SAFETY INSTRUCTION » section at the
beginning of this manual including all text under
subheading therein before using this product.

16
RU
KZ
EN
We strongly recommend that before use of this product, you
attend a chainsaw training course to familiarise yourself
with the maintenance and usage of these products!
Thoroughly read this manual and adhere to all safety
instructions at all times. The manufacturer will not be
held liable for any accidents/injuries caused due to misuse
or incorrect maintenance of t is product!
1. To become procient, attend a recognised chainsaw training course to learn how to operate chainsaws
safely and eectively. Familialise yourself with all the controls and switches. Practice all movements with
the product switched o .
2. Always hold the product rmly with both hands; front handle with the left hand and rear handle with
the right hand. Fully grip both handles at all times during operation. Never operate the product using
only one hand.
3. Only use the product with a secure stance. Hold the product at the right-hand side of your body.
NOTE : Any other cutting positions should not be used with this product except the chainsaw.
Pay particular attention using the machine for the rst time : focus and dedicate all your attention to this
rst use. Make the rst trial on a free space with no obstacle and no surrounding element
4.5 OPERATION
Switching on/o : illustration 4.1
To turn the tool ON, push and hold the safety lock-o button with your thumb, while squeezing the
ON/OFF trigger switch. Once the trigger switch engages, you can release the safety lock-o button and
proceed with operation. The safety lock-o button reduces the risk of accidental starting. To turn the tool
OFF, release the ON/OFF trigger switch.
Operation safety warnings :
• Check the product as well as accessories for damage before each use. Do not use the
product if it is damaged or shows wear.
• Double check that the accessories and attachments are properly xed.
• Always hold the product on its handle. Keep the handle dry to ensure safe support.
• Ensure that the air vents are always unobstructed and clear. Clean them if necessary
with a soft brush. Blocked air vents may lead to overheating and damage the product.
• Switch the product o immediately if you are disturbed while working by other people
entering the working area. Always let the product come to complete stop before putting
it down.
• Do not overwork yourself. Take regular breaks to ensure you can concentrate on the
work and have full control over the product.
• Before switching the product on, check whether it has been assembled correctly and all
the moving parts are running smoothly.
• We recommend slightly dampening surfaces in dusty conditions or using a mister
attachment.

17
RU
KZ
EN
• Operate the product only at reasonable hours – not early in the morning or late at night
when people might be disturbed.
• Avoid using the product in bad weather conditions, especially when there is a risk of
lightning. Do not operate the product in poor lighting.The operator requires a clear view
of the work area to identify potential hazards.
• Operating similar tools nearby increases both the risk of hearing injury and the potential
for other persons to enter your work area.
• Keep rm footing and balance.
• Do not overreach. Overreaching can result in loss of balance. Always be sure of the
footing on slopes.
• Walk, never run. Keep all parts of your body away from any moving part.
• Never run the product without the proper equipment attached.
• Do not modify the product in any way or use parts and accessories that are not
recommended by the manufacturer.
If the product is dropped, suers heavy impact or begins to
vibrate abnormally, immediately stop the product and
inspect for damage or identify the cause of the vibration.
Any damage should be properly repaired or replace by an
authorized service center.
• To reduce the risk of injury associated with contacting rotating parts, always stop the
machine and make sure all moving parts have stopped:
- before cleaning or clearing a blockage
- when leaving the product unattended
- before installing or removing attachments
- before checking, maintaining or working on the product
- if the machine starts to vibrate abnormally (inspect immediately)
4.6 CUTTING TIPS
Kickback : Illustration 4.2
Reactive forces may occur any time the chain is rotating. Reactive forces can cause serious personal
injury. The powerful force used to cut wood can be reversed and work against the operator. If the rotating
saw chain is suddenly and signicantly slowed or stopped by contact with any solid abject such as a log
or branch or is pinched, the reactive forces may occur instantly. These reactive forces may result in loss of
control, which, in turn, may cause serious or fatal injury. An understanding of the causes of these reactive
forces may help you avoid the element of surprise and loss of control. Surprise contributes to accidents.
Rotational kickback can happen when the upper tip of the guide bar contacts an abject while the chain
is moving. This can cause the chain to dig into the abject and momentarily stop moving. The guide bar is
then kicked up and back toward the operator in a lightning-fast reverse reaction.
Linear kickback can happen when the wood on either side of a cut closes in and pinches the moving saw

18
RU
KZ
EN
chain a long the top of the guide bar. This can cause the chain to instantly stop. The chain force is then
reversed, causing the saw to move in the opposite direction, sending the saw straight back toward the
operator.
Either of these reactions may cause you to lose control of the saw which could result in serious personal
injury. Do not rely exclusively upon the safety devices built into your saw. Many factors inuence the
occurrence and force of the kickback reaction. These include saw chain speed, the speed at which the bar
and saw chain contact the abject, the angle of contact, the condition of the saw chain and other factors.
How to avoid kickback
1 ) Hold the chain saw rmly with both hands and maintain a secure grip. Don't let go of the chain saw.
2 ) Be aware of the location of the guide bar nose at all times. Never let the nose of the guide bar contact
any abject. Do not cut limbs with the nose of the guide bar. Be especially careful near wire fences and
when cutting small, tough limbs, small size brush and saplings which may easily catch the saw chain.
3 ) Don't overreach. Don't cut above shoulder height. Do not attempt to plunge cut if you are not
experienced with these cutting techniques.
4 ) Begin cutting and continue at full throttle. Cut only one log at a time.
5 ) Use extreme caution when reentering a previous cut.
6 ) Be alert for shifting of the log or other forces that may cause the cut to close and pinch the saw chain.
7 ) Maintain saw chain properly. Cut with a correctly sharpened, properly tensioned saw chain at all times.
Only use replacement bars and chains specied by the manufacturer. Incorrect replacement bars and
chains may cause chain breakage and/ or kickback.
Limbing and bucking Illustration 4.3 to 4.5
Limbing is removing the branches from a fallen tree. Start limbing by leaving the lower limbs to support
the log o the ground. When under-bucking freely hanging limbs, a pinch may result or the limb may fall,
causing loss of control. If a pinch occurs, stop the engine and remove the saw by lifting the limb. Remove
the small limbs in one cut. Branches under tension should be cut from the bottom up to avoid binding
the product. Bucking is cutting a log into lengths. It is important to make sure your footing is rm and
our weight is evenly distributed on bath feet. When possible, the log should be raised and supported
by the use of limbs, logs or chocks. Do not stand on the log. Make sure the log will not roll downhill. If
on a slope, stand on the uphill side of the log. Watch out for rolling logs. Shattered wood should be cut
very carefully. Sharp slivers of wood may be caught and ung in the direction of the operator of the saw.
Don't let the chain contact the ground. Logs under strain: Risk of pinching! Always start relieving cut at
compression side.Then make bucking cut at tension side. If the saw pinches, stop the engine and remove
it from the log. Only properly trained professionals should work in an area where the logs, limbs and roots
are tangled. Drag the logs into a clear area before cutting. Pull out exposed and cleared logs rst.
When the log is supported on one end, cut 1/3 the diameter from the underside (under buck). Then make
the nished cut by over bucking to meet the rst cut. When the log is supported on bath ends, cut 1/3 the
diameter from the top (over buck). Then make the nished cut by under bucking the lower 2/3 to meet
the rst cut. When "cutting through", to maintain complete control release the cutting pressure near the
end of the cut without relaxing your grip on the product handles. Always stop the engine before moving
from tree to tree. If the wood diameter is large enough for you to insert a soft bucking wedge without
touching the chain, you should use the wedge to hold the cut open to prevent pinching.
Always support small logs on a sawing stand or another log while bucking.
Pull in
Pull-in occurs when the saw chain on the bottom of the bar is suddenly stopped when it is pinched,
caught or encounters a foreign object in the wood. The reaction of the saw chain pulls the chain saw

19
RU
KZ
EN
forward and may cause the operator to lose control. Pull-in frequently occurs when the bumper spike of
the chain saw is not held securely against the tree or limb and when the saw chain is not rotating at full
speed before it contacts the wood.
Use extreme caution when cutting small size brush and saplings which may easily catch the saw chain,
be whipped towards you or pull you o balance.
How to avoid pull in :
1) Always start a cut with the saw chain rotating at full speed and the bumper spike in contact with the
wood.
2) The risk of pull-in may also be reduced by using wedges to open the kerf or cut.
Push-back
Push-back occurs when the saw chain on the top of the bar is suddenly stopped when it is pinched,
caught or encounters a foreign object in the wood. The reaction of the saw chain may drive the chain
saw rapidly straight back toward the operator and may cause loss of chain saw control, which, in turn,
may cause serious or fatal injury. Push-back frequently occurs when the top of the bar is used for cutting.
How to avoid push-back :
1 ) Be alert to forces or situations that may cause material to pinch the top of the saw chain. Do not cut
more than one log at a time.
2 ) Do not twist the chain saw when withdrawing the bar from a plunge cut or under-buck cut because
the saw chain can pinch.
4.7 AFTER USE
Switch the product o and let it cool down. Check, clean and store the product as described below.
5. TRANSPORTATION
Transporting the machine may require that you meet certain requirements specic to your country.
Please make sure to respect them by contacting the authorities of your country, in order to respect them
all. Ensure temperature during transportation will never be out of temperature range given on chapter
storage. Switch the product o.
Protect the product from any heavy impact or strong vibrations which may occur during transportation
in vehicles. Secure the product to prevent it from slipping or falling over.
6. WINTERING
Follow all instructions given on chapter storage below. We recommend using the original package
for storage or covering the product with a suitable cloth or enclosure to protect it against dust.
7. STORAGE
Store the machine : Illustration 6.1
Shutdown the power tool. Examine the unit thoroughly for worn, loose or damaged parts. Clean the unit
before storing and remove the oil from the tank. Remove the chain and the chain bar.
Only store the machine in a clean, dry, ventilated place with a temperature range of 4°C to 24°C. Cover it
in order to provide added protection. We recommend using the original package for storage or covering
the product with a suitable cloth or enclosure to protect it against dust. Be sure to secure the unit while
transporting
Do not expose the product to sunlight. Make sure the product is always protected from cold and humidity.

20
RU
KZ
EN
8. MAINTENANCE
8.1 CLEANING AND SERVICING
DANGER! Risk of injury due to electric shock.
Shutdown the power tool before adjusting, inspecting,
cleaning or storing the product.
WARNING ! Do not handle cutting parts without gloves as
they are sharp and can become hot after use, potentially
causing personal injury.
Cleaning the product : Illustration 5.1
Keep all safety devices, air vents, and motor housing free of debris and dirt. Wipe down the equipment
with a cloth. It is highly suggested that you clean the device after every use. Do not use cleaning agents,
as these can attack the plastic and weaken the structural integrity of the product.
Remove and brush clean the cover plate, chain and chain bar after 1 to 3 hours of use. Clean the area
under the cover plate, the drive sprocket and chain bar assembly using a soft brush. Clean oil outlet with
a clean cloth. Do not place other objects on the chain saw.
8.2 REPLACEMENT
Part Action Before/After each usage Every 10H
CHAIN
CHECK
CLEAN
CHANGE WHEN IT'S NECESSARY / REFER TO TROUBLE SHOOTING
GREASE
SHARP
CHAIN BAR
CHECK
CLEAN
CHANGE WHEN IT'S NECESSARY / REFER TO TROUBLE SHOOTING
GREASE
RIM DRIVE
SPROCKET
CHECK
CLEAN
POWER CABLE Check
If the replacement of the supply cord is necessary, this has to be done by the manufacturer or his agent
in order to avoid a safety hazard.
This manual suits for next models
1
Table of contents
Other STERWINS Chainsaw manuals

STERWINS
STERWINS PCS 46 User manual

STERWINS
STERWINS ECS2-45.3 Installation instructions

STERWINS
STERWINS ECS2-40.3 Maintenance manual

STERWINS
STERWINS 40VCS2-34.1 User guide

STERWINS
STERWINS ECS2-35.3 Installation instructions

STERWINS
STERWINS PCS1-45.3 Maintenance manual

STERWINS
STERWINS 2200 CS ILM-2 Operation instructions

STERWINS
STERWINS PCS1-40.3 Maintenance manual

STERWINS
STERWINS 20VPS2-22.1 User guide

STERWINS
STERWINS PCS 38 User manual