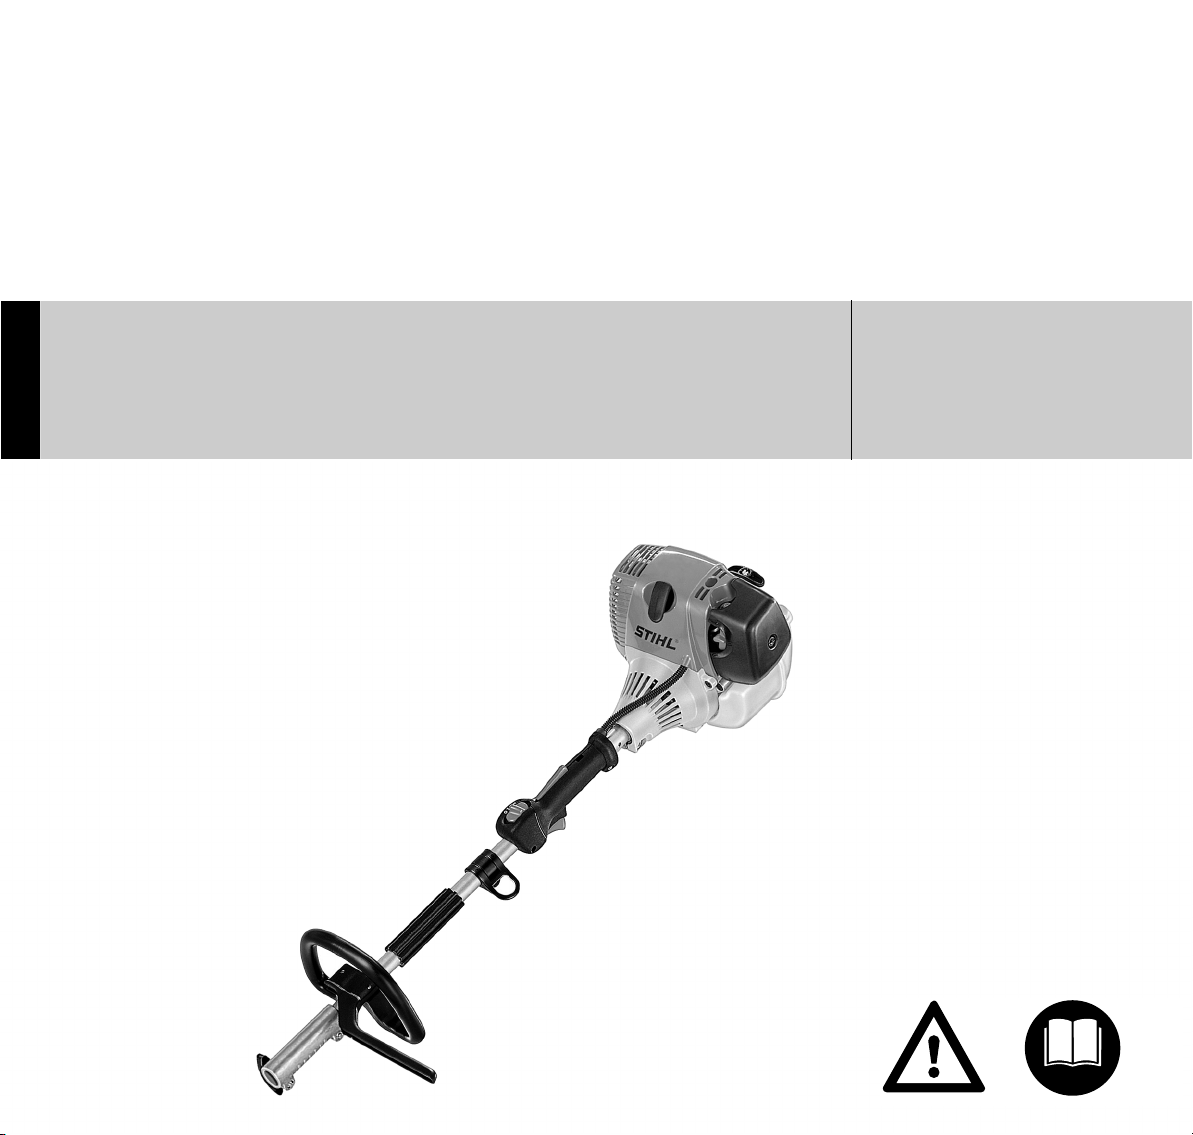
Stihl KM 110 R User manual

{
STIHL KM 110 R, 130 R
Warning!
Read and follow all safety
precautions in Instruction Manual –
improper use can cause serious or
fatal injury.
Advertencia!
Lea y siga todas las precauciones
de seguridad dadas en el manual
de instrucciones – el uso incorrecto
puede causar lesiones graves o
mortales.
Instruction Manual
Manual de instrucciones

Original Instruction ManualPrinted on chlorine-free paper
Printing inks contain vegetable oils, paper can be recycled.
© A DREAS STIHL AG & Co. KG, 2012
0458-464-8621-E. VA1.C12.
0000000455_005_GB
KM 110 R, KM 130 R
English
1
{
Contents
Allow only persons who fully understand
the manuals of the KombiEngine and the
KombiTool to operate this power tool
ombination.
To re eive maximum performan e and
satisfa tion from your STIHL power tool,
it is important that you read, understand
and follow the safety pre autions and
the operating and maintenan e
instru tions in hapter "Safety
Pre autions and Working Te hniques"
before using your power tool. For further
information you an go to
www.stihlusa. om.
Conta t your STIHL dealer or the STIHL
distributor for your area if you do not
understand any of the instru tions in the
two manuals.
KombiSystem 2
Guide to Using this Manual 2
Safety Pre autions and Working
Te hniques 3
Approved KombiTools 11
Mounting the Loop Handle 12
Adjusting the Throttle Cable 13
4-MIX Engine 13
Fuel 13
Fueling 14
Starting / Stopping the Engine 16
Operating Instru tions 18
Cleaning the Air Filter 18
Engine Management 19
Adjusting the Carburetor 19
Spark Arresting S reen in Muffler 21
Spark Plug 22
Repla ing the Starter Rope and
Rewind Spring 23
Storing the Ma hine 25
Maintenan e and Care 26
Main Parts 28
Spe ifi ations 29
Spe ial A essories 30
Maintenan e and Repairs 31
STIHL In orporated Federal
Emission Control Warranty
Statement 31
STIHL In orporated California
Exhaust and Evaporative
Emissions Control Warranty
Statement 33
Trademarks 35
Warning!
Be ause this KombiEngine is the
engine for a high-speed power tool,
some spe ial safety pre autions must
be observed to redu e the risk of per-
sonal injury. Careless or improper use
may ause serious or even fatal injury.

KM 110 R, KM 130 R
English
2
In the STIHL KombiSystem a number of
different KombiEngines and KombiTools
an be ombined to produ e a power
tool. In this instru tion manual the
fun tional unit formed by the
KombiEngine and KombiTools is
referred to as the power tool.
Therefore, the separate instru tion
manuals for the KombiEngine and
KombiTool should be used together for
the power tool.
Always read and and make sure you
understand both instru tion manuals
before using your power tool for the first
time and keep them in a safe pla e for
future referen e.
Pictograms
The meanings of the pi tograms
atta hed to or embossed on the
ma hine are explained in this manual.
Depending on the model on erned, the
following pi tograms may be on your
ma hine.
Symbols in Text
Many operating and safety instru tions
are supported by illustrations.
The individual steps or pro edures
des ribed in the manual may be marked
in different ways:
NA bullet marks a step or pro edure.
A des ription of a step or pro edure that
refers dire tly to an illustration may
ontain item numbers that appear in the
illustration. Example:
NLoosen the s rew (1).
NLever (2) ...
In addition to the operating instru tions,
this manual may ontain paragraphs
that require your spe ial attention. Su h
paragraphs are marked with the
symbols and signal words des ribed
below:
DA GER
Indi ates an imminent risk of severe or
fatal injury.
WAR I G
Indi ates a hazardous situation whi h, if
not avoided, ould result in severe or
fatal injury.
Indi ates a risk of property damage,
in luding damage to the ma hine or its
individual omponents.
KombiSystem
.
.
.
.
002BA442 KN
+
+
Guide to Using this Manual
Fuel tank for gasoline
and engine oil mixture
Press to operate de om-
pression valve
Manual fuel pump
Press to operate manual
fuel pump
Filler hole for gear
lubri ant
Air intake summer mode
Air intake winter mode
Handle heating

KM 110 R, KM 130 R
English
3
Engineering Improvements
STIHL’s philosophy is to ontinually
improve all of its produ ts. As a result,
engineering hanges and improvements
are made from time to time. Therefore,
some hanges, modifi ations and
improvements may not be overed in
this manual. If the operating
hara teristi s or the appearan e of
your ma hine differs from those
des ribed in this manual, please onta t
your STIHL dealer for assistan e.
Have your STIHL dealer show you how
to operate your power tool. Observe all
appli able lo al safety regulations,
standards and ordinan es.
Use your power tool only for the
appli ations des ribed in the instru tion
manual of the KombiTool you are using.
Most of these safety pre autions and
warnings apply to the use of all STIHL
power tools. Different models may have
different parts and ontrols. See the
appropriate se tion of your
KombiEngine and KombiTool instru tion
manuals for a des ription of the ontrols
and the fun tion of the parts of your
model.
Do not lean your ma hine with a
pressure washer. The solid jet of water
may damage parts of the ma hine.
Safe use of a KombiEngine involves
1. the operator
2. the power tool
3. the use of the power tool
Sa ety Precautions and
Working Techniques
Be ause this KombiEn-
gine is the engine for a
high-speed power tool,
spe ial safety pre au-
tions must be observed to
redu e the risk of per-
sonal injury.
It is important that you
read, fully understand
and observe the following
safety pre autions and
warnings. Read the
instru tion manuals and
the safety pre autions of
your KombiEngine and
KombiTool periodi ally.
Careless or improper use
may ause serious or
fatal injury.
Warning!
Do not lend or rent your power tool with-
out the instru tion manuals. Be sure that
anyone using it understands the infor-
mation ontained in these manuals.
Warning!
Do not use it for other purposes, sin e
misuse may result in personal injury or
property damage, in luding damage to
the ma hine.
Warning!
Minors should never be allowed to use
this power tool. Bystanders, espe ially
hildren, and animals should not be
allowed in the area where it is in use.
Warning!
To redu e the risk of injury to bystand-
ers and damage to property, never let
your power tool run unattended. When it
is not in use (e.g. during a work break),
shut it off and make sure that unauthor-
ized persons do not use it.

KM 110 R, KM 130 R
English
4
THE OPERATOR
Physical Condition
You must be in good physi al ondition
and mental health and not under the
influen e of any substan e (drugs,
al ohol, et .) whi h might impair vision,
dexterity or judgment. Do not operate
this ma hine when you are fatigued.
These onditions redu e the hand's
ability to feel and regulate temperature,
produ e numbness and burning
sensations and may ause nerve and
ir ulation damage and tissue ne rosis.
All fa tors whi h ontribute to
whitefinger disease are not known, but
old weather, smoking and diseases or
physi al onditions that affe t blood
vessels and blood transport, as well as
high vibration levels and long periods of
exposure to vibration are mentioned as
fa tors in the development of whitefinger
disease. In order to redu e the risk of
whitefinger disease and arpal tunnel
syndrome, please note the following:
–Most STIHL power tools are
available with an anti-vibration
("AV") system designed to redu e
the transmission of vibrations
reated by the ma hine to the
operator's hands. An AV system is
re ommended for those persons
using power tools on a regular or
sustained basis.
–Wear gloves – not while using
KombiTool BG-KM – and keep your
hands warm.
–Keep the AV system well
maintained. A power tool with loose
omponents or with damaged or
worn AV elements will tend to have
higher vibration levels.
–Maintain a firm grip at all times, but
do not squeeze the handles with
onstant, ex essive pressure. Take
frequent breaks.
All the above-mentioned pre autions do
not guarantee that you will not sustain
whitefinger disease or arpal tunnel
syndrome. Therefore, ontinual and
regular users should losely monitor the
ondition of their hands and fingers. If
any of the above symptoms appear,
seek medi al advi e immediately.
Proper Clothing
Be parti ularly alert and autious when
wearing hearing prote tion be ause
your ability to hear warnings (shouts,
alarms, et .) is restri ted.
Warning!
Be alert – if you get tired, take a break.
Tiredness may result in loss of ontrol.
Working with any power tool an be
strenuous. If you have any ondition
that might be aggravated by strenuous
work, he k with your do tor before
operating this ma hine.
Warning!
Prolonged use of a power tool (or other
ma hines) exposing the operator to
vibrations may produ e whitefinger dis-
ease (Raynaud's phenomenon) or
arpal tunnel syndrome.
Warning!
The ignition system of the STIHL unit
produ es an ele tromagneti field of a
very low intensity. This field may inter-
fere with some pa emakers. To redu e
the risk of serious or fatal injury, persons
with a pa emaker should onsult their
physi ian and the pa emaker manufa -
turer before operating this tool.
Warning!
To redu e the risk of injury, the operator
should wear proper prote tive apparel.
Warning!
Power tool noise may
damage your hearing.
Wear sound barriers (ear
plugs or ear mufflers) to
prote t your hearing.
Continual and regular
users should have their hearing
he ked regularly.

KM 110 R, KM 130 R
English
5
For further instru tions on proper
lothing see the safety pre autions in
the instru tion manual of the KombiTool
you are using.
THE POWER TOOL
For illustrations and definitions of the
power tool parts see the hapter on
"Main Parts."
If this tool is subje ted to unusually high
loads for whi h it was not designed (e.g.
heavy impa t or a fall), always he k
that it is in good ondition before
ontinuing work. Che k in parti ular that
the fuel system is tight (no leaks) and
that the ontrols and safety devi es are
working properly. Do not ontinue
operating this ma hine if it is damaged.
In ase of doubt, have it he ked by your
STIHL servi ing dealer.
THE USE OF THE POWER TOOL
Transporting the Power Tool
Fuel
Your STIHL power tool uses an oil-
gasoline mixture for fuel (see the
hapter on "Fuel" of your instru tion
manual).
Fueling Instructions
In order to redu e the risk of burns and
other personal injury from es aping gas
vapor and fumes, remove the fuel filler
ap on your power tool arefully so as to
allow any pressure build-up in the tank
to release slowly. Never remove the fuel
filler ap while the engine is running.
Sele t bare ground for fueling and move
at least 10 feet (3 m) from the fueling
spot before starting the engine. Wipe off
any spilled fuel before starting your
ma hine.
Avoid loose-fitting ja k-
ets, s arfs, ne kties,
jewelry, flared or uffed
pants, un onfined long
hair or anything that
ould be ome aught on
bran hes, brush or the
moving parts of the unit.
Se ure hair so it is above
shoulder level.
Warning!
Never modify this power tool in any way.
Only atta hments supplied by STIHL or
expressly approved by STIHL for use
with the spe ifi STIHL KombiEngine
model are authorized. Although ertain
unauthorized atta hments are useable
with STIHL power tools, their use may,
in fa t, be extremely dangerous.
Warning!
Always swit h off the engine and make
sure the working tool has stopped
before putting a power tool down. When
transporting your power tool in a vehi-
le, properly se ure it to prevent
turnover, fuel spillage and damage to
the power tool.
Warning!
Gasoline is an extremely
flammable fuel. If spilled
and ignited by a spark or
other ignition sour e, it
an ause fire and seri-
ous burn injury or
property damage. Use extreme aution
when handling gasoline or fuel mix. Do
not smoke or bring any fire or flame near
the fuel or the power tool. Note that
ombustible fuel vapor may es ape
from the fuel system.
Warning!
To redu e the risk of serious injury from
burns, never attempt to refuel the unit
until it has been ompletely removed
from the operator.
Warning!
Fuel your power tool in well-ventilated
areas, outdoors. Always shut off the
engine and allow it to ool before refu-
eling. Gasoline vapor pressure may
build up inside the fuel tank depending
on the fuel used, the weather onditions
and the tank venting system.
Warning!
Che k for fuel leakage
while refueling and dur-
ing operation. If fuel
leakage is found, do not
start or run the engine
until the leak is fixed and
any spilled fuel has been wiped away.
Take are not to get fuel on your loth-
ing. If this happens, hange your
lothing immediately.

KM 110 R, KM 130 R
English
6
Different models may be equipped with
different fuel aps.
Toolless cap with grip
To do this with this STIHL ap, raise the
grip on the top of the ap until it is upright
at a 90° angle. Insert the ap in the fuel
tank opening with the raised positioning
marks on the grip of the ap and on the
fuel tank opening lining up. Using the
grip, press the ap down firmly while
turning it lo kwise as far as it will go
(approx. 1/4 turn).
Misaligned, damaged or broken cap
NIf the ap does not drop fully into the
opening when the positioning marks
line up and/or if the ap does not
tighten properly when twisted, the
base of the ap may be prematurely
rotated (in relation to the top) to the
losed position. Su h misalignment
an result from handling, leaning
or an improper attempt at
tightening.
NTo return the ap to the open
position for installation, turn the ap
(with the grip up) until it drops fully
into the tank opening. Next, twist the
ap ounter lo kwise as far as it will
go (approx. 1/4 turn) – this will twist
the base of the ap into the orre t
position. Then, twist the ap
lo kwise, losing it normally.
NIf your ap still does not tighten
properly, it may be damaged or
broken; immediately stop use of the
unit and take it to your authorized
STIHL dealer for repair.
Screw Cap
See also the "Fueling" hapter in your
Instru tion Manual for additional
information.
Warning!
In order to redu e the risk of fuel spill-
age and fire from an improperly
tightened fuel ap, orre tly position
and tighten the fuel ap in the fuel tank
opening.
001BA220 KN
Fold the grip flush with
the top of the ap. Grip
the ap and he k for
tightness. If the grip does
not lie ompletely flush
with the ap and the
detent on the grip does
not fit in the orrespond-
ing re ess in the filler
opening, or if the ap is
loose in the filler opening,
the ap is not properly
seated and tightened and
you must repeat the
above steps.
Left: Base of ap in losed posi-
tion (with open spa e)
Right: Base of ap orre tly posi-
tioned for installation
001BA227 KN
Warning!
Unit vibrations an ause
an improperly tightened
fuel filler ap to loosen or
ome off and spill quanti-
ties of fuel. In order to
redu e the risk of fuel
spillage and fire, tighten the fuel filler
ap by hand as se urely as possible.
001BA226 KN

KM 110 R, KM 130 R
English
7
Before Starting
Keep the handles lean and dry at all
times; it is parti ularly important to keep
them free of moisture, pit h, oil, fuel mix,
grease or resin in order for you to
maintain a firm grip and properly ontrol
your power tool.
Starting
Start the engine at least 10 feet (3 m)
from the fueling spot, outdoors only.
For spe ifi starting instru tions, see the
appropriate se tion of your
KombiEngine and KombiTool manuals.
Pla e the power tool on firm ground or
other solid surfa e in an open area.
Maintain good balan e and se ure
footing.
On e the engine has started,
immediately blip the throttle trigger,
whi h should release the starting throttle
and allow the engine to slow down to
idle.
See also the safety pre autions on
Starting in the instru tion manual of the
KombiTool.
Important Adjustments
If you annot set the orre t idle speed,
have your STIHL dealer he k your
power tool and make proper
adjustments and repairs.
During Operation
Holding and Controlling the Power Tool
Always hold the unit firmly with both
hands on the handles while you are
working. Wrap your fingers and thumbs
around the handles.
Your right hand should grip the rear
handle. This also applies to left-handers.
Warning!
Always he k your power tool for proper
ondition and operation before starting,
parti ularly the throttle trigger, throttle
trigger lo kout, stop swit h, utting
atta hment, defle tor and harness. The
throttle trigger must move freely and
always spring ba k to the idle position.
Never attempt to modify the ontrols or
safety devi es.
Warning!
Never operate your power tool if it is
damaged, improperly adjusted or main-
tained, or not ompletely or se urely
assembled.
Warning!
Che k that the spark plug boot is
se urely mounted on the spark plug – a
loose boot may ause ar ing that ould
ignite ombustible fumes and ause a
fire.
Warning!
To redu e the risk of injury from loss of
ontrol, be absolutely sure that the
working tool is lear of you and all other
obstru tions and obje ts, in luding the
ground, be ause when the engine starts
at starting-throttle, engine speed will be
fast enough for the lut h to engage and
move the working tool.
Warning!
Your power tool is a one-person
ma hine. Do not allow other persons in
the general work area, even when
starting.
Warning!
To redu e the risk of injury from loss of
ontrol, do not attempt to "drop start"
your power tool.
Warning!
When you pull the starter grip, do not
wrap the starter rope around your hand.
Do not let the grip snap ba k, but guide
the starter rope to rewind it properly.
Failure to follow this pro edure may
result in injury to your hand or fingers
and may damage the starter
me hanism.
Warning!
To redu e the risk of personal injury
from loss of ontrol or onta t with the
running working tool, do not use a
power tool with in orre t idle adjust-
ment. At orre t idle speed, the working
tool should not move. For dire tions on
how to adjust idle speed, see the appro-
priate se tion of your instru tion
manual.
002BA057 KN

KM 110 R, KM 130 R
English
8
Working Conditions
Operate and start your power tool only
outdoors in a well ventilated area.
Operate it under good visibility and
daylight onditions only. Work arefully.
Operating Instructions
In the event of an emergen y, swit h off
the engine immediately – move the slide
ontrol / stop swit h to 0 or STOP.
Your muffler is furnished with a spark
arresting s reen designed to redu e the
risk of fire from the emission of hot
parti les. Never operate your unit with a
missing or damaged spark arresting
s reen. If your gas/oil mix ratio is orre t
Warning!
To redu e the risk of injury from loss of
ontrol, never work on a ladder or on
any other inse ure support.
Warning!
As soon as the engine is
running, this produ t gen-
erates toxi exhaust
fumes ontaining hemi-
als, su h as unburned
hydro arbons (in luding
benzene) and arbon monoxide, that
are known to ause respiratory prob-
lems, an er, birth defe ts, or other
reprodu tive harm. Some of the gases
(e.g. arbon monoxide) may be olor-
less and odorless. To redu e the risk of
serious or fatal injury/illness from inhal-
ing toxi fumes, never run the ma hine
indoors or in poorly ventilated lo ations.
Warning!
Inhalation of ertain dusts, espe ially
organi dusts su h as mold or pollen,
an ause sus eptible persons to have
an allergi or asthmati rea tion. Sub-
stantial or repeated inhalation of dust
and other airborne ontaminants, in par-
ti ular those with a smaller parti le size,
may ause respiratory or other ill-
nesses. Control dust at the sour e
where possible. Use good work pra -
ti es, su h as operating the unit so that
the wind or operating pro ess dire ts
any dust raised by the power tool away
from the operator. Follow the re om-
mendations of EPA/OSHA/NIOSH and
o upational and trade asso iations
with respe t to dust ("parti ulate mat-
ter"). When the inhalation of dust annot
be substantially ontrolled, i.e., kept at
or near the ambient (ba kground) level,
the operator and any bystanders should
wear a respirator approved by
NIOSH/MSHA for the type of dust
en ountered.
Warning!
Do not operate your power tool using
the starting throttle lo k, as you do not
have ontrol of the engine speed.
Warning!
Never modify your muffler. Any modifi-
ation ould ause an in rease in heat
radiation, sparks or sound level, thereby
in reasing the risk of fire, burn injury or
hearing loss. You may also permanently
damage the engine. Have your muffler
servi ed and repaired by your STIHL
servi ing dealer only.
Warning!
The muffler and other parts of the
engine (e.g. fins of the ylinder, spark
plug) be ome hot during operation and
remain hot for a while after stopping the
engine. To redu e risk of burns, do not
tou h the muffler and other parts while
they are hot. Keep the area around the
muffler lean. Remove ex ess lubri ant
and all debris su h as pine needles,
bran hes or leaves. Let the engine ool
down sitting on on rete, metal, bare
ground or solid wood away from any
ombustible substan es.
Warning!
An improperly mounted or damaged yl-
inder housing or a damaged/deformed
muffler shell may interfere with the ool-
ing pro ess of the muffler. To redu e the
risk of fire or burn injury, do not ontinue
work with a damaged or improperly
mounted ylinder housing or a dam-
aged/deformed muffler shell.

KM 110 R, KM 130 R
English
9
(i.e., not too ri h), this s reen will
normally stay lean as a result of the
heat from the muffler and need no
servi e or maintenan e. If you
experien e loss of performan e and you
suspe t a logged s reen, have your
muffler maintained by a STIHL servi ing
dealer. Some state or federal laws or
regulations may require a properly
maintained spark arrestor for ertain
uses. See the "Maintenan e, Repair and
Storing" se tion of these Safety
Pre autions. Remember that the risk of
a brush or forest fire is greater in hot or
dry onditions.
MAI TE A CE, REPAIR A D
STORI G
Maintenance, replacement, or repair of
the emission control devices and
systems may be performed by any
nonroad engine repair establishment or
individual. However, if you make a
warranty claim for a component which
has not been serviced or maintained
properly or if nonapproved replacement
parts were used, STIHL may deny
coverage.
Stri tly follow the maintenan e and
repair instru tions in the appropriate
se tion of your KombiEngine and
KombiTool instru tion manuals. Please
refer to the maintenan e harts
respe tively the maintenan e notes in
these manuals.
In California, it is a violation of § 4442 or
§ 4443 or the Publi Resour es Code to
use or operate gasoline-powered tools
on forest- overed, brush- overed or
grass- overed land unless the engine’s
exhaust system is equipped with a
omplying spark arrester that is
maintained in effe tive working order.
Warning!
Some STIHL power tools
are equipped with a ata-
lyti onverter, whi h is
designed to redu e the
exhaust emissions of the
engine by a hemi al
pro ess in the muffler. Due to this pro -
ess, the muffler does not ool down as
rapidly as onventional mufflers when
the engine returns to idle or is shut off.
To redu e the risk of fire and burn inju-
ries when using a atalyti onverter,
always set your power tool down in the
upright position and never lo ate it
where the muffler is near dry brush,
grass, wood hips or other ombustible
materials while it is still hot.
Warning!
Use only identi al STIHL repla ement
parts for maintenan e and repair. Use of
non-STIHL parts may ause serious or
fatal injury.
Warning!
Always stop the engine and make sure
that the working tool is stopped before
doing any maintenan e or repair work or
leaning the power tool. Do not attempt
any maintenan e or repair work not
des ribed in your KombiEngine and
KombiTool instru tion manuals. Have
su h work performed by your STIHL
servi ing dealer only.
Warning!
Use the spe ified spark plug and make
sure it and the ignition lead are always
lean and in good ondition. Always
press spark plug boot snugly onto spark
plug terminal of the proper size. (Note: If
terminal has deta hable SAE adapter
nut, it must be atta hed.) A loose on-
ne tion between spark plug boot and
the ignition wire onne tor in the boot
may reate ar ing that ould ignite om-
bustible fumes and ause a fire.
Warning!
Never test the ignition system with the
ignition wire boot removed from the
spark plug or with a removed spark
plug, sin e un ontained sparking may
ause a fire.
Warning!
Do not operate your power tool if the
muffler is damaged, missing or modi-
fied. An improperly maintained muffler
will in rease the risk of fire and hearing
loss. Your muffler is equipped with a
spark-arresting s reen to redu e the
risk of fire; never operate your power
tool if the s reen is missing, damaged or
logged. Remember that the risk of a
brush or forest fire is greater in hot or dry
weather.

KM 110 R, KM 130 R
English
10
The owner/operator of this produ t is
responsible for properly maintaining the
spark arrester. Other states or
governmental entities/agen ies, su h as
the U.S. Forest Servi e, may have
similar requirements. Conta t your lo al
fire agen y or forest servi e for the laws
or regulations relating to fire prote tion
requirements.
Store the power tool in a dry and high or
lo ked lo ation out of rea h of hildren.
Before storing for longer than a few
days, always empty the fuel tank. See
hapter "Storing the ma hine" in this
manual.

KM 110 R, KM 130 R
English
11
The following STIHL KombiTools may
be mounted on the KombiEngine:
The barrier bar supplied with the
ma hine must be mounted to the loop
handle – see also "Mounting the Loop
Handle".
Approved KombiTools
HT-KM
BF-KM
470BA018 KN
FCS-KM
FCB-KM
KW-KM
KB-KM
FH-KM
FS-KM FS-KM
FSB-KM BG-KM
KombiTool Purpose
FS-KM Brush utter with
mowing head
FS-KM Brush utter with
grass utting blade
FSB-KM Brush utter with
mowing head
HL-KM 135° Hedge trimmer,
adjustable
HL-KM 0° Hedge trimmer
FH-KM 135° Power s ythe
BG-KM Blower
HT-KM Pole pruner
BF-KM Pi k tines
FCB-KM Power edger
FCS-KM Power edger
KB-KM Bristle brush
KW-KM PowerSweep

KM 110 R, KM 130 R
English
12
A barrier bar is supplied with the
ma hine. Atta h the barrier bar to the
loop handle.
NInsert square nuts (1) in the barrier
bar (2) – the holes must line up
NInsert the lamp (3) in the loop
handle (4) and position them
together on the shaft (5)
NPosition lamp (6)
NPosition barrier bar (2) – note
position!
NLine up the holes
NInsert bolts (7) in the holes – and
s rew them into the barrier bar as
far as possible
NFit the loop handle (4) at a distan e
of (A) approx. 20 m (8 in) forward
of the ontrol handle (8)
NOrient the loop handle
NTighten the bolts – lo k the nuts if
ne essary
The sleeve (9) is present depending on
the ountry and must be lo ated
between the loop handle and ontrol
handle.
Always leave the barrier bar attached.
Mounting the Loop Handle
2
002BA098 KN
1
1
5
4
002BA099 KN
2
3
67
A
9
8
4
002BA353 KN

KM 110 R, KM 130 R
English
13
A properly adjusted throttle able is the
pre ondition for orre t operation in the
full throttle, starting throttle and idle
positions.
NAdjust the throttle able only when
the unit is ompletely and properly
assembled.
NUse a suitable tool to push the slide
to the end of the slot (see
illustration).
NPress down the throttle trigger
lo kout (1) and squeeze the throttle
trigger (2) (full throttle) – this sets
the throttle able orre tly.
The STIHL 4-MIX engine features
mixture lubri ation and must be run on a
fuel mixture of gasoline and engine oil.
It operates otherwise on the 4-stroke
prin iple.
This engine is ertified to operate on
unleaded gasoline and the STIHL two-
stroke engine oil at a mix ratio of 50:1.
Your engine requires a mixture of high-
quality gasoline and two-stroke air
ooled engine oil.
Use mid-grade unleaded gasoline with a
minimum o tane rating of 89 (R+M/2)
and no more than 10% ethanol ontent.
Fuel with a lower o tane rating may
in rease engine temperatures. This, in
turn, in reases the risk of piston seizure
and damage to the engine.
The hemi al omposition of the fuel is
also important. Some fuel additives not
only detrimentally affe t elastomers
( arburetor diaphragms, oil seals, fuel
lines, et .), but magnesium astings and
atalyti onverters as well. This ould
ause running problems or even
damage the engine. For this reason
STIHL re ommends that you use only
high-quality unleaded gasoline!
Gasoline with an ethanol ontent of
more than 10% an ause running
problems and major damage in engines
with a manually adjustable arburetor
and should not be used in su h engines.
The ethanol ontent in gasoline affe ts
engine running speed – it may be
ne essary to readjust the arburetor if
you use fuels with various ethanol
ontents.
Adjusting the Throttle Cable
002BA163 KN
2
1
002BA161 KN
4-MIX Engine Fuel

KM 110 R, KM 130 R
English
14
The idle speed and maximum speed of
the engine hange if you swit h from a
fuel with a ertain ethanol ontent to
another fuel with a mu h higher or lower
ethanol ontent.
This problem an be avoided by always
using fuel with the same ethanol
ontent.
Use STIHL HP Ultra oil or ask your
dealer for an equivalent high quality oil
to ensure the maximum performan e of
the produ t for the full lifetime.
To meet the requirements of EPA
40CFR90/1054 we re ommend to use
STIHL HP Ultra oil.
Do not use BIA or TCW rated (two-
stroke water ooled) mix oils or other
mix oils that state they are for use in both
water ooled and air ooled engines
(e.g., outboard motors, snowmobiles,
hain saws, mopeds, et .).
Take are when handling gasoline.
Avoid dire t onta t with the skin and
avoid inhaling fuel vapor. When filling at
the pump, first remove the ontainer
from your vehi le and pla e the
ontainer on the ground before filling. To
redu e the risk of sparks from stati
dis harge and resulting fire and/or
explosion, do not fill fuel ontainers that
are sitting in or on a vehi le or trailer.
The ontainer should be kept tightly
losed in order to limit the amount of
moisture that gets into the mixture.
The ma hine’s fuel tank should be
leaned as ne essary.
Fuel mix ages
Only mix suffi ient fuel for a few days
work, not to ex eed 3 months of storage.
Store in approved fuel- ontainers only.
When mixing, pour oil into the ontainer
first, and then add gasoline. Close the
ontainer and shake it vigorously by
hand to ensure proper mixing of the oil
with the fuel.
Dispose of empty mixing-oil ontainers
only at authorized disposal lo ations.
Preparations
NBefore fueling, lean the filler ap
and the area around it to ensure that
no dirt falls into the tank.
Always thoroughly shake the mixture in
the anister before fueling your
ma hine.
NPosition the ma hine so that the
filler ap is fa ing up.
In order to redu e the risk of fire and
personal injury from es aping gas vapor
and fumes, remove the fuel filler ap
arefully so as to allow any pressure
build-up in the tank to release slowly.
One of two different filler aps is
installed as standard at the fa tory.
Warning!
To redu e the risk of personal injury
from loss of ontrol and / or onta t with
the running utting tool, do not use your
unit with in orre t idle adjustment. At
orre t idle speed, the utting tool
should not move.
If your power tool shows an in orre t
idle adjustment, have your STIHL dealer
he k your power tool and make proper
adjustments and repairs.
Gaso-
line
Oil (STIHL 50:1 or equiva-
lent high-quality oils)
US gal. US fl.oz.
12.6
2 1/2 6.4
5 12.8
Fueling
002BA420 KN

KM 110 R, KM 130 R
English
15
Toolless filler ap (with folding grip)
Threaded filler ap
Opening the toolless filler cap
NSwing the grip into an upright
position.
NTurn the ap ounter lo kwise
(approx. 1/4 turn).
NRemove the filler ap.
Refueling
Take are not to spill fuel while fueling,
and do not overfill the tank. STIHL
re ommends use of the STIHL filling
system (spe ial a essory).
Closing the toolless filler cap
NPosition the ap with the grip in an
upright position; the raised
positioning marks must line up.
NTurn ap lo kwise as far as it will
go (approx. 1/4 turn).
NFold the grip down so that it is flush
with the surfa e.
If the grip is not flush with the surfa e
and the lug on the lip does not engage
entirely in the re ess (arrow), the ap is
not properly losed and the steps
des ribed above must be repeated. See
also the "Toolless ap with grip" se tion
in the Safety Pre autions.
Opening the threaded filler cap
NTurn the ap ounter lo kwise until
it an be removed from the tank
opening.
NRemove the filler ap.
Refueling
Take are not to spill fuel while fueling
and do not overfill the tank. STIHL
re ommends use of the STIHL filling
system (spe ial a essory).
002BA418 KN
002BA419 KN
249BA053 KN
249BA054 KN
249BA055 KN
249BA056 KN
002BA447 KN

KM 110 R, KM 130 R
English
16
Closing the threaded filler cap
NPosition ap.
NTurn the ap lo kwise as far as it
will go and tighten it as se urely as
possible by hand.
Controls
1Throttle trigger lo kout
2Throttle trigger
3Slide ontrol
Positions of slide control
4STOP-0 – engine off – the ignition is
swit hed off
5F – normal run position – the engine
is running or an start
6START – the ignition is swit hed on
– the engine an start
Symbol on slide control
7h – stop symbol and arrow. To stop
the engine, push the slide ontrol in
the dire tion of the arrow on the stop
symbol (h) to STOP-0.
Starting
NPress down the trigger lo kout lever
and squeeze the throttle trigger.
Nand hold them in that position.
NMove the slide ontrol to START
and hold it there.
NNow release the throttle trigger,
slide ontrol and trigger lo kout in
that order. This is the starting
throttle position.
NSet the hoke knob (8)
002BA448 KN
Starting / Stopping the
Engine
3
STOP
2
5
6
4
7
002BA181 KN
START
STOP-
1
249BA057 KN
9
8

KM 110 R, KM 130 R
English
17
NPress the fuel pump bulb (9) at least
five times – even if the bulb is filled
with fuel.
Starting
NPla e the power tool on the ground
so that it rests on the ma hine
support: Che k that the working tool
is not tou hing the ground or any
other obsta les – see also
"Starting / Stopping the Engine" in
the KombiTool instru tion manual.
NMake sure you have a safe and
se ure footing.
NHold the unit with your left hand and
press it down firmly – your thumb
should be under the fan housing.
Do not stand or kneel on the drive tube.
NHold the starter grip with your right
hand.
NPull the starter grip slowly until you
feel it engage and then give it a brisk
strong pull.
Do not pull out the starter rope all the
way – it might otherwise break.
NDo not let the starter grip snap ba k.
Guide it slowly ba k into the housing
so that the starter rope an rewind
properly.
NCrank the engine until it begins to
fire. After no more than five
attempts, turn the hoke knob to e.
NContinue ranking.
As soon as the engine runs
NBlip the throttle trigger. The slide
ontrol moves to the normal run
position F – and the engine settles
down to idle speed.
Make sure the arburetor is orre tly
adjusted. The working tool must not
rotate when the engine is idling.
Your ma hine is now ready for
operation.
Stopping the engine
NPush the slide ontrol in the
dire tion of the arrow on the stop
symbol (h) to STOP-0.
At very low outside temperatures:
As soon as the engine runs:
NBlip the throttle trigger to disengage
the starting throttle position. The
slide ontrol moves to the normal
run position (F) – and the engine
settles down to idle speed.
NOpen the throttle slightly.
NWarm up the engine for a short
period.
If the engine does not start
Choke knob
If you did not turn the hoke knob to e
qui kly enough after the engine began to
fire, the ombustion hamber is flooded.
NTurn the hoke knob to e.
NSet the slide ontrol, lo kout lever
and throttle trigger to the starting
throttle position.
NStart the engine by pulling the
starter rope briskly – 10 to 20 pulls
may be ne essary.
gif the engine is old
efor warm start – also use this posi-
tion if the engine has been running
but is still old.
552BA014 KN
552BA015 KN
552BA016 KN

KM 110 R, KM 130 R
English
18
If the engine still does not start
NMove the slide ontrol to STOP-0.
NRemove the spark plug – see
"Spark Plug".
NDry the spark plug.
NCrank the engine several times with
the starter to lear the ombustion
hamber.
NRefit the spark plug – see "Spark
Plug".
NMove the slide ontrol to START.
NSet the hoke knob to e – even if
the engine is old.
NNow start the engine.
Throttle cable adjustment
NChe k adjustment of throttle able –
see hapter on "Adjusting the
Throttle Cable".
Fuel tank run until completely dry
NAfter refueling, press the fuel pump
bulb at least five times – even if the
bulb is filled with fuel.
NSet the hoke knob a ording to
engine temperature.
NStart the engine.
During break-in period
A fa tory-new ma hine should not be
run at high revs (full throttle off load) for
the first three tank fillings. This avoids
unne essary high loads during the
break-in period. As all moving parts
have to bed in during the break-in
period, the fri tional resistan es in the
engine are greater during this period.
The engine develops its maximum
power after about 5 to 15 tank fillings.
During Operation
After a long period of full throttle
operation, allow the engine to run for a
short while at idle speed so that engine
heat an be dissipated by the flow of
ooling air. This prote ts engine-
mounted omponents (ignition,
arburetor) from thermal overload.
After Finishing Work
Storing for a short period: Wait for the
engine to ool down. Empty the fuel tank
and keep the ma hine in a dry pla e,
well away from sour es of ignition, until
you need it again. For longer out-of-
servi e periods – see "Storing the
Ma hine".
If there is a noticeable loss of engine
power
NTurn the hoke knob to g
NTake out the s rew (1) and remove
the filter over (2).
NClean away loose dirt from around
the filter.
NGrip the filter element (3) at the
utout (arrow) in the filter
housing (4) and remove it.
NFit a new filter element. As a
temporary measure you an kno k it
out on the palm of your hand or blow
it out with ompressed air. Do not
wash.
NRepla e damaged parts.
Installing the filter
NInstall the filter element in the filter
housing and fit the over.
NInsert the s rew and tighten it down
firmly.
Operating Instructions Cleaning the Air Filter
1
273BA006 KN
2
4
Other manuals for KM 110 R
2
This manual suits for next models
1
Table of contents
Languages:
Other Stihl Lawn And Garden Equipment manuals

Stihl
Stihl BT 120 C User manual

Stihl
Stihl FC 100 User manual

Stihl
Stihl HSA 60.0 User manual

Stihl
Stihl FS 25-4 User manual

Stihl
Stihl MH 610 User manual

Stihl
Stihl KombiEngine KM 56 R User manual

Stihl
Stihl HL 90 User manual

Stihl
Stihl SR 430 User manual

Stihl
Stihl 459-481 User manual

Stihl
Stihl SPA 130.0 User manual

Stihl
Stihl FC 110 User manual

Stihl
Stihl STIHL PC 70 User manual

Stihl
Stihl HSA 26 User manual

Stihl
Stihl MM 56 User manual

Stihl
Stihl AR 900 User manual

Stihl
Stihl MM 56 User manual

Stihl
Stihl SuperCut 40-2 User manual

Stihl
Stihl GHE 150 User manual

Stihl
Stihl HT-KM User manual

Stihl
Stihl AHK 800.0 User manual