Stihl HS 87 User manual

STIHL HS 87
WARNING
Read Instruction Manual thoroughly
before use and follow all safety
precautions – improper use can
cause serious or fatal injury.
ADVERTENCIA
Antes de usar la máquina lea y siga
todas las precauciones de
seguridad dadas en el manual de
instrucciones – el uso incorrecto
puede causar lesiones graves o
mortales.
Instruction Manual
Manual de instrucciones

Instruction Manual
1 - 34
Manual de instrucciones
35 - 72

Original Instruction ManualPrinted on chlorine-free paper
Printing inks contain vegetable oils, paper can be recycled.
© ANDREAS STIHL AG & Co. KG, 2018
0458-449-8621-B. VA1.L18.
0000008272_003_GB
HS 87 R, HS 87 T
English
1
This instruction manual is protected by copyright. All rights reserved, especially the rights to reproduce, translate and process
with electronic systems.
Contents
Allow only persons who fully understand
this manual to operate your hedge
trimmer.
To receive maximum performance and
satisfaction from your STIHL hedge
trimmer, it is important that you read,
understand and follow the safety
precautions and the operating and
maintenance instructions in chapter
"Safety Precautions and Working
Techniques" before using your hedge
trimmer. For further information you can
go to www.stihlusa.com.
Contact your STIHL dealer or the STIHL
distributor for your area if you do not
understand any of the instructions in this
manual.
WARNING
Because a hedge trimmer is a high-
speed cutting tool some special safety
precautions must be observed to reduce
the risk of personal injury. Careless or
improper use may cause serious or even
fatal injury.
Guide to Using this Manual 2
Safety Precautions and Working
Techniques 2
Using the Unit 11
Fuel 12
Fueling 14
Starting / Stopping the Engine 16
Cleaning the Air Filter 18
Engine Management 19
Adjusting the Carburetor 19
Spark Arresting Screen in Muffler 20
Spark Plug 21
Lubricating the Gearbox 22
Storing the Machine 23
Sharpening Instructions 23
Maintenance and Care 24
Main Parts 26
Specifications 27
Maintenance and Repairs 28
Disposal 28
Limited Warranty 29
STIHL Incorporated Federal
Emission Control Warranty
Statement 29
STIHL Incorporated California
Exhaust and Evaporative
Emissions Control Warranty
Statement 31
Trademarks 33

HS 87 R, HS 87 T
English
2
Pictograms
The meanings of the pictograms
attached to or embossed on the
machine are explained in this manual.
Depending on the model concerned, the
following pictograms may be on your
machine.
Symbols in Text
Many operating and safety instructions
are supported by illustrations.
The individual steps or procedures
described in the manual may be shown
in different ways:
NA bullet indicates a step or
procedure.
A description of a step or procedure that
refers directly to an illustration may
contain item numbers that appear in the
illustration. For example:
NRemove the screw (1)
NPull the spark arresting screen (2)
upwards out of the muffler
In addition to the operating instructions,
this manual may contain paragraphs
that require your special attention. Such
paragraphs are indicated with the
symbols and signal words described
below:
DANGER
Indicates a hazardous situation that, if
not avoided, will result in death or
serious injury.
WARNING
Indicates a hazardous situation that, if
not avoided, could result in death or
serious injury.
NOTICE
Indicates a risk of property damage,
including damage to the machine or its
individual components.
Engineering Improvements
STIHL’s philosophy is to continually
improve all of its products. As a result,
engineering changes and improvements
are made from time to time. Therefore,
some changes, modifications and
improvements may not be covered in
this manual. If the operating
characteristics or the appearance of
your machine differs from those
described in this manual, please contact
your STIHL dealer or the STIHL
distributor for your area for assistance.
Have your STIHL dealer show you how
to operate your power tool. Observe all
applicable local safety regulations,
standards and ordinances.
WARNING
Do not lend or rent your power tool
without the instruction manual. Be sure
that anyone using it understands the
information contained in this manual.
WARNING
The use of this machine may be
hazardous. If the cutting tool comes in
contact with your body, it will cut you.
Use your hedge trimmer only for cutting
hedges, shrubs, scrub, bushes and
similar material.
Guide to Using this Manual
Fuel tank for gasoline
and engine oil mixture
Press to operate manual
fuel pump
Filler hole for gear
lubricant
Safety Precautions and
Working Techniques
Because a hedge trim-
mer is a high-speed, fast-
cutting power tool with
sharp cutting blades,
special safety precau-
tions must be observed to
reduce the risk of per-
sonal injury.
It is important that you
read, fully understand
and observe the following
safety precautions and
warnings. Read the
instruction manual and
the safety precautions
periodically. Careless or
improper use may cause
serious or fatal injury.

HS 87 R, HS 87 T
English
3
WARNING
Do not use it for other purposes, since
misuse may result in personal injury or
property damage, including damage to
the machine.
WARNING
Minors should never be allowed to use
this power tool. Bystanders, especially
children, and animals should not be
allowed in the area where it is in use.
WARNING
To reduce the risk of injury to bystanders
and damage to property, never let your
power tool run unattended. When it is
not in use (e.g. during a work break),
shut it off and make sure that
unauthorized persons do not use it.
Most of these safety precautions and
warnings apply to the use of all STIHL
hedge trimmers. Different models may
have different parts and controls. See
the appropriate section of your
instruction manual for a description of
the controls and the function of the parts
of your model.
Safe use of a hedge trimmer involves
1. the operator
2. the power tool
3. the use of the power tool.
THE OPERATOR
Physical Condition
You must be in good physical condition
and mental health and not under the
influence of any substance (drugs,
alcohol, etc.) which might impair vision,
dexterity or judgment. Do not operate
this machine when you are fatigued.
WARNING
Be alert – if you get tired, take a break.
Tiredness may result in loss of control.
Working with any power tool can be
strenuous. If you have any condition that
might be aggravated by strenuous work,
check with your doctor before operating
this machine.
WARNING
Prolonged use of a power tool (or other
machines) exposing the operator to
vibrations may produce whitefinger
disease (Raynaud's phenomenon) or
carpal tunnel syndrome.
These conditions reduce the hand's
ability to feel and regulate temperature,
produce numbness and burning
sensations and may cause nerve and
circulation damage and tissue necrosis.
All factors which contribute to
whitefinger disease are not known, but
cold weather, smoking and diseases or
physical conditions that affect blood
vessels and blood transport, as well as
high vibration levels and long periods of
exposure to vibration are mentioned as
factors in the development of whitefinger
disease. In order to reduce the risk of
whitefinger disease and carpal tunnel
syndrome, please note the following:
–Most STIHL power tools are
available with an anti-vibration
("AV") system designed to reduce
the transmission of vibrations
created by the machine to the
operator's hands. An AV system is
recommended for those persons
using power tools on a regular or
sustained basis.
–Wear gloves and keep your hands
warm.
–Keep the AV system well
maintained. A power tool with loose
components or with damaged or
worn AV elements will tend to have
higher vibration levels.
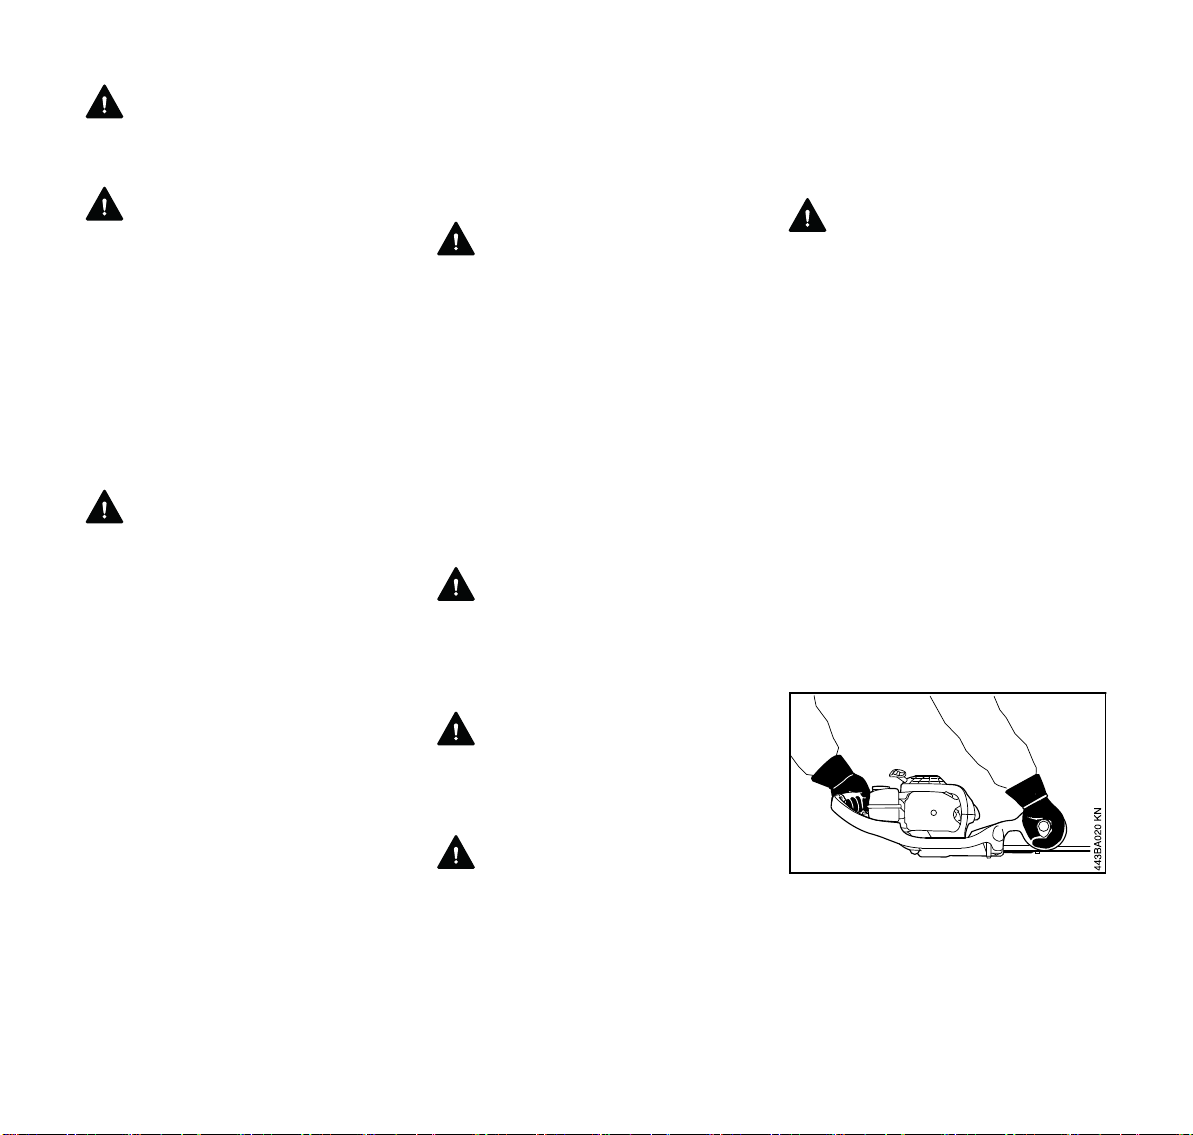
–Maintain a firm grip at all times, but
do not squeeze the handles with
constant, excessive pressure. Take
frequent breaks.
All the above-mentioned precautions do
not guarantee that you will not sustain
whitefinger disease or carpal tunnel
syndrome. Therefore, continual and
regular users should closely monitor the
condition of their hands and fingers. If
any of the above symptoms appear,
seek medical advice immediately.
WARNING
The ignition system of the STIHL unit
produces an electromagnetic field of a
very low intensity. This field may
interfere with some pacemakers. To
reduce the risk of serious or fatal injury,
persons with a pacemaker should

HS 87 R, HS 87 T
English
4
consult their physician and the
pacemaker manufacturer before
operating this tool.
Proper Clothing
WARNING
To reduce the risk of injury, the operator
should wear proper protective apparel.
WARNING
Be particularly alert and cautious when
wearing hearing protection because
your ability to hear warnings (shouts,
alarms, etc.) is restricted.
Avoid loose-fitting jackets, scarfs,
neckties, jewelry, flared or cuffed pants,
unconfined long hair or anything that
could become caught on branches,
brush or the moving parts of the unit.
Secure hair so it is above shoulder level.
THE POWER TOOL
For illustrations and definitions of the
power tool parts see the chapter on
"Main Parts".
WARNING
Never modify this power tool in any way.
Only attachments supplied by STIHL or
expressly approved by STIHL for use
with the specific STIHL model are
authorized. Although certain
unauthorized attachments are useable
with STIHL power tools, their use may,
in fact, be extremely dangerous.
If this tool is subjected to unusually high
loads for which it was not designed (e.g.
heavy impact or a fall), always check
that it is in good condition before
continuing work. Check in particular that
the fuel system is tight (no leaks) and
that the controls and safety devices are
working properly. Do not continue
operating this machine if it is damaged.
In case of doubt, have it checked by your
STIHL servicing dealer.
THE USE OF THE POWER TOOL
Transporting the Power Tool
WARNING
To reduce the risk of injury from blade
contact, never carry or transport your
power tool with the cutter blades
moving.
To reduce the risk of
injury to your eyes never
operate your power tool
unless wearing goggles
or properly fitted protec-
tive glasses with
adequate top and side
protection complying with
ANSI Z87 "+" (or your
applicable national stand-
ard.) To reduce the risk of
injury to your face STIHL
recommends that you
also wear a face shield or
face screen over your
goggles or protective
glasses.
Power tool noise may
damage your hearing.
Wear sound barriers (ear
plugs or ear mufflers) to
protect your hearing.
Continual and regular
users should have their
hearing checked
regularly.
Always wear heavy duty
work gloves (e.g. made of
leather or other wear
resistant material) when
handling the machine
and the cutting tool.
Heavy-duty, nonslip
gloves improve your grip
and help to protect your
hands.
Clothing must be sturdy
and snug-fitting, but allow
complete freedom of
movement. Wear long
pants made of heavy
material to help protect
your legs. Do not wear
shorts, sandals or go
barefoot.
Good footing is very
important. Wear sturdy
boots with nonslip soles.
Steel-toed safety boots
are recommended.

HS 87 R, HS 87 T
English
5
It may be carried only in the upright
position. Grip the front handle and keep
the hot muffler away from your body and
the cutter blades behind you.
WARNING
Always switch off the engine and fit the
scabbard over the cutter blades before
transporting the power tool over long
distances. When transporting it in a
vehicle, properly secure it to prevent
turnover, fuel spillage and damage to
the unit.
Fuel
Your STIHL power tool uses an oil-
gasoline mixture for fuel (see the
chapter on "Fuel" of your instruction
manual.)
WARNING
Fueling Instructions
WARNING
Fuel your power tool in well-ventilated
areas, outdoors. Always shut off the
engine and allow it to cool before
refueling. Gasoline vapor pressure may
build up inside the fuel tank depending
on the fuel used, the weather conditions
and the tank venting system.
In order to reduce the risk of burns and
other personal injury from escaping gas
vapor and fumes, remove the fuel filler
cap on your power tool carefully so as to
allow any pressure build-up in the tank
to release slowly. Never remove the fuel
filler cap while the engine is running.
Flip up the lever and slowly turn left (1)
to the vent position of the cap at about
1/8 turn where the cap is held in place by
the thread. Once the fumes have been
relieved, turn (2) the cap further to the
1/4 turn position where the tool-less cap
can be removed from the tank thread.
Never remove the fuel filler cap by
quickly turning it to the full 1/4 open
position without letting it vent out any
vapor/pressure build-up at the
1/8 position.
Select bare ground for fueling and move
at least 10 feet (3 m) from the fueling
spot before starting the engine. Wipe off
any spilled fuel before starting your
machine.
WARNING
Gasoline is an extremely
flammable fuel. If spilled
and ignited by a spark or
other ignition source, it
can cause fire and seri-
ous burn injury or
property damage. Use
extreme caution when
handling gasoline or fuel
mix. Do not smoke or
bring any fire or flame
near the fuel or the power
tool. Note that combus-
tible fuel vapor may
escape from the fuel
system.
Check for fuel leakage
while refueling and during
operation. If fuel leakage
is found, do not start or
run the engine until the
leak is fixed and any
spilled fuel has been
wiped away. Take care
not to get fuel on your
clothing. If this happens,
change your clothing
immediately.
2
0000-GXX-0908-A0
1

HS 87 R, HS 87 T
English
6
Toolless cap with grip
WARNING
In order to reduce the risk of fuel spillage
and fire from an improperly tightened
fuel cap, correctly position and tighten
the fuel cap in the fuel tank opening.
To do this with this STIHL cap, raise the
grip on the top of the cap until it is upright
at a 90° angle. Insert the cap in the fuel
tank with the positioning mark on the
grip of the cap and the "open" mark on
the fuel tank opening lining up. Using the
grip, press the cap down firmly while
turning it clockwise as far as it will go
(approx. 1/4 turn). The positioning mark
on the cap should now line up with the
"closed" mark on the tank.
Misaligned, damaged or broken cap
NIf the cap does not drop fully into the
opening when the positioning marks
line up and/or if the cap does not
tighten properly when twisted, the
base of the cap may be prematurely
rotated (in relation to the top) to the
closed position. Such misalignment
can result from handling, cleaning
or an improper attempt at
tightening.
NTo return the cap to the open
position for installation, turn the cap
(with the grip up) until it drops fully
into the tank opening. Next, twist the
cap counterclockwise as far as it will
go (approx. 1/4 turn) – this will twist
the base of the cap into the correct
position for installation. Then, twist
the cap clockwise, closing it
normally.
NIf your cap still does not tighten
properly, it may be damaged or
broken; immediately stop use of the
unit and take it to your authorized
STIHL dealer for repair.
See also the "Fueling" chapter in your
Instruction Manual for additional
information.
Before Starting
WARNING
Always check your power tool for proper
condition and operation before starting,
particularly the throttle trigger, throttle
trigger lockout, slide control and cutting
tool. The slide control must move easily
in direction of STOP or † and spring
back to the normal run position F. Action
of slide control, throttle trigger lockout
and throttle trigger must be smooth – the
throttle trigger must return automatically
to the idle position. Never attempt to
modify the controls or safety devices.
WARNING
Check fuel system for leaks, especially
the visible parts, e.g., filler cap, hose
connections, manual fuel pump (only for
power tools equipped with a manual fuel
pump). Do not start the engine if there
are leaks or damage – risk of fire! Have
the machine repaired by a servicing
dealer before using it.
Fold the grip flush with
the top of the cap. Grip
the cap and check for
tightness. If the grip does
not lie completely flush
with the cap and the
detent on the grip does
not fit in the correspond-
ing recess in the filler
opening, or if the cap is
loose in the filler opening,
the cap is not properly
seated and tightened and
you must repeat the
above steps.
001BA234 KN
Left: Bottom of cap in closed posi-
tion – inner mark (1) in line
with outer mark.
Right: Bottom of cap in correct posi-
tion for installation – inner
mark is under the grip and
not in line with the outer
mark.
1
001BA238 KN
001BA239 KN

HS 87 R, HS 87 T
English
7
WARNING
Never use a power tool that is damaged
or not properly maintained.
WARNING
Check that the spark plug boot is
securely mounted on the spark plug – a
loose boot may cause arcing that could
ignite combustible fumes and cause a
fire.
Keep the handles clean and dry at all
times; it is particularly important to keep
them free of moisture, pitch, oil, fuel mix,
grease or resin in order for you to
maintain a firm grip and properly control
your power tool.
WARNING
The cutting tool must be properly
tightened and in safe operating
condition. Inspect for loose parts (nuts,
screws, etc.) and for cracked, bent,
warped or damaged blades. Regularly
check the condition and tightness of the
cutter blades – with the engine stopped!
Replace damaged cutter blades before
using the power tool. Always keep
blades sharp.
STIHL recommends that you always
spray the cutter blades with STIHL resin
solvent before starting work – with the
engine stopped! You can obtain this
protective spray from your dealer. Apply
generously.
Starting
Start the engine at least 10 feet (3 m)
from the fueling spot, outdoors only.
For specific starting instructions, see the
appropriate section of your manual.
Place the power tool on firm ground or
other solid surface in an open area.
Maintain good balance and secure
footing.
WARNING
To reduce the risk of injury from blade
contact, be absolutely sure that the
cutting tool is clear of you and all other
obstructions and objects, including the
ground, because when the engine starts
at starting-throttle, engine speed will be
fast enough for the clutch to engage and
move the blades on the cutting tool.
Once the engine has started,
immediately blip the throttle trigger,
which should release the starting throttle
and allow the engine to slow down to
idle.
WARNING
Your power tool is a one-person
machine. Do not allow other persons in
the general work area, even when
starting.
WARNING
To reduce the risk of injury from loss of
control, do not attempt to "drop start"
your power tool.
WARNING
When you pull the starter grip, do not
wrap the starter rope around your hand.
Do not let the grip snap back, but guide
the starter rope to rewind it properly.
Failure to follow this procedure may
result in injury to your hand or fingers
and may damage the starter
mechanism.
Important Adjustments
WARNING
To reduce the risk of personal injury
from loss of control or contact with the
running cutting tool, do not use your unit
with incorrect idle adjustment. At correct
idle speed, the cutting tool should not
move. For directions on how to adjust
idle speed, see the appropriate section
of your instruction manual.
If you cannot set the correct idle speed,
have your STIHL dealer check your
power tool and make proper
adjustments and repairs.
During Operation
Holding and Controlling the Power Tool
Always hold the unit firmly with both
hands on the handles while you are
working. Wrap your fingers and thumbs
around the handles.
Left hand on the control handle, right
hand on the front handle.
Operate the machine so that the cutting
blades are always away from your body.

HS 87 R, HS 87 T
English
8
WARNING
WARNING
Do not overreach. Keep proper footing
and balance at all times. Special care
must be taken in slippery conditions (wet
ground, snow) and in difficult, overgrown
terrain. Watch for hidden obstacles such
as tree stumps, roots and ditches to
avoid stumbling. For better footing, clear
away fallen branches, scrub and
cuttings. Be extremely cautious when
working on slopes or uneven ground.
WARNING
To reduce the risk of injury from loss of
control, never work on a ladder, in a tree
or any other insecure support. Never
hold the machine above shoulder
height.
Working Conditions
Operate and start your power tool only
outdoors in a well ventilated area.
Operate it under good visibility and
daylight conditions only. Work carefully.
WARNING
WARNING
If the vegetation being cut or the
surrounding ground is coated with a
chemical substance (such as an active
pesticide or herbicide), read and follow
the instructions and warnings that
accompanied the substance at issue.
WARNING
Inhalation of certain dusts, especially
organic dusts such as mold or pollen,
can cause susceptible persons to have
an allergic or asthmatic reaction.
Substantial or repeated inhalation of
dust and other airborne contaminants, in
particular those with a smaller particle
size, may cause respiratory or other
illnesses. Control dust at the source
where possible. Use good work
practices, such as operating the unit so
that the wind or operating process
directs any dust raised by the power tool
away from the operator. Follow the
recommendations of EPA / OSHA /
NIOSH and occupational and trade
associations with respect to dust
("particulate matter".) When the
inhalation of dust cannot be
substantially controlled, i.e., kept at or
near the ambient (background) level, the
operator and any bystanders should
wear a respirator approved by NIOSH /
MSHA for the type of dust encountered.
Operating Instructions
WARNING
Do not operate your power tool using the
starting throttle lock, as you do not have
control of the engine speed.
In the event of impending danger or in
an emergency, switch off the engine
immediately – move the slide control in
the direction of STOP or †.
WARNING
The cutter blades continue to move for a
short period after the throttle trigger is
released (flywheel effect.)
Accelerating the engine while the blades
are blocked increases the load and will
cause the clutch to slip continuously.
This may result in overheating and
damage to important components (e.g.
clutch, polymer housing components) –
which can then increase the risk of injury
from the blades moving while the engine
is idling.
Never attempt to operate
your power tool with one
hand. Loss of control of
the power tool resulting in
serious or fatal injury may
result. To reduce the risk
of cut injuries, keep
hands and feet away
from the cutting tool.
Never touch a moving
cutting tool with your
hand or any other part of
your body.
As soon as the engine is
running, this product gen-
erates toxic exhaust
fumes containing chemi-
cals, such as unburned
hydrocarbons (including
benzene) and carbon
monoxide, that are
known to cause respira-
tory problems, cancer,
birth defects, or other
reproductive harm. Some
of the gases (e.g. carbon
monoxide) may be color-
less and odorless. To
reduce the risk of serious
or fatal injury / illness
from inhaling toxic fumes,
never run the machine
indoors or in poorly venti-
lated locations.

HS 87 R, HS 87 T
English
9
WARNING
Before you start work, examine the
hedge area for stones, fence wire, metal
or other solid objects which could
damage the cutter blades.
Take particular care when cutting
hedges next to or against wire fences.
Do not touch the wire with the cutting
blades. When working close to the
ground, make sure that no sand, grit or
stones get between the cutter blades.
Striking solid foreign objects such as
stones, fence wire or metal could
damage the cutting attachment and may
cause blades to crack, chip or break.
STIHL does not recommend the use of
your power tool when cutting in areas
where the blades could contact such
objects.
WARNING
Observe the cutting blades at all times –
do not cut any areas of the hedge that
you cannot see. When cutting the top of
a taller hedge, check the other side of
the hedge frequently for bystanders,
animals and obstructions.
DANGER
WARNING
If the cutting tool becomes clogged or
stuck, always turn off the engine and
make sure the cutting tool has stopped
before cleaning. Grass, weeds, etc.
should be cleaned off the cutting tool at
regular intervals.
Check the cutting blades at regular short
intervals during operation, or
immediately if there is a noticeable
change in cutting behavior:
–Shut off the engine.
–Wait until the cutting blades have
come to a complete standstill.
–Check condition and tightness, look
for cracks.
–Check sharpness.
–Replace damaged or dull cutting
tools immediately, even if they have
only superficial cracks.
WARNING
The gearbox becomes hot during
operation. To reduce the risk of burn
injury, do not touch the gear housing
when it is hot.
WARNING
Never modify your muffler. Any
modification could cause an increase in
heat radiation, sparks or sound level,
thereby increasing the risk of fire, burn
injury or hearing loss. You may also
permanently damage the engine. Have
your muffler serviced and repaired by
your STIHL servicing dealer only.
WARNING
The muffler and other parts of the engine
(e.g. fins of the cylinder, spark plug)
become hot during operation and remain
hot for a while after stopping the engine.
To reduce risk of burns, do not touch the
muffler and other parts while they are
hot. Keep the area around the muffler
clean. Remove excess lubricant and all
debris such as pine needles, branches
or leaves. Let the engine cool down
sitting on concrete, metal, bare ground
or solid wood (e.g. the trunk of a felled
tree) away from any combustible
substances.
WARNING
An improperly mounted or damaged
cylinder housing or a
damaged/deformed muffler shell may
interfere with the cooling process of the
muffler. To reduce the risk of fire or burn
injury, do not continue work with a
damaged or improperly mounted
cylinder housing or a
damaged/deformed muffler shell.
Your muffler is furnished with a spark
arresting screen designed to reduce the
risk of fire from the emission of hot
particles. Never operate your unit with a
missing or damaged spark arresting
screen. If your gas/oil mix ratio is correct
(i.e., not too rich), this screen will
normally stay clean as a result of the
heat from the muffler and need no
service or maintenance. If you
experience loss of performance and you
suspect a clogged screen, have your
muffler maintained by a STIHL servicing
dealer. Some state or federal laws or
regulations may require a properly
Your power tool is not
insulated against electric
shock. To reduce the risk
of electrocution, never
operate this power tool in
the vicinity of any wires or
cables (power, etc.)
which may be carrying
electric current.

HS 87 R, HS 87 T
English
10
maintained spark arrestor for certain
uses. See the "Maintenance, Repair and
Storing" section of these Safety
Precautions. Remember that the risk of
a brush or forest fire is greater in hot or
dry conditions.
WARNING
After Finishing Work
Always clean dust and dirt off the
machine – do not use any grease
solvents for this purpose.
Spray the blades with STIHL resin
solvent. Start and run the engine briefly
so that the solvent is evenly distributed.
MAINTENANCE, REPAIR AND
STORING
Maintenance, replacement, or repair of
the emission control devices and
systems may be performed by any
nonroad engine repair establishment or
individual. However, if you make a
warranty claim for a component which
has not been serviced or maintained
properly or if nonapproved replacement
parts were used, STIHL may deny
coverage.
WARNING
Use only identical STIHL replacement
parts for maintenance and repair. Use of
non-STIHL parts may cause serious or
fatal injury.
Strictly follow the maintenance and
repair instructions in the appropriate
section of your instruction manual.
Please also refer to the maintenance
chart in this manual.
WARNING
Always stop the engine and make sure
that the cutting blades are stopped
before doing any maintenance or repair
work or cleaning the power tool. Do not
attempt any maintenance or repair work
not described in your instruction manual.
Have such work performed by your
STIHL servicing dealer only.
Wear gloves when handling or
performing maintenance on blades.
WARNING
Use the specified spark plug and make
sure it and the ignition lead are always
clean and in good condition. Always
press spark plug boot snugly onto spark
plug terminal of the proper size. (Note: If
terminal has detachable SAE adapter
nut, it must be securely attached.) A
loose connection between spark plug
terminal and the ignition wire connector
in the boot may create arcing that could
ignite combustible fumes and cause a
fire.
WARNING
Never test the ignition system with the
ignition wire boot removed from the
spark plug or with a removed spark plug,
since uncontained sparking may cause
a fire.
WARNING
Do not operate your power tool if the
muffler is damaged, missing or modified.
An improperly maintained muffler will
increase the risk of fire and hearing loss.
Your muffler is equipped with a spark-
arresting screen to reduce the risk of
fire; never operate your power tool if the
screen is missing, damaged or clogged.
Remember that the risk of a brush or
forest fire is greater in hot or dry
weather.
In California, it is a violation of § 4442 or
§ 4443 of the Public Resources Code to
use or operate gasoline-powered tools
on forest-covered, brush-covered or
grass-covered land unless the engine’s
exhaust system is equipped with a
complying spark arrester that is
maintained in effective working order.
Some STIHL power tools
are equipped with a cata-
lytic converter, which is
designed to reduce the
exhaust emissions of the
engine by a chemical pro-
cess in the muffler. Due
to this process, the muf-
fler does not cool down
as rapidly as conven-
tional mufflers when the
engine returns to idle or
is shut off. To reduce the
risk of fire and burn inju-
ries when using a
catalytic converter,
always set your power
tool down in the upright
position and never locate
it where the muffler is
near dry brush, grass,
wood chips or other com-
bustible materials while it
is still hot.

HS 87 R, HS 87 T
English
11
The owner/operator of this product is
responsible for properly maintaining the
spark arrester. Other states or
governmental entities/agencies, such as
the U.S. Forest Service, may have
similar requirements. Contact your local
fire agency or forest service for the laws
or regulations relating to fire protection
requirements.
WARNING
Never repair damaged cutting attach-
ments by welding, straightening or
modifying the shape. This may cause
parts of the cutting blades to come off
and result in serious or fatal injuries.
Keep the cutting blades sharp. Tighten
all nuts, bolts and screws, except the
carburetor adjustment screws, after
each use.
Do not clean your machine with a
pressure washer. The solid jet of water
may damage parts of the machine.
Store the power tool in a dry and high or
locked location out of reach of children.
Before storing for longer than a few
days, always empty the fuel tank. See
chapter "Storing the machine" in this
manual.
HS 87 R
The HS 87 R is designed for cutting
hedges and shrubs with thicker stems
and branches.
HS 87 T
The HS 87 T is designed for shaping
and trimming hedges and shrubs with
thinner branches.
Use the HS 87 R hedge trimmer for
cutting hedges with thicker branches.
Cutting Season
Observe country-specific or municipal
rules and regulations for cutting hedges.
Do not use your power tool during other
people's normal rest periods.
Cutting Sequence
Use lopping shears or a chain saw to cut
out thick branches first.
Cut both sides of the hedge first, then
the top.
Disposal
Do not throw cuttings in the garbage can
– they can be composted!
Using the Unit

HS 87 R, HS 87 T
English
12
Working Technique
Vertical Cut
Swing the cutting blade from the bottom
upwards in an arc – lower the nose of the
blade, move along the hedge and then
swing the blade up again in an arc.
Any working position above head height
is tiring. To minimize the risk of
accidents, work in such positions for
short periods only.
Horizontal Cut
Hold the cutter bar at an angle of 0° to
10° as you swing the hedge trimmer
horizontally.
Swing the cutting blade in an arc
towards the outside of the hedge so that
the cuttings are swept to the ground.
Cuttings can be easily swept off the
hedge with the aid of the optional
catcher plate on the cutting blade.
This engine is certified to operate on
unleaded gasoline and the STIHL two-
stroke engine oil at a mix ratio of 50:1.
Your engine requires a mixture of high-
quality gasoline and two-stroke air
cooled engine oil.
Use mid-grade unleaded gasoline with a
minimum octane rating of 89 ((R+M)/2)
and no more than 10% ethanol content.
NOTICE
Fuel with an octane rating below 89 may
increase engine temperatures. This, in
turn, increases the risk of piston seizure
and damage to the engine.
The chemical composition of the fuel is
also important. Some fuel additives not
only detrimentally affect elastomers
(carburetor diaphragms, oil seals, fuel
lines, etc.), but magnesium castings and
catalytic converters as well. This could
cause running problems or damage the
engine. For this reason STIHL
recommends that you use only quality
unleaded gasoline!
NOTICE
Gasoline with an ethanol content of
more than 10% can cause running
problems and major damage in engines
and should not be used.
For further details, see
www.STIHLusa.com/ethanol
The ethanol content in gasoline affects
engine speed – it may be necessary to
readjust the carburetor if you use fuels
with various ethanol contents.
Fuel

HS 87 R, HS 87 T
English
13
WARNING
To reduce the risk of personal injury
from loss of control and/or contact with
the running cutting tool, do not use your
unit with an incorrect idle adjustment. At
correct idle speed, the cutting tool
should not move.
If your machine’s idle speed is
incorrectly adjusted, have your
authorized STIHL servicing dealer
check your machine and make the
proper adjustments and repairs.
The idle speed and maximum speed of
the engine change if you switch from a
fuel with a certain ethanol content to a
fuel with a much higher or lower ethanol
content.
This problem can be avoided by always
using fuel with the same ethanol
content.
To ensure the maximum performance of
your STIHL engine, use a high quality 2-
cycle engine oil. To help your engine run
cleaner and reduce harmful carbon
deposits, STIHL recommends using
STIHL HP Ultra 2-cycle engine oil or ask
your dealer for an equivalent fully
synthetic 2-cycle engine oil.
To meet the requirements of EPA and
CARB we recommend to use STIHL HP
Ultra oil.
STIHL MotoMix
STIHL recommends the use of STIHL
MotoMix. STIHL MotoMix has a high
octane rating and ensures that you
always use the right gasoline/oil mix
ratio.
STIHL MotoMix uses STIHL HP Ultra
two-stroke engine oil suited for high
performance engines.
For further details, see
www.STIHLusa.com/ethanol
If not using MotoMix, use only STIHL
two-stroke engine oil or equivalent high-
quality two-stroke engine oils that are
designed for use in air cooled two-cycle
engines.
The use of non-seasonal gasoline
blends may increase the potential for
pressure to build in the fuel tank during
operation. For example, using a winter
blend during the summer will increase
pressure in the fuel tank. Always use
gasoline blends appropriate to the
season, altitude and other
environmental factors.
Do not use BIA or TCW rated (two-
stroke water cooled) mix oils or other
mix oils that state they are for use in both
water cooled and air cooled engines
(e.g., outboard motors, snowmobiles,
chain saws, mopeds, etc.).
WARNING
Take care when handling gasoline.
Avoid direct contact with the skin and
avoid inhaling fuel vapor. When filling at
the pump, first remove the container
from your vehicle and place the
container on the ground before filling. To
reduce the risk of sparks from static
discharge and resulting fire and/or
explosion, do not fill fuel containers that
are sitting in or on a vehicle or trailer.
The container should be kept tightly
closed in order to limit the amount of
moisture that gets into the mixture.
The machine's fuel tank should be
cleaned as necessary.
Fuel mix ages
If not using MotoMix, only mix sufficient
fuel for a few days of work, not to exceed
30 days of storage. Store in approved
fuel-containers only. When mixing, pour
oil into the container first, and then add
gasoline. Close the container and shake
it by hand to ensure proper mix of oil and
gasoline.
WARNING
Shaking fuel can cause pressure to build
in the fuel container. To reduce the risk
of fire and severe personal injury or
property damage from fuel spraying,
allow the fuel container to sit for several
minutes before opening. Open the
container slowly to release any residual
pressures. Never open the fuel
container in the vicinity of any ignition
source. Read and follow all warnings
and instructions that accompany your
fuel container.
Dispose of empty mixing-oil containers
only at authorized disposal locations.
Gaso-
line
Oil (STIHL 50:1 or equiva-
lent high-quality oils)
US gal. US fl.oz.
12.6
2 1/2 6.4
5 12.8

HS 87 R, HS 87 T
English
14
Preparations
NBefore fueling, clean the filler cap
and the area around it to ensure that
no dirt falls into the tank.
NPosition the machine so that the
filler cap is facing up.
NAlways thoroughly shake the
mixture in the canister before
fueling your machine.
WARNING
In order to reduce the risk of fire and
personal injury from escaping gas vapor
and fumes, remove the fuel filler cap
carefully so as to allow any pressure
build-up in the tank to release slowly.
Opening
WARNING
After allowing the chain saw to cool,
remove the fuel filler cap slowly and
carefully to allow any remaining
pressure build-up in the tank to release:
NFlip up the grip and press the cap
down firmly (1).
NWhile maintaining steady,
downward pressure, turn the cap
slowly counter-clockwise to the vent
position (2), approximately a
1/8 turn of the cap.
NIf any significant venting occurs,
immediately re-seal the tank by
turning the cap clockwise to the
closed position. Allow the saw to
cool further before attempting to
open the tank.
NTurn the cap to the open position (3)
only after the contents of the tank
are no longer under pressure. In the
open position, the exterior
positioning mark (4) on the cap will
line up with the "unlocked"
symbol (5) on the fuel tank housing.
NRemove the fuel filler cap.
WARNING
Never remove the cap by turning it
directly to the open position without first
allowing the saw to cool adequately and
then letting it release any residual
pressure at the vent position (2). Never
attempt to remove the cap while the
engine is still hot or running.
Refueling
Take care not to spill fuel while fueling
and do not overfill the tank – leave
approx. 1/2" (13 mm) air space.
Closing
WARNING
An improperly tightened fuel filler cap
can loosen or come off and spill
quantities of fuel. To reduce the risk of
Fueling
0023BA015 KN
1
0000-GXX-6423-A0
2
0000-GXX-6424-A0
34
5
0000-GXX-6425-A0

HS 87 R, HS 87 T
English
15
fuel spillage and fire from an improperly
installed fuel cap, correctly position and
tighten the cap in the fuel tank opening:
NRaise the grip on the top of the cap
until it is upright at a 90° angle.
Insert the cap in the fuel tank
opening with the exterior positioning
mark (1) lined up with the
"unlocked" symbol (2) on the fuel
tank housing.
NUsing the grip, press the cap down
firmly while turning it clockwise to
the closed position (approximately
1/4 turn). In the closed position, the
interior (4) and exterior (1)
positioning marks will align with the
"locked" symbol (3) on the fuel tank
housing.
NFold the grip flush with the top of the
cap and check for tightness.
WARNING
If the grip does not lie completely flush
with the cap or the detent on the grip
does not fit in the corresponding recess
in the tank opening, or if the cap is loose,
the cap is not properly seated and you
must repeat the above steps. Also refer
to the procedure below for returning the
base of the cap to the proper starting
position for installation.
If the filler cap will not engage into the
fuel tank housing
If the cap does not drop fully into the fuel
tank opening when the positioning
marks (1, 2) line up, or if it does not
tighten properly when turned, the base
of the cap may be prematurely rotated in
relation to the top. Such misalignment
can result from handling, cleaning or an
improper attempt at tightening.
–Illustrations A and B: The base of
the cap is prematurely rotated to the
closed position and is not in the
correct starting position for
installation. The tank will not seal in
this configuration. Note: in
Illustrations A and B, the interior
positioning marks (1) are in line with
the exterior position marks (2).
–Illustration C: The bottom of the cap
is in the correct starting position for
installation. Note: In Illustration C,
the interior positioning mark (1) is
under the grip and not in line with
the outer position mark (2).
To return the base of the cap to the
proper starting position for installation:
1
2
0000-GXX-6426-A0
3
1
4
0000-GXX-6427-A0
ABC
1
2
1
22
1
0000-GXX-6421-A0

HS 87 R, HS 87 T
English
16
NTurn the cap (with the grip up) until
it drops into the fuel tank opening.
NNext, turn the cap counter-
clockwise as far as it will go
(approximately 1/4 turn). This will
rotate the base of the cap into the
correct starting position for
installation. The exterior positioning
mark (1) on the cap will line up with
the "unlocked" symbol (2) on the
fuel tank housing.
NThen, turn the cap clockwise,
closing it normally.
NIf your fuel cap still does not tighten
properly, it may be damaged or
broken. Stop using the unit and take
it to your authorized STIHL dealer
for repair.
NObserve safety precautions – see
chapter on "Safety Precautions and
Working Techniques".
The slide control (1) is in the normal run
position F.
NPress the manual fuel pump bulb at
least five times – even if the bulb is
filled with fuel.
Cold engine (cold start)
NDepress the outer ring (arrows) of
the choke knob (2) and then turn it
to g .
Warm engine (warm start)
NDepress the outer ring (arrows) of
the choke knob (2) and then turn it
to f.
Also use this setting if the engine has
been running but is still cold.
1
2
0000-GXX-6422-A0
Starting / Stopping the
Engine
1
0000-GXX-1816-A0
0000-GXX-1806-A0
2
0000-GXX-1803-A0
2
0000-GXX-1804-A0

HS 87 R, HS 87 T
English
17
Cranking
NPlace the machine on the ground.
NRemove the blade scabbard. Check
that the cutting blades are not
touching the ground or any other
obstacles.
NMake sure you have a safe and
secure footing.
NHold the machine firmly with your
left hand on the fan housing and
press down.
NHold the starter grip with your right
hand.
NPull the starter grip slowly until you
feel it engage and then give it a brisk
strong pull.
NOTICE
Do not pull out the starter rope all the
way – it might otherwise break.
NDo not let the starter grip snap back.
Guide it slowly back into the housing
so that the starter rope can rewind
properly.
As Soon As the Engine Runs
NPress down the throttle trigger
lockout and open the throttle – the
choke knob moves to the run
position e. After a cold start, warm
up the engine by opening the
throttle several times.
WARNING
Make sure the carburetor is correctly
adjusted. The cutting attachment must
not run when the engine is idling.
Your machine is now ready for
operation.
Stopping the Engine
NMove the stop switch in the direction
of † – when released, the slide
control springs back to the normal
run position F.
Other Hints on Starting
At very low outside temperatures –
warm up the engine
As soon as the engine runs:
NAllow engine to run in starting
throttle position for about 10
seconds.
NOpen the throttle wide – the slide
control springs back to the normal
run position e and the engine
returns to idling speed.
Engine does not start in warm start
position f
NMove the choke knob to g and
continue cranking until the engine
runs.
If the engine does not start
NCheck that all settings are correct.
NCheck that there is fuel in the tank
and refuel if necessary.
NCheck that the spark plug boot is
properly connected.
NRepeat the starting procedure.
Engine is flooded
NDepress the outer ring of the choke
knob and then turn it to e –
continue cranking until engine runs.
0000-GXX-7039-A0
0000-GXX-1820-A0

HS 87 R, HS 87 T
English
18
Fuel tank run until completely dry
NAfter refueling, depress the manual
fuel pump bulb at least 5 times –
even if the bulb is already filled with
fuel.
NSet the choke knob to suit the
engine temperature.
NNow start the engine.
The machine is equipped with either a
felt or paper filter element.
If There is a Noticeable Loss of Engine
Power
Felt filter
NTake out the screw (2).
NDepress the outer ring (arrows) of
the choke knob (1) and then turn it
to e.
NDepress the outer ring (arrows) of
the choke knob (1) and hold it
depressed.
NRemove the filter cover (3).
NClean away loose dirt from around
the filter.
NRemove the filter element (4).
NFit a new filter element. As a
temporary measure you can knock it
out on the palm of your hand or blow
it out with compressed air. Do not
wash.
NFit the filter element.
NDepress the outer ring of the choke
knob and fit the filter cover.
NInsert the screw and tighten it down
firmly.
Paper filter
NTake out the screw (2).
NDepress the outer ring (arrows) of
the choke knob (1) and then turn it
to e.
NDepress the outer ring (arrows) of
the choke knob (1) and hold it
depressed.
NRemove the filter cover (3).
NClean away loose dirt from around
the filter and inside the filter cover.
Cleaning the Air Filter
1
2
3
0000-GXX-1809-A0
4
0000-GXX-1810-A0
0000-GXX-1812-A0
1
2
3
0000-GXX-6031-A0
Other manuals for HS 87
2
This manual suits for next models
2
Table of contents
Languages:
Other Stihl Trimmer manuals

Stihl
Stihl HLA 56 User manual

Stihl
Stihl HSA 56 User manual

Stihl
Stihl FSA 57 User manual

Stihl
Stihl FSA 130 R User manual

Stihl
Stihl FSA 90 User manual

Stihl
Stihl FS 55 User manual

Stihl
Stihl FS 94 R User manual

Stihl
Stihl KombiMotor KMA 130 R User manual

Stihl
Stihl HSA 130.0 R User manual

Stihl
Stihl FSE 60 User manual