Stirling tp54h4wh User manual

INSTRUCTION MANUAL
Model Number TP54H4WH
N13275
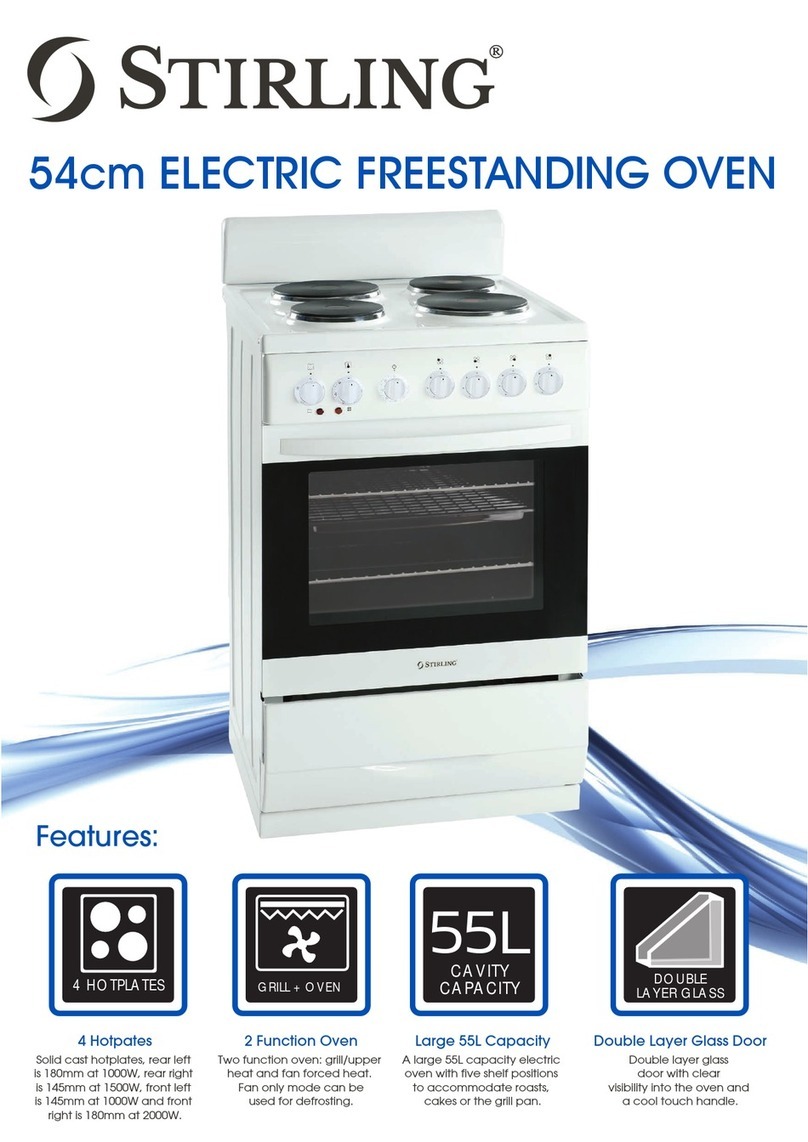
54cm Electric Freestanding Oven
After Sales Support
Telephone: 1300 886 649
Email: [email protected]

After Sales Support
Telephone: 1300 886 649
Email: [email protected]
Contents
03 Warranty Details
04 Welcome
05 General Safety Instructions
08 Product Overview
10 Getting Started
12 Instructions
17 Baking, Roasting and Grilling
23 Other Useful Information
30 Installation
34 Repair and Refurbished Goods or Parts Notice

3
54cm Electric Freestanding Oven
Warranty Details
The product is guaranteed to be free from defects in workmanship and parts
for a period of 36 months from the date of purchase. Defects that occur
within this warranty period, under normal use and care, will be repaired,
replaced or refunded at our discretion, solely at our option with no charge for
parts and labour. The benefits conferred by this warranty are in addition
to all rights and remedies in respect of the product that the consumer
has under the Competition and Consumer Act 2010 and similar state and
territory laws.
Our goods come with guarantees that cannot be excluded under the
Australian Consumer Law. You are entitled to a replacement or refund for
a major failure and to compensation for any other reasonably foreseeable
loss or damage. You are also entitled to have the goods repaired or
replaced if the goods fail to be of acceptable quality and the failure does
not amount to a major failure.

4
Welcome
Congratulations on choosing to buy a STIRLING®product.
All products brought to you by STIRLING®are manufactured to the highest
standards of performance and safety and, as part of our philosophy of customer
service and satisfaction, are backed by our comprehensive 3 Year Warranty.
We hope you will enjoy using your purchase for many years to come.

5
General Safety Instructions
This freestanding electric oven must be installed by an
appropriately qualified electrician following the instructions in
this manual (on pages 30 to 33) and all applicable regulations.
Do not try to install the oven on your own; doing so will
expose you to danger and void the warranty. Improper
installation, adjustment, alteration or service can cause injury
or damage. Always contact specialised technical personnel.
Electric Freestanding Ovens can tip and cause serious
burns and injury to persons. Babies and young
children, and infirm people who lean on the oven, are
particularly at risk. This oven has a stabilising means
which must be installed to prevent tilting. Always
exercise due care when the oven is in use.
• Never lean on or steady yourself on the oven.
• Always keep children away from the oven.
• Supervise young children at all times to ensure they
do not climb onto the open oven door and cause the
oven to tip over.
Read this manual thoroughly before first use, even if you are familiar with this
type of product. The safety precautions enclosed herein reduce the risk of fire,
electric shock and injury when correctly adhered to.
Keep the manual in a safe place for future reference, along with the completed
warranty card, purchase receipt and carton. If applicable, pass these
instructions on to the next owner of the appliance.
Always follow basic safety precautions and accident prevention measures
when using an electrical appliance, including the following:

6
General Safety Instructions (Cont.)
Usage conditions and general warnings
• Domestic use only: This appliance is intended for indoor household use
only. It is not suitable for commercial or industrial use. Do not use the
appliance outdoors. Do not use this appliance for anything other than its
intended purpose, and only use it as described in this manual.
• Responsible usage: These instructions are not intended to cover every
possible condition and situation. As with any electrical household appliance,
common sense and caution are therefore always recommended when
installing, operating and maintaining the unit. Do not use this appliance until
you have read this instruction manual; always follow all instructions.
• No timer: The appliance is not intended to be operated by means of an
external timer or separate remote control system.
• Usage restriction: This appliance is not intended for use by persons
(including children) with reduced physical, sensory or mental capabilities,
or lack of experience and knowledge, unless they have been given
supervision or instruction concerning use of the appliance by a person
responsible for their safety.
• Children: Supervise children to ensure they do not play with the appliance.
This appliance is not intended for use by children without supervision.
• Unattended: Do not leave the appliance unattended during use.
• Cleaning: Do not use a steam cleaner for cleaning any part of this oven.
• Faults/service: Do not use the oven in the event of a technical fault. Any
faults must be corrected by an appropriately qualified person.
• Damage: If the supply cord is damaged, it must be replaced by the
manufacturer or an appropriately qualified person in order to avoid a hazard.
CAUTION: Hot!
• During use the appliance becomes hot. Always take utmost care to avoid
touching any hotplates or heating elements inside the oven. Use oven mitts.
• Accessible parts may become hot during use. Always keep young children
away from the stove and oven during use.
• Ensure that small items of household equipment, including connection
leads, do not touch the hot oven or the hob as the insulation material of
this equipment is usually not resistant to high temperatures.
In case of damage, or when the oven needs servicing, contact our after
sales support line to arrange repair or return of the damaged product.

7
General Safety Instructions (Cont.)
WARNING!
Failure to comply with the safety warnings in this manual may result in a
fire or explosion and cause property damage, personal injury or death.
Oven warnings
• Do not store flammable materials in the oven or near the appliance.
• Do not lean on the open oven door. Do not use it as a shelf. Do not put pans
weighing more than 15kg on the opened oven door.
• Do not line oven shelves with foil.
• Do not use harsh abrasive cleaners or sharp metal scrapers to clean the
oven door glass since they can scratch the surface, which may result in the
glass cracking.
• Ensure the appliance is switched off before replacing the lamp.
• Always switch off the oven or grill straight after use.
• Clean the grill pan and grid after every use. Fat left on these surfaces is a
fire hazard.
• To avoid a fire hazard, do not place food that is too thick under the grill.
• Never cover the grill pan with foil.
Hob warnings
• Do not leave the oven unattended when frying. Oils and fats may catch fire
due to overheating.
• Do not allow the cooktop to get soiled and prevent liquids from boiling over
onto the surface of the cooktop. Clean up any spillages up as they happen.
• Do not place pans with a wet bottom on the warmed up hotplates as this
can cause irreversible changes to the cooktop (irremovable stains).
• Do not place pans weighing more than 25kg on the cooktop.
• Do not switch on a hotplate until a pot or pan has been placed on it.
• Do not let pots boil dry, as this could damage the hotplate (and your pot).
• Do not let hot cookware overhang the hob and touch your benchtop.
• Always let the hotplates cool down completely before cleaning.

8
Product Overview
1 Splash guard
2 Hob with 4 hotplates
3 Control dials (from left to right): oven function, oven temperature,
mechanical timer, hotplates (top left, bottom left, bottom right, top right)
4 Pilot lights: oven (red), hob (orange)
5 Oven door handle
6 Oven door with viewing window
7 Storage drawer
8 Adjustable feet
1
3
4
5
6
7
8
2
Oven: front view

9
Product Overview (Cont.)
Oven interior
Grill pan
Oven racks
9
10
11
13
12
14
15
16
9 Top heater/grill element
10 Grill pan (tray with grid)
11 Oven racks (2)
12 Fan and fan cover
13 Bottom of the oven
14 Grill grid
15 35mm grill/baking tray
16 Oven racks (2)

10
Getting Started
Unpacking the appliance
• Unpack the appliance and remove all packaging materials from around the
oven and from inside the oven cavity. Empty the bottom storage drawer.
• Keep all packaging materials until you have made sure your new electric
oven is undamaged and in good working order. Plastic wrapping can be a
suffocation hazard for babies and young children, so ensure all packaging
materials are out of their reach.
• Dispose of all packaging elements in a way that will not cause damage to
the environment. All materials used for packaging are recyclable and are
marked with the appropriate symbol.
• Do not remove the rating label or any other warnings affixed to the
appliance.
Installation
IMPORTANT!
Do not try to install the oven yourself. It must be installed and properly
earthed by an appropriately qualified electrician in accordance with the
installation instructions on pages 30-33 and all applicable regulations.
Before first use
• Read this manual to familiarise yourself with all the parts and operating
principles of the electric oven. Pay particular attention to the safety
instructions on pages 5–7.
• After the appliance has been properly installed, before first use, wipe the
interior oven surfaces with a soft cloth dampened with warm water and
a little mild detergent to remove any dust from transport. Leave the oven
door open until it is completely dry.
• Wipe the cooktop in the same manner, but do not wipe the solid elements.
• Remove and wash the oven racks and grill pan with warm water and a little
washing-up liquid.
• Before you use the electric oven for the first time, prepare the hotplates
and oven as described on the following page. Ensure plenty of ventilation
in the kitchen before proceeding — windows and/or doors should be open
and a rangehood turned on.

11
Hotplate preparation
• The top surface of the hotplates are sealed with a heat-resistant coating.
Before first use, the hotplates should be heated for a short period without
a pot or pan on it to harden the protective coating. If this is not done,
premature rusting may occur.
Simply turn the heat setting to high for 3–4 minutes to fully harden the
coating. When the hotplates have cooled, we recommend you apply a thin
coating of a hotplate protector to seal and protect the surface.
Oven preparation
• Turn the oven to a temperature of 250°C for approximately 30 minutes to
burn off any dust, oil or other remnants from manufacturing or transport.
When cooled, wipe away any residue.
NOTE: When heating the oven for the first time it is normal for the
appliance to give off smoke and odours. These will be gone after
approximately 30 minutes. This is due to the components being
new and is no cause for concern. Ensure sufficient ventilation.
• Your new freestanding electric oven is now ready for use.
Getting Started (Cont.)
CAUTION!
The appliance becomes very hot during use. Take care to avoid burns.
Always keep children away and supervise when the oven is in use.

12
Instructions
Choice of hotplate
When choosing a hotplate, make sure to match the diameter of your pots and
pans with the heating potential of the hotplates. Using a pan that does not
properly fit the hotplate will result in poor heat transfer (Fig. 1).
Using the hotplates
Keep the following points in mind when choosing a hotplate for cooking.
• Try to match as closely as possible the diameter of your pots and pans
with the diameter of the hotplate. Using a pot with a small diameter on a
large hotplate will leave the hotplate exposed when it is hot; and cooking
food in a large pot on a small hotplate will take longer.
• Your pots and pans should have a flat bottom. Do not use pans with a
convex or recessed base.
• Make sure the base of your pot is dry before placing it on a hotplate.
• Do not lift up the pot lid unnecessarily during cooking to avoid depositing
moisture on the hotplate.
• Do not heat up the hotplates without pot or pan.
OPERATION
Using the hotplates
The level of heat can be adjusted gradually by turning the appropriate knob to the right or
left.
Switching on the plate results in a red signal light on the control panel turning on.
Switching off
MIN.
Warming up
Stewing vegetables,
slow cooking
Cooking soups,larger
dishes
Slow frying
Grilling meat,fish
MAX.
Fast heating up,
fast cooking and frying
An appropriately selected pan saves energy.
A pan should have a thick, flat base with a diameter equal to the plate diameter, as in that
case heat is transferred most efficiently.
Caution!
Ensure the plate is clean – a soiled zone does not transfer all of the heat.
Protect the plate against corrosion.
Switch off the plate before a pan is removed.
Do not leave pans with prepared dishes based on fats and oils unattended on the switched
– on plate; hot fat can spontaneously catch fire.
9
Use
Do not use pots and pans that are unsteady and likely to rock or overbalance.
Do not operate the cooktop for an extended time without utensil on the hotplate.
Good Bad Bad Bad Bad Bad Bad
(recessed
base)
(convex
base)
(undersize)
(oversize)
(moisture
on
hotplate)
(no
utensil)
hotplate to seal and protect the surface. We recommend the Hillmark
brand of "Shine On" which is available from most leading electrical retailers
and supermarkets in Australia.
Turn the oven to a temperature of 250 degrees C for approximately 30
minutes. When cooled, wipe away any residue.
When heating the oven for the first time it is normal for the stove to give off
smoke and manufacturing odours. These will be gone after approximately
30 minutes
l
l
Oven functions and operation
The oven is controlled by the function
Temperature selection knob
The function knob
Caution!
When selecting any oven function, the
OPERATION
10
The function knob
The timer knob
knob, timer knob and the temperature
selection knob.
oven will only be switched on after the
temperature has been set by the
temperature selection knob.
If you don't want the oven work
controlled by the mechanical timer ,
you can turn the mechanical timer to
the position
Fig. 1
145mm Hotplate (W) 1000
145mm Rapid Hotplate (W) 1500
180mm Hotplate (W) 1500
180mm Rapid Hotplate (W) 2000
The hob features four solid hotplates of two different sizes, as listed below.
One of each size is a rapid hotplate (marked with a red dot), which heats up
faster than the normal hotplates.

13
Instructions (Cont.)
CAUTION!
• Ensure the hotplate is clean; a soiled zone does not transfer all the heat.
• Protect the plate against corrosion.
• Switch off the plate before removing a pan.
• Do not leave a pan with a prepared dish containing fats and oils un-
attended on the switched on plate; hot fat can spontaneously catch fire.
• Do not use a cracked or otherwise damaged hotplate. Have it repaired
by qualified personnel (contact our after sales support line).
Hotplate control
The hotplates are individually controlled with the relevant control dials. The
level of heat can be adjusted gradually by turning the appropriate dial to the
right or left (Fig. 2).
• Once a hotplate is switched on, the corresponding indicator light will
illuminate on the control panel.
OPERATION
Using the hotplates
The level of heat can be adjusted gradually by turning the appropriate knob to the right or
left.
Switching on the plate results in a red signal light on the control panel turning on.
Switching off
MIN.
Warming up
Stewing vegetables,
slow cooking
Cooking soups,larger
dishes
Slow frying
Grilling meat,fish
MAX.
Fast heating up,
fast cooking and frying
An appropriately selected pan saves energy.
A pan should have a thick, flat base with a diameter equal to the plate diameter, as in that
case heat is transferred most efficiently.
Caution!
Ensure the plate is clean – a soiled zone does not transfer all of the heat.
Protect the plate against corrosion.
Switch off the plate before a pan is removed.
Do not leave pans with prepared dishes based on fats and oils unattended on the switched
– on plate; hot fat can spontaneously catch fire.
9
Use
Do not use pots and pans that are unsteady and likely to rock or overbalance.
Do not operate the cooktop for an extended time without utensil on the hotplate.
Good Bad Bad Bad Bad Bad Bad
(recessed
base)
(convex
base)
(undersize)
(oversize)
(moisture
on
hotplate)
(no
utensil)
hotplate to seal and protect the surface. We recommend the Hillmark
brand of "Shine On" which is available from most leading electrical retailers
and supermarkets in Australia.
Turn the oven to a temperature of 250 degrees C for approximately 30
minutes. When cooled, wipe away any residue.
When heating the oven for the first time it is normal for the stove to give off
smoke and manufacturing odours. These will be gone after approximately
30 minutes
l
l
Oven functions and operation
The oven is controlled by the function
Temperature selection knob
The function knob
Caution!
When selecting any oven function, the
OPERATION
10
The function knob
The timer knob
knob, timer knob and the temperature
selection knob.
oven will only be switched on after the
temperature has been set by the
temperature selection knob.
If you don't want the oven work
controlled by the mechanical timer ,
you can turn the mechanical timer to
the position
Fig. 2

14
Oven functions and operation
The oven is controlled with the three dials at the left of the control panel
(Fig. 4): the function and temperature selection dials and the mechanical
timer.
Instructions (Cont.)
Using the oven
Shelf positions
This oven is equipped with five shelf positions (Fig. 3) so that you can position
your food at a height suitable for the cooking mode. For best results, place
dishes centrally on the oven racks or grill pan.
OPERATION
Caution!
When the functions with fan have been
selected but the temperature knob is set to
zero only the fan will be on.
With this function you can cool the dish or
the oven chamber.
Use of the grill
The grilling process operates through
infrared rays emitted onto the dish by the
incandescent grill heater.
In order to switch on the grill you need to:
● Set the oven knob to the position
marked grill.
● Heat the oven for approx. 5 minutes(with
the oven door shut).
● Insert a tray with a dish onto the
appropriate cooking level ; and if you are
grilling on the grate insert a tray for
dripping on the level immediately below
● Close the oven door.
For grilling with the function grill and
combined grill the temperature must be set
to 250℃, but for the function fan and grill it
must be set to a maximum of 200℃.
Warning!
When using grill function it is recommended
that the oven door is closed.
When the grill is in use accessible parts can
become hot.
It is best to keep children away from the
oven.
11
It is best to keep children away from the
Possibility to bake at two cooking levels
simultaneously.
Circular heater fan
At this function ,allows the oven to be
heating up in a forced way with the therm-
ofan, which is in the central part of the oven
chamber.Heating the oven up in this way
permits even heat cirulation around the dish
in the oven.The advantage of this heating
method is:
Redution of ovenheating-up time and
of the initial heating stage.
Possible settings of the oven function
knob
Separate oven lighting
By setting the knob to this position the light-
ing inside the oven is switched on, e.g.use
when washing the oven chamber.
Caution!
At this oven function knob position.
The oven is not being warmed up.
Combined grill
(Grill and the top heater)
When the “combined grill” is active it enables
grilling with the grill and with the top heaer
switched on at the same time.
This function allows a higher temperature
at the top of the cooking area,which causes
more intense browning of the dish and per-
mits larger portions to be grilled.
This function for defrosting
Fan only
(under the grate).
1
2
3
4
5
Baking pans and accessories (oven grid, baking tray, etc) may be inserted into the oven in
Appropriate levels are indicated in the tables that follow.
Always count levels from the bottom upwards!
CLEANING AND MAINTENANCE
By ensuring proper cleaning and maintenance
of your oven you can have a significant
influence on the continuing faultfree
operation of your appliance.
you start cleaning, the oven must be
switched off and you should ensure that all
knobs are set to the “0”position. Do not start
cleaning until the oven has completely cooled.
ould be cleaned after every
Cool the oven completely before cleaning.
Never clean the appliance with
pressurized hot steam cleaner!
The oven chamber should only be washed
with warm water and a small amount
Steam cleaning
-pour 250ml of water (1 cup) into a
bowl placed in the oven on the first level
from the bottom.
-Close the oven door,
-Set the temperature knob to 50 ℃, and
the function knob to the bottom heater
position,
-heat the oven chamber for approximately
30 minutes,
-Open the oven door, wipe the chamber
inside with a cloth or sponge and wash
using warm water with washing-up liquid.
After cleaning the oven chamber wipe it
dry.
Caution!
Do not use cleaning products containing
abrasive materials for the cleaning and
maintenance of the glass front panel.
Oven guide levels
5 guiding levels.
OPERATION
Before
Oven
The oven sh
time use.
of washing-up liquid.
12
Fig. 3
OPERATION
Using the hotplates
The level of heat can be adjusted gradually by turning the appropriate knob to the right or
left.
Switching on the plate results in a red signal light on the control panel turning on.
Switching off
MIN.
Warming up
Stewing vegetables,
slow cooking
Cooking soups,larger
dishes
Slow frying
Grilling meat,fish
MAX.
Fast heating up,
fast cooking and frying
An appropriately selected pan saves energy.
A pan should have a thick, flat base with a diameter equal to the plate diameter, as in that
case heat is transferred most efficiently.
Caution!
Ensure the plate is clean – a soiled zone does not transfer all of the heat.
Protect the plate against corrosion.
Switch off the plate before a pan is removed.
Do not leave pans with prepared dishes based on fats and oils unattended on the switched
– on plate; hot fat can spontaneously catch fire.
9
Use
Do not use pots and pans that are unsteady and likely to rock or overbalance.
Do not operate the cooktop for an extended time without utensil on the hotplate.
Good Bad Bad Bad Bad Bad Bad
(recessed
base)
(convex
base)
(undersize)
(oversize)
(moisture
on
hotplate)
(no
utensil)
hotplate to seal and protect the surface. We recommend the Hillmark
brand of "Shine On" which is available from most leading electrical retailers
and supermarkets in Australia.
Turn the oven to a temperature of 250 degrees C for approximately 30
minutes. When cooled, wipe away any residue.
When heating the oven for the first time it is normal for the stove to give off
smoke and manufacturing odours. These will be gone after approximately
30 minutes
l
l
Oven functions and operation
The oven is controlled by the function
Temperature selection knob
The function knob
Caution!
When selecting any oven function, the
OPERATION
10
The function knob
The timer knob
knob, timer knob and the temperature
selection knob.
oven will only be switched on after the
temperature has been set by the
temperature selection knob.
If you don't want the oven work
controlled by the mechanical timer ,
you can turn the mechanical timer to
the position
OPERATION
Using the hotplates
The level of heat can be adjusted gradually by turning the appropriate knob to the right or
left.
Switching on the plate results in a red signal light on the control panel turning on.
Switching off
MIN.
Warming up
Stewing vegetables,
slow cooking
Cooking soups,larger
dishes
Slow frying
Grilling meat,fish
MAX.
Fast heating up,
fast cooking and frying
An appropriately selected pan saves energy.
A pan should have a thick, flat base with a diameter equal to the plate diameter, as in that
case heat is transferred most efficiently.
Caution!
Ensure the plate is clean – a soiled zone does not transfer all of the heat.
Protect the plate against corrosion.
Switch off the plate before a pan is removed.
Do not leave pans with prepared dishes based on fats and oils unattended on the switched
– on plate; hot fat can spontaneously catch fire.
9
Use
Do not use pots and pans that are unsteady and likely to rock or overbalance.
Do not operate the cooktop for an extended time without utensil on the hotplate.
Good Bad Bad Bad Bad Bad Bad
(recessed
base)
(convex
base)
(undersize)
(oversize)
(moisture
on
hotplate)
(no
utensil)
hotplate to seal and protect the surface. We recommend the Hillmark
brand of "Shine On" which is available from most leading electrical retailers
and supermarkets in Australia.
Turn the oven to a temperature of 250 degrees C for approximately 30
minutes. When cooled, wipe away any residue.
When heating the oven for the first time it is normal for the stove to give off
smoke and manufacturing odours. These will be gone after approximately
30 minutes
l
l
Oven functions and operation
The oven is controlled by the function
Temperature selection knob
The function knob
Caution!
When selecting any oven function, the
OPERATION
10
The function knob
The timer knob
knob, timer knob and the temperature
selection knob.
oven will only be switched on after the
temperature has been set by the
temperature selection knob.
If you don't want the oven work
controlled by the mechanical timer ,
you can turn the mechanical timer to
the position
OPERATION
Using the hotplates
The level of heat can be adjusted gradually by turning the appropriate knob to the right or
left.
Switching on the plate results in a red signal light on the control panel turning on.
Switching off
MIN.
Warming up
Stewing vegetables,
slow cooking
Cooking soups,larger
dishes
Slow frying
Grilling meat,fish
MAX.
Fast heating up,
fast cooking and frying
An appropriately selected pan saves energy.
A pan should have a thick, flat base with a diameter equal to the plate diameter, as in that
case heat is transferred most efficiently.
Caution!
Ensure the plate is clean – a soiled zone does not transfer all of the heat.
Protect the plate against corrosion.
Switch off the plate before a pan is removed.
Do not leave pans with prepared dishes based on fats and oils unattended on the switched
– on plate; hot fat can spontaneously catch fire.
9
Use
Do not use pots and pans that are unsteady and likely to rock or overbalance.
Do not operate the cooktop for an extended time without utensil on the hotplate.
Good Bad Bad Bad Bad Bad Bad
(recessed
base)
(convex
base)
(undersize)
(oversize)
(moisture
on
hotplate)
(no
utensil)
hotplate to seal and protect the surface. We recommend the Hillmark
brand of "Shine On" which is available from most leading electrical retailers
and supermarkets in Australia.
Turn the oven to a temperature of 250 degrees C for approximately 30
minutes. When cooled, wipe away any residue.
When heating the oven for the first time it is normal for the stove to give off
smoke and manufacturing odours. These will be gone after approximately
30 minutes
l
l
Oven functions and operation
The oven is controlled by the function
Temperature selection knob
The function knob
Caution!
When selecting any oven function, the
OPERATION
10
The function knob
The timer knob
knob, timer knob and the temperature
selection knob.
oven will only be switched on after the
temperature has been set by the
temperature selection knob.
If you don't want the oven work
controlled by the mechanical timer ,
you can turn the mechanical timer to
the position
Oven Function Temperature Selection Mechanical Timer
Fig. 4

15
Instructions (Cont.)
IMPORTANT!
When selecting any oven function, the oven will only switch on after you
have turned the temperature selection dial to set the oven temperature.
Temperature selection
Turn the oven temperature selection dial in
clockwise direction to set the oven temperature
from 50°C to 250°C (Fig. 6).
The timer
When using the oven, you must set the cooking time with the timer dial
(Fig. 5).
OPERATION
Using the hotplates
The level of heat can be adjusted gradually by turning the appropriate knob to the right or
left.
Switching on the plate results in a red signal light on the control panel turning on.
Switching off
MIN.
Warming up
Stewing vegetables,
slow cooking
Cooking soups,larger
dishes
Slow frying
Grilling meat,fish
MAX.
Fast heating up,
fast cooking and frying
An appropriately selected pan saves energy.
A pan should have a thick, flat base with a diameter equal to the plate diameter, as in that
case heat is transferred most efficiently.
Caution!
Ensure the plate is clean – a soiled zone does not transfer all of the heat.
Protect the plate against corrosion.
Switch off the plate before a pan is removed.
Do not leave pans with prepared dishes based on fats and oils unattended on the switched
– on plate; hot fat can spontaneously catch fire.
9
Use
Do not use pots and pans that are unsteady and likely to rock or overbalance.
Do not operate the cooktop for an extended time without utensil on the hotplate.
Good Bad Bad Bad Bad Bad Bad
(recessed
base)
(convex
base)
(undersize)
(oversize)
(moisture
on
hotplate)
(no
utensil)
hotplate to seal and protect the surface. We recommend the Hillmark
brand of "Shine On" which is available from most leading electrical retailers
and supermarkets in Australia.
Turn the oven to a temperature of 250 degrees C for approximately 30
minutes. When cooled, wipe away any residue.
When heating the oven for the first time it is normal for the stove to give off
smoke and manufacturing odours. These will be gone after approximately
30 minutes
l
l
Oven functions and operation
The oven is controlled by the function
Temperature selection knob
The function knob
Caution!
When selecting any oven function, the
OPERATION
10
The function knob
The timer knob
knob, timer knob and the temperature
selection knob.
oven will only be switched on after the
temperature has been set by the
temperature selection knob.
If you don't want the oven work
controlled by the mechanical timer ,
you can turn the mechanical timer to
the position
OPERATION
Using the hotplates
The level of heat can be adjusted gradually by turning the appropriate knob to the right or
left.
Switching on the plate results in a red signal light on the control panel turning on.
Switching off
MIN.
Warming up
Stewing vegetables,
slow cooking
Cooking soups,larger
dishes
Slow frying
Grilling meat,fish
MAX.
Fast heating up,
fast cooking and frying
An appropriately selected pan saves energy.
A pan should have a thick, flat base with a diameter equal to the plate diameter, as in that
case heat is transferred most efficiently.
Caution!
Ensure the plate is clean – a soiled zone does not transfer all of the heat.
Protect the plate against corrosion.
Switch off the plate before a pan is removed.
Do not leave pans with prepared dishes based on fats and oils unattended on the switched
– on plate; hot fat can spontaneously catch fire.
9
Use
Do not use pots and pans that are unsteady and likely to rock or overbalance.
Do not operate the cooktop for an extended time without utensil on the hotplate.
Good Bad Bad Bad Bad Bad Bad
(recessed
base)
(convex
base)
(undersize)
(oversize)
(moisture
on
hotplate)
(no
utensil)
hotplate to seal and protect the surface. We recommend the Hillmark
brand of "Shine On" which is available from most leading electrical retailers
and supermarkets in Australia.
Turn the oven to a temperature of 250 degrees C for approximately 30
minutes. When cooled, wipe away any residue.
When heating the oven for the first time it is normal for the stove to give off
smoke and manufacturing odours. These will be gone after approximately
30 minutes
l
l
Oven functions and operation
The oven is controlled by the function
Temperature selection knob
The function knob
Caution!
When selecting any oven function, the
OPERATION
10
The function knob
The timer knob
knob, timer knob and the temperature
selection knob.
oven will only be switched on after the
temperature has been set by the
temperature selection knob.
If you don't want the oven work
controlled by the mechanical timer ,
you can turn the mechanical timer to
the position
OPERATION
Using the hotplates
The level of heat can be adjusted gradually by turning the appropriate knob to the right or
left.
Switching on the plate results in a red signal light on the control panel turning on.
Switching off
MIN.
Warming up
Stewing vegetables,
slow cooking
Cooking soups,larger
dishes
Slow frying
Grilling meat,fish
MAX.
Fast heating up,
fast cooking and frying
An appropriately selected pan saves energy.
A pan should have a thick, flat base with a diameter equal to the plate diameter, as in that
case heat is transferred most efficiently.
Caution!
Ensure the plate is clean – a soiled zone does not transfer all of the heat.
Protect the plate against corrosion.
Switch off the plate before a pan is removed.
Do not leave pans with prepared dishes based on fats and oils unattended on the switched
– on plate; hot fat can spontaneously catch fire.
9
Use
Do not use pots and pans that are unsteady and likely to rock or overbalance.
Do not operate the cooktop for an extended time without utensil on the hotplate.
Good Bad Bad Bad Bad Bad Bad
(recessed
base)
(convex
base)
(undersize)
(oversize)
(moisture
on
hotplate)
(no
utensil)
hotplate to seal and protect the surface. We recommend the Hillmark
brand of "Shine On" which is available from most leading electrical retailers
and supermarkets in Australia.
Turn the oven to a temperature of 250 degrees C for approximately 30
minutes. When cooled, wipe away any residue.
When heating the oven for the first time it is normal for the stove to give off
smoke and manufacturing odours. These will be gone after approximately
30 minutes
l
l
Oven functions and operation
The oven is controlled by the function
Temperature selection knob
The function knob
Caution!
When selecting any oven function, the
OPERATION
10
The function knob
The timer knob
knob, timer knob and the temperature
selection knob.
oven will only be switched on after the
temperature has been set by the
temperature selection knob.
If you don't want the oven work
controlled by the mechanical timer ,
you can turn the mechanical timer to
the position
OPERATION
Using the hotplates
The level of heat can be adjusted gradually by turning the appropriate knob to the right or
left.
Switching on the plate results in a red signal light on the control panel turning on.
Switching off
MIN.
Warming up
Stewing vegetables,
slow cooking
Cooking soups,larger
dishes
Slow frying
Grilling meat,fish
MAX.
Fast heating up,
fast cooking and frying
An appropriately selected pan saves energy.
A pan should have a thick, flat base with a diameter equal to the plate diameter, as in that
case heat is transferred most efficiently.
Caution!
Ensure the plate is clean – a soiled zone does not transfer all of the heat.
Protect the plate against corrosion.
Switch off the plate before a pan is removed.
Do not leave pans with prepared dishes based on fats and oils unattended on the switched
– on plate; hot fat can spontaneously catch fire.
9
Use
Do not use pots and pans that are unsteady and likely to rock or overbalance.
Do not operate the cooktop for an extended time without utensil on the hotplate.
Good Bad Bad Bad Bad Bad Bad
(recessed
base)
(convex
base)
(undersize)
(oversize)
(moisture
on
hotplate)
(no
utensil)
hotplate to seal and protect the surface. We recommend the Hillmark
brand of "Shine On" which is available from most leading electrical retailers
and supermarkets in Australia.
Turn the oven to a temperature of 250 degrees C for approximately 30
minutes. When cooled, wipe away any residue.
When heating the oven for the first time it is normal for the stove to give off
smoke and manufacturing odours. These will be gone after approximately
30 minutes
l
l
Oven functions and operation
The oven is controlled by the function
Temperature selection knob
The function knob
Caution!
When selecting any oven function, the
OPERATION
10
The function knob
The timer knob
knob, timer knob and the temperature
selection knob.
oven will only be switched on after the
temperature has been set by the
temperature selection knob.
If you don't want the oven work
controlled by the mechanical timer ,
you can turn the mechanical timer to
the position
Turn the timer dial clockwise to the time (minutes) you want.
Turn the function dial clockwise to the function you want.
Turn the temperature dial clockwise to the temperature you want.
The oven will now start working. The alarm will sound after the set
cooking time has expired.
If you do not want to set the timer for the oven to work, you
must set it to the MANUAL position (indicated with a hand).
OPERATION
Using the hotplates
The level of heat can be adjusted gradually by turning the appropriate knob to the right or
left.
Switching on the plate results in a red signal light on the control panel turning on.
Switching off
MIN.
Warming up
Stewing vegetables,
slow cooking
Cooking soups,larger
dishes
Slow frying
Grilling meat,fish
MAX.
Fast heating up,
fast cooking and frying
An appropriately selected pan saves energy.
A pan should have a thick, flat base with a diameter equal to the plate diameter, as in that
case heat is transferred most efficiently.
Caution!
Ensure the plate is clean – a soiled zone does not transfer all of the heat.
Protect the plate against corrosion.
Switch off the plate before a pan is removed.
Do not leave pans with prepared dishes based on fats and oils unattended on the switched
– on plate; hot fat can spontaneously catch fire.
9
Use
Do not use pots and pans that are unsteady and likely to rock or overbalance.
Do not operate the cooktop for an extended time without utensil on the hotplate.
Good Bad Bad Bad Bad Bad Bad
(recessed
base)
(convex
base)
(undersize)
(oversize)
(moisture
on
hotplate)
(no
utensil)
hotplate to seal and protect the surface. We recommend the Hillmark
brand of "Shine On" which is available from most leading electrical retailers
and supermarkets in Australia.
Turn the oven to a temperature of 250 degrees C for approximately 30
minutes. When cooled, wipe away any residue.
When heating the oven for the first time it is normal for the stove to give off
smoke and manufacturing odours. These will be gone after approximately
30 minutes
l
l
Oven functions and operation
The oven is controlled by the function
Temperature selection knob
The function knob
Caution!
When selecting any oven function, the
OPERATION
10
The function knob
The timer knob
knob, timer knob and the temperature
selection knob.
oven will only be switched on after the
temperature has been set by the
temperature selection knob.
If you don't want the oven work
controlled by the mechanical timer ,
you can turn the mechanical timer to
the position
Fig. 5
OPERATION
Using the hotplates
The level of heat can be adjusted gradually by turning the appropriate knob to the right or
left.
Switching on the plate results in a red signal light on the control panel turning on.
Switching off
MIN.
Warming up
Stewing vegetables,
slow cooking
Cooking soups,larger
dishes
Slow frying
Grilling meat,fish
MAX.
Fast heating up,
fast cooking and frying
An appropriately selected pan saves energy.
A pan should have a thick, flat base with a diameter equal to the plate diameter, as in that
case heat is transferred most efficiently.
Caution!
Ensure the plate is clean – a soiled zone does not transfer all of the heat.
Protect the plate against corrosion.
Switch off the plate before a pan is removed.
Do not leave pans with prepared dishes based on fats and oils unattended on the switched
– on plate; hot fat can spontaneously catch fire.
9
Use
Do not use pots and pans that are unsteady and likely to rock or overbalance.
Do not operate the cooktop for an extended time without utensil on the hotplate.
Good Bad Bad Bad Bad Bad Bad
(recessed
base)
(convex
base)
(undersize)
(oversize)
(moisture
on
hotplate)
(no
utensil)
hotplate to seal and protect the surface. We recommend the Hillmark
brand of "Shine On" which is available from most leading electrical retailers
and supermarkets in Australia.
Turn the oven to a temperature of 250 degrees C for approximately 30
minutes. When cooled, wipe away any residue.
When heating the oven for the first time it is normal for the stove to give off
smoke and manufacturing odours. These will be gone after approximately
30 minutes
l
l
Oven functions and operation
The oven is controlled by the function
Temperature selection knob
The function knob
Caution!
When selecting any oven function, the
OPERATION
10
The function knob
The timer knob
knob, timer knob and the temperature
selection knob.
oven will only be switched on after the
temperature has been set by the
temperature selection knob.
If you don't want the oven work
controlled by the mechanical timer ,
you can turn the mechanical timer to
the position
Fig. 6

16
Instructions (Cont.)
Oven functions
There are five settings on the function dial (Fig. 7).
OPERATION
Caution!
When the functions with fan have been
selected but the temperature knob is set to
zero only the fan will be on.
With this function you can cool the dish or
the oven chamber.
Use of the grill
The grilling process operates through
infrared rays emitted onto the dish by the
incandescent grill heater.
In order to switch on the grill you need to:
● Set the oven knob to the position
marked grill.
● Heat the oven for approx. 5 minutes(with
the oven door shut).
● Insert a tray with a dish onto the
appropriate cooking level ; and if you are
grilling on the grate insert a tray for
dripping on the level immediately below
● Close the oven door.
For grilling with the function grill and
combined grill the temperature must be set
to 250℃, but for the function fan and grill it
must be set to a maximum of 200℃.
Warning!
When using grill function it is recommended
that the oven door is closed.
When the grill is in use accessible parts can
become hot.
It is best to keep children away from the
oven.
11
It is best to keep children away from the
Possibility to bake at two cooking levels
simultaneously.
Circular heater fan
At this function ,allows the oven to be
heating up in a forced way with the therm-
ofan, which is in the central part of the oven
chamber.Heating the oven up in this way
permits even heat cirulation around the dish
in the oven.The advantage of this heating
method is:
Redution of ovenheating-up time and
of the initial heating stage.
Possible settings of the oven function
knob
Separate oven lighting
By setting the knob to this position the light-
ing inside the oven is switched on, e.g.use
when washing the oven chamber.
Caution!
At this oven function knob position.
The oven is not being warmed up.
Combined grill
(Grill and the top heater)
When the “combined grill” is active it enables
grilling with the grill and with the top heaer
switched on at the same time.
This function allows a higher temperature
at the top of the cooking area,which causes
more intense browning of the dish and per-
mits larger portions to be grilled.
This function for defrosting
Fan only
(under the grate).
1
2
3
4
5
Baking pans and accessories (oven grid, baking tray, etc) may be inserted into the oven in
Appropriate levels are indicated in the tables that follow.
Always count levels from the bottom upwards!
CLEANING AND MAINTENANCE
By ensuring proper cleaning and maintenance
of your oven you can have a significant
influence on the continuing faultfree
operation of your appliance.
you start cleaning, the oven must be
switched off and you should ensure that all
knobs are set to the “0”position. Do not start
cleaning until the oven has completely cooled.
ould be cleaned after every
Cool the oven completely before cleaning.
Never clean the appliance with
pressurized hot steam cleaner!
The oven chamber should only be washed
with warm water and a small amount
Steam cleaning
-pour 250ml of water (1 cup) into a
bowl placed in the oven on the first level
from the bottom.
-Close the oven door,
-Set the temperature knob to 50 ℃, and
the function knob to the bottom heater
position,
-heat the oven chamber for approximately
30 minutes,
-Open the oven door, wipe the chamber
inside with a cloth or sponge and wash
using warm water with washing-up liquid.
After cleaning the oven chamber wipe it
dry.
Caution!
Do not use cleaning products containing
abrasive materials for the cleaning and
maintenance of the glass front panel.
Oven guide levels
5 guiding levels.
OPERATION
Before
Oven
The oven sh
time use.
of washing-up liquid.
12
OPERATION
Caution!
When the functions with fan have been
selected but the temperature knob is set to
zero only the fan will be on.
With this function you can cool the dish or
the oven chamber.
Use of the grill
The grilling process operates through
infrared rays emitted onto the dish by the
incandescent grill heater.
In order to switch on the grill you need to:
● Set the oven knob to the position
marked grill.
● Heat the oven for approx. 5 minutes(with
the oven door shut).
● Insert a tray with a dish onto the
appropriate cooking level ; and if you are
grilling on the grate insert a tray for
dripping on the level immediately below
● Close the oven door.
For grilling with the function grill and
combined grill the temperature must be set
to 250℃, but for the function fan and grill it
must be set to a maximum of 200℃.
Warning!
When using grill function it is recommended
that the oven door is closed.
When the grill is in use accessible parts can
become hot.
It is best to keep children away from the
oven.
11
It is best to keep children away from the
Possibility to bake at two cooking levels
simultaneously.
Circular heater fan
At this function ,allows the oven to be
heating up in a forced way with the therm-
ofan, which is in the central part of the oven
chamber.Heating the oven up in this way
permits even heat cirulation around the dish
in the oven.The advantage of this heating
method is:
Redution of ovenheating-up time and
of the initial heating stage.
Possible settings of the oven function
knob
Separate oven lighting
By setting the knob to this position the light-
ing inside the oven is switched on, e.g.use
when washing the oven chamber.
Caution!
At this oven function knob position.
The oven is not being warmed up.
Combined grill
(Grill and the top heater)
When the “combined grill” is active it enables
grilling with the grill and with the top heaer
switched on at the same time.
This function allows a higher temperature
at the top of the cooking area,which causes
more intense browning of the dish and per-
mits larger portions to be grilled.
This function for defrosting
Fan only
(under the grate).
1
2
3
4
5
Baking pans and accessories (oven grid, baking tray, etc) may be inserted into the oven in
Appropriate levels are indicated in the tables that follow.
Always count levels from the bottom upwards!
CLEANING AND MAINTENANCE
By ensuring proper cleaning and maintenance
of your oven you can have a significant
influence on the continuing faultfree
operation of your appliance.
you start cleaning, the oven must be
switched off and you should ensure that all
knobs are set to the “0”position. Do not start
cleaning until the oven has completely cooled.
ould be cleaned after every
Cool the oven completely before cleaning.
Never clean the appliance with
pressurized hot steam cleaner!
The oven chamber should only be washed
with warm water and a small amount
Steam cleaning
-pour 250ml of water (1 cup) into a
bowl placed in the oven on the first level
from the bottom.
-Close the oven door,
-Set the temperature knob to 50 ℃, and
the function knob to the bottom heater
position,
-heat the oven chamber for approximately
30 minutes,
-Open the oven door, wipe the chamber
inside with a cloth or sponge and wash
using warm water with washing-up liquid.
After cleaning the oven chamber wipe it
dry.
Caution!
Do not use cleaning products containing
abrasive materials for the cleaning and
maintenance of the glass front panel.
Oven guide levels
5 guiding levels.
OPERATION
Before
Oven
The oven sh
time use.
of washing-up liquid.
12
Oven light: Turn the dial to this position to light the interior lamp
while the oven is switched off, for example, when cleaning the oven.
Fan only: Turn the dial to this position for defrosting food.
Fan-forced heating: This is the regular fan-forced oven heat setting,
where hot air is distributed by the thermofan at the back of the oven
chamber. On this setting heat is circulated evenly around the dish in
the oven, which reduces heat-up times and enables cooking/baking
on two levels simultaneously.
NOTE: When you have cooked on the fan-forced heat setting and
then turn the temperature dial to zero, only the fan will remain
on and will cool the dish or the oven chamber.
Grill: Turn the dial to this position for grilling. The grilling process
operates through infrared rays emitted onto the dish by the
incandescent grill heater. Preheat the oven for approximately 3–5
minutes (with the oven door shut). Place the food you want to grill
on the grid on top of the grill tray. Then slide the grill pan into the
appropriate shelf position (4 or 5, as illustrated on page 14). Close
the oven door.
CAUTION!
• Keep the oven door closed when grilling.
• Take care when the grill is in use as accessible parts can become hot.
• Always keep children away from the oven when it is in use.
OPERATION
Using the hotplates
The level of heat can be adjusted gradually by turning the appropriate knob to the right or
left.
Switching on the plate results in a red signal light on the control panel turning on.
Switching off
MIN.
Warming up
Stewing vegetables,
slow cooking
Cooking soups,larger
dishes
Slow frying
Grilling meat,fish
MAX.
Fast heating up,
fast cooking and frying
An appropriately selected pan saves energy.
A pan should have a thick, flat base with a diameter equal to the plate diameter, as in that
case heat is transferred most efficiently.
Caution!
Ensure the plate is clean – a soiled zone does not transfer all of the heat.
Protect the plate against corrosion.
Switch off the plate before a pan is removed.
Do not leave pans with prepared dishes based on fats and oils unattended on the switched
– on plate; hot fat can spontaneously catch fire.
9
Use
Do not use pots and pans that are unsteady and likely to rock or overbalance.
Do not operate the cooktop for an extended time without utensil on the hotplate.
Good Bad Bad Bad Bad Bad Bad
(recessed
base)
(convex
base)
(undersize)
(oversize)
(moisture
on
hotplate)
(no
utensil)
hotplate to seal and protect the surface. We recommend the Hillmark
brand of "Shine On" which is available from most leading electrical retailers
and supermarkets in Australia.
Turn the oven to a temperature of 250 degrees C for approximately 30
minutes. When cooled, wipe away any residue.
When heating the oven for the first time it is normal for the stove to give off
smoke and manufacturing odours. These will be gone after approximately
30 minutes
l
l
Oven functions and operation
The oven is controlled by the function
Temperature selection knob
The function knob
Caution!
When selecting any oven function, the
OPERATION
10
The function knob
The timer knob
knob, timer knob and the temperature
selection knob.
oven will only be switched on after the
temperature has been set by the
temperature selection knob.
If you don't want the oven work
controlled by the mechanical timer ,
you can turn the mechanical timer to
the position
Fig. 7

17
Baking, Roasting and Grilling
Baking tips
IMPORTANT!
• The baking chart on the following page gives approximate times and
temperature ranges for some cakes, pastries, biscuits and frozen
foods. Use the chart as a guide only and adjust according to your own
experience and preference.
• Always start with a lower temperature and increase if required.
• Always check after the shorter time and leave in for longer if required.
• If the cake you want to bake is not listed in the chart, use the information
for a similar type and adjust the values as appropriate.
• Whenever possible, choose dark baking pans. Light ones reflect the heat
and sometimes the cake will not be properly browned.
• The centre shelf is the most suitable position for baking most cakes and
loaves.
• Preheating shortens the baking time. Do not put the cake in the oven until
the proper temperature is obtained.
• Always place baking pans directly on wire shelves. For baking biscuits in
the tray, remove the wire grid from the tray supplied.
• To check whether a cake is baked, pierce it with a fine skewer at the
thickest part. If the dough does not stick to it, the cake is baked.
• Unsatisfactory results
* If your cake has collapsed in the middle, check the recipe for the amount
of fluids used and use less the next time. Also follow the recommended
mixing times, especially when using powered kitchen mixers.
* If the cake is too light at the bottom, use a dark baking pan the next
time, or place the pan one level lower.
* If a cheesecake is undercooked, reduce the baking temperature the next
time you bake it and extend the baking time.

18
Baking, Roasting and Grilling (Cont.)
Type of Pastry Shelf Position
lowest position = 1
highest position = 5
Temperature
(°C)
Baking Time
(minutes)
Sweet Pastry
Raisin cake 2 150-160 55-70
Cheesecake (tart form) 3 160-170 60-80
Fruitcake 3 170-180 50-70
Sponge cake 2 160-170 30-40
Jelly roll 3 170-180 15-25
Fruit flan 3 150-160 25-35
Plait bun 3 180-210 35-50
Christmas cake 3 170-200 45-70
Apply pie 3 170-200 40-60
Puff pastry 3 160-170 40-60
Salted Pastry
Bacon roll 3 170-180 45-60
Pizza 3 210-230 30-45
Bread 3 180-210 50-60
Rolls 3 200-220 30-40
Biscuits / Cookies
Biscuits 3 160-170 20-30
Danish pastry 3 170-200 20-35
Flaky pastry 3 180-200 20-30
Cream puffs 3 170-200 25-45
Frozen Foods
Apple pie 3 170-200 50-70
Cheesecake 3 170-180 65-85
Pizza 3 200-220 20-30
Oven bake chips 3 200-220 20-35
Oven bake potato fries 3 200-220 20-35
Baking chart

19
Roasting tips
Baking, Roasting and Grilling (Cont.)
IMPORTANT!
• The roasting chart on the next page gives approximate times and tem-
perature ranges for some commonly roasted meat cuts, poultry and fish.
• Roasting times largely depend upon the type of meat, its size and quality,
so you may expect some variations.
• Use the chart as a guide only and adjust according to your own
experience and preference.
• Cover your roast or wrap it in foil. It will preserve its juice and the oven will
remain cleaner.
• If you leave the pan uncovered the roast will be cooked sooner. Roast large
chunks of meat directly on the grid, with the baking/drip tray underneath.
• Roasting large chunks of meat may produce excessive steaming and dew
formation at the oven door. This is quite normal and does not affect the
operation of the oven. However, at the end of roasting, wipe the oven door
and the glass thoroughly.
• Roasting of red meat, poultry and fish is recommended if the roast exceeds
one kilogram in size.
• Add as much liquid as necessary to prevent burning of juice and dripping
from meat. Keep an eye on the roast at all times, and add liquid if
necessary.
• At approximately the middle of the indicated roasting time, turn the roast
round, especially if you use the deep roast dish.
• When roasting on the grill grid, place the grid in the deep roasting pan and
insert both into the sliding guide. The bottom pan will catch dripping fat.
• Never leave the roast to cool in the oven, as it might produce dew and
corrosion on the oven. Take the roast out of the oven at the end of the
cooking time and let it rest, covered, before serving.

20
Type of Meat Weight
(kg)
Shelf Position
lowest position = 1
highest position = 5
Temperature
(°C)
Roasting Time
(minutes)
Beef
Beef loin 1.0 2 200-220 100-120
Beef loin 1.5 2 200-220 120-150
Roast beef, rare 1.0 2 220-230 30-40
Roast beef, well done 1.0 2 220-230 40-50
Pork
Pork roast with skin 1.5 2 170-180 140-160
Flank 1.5 2 180-190 120-150
Pork loin 1.5 2 200-220 120-140
Rolled roast 1.5 2 200-220 120-140
Pork cutlets 1.5 2 170-200 100-120
Minced meat roast 1.5 2 210-220 60-70
Veal
Veal roll 1.5 2 170-200 90-120
Veal knuckle 1.7 2 170-200 120-130
Lamb
Lamb prime ribs 1.5 2 180-200 100-120
Lamb roast with bone 1.5 2 180-200 120-130
Poultry
Chicken, whole 1.2 2 200-210 60-70
Duck 1.7 2 170-200 120-150
Turkey 5.0 2 140-150 180-240
Fish
Fish, whole 1.0 2 200-210 50-60
Roasting chart
Baking, Roasting and Grilling (Cont.)
Other manuals for tp54h4wh
1
Table of contents
Other Stirling Oven manuals

Stirling
Stirling SO69S User manual

Stirling
Stirling Black Edition STR-PEO User manual
Stirling
Stirling AFD23L-G User manual

Stirling
Stirling AFD24L User manual

Stirling
Stirling SO65B User manual

Stirling
Stirling STR-AEO User manual

Stirling
Stirling STR-BEO65L User manual

Stirling
Stirling SORHP1-O User manual

Stirling
Stirling STR-AEO65L User manual

Stirling
Stirling STR-APYRO User manual