Stirling SO65B User manual

MODEL: SO65B | PRODUCT CODE: 60151 | 04/2018
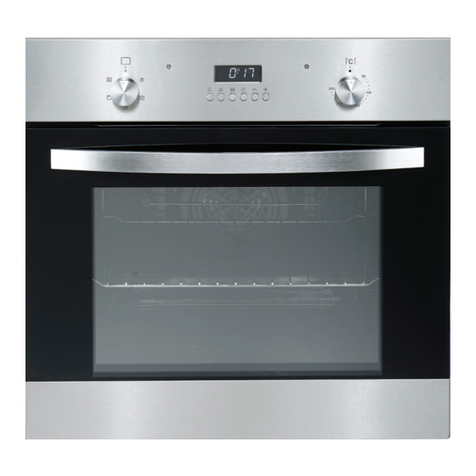
70L Electric Oven
INSTRUCTION MANUAL
Issue Date: 04/2018IM Version No.: V1.5
Model Number SO65B

2MODEL: SO65B | PRODUCT CODE: 60151 | 04/2018
Congratulations on choosing to buy a STIRLING® product.
All products brought to you by STIRLING® are manufactured to the highest standards
of performance and safety and, as part of our philosophy of customer service and
satisfaction, are backed by our comprehensive 3 Year In Home Warranty. We hope you
will enjoy using your purchase for many years to come.
Welcome

3
MODEL: SO65B | PRODUCT CODE: 60151 | 04/2018
Contents
2 Welcome
4 Warranty Details
5 General Safety Instructions
7 Product Overview
9 Operating Instructions
11 Getting Started
13 Installation
14 Cleaning and Maintenance
16 Technical Specification
17 FAQs
18 Repair and Refurbished Goods or Parts Notice
19 Warranty Returns

4
MODEL: SO65B | PRODUCT CODE: 60151 | 04/2018
The product is guaranteed to be free from defects in workmanship and parts for a period
of 36 months from the date of purchase. Defects that occur within this warranty period,
under normal use and care, will be repaired, replaced or refunded at our discretion. The
benets conferred by this warranty are in addition to all rights and remedies in respect of
the product that the consumer has under the Competition and Consumer Act 2010 and
similar state and territory laws.
Our goods come with guarantees that cannot be excluded under the Australian Consumer
Law. You are entitled to a replacement or refund for a major failure and for compensation
for any other reasonably foreseeable loss or damage. You are also entitled to have the
goods repaired or replaced if the goods fail to be of acceptable quality and the failure does
not amount to a major failure.
70L Electric Oven

5
MODEL: SO65B | PRODUCT CODE: 60151 | 04/2018
IMPORTANT SAFETY INSTRUCTIONS
READ CAREFULLY AND KEEP FOR FUTURE REFERENCE
Read this manual thoroughly before rst use, even if you are familiar with this type of product. The safety
precautions enclosed herein reduce the risk of re, electric shock and injury when correctly adhered to. Make
sure you understand all instructions and warnings.
Keep the manual in a safe place for future reference, along with the completed warranty card and purchase
receipt. If you sell or transfer ownership of this product, pass on these instructions to the new owner.
Always follow basic safety precautions and accident prevention measures when using an electrical appliance,
including the following:
WARNING!
Installation
Electrical Shock Hazard
WARNING: All electrical work associated with the installation of this oven must be carried out by a licensed
electrician.
WARNING: This oven must be installed by a suitably qualied person in strict accordance with all
instructions in this manual.
• Disconnect the appliance from the mains electricity supply before carrying out any work or maintenance on it.
• Failure to follow this advice may result in electrical shock or death.
Important installation advice
• Adjacent furniture: When having the oven installed, make sure that the adjacent furniture or housing, and
all installation materials, are able to withstand a minimum temperature of 85° C above the ambient room
temperature while the oven is in use.
• Certain types of vinyl or laminate kitchen furniture are particularly prone to heat damage or discolouration
at temperatures below the guidelines given above. We assume no liability for any damage caused by
the appliances being installed in contravention of this temperature limit, or by placing adjacent cabinet
materials closer than 4mm near the appliance.
• Ventilation: Heat, steam and moisture will be created during use of the oven. Take care to avoid injury and
ensure that the room is adequately ventilated. If the appliance is going to be used for prolonged periods
of time, additional ventilation may be required. If in doubt about your ventilation requirements, consult your
qualied installer.
• Cables: Do not allow electrical ttings or cables to come into contact with areas on the oven that get hot.
• Curtains: Do not install the oven next to curtains or soft furnishings.
• Damaged cord: If the power cord is damaged, it must be replaced by the manufacturer or a qualied
service engineer in order to avoid a hazard.
General usage conditions and restrictions
• Domestic use only: This oven is designed for indoor domestic use only. It can be built into a standard
kitchen cabinet or housing unit.
• Intended purpose: Only use this oven for its intended purpose, in its intended environment and as
described in this manual. Any other use may cause re, electric shock or injury. It is not intended for
commercial, trade or industrial use.
• Follow instructions: Make sure to observe all rules and provisions in this instruction manual. Do not allow
anybody who is not familiar with the contents of this manual to operate the oven.
• Use common sense: These instructions are not intended to cover every possible condition and
situation. As with any electrical household appliance, common sense and caution are therefore always
recommended when installing, operating and maintaining the oven.
• Usage restriction: This oven is not intended for use by persons (including children) with reduced physical,
sensory or mental capabilities, or lack of experience and knowledge, unless they have been given
supervision or instruction concerning use of the appliance by a person responsible for their safety.
General Safety Instructions

6
MODEL: SO65B | PRODUCT CODE: 60151 | 04/2018
CAUTION
RISK OF FIRE
General Safety Instructions Cont.
• Supervise children: Young children do not recognise the risks involved when using electrical appliances.
Make sure children younger than 8 years of age are kept away from the oven during use. If it is necessary
for younger family members to be in the kitchen, ensure that they are kept under close supervision at all
times.
• Unattended: Never leave the oven unattended during use, as this is a re risk. Oils and fats in roasting
dishes may catch re due to overheating.
• No heater: Do not use the oven for heating a room or drying clothes.
• No timer: The appliance is not intended to be operated by means of an external timer or separate remote
control system.
• After use: Make sure to switch off the oven after use and before cleaning.
• Damage: Do not use the oven if any part has been damaged or does not work properly. Only have it
repaired by an authorised service centre. Incorrect repair could expose you to the risk of electric shock, re
or injury. Prolonged use of the unit in such conditions could cause re or electrocution. In case of damage,
contact our after sales support centre using the details at the bottom of this page.
• Liability: We assume no liability for any eventual damages caused by misuse of the product or
noncompliance with these instructions.
• Do not use when faulty: Do not use the oven in the event of a technical fault. Any faults must be xed by
an appropriately qualied and authorised person. Contact our after sales support line for advice.
Oven-specific safety advice
• Oven door: Do not place heavy objects on the oven door. Do not lean on the oven door when it is open, as
this can damage the door hinges.
• Grill: Keep the oven door closed when using the grill function.
• Oven cavity: During cooking, never place pans or cookware directly onto the bottom of your oven. Always
place them on the shelves provided.
• Oven accessories: When removing the baking/drip tray or oven rack from the hot oven, always use an
oven mitt.
• Aluminium foil: Do not use aluminium foil to cover the grill pan or heat items wrapped in aluminium foil
under the grill. The high reectivity of the foil could potentially damage the grill element. You should also
never line the base of your oven with aluminium foil.
• Lifting/moving: Do not attempt to lift or move the oven by using the oven door or handle, as this may
cause damage to the appliance or result in injury to the person lifting the appliance.
• Cleaning: Clean the oven on a regular basis so oils and fats do not accumulate and cause a re risk. Make
sure the oven is switched off before cleaning. Do not use harsh abrasive cleaners or metal scrapers to
clean the oven door glass as this can scratch the surface, which may result in the oven glass shattering.
Do not use steam cleaning equipment for cleaning any part of the oven. When cleaning the oven, ensure
that no part is immersed in water or other liquid.
CAUTION: Hot!
• Do not touch hot surfaces: The heating elements and other accessible parts including inside the oven
cavity become extremely hot during operation and can cause burns on contact. Take care when handling
the food you are cooking to avoid touching hot parts inadvertently. Keep young children well away when
using the oven.
• Opening the door: Be careful when opening the oven door to avoid contact with hot parts of the oven and
steam.
• Danger of fire! With the exception of food products to be cooked using the
programmable timer, never leave any other items or objects inside the oven
cavity as this can be a re hazard when the oven is switched on.
• Danger: Children should be supervised near the appliance. Ensure that they do
not play with the appliance.

7
MODEL: SO65B | PRODUCT CODE: 60151 | 04/2018
Oven Layout
Key
1 Cooking function knob
2 Control panel and LED screen
3 Temperature knob
4 Handle
5 Triple glazed glass door
Also included but not visible:
1 × Chrome oven rack (see page 11)
1 × Roasting tray (see page 11)
2 × Screws for connection to the cabinetry
1 × Quick Start Guide
1 × Warranty Card
Product Overview
1
4
5
32

8
MODEL: SO65B | PRODUCT CODE: 60151 | 04/2018
OvenLamp:Whichenablestheusertoobservetheprogressofcookingwithout
openingthedoor.Ovenlampwilllightforallcookingfunctions.
Defrost:Thecirculationofairatroomtemperatureenablesquickerthawingoffrozen
food,(withouttheuseofanyheat).It'sagentlebutquickwaytospeedupthedefrosting
timeandthawingofready-madedishesandcreamfilledproduceetc.
Convection:Warmairheatedbytherearheaterisevenlydistributedthroughoutthe
ovenveryfastbymeansofthefan.Thisresultsinafasterandmoreeconomicalcooking
process.Theconvectionallowsfoodtobecookedsimultaneouslyondifferentshelves.
Grill-small:Thiscookingmethodisnormalgrilling,utilizingtheinnerpartonlyofthetop
heatingelement,whichdirectsheatdownwardsontothefood.
Doublegrillwithfan(attherearpanel):Theinnerheatingelementandtheouterheating
elementinthetopoftheovenareworkingwithfan.Itissuitableforgrillinglargeamount
ofmeat.
Function DescriptionSymbol
Product Overview Cont.
Control Panel Layout
Temperature KnobIncreasing ControlCooking Functions
Decreasing Control Time Function
Time Functions
Mode Description
Manual Mode The cooking duration has to be controlled by the user.
Minute Minder A useful and easy to use timer which alerts you when a selected cooking time has elapsed
and can automatically switch the oven off. This feature can also be used as a minute
minder when the oven is not in use.
Dur The cooking duration is controlled by the oven after it has been entered by the user.
End The cooking end-time is controlled by the oven after it has been entered by the user.
Cooking Functions

9
MODEL: SO65B | PRODUCT CODE: 60151 | 04/2018
Operating Instructions
When the oven is rst connected to the electrical supply, the display will automatically show “12.30”,
a beep will sound once and the “12” will ash. Please ensure the correct time is set before using the oven.
Please note: the oven has a 24 hour clock, for example 2 p.m. is shown as 14.00.
To Set the Correct Time of Day
Note: To adjust the time press the “+” and “-” buttons at the same time for more than 3 seconds. The hour
display will then begin to ash, indicating you can adjust the time.
1 When the hour display is ashing, press “+” or “-” button to adjust the hour setting.
2 Press “ ” to conrm the hour setting.
3 The minute display will now be ashing. Press “+” or “-” button to adjust the minute setting.
4 Press “ ” to conrm the minute setting and the timer will be in standby mode.
Oven On and Off
If the timer is in standby mode, press “ ” for more than 3 seconds, the timer will enter manual mode and the
symbol “ ” will light up continuously.
1 Set the desired cooking function.
2 Set the temperature.
3 Set the time function.
4 Once function, temperature and time is set, the oven will be on.
If you have set a cooking duration time or end time, the oven will automatically turn off after cooking.
If you have set manual or minutes minder, turn the cooking function and temperature knobs to the “O” position
to turn the oven off. Press “ ” and “+” buttons for more than 3 seconds to return to standby mode.
Using the Time Function Setting
In manual mode, pressing the “ ” button allows you to set a time function. The sequence of the functions
are: Manual mode; Minute minder; Dur; End. After a time function is selected, the cooking function
temperature should be set (if required).
Manual Mode
In manual mode, the time and the symbol “ ” will be shown. The cooking duration has to be controlled
by the user, manually turning the oven off at the desired time. When the timer is ashing in manual mode,
press any button to reset the timer if you intend to continue using the oven. Alternatively, press “ ” and “+”
together for more than 3 seconds to enter standby mode if oven is not being used.
Note: To ensure the oven is not left on accidentally while in manual mode, it will enter standby mode after a
total of 10 hours. Please note, after 5 hours of no button being pressed the timer will ash once a second to
warn you the oven will enter standby mode. Once any button is pressed, this time period will reset.
Setting Audible Time Warnings
This function can be used to sound audible warnings at the completion of a set time period.
1 Press the “ ” button to select the minute minder function. The “ ” and “.” symbols will begin to ash.
2 Use “+” or “-” button to adjust minute minder (refer to the instructions for setting the correct time of day).
Press the “ ” button to conrm. The “ ” symbol will now light continuously, conrming the audible time
warning is set.
3 When the time is up, the oven gives an audible warning and the “ ” symbol begins to ash on the screen.
Press any button for less than 3 seconds to stop the audible warning and the “ ” symbol will disappear
from the screen.
Note: Audible time warning is for warning purposes only and will not control or affect the oven.

10
MODEL: SO65B | PRODUCT CODE: 60151 | 04/2018
Operating Instructions Cont.
Semi-automatic Programming: Defined by a Set Cooking Period
This function is used to cook in a desired time period. First, place the food to be cooked into the oven.
Adjust the oven to the desired cooking function and temperature.
Note: The maximum cooking period is 10 hours.
1 Before setting the cooking period, press the “ ” button until you see “Dur”on the timer screen.
2 Use “+” or “-” button to adjust the cooking period (refer to the instructions for setting the correct time
of day). Press the “ ” button to conrm. The time will then appear on the screen and the symbols
“A” and “ ” will light up on the screen. The oven will now start to operate.
3 At the completion of the set duration, the timer will stop the oven and give an audible warning and the
“A” symbol will begin to ash on the screen.
4 To stop the audible warning, set the cooking function and oven temperature knobs to “0”. Pressing any
button for less than 3 seconds will now stop the audible warning. Press the “ ” button for more than
3 seconds sets the oven to Manual mode again.
Semi-automatic Programming: Defined by a Set Finishing Time
This function is used to cook according to a desired nishing time. First, place the food to be cooked into the
oven. Adjust the oven to the desired cooking function and temperature.
1 Before setting the nished time, press “ ” button until you see “End” on the timer screen.
2 Use “+” or “-” button to adjust nishing time. (Refer to the instructions for setting the correct time of day)
3 Press “ ” button to conrm. The time will then appear on the screen and the symbols “A” and “ ” will
light up on the screen. While doing this, the oven will start to operate.
4 At the completion of the set nishing time, the timer will stop the oven and give an audible warning and
the symbol “A” will begin to ash on the screen.
5 To stop the audible warning, set the cooking function and oven temperature knobs to “0”. Pressing any
button for less than 3 seconds will now stop the audible warning. Press the “ ” button for more than
3 seconds sets the oven to Manual mode again.
Full-automatic Programming
This function is used to cook after a certain period of time, with a certain duration. First, place the food to be
cooked into the oven. Adjust the oven to the desired cooking function and temperature.
1 Press the “ ” button until you see “Dur” on the timer screen. Use “+” or “-” button to adjust cooking
period for the food you wish to cook. Press “ ” button to conrm. The time will then appear on the
screen and the “A” symbol will light up on the screen.
2 Now press the “ ” button until you see “End” on the timer screen. When you see “End” on the timer
screen, use “+” or “-” button to adjust nishing time and then press “ ” button to conrm. The time will
then appear on the screen and the “A” symbol will light up on the screen. Note: the “ ” symbol will not
appear until the time cooking starts. Note: you can set a time of up to 23.59 hours.
4 The oven now will start operating at the time calculated by deducting the cooking period from the set
nishing time, and will stop at the set nishing time.
4 At the completion of the set program, the timer will stop the oven and give an audible warning and the “A”
symbol will begin to ash on the screen.
5 To stop the audible warning, set the cooking function and oven temperature knobs to “0”. Pressing any
button for less than 3 seconds will now stop the audible warning. Press the “ ” button for more than
3 seconds sets the oven to Manual mode again.
Please note: Once full-automatic mode has been set, the time cannot be changed. Changing the time
cancels the automatic program and enters the oven into Manual mode. If you need to reset automatic mode
or need to stop setting the current mode, follow the steps above again.

11
MODEL: SO65B | PRODUCT CODE: 60151 | 04/2018
Getting Started
Accessories
Chrome Rack: Used for grilling dishes, cake pans or items for roasting and grilling. (Fig. 1)
Chromed Rack Support: Used for cooking larger sized food, the shelf support rails on the right and
left sides of the oven can be removed, dishes and trays can be put directly on the oor of the oven. Use
functions such as radiant grilling, double grilling, double grill with fan. (Fig. 2)
IMPORTANT: When placing dishes on the oven oor, DO NOT use functions with the bottom element to
prevent heat gathering at the bottom.
Roasting Tray: Used for cooking large quantities of food such as moist cakes, pastries, frozen food etc., or
for collecting spillage (I.e. meat juices or crumbs). (Fig. 3)
Fig. 1
Fig. 2
Fig. 3

12
MODEL: SO65B | PRODUCT CODE: 60151 | 04/2018
Getting Started Cont.
Shelf Placement
To ensure the oven shelves operate safely, correct placement of the shelves between the rack supports
is imperative. The shelves should be tted facing the right direction. This will ensure that during careful
removal of the shelf or tray, hot items should not slide out. (Fig. 4)
Note: The wire shelves and the roasting tray only can be used between the rst and fth layers.
Securing the Oven to the Cabinet
Please ensure the oven is secured to the cabinet. This should be done
using the screws provided and the following steps in (Fig. 6):
1 Fit oven into the cabinet recess.
2 Open the oven door.
3 Secure the oven to the kitchen cabinet with two distance holders
“A” which t the holes in the oven frame and t the two screws “B”.
Unpacking the appliance
• This product has been packaged to protect it against transportation
damage. Unpack the appliance and remove all packaging materials
from around the oven and from inside the oven cavity. If you need
to transport the oven at a later date, please ensure it is packaged
appropriately to prevent damage.
• Keep all packaging materials until you have made sure your new
oven is undamaged and in good working order. The carton is
recyclable. Whenever possible, reuse the carton and recycle it when
disposing of the packaging materials.
• Plastic wrapping can be a suffocation hazard for babies and young
children, so ensure all packaging materials are out of their reach, and
dispose of them safely.
Note: If you sell or transfer ownership of this product, pass on these
instructions to the new owner.
OR
Fig. 4
Fig. 5

13
MODEL: SO65B | PRODUCT CODE: 60151 | 04/2018
Installation
General Installation Warnings:
• The oven must be installed by a licenced electrician.
• Please never try to modify or repair the oven by yourself.
• The oven should be installed with adequate ventilation.
• A suitable isolating switch providing full disconnection from the mains power supply must be incorporated
in the permanent wiring. The switch must be mounted and positioned to comply with the local wiring rules
and regulations. The isolating switch must be of an approved type and provide a 3 mm air gap contact
separation in all poles (or in all active [phase] conductors if the local wiring rules allow for this variation of
the requirements). The isolating switch will be easily accessible to the customer with the oven installed.
• The oven must not be installed behind a decorative door to prevent overheating.
Installation Dimensions
Note. It is a requirement for a ventilation gap to be cut into the
oven cabinet as per the diagrams below.
Oven dimensions
Height: 595mm
Front Width: 595mm
Depth: 575mm
Rear Width: 560mm
Connection of the Oven
This oven must be correctly installed by an appropriately qualied electrician in accordance with all
applicable rules and regulations and following the instructions in this manual.
Do not try to install the oven yourself: doing so will expose you to danger and void the warranty. Improper
installation, adjustment, alteration or service can cause injury or damage. We decline any responsibility for
injury or damage, to persons or property, as a result of improper use or installation.
Important advice for the installer
• Before connecting the appliance, make sure that the
supply voltage marked on the Rating Plate corresponds
with your mains supply voltage.
• WARNING: This appliance must be earthed.
N
L
590-59 5
56 0
560
500
40
600
560
40
570
560

14
MODEL: SO65B | PRODUCT CODE: 60151 | 04/2018
Cleaning and Maintenance
CAUTION
• Before cleaning any part of the oven, make sure all oven controls are switched off and the oven has cooled
down sufciently.
• Never use a steam cleaner to clean any part of the oven.
Frequency: After each use, make sure to clean the oven thoroughly. This will prevent residual food stuffs
becoming baked on the oven chamber surfaces, which will make the residues more difcult to remove.
To avoid such stains, make sure to select a cooking temperature and function that is appropriate for the food
you are cooking. Also make sure to place the food in an adequately sized dish and to use the drip tray where
appropriate.
• Oven exterior: Clean the oven exterior with a wrung out soft cloth or sponge, dampened with warm soapy
water. Do not use any abrasive cleaners.
• Oven door: If the glass oven door is splattered with fat or other food residues, remove them with a cloth
dampened in warm, soapy water. Then use a dry, lint-free cloth to remove any streaks. You can remove the
door for thorough cleaning, as per the instructions on page 15.
• Oven cleaners: If you use any form of oven cleaner on your appliance, you must check with the
manufacturer of the cleaner that it is suitable for use on your appliance. Any damage caused to the
appliance by a cleaning product will not be covered under your warranty.
Inside surfaces: Remove the oven rack and baking/drip tray from the oven before cleaning. Clean the oven
cavity only with warm, soapy water, using either a sponge or soft cloth, then dry with a dry cloth. Do not use
any abrasive cleaners, harsh detergents and hard or metal brushes on any oven surface. The oven rack and
baking/drip tray should be cleaned separately in warm, soapy water and dried thoroughly before being put
back into the oven.
Bottom of the oven: Any stains that may appear on the bottom of the oven are probably due to spilled
food or food splashes, which will have occurred during the cooking process. These spills and splashes
could possibly be a result of the food being cooked at an excessively high temperature, or being placed in
cookware that is too small.
Bulb Replacement
For replacement of bulbs, please follow these instructions:
1 Disconnect the power from the mains power outlet or switch
off the circuit breaker of the units mains outlet.
2 Unscrew the glass lamp cover by turning it counter-clockwise
(Note: it may be stiff) and replace the bulb with a new one of the
same type. (Fig. 6)
3 Screw the glass lamp cover back in place.
Note: Only use 25-40W/220V-240V, T300°C halogen lamps.
Fig. 6

15
MODEL: SO65B | PRODUCT CODE: 60151 | 04/2018
Cleaning and Maintenance Cont.
To remove the oven door and subsequently the glass as well, please follow the following steps.
Remove oven door
1. Open the oven door completely so that it is horizontal. Pull the buckle at the door hinge backward. (Fig. 5)
2. Close the door to an angle approximately 15°. Lift up and slowly pull the door out from the oven. (Fig. 6)
3. Place the door on a at surface with door top cover facing upwards. Put your hands on the glass and pull
it towards the oven. (Fig. 7)
4. Seperate the glass carefully by lifting it approximately 25°. (Fig. 8)
5. Push the glass into the position indicated by the arrow in Fig. 9. Gently pull the glass out of the socket.
6. After pulling out the inner glass, please take out the middle layer of glass, as shown in Fig. 10.
Put oven door back on
When cleaning is completed, reverse the above procedures to return the door to its original position.
5˚
Fig. 5 Fig. 6
Fig. 7
Fig. 8
Fig. 9
Fig. 10

16
MODEL: SO65B | PRODUCT CODE: 60151 | 04/2018
Technical Specification
Specification
Oven Capacity 70L
Dimensions Refer to page 13
Weight 32kg Net / 35kg Gross
Oven Door Triple glazed, removable
Accessories 1 × Baking tray with grill insert, 2 × oven shelves
SS side racks (already assembled)
Oven Functions 5
Timer Programmable
Rated Voltage / Frequency 220–240V, 50/60Hz
Total Rated Mains Power 2.1 kW
Rating Label
Declaration of conformity
This appliance complies with the following Australian/European Directives:
• 2006/95/CE General regulations / Low tension
• 1935/2004/CE 90/128/EEC This appliance is suitable to come in contact with food
• 2004/108/CE Electromagnetic compatibility
• Low voltage – 73/23
• Safety standards – EN 60335-1, EN30-1-1, AS/NZS 3350-1,3350-2-6, AS/NZS 60335.2.6:2014
The manufacturer declares that the oven is built using certied materials and requires the appliance to be
installed in accordance with the standards currently in force. This oven should only be used by a trained person
and for domestic purposes only.
Other repairs or service inspections
Besides keeping the oven clean, regularly inspect the control dials and heating elements. In case of damage,
or if you experience any problems with the appliance, contact our after sales support line to arrange a technical
inspection of the oven and x any operational faults. Do not attempt to carry out any repairs yourself!
Responsible disposal
At the end of their working life, do not throw the appliance out with your household rubbish. Electrical and
electronic products contain substances that can have a detrimental effect on the environment and human
health if disposed of inappropriately. Observe any local regulations regarding the disposal of electrical
consumer goods and dispose of it appropriately for recycling. Contact your local authorities for advice on
recycling facilities in your area.

17
MODEL: SO65B | PRODUCT CODE: 60151 | 04/2018
FAQs
If you experience problems with your oven, or it appears not to be operating correctly, check on the following
pages for solutions to common problems. If none of the solutions offered help you solve your problem, please
contact our after sales support centre for advice; contact details are printed at the bottom of the page.
Do not attempt to repair the appliance yourself.
The oven isn’t coming on.
• Check whether the clock is ashing, if it is ashing then set the clock.
• Check that you have selected a cooking function and a cooking temperature.
There appears to be no power to the oven and grill.
• Check that the operating instructions for setting the clock.
• Check with another appliance that the electrical outlet is working properly, or whether there is a power
outage.
• Check that the appliance has been correctly connected to the electrical mains supply.
• Check your household fuse box, and if there is a blown fuse, replace it with a new one. If this problem
happens again, call our after sales support line and arrange a service.
The grill function works but the main oven does not.
• Check that you have selected the correct cooking function.
The grill and top oven element is not working, or cuts out for long periods of time during use.
• Allow the oven to cool for approximately 2 hours. Once cool, check whether the appliance is again working
properly.
My food is not cooking properly.
• Ensure that you are selecting the correct temperature and cooking function for the food you are cooking.
It may be appropriate to adjust your cooking temperature by +/-10°C to achieve the best cooking results.
My food is not cooking evenly.
• Ensure that the correct temperatures and shelf positions are being used.
• Ensure that your dishes are placed centrally on the oven rack.
• Rotate the dish during cooking.
• Check that the oven has been installed correctly and is level.
The oven light is not working.
• Check whether the light bulb is loose and if so, tighten it.
• If the bulb is still not working, replace it with one of the same size and wattage (see the ‘Cleaning and
Maintenance’ section).
I am getting condensation in my oven.
• Steam and condensation is a natural by product of cooking any food with a high water content, such as
frozen food, chicken etc. It may form in the oven cavity and between the oven door glass layers. This is not
necessarily a sign that the oven is not working correctly.
• Carefully wipe any built up condensation from the oven door after use.
• Leave the oven door open after cooking.
• Do not leave food in the oven to cool after it has been cooked and the oven has been switched off.
• Use a covered container, where practical, when cooking to reduce the amount of condensation that forms.
The fan keeps on running although the oven is switched off.
• A cooling fan is tted inside this appliance to help stabilise the oven’s internal temperature and lower the
external surface temperature. After the oven has been used, the cooling fan will run on for a period of time,
until the oven is sufciently cooled. It will then switch off automatically.

18
MODEL: SO65B | PRODUCT CODE: 60151 | 04/2018
1
www.xxxxxxx.com
0000 000 000
60cm/90cm Canopy Rangehood
Unfortunately, from time to time, faulty products are manufactured which need to be
returned to the Supplier for repair.
Please be aware that if your product is capable of retaining user-generated data (such as files
stored on a computer hard drive, telephone numbers stored on a mobile telephone, songs
stored on a portable media player, games saved on a games console or files stored on a USB
memory stick) during the process of repair, some or all of your stored data may be lost.
We recommend you save this data elsewhere prior to sending the product for repair.
You should also be aware that rather than repairing goods, we may replace them with
refurbished goods of the same type or use refurbished parts in the repair process.
Please be assured though, refurbished parts or replacements are only used where they
meet ALDI’s stringent quality specifications.
If at any time you feel your repair is being handled unsatisfactorily, you may escalate your
complaint. Please telephone us on 1300 11 43 57 or write to us at:
Residentia Group
Repair and Refurbished
Goods or Parts Notice
70L Electric Oven
118 Campbell Street
Collingwood VIC 3066
Australia
Email: support@residentiagroup.com.au
Helpline hours of operation:
Mon–Fri
9:00 AM - 5:00 PM

19
MODEL: SO65B | PRODUCT CODE: 60151 | 04/2018

20
MODEL: SO65B | PRODUCT CODE: 60151 | 04/2018
This page
is intentionally
left blank
Table of contents
Other Stirling Oven manuals
Stirling
Stirling tp54h4wh User manual
Stirling
Stirling tp54h4wh User manual
Stirling
Stirling AFD23L-G User manual
Stirling
Stirling SORHP1-O User manual
Stirling
Stirling Black Edition STR-PEO User manual
Stirling
Stirling STR-APYRO User manual
Stirling
Stirling STR-AEO User manual
Stirling
Stirling AFD24L User manual
Stirling
Stirling STR-AEO65L User manual
Stirling
Stirling SO69S User manual
