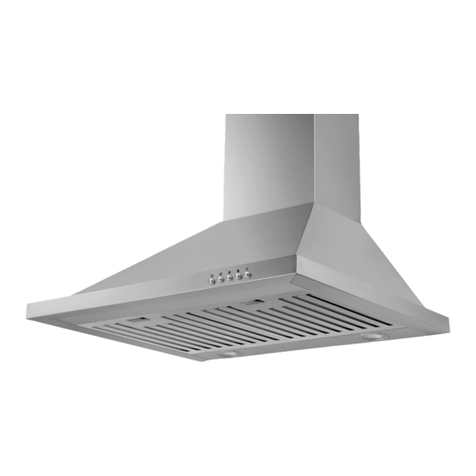
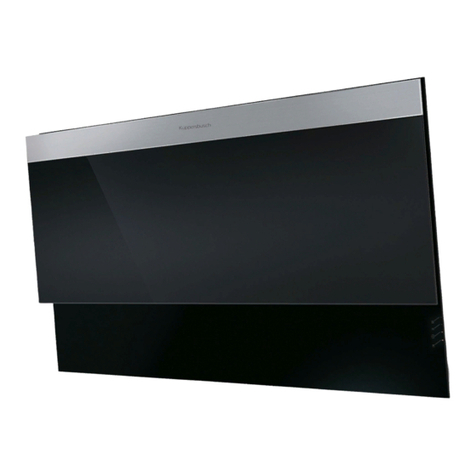
Stirling SRH91B User manual

90cm Slimline Rangehood
Model Number SRH91B
INSTRUCTION MANUAL
Issue Date: 08/2016IM Version No.: V1.3
MODEL: SRH91B | PRODUCT CODE: 54296 | 08/2016

2
MODEL: SRH91B | PRODUCT CODE: 54296 | 08/2016
Congratulations on choosing to buy a STIRLING® product.
All products brought to you by STIRLING® are manufactured to the highest standards
of performance and safety and, as part of our philosophy of customer service and
satisfaction, are backed by our comprehensive 3 Year In Home Warranty. We hope you
will enjoy using your purchase for many years to come.
Welcome

MODEL: SRH91B | PRODUCT CODE: 54296 | 08/2016
3
Contents
02 Welcome Section
04 Warranty Page
05 General Safety
07 Product Overview
08 Specification
08 Components
09 Installation Requirements
10 Installation
13 Operating Your Rangehood
14 Cleaning and Maintenance
15 Troubleshooting & Technical Data
16 Other Useful Information
17 Repair and Refurbished Goods or Parts Notice
18 Warranty Returns

4
MODEL: SRH91B | PRODUCT CODE: 54296 | 08/2016
The product is guaranteed to be free from defects in workmanship and parts for a period
of 36 months from the date of purchase. Defects that occur within this warranty period,
under normal use and care, will be repaired, replaced or refunded at our discretion. The
benets conferred by this warranty are in addition to all rights and remedies in respect of
the product that the consumer has under the Competition and Consumer Act 2010 and
similar state and territory laws.
Our goods come with guarantees that cannot be excluded under the Australian Consumer
Law. You are entitled to a replacement or refund for a major failure and for compensation
for any other reasonably foreseeable loss or damage. You are also entitled to have the
goods repaired or replaced if the goods fail to be of acceptable quality and the failure does
not amount to a major failure.
90cm Slimline Ranghood

MODEL: SRH91B | PRODUCT CODE: 54296 | 08/2016
5
Read this manual thoroughly before rst use, even if you are familiar with this type of product. The safety
precautions enclosed herein reduce the risk of re, electric shock and injury when correctly adhered to. Keep
the manual in a safe place for future reference, along with the completed warranty card and purchase receipt.
If applicable, pass these instructions on to the next owner of the appliance.
Always follow basic safety precautions and accident prevention measures when using an electrical appliance,
including the following:
Important installation advice
This rangehood must only be installed in accordance with the instructions provided. Incorrect installation may
cause harm to persons, damage property and void the product’s warranty.
This rangehood complies the safety standard AS/NZS60335.2.31:2013 and AS/NZS 60335.1
WARNING: All electrical work associated with the installation of this rangehood must be carried out by a
licensed electrician.
WARNING: This rangehood must be installed by a suitably qualied person in strict accordance with all
instructions in this manual.
• Cables: Do not allow electrical ttings or cables to come into contact with areas on the associated
equipment (rangehood) that get hot.
• Air discharge: The exhaust air must not be discharged into a ue which is used for exhausting fumes from
appliances burning gas or other fuels.
• External air evacuation: Make sure to follow your local laws that apply to external air evacuation when
installing and using the rangehood.
Electrical safety and cord handling
• Voltage and frequency: Before plugging the unit into an appropriate electrical outlet, make sure your
outlet voltage and circuit frequency correspond to the voltage stated on the appliance rating label.
• Power cord: Check the cord regularly for damage. Do not use the appliance if the cord, or any other part
of the appliance, has been damaged.
• Damaged cord: A damaged cord must be replaced by the manufacturer or a similarly qualied person in
order to avoid a hazard.
• Disconnect: Before cleaning the rangehood, make sure to switch it off and unplug it from the electrical
supply. Do not disconnect the appliance with wet hands. Grip by the plug, do not pull by the cord when
disconnecting.
Usage conditions and restrictions
• Domestic use only: This rangehood is designed for indoor domestic use only. It is not intended for
commercial, trade or industrial purposes. It can be built into a standard kitchen cabinet or housing unit
following the installation instructions in this manual.
• Intended purpose: Only use this rangehood for its intended purpose, in its intended environment and as
described in this manual. Any other use may cause re, electric shock or injury.
• Use common sense: These instructions are not intended to cover every possible condition and
situation. As with any electrical household appliance, common sense and caution are therefore always
recommended when installing, operating and maintaining the equipment.
General Safety

6
MODEL: SRH91B | PRODUCT CODE: 54296 | 08/2016
General Safety Cont.
Usage restriction: This rangehood is not intended for use by persons (including children) with reduced
physical, sensory or mental capabilities, or lack of experience and knowledge, unless they have been given
supervision or instruction concerning use of the appliance by a person responsible for their safety.
Children: Supervise young children to ensure they do not play with the appliance. Close supervision is
necessary when any appliance is used by or near children.
No timer: The appliance is not intended to be operated by means of an external timer or separate remote
control system.
CAUTION: Take care when the rangehood is operating simultaneously with an open replace or burner
that depend on air from the environment and are supplied by other than electrical energy, as the rangehood
removes air from the environment which a burner or replace needs for combustion.
Ventilation: The rangehood removes air from the environment during use. Always provide adequate
ventilation for safe operation of the rangehood. This is particularly important when the rangehood is used at
the same time as ued heaters burning gas or other fuels.
CAUTION: No open ame cooking: Do not use an open ame for cooking underneath this rangehood. Open
ames can damage the lters and present a re hazard.
Unattended: Do not leave the rangehood unattended during use.
After use: Make sure to switch off the rangehood after use and before cleaning.
CAUTION: Do not touch the light bulbs after the appliance has been used as they may be hot. Let them cool
down before cleaning and maintenance.
WARNING: Fire Risk! Clean your rangehood regularly as instructed in this manual. There is a re risk if
cleaning is not carried out in accordance with the instructions.
Cleaning: Do not use steam cleaning equipment for cleaning any part of the rangehood.
Filters: Do not check the status of the lters while the rangehood is in use.
Damage: Do not use the rangehood if any part, including the supply cord, has been damaged, is faulty or
does not work properly. Only have it repaired by an authorised service centre. Incorrect repair could expose
you to the risk of electric shock, re or injury. Prolonged use of the unit in such conditions could cause re or
electrocution. In case of damage, contact our after sales support line for advice.
Liability: We assume no liability for any eventual damages caused by incorrect installation, misuse of the
product or noncompliance with these instructions.
CAUTION: Accessible parts may become hot when used with cooking appliances.

MODEL: SRH91B | PRODUCT CODE: 54296 | 08/2016
7
Product Overview
90cm Slimline Rangehood Layout
Key: 1 Flue Cover
2 SS Bafe Grease Filters
3 LED Light
4 Control panel
5 Canopy
1
23 3
45

8
MODEL: SRH91B | PRODUCT CODE: 54296 | 08/2016
Components
Installation Kit
The installation kit contains the following parts:
Specification
Product dimensions (W,D,H): 900mm, 500mm, 548–1028mm
Weight: 16kg
Extraction: Powerful extraction
Other features: – 3 speed Invisible touch control
– 2 × LED lights
– 3 × Stainless steel bafe lters
Part ID Part IDIllustration & Description Illustration & Description
Rangehood
Screws (ST4 x 30mm)
1
9
1
5
Expandable 150mm ducting pipe
Rangehood wall mounting bracket
Outer ue cover bracket
Inner ue extension cover bracket
SS Inner ue extension cover
Screws (ST4 x 8mm)
SS Outer ue cover
Wall Plugs (8mm)
1
1
1
1
1
2
1
9
4
8
9
10
2
6
3
7
QTY QTY

MODEL: SRH91B | PRODUCT CODE: 54296 | 08/2016
9
Installation Requirements
Typical installation tools required
You’ll most likely require the following tools/equipment (not supplied)
for the installation of your rangehood.
• Electrical drill • Tape Measure
• Screw-driver • Spirit Level
If ducting your rangehood, you’ll also most likely require:
• Jig saw • Ladder
• Duct-tape • Ducting
Important installation safety notes:
• Always switch the mains power off prior to beginning the installation.
• Stainless steel is very easily damaged during installation. Wherever possible, protect the rangehood with
the cardboard box or plastic wrap during the installation.
• For safety reasons, this Rangehood must be earthed.
• A power point must be located within 1.5m of the power cord exit from the rangehood, and it should be
always accessible to allow isolation from power during cleaning or maintenance.
• A 150mm round ducting adapter is supplied, however all other ducting accessories are not.
• All ducting must comply with building codes and local requirements.
• If you are re-circulating the air, rather than ducting, please ensure that the side outlet grilles are not
obstructed in any way as this will effect the efciency of the rangehood.
• Ensure that the rangehood is mounted in a level position, both horizontally and vertically. This is essential
to ensure the rangehood operates correctly and prevents grease build up at one end.
Unpacking
During transportation, protective packaging was used to protect the appliance against any damage.
After unpacking, please dispose of all elements of packaging in a way that will not cause damage to the
environment. All materials used for packaging the appliance are environmentally friendly; they are 100%
recyclable and are marked with the appropriate symbol.
WARNING!
All electrical work associated with the installation of this rangehood must be carried out by a
licensed electrician. This rangehood must be correctly installed by a suitably qualied person in strict
accordance with all applicable rules and regulations and following the instructions in this manual.
Do not try to install the rangehood yourself; doing so will expose you to danger and void
the warranty. Improper installation, adjustment, alteration or service can cause injury or damage.
We decline any responsibility for injury or damage, to persons or property, as a result of
improper installation.

10 MODEL: SRH91B | PRODUCT CODE: 54296 | 08/2016
Installation
Ducting options
Before beginning the installation of your
rangehood, the method of ducting should be
considered and selected. The guide below
illustrates the various ducting options.
Note: this rangehood can be operated in
recirculation mode where required,
although it is recommended to duct
wherever possible.
• Straight up and through your tiled or metal roof. (Fig. 1)
• Into your ceiling cavity and then vented through your eaves. (Fig. 2)
• Through an external wall (Fig. 3)
Further to your various ducting options, below are some tips on how to correctly duct your rangehood:
• Always use correctly sized ducting — DO NOT reduce the size of the ducting
• Always use solid ducting
• Always use non-ammable ducting
• Always duct to the outside atmosphere
• Do not use exible ducting
• Do not duct into the ceiling space- always vent to the outside atmosphere.
• Wherever possible avoid sharp 90 degree bends in the exible ducting as you can reduce reduce the
extraction performace of the rangehood. Use 45 degree bends instead wherever possible.
• Duct to the outside atmosphere using the shortest duct run possible
• Use cylindrical ducting whenever possible
Positioning the rangehood: Installation heights
• Over gas and electric cookers, we recommend our rangehoods to be mounted at a height of between 600-
800mm above the cooking surface.
• Electric cooktops must have a minimum height of 600mm from the underside of the rangehood to the
cooktop face.
• For optimum performance, it is recommended that the rangehood be installed at a height of between 650-
750mm from the cooking surface. See Fig. 4 for detailed AS/NZS minimum distance requirements.
• Gas cooktops must have a minimum of 650mm from the burner to the underside of the rangedhood.
• Over open ame grillers or barbecues, the Gas Regulations require the lters of the rangehood to be at
least 1200mm above the cooking surface.
Fig. 4
Minimum distance
– Electric: 600mm
– Gas: 650mm
Maximum distance
– Either: 750mm
Top of
cooktop
Rangehood base
Fig. 2 Fig. 3Fig. 1

MODEL: SRH91B | PRODUCT CODE: 54296 | 08/2016
11
Installation Cont.
Installing the rangehood
Please refer to the Components list on page 7 for all part ID’s.
1. Determine your installation height.
2. Drill 3 holes to install the rangehood wall mounting bracket (8) onto the wall.
3. Use a spirit level to ensure that the rangehood wall mounting bracket is secured in a level position.
4. Tighten the bracket using the wall plugs (7) and screws (ST4 × 30mm, 5).
5. When nished, lift up the hood (1) and hang onto the rangehood wall mounting bracket (8)
(see Pic A).
6. Remove the grease lters to access the safety screw holes in the rear of the rangehood. (see Pic. C).
Using the wall plugs (7) and screws (ST4 × 30mm, 5), secure the rangehood to the
wall as illustrated in Pic. C.
7. Attach the expandable 150mm ducting pipe (4) to the canopy.
8. Insert the inner ue extension cover (2) into the outer ue cover (3), ensure it can move freely.
9. Mount the outer ue cover bracket in position and mark the two holes to drill to afx the bracket.
10. Using wall plugs and screws (ST4 × 30mm, 5) x the outer ue cover bracket to the wall
(see Pic B).
11. Slide the inner ue extension cover (2) up until you reach the desired height.
12. Position the inner ue extension cover bracket (10) at the highest point as illustrated in Pic. C. Mark and
drill holes for the wall plugs (7).
13. Using screws (ST4 × 30mm, 5) afx the inner ue extension cover bracket (10) to
the wall.
14. Fix the inner ue extension cover (Part ID 2) to the inner ue extension cover bracket (10) using the
screws (ST4 × 8mm, 6) (see Pic C).
Pic. A

12
MODEL: SRH91B | PRODUCT CODE: 54296 | 08/2016
Pic. B
Pic. C

MODEL: SRH91B | PRODUCT CODE: 54296 | 08/2016
13
Operating Your Rangehood
Invisible Touch Control
Standby Mode
After the rangehood is plugged in, only the (power symbol) will appear.
The rangehood is in STANDBY MODE.
On/Off Button
Press the on/off button to turn the fan on or off. When the rangehood is rst plugged in,
press the on/off button for 3 seconds to take the rangehood out of STANDBY MODE.
Low Speed Setting
The low speed setting is used when cooking does not produce a lot of steam.
Use this setting when simmering.
Medium Speed Setting
The medium speed setting is the standard setting for normal cooking.
This setting is recommended for most types of cooking.
High Speed Setting
Use the high speed setting when cooking on multiple zones or when the density
of smoke/steam increases.
Light Button
Press the (light button symbol) to turn the LED lights on or off.

14
MODEL: SRH91B | PRODUCT CODE: 54296 | 08/2016
Cleaning & Maintenance
Cleaning the Grease Filters
Keeping the grease lters clean will keep the rangehood extraction performance at an optimum. Please
strictly follow the guidelines below.
• To remove the grease lters squeeze the spring loaded latch with your ngers and gently lower the lters
out. Follow the same process to reinstall.
• The grease lters are made of high-density stainless steel. Please ensure you never use a corrosive
detergent during cleaning.
• Method 1: Put the grease lters into 40-50°C clean water with a small amount of regular dishwashing
liquid, and soak for 2-3 minutes. Wear gloves and clean with a soft brush. Do not apply too
much pressure, as the lter is delicate and could damage easy.
• Method 2: Wash your rangehood grease lters in the dishwasher, please ensure they aren’t washed at
a temperature above 60°C degrees.
Warning!
Heavy-duty scourers, some nylon scourers and harsh/abrasive cleaning agents may scratch
the stainless steel lters. Always read the label to check if your cleaner or scourer is suitable.
Cleaning the Rangehood
To protect the main body of your rangehood from corrosion or stains, the rangehood should be cleaned
with hot water and a non-corrosive detergent every two months. For stubborn stains or marks, try
using a stainless steel cleaner available from most supermarkets.
Warning!
Please do not use a corrosive detergent, or abrasive cloths, as it will damage the body.
• Keep the motor and other spare parts free from water, as this will cause damage to the appliance.
• Before cleaning the rangehood, always switch the power off at the outlet and unplug the rangehood.
• If your rangehood has a damaged plug or cord, please ensure your rangehood remains unplugged and
contact After Sales Support for further assistance. Any electrical work should only be completed by a
suitably licenced and authorised person.
• If you’re using a carbon lter, it should never be exposed to heat.

MODEL: SRH91B | PRODUCT CODE: 54296 | 08/2016
15
Troubleshooting & Technical Data
Operation in case of emergency
In the event of an emergency you should:
– Switch off all rangehood controls.
– Switch the rangehood off at the power outlet and immediately unplug.
– Call After Sales Support on 1300 11 HELP (4357).
Some minor faults can be xed by referring to the instructions given in the Troubleshooting section below.
Important!
If your appliance appears to be operating incorrectly, then you should disconnect it from your electrical
supply and then contact After Sales Support on 1300 11 HELP (4357).
Warning!
Do not attempt to repair the rangehood yourself.
Please note that if an engineer is asked to attend whilst the product is under warranty and nds that the
problem is not the result of an appliance fault, then you may be liable for the cost of the call out charge.
The appliance must be accessible for the engineer to perform any necessary repair. If your appliance is
installed in such a way that an engineer is concerned that damage will be caused to the appliance or your
kitchen, then they will not complete a repair. This includes situations where the rangehood has been tiled
in or sealed in with a sealant.
Please refer to the conditions of that appear on the warranty card at the rear of this user manual.
Fault: Common Cause: Common Solutions:
The lights work, however
the motor does not work
The motor is blocked or jammed. Call After Sales Support for further
guidance.
The capacitor is damaged. Call After Sales Support for further
guidance.
Neither the lights or the
motor works
Beside the above mentioned, check the following:
Light globes are damaged or blown Call After Sales Support for further
guidance.
The power cord is loose. Ensure that the rangehood is
correctly plugged in and the power
outlet is switched on.
The rangehood is vibrat-
ing against the wall
The rangehood canopy is not xed to
the wall correctly.
Ensure that the internal safety screws
have been used and are tight.
Insufcient suction The distance between the rangehood
and your cooktop is too great.
Have your installer re-adjust the
installation position, ensuring that the
minimum distances are observed as
per the building code.
Technical data
Electrical details: Rated Voltage: 220-240VAC, 50/60HZ | Rated Power: 213W

16
MODEL: SRH91B | PRODUCT CODE: 54296 | 08/2016
Other Useful Information
Spare parts
Our after sales support centre stocks a wide range of spare parts for the SRH91B STIRLING Rangehood.
To purchase a part, call the centre on 1300 11 43 57 or email us at support@residentiagroup.com.au
• Blower • Charcoal lter • Connection box and bar
• Ducting • Switch • Slider
• Lamp and lamp holder • Motor • Outlet
• Reector • Filter (aluminium mesh, inner and outer)
Specifications
Rated voltage / frequency 220-240VAC 50/60Hz
Dimensions (H × W × D) 900mm × 500m × 548-1028mm
Weight 16kg
Motor power 210W
Lamp power 2 × 1.5W
Total input power 213W
Housing Stainless steel
Filters 3 × SS Bafe Grease Filters
Accessories supplied Extension Pipe
This product complies with AS/NZS60335.2.31: 2013 electrical safety,
and with EN 55014-1:2006+A1:2009+A2:2011 for electromagnetic compatibility.
Responsible disposal
At the end of its working life, do not throw the rangehood out with your household rubbish.
Electrical and electronic products contain substances that can have a detrimental effect on the environment
and human health if disposed of inappropriately. Observe any local regulations regarding the disposal of
electrical consumer goods and dispose of it appropriately for recycling. Contact your local authorities for
advice on recycling facilities in your area.

MODEL: SRH91B | PRODUCT CODE: 54296 | 08/2016
17
1
www.xxxxxxx.com
0000 000 000
60cm/90cm Canopy Rangehood
Unfortunately, from time to time, faulty products are manufactured which need to be
returned to the Supplier for repair.
Please be aware that if your product is capable of retaining user-generated data (such as files
stored on a computer hard drive, telephone numbers stored on a mobile telephone, songs
stored on a portable media player, games saved on a games console or files stored on a USB
memory stick) during the process of repair, some or all of your stored data may be lost.
We recommend you save this data elsewhere prior to sending the product for repair.
You should also be aware that rather than repairing goods, we may replace them with
refurbished goods of the same type or use refurbished parts in the repair process.
Please be assured though, refurbished parts or replacements are only used where they
meet ALDI’s stringent quality specifications.
If at any time you feel your repair is being handled unsatisfactorily, you may escalate your
complaint. Please telephone us on 1300 11 43 57 or write to us at:
Residentia Group
1/32 Wangaratta St
Richmond VIC 3121
Australia
Email: [email protected]
Repair and Refurbished
Goods or Parts Notice
Helpline hours of operation:
Mon–Fri
9:00 AM - 5:00 PM
90cm Slimline Ranghood

18
MODEL: SRH91B | PRODUCT CODE: 54296 | 08/2016

MODEL: SRH91B | PRODUCT CODE: 54296 | 08/2016
19
This page is intentionally left blank

MODEL: SRH91B | PRODUCT CODE: 54296 | 08/2016
Table of contents
Other Stirling Ventilation Hood manuals

Stirling
Stirling STR-BRH User manual

Stirling
Stirling SUM52 User manual

Stirling
Stirling SRH60 User manual

Stirling
Stirling STR-SRH User manual

Stirling
Stirling SORHP1-RH User manual

Stirling
Stirling STR-PRHGC User manual

Stirling
Stirling Black Edition STR-PRHGC User manual

Stirling
Stirling STR-BRH User manual

Stirling
Stirling SRHGC90 User manual

Stirling
Stirling Premium STR-PRHTP User manual