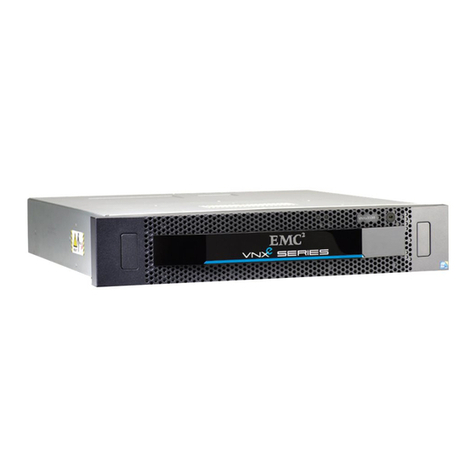
StorageWorks EK-SMRAB-IG User manual

Getting Started
RAID Array 310 V3.1 for HP–UX
Installation Guide
EK–SMRAB–IG. B01
Digital Equipment Corporation
Maynard, Massachusetts

Second Edition, April 1997
The disclosure of this information does not grant to the user a license under any patents,
pending patents, trademarks, or copyrights or other rights of Digital Equipment
Corporation, or of any third party.
This software is proprietary to and embodies the confidential technology of Digital
Equipment Corporation.
Possession, use or copying of the software described in this publication is authorized only
pursuant to a valid written license from Digital Equipment Corporation or an authorized
sublicensor.
Digital Equipment Corporation makes no representation that the use of its products in the
manner described in this publication will not infringe on existing or future patent rights,
nor do the descriptions contained in this publication imply the granting of licenses to
make, use, or sell equipment or software in accordance with the description.
The following are trademarks of Digital Equipment Corporation:
DEC, RAID Array 310, StorageWorks, and the Digital Logo.
UNIX is a registered trademark in the United States and other countries, licensed
exclusively through X/Open Company, Ltd.
All other trademarks and registered trademarks are the property of their respective owners.
© Digital Equipment Corporation 1995, 1996, 1997. All Rights Reserved
Printed in U. S. A.

EK–SMRAB–IG. B01 iii
Contents
Revision Record ......................................................................................................................vii
About This Guide ....................................................................................................................ix
Getting Started ..................................................................................................................... xiii
1 Unpacking and Setting Up Your RAID Array 310 Subsystem Components
1.1 Introduction..........................................................................................................1–1
1.2 Site Preparation....................................................................................................1–1
1.3 Unpacking the RAID Array 310 ...........................................................................1–2
1.4 Preparing the RAID Array 310 for Operation........................................................1–3
1.5 Mounting the Base ...............................................................................................1–4
1.6 Connecting the Subsystem Power Cords...............................................................1–4
1.7 Connecting the CLI Serial Interface......................................................................1–7
1.7.1 Cabling Kit .......................................................................................................1–7
1.7.2 Serial Connection..............................................................................................1–8
1.7.3 Terminal Connection.........................................................................................1–8
1.7.4 Setting-up the Serial Line using SAM...............................................................1–8
1.7.5 CLI Serial Interface Verification........................................................................1–9
1.8 Installing Disk SBBs in the RAID Array 310 Enclosure .......................................1–9
1.9 Charging the RAID Array Controller Cache Battery...........................................1–10
2 Creating an Initial Controller Configuration
2.1 Introduction..........................................................................................................2–1
2.2 What is the CLI? ..................................................................................................2–2
2.3 Accessing the CLI................................................................................................2–2
2.3.1 Start the Communications Program...................................................................2–2
2.3.2 Establish the Connection with the Controller.....................................................2–2
2.4 Show Initial Configuration...................................................................................2–2
2.5 Add Disks to the Configuration............................................................................2–5
2.6 Setting Up a Communications LUN for a Command Console...............................2–6
2.7 Create a RAIDset..................................................................................................2–7
2.7.1 Initialize the RAIDset........................................................................................2–7
2.7.2 Add the RAIDset as a Logical Unit ...................................................................2–8
2.7.3 Set Writeback Cache .........................................................................................2–8
2.7.4 Verify and Record Your Configuration..............................................................2–9
3 Preparing the HP 9000 Series Systems for Use with the StorageWorks
Controller
3.1 Installing Hardware ..............................................................................................3–1
3.2 Installing the Host Device Driver..........................................................................3–2
3.2.1 Determine the Device Driver Required..............................................................3–2
3.2.2 Verify Host Adapter and Driver.........................................................................3–3
3.2.3 HP-UX Series 800 Patch Installation (10.01 only).............................................3–4
3.2.4 Set the SCSI Bus Address of the RAID Array Controller ..................................3–4
3.2.5 Reboot the System and Verify the Successful Installation..................................3–4

Getting Started – RAID Array 310 V3.1 for HP-UX
iv EK–SMRAB-IG. B01
4 Installing Command Console Agent on Your Host System
4.1 Introduction ......................................................................................................... 4–1
4.2 Minimum System Requirements.......................................................................... 4–1
4.3 Installing and Configuring CC Agent for HP-UX®............................................... 4–2
4.4 Installing and Configuring Automatically............................................................. 4–2
4.5 Running CC Agent ............................................................................................ 4–10
4.6 Reconfiguring CC Agent.................................................................................... 4–10
4.7 Uninstalling CC Agent....................................................................................... 4–10
4.8 What To Do Next............................................................................................... 4–10
5 Installing the Command Console Client
5.1 Introduction........................................................................................................ 5–1
5.2 Installing the Client Program............................................................................ 5–1
5.3 Uninstalling Command Console....................................................................... 5–2
Appendix A Configuration Records – Blank Forms
Appendix B Configuration Guidelines
Appendix C Upgrading Your Controller Software
C.1 Backing Up Your System.....................................................................................C–1
C.2 Saving the RAID Array 310 Configuration ..........................................................C–1
C.2.1 Record Logical Units........................................................................................C–2
C.3 Upgrading Controller Software Using Windows NT ............................................C–5
C.4 Windows NT 3.51 Procedures..............................................................................C–5
C.4.1 Downloading the Software................................................................................C–7
C.5 Firmware Upgrade Procedures for Windows 95 and Windows NT 4.0 ...............C–10
C.5.1 Downloading the Software..............................................................................C–11
C.6 Reverting to Software Image Version 2.7...........................................................C–15
C.7 Manual RAID Array 310 Configuration Restoration ..........................................C–15
Appendix D Configuring STRIPEsets, MIRRORsets, and Striped MIRRORsets
D.1 Create a STRIPEset (Configuration Example 1)...................................................D–1
D.1.1 Initialize the STRIPEset....................................................................................D–1
D.1.2 Add the STRIPEset as a Logical Unit ...............................................................D–2
D.1.3 Set Writeback Cache.........................................................................................D–2
D.2 Create a MIRRORset (Configuration Example 1).................................................D–2
D.2.1 Initialize the MIRRORset .................................................................................D–2
D.2.2 Add the MIRRORset as a Logical Unit.............................................................D–3
D.2.3 Set Writeback Cache.........................................................................................D–3
D.3 Create a Striped MIRRORset (Configuration Example 2).....................................D–3
D.3.1 Create the MIRRORsets ...................................................................................D–3
D.3.2 Create a STRIPEset from the MIRRORsets ......................................................D–3
D.3.3 Initialize the Striped MIRRORset.....................................................................D–4
D.3.4 Add the Striped MIRRORset as a Logical Unit.................................................D–4
D.3.5 Set Writeback Cache.........................................................................................D–4
D.4 Add Individual Disks as Logical Units (Configuration Example 2) ......................D–5
D.5 Add Drives to the Spareset...................................................................................D–5

Contents
EK–SMRAB-IG. B01 v
Appendix D Configuring STRIPEsets, MIRRORsets, and Striped MIRRORsets
(continued)
D.6 Failed Set............................................................................................................D–5
D.7 Verify and Record Your Configuration................................................................D–6
Figures
1–1 Minimum Installation Clearance Measurements....................................................1–2
1–2 Unpacking the RAID Array 310 ...........................................................................1–3
1–3 Mounting the Base ...............................................................................................1–4
1–4 Subsystem AC Power Receptacles........................................................................1–6
1–5 Subsystem CLI Serial Connector..........................................................................1–7
1–6 StorageWorks SCSI Bus Port and Default SCSI ID Assignment.........................1–10
2–1 Distribution Example............................................................................................2–6
C–1 Select Send Binary Files from the Transfers Menu ..............................................C–8
C–2 Select the V31Z.IMG File ................................................................................... C–9
C–3 Select Send File from the Transfer Menu........................................................... C–13
C–4 Select the V31Z.IMG File ................................................................................. C–14
Tables
1–1 Country Specific Power Cords..............................................................................1–5
1–2 Cabling Kit Components......................................................................................1–7
3–1 HP 9000 Drivers...................................................................................................3–2
4–1 Minimum System Requirements...........................................................................4–2
5–1 Minimum CC Client System Requirements..........................................................5–1
C–1 Logical Unit Table...............................................................................................C–3
C–2 Storageset Table.................................................................................................. C–4


EK–SMRAB–IG. B01 vii
Revision Record
This Revision Record provides a concise publication history of this manual. It lists the manual revision
levels, release dates, and reasons for the revisions. It also describes how the changes to affected pages
are marked in the guide.
The following revision history lists all revisions of this publication and their effective
dates. The publication part number is included in the Revision Level column, with the
last entry denoting the latest revision. This publication supports the StorageWorks RAID
Array 310 Subsystem.
Revision Level Date Summary of Changes
EK–SMRAB–IG. A01 March 1996 Original release.
EK–SMRAB–IG. B01 April 1997 Updated to add support for HSOF
V3.1 and StorageWorks Command
Console (SWCC) V1.1B.


EK–SMRAB–IG. B01 ix
About This Guide
This section identifies the audience of this guide and describes the contents (chapter by chapter) and
structure. In addition, this section includes a list of associated documents and the conventions used in this
guide.
This guide provides the following:
• Getting Started
• Unpacking and setting-up the RAID Array 310 Subsystem
• Creating an initial controller interface using the Command Line Interpreter (CLI)
• Preparing the HP 9000 for use with the RAID Array Controller
• Installing Command Console Agent and Client
Visit our Web Site for the Latest Information
Check out web for the latest drivers, technical tips, and documentation. We can be found
in the technical area of our web page, http://www.storage.digital.com/
Intended Audience
This guide is intended for administrators of StorageWorks RAID Array 310 Subsystems.
Installing the StorageWorks RAID Array 310 Subsystem requires a general
understanding of UNIX system administration and product installation procedures
Document Structure
This guide contains the following chapters:
Chapter 1: Unpacking and Setting Up Your RAID Array 310 Subsystem
Components
This chapter describes the site preparation and unpacking procedures for the RAID Array
310 Subsystem. It also describes the procedure to recharge the controller cache battery.
Chapter 2: Creating an Initial Controller Configuration
This chapter contains instructions for creating an initial configuration for your RAID
Array Controller using the Command Line Interpreter (CLI). It briefly describes the CLI
and how to access it. The configuration steps include verifying the default configuration,
adding drives, creating and initializing RAIDsets, identifying the storageset as a unit to
the host, and verifying and recording your final configuration.
It also describes setting up an initial LUN to be used for communication with the
Command Console GUI.

Getting Started – RAID Array 310 V3.1 for HP-UX
x EK–SMRAB–IG. B01
Chapter 3: Preparing the HP 9000 Series Systems for Use with the
StorageWorks Controller
This chapter describes the steps for installing the required device drivers onto HP 9000
Series systems running HP-UX 10.01 or higher. The installation steps include loading
the device driver(s) to communicate through the SCSI Adapter to the StorageWorks
RAID Array Controller.
Chapter 4: Installing Command Console Agent on Your Host System
This chapter describes how to install a copy of the Command Console (CC) Agent on
each of your host systems connected to StorageWorks RAID Array 310 subsystems. You
can install and configure the CC Agent automatically, using a script, or manually by
copying files from the CC Agent distribution CD-ROM and editing Agent configuration
and your host system ASCII files.
Chapter 5: Installing the Command Console Client
This chapter describes how to install a copy of the Command Console (CC) Client on
each of your client systems.
Appendix A: Configuration Records – Blank Forms
This appendix contains a copy of the tables used in Chapter 2 to record the configuration
of your system. If additional copies are required, this table can be reproduced as
necessary.
Appendix B: Configuration Guidelines
This appendix contains a list of guidelines that will assist in optimizing the performance
of your RAID Array 310 Subsystem.
Appendix C: Upgrading Controller Software
This appendix contains the procedures for backing up and upgrading the controller
software.
Appendix D: Configuring STRIPEsets, MIRRORsets, and Striped
MIRRORsets
This appendix supplements Chapter 2 and contains instructions for configuring
STRIPEsets, MIRRORsets, and Striped MIRRORsets.
Associated Documents
In addition to this guide, the following documentation is useful to the reader:
Table 1 Associated Documents
Document Title Order Number
RAID Array 310 for HP-UX Release Notes AA–QWTFA–TE
RAID Array 310 Configuration and Maintenance Guide EK-SMCS2-UG
RAID Array 310 Deskside Subsystem Hardware User's Guide EK-SMCPL-UG
RAID Array 310 Command Console V1.1 User’s Guide AA–R24LA–TE

About This Guide
EK–SMRAB–IG. B01 xi
Conventions
This guide uses the following documentation conventions:
Table 2 Style Conventions
Style Meaning
boldface monospace type To be input by the user and filenames
plain monospace type Text
italic type
For emphasis and manual titles
# Represents the HP-UX system prompt. Do not type it as
part of information given here as to be input by the user.
In addition, the following naming convention is followed in describing RAID levels:
Table 3 Nomenclature Conventions
RAID Advisory Board Description RAID Array 310 Usage
RAID 0 STRIPEset
RAID 1 MIRRORset
RAID 0+1 STRIPED MIRRORset
RAID 5/3 RAIDset


EK–SMRAB–IG. B01 xiii
Getting Started
This section provides an overview for preparing and installing RAID Array 310 for HP-UX. Detailed
information is contained in Chapters 1 through 5.
Thank you for purchasing a StorageWorks RAID Array 310 Subsystem. The following is
an overview of the installation steps that are required.
NOTE
Installing the StorageWorks RAID Array 310 Subsystem
requires a general understanding of the following:
• HP 9000 Series 800 and 700 Computer Systems
• HP-UX 10.01, 10.10, or 10.20
• A fast, wide differential SCSI interconnection on the HP
machine
• Basic hardware installation procedures
Or, contact your service representative for installation
assistance.
Installation Roadmap
This section provides an overview/road map of the major steps required to install a RAID
Array 310 Subsystem. See the specified chapters for detailed procedures. (Depending
upon your specific configuration requirements, you may not need to perform all the tasks
listed.)
1. Perform the pre-installation steps listed below.
2. Unpack the RAID Array 310 Subsystem (Chapter 1)
3. Create a communications LUN (Chapter 2).
4. Install the SCSI Adapter in your HP system (if necessary)
5. Mount the software medium. The RAID Array 310 software and HP-UX support
files are provided on a CD-ROM.
6. Install the Command Console Agent (Chapter 4)
7. Plan your storagesets, which means “mapping out” your Stripeset, Mirrorset and/or
RAIDset configuration for the disks to be configured as your RAID Array. A useful
tool for this purpose is the blank configuration record forms provided in Appendix
A.
8. Create your storage configuration using either the Command Line Interpreter (CLI)
or the Command Console Client Graphical User Interface (Chapter 5).

Getting Started – RAID Array 310 V3.1 for HP–UX
xiv EK–SMRAB–IG. B01
Pre-Installation Steps
Before starting your installation, follow these steps:
• Verify the availability of user-supplied hardware and software.
• Inventory the contents of the StorageWorks RAID Array 310 Subsystem platform
kit.
• Inventory the contents of the StorageWorks RAID Array 310 Subsystem.
• Follow your normal procedures to back up your system files.
Verify User Supplied Hardware and Software
The StorageWorks RAID Array 310 Subsystem requires:
• A 9000 Series System that supports one of the following fast wide differential
(FWD) SCSI adapters:
– Built-in,
– HP–PB 28696A
– GSC A4107A
– HSC A4107A
– HSC A2969A
• The associated system hardware manual
• Appropriate tools to service your computer
• The HP–UX operating system V10.01 or higher
• If version 10.00 is running, upgrade to 10.01 before installing the RAID Array 310
Inventory the StorageWorks RAID Array 310 Platform Kit and Subsystem
Components
The Storage Works RAID Array 310 Platform Kit contains the following components:
• This guide.
• Release Notes
• A BN21G-xx SCSI cable with two straight high-density 68-pin connectors
• RAID Array 310 Controller Firmware License Keys
• Optional HP–PB 28696A FWD controller, depending on the type of platform kit
NOTE
Retain the Firmware License Keys information in a safe place.
It may be required to re-initialize the RAID Array Controller.

Getting Started
EK–SMRAB–IG. B01 xv
The StorageWorks RAID Array 310 Subsystem provides the following components:
•
RAID Array 310 Configuration and Maintenance Guide (EK-SMCS2-UG)
•
RAID Array 310 Deskside Subsystem Hardware User's Guide (EK-SMCPL-UG)
• The StorageWorks RAID Array 310 Subsystem
• Serial cabling kit (see Section 1.7.1) for connecting the maintenance port of the
controller to the serial port of the host computer, a personal computer, or a terminal
• Power Cables (2)
• Enclosure Keys
Perform a System Backup
Follow normal procedures to backup your system before installing the subsystem.


EK–SMRAB–IG. B01 1–1
1
Unpacking and Setting Up Your RAID Array 310
Subsystem Components
This chapter describes the site preparation and unpacking procedures for the RAID Array 310 Subsystem.
It also describes the procedure to recharge the controller write-back cache battery and making the CLI
interface connection between the subsystem and the host system or maintenance terminal.
1.1 Introduction
The installation of your RAID Array 310 subsystem is accomplished by performing the
following seven major steps:
• Unpacking and setting up the mechanical configuration (Chapter 1)
• Connecting ac power and recharging the controller cache battery (Chapter 1)
• Making the serial interface connection between the RAID Array 310 and the host
system or maintenance terminal (Chapter 1)
• Creating an initial RAID array controller configuration (Chapter 2)
• Preparing the HP9000 for use with the RAID Array Controller (Chapter 4)
1.2 Site Preparation
Before installing the subsystem, make sure that adequate space is available in front of the
enclosure for opening the front door (10 inches clearance) and around the enclosure for
adequate airflow. See Figure 1–1 for specific space requirements.

Getting Started - RAID Array 310 V3.1 for HP–UX
1–2 EK–SMRAB–IG. B01
Figure 1–1 Minimum Installation Clearance Measurements
1.3 Unpacking the RAID Array 310
The shipping containers provide maximum protection for the subsystem and all
components. We recommend that you unpack the subsystem in the installation area.
NOTE
Before unpacking the equipment, inspect the shipping carton
for signs of external damage. Report any damage to the local
carrier and to your reseller.
Refer to Figure 1–2 and complete the following procedure to unpack the subsystem:
1. Orient the shipping container as shown.
2. Open the container to remove the subsystem and packing material.
3. Remove the top foam blocks.
4. Remove the door.
5. Remove the subsystem.
6. Replace all packing material in the shipping container and store it for future use.

Chapter 1. Unpacking and Setting Up Your RAID Array 310 Subsystem Components
EK–SMRAB–IG. B01 1–3
Figure 1–2 Unpacking the RAID Array 310
1.4 Preparing the RAID Array 310 for Operation
Preparing the RAID Array 310 for operation involves the following procedures:
1. Mounting the base as described in Section 1.5.
2. Mounting the door.
3. Installing the disk Storage Building Blocks (SBB's).
4. Connecting the power, SCSI bus, and CLI serial cables.
5. Configuring the RAID Array 310.
6. Charging the controller cache battery.
7. Checking the subsystem for proper operation.

Getting Started - RAID Array 310 V3.1 for HP–UX
1–4 EK–SMRAB–IG. B01
1.5 Mounting the Base
Mount the stabilizing base to the subsystem as follows:
1. Place the subsystem on its top.
2. Align the base with the bottom of the subsystem as shown in Figure 1–3.
3. Install the four hex-head screws through the base into the subsystem and tighten the
screws using a 3/16 (5 mm) hex-head or flat-head screwdriver.
4. Set the subsystem on its base and continue the installation process.
Figure 1–3 Mounting the Base
1.6 Connecting the Subsystem Power Cords
The subsystem contains two identical power supplies which provide redundant power to
the RAID Array 310. Each supply is equipped with an ac power receptacle for
connection to a 125 or 250 Vac power source. The power supply automatically senses
and switches itself to accommodate either power source. Table 1–1 lists and describes
the Digital power cords available for the subsystem. Since these cords are country-
specific, ensure that your cords match those listed in Table 1–1 for your installation.
Obtain the correct power cords for your ac power source and connect them between the
ac receptacles on the power supplies (Figure 1–4) and the ac outlets (the power supply
automatically senses the voltage level and will work with either voltage). For optimal
fault tolerant operation, connect the supplies to independent ac sources.
Table of contents
Other StorageWorks Enclosure manuals
Popular Enclosure manuals by other brands

VIPowER
VIPowER VPM-62289 user manual

Aerocool
Aerocool Skyline-A-BK-v2 user manual
SilverStone
SilverStone DS322 manual
SilverStone
SilverStone raven RVX01 instruction manual
Lippert Components
Lippert Components Waste Master 362881 Installation and owner's manual
Eaton
Eaton Crouse-Hinds 9373-FB3 Series instruction manual

