Stricker Neodrives Operating instructions

Additional operating instructions
R&E Stricker Reha-Entwicklungen GmbH
Model series
Neodrives
This supplementary operating manual for the Neodrives model series supplements
the general operating manual for the City, Ultra, Sport, Neodrives and Lipo Smart mo-
del series..

Manufacturer
R&E Stricker Reha-Entwicklungen GmbH
Klotzberg 64
D-77815 Bühl
Phone: +49 7223 / 72510
Fax: +49 7223 / 74947
E-Mail: [email protected]
Web: www.stricker-handbikes.de
Misprints, errors and price or product changes reserved. Product changes include, but are not limited to, changes
resulting from further development of mechanics, software or legal requirements.
Date: 2.11.2021
© R&E Stricker Reha-Entwicklungen GmbH, Bühl
Reprint, even in part, only with the written permission of R&E Stricker Reha-Entwicklungen GmbH , Bühl.
Notice to reader
For reasons of readability, the masculine form has been chosen in these operating instructions;
nevertheless, the information refers to members of all genders.

R&E Stricker Reha-Entwicklungen GmbH
1
Additional operating instructions Neodrives
Table of contents
1 Declaration of Conformity ..................................................................................................................2
2 Introductory notes..............................................................................................................................2
3 Note on the general instructions for use.............................................................................................2
4 Product Description & Intended Use ...................................................................................................2
5 Safety and driving instructions for accident prevention ......................................................................2
5.1 Safety instructions for battery and charger...............................................................................................3
6 Operation ...........................................................................................................................................4
6.1 Key................................................................................................................................................................4
6.2 Start driving .................................................................................................................................................5
6.3 Display of the charge level..........................................................................................................................6
6.4 End of ride....................................................................................................................................................6
7 Battery and charger............................................................................................................................6
7.1 Charging the battery....................................................................................................................................6
7.2 Attaching the battery...................................................................................................................................7
7.3 Charging the battery....................................................................................................................................8
7.4 Storage.........................................................................................................................................................9
8 Repair, cleaning and maintenance ......................................................................................................9
8.1 Motor............................................................................................................................................................9
8.2 sMMI Connect .............................................................................................................................................9
8.3 Akku .......................................................................................................................................................... 10
8.4 Motor......................................................................................................................................................... 10
8.5 Removing the drive wheel........................................................................................................................ 10
8.6 Attaching the drive wheel ........................................................................................................................ 11
9 Transport .........................................................................................................................................12
9.1 Transportation in vehicle ......................................................................................................................... 12
10 Disposal and recycling .....................................................................................................................12
11 Warranty and guarantee ...................................................................................................................13
12 Liability ............................................................................................................................................13
Attachment ............................................................................................................................................14
A Technical data.......................................................................................................................................... 14

2
R&E Stricker Reha-Entwicklungen GmbHAdditional operating instructions Neodrives
Declaration of Conformity
1 Declaration of Conformity
The device complies with the current EU standards and directives. We certify this in
the EC Declaration of Conformity. If required, we will be pleased to send you the
corresponding declaration of conformity. Our power assist devices have been tested by
means of an electromagnetic compatibility test (EMC).
In the event of a change not agreed with R&E Stricker GmbH, this declaration loses its validity.
2 Introductory notes
WARNING
Before operating the handcycle, please read these instructions for use and all other instructions for use
supplied with the handcycle carefully and observe them.
WARNING
Visually impaired persons or persons with cognitive impairments must have the information material
and the operating instructions read aloud by assistants. Corresponding documents are available on our
website www.stricker-handbikes.de on the Internet. Videos and photos are also available there.
DEALER NOTICE
Be sure to hand out these instructions for use to each customer when handing over the handcycle and
expressly draw the customer‘s attention to the safety and hazard information.
Never deliver a handbike without operating instructions!
3 Note on the general instructions for use
WARNING
This is the supplementary instruction manual for handbikes of the Neodrives model series. It supplements
the general instructions for use for the City, Ultra, Sport, Neodrives and Lipo Smart model series. Be sure
to read both instruction manuals before operating the handcycle.
4 Product Description & Intended Use
The handbike is coupled to a manual wheelchair as an electrically assisted manual traction aid. This
allows the rider to be supported in his mobility. The aim is to extend the range of action by enabling longer
distances to be covered more easily and independently. Coupling the handbike creates a three-wheeled
vehicle with three relatively large wheels. The handbike therefore improves driving characteristics on
uneven surfaces. Obstacles can also be overcome more easily. Driving downhill and on slopes becomes
safer due to the additional braking systems. The handbike can be independently coupled to and released
from the wheelchair by the rider. The wheelchair as such is not changed and its characteristics remain
completely unchanged.
5 Safety and driving instructions for accident prevention
WARNING
These instructions are for your own safety. Please read them carefully before using the handbike and
follow the instructions! Failure to observe the instructions for use could result in damage to the product
as well as serious personal injury. We accept no liability for damage resulting from failure to observe the
operating instructions.

R&E Stricker Reha-Entwicklungen GmbH
3
Additional operating instructions Neodrives
Safety and driving instructions for accident prevention
NOTE
Observe all safety and hazard information and
instructions, both in this and in all other operating
instructions supplied.
5.1 Safety instructions for battery
and charger
WARNING
Before performing any repair, cleaning or
maintenance tasks on the handbike, switch off the
electrical components and remove the batteries
from the handbike.
The batteries supplied are used exclusively to
operate the drive systems of the handbike. Do not
connect any other systems to the battery. Any use
beyond this requires the written approval of the
manufacturer. All information is state of the art at
the time of printing. Cases of misuse include:
• Use of the battery contrary to the description
and instructions in the user manual.
• Use of the battery in excess of the technical
performance limits
• Technical modication of the battery
• Modication of the battery software
• Use of the battery to supply other systems
We accept no liability for damage in the event of
misuse.
HEALTH INFORMATION
In case of contact with leaking gases, supply
fresh air. In case of body contact with battery
uids, rinse the affected body part with plenty
of water. In case of contact with mucous
membranes or discomfort, consult a physician.
5.1.1 Operation
Make sure that the batteries are rmly seated in
the holders provided and lock the batteries. This
applies especially if you have previously removed
the batteries from the power assist device for
charging.
Observe the battery temperature on the display
during extreme uphill travel. The temperature must
not exceed 45 °C. To prevent overheating, take an
operating break to relieve the batteries.
Only operate the battery in ambient temperatures
between -20 °C and 50 °C. Operation outside the
temperature range shortens the service life of the
battery and poses a risk of ignition.
Do not subject the battery to shocks. If the battery
has been dropped or has taken a knock, the battery
must be checked by the manufacturer. Contact
your dealer or the manufacturer for return and
repair/disposal procedures. This also applies to
otherwise damaged or defective batteries. Never
continue to use a damaged or defective battery. Do
not open the battery yourself.
Keep the battery dry and clean. Protect the battery
against the ingress of moisture or foreign particles.
Do not connect the battery‘s contacts to metallic
or other conductive objects. Keep the battery away
from small metallic objects such as screws, coins,
paper clips, keys or similar to avoid a short circuit.
Clean dirty contacts with a dry, clean cloth only. Do
not immerse the battery in water.
If you notice that the battery is overheating, leaking,
smoking, emitting an unusual odour or deforming,
stop using the battery immediately and switch it
off.
Protect the battery from heat and open re
(radiators, microwaves, ovens, strong sunlight).
Exposure to heat can cause ignition and explosion.
Do not open the battery casing. Do not
disassemble the battery. Damage to the battery
cells or contact with oxygen can cause re and
explosion. Opening the battery will void the
warranty.
FIRE FIGHTING
Do not attempt to extinguish lithium-ion
batteries with water or other liquids in the event
of a re. Sand is recommended by battery cell
manufacturers as the only extinguishing agent.
There is a risk of explosion in the event of a re.
Extinguish lead-gel batteries with water, foam or
CO2. Dangerous gases may be formed in a re
involving lead-gel batteries. Do not breathe in the
gases under any circumstances.
5.1.2 Charging process
WARNING
Do not leave the battery unattended during the
charging process.

4
R&E Stricker Reha-Entwicklungen GmbHAdditional operating instructions Neodrives
Operation
Only charge the battery at temperatures between
0 and 40 °C. A charging process outside the
temperature range is automatically aborted by the
battery. To optimize the service life, charge the
battery at temperatures of 10-30 °C.
Charge the battery in a sufciently ventilated, dry
and dust-free environment. Ensure sufcient air
circulation during the charging process.
Do not charge the battery near ammable
substances (solids, liquids, gases).
Protect the battery from moisture during the
charging process. Do not charge the battery in
rooms where water could condense on the battery
or the charger. Only use the charger when it is
completely dry. If condensation has formed, allow
the charger to dry completely before charging.
Only use the charger supplied to charge the
battery. Using any other charger may cause
malfunction, damage, defect, ignition or explosion.
Do not charge the battery with a defective charger.
Replace a defective charger immediately.
Do not use a charger that has been knocked
or dropped. Do not open or repair the charger
yourself.
Do not charge damaged batteries.
Avoid unnecessary charging and do not charge the
battery for a long time when not in use.
The battery charging process is automatically
terminated as soon as the battery is fully charged.
When charging is complete, rst disconnect the
charger from the mains socket and then from the
battery.
Do not carry the charger by the mains cable or the
charging cable. Do not pull on the mains cable to
disconnect the charger from the mains socket. Do
not subject the cables and plugs to pressure or
pinch the parts. There is a risk of electric shock or
ignition.
Position the charger so that no one can step on
or trip over the cable or charger. Also protect the
charger and all related components from other
harmful inuences or stresses.
5.1.3 Storage
Do not store the batteries in places that are
exposed to heat for long periods of time (sunlit
car boot, garden shed, etc.). The service life of
the battery depends, among other things, on the
storage conditions.
Only use your car for transport, not for storing or
keeping the battery.
For optimum service life, store the battery at
18-23 °C and a maximum humidity of 80 %. Do not
expose the battery to moisture (rain, snow, etc.)
during storage.
Charge the battery before storage according to
the specications of the respective battery. Check
the charge level at least every three months and
recharge the battery if necessary. („7.4 Storage“).
Ensure that the battery is stored away from
damage and unauthorised access.
Store the battery out of the reach of children.
6 Operation
NOTE
Unpacking and installation video can be found on
www.stricker-handbikes.de/installationsupport
NOTE
The contents listed in this user manual for
Neodrive‘s components were provided to us with
the kind support of Alber GmbH (93.0001.4.01.03
as of: 02.10.2014). The original instructions can
also be found on the website www.neodrives.
com in the Service > Downloads tab. More
comprehensive information on assembly and
repair is also available there.
6.1 Key
Two keys for locking the battery in the battery
rail are included in the scope of delivery. The
identication engraved on the key is noted by the
specialist dealer in the delivery bill of the handbike
so that they can be reordered if necessary. Please
therefore check whether the key marking is entered
in the papers. If this is not the case, please add
it. Keys can only be reordered from AXA via the
specialist trade (as of November 2013). (Fig. 1).

R&E Stricker Reha-Entwicklungen GmbH
5
Additional operating instructions Neodrives
Operation
Fig. 1: Key with marking
6.2 Start driving
INFORMATION
Basically, there are two different operating
modes for the rechargeable battery. The battery
is either in „Active Mode“ or in „Deep Sleep
Mode“. In „Active Mode“, the battery consumes
at least 5 mA per hour (self-consumption of the
electronics). To keep the self-consumption as low
as possible, the battery automatically switches to
the so-called „Deep Sleep Mode“ after 48 hours.
If you have used the battery in the last 48 hours,
you can start up the handbike via the neodrives
sMMI Connect.
If you have not used the battery in the last 48
hours, switch it on using the On/Off button [4]).
To do this, briey press the button. Successful
switching on is signaled by the LEDs [5] ashing
three times. The battery is now ready for operation
and you can now start up the handbike via the
neodrives sMMI Connect. (Fig. 2).
Fig. 2: Switching on the battery
NOTE
To operate the neodrives sMMI Connect terminal,
please read the supplied neodrives sMMI Connect
Quick Start Guide. This is only available in German
and English.
Fig. 3: neodrives sMMi Connect Kurzanleitung
If you have not yet connected the motor cable to
the battery, the battery will still be set to „Active
Mode“ when switched on. If the battery cannot be
switched on, the cell voltage may be too low. In this
case, connect the charger and then press the On/
Off button [4]. The battery is then charged for one
minute.

6
R&E Stricker Reha-Entwicklungen GmbHAdditional operating instructions Neodrives
Battery and charger
NOTE
If the system comes to a standstill due to
increased temperatures (caused, for example,
by uninterrupted driving or at a standstill due to
continuous direct sunlight), allow the motor to
cool down for about 10 minutes before continuing
your journey.
6.3 Display of the charge level
You can check the charge status of the battery
at any time using the LED display. If the battery
has not been used for more than 48 hours, briey
press the button [4]. The battery is switched on, all
LEDs (a to e) ash three times. Press the button [4]
again briey. Now the capacity of the accumulator
is indicated by the LEDs as shown in the following
table.
If the battery has been used within the last 48
hours, press the button [4] briey. Now the capacity
of the battery, as shown in the table below, is
indicated by the LEDs.
LED is on LED ashes Capacity
- a < 19 %
a - 20 – 39 %
a, b - 40 – 59 %
a, b, c - 60 – 79 %
a, b, c, d - 80 – 99 %
a, b, c, d, e - 100 %
Fig. 4: Neodrives battery LED display
6.4 End of ride
The battery is switched off using the sMMI
controller (see neodrives sMMI Connect Quick
Start Guide). The battery is initially set to „Active
Mode“ for 48 hours. This means that the sMMI
can be reactivated at any time during this period
without having to switch on the battery rst. The
power required for this is minimal.
7 Battery and charger
SAFETY NOTICE
Be sure to read and observe all safety and hazard
information „5.1 Safety instructions for battery
and charger“.
WARRANTY NOTICE
Batteries are wearing parts. The warranty period
is 24 months.
DISPOSAL INSTRUCTIONS
Dispose of batteries only at designated disposal
points. If you have any questions, please contact
a specialist dealer or the manufacturer.
7.1 Charging the battery
WARNING
Before using the charger, check that the mains
voltage matches the connection voltage of the
charger. The connection voltage of the charger is
indicated on its type plate.
We recommend charging the battery after each
use of the pulling device, if possible. If you have
completely discharged the battery, charge it again
immediately.
Charge the battery before each use. Check the
charge level of the battery before each trip. If the
battery is completely discharged during travel,
further travel is only possible manually via the
cranks.
Only switch on the battery for use. Switch off the
battery immediately when you stop the traction
unit.

R&E Stricker Reha-Entwicklungen GmbH
7
Additional operating instructions Neodrives
Battery and charger
7.2 Attaching the battery
Place the battery [1] on the battery rail [6] mounted
on the handbike. Push the battery [1] to the front
edge of the battery rail [6] as shown in the diagram.
Lock the battery [1] by gently turning the key [2]
clockwise until it stops. The battery can now no
longer be removed from the battery rail. Remove
the key [2] from the battery [1]. (Fig. 5).
Fig. 5: Insert battery into battery rail
Insert the plug [7] of the cable coming from the
motor into the socket [3] on the battery [1]. The
correct alignment and locking of the two parts is
done automatically by a magnetic lock. Before
inserting the plug [7] into the socket [3], make sure
that both parts are clean and that there are no
metallic particles in them. If these are present, they
must be removed with a clean, dry cloth (Fig. 6).
Fig. 6: Establish cable connection
Switch off the handbike at the sMMI. Then pull the
plug of the motor cable [7] out of the socket [3] .
Make sure that the plug of the motor cable [7] does
not come into contact with any metallic particles
when it is removed (risk of contamination). (Fig. 7).
Fig. 7: Disconnect cable connection
Insert the key [2] into the lock on the battery [1].
Turn the key [2] counterclockwise until it stops.
The lock is now released and the key can no longer
be removed from the battery. Pull the battery [1]
approx. 2 cm upwards along the rail [6] and then

8
R&E Stricker Reha-Entwicklungen GmbHAdditional operating instructions Neodrives
Battery and charger
remove it completely. Place the battery in a clean
place. Make sure that the socket [3] does not
come into contact with any metallic particles when
placing the battery (risk of contamination).(Fig. 8).
Fig. 8: Remove battery from battery rail
7.3 Charging the battery
Fully charge the battery before using it for the rst
time. The charge level of the rechargeable battery
is generally 30 % at delivery. The rechargeable
battery can be charged in any state of charge
without this affecting its service life. The battery
reaches its maximum service life when it is
charged at an ambient temperature between 10 °C
and 30 °C.
Fig. 9: Connecting the charger
The battery [1] does not have to be removed
from the handpiece for charging, but can remain
attached. Pull the plug of the motor cable [7] out
of the socket. Insert the plug [9] of the charger into
the socket [3] on the battery. The correct alignment
and locking of the two parts is done automatically
by a magnetic lock. (Fig. 7) (Fig. 9).
Carry out the charging process according to the
instructions in the charger operating manual. Also
observe the notes on the charging process. Before
inserting the plug [9] into the socket [3], make sure
that both parts are clean and that there are no
metallic particles in them. If these are present, they
must be removed with a clean dry cloth. („5.1.2
Charging process“)
When charging the battery, follow the instructions
in the charger operating manual. Also observe
the safety and warning notes in „5.1 Safety
instructions for battery and charger“ & „7 Battery
and charger“.

R&E Stricker Reha-Entwicklungen GmbH
9
Additional operating instructions Neodrives
Repair, cleaning and maintenance
Fig. 10: LEDs during charging
The following table shows the LED display [5]
of the battery during the charging process. If an
error occurs during the charging process, all LEDs
light up. Check whether all criteria (e.g. ambient
temperature, correctly attached charging plug, etc.)
for the charging process are fullled in accordance
with this and the instructions for use enclosed
with the charger are fullled. Do not leave the
charger connected to the power supply for longer
than is necessary for the charging process. After
the charging process, rst disconnect the charger
from the mains socket and then from the battery.
Always check the charge status of the battery
before starting to drive. The battery should be
fully charged before the start of the journey in
order to have the motor support available at all
times. The battery may only be charged in a dry
room at temperatures between 0° and a maximum
of 40 °Celsius. Observe the instructions in the
operating manual enclosed with the charger.
Observe the safety and warning instructions for the
battery in chapters 2.1 to 2.5 of these operating
instructions (Fig. 10).
LED is on LED ashes Charge status
- a ca. 0-19 %
a - ca. 20 – 39 %
a, b - ca. 40 – 59 %
a, b, c - ca. 60 – 79 %
a, b, c, d - ca. 80 – 99 %
a, b, c, d, e - Battery 100 %
charged.
7.4 Storage
Charge the battery to 70 % before storing it for
a longer period. Check the charge level every
three months and recharge the battery to 70 %
if necessary. Also observe the notes in „5.1.3
Storage“.
8 Repair, cleaning and
maintenance
Never use benzene, thinner, acetone or similar
agents for any cleaning processes. Likewise, do
not use abrasive or aggressive cleaning agents.
Instead, use only commercially available household
cleaning agents and disinfectants (isopropanol).
8.1 Motor
The motor of your handbike should be regularly
cleaned of dirt, preferably with a dry brush or a
damp (not wet) cloth. Cleaning should not be done
with running water such as a water hose or even a
high-pressure cleaner. However, driving in the rain
and on wet roads is possible without any problems.
Penetrating water can destroy the engine. When
cleaning, therefore, always ensure that neither
liquids nor moisture penetrate the engine.
Do not clean the engine when it is warm, e.g.
directly after a journey. Wait until it has cooled
down. Otherwise, damage may occur.
If the motor is removed, e.g. for cleaning purposes,
it must not be held or transported by the cables
under any circumstances, otherwise there is a risk
of cable breakage.
If the motor has been removed from the frame of
the handbike, the plug of the motor and the socket
of the cable to the battery pack must be checked
or cleaned with regard to possible contamination
before assembly.
8.2 sMMI Connect
The contacts of the sMMI dock are spring-loaded
and should be cleaned from time to time with
a contact spray to ensure their proper and
long-lasting function.
The sMMI housing may only be cleaned with a
damp (not wet) cloth.

10
R&E Stricker Reha-Entwicklungen GmbHAdditional operating instructions Neodrives
Repair, cleaning and maintenance
8.3 Akku
Never use benzene, thinner, acetone or similar
agents for any cleaning processes. Instead, use
only commercially available household cleaning
agents and disinfectants (isopropanol).
The plug of the charging cable on the charger [9],
the plug of the motor cable [7] and the charging
socket [3] on the battery may only be cleaned with
a dry cloth.
The battery must never be sprayed with a steam jet
or similar.
8.4 Motor
The drive wheel of your hand bike can be removed
from the bike frame at any time, for example for
cleaning purposes or in case of a at tire. Proceed
with extreme care during this process and during
subsequent assembly and, in particular, also
observe the instructions and information provided
by the manufacturers of the various components
attached to the wheel, especially the brake disc.
NOTE
For reasons of clarity, only the drive motor
integrated in the wheel is shown in the following
graphics, but not the complete drive wheel.
8.5 Removing the drive wheel
Before removing the drive wheel, note or memorize
the cable routing as well as the fastening points
of the cable ties. First loosen and remove all cable
ties with which the cable [16] coming from the
motor as well as cables and supply lines of other
components are fastened to the bicycle frame.
Then disconnect the plug [15] on the motor cable
[16] from the socket [17] on the battery cable.
Loosen the two nuts [18] or the quick release with
which the wheel is attached to the frame so that
the complete wheel can be removed from the
frame of your handbike. (Fig. 14)(Fig. 11).
Fig. 11: Cable connection to wheel hub motor
NOTE
Note or mark the position of the torque arm
[20] . When attaching the wheel later, it must be
attached in exactly the same position as before
removal. (Fig. 14).
WARNING
Never hold or transport the removed wheel by the
cable coming from the motor [16]! There is a risk
of cable breakage.

R&E Stricker Reha-Entwicklungen GmbH
11
Additional operating instructions Neodrives
Repair, cleaning and maintenance
Fig. 12: Do not carry motor by cable
8.6 Attaching the drive wheel
Make sure that all components attached to the
wheel have been mounted according to the
instructions and specications of the respective
manufacturer. This applies in particular to the
brake and the gear shift. Do not forget to remount
the torque arm [20] in the same position in which it
was previously removed. Then push the wheel into
the receptacle of the frame and tighten it with the
axle nut [18] in the following order:
• rst tighten on the side of the gear shift ( Fig.
13)
• then tighten on the brake side (Fig. 14)
The tightening torque of both nuts is between 30
and 40 Nm. Also make sure that the ratchet washer
[19] is under the axle nut, otherwise there is a risk
that the axle nut [18] will come loose.
Fig. 13: Fastening to the fork [1]
Fig. 14: Attachment to the fork [2] and torque arm
If your wheels are equipped with quick-releases,
please observe the manufacturer‘s specications
for mounting and tightening torque.

12
R&E Stricker Reha-Entwicklungen GmbHAdditional operating instructions Neodrives
Transport
Once the wheel is correctly attached to the frame,
the motor can be connected to the cable end that
leads to the battery. Make sure that the plug [15] is
correctly aligned with the socket [17]. The rounded
surfaces ([A] and [B]) must be aligned with each
other! Now fasten all cables and supply lines to the
bicycle frame again with cable ties and carry out a
nal function test (Fig. 15).
Fig. 15: Correct connection of cables
WARNING
Make sure that the cable is laid correctly, as
incorrect laying could result in the cable getting
caught in the brake disc, the drive or in the
spokes, which could cause the bike to lock up and
fall.
NOTE
In all your assembly work, be sure to follow
the instructions and specications of the
manufacturers of the various components
attached to the wheel. This applies in particular to
the brakes, gears and quick-releases.
WARNING
Never mount the motor without the torque arm
[20] . This would result in a total loss (twisting
off of the cable). In this case, all guarantee and
warranty claims are void. (Fig. 14).
NOTE
In addition to your repair tools, also carry 5 cable
ties with you in order to be able to securely fasten
any cables that may come loose during a trip.
9 Transport
NOTE
Special legal regulations apply to the transport
and shipping of lithium-ion batteries and must be
strictly observed.
The shipping of lithium-ion batteries is strictly
regulated. Therefore, take a defective battery
personally to your specialist dealer. Contact your
specialist dealer beforehand.
The legal transport regulations for taking
lithium-ion batteries with you may change annually.
Before starting a journey, enquire in good time
about the applicable regulations with the airline or
shipping company or your tour operator.
9.1 Transportation in vehicle
Always transport the handbike only when it is
disconnected. If necessary, detach the attachment
stand from the handbike. Secure all individual parts
against slipping. The batteries can be transported
in any position, as they are leak-proof batteries.
Only use your car for transport, not for storing or
keeping the battery.
NOTE
Remove the battery and the sMMI Connect from
the handbike to avoid damage during loading and
during the journey. Make sure that cable ends
cannot cause any damage to the handbike or your
car while driving.
10 Disposal and recycling
Electrical appliances, batteries, accessories
and packaging should be recycled in an
environmentally friendly manner.
Avoid taping parcel tape to the handcycle, as
adhesive residue is difcult to remove.
Dispose of all other components of your handbike
in accordance with the regulations of your region at
appropriate collection points or in household waste
(paper, cardboard, plastic packaging).

R&E Stricker Reha-Entwicklungen GmbH
13
Additional operating instructions Neodrives
Warranty and guarantee
11 Warranty and guarantee
NOTE
Do not throw the batteries, chargers and electrical
components of your handbike in the household
waste. According to the current EU directives,
electrical devices and batteries must be collected
separately and recycled in an environmentally
friendly manner.
Complaints due to incomplete or incorrect delivery
or recognizable defects must be made in writing
immediately, at the latest 8 days after receipt of
the goods. Our obligation in the case of justied
complaints is limited to replacement delivery or
repair by us. In the case of warranty repairs, which
have been agreed with us in advance, the rejected
parts are to be sent back to us. Modication or
repair work carried out by the customer or a third
party without our prior consent shall invalidate the
warranty obligation.
The warranty period for the handbike is 2 years.
The batteries for our Lipo and Neodrives models
also have a 2 year warranty. Not covered by the
warranty are defects due to wear and tear or
improper handling. Wear parts are for example:
tires, brake pads, Bowden cables, light bulbs. Also
wear parts are lead-acid batteries, on which we
grant a half-year warranty.
12 Liability
NOTE
The information on liability is taken from our
general terms and conditions (as at the time
of printing). These can be viewed in full at the
web address https://stricker-handbikes.de/en/
general-business-terms.
We shall only be liable for consequential damages
or other claims for damages if we, our legal
representatives or vicarious agents are guilty of
intent or gross negligence insofar as this is in
accordance with the statutory provisions.

14
R&E Stricker Reha-Entwicklungen GmbHAdditional operating instructions Neodrives
Liability
Attachment
A Technical data
Power Assist Device
from 22
kg
Total weight from
18,5 kg
Range**
Drive 120 km
Wheel hub motor electric 25
km/h
Rated power (Peak) 250 W
(650 W)
Operating voltage 36 V
Nominal torque 12 Nm
Peak torque 40 Nm
Efciency 80 %
(incl. electronics)
Control power electronics integrated in the wheel
hub
Cassette mount standard plug-in cassette, up to
10-speed
Brake disc from 160 mm diameter
Torque absorption variable torque support
adaptable to dropout
Weight 4.36 kg (drive only incl. plug and cable,
without brake disc, freewheel, cassette)
Smart MMI
Display control monochrome
Display Diagonal, resolution 2,4 Zoll,
240 X 320 Pixel
Dimensions sMMI without dock (B X L
X H) 53 mm x 85 mm x 14 mm
Connectivity
Micro-B 1.1 USB, 5 volt power supply, 500 mA,
Connection to PC with diagnostic and
parameterization software
Mechanical/electrical contacting Twist
bayonet lock (twist-to-lock), corrosion-protected
contacts, spring-mounted
Lighting LED
backlight, 70 - 350 cd/m²
Display lens
scratch-resistant, coated acrylic glass pane
Weight sMMI (removed) 55 g
Smart MMI Dock
Controller 23 mm
inner diameter, 3 buttons (up, down, menu), xed
wired
Mounting plate Stem
and handlebar mount, angle adjustable in 10°
increments,
Height adjustable with spacers
Weight (incl. cable and remote control) 60 g
Total system
Operating temperature - 20 °C
to + 50 °C (below 0 °C automatic deactivation of
recuperation or
deactivation of the recuperation or the brake
assistant)
Protection class IP65
Battery
Designation
10INR19/66-5
Battery type Lithium
Ion
Nominal capacity in Ah 17.25
Rated voltage in V 36.2
End of charge voltage in V 42
Total energy in Wh 515
Maximum discharge current in A 30
Charging ambient temperature 0 °C to
40 °C
Operating ambient temperature -20 °C
to 60 °C
Number of cells 50
Protection class IP54

R&E Stricker Reha-Entwicklungen GmbH
15
Additional operating instructions Neodrives
Attachment
Weight approx. 3.5 kg
(*) The transport weight is the total weight minus the battery and the mounting frame. It is recommended to
remove these parts for easier transport.
(**) The range varies depending on the battery used, as well as the terrain traveled and the prevailing driving
conditions. Under optimal riding conditions (for example, a level terrain, freshly charged batteries, ambient
temperature of 20 °C, steady ride, etc.), a drive power of 100 watts and a pedaling power of 100 watts, the
indicated range can be achieved.
Subject to changes in technology and design due to continuous further developments.
These operating instructions are available for download from our website www.neodrives.de. If you need a
version with a larger font, please contact the Alber Service Center.

16
R&E Stricker Reha-Entwicklungen GmbHAdditional operating instructions Neodrives
Attachment

R&E Stricker Reha-Entwicklungen GmbH
17
Additional operating instructions Neodrives

Misprints, errors and price or product changes reserved. Product changes include, but are not limited to, changes
resulting from further development of mechanics, software or legal requirements.
Date: 2.11.2021
© R&E Stricker Reha-Entwicklungen GmbH, Bühl
Reprint, even in part, only with the written permission of R&E Stricker Reha-Entwicklungen GmbH , Bühl.
V-Nr.: NEO EN EC 20211102 1119
Table of contents
Other Stricker Bicycle manuals
Stricker
Stricker Lipo Smart Series User manual
Stricker
Stricker Lipo Lomo V16/4 User manual

Stricker
Stricker City User manual
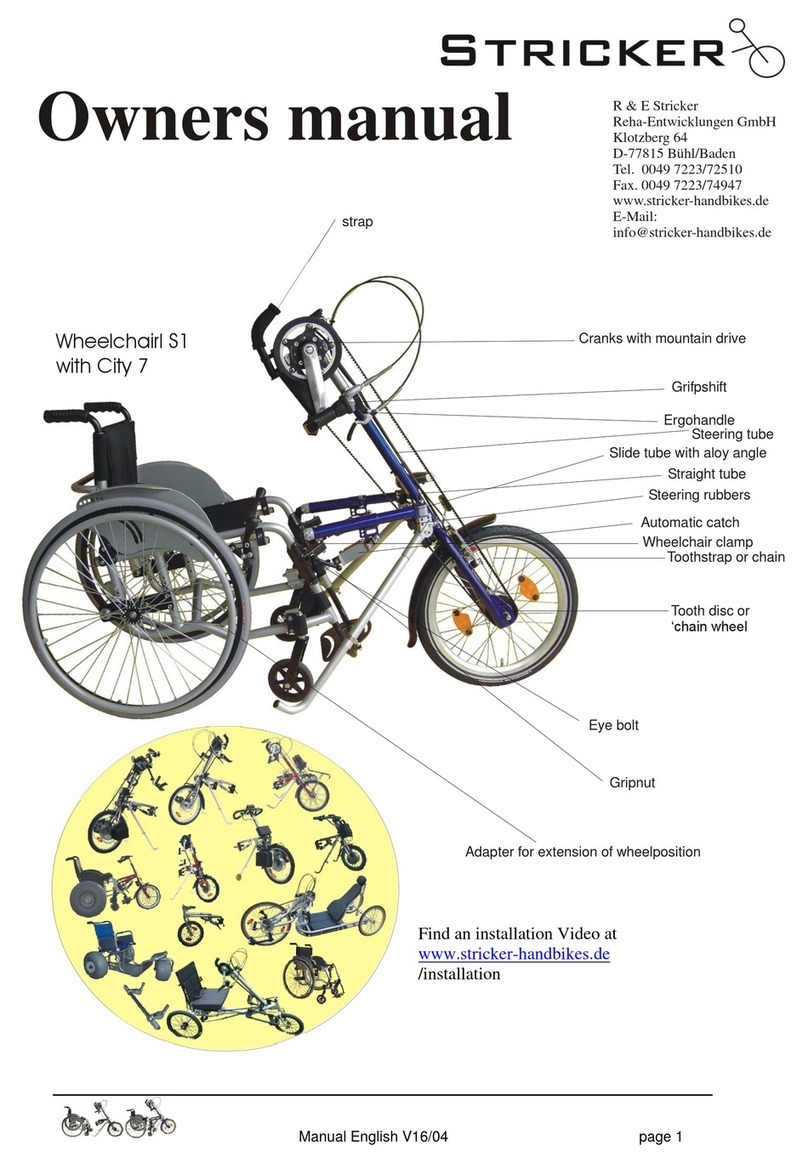
Stricker
Stricker CITY 7 User manual
Stricker
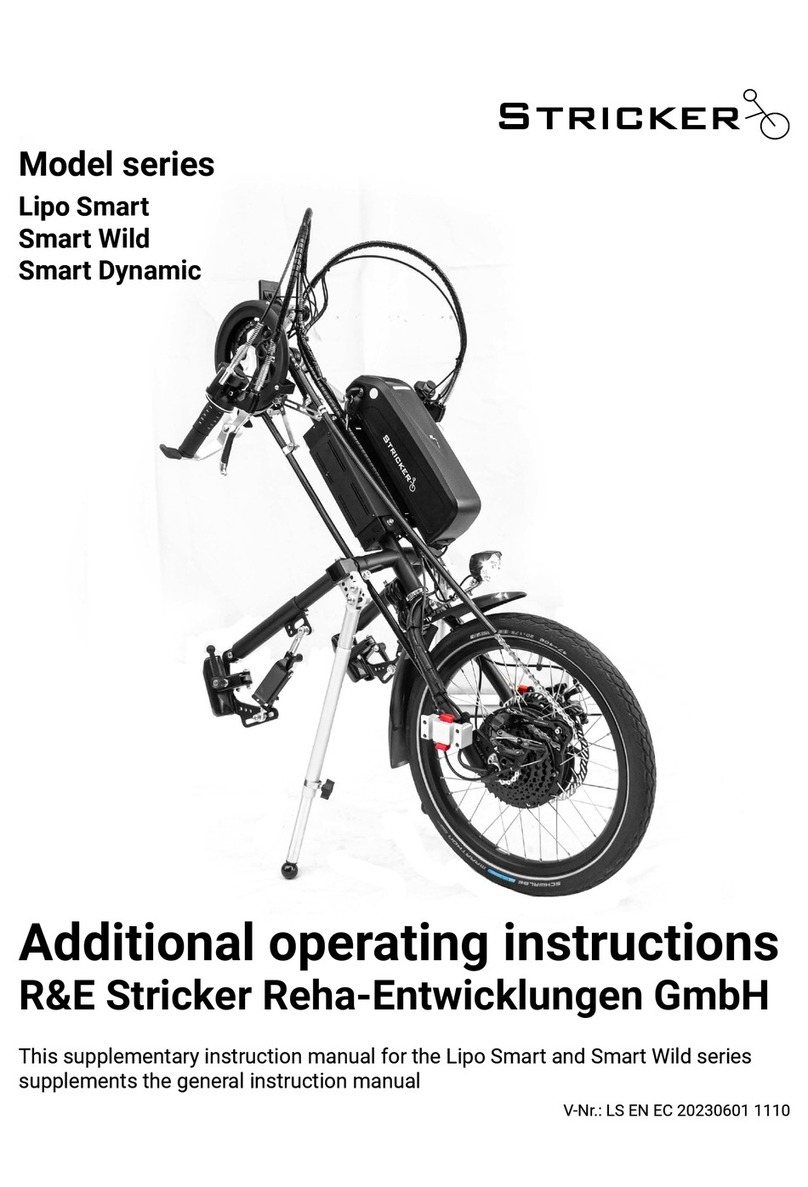
Stricker Lipo Smart Series Operating instructions

Stricker
Stricker Lipo Smart Series Operating instructions
Stricker
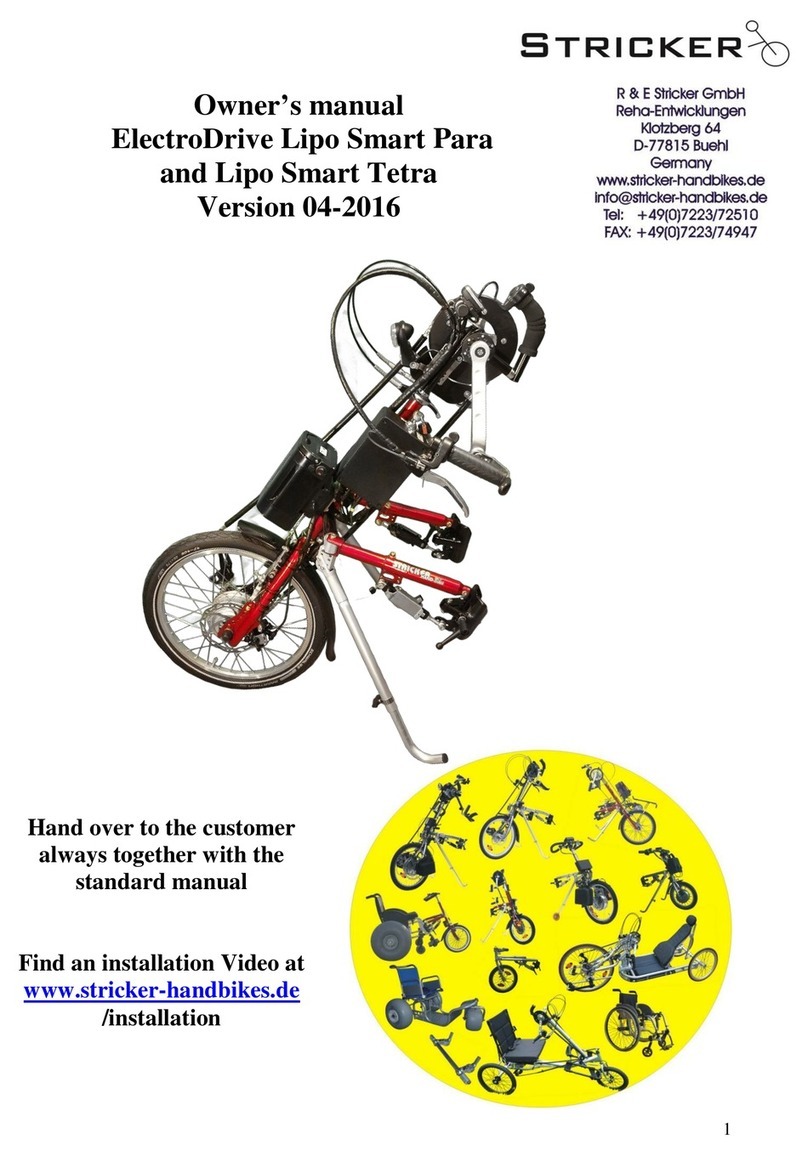
Stricker Lipo Smart Para User manual
Popular Bicycle manuals by other brands

Yamaha
Yamaha Waverunner FX 160 Service manual

Liberty 123
Liberty 123 24v FoldNGo user manual

Urban Arrow
Urban Arrow Family quick start guide
Juiced Bikes
Juiced Bikes RipCurrent S owner's manual
Flyer
Flyer Upstreet2 Folding Instructions
J&B Importers
J&B Importers Sun Bicycles HT-3 Hand-Trike owner's manual
