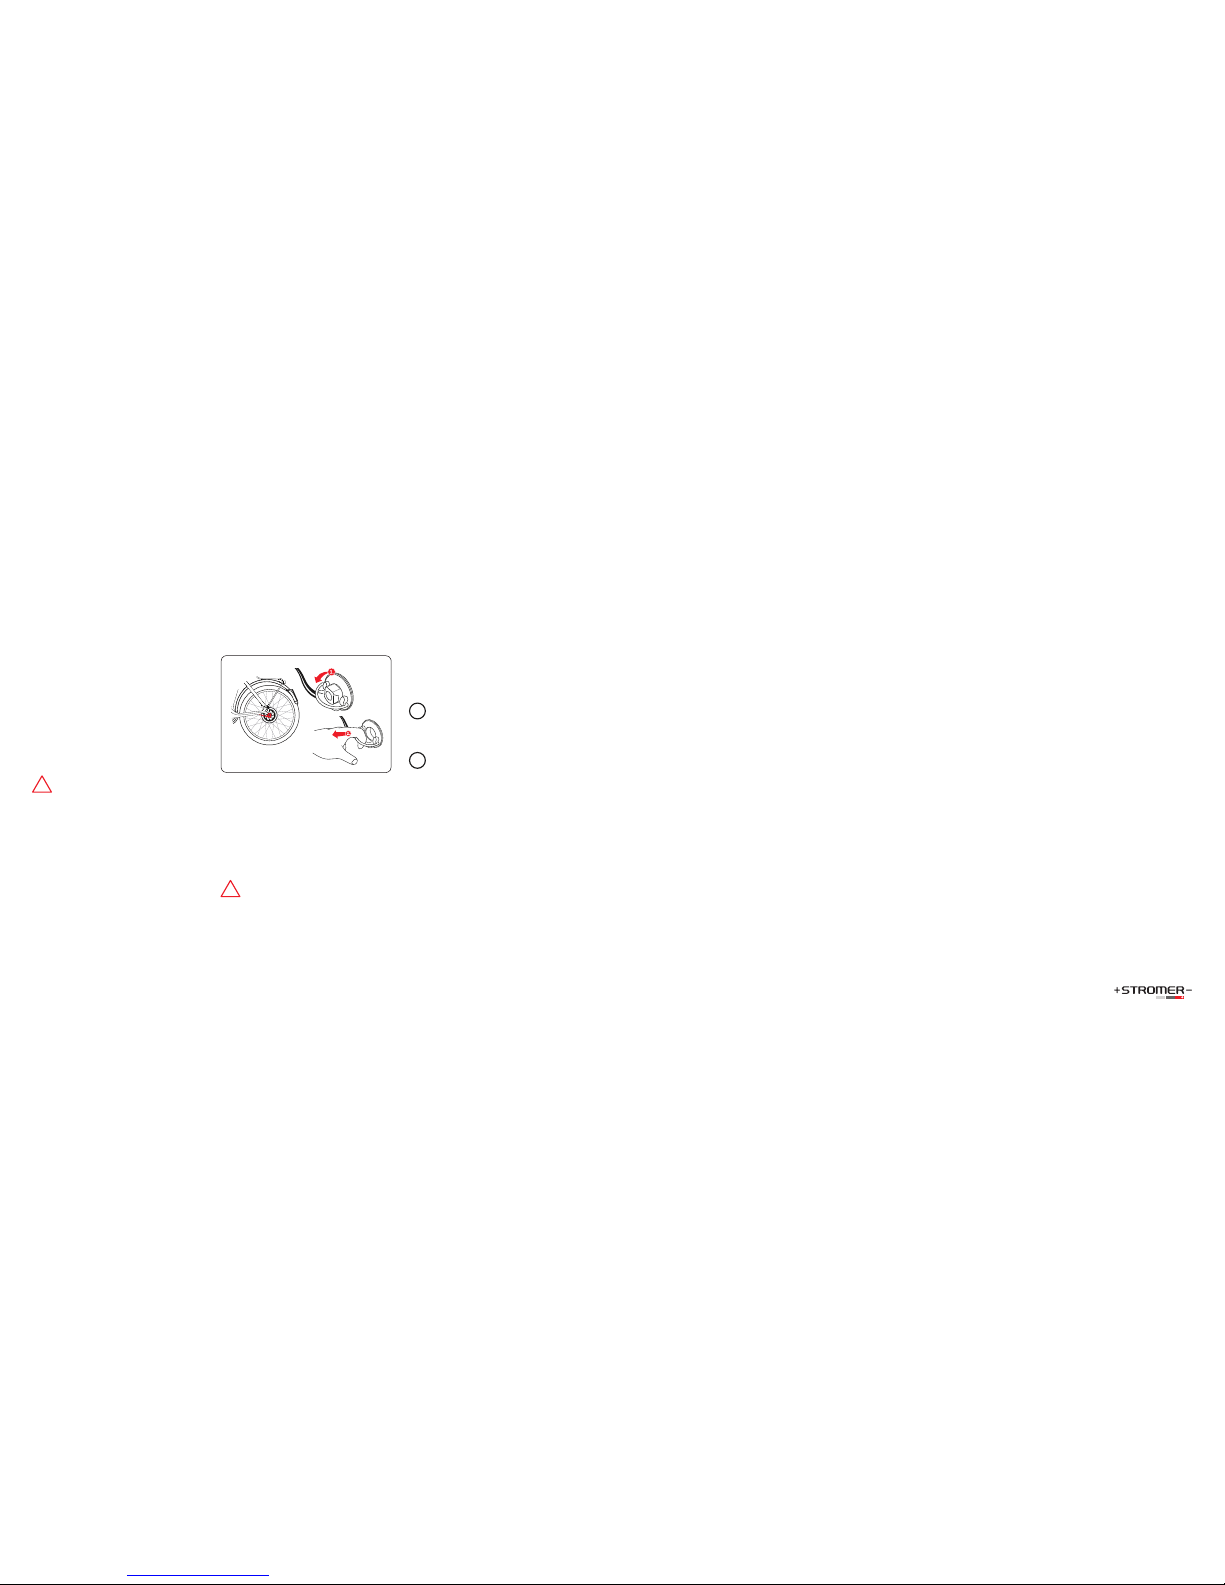
8 | 9
Insert the key gently into the lock and turn it
clockwise until the battery box opens.
Pull out the battery.
The battery is very heavy. Do not drop it. You
could injure yourself and/or damage the battery.
Battery insertion
Insert the battery in the battery box. Make sure
that the EnergyBus plug is pointing down and
the lettering THIS SIDE UP is visible on the top.
Slide the battery down until this engages.
Use the flat of your hand to press the flap until this
engages with a slight click and then withdraw the
key from the lock.
Never leave the key in the lock. You could
injure yourself on the protruding key or get caught
on it which could lead to a crash.
Always remove the key from the lock and retain
it in a safe place so that it does not break and is
not lost.
Battery charging
The ST2 battery may only be charged with the ST2
charger. The battery can be charged directly in the
Stromer or separately. The charging process with
the ST2 battery charger is described below.
Before the first charging process, be sure to
read the notes on the battery charger.
1. Connect the battery charger to the power
network. The LED lights up red.
2. Loosely hold the charging cable in your
hands and slowly guide it near to the socket
of the battery (A) or your ST2 (B). The plug is
automatically correctly aligned by means of the
integrated magnets. The magnets will help you
align the connector correctly.
Never force the battery charging cable into
the charging socket. Make sure that the magnets
on the Energybus connector can align the charg-
ing cable correctly before you connect it to the
charging socket. Incorrect alignment could dam-
age the ST2’s electronics.
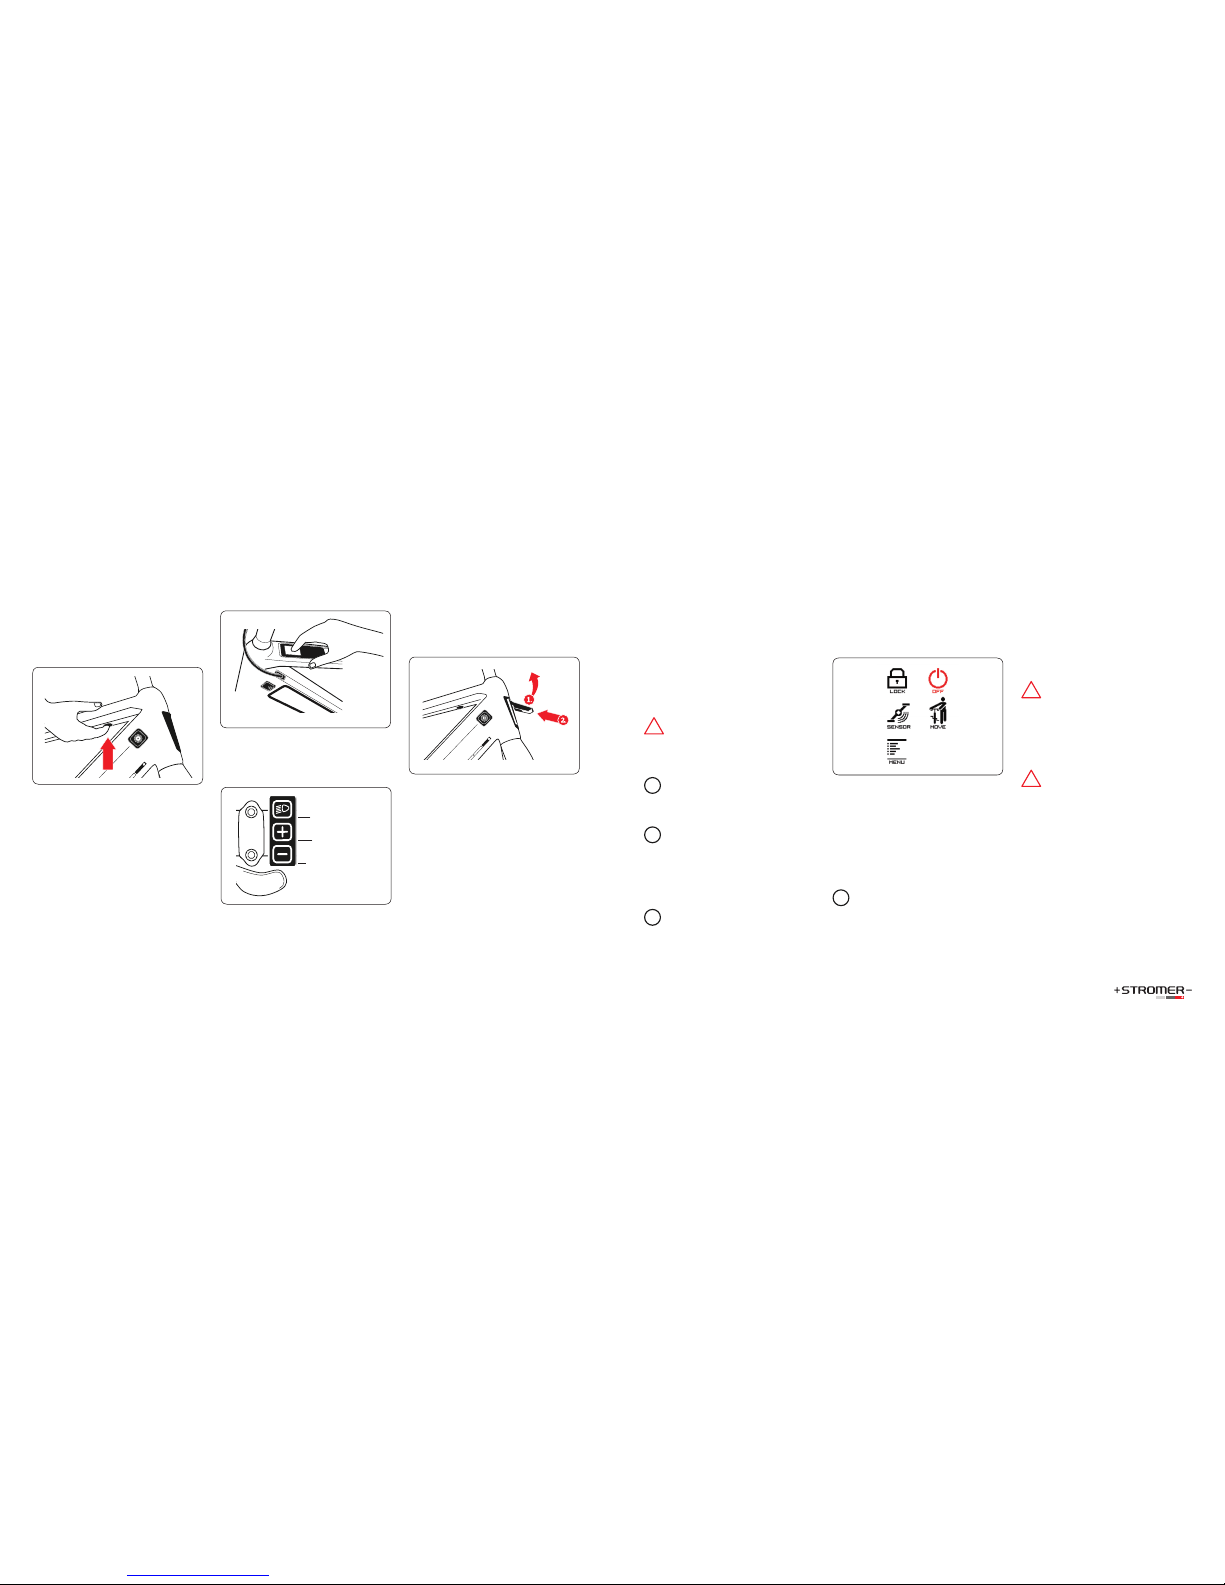
Theft protection
Activate lock
The ST2 offers you the best possible theft protec-
tion. You can lock the ST2 with a PIN when it is
switched off. The ST2 can only be switched on
again, by re-entering the PIN.
1. Press the power button to access the shortcut
screen.
2. In the shortcut screen, select LOCK.
If the locked ST2 is moved or is pushed for
more than one minute, theft mode is activated.
The motor is blocked and the actual position of
the ST2 is recorded if a mobile network connec-
tion exists. This makes the ST2 highly unattrac-
tive for thieves.
If your ST2 was not switched off or locked but has
not been used for a longer period, it switches itself
off. However, it will remain unlocked.
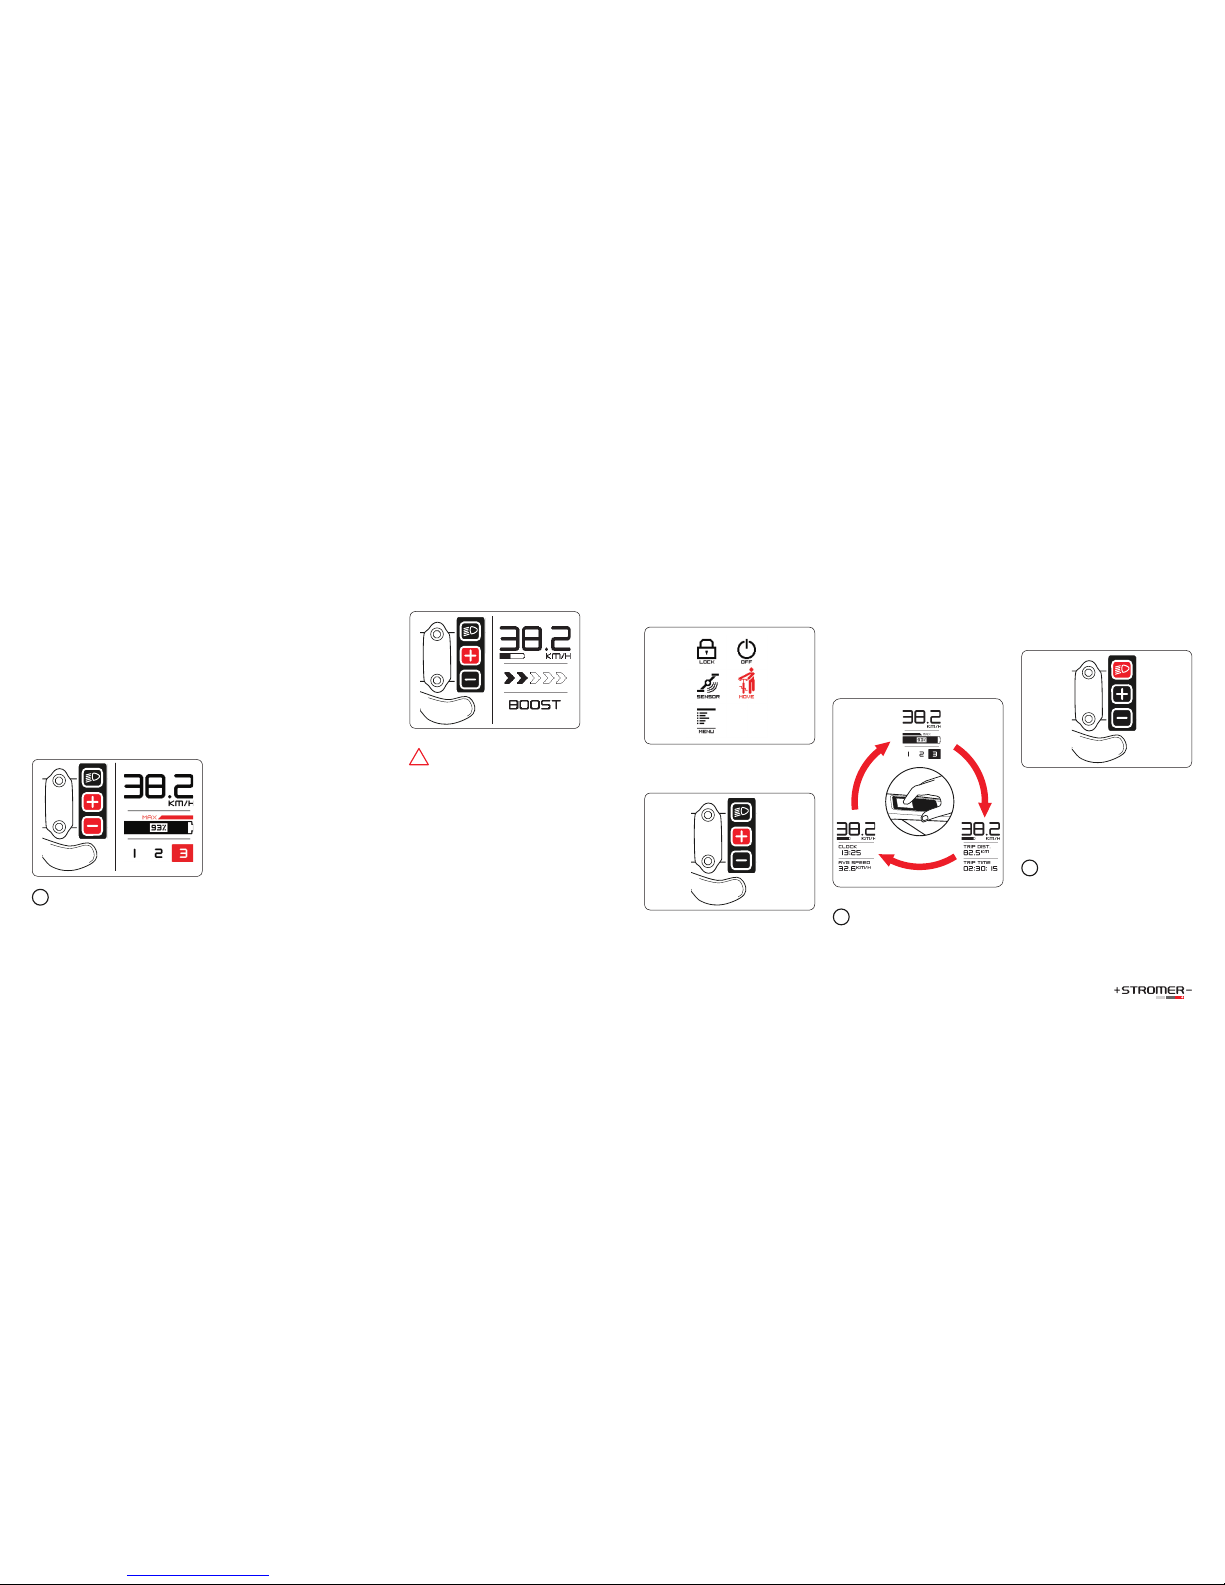
Deactivate lock
To deactivate the lock, proceed as follows:
1. Press the power button.
2. Then use the touchscreen to enter your PIN.
Set PIN
1. Press the power button to access the shortcut
screen.
2. In the shortcut screen, select MENU and then
SETTINGS.
3. In the PIN rubric you can set a new PIN.
Your first lock code is generated randomly
and sent to you by text message to the cell phone
number and by e-mail address you provided to ac-
tivate your ST2.
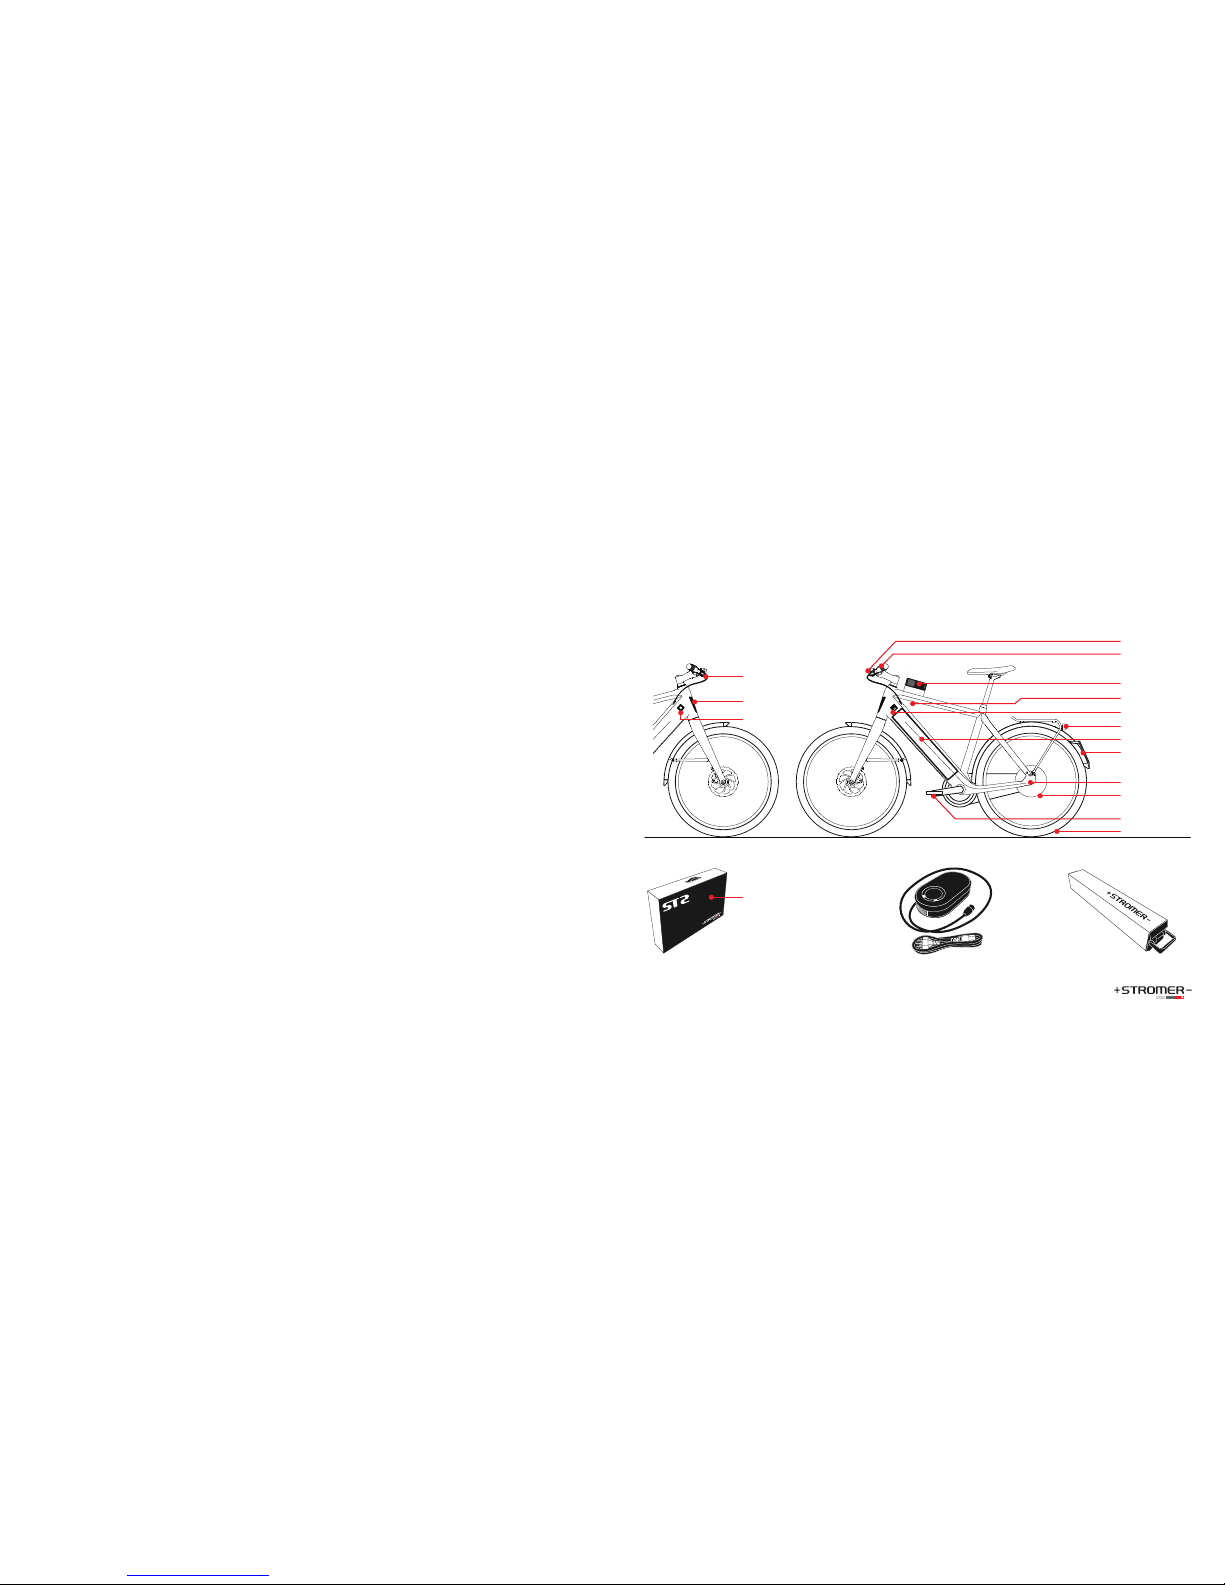
Battery
ST2 battery
The ST2 is equipped with a heavy-duty lithi-
um-ion battery. It supplies the drive system and
all other electronic components with power.
You can also use your ST2 battery in another
Stromer ST2 or use an additional battery for your
ST2.
You can fully recharge the ST2 battery after every
ride, which increases the service life of the battery
and ensures that you are always ready for the next
ride. There is thus no need to ride the battery until
it is empty each time, as there is no memory ef-
fect. Perform as many partial charges as possible,
do not ride the battery until it is completely empty
and recharge it even after a short rides.
Do not dispose of your ST2 battery and the
battery charger in domestic waste. In most coun-
tries, dealers are obliged to take back electrical
appliances and batteries.
Get to know the current national regulations for
the disposal of old electronics and batteries. Bring
used battery chargers and the battery back to your
Stromer dealer.
Battery removal
Open the battery box with the appropriate key.