manuals.online logo
Brands
  1. Home
  2. •
  3. Brands
  4. •
  5. Sub-Zero
  6. •
  7. Refrigerator
  8. •
  9. Sub-Zero PRO 48 User manual

Sub-Zero PRO 48 User manual

USE & CARE GUIDE
PRO 48 Refrigeration
Important Note
To ensure the safe and efficient use of Sub-Zero equip-
ment, please take note of the following types of highlighted
information throughout this guide:
IMPORTANT NOTE highlights information that is especially
important.
CAUTION signals a situation where minor injury or product
damage may occur if instructions are not followed.
WARNING states a hazard that may cause serious injury or
death if precautions are not followed.
Contents
PRO 48 Refrigeration ............................ 3
PRO 48 Features ................................ 4
PRO 48 Models ................................. 5
PRO 48 Use & Care .............................. 6
Keeping Food at Its Best ........................ 15
Food Storage Recommendations ................. 19
Water Filtration System Data ..................... 25
California Certification .......................... 26
Troubleshooting Guide .......................... 27
Service Information ............................. 30
Sub-Zero Warranty ............................. 31
Features and specifications are subject to change at any time
without notice. Visit our website, subzero.com for the most
up-to-date information.
PRO 48 Refrigeration 3
subzero.com
Thank You
Thank you for purchasing your new Sub-Zero PRO 48 unit.
With Sub-Zero, you can rely on a 60-year tradition of
quality and reliability.
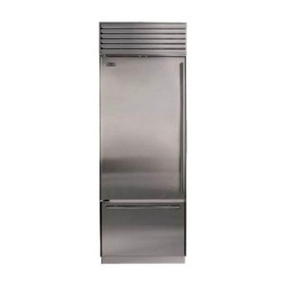
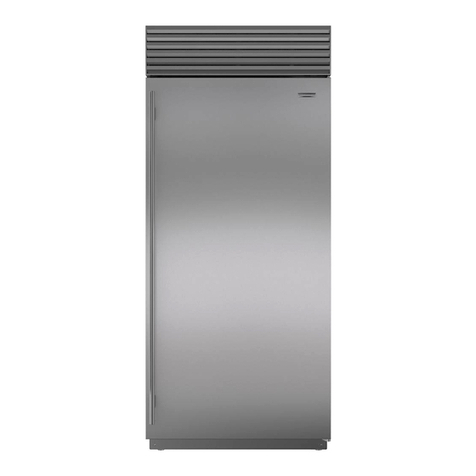
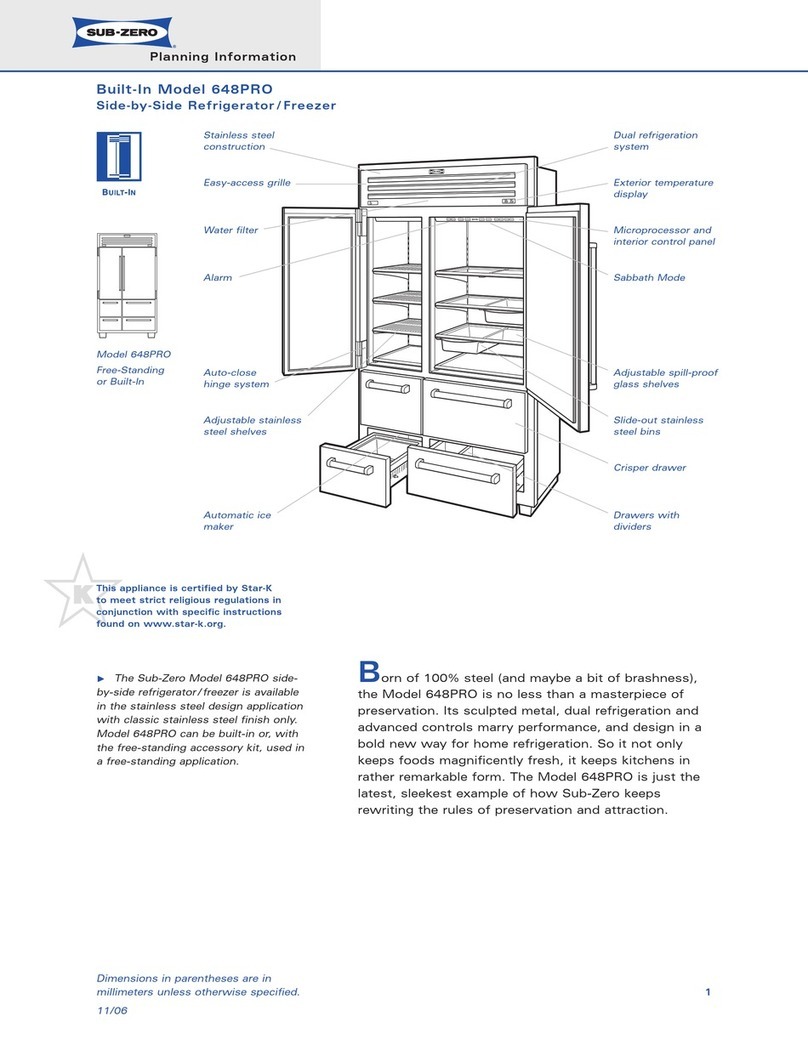
Built in to cabinetry or freestanding, the PRO 48 is just
the latest example of Sub-Zero pushing food preservation
to new heights. And of course, the PRO 48 meets rigorous
Department of nergy standards for residential use.
Featuring a glass door on model 648PROG or top-to-
bottom stainless steel on model 648PRO. The PRO 48
brings together the latest technology and finest features in
home refrigeration to give you the freshest food possible.
Your Sub-Zero is protected by a warranty that is one of
the finest in the industry. Take a moment to read the
warranty statement at the end of this guide and refer to it
should service become necessary.
This use & care guide will answer most of your questions
about the features, operation and maintenance of your
PRO 48 unit. If you have questions that are not addressed
here, call Sub-Zero customer care at 800-222-7820 or visit
our website, subzero.com.
Dual Refrigeration
The PRO 48 continues the Sub-Zero tradition of superior
quality and reliability. Sub-Zero pioneered the develop-
ment of our dual refrigeration system, giving you optimum
fresh and freezer food storage in ideal self-contained
sections. Both refrigerator and freezer maintain accurate,
consistent temperatures. Dual refrigeration keeps your
food fresh longer than any other system available.
With dual refrigeration, the freezer maintains a constant
temperature within one degree of the temperature you set
within our range of -5°F (-21°C) to +5°F (-15°C), without
unwanted moisture and odor from the refrigerator. Simi-
larly, you can adjust the refrigerator temperature within a
range of 34°F (1°C) to 45°F (7°C), for proper humidity levels
tailored for longer food life expectancy.
The dual refrigeration system also means there is no
transfer of fresh food odors to frozen food or ice. The
Sub-Zero system does not freeze the moisture out of the
air in the fresh food section.
Sub-Zero dual refrigeration is also more energy efficient
than old-fashioned single refrigeration systems. When the
refrigerator is used frequently during the day it does not
require the freezer to circulate its very cold, dry air to the
refrigerator. Instead, the refrigerator uses moist air to keep
fresh foods fresh and energy use minimal.
PRO 48 Features 4
PRO 48 Features
•Can be built in or, with the freestanding accessory kit,
used in a freestanding application.
•Stainless steel construction, inside and out, for profes-
sional strength and beauty.
•Dual refrigeration system with two compressors and
three evaporators keep foods fresher longer and
prevent odor transfer.
•Microprocessor with up-front touch controls monitor
pattern-sensing defrost and automatic service alerts.
•xterior temperature displays with easy-to-read digital
readout are accurate within one degree of your preset
temperatures.
•Triple-pane, UV-resistant glass door (model 648PROG).
•L D lights bathe upper compartments in a soft glow.
Channeled sidewall L Ds on the refrigerator side can
serve as a door area night light (model 648PROG).
•Auto-close system with an advanced hinge design lets
doors finish closing easily and automatically.
•Adjustable shelves are cantilevered and spill-proof,
with stainless steel trim (refrigerator) and 100%
stainless steel (freezer).
•Removable, slide-out stainless steel bins hold small
items and fit neatly under any shelf.
•Touch-and-glide crisper drawer with a tight-sealing
clear cover gives vegetables generous humidity.
•Storage drawers allow full access to food with
adjustable, removable and interchangeable dividers.
•Automatic ice maker with advanced water filtration
system for ice as pure as it is fresh.
•asy-access grille flips up, without tools, to access the
water filter for replacement and condenser for cleaning.
•Alarm with an audible chime lets you know when doors
or drawers are left open.
•Holiday mode allows you to power down one or both
sides for extended periods or just the weekend.
•For installations at or above 5,000' (1524 m) in eleva-
tion, high altitude glass is available as a special order.
•Certified by Star-K to meet religious regulations.
•UL approved for US and Canada.
•Sub-Zero products are covered by a two, five and
twelve year residential warranty (exclusions apply).
See warranty details at the end of this guide.
This appliance is certified by Star-K to meet
strict religious regulations in conjunction with
specific instructions found on www.star-k.org.
PRO 48 Models 5
subzero.com
PRO 48 Models
MODELS 648PRO AND 648PROG
Model 648PROG
with glass door
Model 648PRO
Automatic ice
maker
Auto-close
hinge system
Location of
water filter
xterior freezer
temperature display
asy-access grille
Adjustable stainless
steel shelves
Location of rating
plate (open drawer)
Sidewall lighting
Stainless steel
construction
Storage drawers
with dividers
Adjustable spill-
proof glass shelves
Touch control
panel
Microprocessor
xterior refrigerator
temperature display
Slide-out stainless
steel bins
Crisper drawer
Triple-pane, UV-resis-
tant glass (648PROG)
Dual refrigeration
system
Model 648PROG with glass door shown.
lectronic Control System
The electronic control system of the PRO 48 monitors and
accurately displays compartment temperatures within one
degree of your pre-set temperatures. It also monitors the
operation of the unit and lets you know if there is a
problem. The interior control panel located at the top of
the refrigerator door compartment has key pads to set
temperatures and control functions of the electronic
control system. Refer to the illustration below.
TEMPERATURE CONTROL
Your new PRO 48 was thoroughly inspected and tested
before it was shipped from the Sub-Zero factory. Tempera-
tures are preset at 38°F (3°C) in refrigerator compartments
and 0°F (-18°C) in the freezer compartments.
There are three sets of WARM R and COLD R key pads
on the interior control panel, two for the refrigerator
compartments (upper door and lower drawers) and one for
the freezer compartments. To adjust the temperature in
any of the three compartments, press the WARM R or
COLD R key pad for that compartment. Digital tempera-
tures for each of the three compartments are displayed in
the exterior temperature display.
Temperature ranges are -5°F (-20°C) to +5°F° (-15°C°) in the
freezer sections and 34°F (1°C) to 45°F (7°C) in the refriger-
ator sections. It is normal for temperatures to fluctuate
slightly, depending on external influences such as an open
door, the degree of humidity and room temperature.
IMPORTANT NOTE: Always allow 24 hours for compart-
ments to reach the temperature you set.
PRO 48 Use & Care 6
EXTERIOR TEMPERATURE DISPLAYS
lectronic control system functions, such as digital
temperatures and service indicators, are displayed in two
exterior temperature displays located on the grille. The
display in the lower left area of the grille shows the
temperature and indicators for freezer compartments, and
the display in the lower right gives readouts for refrigerator
compartments. Refer to the illustrations below.
TEMPERATURE DISPLAY
The electronic control system can display temperatures in
Fahrenheit (°F) or Celsius (°C).
To convert Fahrenheit to Celsius, turn the unit off then
back on. Within the first minute after turning the unit on,
press and hold the ALARM key pad and the POW R key
pad simultaneously for five seconds, then release. A ‘C’
will appear in each of the exterior temperature displays.
Follow the same procedure to convert from Celsius to
Fahrenheit.
Freezer Temperature
Controls
Ice Maker
On/Off
Power
On/Off
Alarm
On/Off
Lights
On/Off
Refrigerator
Temperature Controls
Upper
Compartment
Drawer
Compartments
Exterior temperature displays.
Control panel.
PRO 48 Use & Care 7
subzero.com
lectronic Control System
POWER
The POW R key pad on the control panel will shut off all
electrical power to the unit. When the power is off, the
OFF indicator light will be visible in the exterior tempera-
ture display. Using the POW R key pad means you do not
have to shut off power at the circuit breaker or unplug the
unit. The POW R key pad can be used for extended
vacations.
It is possible to shut off power to one compartment of the
PRO 48 for an extended period without affecting operation
of the other compartments.
First, turn the unit off by pressing the POW R key pad.
Then push and hold the WARM R key pad of the
compartment you wish to shut down. Press the POW R
key pad to turn the unit back on. The disabled zone will be
indicated with ‘--’ in the exterior temperature display.
Repeat the process to resume power to the compartment.
ALARM FEATURE
The PRO 48 has an alarm feature that lets you know with
an audible chime if a door or drawer is left ajar. The alarm
will sound after 30 seconds if a door or drawer is left open
and will stop once the door or drawer is closed. This alarm
can be disabled for cleaning or restocking by pressing the
ALARM key pad on the control panel.
ICE MAKER CONTROL
The IC MAK R key pad on the control panel switches
power to the ice maker system on or off. Use the IC
MAK R key pad to shut down ice maker operation during
extended vacations. The ice bucket icon will be visible in
the exterior temperature display if the ice maker system
is on.
VISUAL SERVICE DISPLAY
The electronic control system monitors compartment and
component temperatures as well as the ice maker system.
If there is a temperature or ice maker problem, you will be
alerted by a flashing S RVIC indicator light in the exterior
temperature display. This same S RVIC light will also
flash if the condenser needs cleaning.
SABBATH MODE (STAR-K)
Sabbath mode is available for the observance of certain
religious holidays. This mode turns off the lights, ice maker
system and door alarm and prevents them from turning on
again. Normal cooling operations will still take place.
To initiate Sabbath mode while the unit is on, press the
POW R key pad on the control panel so that ‘OFF’ is
visible in the exterior temperature display. Then press and
hold the POW R key pad for 10 seconds. This will turn the
unit back on with lights and ice maker disabled. There will
be four short chimes, indicating that the Sabbath mode
has been set. To return the unit to normal operation, press
and release the POW R key pad.
If you have questions about Star-K compliance, visit
www.star-k.org.
Shut off power to the unit at the control panel during
service.
PRO 48 Use & Care 8
Refrigerator Storage
AD USTABLE GLASS SHELVES
The adjustable glass shelves of the PRO 48 upper refriger-
ator compartment are cantilevered and spill proof with
stainless steel trim.
To remove a shelf, tilt the shelf up at the front, then lift it
up and out of the tracks on the rear wall of the refrigerator.
To replace a shelf, insert in the tracks with the front of the
shelf raised slightly. As you push the shelf in, lower the
front of the shelf until it locks into position. Refer to the
illustration below.
IMPORTANT NOTE: Use care when handling glass shelves
to prevent breaking the glass or scratching the interior.
AD USTABLE SLIDE-OUT BINS
The PRO 48 features two versatile, adjustable stainless
steel slide-out bins that fit neatly under any refrigerator
compartment shelf. The glass shelves have integrated rails
that make it possible to position the slide-out bins in a
variety of locations.
To remove the slide-out bin, pull the handle of the bin
forward until it stops, lift it up and out of the rails mounted
below the glass shelf. Refer to the illustration below.
CRISPER LID
The PRO 48 upper refrigerator drawer features a tight-
sealing crisper lid for higher humidity storage in the
drawer compartment. This clear lid provides visibility and
easy access to the compartment.
To remove the crisper lid assembly, pull the upper refriger-
ator drawer all the way out, raise the front edge of the
crisper lid up and pull out from the back. Refer to the illus-
tration below.
STORAGE DRAWER DIVIDERS
The PRO 48 refrigerator storage drawers give you full
access to food with adjustable and removable dividers.
The dividers are interchangeable between the upper and
lower refrigerator drawer. Two long dividers run the full
depth of the drawer, with shorter dividers that connect to
the long dividers to compartmentalize the drawer.
To remove the short dividers, lift up and out of position
from supports on the long dividers and sides of the
drawer. The long dividers can also be removed by lifting
up and out of position from drawer support tabs. Refer to
the illustration below.
Adjustable glass shelf. Adjustable slide-out bin. Storage drawer with crisper lid.
PRO 48 Use & Care 9
subzero.com
Freezer Storage
AD USTABLE SHELVES
The adjustable shelves of the PRO 48 upper freezer
compartment are cantilevered and 100% stainless steel.
The freezer shelves are repositioned the same way as the
glass shelves in the refrigerator compartment. To remove
or adjust the freezer shelves, first tilt the shelf up at the
front, then lift it up and out of the tracks on the rear wall of
the freezer.
To replace a shelf, insert in the tracks on the rear wall of
the freezer with the front of the shelf raised slightly. As you
push the shelf in, lower the front of the shelf until it locks
into position.
ICE BUCKET REMOVAL
The automatic ice maker and stainless steel ice bucket are
located in the lower freezer drawer.
To remove the ice bucket, pull the freezer drawer out until
it stops, lift the ice bucket up and out of the drawer. The
entire lower freezer drawer can now be used for more ice
storage if necessary.
Storage Drawers
DRAWER REMOVAL
The refrigerator and freezer storage drawers are remov-
able for cleaning. The drawers have an automatic stop
built in to prevent drawers from coming all the way out of
the unit.
To remove, pull the drawer all the way out until it stops, lift
up evenly on both sides of the drawer front and pull out.
To reinstall, raise the front of the drawer and place onto
the drawer slide tracks. Be sure to engage the front of
the drawer slide with the drawer assembly. Refer to the
illustration below.
IMPORTANT NOTE: To reduce the weight of the drawer, be
sure to unload the contents before removing the drawer.
Storage drawer removal.
Storage drawers are heavy. Be sure to keep your feet
clear as you remove the drawer.
PRO 48 Use & Care 10
Water Filtration System
The PRO 48 features a water filtration system that
supplies filtered water to the ice maker to produce great-
tasting ice. The water filter has been factory installed
behind the grille assembly.
It is important that the operation, maintenance and filter
replacement requirements be carried out as scheduled.
Refer to the following information on the water filter
cartridge monitor.
IMPORTANT NOTE: If the unit has been turned off or the
ice maker disabled for one month or longer, the water filter
cartridge should be replaced once the unit and ice maker
are back in operation.
IMPORTANT NOTE: Do not use with water that is microbi-
ologically unsafe or of unknown water quality without
adequate disinfection before or after the system. Systems
certified for cyst reduction may be used on disinfected
waters that may contain filterable cysts.
Refer to the performance data on page 25 for additional
information regarding the water filtration system.
WATER FILTER CARTRIDGE MONITOR
The water filter cartridge is designed to last for up to one
year of continuous use of the ice maker. The electronic
control system monitors the life of the water filter cartridge
and indicates when it needs to be replaced. An indicator
that reads ‘R PLAC FILT R’ will be visible in the left
side exterior temperature display. Follow steps to replace
the water filter cartridge on the following page.
Once the filter cartridge has been replaced, the control
automatically resets the water filter life monitor and the
‘R PLAC FILT R’ indicator will no longer be displayed.
Although it is designed to last for up to one year of use,
the actual life of the filter cartridge may vary with water
supply conditions. Therefore, it is recommended that the
filter cartridge be replaced when the ‘R PLAC FILT R’
indicator is displayed or if the ice cubes become hollow or
smaller.
IMPORTANT NOTE: The warranty for the water filter
cartridge supplied with the unit only covers defects in
materials or workmanship and not replacement due to
normal use.
REPLACEMENT CARTRIDGES
Replacement Sub-Zero water filter cartridges can be
ordered online at subzerowolfstore.com. For questions,
contact Sub-Zero customer care at 800-222-7820.
PRO 48 Use & Care 11
subzero.com
Water Filtration System
WATER FILTER CARTRIDGE REPLACEMENT
1) Lift the top grille assembly to access the water filter
cartridge. To lift the grille, pull out on the bottom edge
of the grille and tilt the grille frame forward. Refer to the
illustration below.
2) Slowly rotate the water filter cartridge one-quarter turn
counterclockwise to disengage. Gently twist until the
cartridge is free from the base. DO NOT pull. There will
be water in the filter cartridge, so it is normal for a
small amount of water to spill out. Refer to the illustra-
tion below.
3) Remove the cap from the replacement water filter
cartridge.
4) Line up the cartridge so that the locking tabs can be
inserted into the filter head.
5) Rotate the filter cartridge into the base approximately
one-quarter turn clockwise until it stops. DO NOT
overtighten.
6) After the new filter cartridge is installed, the first full
bucket of ice produced should be discarded. This will
help clean the water system and clear air from the line.
Allow 24 hours before discarding the first bucket of ice.
WATER FILTER BYPASS MODE
If you choose not to use the water filtration system, the
system can be placed in water filter bypass mode by
removing the water filter cartridge. In this mode, the water
supplied to the ice maker will not be filtered and the water
filter monitor will be deactivated.
The water filtration system automatically goes into bypass
mode when the filter cartridge is removed. Once a filter
cartridge is reinstalled, the water filtration system will be
activated and the water filter monitor function will resume.
IMPORTANT NOTE: If a reverse osmosis system is used,
the water filter cartridge must be removed to put the water
filtration system into bypass mode.
Lift grille assembly. Water filter removal.
WATER FILTER
PRO 48 Use & Care 12
Ice Maker Operation
The ice maker in the PRO 48 is fully automatic and has
been tested at the Sub-Zero factory. To turn the ice maker
on or off, press the IC MAK R key pad on the control
panel. When the ice maker is on, it will be operating any
time the drawer is closed.
IMPORTANT NOTE: A reverse osmosis system can be
used, provided there is constant water pressure of 20 psi
(1.4 bar) to 120 psi (8.3 bar) supplied to the unit at all
times. In this application, the water filtration system
must be bypassed. Refer to water filter bypass mode on
the previous page.
ICE PRODUCTION
The ice maker is designed to produce enough ice for
normal family use. The timing of ice making cycles will
vary depending on load conditions, door and drawer
openings and room temperature. On average, you can
expect a cycle of ice (eight cubes per cycle) every two
hours.
For extra ice capacity, remove the ice bucket with the ice
maker system on and allow the drawer to fill with ice.
IMPORTANT NOTE: Removing the ice bucket will not
increase the rate of ice production.
If ice is not used on a regular basis it tends to fuse
together. To avoid this, empty the ice bucket periodically
allowing it to replenish with a fresh supply.
Operations
DOOR AND DRAWER CLOSING
The PRO 48 refrigerator and freezer door hinges have an
auto-close system that allows doors to finish closing auto-
matically. As you close the door, the built-in cam takes
over to close the door the final 15°. A built-in door stop
allows both doors to stay open at approximately 120°.
For corner applications, an optional door stop kit is avail-
able that limits the door opening to 90°. Optional acces-
sories are available through your authorized Sub-Zero
dealer. To obtain local dealer information, visit the find a
showroom section of our website, subzero.com.
The PRO 48 refrigerator and freezer drawers have an
auto-close system that allows drawers to finish closing
automatically. The drawers have an automatic stop built in
at full extension.
Cleaning
INTERIOR CLEANING
To clean interior surfaces and removable parts, wash with
a mild solution of soap and lukewarm water with a little
baking soda. Do not use vinegar. Rinse and dry thor-
oughly. Avoid getting water on lights, control center and
display panel.
STAINLESS STEEL EXTERIOR
To clean the exterior stainless steel surfaces of the
PRO 48, use a soft, nonabrasive stainless steel cleaner
like Signature polish and apply with a soft lint-free cloth.
Signature polish is available from Signature Limited
Laboratory, P. O. Box 13436, Dayton, Ohio 45413, or call
877-376-5474.
To bring out the natural luster of the stainless steel, lightly
wipe the surface with a water-dampened microfiber cloth
followed by a dry polishing chamois. All work should
follow the grain direction of the finish. Better results are
obtained by keeping the cloth in continuous contact with
the stainless steel.
PRO 48 Use & Care 13
subzero.com
Do not submerge or pour hot water over cold glass
shelves.
CONDENSER CLEANING
The condenser of the PRO 48 is located behind the grille
at the top of the unit. Refer to the illustration below. The
grille must be lifted to access the condenser area for
cleaning. To lift the grille, pull out on the bottom edge of
the grille and tilt the grille frame forward.
Use a soft bristle brush and vacuum to remove dust and
lint from the condenser. Clean the condenser area every
three to six months.
Do not use a metallic or highly abrasive cleaner or
cloth, as this will scratch the stainless steel finish.
Before cleaning the condenser, shut off power to the
unit at the control panel. Wear gloves to avoid injury
from sharp condenser fins.
Failure to clean the condenser could result in tempera-
ture loss or mechanical failure or damage.
CONDENSER
Location of condenser.
PRO 48 Use & Care 14
Vacation Time
For extended vacations, shut off power to the unit by
pressing the POW R key pad. mpty all contents and
block the doors and drawers open slightly. A one-inch
space will let fresh air in to keep the interior dry and fresh.
Upon return, the water filter should be discarded and
replaced with a new filter before start up.
IMPORTANT NOTE: For extended vacations, refer to the
water filtration system information on pages 10–11.
For short vacations, remove all perishable items. Shut off
the ice maker by pressing the IC MAK R key pad and
empty the ice bucket. It is not necessary to change the
control settings.
If the unit is put into service temporarily and later shut off,
block the doors and drawers open to allow fresh air to
circulate inside the compartments. Be sure to shut off
power to the unit by pressing the POW R key pad.
If your religious observances require turning off the lights
and ice maker, refer to Sabbath mode on page 7.
Lighting Information
The PRO 48 features top L D lights that bathe the upper
refrigerator and freezer compartments in a soft glow. The
refrigerator compartment also has channeled sidewall L D
lighting.
For model 648PROG with glass door, the L D lighting
can be left on with the door closed and can serve as a
door-area night light. This feature can be activated or
deactivated by pressing the LIGHT key pad.
IMPORTANT NOTE: This advanced lighting system needs
to be replaced by Sub-Zero factory certified service.
Lighting in the refrigerator and freezer drawers use
40-watt appliance bulbs. The bulbs are easily accessible
with the drawer open and are located on the ceiling of the
drawer compartment.
To replace drawer compartment light bulbs, unscrew the
bulb counterclockwise to remove and clockwise to install.
Shut off power at the control panel before changing
light bulbs. Wear protective gloves when handling
bulbs.
Keeping Food At Its Best 15
subzero.com
Keeping Food Fresh
Your Sub-Zero unit features our unique dual compressor
refrigeration system to keep food fresher longer. However,
the quality and safety of your food also depends on how
you handle it.
The information in this section gives you the most up-to-
date handling and storage recommendations to help you
keep food at its best. If you have specific questions that
are not addressed here, contact a university, county
extension service or your local utility company.
Most food inevitably deteriorates over time. From the very
beginning until it is consumed, food undergoes changes.
Microorganisms get into food, multiply and cause spoiling.
nzymes that occur naturally in food continue the ripening
process even after the food is harvested. Improper
temperatures cause food to deteriorate faster. Changes
in humidity cause wilting and shriveling that can lead to
spoiling.
Sub-Zero’s dual refrigeration system is specifically
designed to combat these changes and keep your food
fresh longer. The individual refrigerator and freezer
systems have been designed to maintain accurate,
consistent temperatures and proper humidity levels for
longer food life expectancy. Dual refrigeration eliminates
transfer of fresh food odors to frozen food or ice and does
not freeze the moisture out of the air in the fresh food
section.
In addition, good handling practices can minimize the rate
of changes in food.
HANDLING RECOMMENDATIONS
•Follow the recommended storage times and tempera-
tures in this guide. Your Sub-Zero unit helps to slow
the ripening process by tailoring temperatures to each
section as needed.
•Use specially designed compartments for dairy foods,
deli foods and fresh produce. These compartments
maintain temperature and humidity levels that keep
specific food groups fresh.
•Rotate food in refrigeration units, using a first-in,
first-out system.
•When food does spoil, it’s usually obvious. It becomes
moldy, has an off-odor and looks rotten. But there are
times when spoiling may not be so apparent. If you
think a food has been stored too long, discard it. Do
not taste it to check if it’s okay.
Keeping Food At Its Best 16
Keeping Food Safe to at
Most food-borne illness is caused by bacteria such as
staphylococcus, salmonella, e-coli and clostridium
botulinum (the bacteria that causes botulism). These
bacteria grow rapidly at temperatures between 40°F (4°C)
and 140°F (60°C), a range that’s called the “danger zone”.
Never leave food in the danger zone for more than two
hours. When the bacteria have multiplied to the millions in
warm temperatures, they cause illness. Some bacteria
cause flu-like symptoms, while others cause serious
illness or even death. Young children, the elderly and
people who are already ill are more likely to become sick
from food poisoning.
To reduce your risk of food-borne illness, use the following
techniques to keep your food safe to eat:
WHEN YOU’RE SHOPPING
•Place packages of raw meat, seafood or poultry in
plastic bags to keep them from dripping on other
foods.
•Shop for meat, seafood and poultry last. Do not leave
these foods in a hot car when you’ve finished
shopping. Take along a cooler in hot weather or when
you have to travel long distances.
•Check ‘use by’ and ‘sell by’ dates on foods to make
sure they’re fresh. Use extra care when buying deli
food. Buy only the amount you will use in 1–2 days.
Discard hot or cold deli food that has been at room
temperature for more than two hours.
WHEN YOU STORE FOOD
•Monitor temperatures of the refrigerator and freezer
sections on the electronic control panel of your
Sub-Zero unit. Keep the refrigerator temperature at
40°F (4°C) or below and freezer temperature at
0°F (-18°C).
•Follow the recommended refrigerator and freezer
storage times and temperatures in this guide.
•Store raw meat, poultry and seafood separate from
other foods. Keep juices from these packages from
dripping on other food.
•Never taste food that looks or smells strange to test its
freshness. Discard it.
•For refrigerator storage, leave raw meat, poultry and
seafood in its original wrapper unless it is torn.
Repeated handling can introduce bacteria to these
foods.
•Wrap food stored in the refrigerator in foil or plastic
wrap, or place it in plastic bags or airtight containers to
keep it from drying out. Date all packages.
•For freezer storage, use freezer wrap, freezer-quality
plastic bags or aluminum foil over the commercial wrap
if foods will be stored in the freezer for more than a
couple of months. This minimizes dehydration and
quality loss. Single layers of aluminum foil may tear
and cause freezer burn.
Keeping Food At Its Best 17
subzero.com
Keeping Food Safe to at
WHEN YOU PREPARE FOOD
•Clean everything that comes in contact with food.
•Wash your hands for 20 seconds before and after
handling food.
•Sanitize counters, equipment and utensils after
handling raw meat, seafood or poultry. Rinse with a
diluted chlorine bleach solution of one teaspoon to one
quart of water.
•Use clean kitchen towels, sponges and cloths. Replace
sponges every few weeks.
•Use disposable plastic gloves if you have an infected
cut or burn on your hands.
•Thaw food in the refrigerator or microwave oven, not
on the counter. When you thaw food in a microwave
oven, cook it immediately.
•Marinate food only in the refrigerator.
•Rinse poultry and seafood in cold water before
cooking.
•Avoid cross-contamination in preparing food. Keep raw
meat, poultry and seafood and their juices away from
other food. For example, do not use the same surface
and utensils for preparing raw meat, poultry and
seafood that you use for preparing salad ingredients.
•Thoroughly clean your plastic and wooden cutting
boards. Wash with hot water and soap and rinse with a
diluted chlorine bleach solution of one teaspoon to one
quart of water.
WHEN YOU COOK FOOD
•Cook meat to an internal temperature of 165°F (75°C)
or above and poultry to 180°F (80°C) or above. For cuts
more than two inches thick, use a meat thermometer
to check the temperature. For thinner cuts, clear juices
(not pink) are a sign of doneness.
•If you are cooking frozen meat or poultry that has not
been defrosted, increase the cooking time to 11/2times
the time required for thawed items.
•Roast meats or poultry in oven temperatures of 325°F
(165°C) or above.
•Cook eggs until the yolk and white are firm, not runny.
•Do not use recipes in which eggs remain raw or
partially cooked.
•If your microwave has a temperature probe, use it.
Check temperatures of meat and poultry in at least
three spots. Rotate foods during microwaving.
•Do not taste raw or partially cooked meat, poultry,
eggs or fish.
WHEN YOU HAVE LEFTOVERS
•Refrigerate or freeze cooked leftovers in small, covered
containers within two hours after cooking. Make sure
there is adequate air space around the containers so
that food can cool down quickly.
•Remove the stuffing from meat or poultry and store it
separately.
•Date packages of leftovers and use within a safe
period of time.
•Cover and reheat leftovers thoroughly before serving.
•Bring sauces, soups and gravy to a boil. Heat other
foods to 165°F (75°C).
•If you think food may be spoiled, discard it. When in
doubt, throw it out.
Keeping Food At Its Best 18
Fresh Food Storage
Shelf life of fresh foods varies depending on how fresh it is
when you buy it. To keep your food fresher longer, follow
the recommended storage tips.
Vegetables: Wash vegetables in cool water and drain.
Store in airtight containers or plastic wrap. Vegetables
stay fresh longer in high humidity storage.
Fruits: Wash and dry fresh fruits. Store more aromatic
fruits in plastic bags. Most fruits stay fresh longer in low
humidity storage.
Prepackaged meats: Store in original packaging. After
opening, rewrap tightly in plastic wrap or aluminum foil.
Eggs: Store eggs unwashed in their carton or a portable
egg tray. Use within three weeks.
Milk, cream and cottage cheese: Keep carton closed.
Store on refrigerator shelf and use within 1–2 weeks.
Cheese: Store in original packaging until ready to use.
After opening, rewrap tightly in plastic wrap or aluminum
foil.
Leftovers: Let cool and cover tightly with plastic wrap or
foil. Airtight plastic containers work well to prevent drying
out and odor transfer.
ETHYLENE
Some fruits and vegetables will produce ethylene, a gas
that initiates the ripening process. thylene can cause
premature ripening in some foods, while in others, it can
actually cause damage. To reduce unnecessary spoilage
of your fresh produce, do not store ethylene producing
fruits and vegetables with those that are ethylene
sensitive. Refer to the chart on page 23.
Frozen Food Storage
Freezer storage: Wrap foods in material designed for
frozen food storage. The wrap must seal out air and
moisture. Do not refreeze thawed meats.
Ice cream: The firmness of the ice cream will depend on
its cream content. Higher quality ice creams usually have
a higher cream content, requiring colder freezer tempera-
tures to maintain their firmness. Soft ice cream is not
always an indication of a temperature problem.
Make sure your refrigerator and freezer doors close freely
and completely. Overloading will affect temperatures
inside the unit. Do not fill your freezer with large quantities
of unfrozen foods expecting them to fast freeze. Give the
freezer ample time to circulate cold air around unfrozen
items before adding additional items.
SUGGESTED FOOD STORAGE
The food storage charts on the following pages give you
specific information to help you keep food safe and keep it
at its best quality. The recommended storage tempera-
tures will help you determine optimal storage conditions
for your food. As a general rule, food that is handled
properly and kept at temperatures below 40°F (4°C) will be
safe to eat.
Storing food at temperatures below 40°F (4°C) keeps it out
of the danger zone. The storage times for refrigeration will
help keep food from spoiling or becoming dangerous to
eat. The time limits for frozen foods are to maintain flavor
and texture. Food kept frozen longer than the recom-
mended time will still be safe to eat, but its quality may
diminish.
Food Storage Recommendations 19
subzero.com
Recommended
Temperature
Storage Life
(refrigerator)
Storage Life
(freezer)* Comments
FR SH FISH AND S AFOOD
cod, flounder, haddock
sole bluefish, perch
mackerel, salmon
shrimp, oysters
34°F (1°C)
34°F (1°C)
34°F (1°C)
34°F (1°C)
2 days
2 days
4 days
1 day
6 months
2–3 months
5–9 months
6 months
Freeze in original wrap up to 2 weeks. Use
freezer wrap, freezer-quality plastic bags or
aluminum foil over the commercial wrap if
foods will be frozen for more than a couple
of months.
FR SH M AT
beef steaks, roasts
lamb chops, roasts
pork and veal chops, roasts
variety meats (tongue, liver, etc.)
34–35°F (1–2°C)
34–35°F (1–2°C)
34–35°F (1–2°C)
34–35°F (1–2°C)
3–5 days
3–5 days
3–5 days
1–2 days
6–12 months
6–9 months
4–6 months
3–4 months
Freeze in original wrap up to 2 weeks. Use
freezer wrap, freezer-quality plastic bags or
aluminum foil over the commercial wrap if
foods will be frozen for more than a couple
of months.
HAMBURG R, GROUND AND ST W M ATS
hamburger, stew meats,
ground turkey, veal, pork, lamb
and mixtures
34–35°F (1–2°C) 1–2 days 3–4 months Freeze in original wrap up to 2 weeks. Use
freezer wrap, freezer-quality plastic bags or
aluminum foil over the commercial wrap if
foods will be frozen for more than a couple
of months.
HOTDOGS AND LUNCH M ATS
hotdogs (opened package)
hotdogs (unopened package)
lunch meats (opened package)
lunch meats (unopened package)
34–35°F (1–2°C)
34–35°F (1–2°C)
34–35°F (1–2°C)
34–35°F (1–2°C)
1 week
2 weeks
3–5 days
2 weeks
1–2 months
1–2 months
1–2 months
1–2 months
Freeze in freezer wrap. Check ‘sell by’
dates. Do not use more than 1 week after
this date.
BACON AND SAUSAG
bacon
raw sausage (pork, beef, turkey)
smoked breakfast links or patties
hard sausage (pepperoni, jerky sticks)
34–35°F (1–2°C)
34–35°F (1–2°C)
34–35°F (1–2°C)
34–35°F (1–2°C)
7 days
1–2 days
7 days
2–3 weeks
1 month
1–2 months
1–2 months
1–2 months
Keep wrapped, and store at recommended
refrigerator temperatures.
HAM AND CORN D B F
corned beef
ham, whole
ham, half
ham, slices
34–35°F (1–2°C)
34–35°F (1–2°C)
34–35°F (1–2°C)
34–35°F (1–2°C)
5–7 days
7 days
3–5 days
3–4 days
1 month
1–2 months
1–2 months
1–2 months
For freezer storage, drain juices.
FR SH POULTRY
chicken or turkey, whole
chicken or turkey, pieces
duck or goose
34–35°F (1–2°C)
34–35°F (1–2°C)
34–35°F (1–2°C)
1–2 days
1–2 days
1–2 days
12 months
9 months
6 months
Freeze in original wrap up to 2 weeks. Use
freezer wrap, freezer-quality plastic bags or
aluminum foil over the commercial wrap if
foods will be frozen for more than a couple
of months.
*Recommended freezer storage temperature is 0°F (-18°C).
Fish, Meats and Poultry
Food Storage Recommendations 20
Fresh Vegetables
Recommended
Temperature
Storage Life
(refrigerator) Comments
FR SH V G TABL S
anise
artichokes
asparagus
beans, green/snap/ lima*
bean sprouts
beets
belgian endive
bok choy
34–36°F (1–2°C)
34°F (1°C)
34–36°F (1–2°C)
40–45°F (4–7°C)
34°F (1°C)
34°F (1°C)
36–38°F (2–3°C)
34°F (1°C)
2–3 weeks
1–2 weeks
2–3 weeks
7–10 days
7–9 days
3–4 months
2–4 weeks
3 weeks
Wash vegetables in cool water and drain. Store in airtight
container or plastic wrap.
Most vegetables should be stored in higher humidity.
broccoli
brussels sprouts
cabbage
carrots
cauliflower
celeriac
celery
chinese broccoli
34°F (1°C)
34°F (1°C)
34°F (1°C)
34°F (1°C)
34°F (1°C)
34°F (1°C)
34°F (1°C)
34°F (1°C)
1–2 weeks
3–5 weeks
3–6 weeks
1–5 months
3–4 weeks
6–8 months
1–2 months
10–14 days
Discard any fresh vegetables that are moldy or have other
signs of spoilage and wipe out the refrigerator compartment.
For fresh-cut produce, follow storage directions on package.
chinese cabbage
corn, sweet
cucumbers*
daikon
eggplant*
endive/ escarole
garlic
horseradish
34°F (1°C)
34°F (1°C)
45°F (7°C)
34°F (1°C)
45°F (7°C)
34°F (1°C)
34°F (1°C)
34°F (1°C)
2–3 months
5–8 days
10–14 days
4 months
1–2 weeks
2–3 weeks
6–7 months
10–12 months
Refer to the list of ethylene sensitive and ethylene producing
vegetables and fruits.
jerusalem artichokes
kale
kohlrabi
leeks
lettuce
mushrooms
okra*
onions, bulb
34°F (1°C)
34°F (1°C)
34°F (1°C)
34°F (1°C)
34°F (1°C)
34°F (1°C)
45°F (7°C)
34°F (1°C)
1–2 weeks
1–2 months
10–14 days
2 months
2–3 weeks
1–2 weeks
1–2 weeks
1–6 months
onions, green
parsley
parsnips
peas, pods and shelled
peppers, bell*
peppers, chile
pumpkins*
radicchio
34°F (1°C)
34°F (1°C)
34°F (1°C)
34°F (1°C)
45°F (7°C)
45°F (7°C)
38–45°F (3–7°C)
34°F (1°C)
7–10 days
1–2 months
4–5 months
1–2 weeks
2–3 weeks
2–3 weeks
3–4 months
2–3 weeks
*Sensitive to chill injury, a cause of spoilage. Damage may not be apparent until the vegetable is returned to a warmer temperature.
See food preservation guide for complete instructions on freezing vegetables. Recommended freezer storage temperature is 0°F (-18°C).

Other manuals for PRO 48

10

Other Sub-Zero Refrigerator manuals

Sub-Zero IC-24FI Guide

Sub-Zero

Sub-Zero IC-24FI Guide

Sub-Zero BI-36U/S/TH User manual

Sub-Zero

Sub-Zero BI-36U/S/TH User manual

Sub-Zero Designer Series User manual

Sub-Zero

Sub-Zero Designer Series User manual

Sub-Zero 315W Guide

Sub-Zero

Sub-Zero 315W Guide

Sub-Zero BI-30UG User manual

Sub-Zero

Sub-Zero BI-30UG User manual

Sub-Zero BI-36R Assembly instructions

Sub-Zero

Sub-Zero BI-36R Assembly instructions

Sub-Zero 601R Instructions for use

Sub-Zero

Sub-Zero 601R Instructions for use

Sub-Zero BI-48S Assembly instructions

Sub-Zero

Sub-Zero BI-48S Assembly instructions

Sub-Zero IT-30RID User manual

Sub-Zero

Sub-Zero IT-30RID User manual

Sub-Zero 700BC User manual

Sub-Zero

Sub-Zero 700BC User manual

Sub-Zero DEC3650RL User manual

Sub-Zero

Sub-Zero DEC3650RL User manual

Sub-Zero 601R User manual

Sub-Zero

Sub-Zero 601R User manual

Sub-Zero PRO 48 User manual

Sub-Zero

Sub-Zero PRO 48 User manual

Sub-Zero IC-27R User manual

Sub-Zero

Sub-Zero IC-27R User manual

Sub-Zero BI-36R User manual

Sub-Zero

Sub-Zero BI-36R User manual

Sub-Zero BI-30UG Assembly instructions

Sub-Zero

Sub-Zero BI-30UG Assembly instructions

Sub-Zero Sub-Zero 648PROG User manual

Sub-Zero

Sub-Zero Sub-Zero 648PROG User manual

Sub-Zero ID-27R User manual

Sub-Zero

Sub-Zero ID-27R User manual

Sub-Zero 600 Series BI-36U User manual

Sub-Zero

Sub-Zero 600 Series BI-36U User manual

Sub-Zero BI-48S User manual

Sub-Zero

Sub-Zero BI-48S User manual

Sub-Zero 400 Series Installation and operation manual

Sub-Zero

Sub-Zero 400 Series Installation and operation manual

Sub-Zero 642 Instructions for use

Sub-Zero

Sub-Zero 642 Instructions for use

Sub-Zero Uc24crh User manual

Sub-Zero

Sub-Zero Uc24crh User manual

Sub-Zero UC-24 series User manual

Sub-Zero

Sub-Zero UC-24 series User manual

Popular Refrigerator manuals by other brands

Fridgmaster MUL49102 How to use

Fridgmaster

Fridgmaster MUL49102 How to use

Daewoo FKM588FSR0CY user manual

Daewoo

Daewoo FKM588FSR0CY user manual

AYA AFD2103X user guide

AYA

AYA AFD2103X user guide

GE TPX24BIDBB Dimensions

GE

GE TPX24BIDBB Dimensions

FUJETA FRDW-450 instruction manual

FUJETA

FUJETA FRDW-450 instruction manual

KitchenAid KSRS25FGSS11 parts list

KitchenAid

KitchenAid KSRS25FGSS11 parts list

AGA marvel MP30RA2 Operation and maintenance instruction

AGA marvel

AGA marvel MP30RA2 Operation and maintenance instruction

Sharp SJ-286M operating manual

Sharp

Sharp SJ-286M operating manual

AEG SKS81000F0 user manual

AEG

AEG SKS81000F0 user manual

Zanussi ZRA40100WA user manual

Zanussi

Zanussi ZRA40100WA user manual

Maytag MFX2571XEW User instructions

Maytag

Maytag MFX2571XEW User instructions

Vitrifrigo VFREE PLUS FP40 instruction manual

Vitrifrigo

Vitrifrigo VFREE PLUS FP40 instruction manual

Nero 240L instruction manual

Nero

Nero 240L instruction manual

Dometic RM2354 Installation and operating instructions

Dometic

Dometic RM2354 Installation and operating instructions

SEVERIN VKS 8805 Instructions for use

SEVERIN

SEVERIN VKS 8805 Instructions for use

Hotpoint Ariston SBLxxxxNF operating instructions

Hotpoint Ariston

Hotpoint Ariston SBLxxxxNF operating instructions

AEG SANTO SU96040-5I operating instructions

AEG

AEG SANTO SU96040-5I operating instructions

Electrolux ER 7346B Installation and instruction manual

Electrolux

Electrolux ER 7346B Installation and instruction manual

manuals.online logo
manuals.online logoBrands
  • About & Mission
  • Contact us
  • Privacy Policy
  • Terms and Conditions

Copyright 2025 Manuals.Online. All Rights Reserved.