2
Caution
Do not use the unit with any other voltage than AC
220V.
*There is risk of electric shock or fire
caused by a short circuit.
If the unit is not working properly,
pull the plug immediately and
turn it in for service or repair.
*There is risk of electric
shock or fire caused by a
short circuit.
Do not obstruct the suction inlet or the exhaust air
vent while the unit is in operation.
*The motor can otherwise overheat and
break down.
Do not use the unit in places where it can be ex-
posed to rain or other water.
*Contact with water can damage the insu-
lation and cause electric shock, short cir-
cuit, fire and other accident and injuries.
Do not use the unit in places with high concentration
of dust in the air.
*If there are high levels of dust in the air,
dust can enter into the motor, causing it
to overheat and can result in a fire.
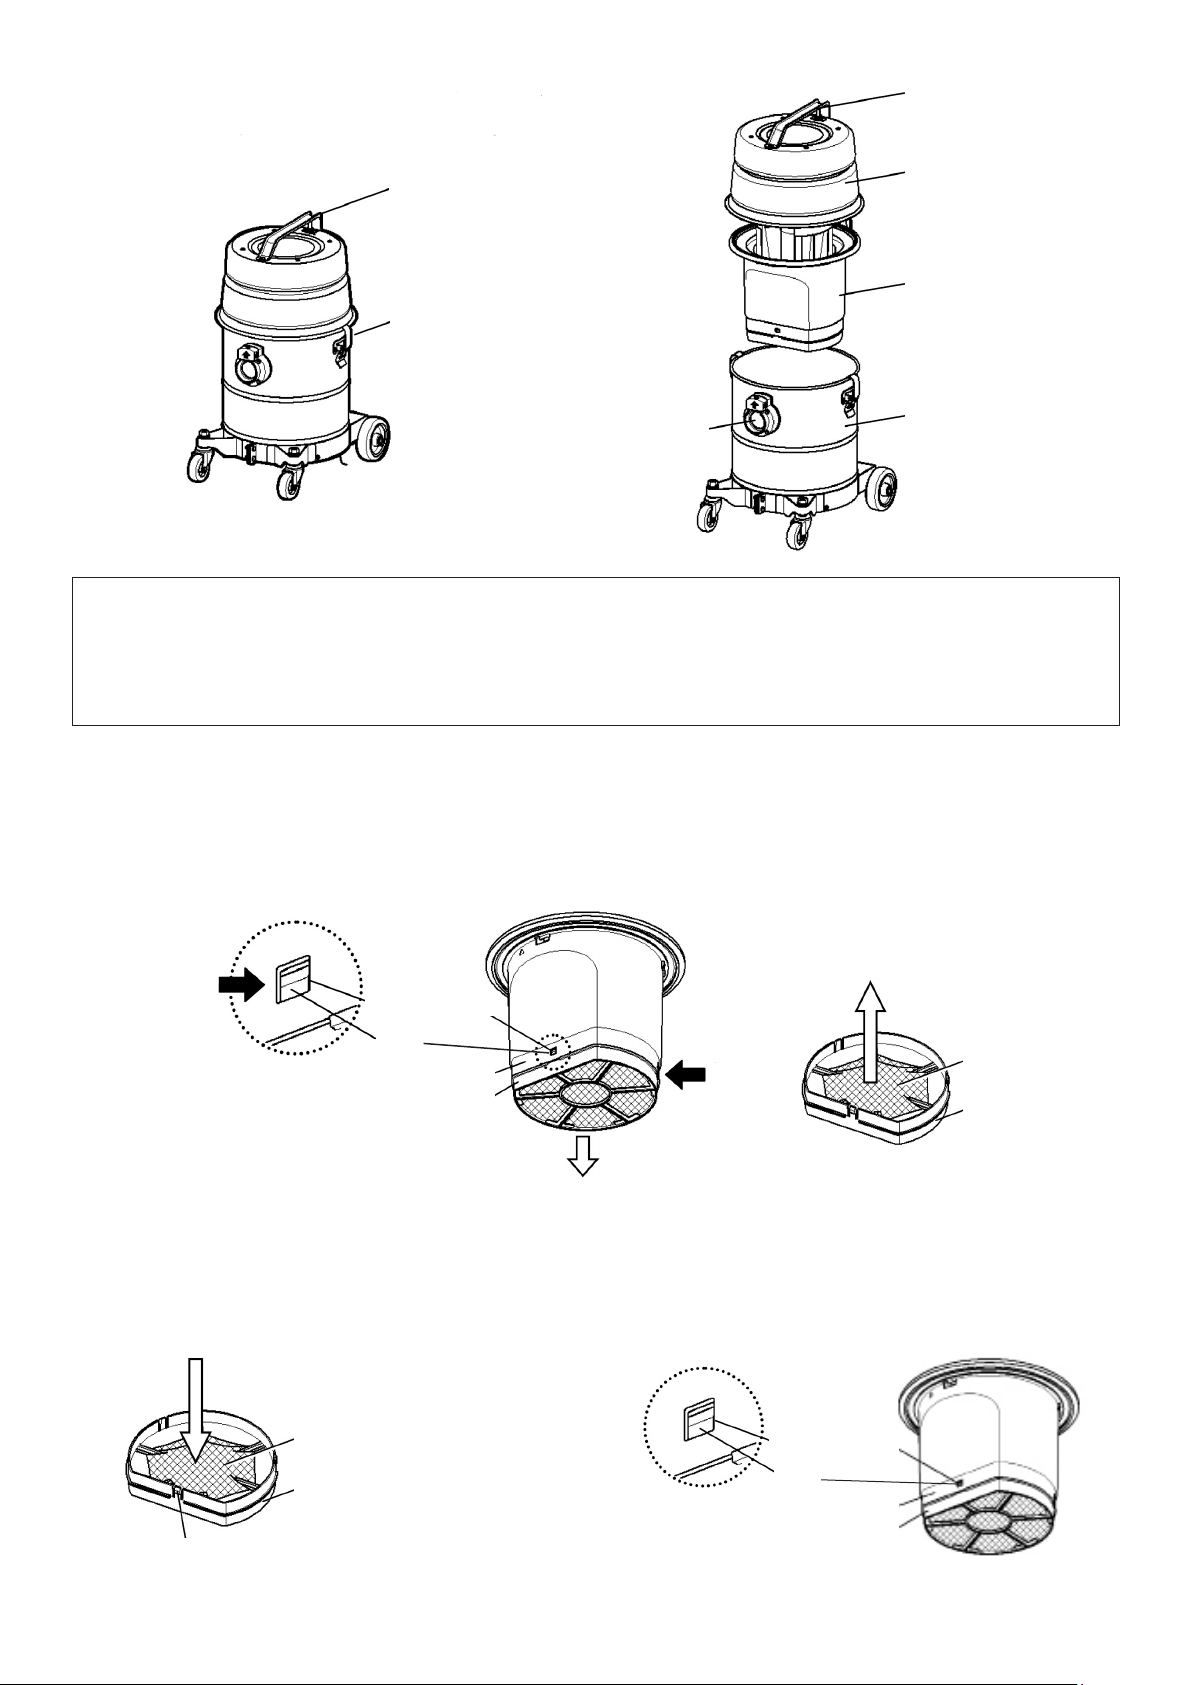
Never use the unit to clean metal chips or swarf
without the support lter.
*Without the support filter, the normal
filter can get damaged by the metal chips
and swarf, which can lead to accidents
and malfunction.
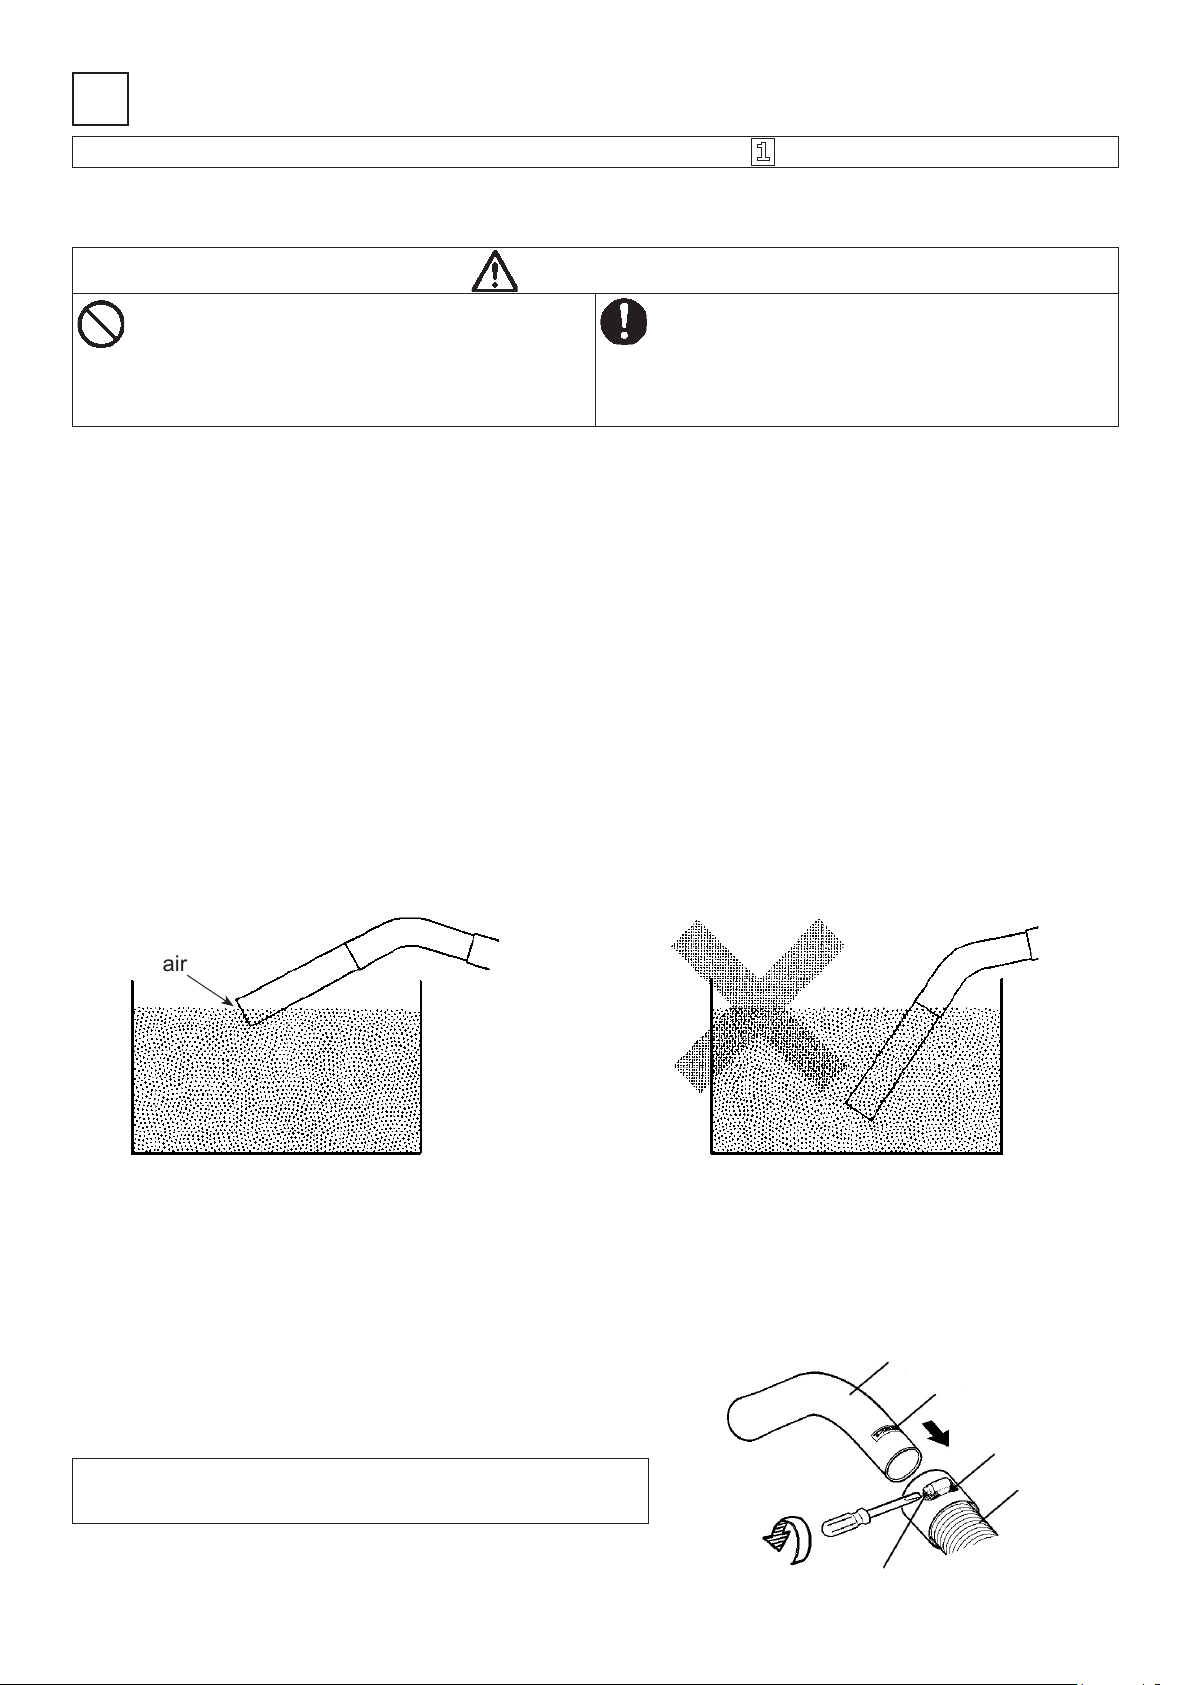
If the suction of the unit if obstructed by something
getting stuck inside the tube or hose, or if the oat
device has been risen, you must turn off the power
immediately.
*The motor can otherwise overheat and
break down.
Keep away from re.
*The unit can become deformed, causing
short circuit and possibly fire.
Do not clean solidied cement dust, synthetic resin
dust, metal dust, carbon dust, conductive ne dust
or pharmaceuticals.
*This could cause fire from short circuit or
electric shock.
Do not clean thinner or other solvents, volatile or
explosive gases or dust, lit cigarettes or other hot or
burning substances.
*This could cause explosions, fires or the
filter to get burned and damaged.
Earth the unit securely with earth clip at the end of
the electric cord. Especially if you are cleaning a
place with wet oors.
*If the unit is not earthed, there is risk of
electric shock.
Do not use in areas with mist or smoke from chlo-
rine-based cutting oil.
*This can lead to a chemical reaction that
makes the resin parts break, which can
lead to injuries as well as damage to the
unit. Do not use the unit at high humidity.
*This could cause fire, short circuit or mal-
function.
*The humidity should be below 80%.
Do not use at temperatures higher than 40ºC.
*This could cause fire.
*The unit can be used within the tempera-
ture range 0-40ºC.
Do not clean any substance, liquid or dust that
foams.
*Foam can cause the float device to not
work properly, causing the vacuum clean-
er to overfill and leak from the exhaust
vent. This could cause short circuit, mo-
tor malfunction, or stain your clothes.
Do not put hands or ngers into
the air suction inlet holes or the
nozzles.
*There is risk of injury.
Do not step on the hose or pull it recklessly.
*The hose can get damaged and start leak-
ing into the environment where the vacu-
um cleaner is being used.
Do not tip the unit over during or after cleaning
liquids.
*This could cause the motor to overheat or
malfunction, or cause an accident.
Never use the unit while it is tipped over on its side.
*The content of the tank might spill out.
Do not use the unit if the cord or plug is damaged,
or if the plug is loose in the socket.
*Electric shock or fire caused by a short
circuit can occur.
If you use an extension cord, make sure to use one
that meets the specied requirements.
*There is risk of the cord overheating and
catching fire.
Do not use the unit when the cord is coiled or bun-
dled together.
*There is risk of the cord overheating and
catching fire.
*Make sure that the cord is extended be-
fore use.
Do not move the unit by pulling the electric cord or
hose.
*The cord or hose can get damaged, cause
electric shock, short circuit, fire or leak-
age.
Do not damage, extend, nor excessively bend, pull, twist, bundle, squeeze or put heavy objects on the cord.
*If the cord gets damaged, there is risk of electric shock or fire.
Do not clean sea water or other
corrosive liquids or powder.
*This can cause the motor
to catch fire, malfunction
or cause and accident.