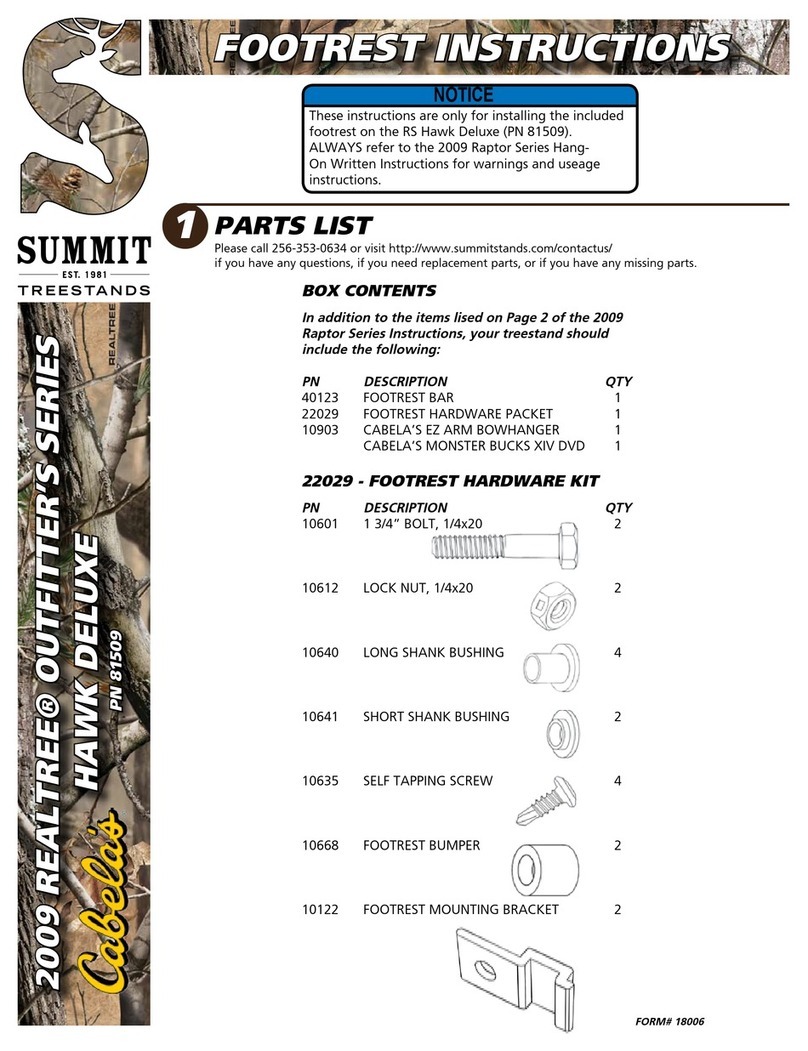
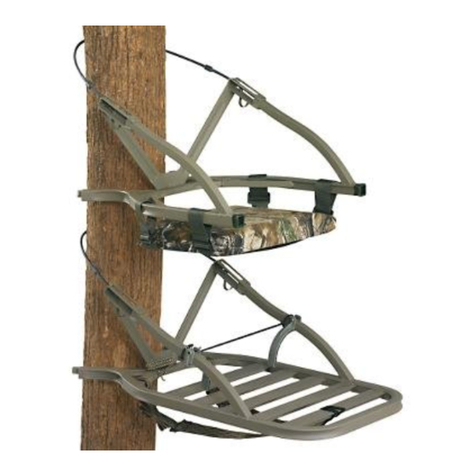
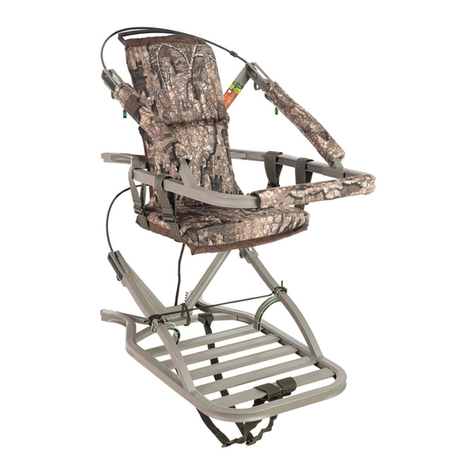
Summit 82077 User manual

FORM# 18014-14 - 11/2013
• WHEN HUNTING FROM A TREESTAND FALLS CAUSING INJURY OR DEATH CAN OCCUR ANY TIME AFTER LEAVING THE GROUND!
FOR THOSE REASONS ALWAYS USE A FALL ARREST SYSTEM (FAS) COMPRISING A FULL BODY HARNESS AT ALL TIMES AFTER LEAVING THE
GROUND. YOU MUST STAY CONNECTED AT ALL TIMES AFTER LEAVING THE GROUND WHILE USING ANY ELEVATED HUNTING PLATFORM.
SINGLE SAFETY BELTS AND CHEST HARNESSES ARE NO LONGER ALLOWED AND SHOULD NEVER BE USED. IF YOU ARE NOT WEARING A
FULL BODY HARNESS THAT IS PROTECTING YOU FROM A FALL, DO NOT LEAVE THE GROUND!
• READ AND UNDERSTAND ALL OF THE MANUFACTURER’S WARNINGS AND INSTRUCTIONS AND USE ALL SAFETY DEVICES PROVIDED.
CONTACT SUMMIT TREESTANDS FOR ANY QUESTIONS. FAILURE TO DO SO COULD RESULT IN INJURY OR DEATH!
• A SIGNAL DEVICE SUCH A MOBILE PHONE, RADIO, WHISTLE, SIGNAL FLARE OR PERSONAL LOCATOR DEVICE (PLD) MUST BE ON YOUR
PERSON AND READILY AVAILABLE AT ALL TIMES! ALWAYS INFORM SOMEONE OF YOUR HUNTING LOCATION, WHERE THE TREESTAND
WILL BE LOCATED AND THE EXPECTED DURATION OF THE HUNT!
• DO NOT USE THIS PRODUCT OR ANY TREESTAND UNLESS YOU ARE IN GOOD PHYSICAL SHAPE AND HAVE NO PHYSICAL LIMITATIONS OR
MEDICAL CONDITIONS WHICH MAY PREVENT YOU FROM SAFELY USING THIS PRODUCT. ALWAYS CONSULT A PHYSICIAN IF YOU HAVE
ANY QUESTIONS ABOUT YOUR PHYSICAL ABILITY TO USE THIS PRODUCT.
• NEVER USE THIS PRODUCT OR ANY TREESTAND WHILE TAKING DRUGS, ALCOHOL OR CERTAIN PRESCRIPTION DRUGS! ALWAYS
CONSULT A PHYSICIAN IF YOU HAVE ANY QUESTION ABOUT TAKING SPECIFIC MEDICATIONS AND USING THIS PRODUCT!
• NEVER USE THIS PRODUCT OR ANY TREESTAND DURING INCLEMENT WEATHER SUCH AS RAIN, LIGHTNING, WINDSTORMS OR ICY
CONDITIONS! END YOUR HUNT AND RETURN TO THE GROUND IF ANY OF THESE INCLEMENT CONDITIONS ARISE.
• NEVER USE THIS PRODUCT OR ANY TREESTAND WHEN FEELING ILL, NAUSEOUS, DROWSY OR DIZZY!
• BE WELL RESTED AND NEVER HURRY. HURRYING CAUSES ACCIDENTS!
• NEVER USE A TREESTAND ON A DEAD, LEANING, DISEASED, LOOSE BARKED TREE, ON A UTILITY POLE OR ON TREES THAT HAVE ANY
OBSTRUCTIONS THAT MAY LIMIT TREESTAND USE! NEVER RELY ON A TREE BRANCH FOR SUPPORT!
• NEVER JUMP OR BOUNCE ON THIS PRODUCT OR ANY TREESTAND TO SECURE IT TO THE TREE!
• PULL UP A BOW, BACKPACK, FIREARM OR OTHER EQUIPMENT ONLY AFTER BEING SECURE IN THE TREESTAND. FIREARMS MUST BE
PULLED UP UNLOADED, CHAMBER OPEN AND MUZZLE DOWN! NEVER CLIMB WITH ANYTHING ON YOUR BACK.
• NEVER MODIFY THIS PRODUCT OR YOUR STAND IN ANY WAY BY MAKING REPAIRS, REPLACING PARTS, OR ALTERING, ADDING OR
ATTACHING ANYTHING TO IT EXCEPT IF EXPLICITLY AUTHORIZED IN WRITING BY THE MANUFACTURER!
• PRACTICE INSTALLING, ADJUSTING AND USING THIS PRODUCT AND YOUR TREESTAND AT GROUND LEVEL PRIOR TO USING IT AT
ELEVATED POSITIONS!
• INSTRUCTIONS (WRITTEN AND VIDEO) SHOULD BE KEPT IN A SAFE PLACE AND REVIEWED AT LEAST ANNUALLY. IT IS THE RESPONSIBILITY
OF THE TREESTAND OWNER TO FURNISH THE COMPLETE INSTRUCTIONS TO ANY PERSON WHO BORROWS OR PURCHASES THE
TREESTAND! THIS SUMMIT TREESTAND IS DESIGNED TO BE USED AS A COMPLETE SYSTEM - NEVER LOAN OR SELL ONLY A PORTION OF
THE HANG-ON TREESTAND SYSTEM.
• BEFORE EACH USE OF YOUR SUMMIT TREESTAND, ALWAYS INSPECT THE TREESTAND AND HARNESS FOR ANY DAMAGE, CRACKS,
TEARS, CABLE WEAR OR ABRASION THAT MAY HAVE OCCURRED IN TRANSPORTING / STORING YOUR TREESTAND. DO NOT USE IF ANY
DAMAGE IS FOUND! CONTACT CUSTOMER SERVICE FOR THE APPROPRIATE REPAIR / REPLACEMENT PROCEDURE!
• DO NOT LEAVE YOUR TREESTAND OUTDOORS OR STORE IT OUTDOORS WHEN IT IS NOT BEING USED! ANY STAND TUBING THAT IS
ALLOWED TO FILL WITH RAINWATER AND FREEZE WILL RUPTURE OR BURST - DO NOT USE YOUR TREESTAND IF THIS OCCURS!
WARNING
!
You must fully read, understand and follow these warnings and
instructions (written and video)! Failure to follow these instructions
may cause serious injury or death!!
Summit
Bucksteps
PN 82077
© 2013 Summit Treestands, LLC
715A Summit Dr. Decatur, AL 35601
(256) 353-0634
www.summitstands.com
You MUST also view the enclosed DVD BEFORE using your new treestand!!
WEIGHT LIMIT
260 LBS. X 1 TOTAL*
DO NOT EXCEED THIS LIMIT!
(* Includes all gear)
Stand minimum and maximum tree size: 8-20” diameter

GENERAL WARNINGS AND PRECAUTIONS, STAND WEIGHT LIMITS PG 1
SECTION 1 - INDEX PG 2
SECTION 2 - PARTS LIST PG 2
SECTION 3 - LIMITED WARRANTY PG 1
SECTION 4 - ASSEMBLY PG 3
SECTION 5 - INSTALLATION AND USE PG 4 - 6
SECTION 6 - MAINTENANCE AND CARE PG 6
RAPTOR SERIES BOX CONTENTS
DESCRIPTION QTY
BUCKSTEP SECTION 4
CAM BUCKLE STRAP 4
STRAP CARRY POUCH 1
SAFETY / INSTRUCTIONAL DVD 1
WRITTEN INSTRUCTIONS 1
WARRANTY CARD 1
Please call 256-353-0634 or visit http://www.summitstands.com/contactus/
if you have any questions, if you need replacement parts, if you have any
missing parts or if the included DVD does not play.
www.summitstands.com
(A) Warranty
Summit Treestands, LLC (Summit) warrants to the original retail purchaser that all products manufactured by it are free from defects in
material and manufacture at the time of shipment for sixty (60) months from the date of purchase. Summit will repair or replace any part
found defective if the unit claimed to be defective shall be returned to Summit, postage prepaid, within the warranty period.
This warranty shall not apply to any product which has been subjected to misuse; misapplication; neglect (including but not limited to
improper maintenance); accident; improper installation; modification (including but not limited to use of unauthorized parts or attachments);
adjustment or repair. THE FOREGOING IS IN LIEU OF ALL OTHER WARRANTIES, WHETHER EXPRESS OR IMPLIED (INCLUDING THOSE OF
MERCHANTABILITY AND FITNESS OF ANY PRODUCT FOR A PARTICULAR PURPOSE), AND OF ANY OTHER OBLIGATION OF LIABILITY ON THE
PART OF THE COMPANY.
(B) Limitation of Liability
It is expressly understood that Summit’s liability for its products, whether due to breach of warranty, negligence, strict liability, or otherwise,
is limited to the repair of the product, as stated above, and Summit will not be liable for any other injury, loss, damage, or expense, whether
direct or consequential, including but not limited to loss of use, income, profit, or damage to material, arising in connection with the sale,
installation, use of, inability to use, or the repair or replacement of Summit’s products.
Summit reserves the right to make alterations or modifications in its products at any time, which in its opinion, may improve the
performance and efficiency of the product. It shall not be obligated to make such alterations or modifications to products already in service.
Please take the time to fill out the warranty card online at http://www.summitstands.com/warranty or fill out and mail in the
enclosed warranty card.
INDEX
1
PARTS LIST
2
WARRANTY
3
PG 2 www.summitstands.com

CAM BUCKLE ATTACHMENT
1. Position a single Buckstep section and cam buckle strap as
shown in figure 1.
2. Start with the sewn loop end that is NOT attached to the
cam buckle. Push this through the metal bracket from the
bottom up as shown in figure 2.
3. Push the sewn loop that is attached to the cam buckle and
the cam buckle through the loop as shown in figure 3.
4. Thread the entire buckle and remaining strap through the
loop as shown in figure 4.
5. Pull snug to create a cinch knot. Your completed Buckstep
should look like figure 5.
6. Repeat Steps 1 -5 for the remaining sections.
1
2 3
45
ASSEMBLY
4
WARNING
!
ALWAYS ENSURE that the cam buckle faces out with no
twists in the strap.
PG 3

SETTING UP
1. Take one Buckstep section and press it firmly against the tree.
For the first (bottom) section, this is made easier by holding it
against the tree with your leg. Wrap the cam buckle end around
the tree as shown in figure 6. There should not be any twists in
the strap as it runs around the tree.
2. Bring the sewn loop of the strap through the center hole in the
bracket as shown in figure 6. Wrap the loop around the ears on
the bracket as shown in figure 7 and 8.
3. Pull the strap tight as shown in figure 9.
4. Your first Buckstep section should be hanging loosely on the
tree. Pull the free end of the cam lock buckle strap as shown in
figure 10.
5. You must pull down on the Buckstep to secure it firmly in place
as shown in Figure 11. The step may slide down the tree until the
strap tightens up.
6. ALWAYS CHECK THE STABILITY OF EACH BUCKSTEP SECTION
BEFORE CLIMBING ONTO IT!
Using a lineman’s belt will allow you to use two hands when
hanging the steps and it prevent you from falling backwards while
climbing and securing the steps.
Carefully climb onto the bottom Buckstep section.
7. USING A PULL UP ROPE - pull the next Buckstep section up to
you. Repeat steps 1-6 to secure other sections.
8. Repeat Step 7 for any remaining sections. ALWAYS Position
your last Buckstep section so that you step down onto your
treestand platform.
WARNING
!
Use of a lineman’s style hook up is mandatory when hanging
or using your Bucksteps. See your harness instructions for
information on using a lineman’s belt!
WARNING
!
The looped end MUST be hooked around both ears as shown
in Figure 9.
WARNING
!
Before proceeding YOU MUST properly attach a lineman’s
style belt (from a properly worn full body harness to the
tree) in order to support your weight. See your Harness
Instructions for details. A full body harness and lineman’s
belt MUST BE USED AT ALL TIMES when installing or
removing any hang-on climbing aids or hang-on stands.
6
7
8
WARNING
!
Do not place any Buckstep section more than 18 inches above
the section below it.
INSTALLATION AND USE
5
PG 4 www.summitstands.com

9
WARNING
!
NEVER unhook from your lineman’s belt until your full body
harness is properly connected to the tree using a safety rope
or strap. YOU MUST attach your full body harness to a
safety rope or strap BEFORE you attempt to step down into
your treestand.
WARNING
!
ALWAYS STEP DOWN from the top of the last Buckstep to
the treestand! NEVER attempt to climb into a stand from your
Bucksteps. The last Buckstep MUST be placed on the tree at a
height above the platform where the user can maintain a hand
hold on the unit and step downwards onto the treestand.
NEVER step up from a climbing device to get into your stand.
REMOVAL
1.
2. Stand on the step below the one you wish to remove. Grab
the top step and pull up. This should take the tension off the cam
buckle. Press the release lever on the buckle.
3. While the release lever is depressed, loosen the strap and lower
the step to the ground with a pull-up rope.
4. Repeat Steps 2-3 for the remaining sections.
WARNING
!
ALWAYS put on your lineman’s style belt before attempting
to unhook the steps from the tree.
WARNING
!
When descending to remove your Bucksteps NEVER loosen
any tie-off strap until you are securely standing on the section
below it. ALWAYS support your weight on the Buckstep
section still securely attached and ALWAYS use a lineman’s
belt and full body harness until you are securely on the
ground!
10
PULL TIGHT
11
PG 5

PACKING
1. Your Bucksteps should include a small, camouflaged bag with
snap straps attached to it. Secure this bag to ONE Buckstep
section as shown in figure 12. This bag can remain attached.
2. Nest the remaining three Buckstep sections together - make
sure the straps are free as shown in figure 13. The section with
the bag attached should be the last (top) section nested.
3. Roll all the straps together and push them into the bag as
shown in figure 14. Your Buckstep sections are now ready to be
strapped to your treestand or carried to your hunting location.
12
13 14
MAINTENANCE AND CARE
6
!
CAUTION
Look for nicks, gouges, cuts, cracks, bends, corrosion or
similar damage that can be the result of improper use
or accidental damage. For instance, this could occur if
someone else used the treestand without knowledge of
its proper use, or if the treestand were dropped, hit by
a motor vehicle or subject to corrosive conditions, etc.
• When not in use, store your treestand in a dry place - tree teeth
pointing down - to keep water from pooling inside the stand tubing.
Water that is allowed to fill the stand tubing and freeze will rupture
the tubing.
• The powdercoat finish applied at the factory is very durable and
should only need touch ups in areas of heavy wear or accidental
impact. Use a high quality, outdoor spray paint to cover any bare
metal areas that might develop. When transporting your Summit
Treestand be sure it is securely tied down and be sure no other objects
can slid into or hit the treestand possibly causing damage.
Should you damage any part of your Summit Treestand, contact your nearest authorized Summit dealer or the factory to obtain the
proper corrective action procedure and/or replacement parts for the treestand.
Summit Treestands have the highest structural integrity by design, material selection and manufacturing techniques, but as its owner,
only your continued care will assure trouble free performance. When the above-mentioned guidelines are followed, your Summit
Treestand will provide years of successful hunting.

• LORS D’UNE CHASSE À PARTIR D’UN MIRADOR, DES CHUTES
POUVANT CAUSER DES BLESSURES OU LA MORT PEUVENT SURVENIR EN TOUT TEMPS APRÈS AVOIR QUITTÉ LE SOL! POUR CETTE
RAISON, UTILISEZ EN TOUT TEMPS UN SYSTÈME D’ARRÊT DE CHUTE (SAC) QUI COMPREND UN HARNAIS COMPLET APRÈS AVOIR QUITTÉ
LE SOL. VOUS DEVEZ ÊTRE ATTACHÉ EN TOUT TEMPS LORSQUE VOUS UTILISEZ UNE PLATEFORME DE CHASSE SURÉLEVÉE. LES CEINTURES
SIMPLES ET DES HARNAIS POUR POITRINE NE SONT PLUS ACCEPTÉS ET NE DEVRAIENT PAS ÊTRE UTILISÉS. SI VOUS N’UTILISEZ PAS UN
HARNAIS COMPLET QUI VOUS PROTÈGERA LORS D’UNE CHUTE, NE QUITTEZ PAS LE SOL!
• LISEZ ET ASSUREZ-VOUS DE COMPRENDRE LES AVERTISSEMENTS ET LES INSTRUCTIONS DU MANUFACTURIER ET L’UTILISATION DES
DISPOSITIFS DE SÉCURITÉ INCLUS. SINON CELA POURRAIT ENTRAÎNER DES BLESSURES OU LA MORT.CONTACTEZ LA COMPAGNIE SUMMIT
TREESTANDS POUR TOUTE QUESTION.
• AYEZ EN VOTRE POSSESSION ET DISPONIBLE EN TOUT TEMPS UN DISPOSITIF DE SIGNALEMENT TEL UN TÉLÉPHONE CELLULAIRE, UNE
RADIO, UN SIFFLET, UNE FUSÉE DE SIGNALISATION OU UN DISPOSITIF DE LOCALISATION PERSONNEL (PLD)! TOUJOURS INFORMER UNE
PERSONNE DE VOTRE TERRITOIRE DE CHASSE, DE L’EMPLACEMENT DE VOTRE MIRADOR ET DE LA DURÉE PRÉVUE DE VOTRE CHASSE!
• N’UTILISEZ PAS DE MIRADOR SI VOUS N’ÊTES PAS EN BONNE CONDITION PHYSIQUE OU SI VOUS AVEZ DES LIMITATIONS PHYSIQUES OU
DES CONDITION MÉDICALES QUI NE VOUS PERMETTRAIENT PAS L’UTILISATION SÉCURITAIRE DE CE PRODUIT. TOUJOURS CONSULTER UN
MÉDECIN SI VOUS AVEZ DES QUESTIONS AU SUJET DE VOTRE HABILETÉ PHYSIQUE POUR L’UTILISATION DE CE PRODUIT.
• N’UTILISEZ JAMAIS UN MIRADOR SI VOUS PRENEZ DE LA DROGUE, DE L’ALCOOL OU DES MÉDICAMENTS PRESCRITS! VEUILLEZ TOUJOURS
CONSULTER UN MÉDECIN SI VOUS AVEZ DES QUESTIONS AU SUJET DE MÉDICAMENTS QUE VOUS DEVEZ PRENDRE ET L’UTILISATION DE
CE PRODUIT!
• N’UTILISEZ JAMAIS UN MIRADOR LORSQUE LE CLIMAT EST INCLÉMENT TEL LA PLUIE, LA FOUDRE, LES TEMPÊTES DE VENT OU DES
CONDITIONS GLACÉES! METTEZ FIN À VOTRE CHASSE ET REJOIGNEZ LE SOL SI CES CONDITIONS CLIMATIQUES SE PRODUISENT.
• N’UTILISEZ JAMAIS UN MIRADOR SI VOUS ÊTES MALADE, SI VOUS AVEZ LA NAUSÉE, SI VOUS ÊTES SOMNOLENT OU ÉTOURDI!
• SOYEZ REPOSÉ ET JAMAIS PRESSÉ. VOUS PRESSER CAUSE DES ACCIDENTS!
• N’UTILISEZ JAMAIS UN MIRADOR SUR UN ARBRE MORT, PENCHÉ, MALADE, AVEC UNE ÉCORCE DÉTACHÉE, SUR UN POTEAU UTILITAIRE
OU SUR TOUT ARBRE PRÈS DUQUEL SE TROUVENT DES OBSTRUCTIONS QUI POURRAIENT LIMITER L’UTILISATION DU MIRADOR! NE VOUS
FIER JAMAIS SUR UNE BRANCHE DE L’ARBRE POUR SUPPORTER LE MIRADOR!
• NE SAUTEZ OU NE BONDISSEZ JAMAIS SUR UN MIRADOR POUR LE SÉCURISER À L’ARBRE!
• MONTEZ UN ARC, UN SAC À DOS, UNE ARME OU TOUT AUTRE ÉQUIPEMENT SEULEMENT LORSQUE VOUS SEREZ EN SÉCURITÉ DANS LE
MIRADOR. LES ARMES À FEU DOIVENT ÊTRE MONTÉES DANS LE MIRADOR DÉCHARGÉES, LA CHAMBRE OUVERTE ET LE CANON DIRIGÉ
VERS LE BAS!
• NE MODIFIEZ JAMAIS VOTRE MIRADOR EN Y FAISANT DES RÉPARATIONS, EN REMPLAÇANT DES PARTIES, OU EN ALTÉRANT, AJOUTANT
OU EN Y ATTACHANT TOUT OBJET SAUF SI LE MANUFACTURIER L’AUTORISE PAR ÉCRIT!
• PRATIQUEZ-VOUS À INSTALLER, AJUSTER ET UTILISER VOTRE MIRADOR AU NIVEAU DU SOL AVANT L’UTILISATION À DES POSITIONS
ÉLEVÉES!
• LES INSTRUCTIONS (ÉCRITES ET PAR VIDÉO) DEVRAIENT ÊTRE GARDÉES DANS UN ENDROIT SÛR ET DOIVENT ÊTRE REVUES AU MOINS UNE
FOIS PAR ANNÉE. LA RESPONSABILITÉ DE FOURNIR LES INSTRUCTIONS COMPLÈTES À TOUTE PERSONNE QUI EMPRUNTE OU ACHÈTE LE
MIRADOR INCOMBE AU PROPRIÉTAIRE! LE MIRADOR SUMMIT EST FAIT POUR ÊTRE UTILISÉ COMME UN SYSTÈME COMPLET - NE PRÊTEZ
OU NE VENDEZ JAMAIS UNE PARTIE DE CE MIRADOR
• AVANT CHAQUE UTILISATION DU MIRADOR SUMMIT, VEUILLEZ TOUJOURS INSPECTER LE MIRADOR ET LE HARNAIS POUR DES
DOMMAGES, DES FENTES, DES DÉCHIRURES, POUR L’USURE OU L’ÉCORCHURE DU CÂBLE QUE PEUT OCCASIONNER LE TRANSPORT OU
L’ENTREPOSAGE DU MIRADOR. NE L’UTILISEZ PAS S’IL EST ENDOMMAGÉ! APPELLEZ LE SERVICE À LA CLIENTÈLE POUR Y APPORTER DES
RÉPARATIONS APPROPRIÉES OU POUR LE REMPLACEMENT DU MIRADOR!
• NE LAISSEZ PAS VOTRE MIRADOR À L’EXTÉRIEUR LORSQU’IL N’EST PAS UTILISÉ! LES TUBES DU MIRADOR QUI SE REMPLIRAIENT D’EAU ET
QUI GELERAIENT POURRAIENT SE ROMPRE OU ÉCLATER - N’UTILISEZ PAS VOTRE MIRADOR SI CETTE SITUATION SE PRODUIT!
Vous devez également visionné le DVD ci-joint AVANT d’utiliser votre
nouveau mirador!!
LIMITE DE POIDS
118 KGS. X 1 TOTAL*
NE DÉPASSER PAS CETTE LIMITE!
(* Inclus tout l’équipement)
Grosseur d’arbre minimum et maximum pour le mirador:
20-50 cm de diamètre
!
Vous devez lire entièrement, comprendre et suivre ces
avertissements et instructions (écrites et sur vidéo)! Si ces
instructions ne sont pas suivies cela pourrait entraîner des
blessures ou la mort!!
AVERTISSEMENT
Summit
Bucksteps
PN 82077
© 2013 Summit Treestands, LLC
715A Summit Dr. Decatur, AL 35601
(256) 353-0634
www.summitstands.com

CONTENU DE LA BÔITE
DESCRIPTION QTY
SECTION BUCKSTEP 4
COURROIE AVEC BOUCLE À CAME 4
POCHETTE DE TRANSPORT DE COURROIE 1
DVD DE SÉCURITÉ ET D’INSTRUCTIONS 1
INSTRUCTIONS 1
CARTE DE GARANTIE 1
INDEX
1
LISTE DES PIÈCES
2
GARANTIE LIMITÉE
3
AVERTISSEMENTS GÉNÉRAUX ET PRÉCAUTIONS, LIMITES DE POIDS DU MIRADOR PAGE 7
SECTION 1 - INDEX P 8
SECTION 2 - LISTE DES PIÈCES P 8
SECTION 3 - GARANTIE LIMITÉE P 8
SECTION 4 - ASSEMBLAGE P 9
SECTION 5 - INSTALLATION ET UTILISATION P 10 - 12
SECTION 6 - ENTRETIEN ET SOINS P 12
Appellez le 256-353-0634 ou visitez le site web à l’adresse http://www.
summitstands.com/contactus/ si vous avez des questions, si vous avez besoin
de pièces de remplacement, si des pièces sont manquantes ou si le DVD
inclus est défectueux.
(A) Garantie
La compagnie Summit Treestands, LLC (Summit) garantie à l’acheteur original que tous ses produits manufacturés sont sans défauts du
matériel et de fabrication lors de l’expédition et ce pour soixante (60) mois à partir de la date d’achat. Summit remplacera toute pièce
défectueuse si le module soi-disant défectueux est retourné à Summit port payé, à l’intérieur de la période de garantie.
Cette garantie ne s’applique pas à tout produit qui aurait subit un usage impropre ou abusif, négligé (notamment un mauvais entretien);
accident; mauvaise installation, modification (notamment l’utilisation de pièces non-autorisées ou pièces ajoutées); ajustement ou réparation.
LA GARANTIE MENTIONNÉE PRÉCÉDEMMENT REMPLACE TOUTE AUTRE GARANTIE, MENTIONNÉE EXPRESSÉMENT OU IMPLICITEMENT
(INCLUANT LES GARANTIES DE COMMERCIALISATION ET D’ADAPTATION DE TOUT PRODUIT À UN OBJECTIF PARTICULIER), ET TOUTE AUTRE
OBLIGATION DE RESPONSABILITÉ DE LA PART DE LA COMPAGNIE.
(B) Limitation de responsabilité
Il est expressément entendu que la responsabilité de Summit pour ses produits, que ce soit dû à une violation de la garantie, de la
négligence, de la responsabilité sans faute ou autrement, est limitée à la réparation du produit, tel que mentionné ci-haut, et Summit ne
sera pas responsable pour toute blessure, perte, dommage ou frais encourus, que ce soit une cause directe ou indirecte, notamment de la
perte d’usage, de salaire ou dommage matériel résultant de la vente, de l’installation, de l’utilisation ou l’incapacité d’utiliser le produit, ou la
réparation ou le remplacement des produits de Summit.
Summit se réserve le droit de faire des modifications ou transformations à ses produits en tout temps, qui, selon son opinion, pourrait
améliorer la performance et l’efficacité du produit. Summit n’est pas obligé de faire ces modifications ou transformations aux produits déjà
en service.
Veuillez prendre le temps de remplir la carte de garantie en ligne à l’adresse http://www.summitstands.com/warranty ou de remplir
la carte ci-jointe et de l’envoyer par la poste.
PG 8 www.summitstands.com

ATTACHEMENT DE LA COURROIE AVEC BOUCLE À
CAME
1. Placez une section Buckstep et une courroie ave boucle à
came tel qu’illustré à la figure 1.
2. Commencez avec la boucle cousue qui n’est PAS attachée à
la boucle à came. Poussez la au travers du support métallique
du bas vers le haut tel qu’illustré à la figure 2.
3. Poussez la boucle cousue qui est attachée à la boucle à
came et la boucle à came au travers de la boucle tel qu’illustré
à la figure 3.
4. Enfilez complètement la boucle et le reste de la courroie au
travers de la boucle tel qu’illustré à la figure 4.
5. Tirez fermement pour créer un nœud sanglé. Votre
Buckstep complété devrait ressembler à la figure 5.
6. Répétez les étapes 1 à 5 pour les sections restantes.
1
2 3
45
ASSEMBLAGE
4
PG 9
Assurez-vous que la boucle à came fait toujours face vers
l’extérieur et qu’il n’y a pas de torsion dans la courroie.
!
AVERTISSEMENT

INSTALLATION
1. Prenez une section Buckstep et appuyez la fermement contre
l’arbre. Pour la première section (bas), il est plus facile de la tenir
contre l’arbre avec votre jambe. Passez le bout de la boucle à
came autour de l’arbre tel qu’illustré à la figure 6. Il ne devrait y
avoir aucune torsion de la courroie autour de l’arbre.
2. Faites passer la courroie avec la boucle cousue à travers le
trou central du support tel qu’illustré à la figure 6. Faites passer
la boucle autour des deux oreilles du support tel qu’illustré à la
figure 7 et 8.
3. Tirez la courroie fermement tel qu’illustré à la figure 9.
4. Votre première section Buckstep ne devrait pas être serrée sur
l’arbre. Tirez sur la partie libre de la courroie de la boucle à came
tel qu’illustré à la figure 10.
5. Vous devez pousser vers le bas sur le Buckstep afin de vous
assurer qu’il est fermement en place tel qu’illustré à la figure 11.
6. VOUS DEVEZ TOUJOURS VOUS ASSURER DE LA STABILITÉ DE
CHAQUE SECTION BUCKSTEP AVANT DE MONTER.
L’utilisation d’une ceinture d’ascension vous permet d’utiliser vos
deux mains lorsque vous installez les marches et prévient les chutes
vers l’arrière lorsque vous grimpez et sécurisez ces dernières.
Grimpez prudemment sur la section Buckstep du bas.
7. EN UTILISANT UNE CORDE DE LEVAGE – tirez la prochaine
section Buckstep vers vous. Répétez les étapes 1 à 6 pour
sécuriser les autres sections.
8. Répétez l’étape 7 pour les sections restantes. TOUJOURS
positionner votre dernière section Buckstep de sorte que vous
descendez sur la plate-forme de votre mirador.
6
7
8
INSTALLATION ET UTILISATION
5
PG 10 www.summitstands.com
L’utilisation d’une ceinture d’ascension est obligatoire lorsque
vous installez vos Bucksteps. Voir les instructions sur les
harnais pour plus d’information sur l’utilisation des ceintures
d’ascension.
!
AVERTISSEMENT
Le bout de la boucle DOIT être enroulé autour des deux
oreilles tel qu’illustré à la figure 9.
!
AVERTISSEMENT
Avant de procéder, VOUS DEVEZ attacher correctement une
ceinture d’ascension (à partir d’un harnais corporel complet
correctement porté et attaché à l’arbre) afin de supporter
votre poids. Voir les instructions sur le harnais pour les
détails. Un harnais corporel complet ainsi qu’une ceinture
d’ascension DOIVENT ÊTRE UTILISÉS EN TOUT TEMPS
lorsque vous installez un dispositif pour grimper ou mirador
fixe.
!
AVERTISSEMENT
N’installez jamais une section Buckstep à plus de 18 po. (45.7
cm) de la section de dessous.
!
AVERTISSEMENT

9
ENLÈVEMENT
1.
2. Tenez-vous sur la section en dessous de celle que vous voulez
enlevez. Agrippez le haut des marches et tirez vers le haut. Ceci
devrait enlever la tension sur la boucle à came. Poussez sur le
levier de déverrouillage de la boucle.
3. Pendant que le levier de déverrouillage est actionné, desserrez
la courroie et descendez cette section au sol en utilisant une corde
de levage.
4. Répétez les étapes 2 et 3 pour les sections restantes.
10
PULL TIGHT
11
PG 11
Ne détachez JAMAIS votre ceinture d’ascension avant que
votre harnais corporel complet soit correctement attaché à
l’arbre en utilisant une corde ou courroie de sécurité. VOUS
DEVEZ attacher votre harnais corporel complet à une corde
ou courroie de sécurité AVANT de descendre sur le mirador.
!
AVERTISSEMENT
VOUS DEVEZ TOUJOURS DESCENDRE du haut de votre
dernier Buckstep sur le mirador. NE JAMAIS essayer de
grimper sur le mirador à partir de votre Buckstep. Votre
dernier Buckstep doit être installé sur l’arbre à une hauteur
supérieure à la plate-forme du mirador de sorte que
vous puissiez conserver une main sur le Buckstep tout en
descendant sur le mirador. NE JAMAIS monter à partir d’un
appareil d’escalade pour embarquer sur un mirador.
!
AVERTISSEMENT
TOUJOURS porter une ceinture d’ascension avant de
détacher les marches de l’arbre.
!
AVERTISSEMENT
Lorsque vous descendez afin de retirer vos Bucksteps, NE
JAMAIS relâcher la tension des courroies jusqu’à ce que vous
soyez debout sur la section du dessous en toute sécurité.
TOUJOURS supporter votre poids sur une section Buckstep
attachée correctement et TOUJOURS utiliser une ceinture
d’ascension et un harnais corporel complet tant que vous
n’êtes pas en toute sécurité au sol.
!
AVERTISSEMENT

EMBALLAGE
1. Vos Bucksteps devraient inclure un petit sac camouflage avec
sangles d’accrochage. Sécurisez ce sac à UNE section Buckstep tel
qu’illustré à la figure 12. Ce sac peut rester attaché.
2. Emboîtez les trois sections Buckstep restantes ensemble –
assurez-vous que les courroies sont libres tel qu’illustré à la figure
13. La section avec le sac attaché devrait être la dernière (dessus)
section emboîtée
3. Enroulez toutes les courroies ensemble et placez les dans
le sac tel qu’illustré à la figure 14. Vos sections Buckstep
sont maintenant prêtes à être attachées à votre mirador ou
transportées à votre emplacement de chasse.
12
13 14
ENTRETIEN ET SOIN
6
• Le fini powdercoat appliqué à l’usine est très durable et devrait
requérir des retouches aux endroits d’usure prononcé ou aux
endroits où un impact s’est produit. Utilisez une peinture en aérosol
d’extérieur de bonne qualité pour couvrir le métal dénudé.
• Lors du transport du mirador Summit, assurez-vous qu’il soit bien
attaché et assurez-vous que d’autres objets ne puissent frapper le
mirador et l’endommager.
Si vous endommagez une partie du mirador Summit, contactez votre
détaillant autorisé Summit le plus près ou le manufacturier pour obtenir
la procédure corrective correcte et / ou un remplacement des pièces de votre mirador.
Les miradors Summit possèdent la plus haute intégrité du design structural, de sélection du matériel et des techniques de fabrication,
mais en tant que propriétaire, seuls vos soins fréquents assureront une utilisation sans problèmes. Si les lignes directrices ci-haut sont
suivies, votre mirador Summit vous procurera des années de succès à la chasse
!
Essayez de voir s’il y a des encoches, des coupures, des
fissures, des plis, de la corrosion ou tout autre dommage
que pourrait occasionner une mauvaise utilisation ou des
dommages accidentels. Par exemple, ceci pourrait se produire
si une autre personne utilise ce mirador sans avoir les
connaissances requises pour son utilisation correcte, ou si le
mirador a été échappé, frappé par un véhicule automobile ou
assujeti à de la rouille, etc.
PRUDENCE
Table of contents
Languages:
Other Summit Accessories manuals

Summit
Summit 85241 User manual

Summit
Summit Dagger User manual

Summit
Summit SPR314LOS User manual

Summit
Summit Dual Pro User manual

Summit
Summit 85251 User manual

Summit
Summit VIPER SS INFINITY User manual

Summit
Summit Solo Pro User manual

Summit
Summit 82061 User manual

Summit
Summit Razor SS User manual

Summit
Summit rsxHAWK User manual

Summit
Summit Solo Deluxe User manual

Summit
Summit 82023 User manual

Summit
Summit SCR314LCSS User manual

Summit
Summit Dual Performer User manual

Summit
Summit FF195 User manual

Summit
Summit VIPER CLASSIC User manual

Summit
Summit rsFalcon User manual

Summit
Summit SCFF55 SERIES User guide

Summit
Summit Raptor Series User manual

Summit
Summit SwifTree 17 User manual