Sun Seeker Eco-Tad SX User manual

1
Eco-Tad Supplemental Owner’s Manual
Revised Date 1/2015
Go to www.sunseeker.bike for more information

2
CONGRATULATIONS!
Congratulations and welcome to the Sun Seeker Recumbent family! You have selected one of the most comfortable and advanced recumbents on the
market. Please read this manual before riding your Sun Seeker Recumbent. In this manual you will find that we cover the basics for setting up and
understanding your new recumbent.
IMPORTANT:
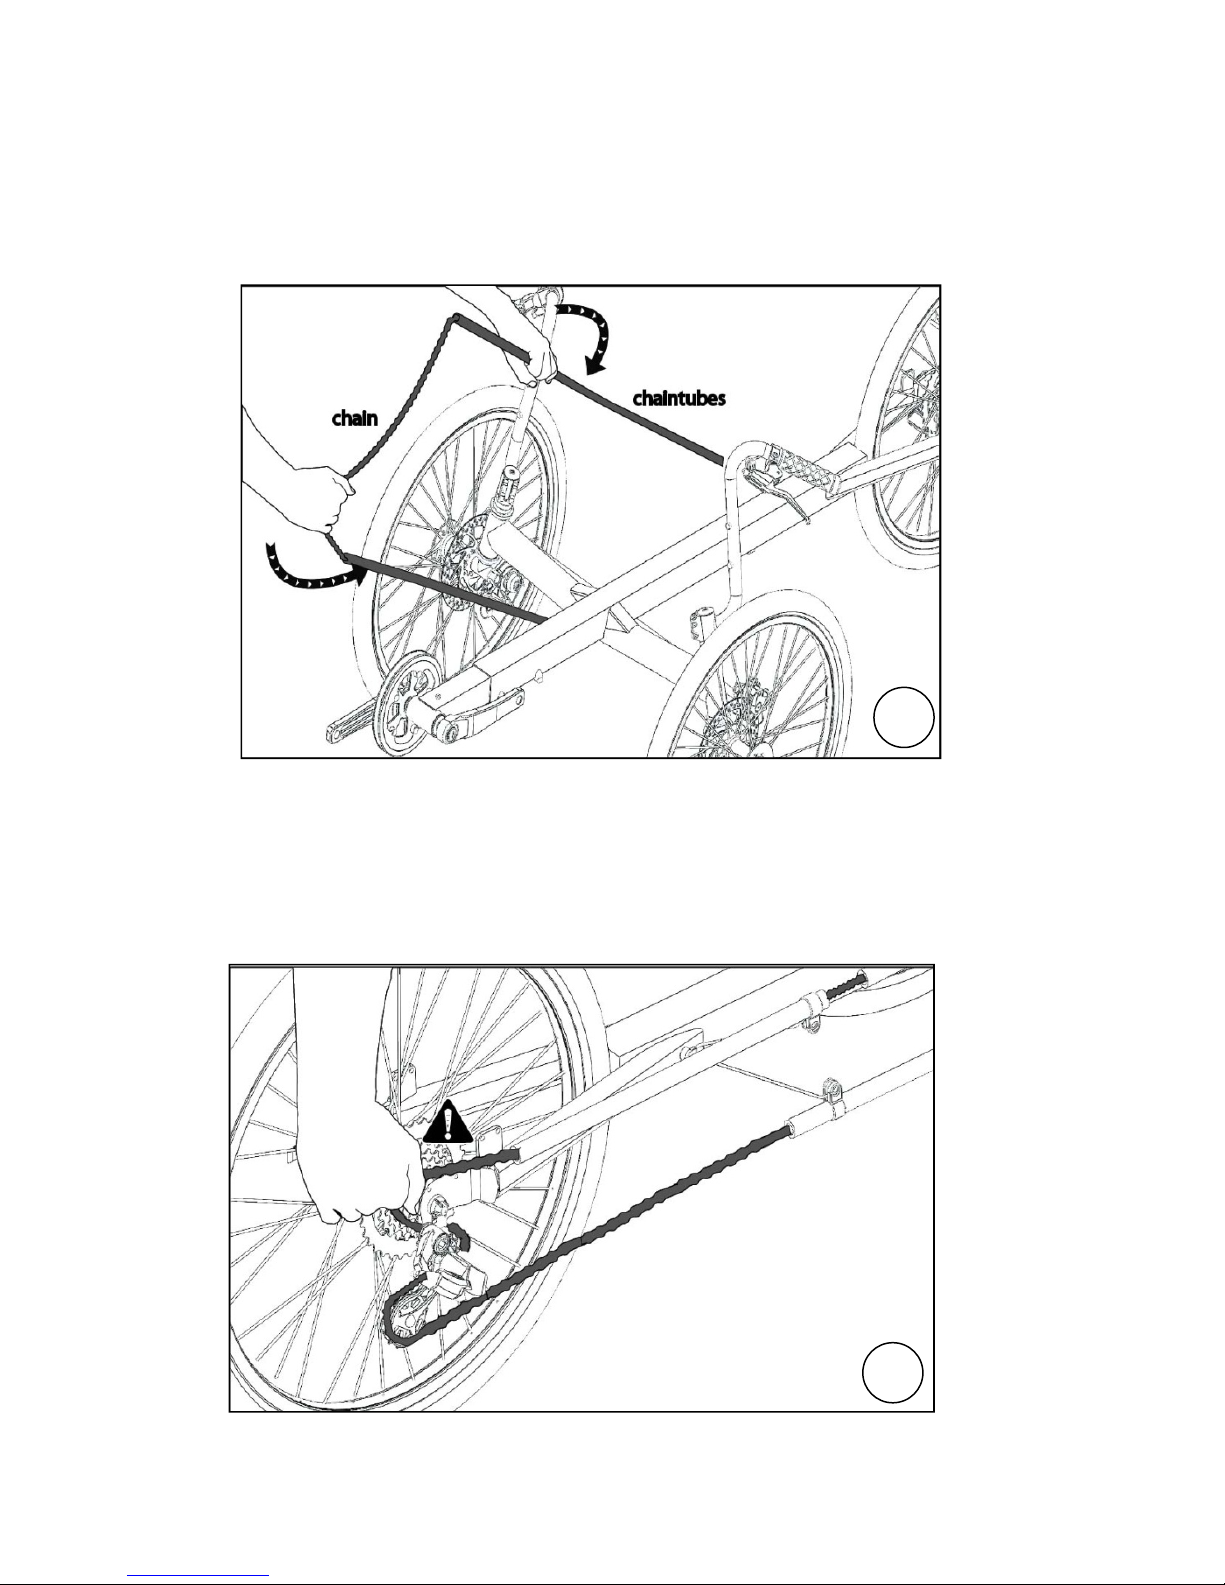
This manual is only a supplement to the main Recumbent Bicycle/Tricycle Owner’s Manual.
Read it before you take the first ride on your new recumbent bicycle/tricycle, and keep it for reference.
NOTE:
This manual is not intended as a comprehensive use, service, repair or maintenance manual. Please see your dealer for all service, repairs or
maintenance. Your dealer may also be able to refer you to classes, clinics or books on bicycle use, service, repair or maintenance.
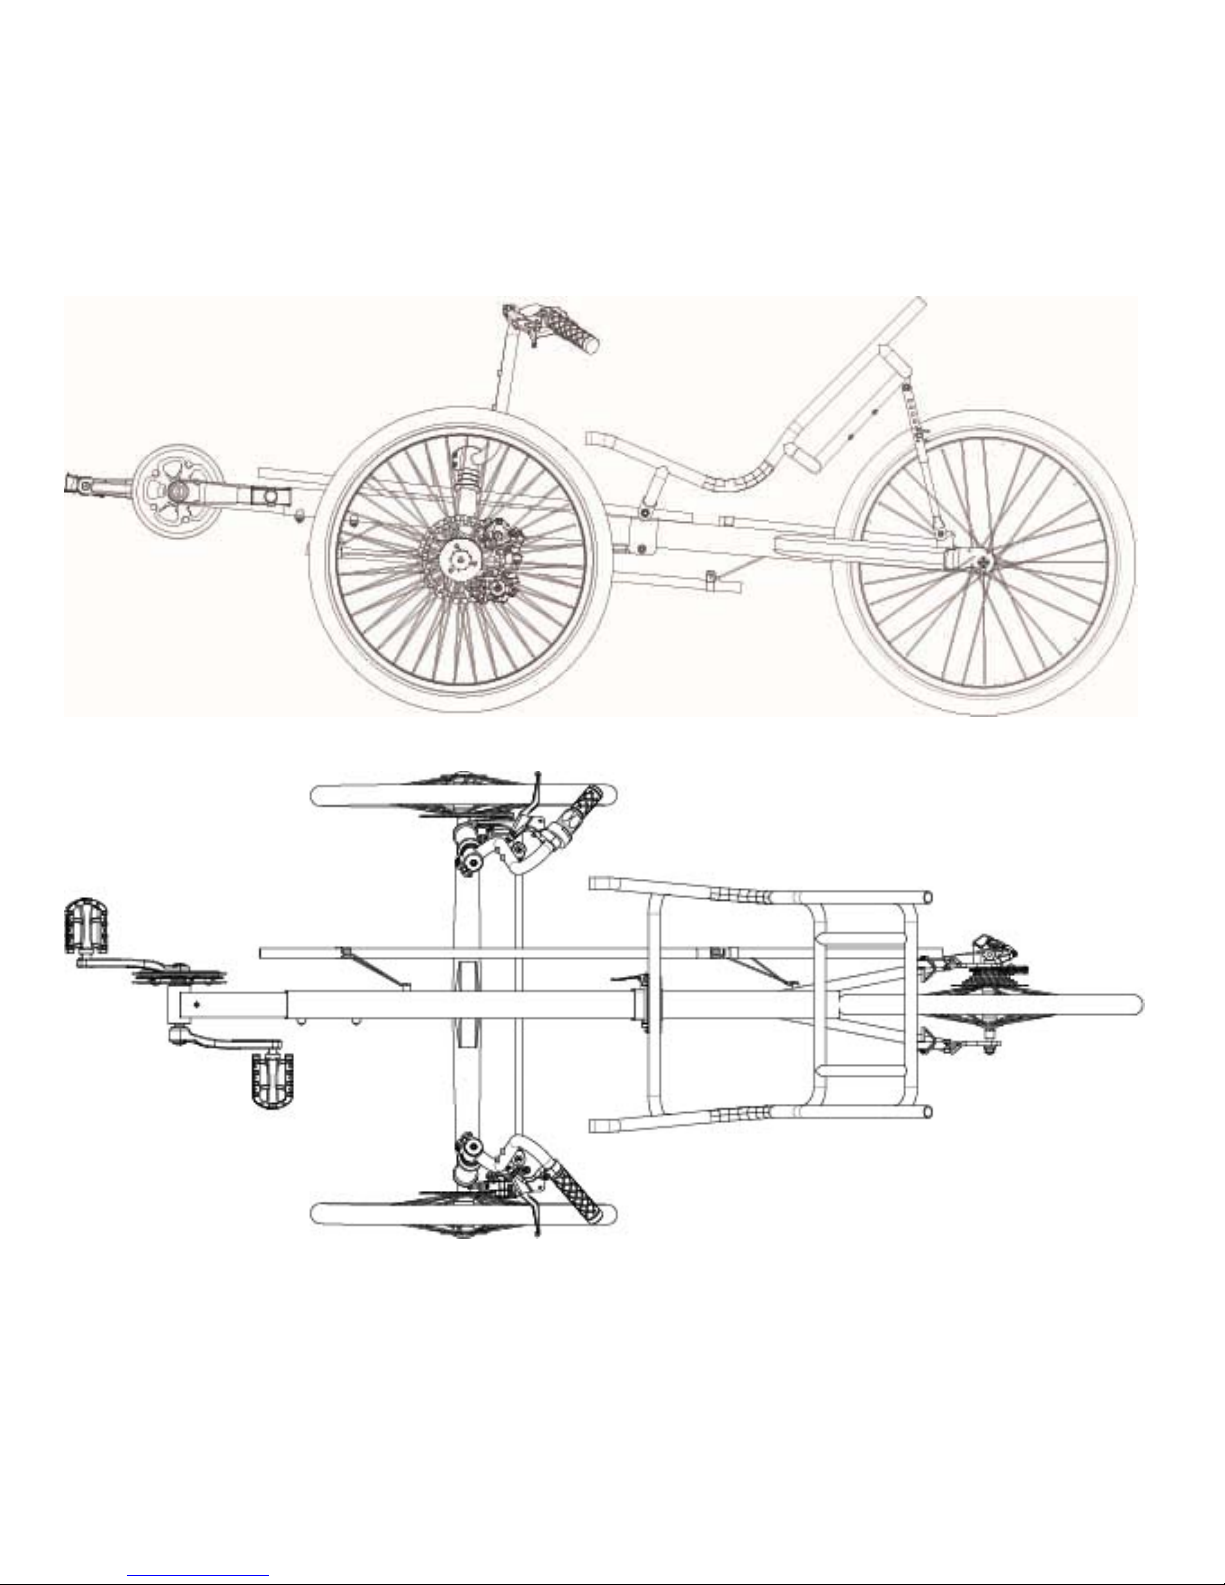
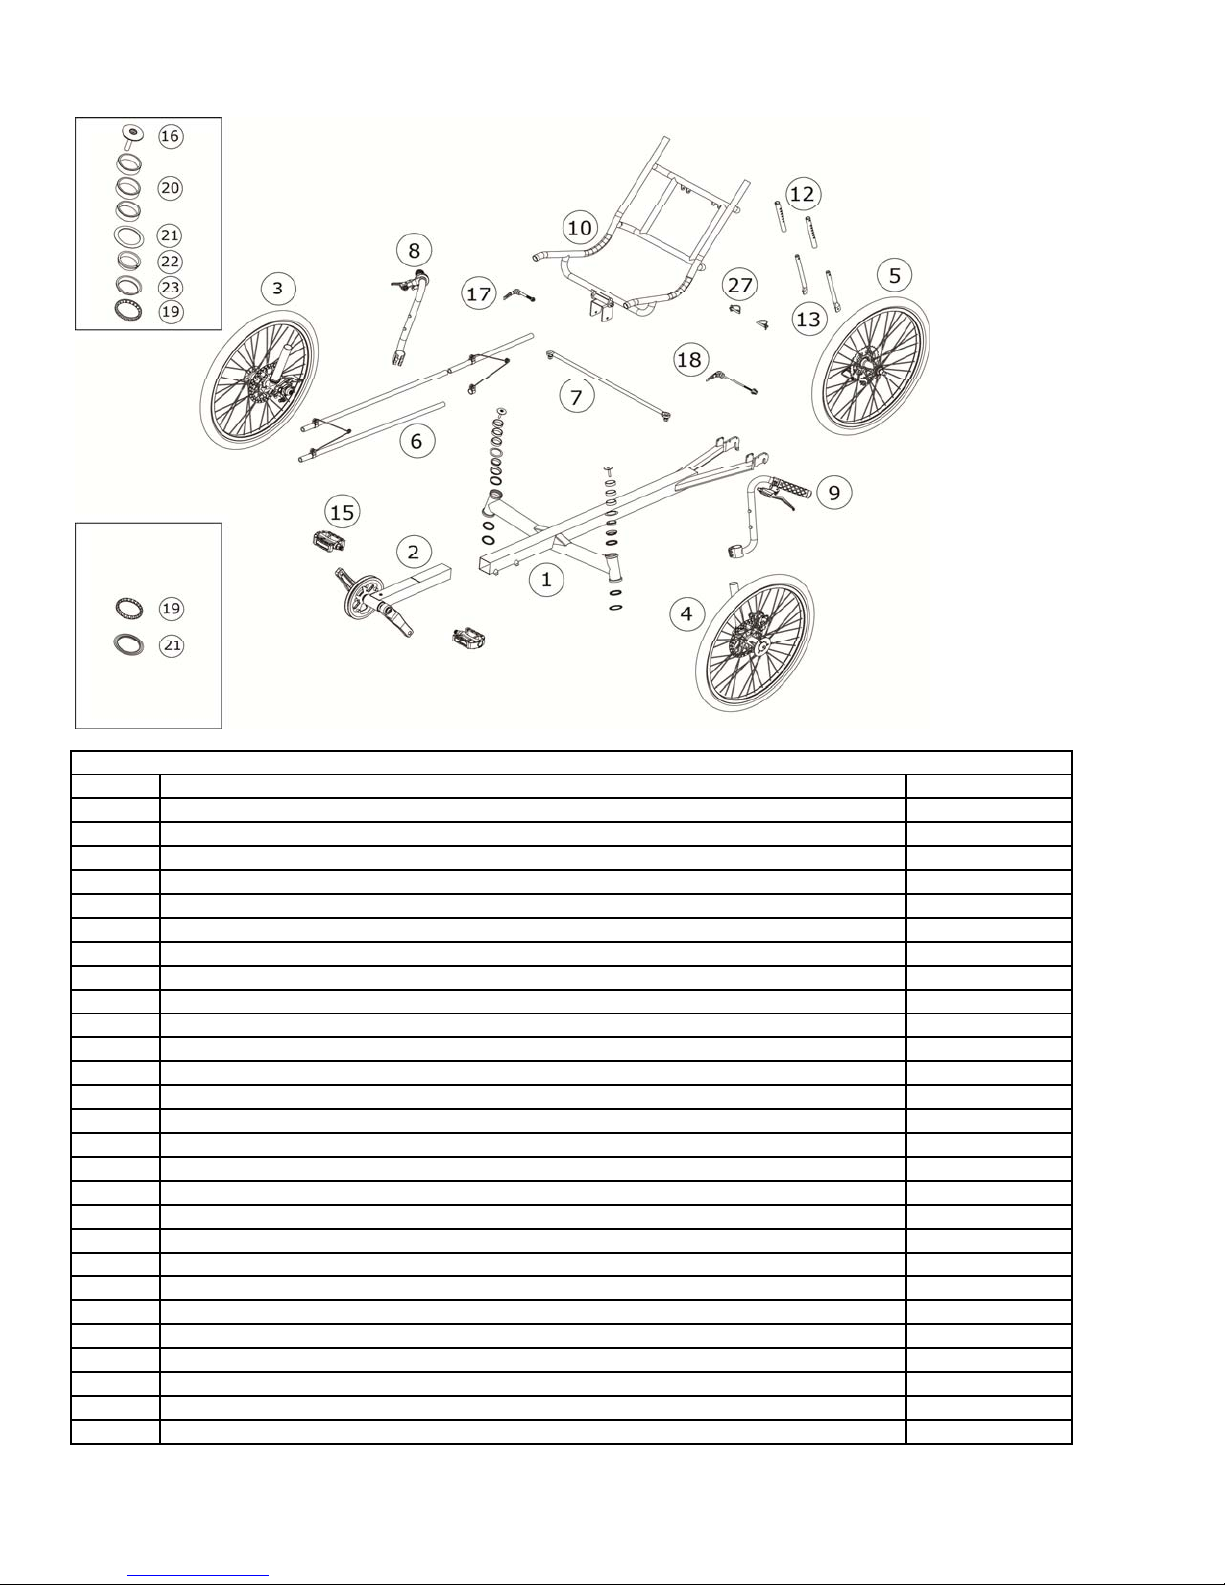
Eco-Tad Specifications
Model: Eco-Tad SX
Style: Tadpole Trike
Frame Material: Hi-Ten Steel
Fork Material: Hi-Ten Steel
Handlebar Material: Chromoly Steel
Steering System: Direct Linkage
Seat Type: 1-piece - Padded Base w/Steel Frame & Full Mesh
Wheelbase: 37-1/2″(95cm)
Overall Length: 70-1/2″- 78-3/4″(179-199cm)
Width: 31″(78.7cm)
Bottom Bracket Height: 13-3/4" (35cm)
Seat Height: 17″-18″(43-46cm)
Weight: 46 lbs.
X-Seam : 31″- 53″(31-79cm)
Weight Limit: 300 lbs.
Gear Inch Range: 22 - 55
Headset: Threadless Steel
Drive Type: Direct 7 speed Derailleur
Pedals Type: Toe Clip Compatible
Crankset: Single Alloy 170mm 38t
Bottom Bracket: Square Taper Sealed Bearing
Chain Type: KMC Z-51
Front Derailleur: N/A
Rear Derailleur: Sunrace RD-M37
FW/Cassette Range: 13-32
Shifters Set: Sunrace TS-M28 Twist
Brake Levers: Promax Locking Linear Pull
Brake Caliper Front/Rear: Promax DSK-400 Mechanical Disc / nil
Rims / Spokes: Alloy Single Wall / Stainless Steel
Tires / Size: Kenda Kwest 20x1.50 40-65psi
Water Bottle Cage Mounts: 2-Handlebar / 2-Seat Back
Note: Specifications subject to change without notice.

3
Eco-Tad Reference Views
Side View
Top View

4
Eco-Tad Assembly Reference
ECO-TAD PARTS LIST
ITEM DESCRIPTION QUANTITY
1 Main Frame 1
2 Crank Boom Assembly 1
3 Right Front Wheel Assembly 1
4 Left Front Wheel Assembly 1
5 Rear Wheel Assembly 1
6 Chain Tube Assembly 2
7 Steering Linkage Assembly 1
8 Right Handlebar Assembly 1
9 Left Handlebar Assembly 1
10 Seat Frame Assembly (Not Pictured Above) 1
11 Seat Mesh 1
12 Upper Seat Strut 5/8"x 150mm 2
13 Lower Seat Strut 1/2"x 400mm 2
14 Rear Derailleur (Not Pictured Above) 1
15 Pedals 1
16 Headset Top Cap & Bolt 2
17 Quick Release Seat Pin M8*95mm 1
18 Quick Release for Rear Wheel M5*180mm 1
19 Headset Bearing 4
20 Headset Spacer 10mm 6
21 Headset Seal 4
22 Headset Compression Ring 2
23 Headset Adjust Cone 2
24 Chain (Not Pictured Above) 1
25 Cable Tie (Not Pictured Above) 2
26 Spare Bolt M8*110mm for optional Alloy Seat Frame (Not Pictured Above) 1
27 Seat Strut Pin 2

5
Assembly Guide
Front Wheel and Handlebar Installation
1. Install #3 Right Front Wheel Assembly
Assemble #19 Bearing (lubricate bearing with grease) #21 Seal and onto steer tube of the #3 Right Front Wheel Assembly. Insert steer
tube into head tube. See Figure A.
Assemble #19 Bearing (lubricate bearing with grease), #21 Seal, #23 Adjust Cone, #22 Compression Ring and (2) of #20 Spacers onto the
remaining top portion of the steer tube. See Figure B.
2. Install #8 Right Handlebar Assembly
Assemble #8 Right Handlebar Assembly and (1) of #20 Spacers onto top of #3 Right Front Wheel Assembly. Install #16 Top Cap and Bolt as
shown in Figure B. Position bar temporarily, secure the #16 Top Cap and Bolt and then secure handlebar bolts (see See Figure W for final
adjustment).
3. Install #4 Left Front Wheel Assembly
Follow procedure 1. Above using the #4 Left Front Wheel Assembly.
4. Install #9 left Handlebar Assembly
Follow procedure 2. Above using the #4 Left Front Wheel Assembly.
A
B

6
Steering Linkage Installation
1. Install #7 Steering Linkage Assembly
Assemble #7 Steering Linkage with supplied hardware onto the Steering Arm Tab holes located closest to wheel. See Figure C-E.
Rear Wheel and Derailleur Installation
1. Install #5 Rear Wheel Assembly
Assemble #5 Rear Wheel onto the rear frame drop outs. See Figure F.
2. Install #14 Rear Derailleur.
Assemble #14 Rear Derailleur onto the rear frame derailleur tab. See Figure G.
C
D E
F
G

7
Setting Front Wheel Toe-In Angle
Setting Toe In For Tadpole Trikes
(0mm to 3mm recommended):
1. With the trike on the ground and wheels fixed in the straight ahead position, measure from the front of the left wheel centerline across to the
right wheel centerline. See Figure H. Record that measurement.
Repeat the above for the rear left wheel centerline across to the right side centerline. See Figure I. Record the measurement.
The measurement should be the same or up to 3mm toed in.
2. Hint for simple measuring technique: Use a tape measure and hook one end on an inside spoke at the centerline of the left front wheel and
measure to the opposing inside spoke on the front of the right hand wheel. Use the same technique at the rear.
3. To adjust the toe in, loosen the Rod End Jam Nuts (See Figure J) on the Steering Linkage Assembly (7) turn the Steering Linkage clockwise
or counter clockwise. This will lengthen or shorten the rod since the rod ends are right hand threaded on one side and left hand threaded on
the other.
4. Tighten the Rod End Jam Nuts (See Figure J) and recheck the toe in. Re-adjust if necessary.
H
I
J

8
Crank Boom Installation
1. Install #2 Crank Boom Assembly
Insert #2 Crank Boom into the front on the frame. For now, insert midway and secure boom bolts. See Figure K.
NOTE: DO NOT extend Crank Boom Assembly past the safety line. See Figure L.
K
L

9
Chain and Chain Tube Installation
1. Thread Chain Into Chain Tubes
Insert the chain into the chain tubes. Position the longer chain tubes above the front axle and the shorter one below with the ends of the chain
to the rear of the trike. Also make sure the “Y” spring brackets are pointed toward the rear of the trike.
2. Install Chain Onto Crank
Pull enough chain to go around crank. See Figure M.
3. Route Chain Through Derailleur
Route the open end of the chain through the derailleur then close the chain.
3. Install Chain Tube Brackets
Secure the brackets to the frame.
NOTE: Chain length is set for crank boom at its fully extended position. Chain and chain tubes may have to be shortened as necessary. Do not shorten
until the rider has been fitted properly.
NOTE: Adjust the upper rear chain tube to be far enough from the freewheel to not affect shifting. See Figure N.
N
M

10
Seat Assembly Installation
1. Install Seat Frame Assembly
Install #10 Seat Frame Assembly onto frame and secure with #17 Quick Release Seat Pin M8*95mm. See Figure O.
2. Install Upper Struts
Install 2 #12 Upper Seat Struts and ½ moon washers to the seat frame using the provided hardware. See Figure P.
3. Install Lower Struts
Install 2 #13 Lower Seat Struts to the lower frame tabs using the provided hardware.
4. Strut Pins
Insert the lower struts into the upper struts and use 2 #27 Strut Pins to secure the struts. . See Figure Q.
O
P
Q

11
Cable Guide Installation
1. Installing Cable Tie
Thread #25 Cable Tie over the #17 Quick Release Seat Pin and zip it onto the pin. Trim the tie and route the derailleur cable through the eye
of the cable tie. See Figure R.
Pedal Installation
1. Installing Pedals
a. Apply grease to the threads of the pedal spindle. This will protect both the threads of the pedal and crank arm over time.
Use pedal washers where required,
b. Using your hands, thread the pedal spindle into the crank arm by turning it toward the front of the bike. Once the threads
catch use your pedal wrench to finish tightening down the pedals. See Figure S.
c. Torque down the pedals to a minimum of 300 in-lbs of torque.
R
S

12
Fit Adjustment
1. Adjusting Seat and Boom
a. The goal is for your seat (and therefore your weight) to be as far back as possible when your set up is complete.
b. Loosen and slide the #10 Seat Frame Assembly rearward on the Main Frame until in a comfortable seating position. Adjust the seat
angle by removing and reinstalling the #27 Strut Pins into a new position on the Seat Struts if necessary. See Figure T.
c. Loosen the Crank Boom Clamp Bolts and position the boom so that when seated, your knee should be just slightly bent when the forward
foot is in the farthest position. See Figure U.
d. Re-tighten the Crank Boom Clamp Bolts to the specified torque setting.
e. If you cannot extend your leg forward enough, you can then move the seat forward to get the proper fit.
Note: Your chain may need to be lengthened or shortened depending on your final seat and boom position.
Seat struts can be trimmed and re-drilled as necessary to provide a perfect fit.
CAUTION: Never lubricate or wax the part of the boom that goes into the frame. See Figure V.
2. Adjusting Handlebars and Headset
a. Loosen the clamp bolts (1) that secure your Handlebar
Assembly to the steering tube. See Figure W.
b. Carefully loosen the Top Cap Bolt (2).
c. Position the Handlebar Assembly to the desired position
then carefully retighten the Top Cap Bolt (2) only until play is
removed from Headset Bearing Assembly and the Front
Wheel Assembly still turns smoothly. Do not over tighten.
d. Tighten clamp bolts (1) on Handlebar Assembly until secure.
e. Repeat for opposite side Handlebar Assembly.
f. Recheck Handlebar and Headset adjustment after a short
test ride.
WARNING: Make sure that once you have made all your handlebar
adjustments, you have sufficient clearance from your hands to your tires or
wheels and that control cables are secured away from all moving parts.
Failure to do so may result in loss of control resulting in a serious or fatal accident.
PO Box 161859, Miami, FL 33116-1859
V
W
T
U
Table of contents
Other Sun Seeker Exercise Bike manuals
Popular Exercise Bike manuals by other brands

NordicTrack
NordicTrack CEX32531 user manual

Schwinn
Schwinn 222 Parts list, full size hardware chart, product illustration, assembly instructions

Sunny Health & Fitness
Sunny Health & Fitness SF-RB420032 user manual

Schwinn
Schwinn active 10 Series Assembly guide

FitNord
FitNord CYCLO 200R owner's manual

Weslo
Weslo Pursuit 625s Manuale d'istruzioni