Page 3 / 3
Care & Maintenance
SAFE USE: Only use on a at, level surface. Do not stand or sit on the log rack.
GENERAL USE & CARE: Recommended for indoor use only. Manufacturer and seller are not liable for any
damage resulting from exposure to outdoor elements. Damage from outdoor use and/or normal wear and
tear is not covered by the 1-year product warranty.
INSPECT: Periodically check assembly points and tighten ttings as necessary. If handles on the tools
become loose, simply re-tighten them by hand.
CLEANING: Use a damp cloth to clean. Do not use abrasive cleaners as doing so may cause parts to
tarnish or rust.
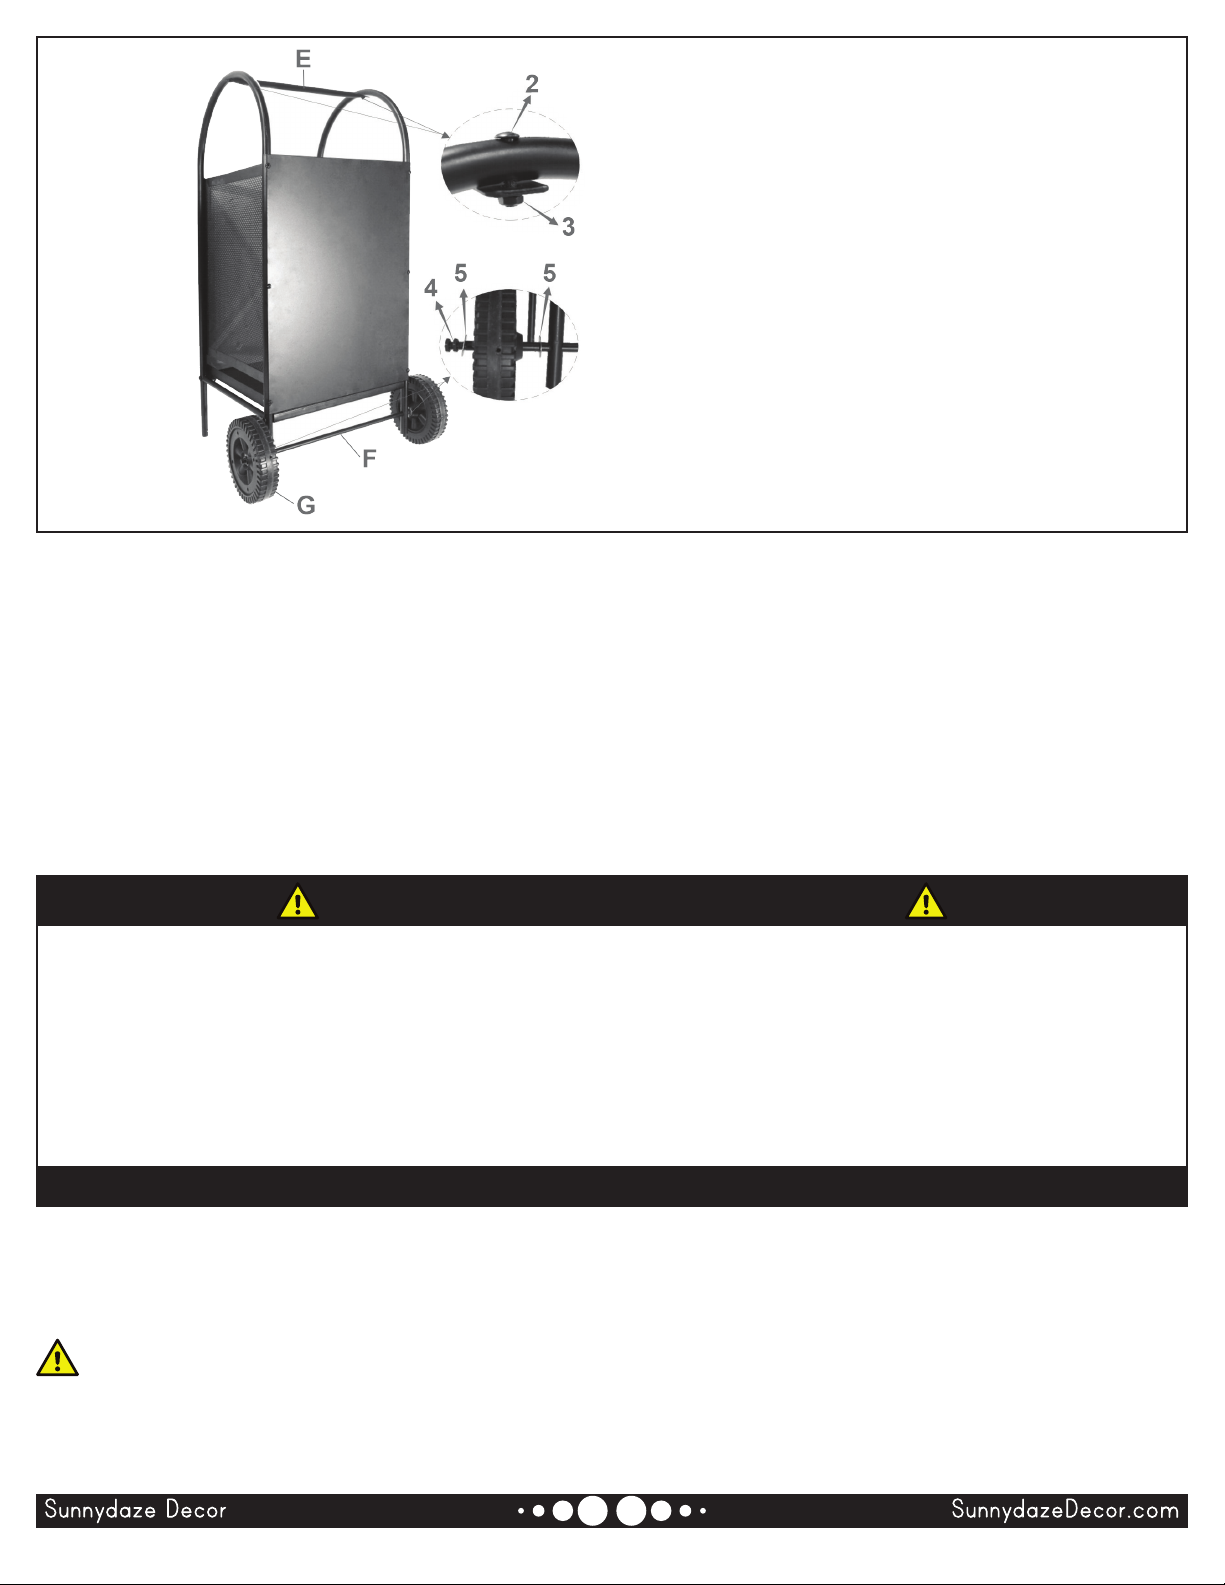
STEP 5
E: 1
2: 2
3: 2
F: 1
G: 2
4: 4
5: 4
06/2021
• Do not exceed the weight capacity of the log rack.
• Supervise children at all times; do not allow children to play on or play with any part of this product.
• Firmly secure all hardware before use.
• Inspect hardware often and tighten as necessary.
• Do not use the brush to sweep live coals (embers).
• Do not use harsh chemicals or abrasive materials to clean this unit.
• This product is for residential use only.
SAFETY STATEMENTS & WARNINGS
LWT-B
• Remove hardware from Run Axle (F).
• Secure Top Bar (E) to the underside of the side
frames by hand-tightening two
M5x25mm Bolts (2)
and two M5 Nuts (3), as shown.
• Run Axle (F) through the holes in the bottom of
the side panels.
• Place one Washer (5) onto the axle, then Wheel
(G), another Washer (5) and secure with two 3/8"
Nuts (4).
• Repeat previous step to attach remaining Wheel
(G).
WARNING!
Manufacturer and seller expressly disclaim any and all liability from personal injury, property damage
If you experience issues with assembly or the product was damaged during shipping,
please contact our customer service team through one of the methods mentioned at the top of page 1.
Please have the item number and order information ready to expedite response time.
Tighten all bolts after this step is complete.