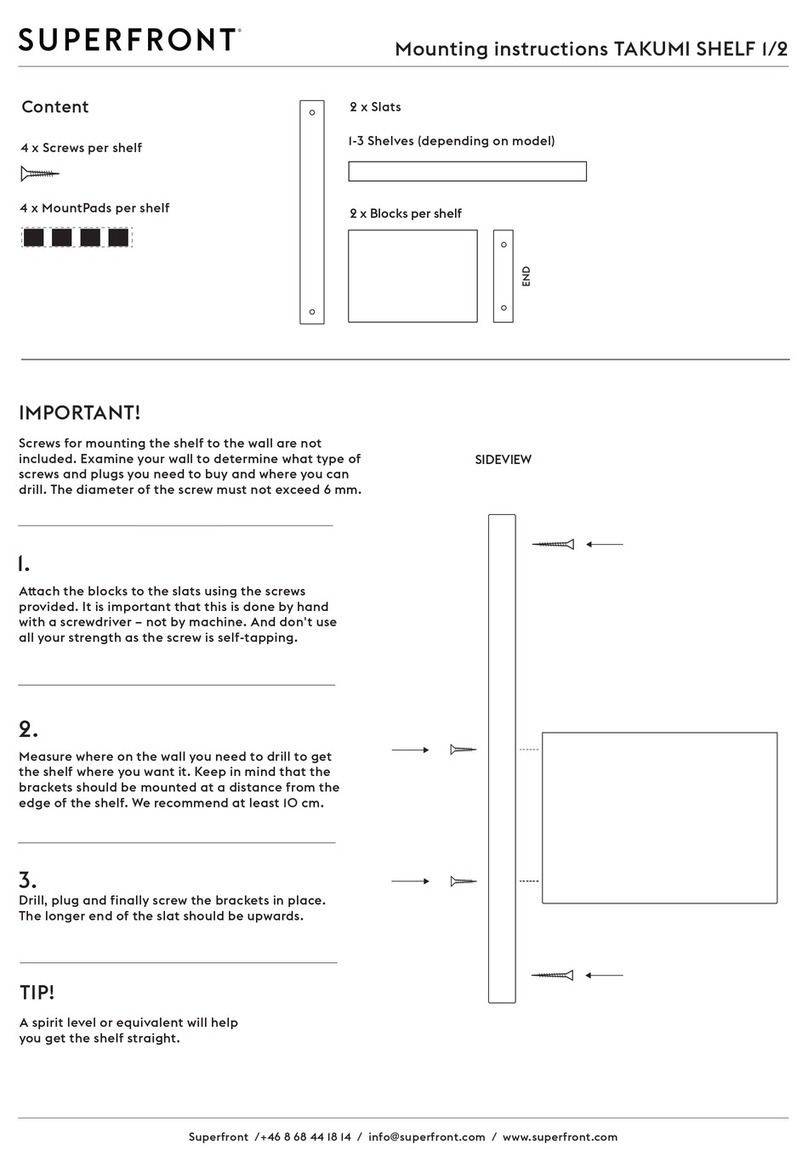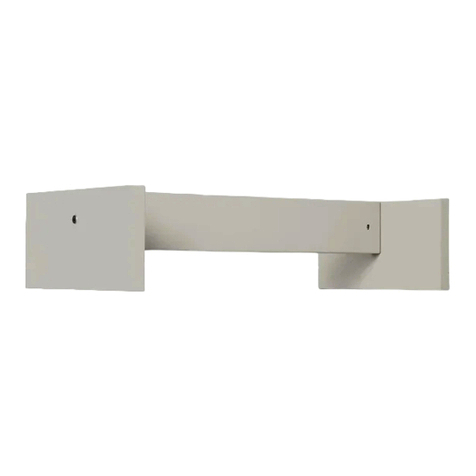
4. Screw from the inside - press from the outside.
Place the screws as shown: two at the top, two at the
boom and the rest evenly spread in between, without
being in the way of the hinges. Use all the screws
supplied.
TIP! Ask a friend to press hard from the outside at the
point where you drive the screw.
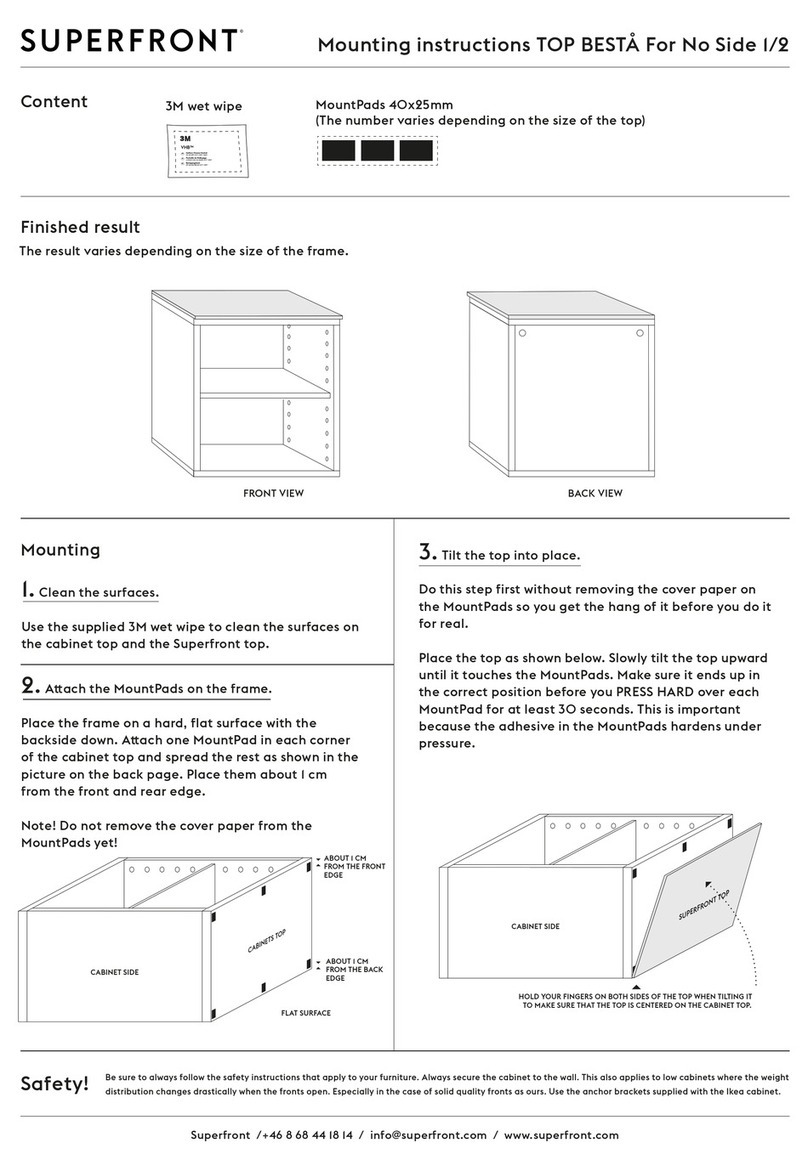
Do this step first without removing the cover paper on
the MountPads so that you get the hang of it before
you do it for real.
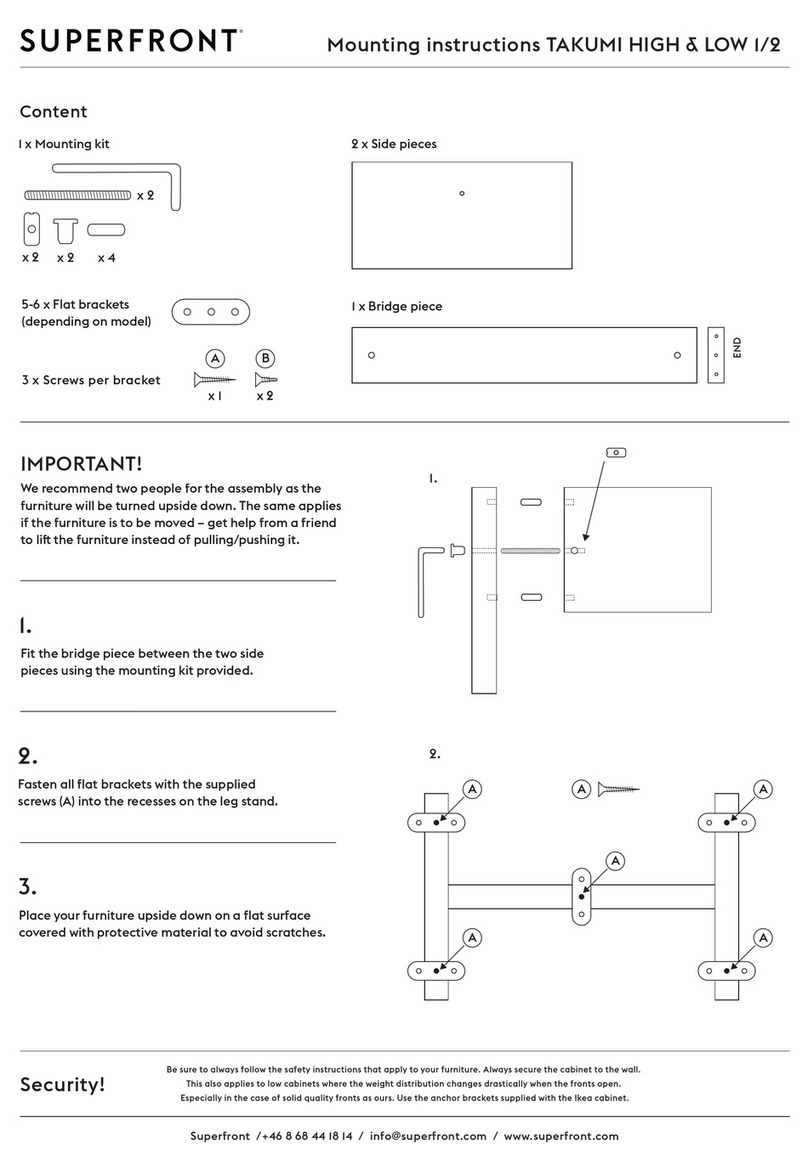
Place the side on the floor, as shown in the picture.
The side should align with the cabinet’s back edge and
protrude about 18mm from the front edge. Slowly tilt
the side upward until it touches the MountPads. Make
sure it ends up in the right position.
PRESS HARD OVER EACH MOUNTPAD FOR AT LEAST
30 SECONDS. This is important because the adhesive
in our MountPads cure under pressure.
3. Tilt the side in place.
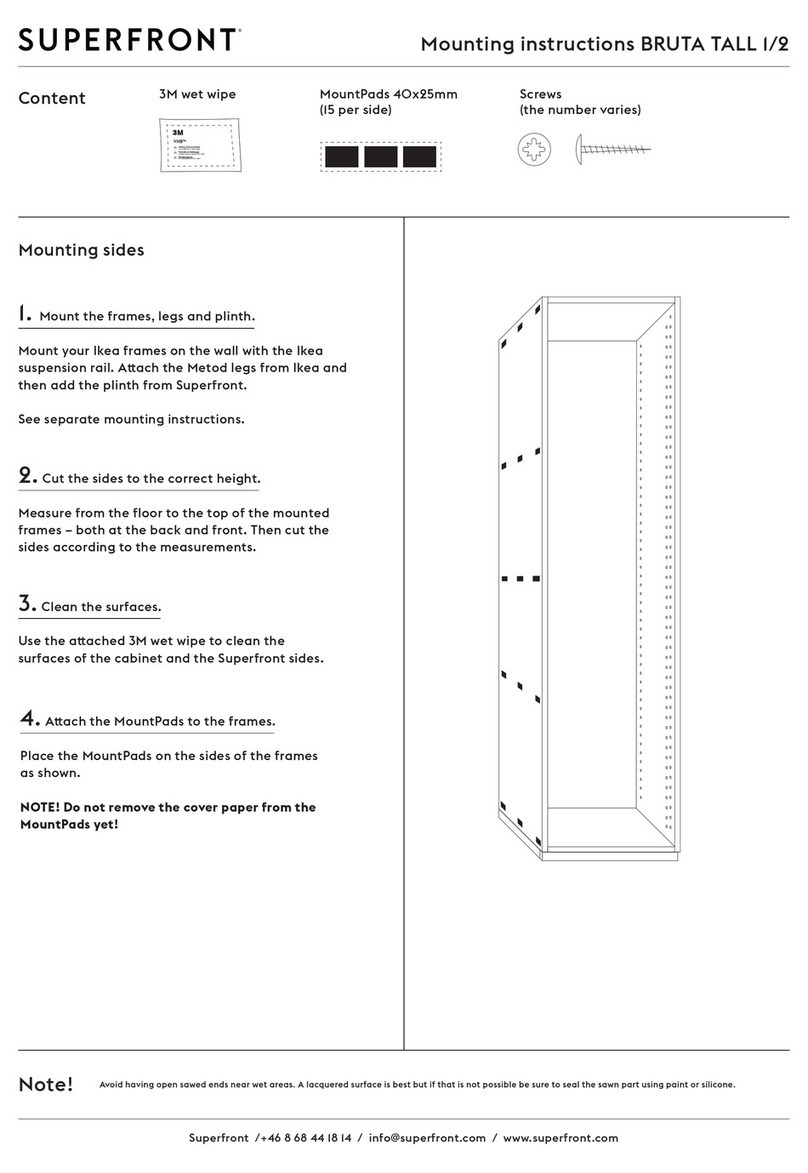
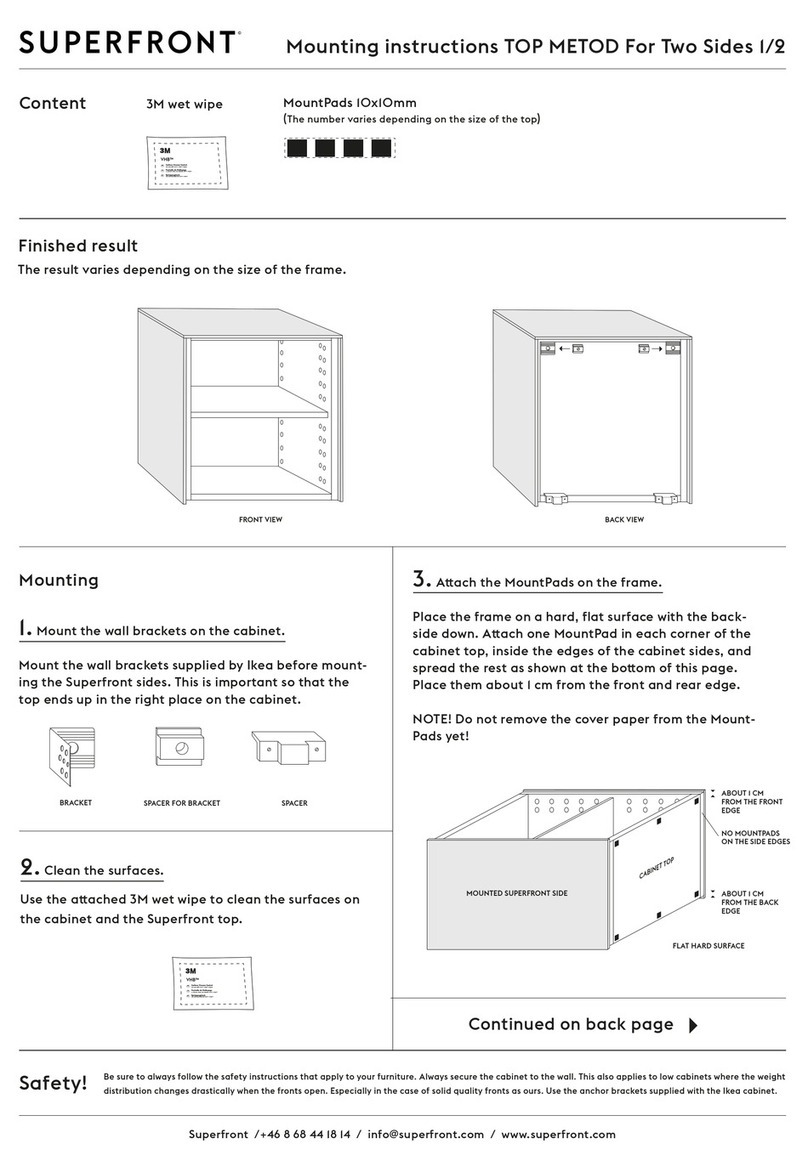
Aach one MountPad in each corner of the cabinet side
and spread the rest evenly along the front and rear edge,
as shown on the back page.
NOTE! Do not remove the cover paper from the MountPads
yet!
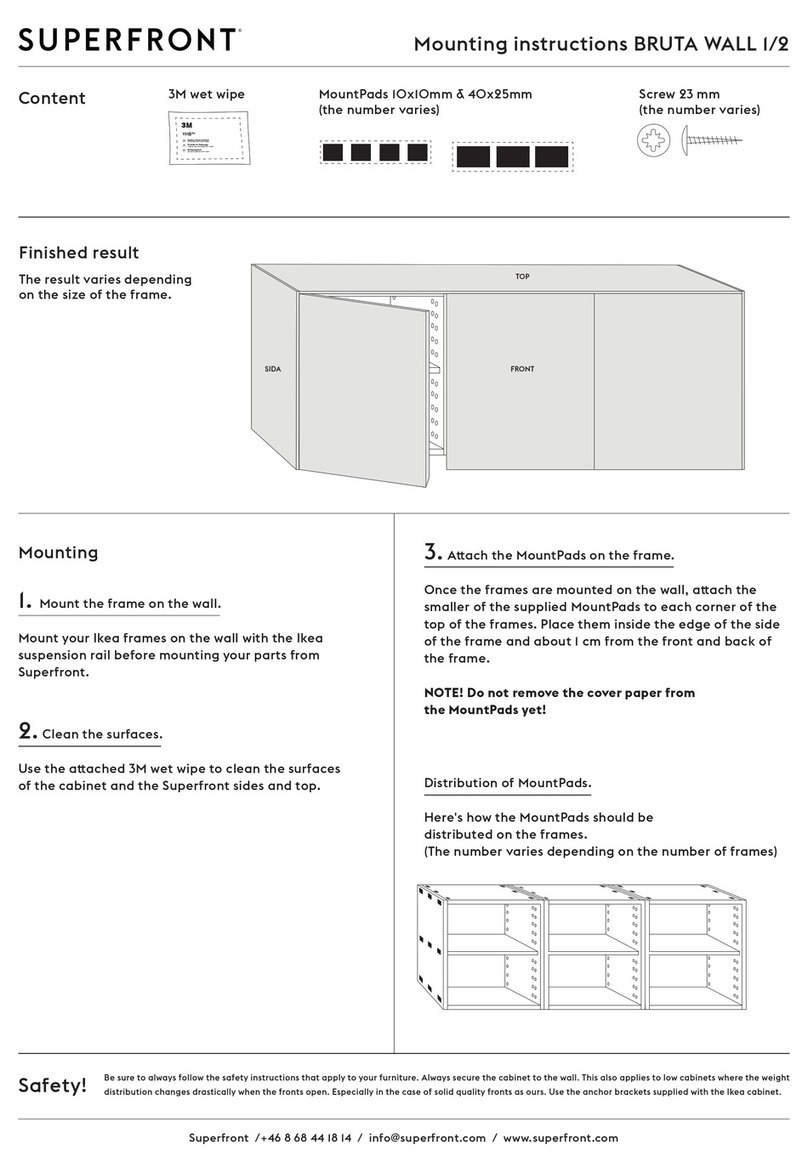
2. Aach the MountPads on the frame.
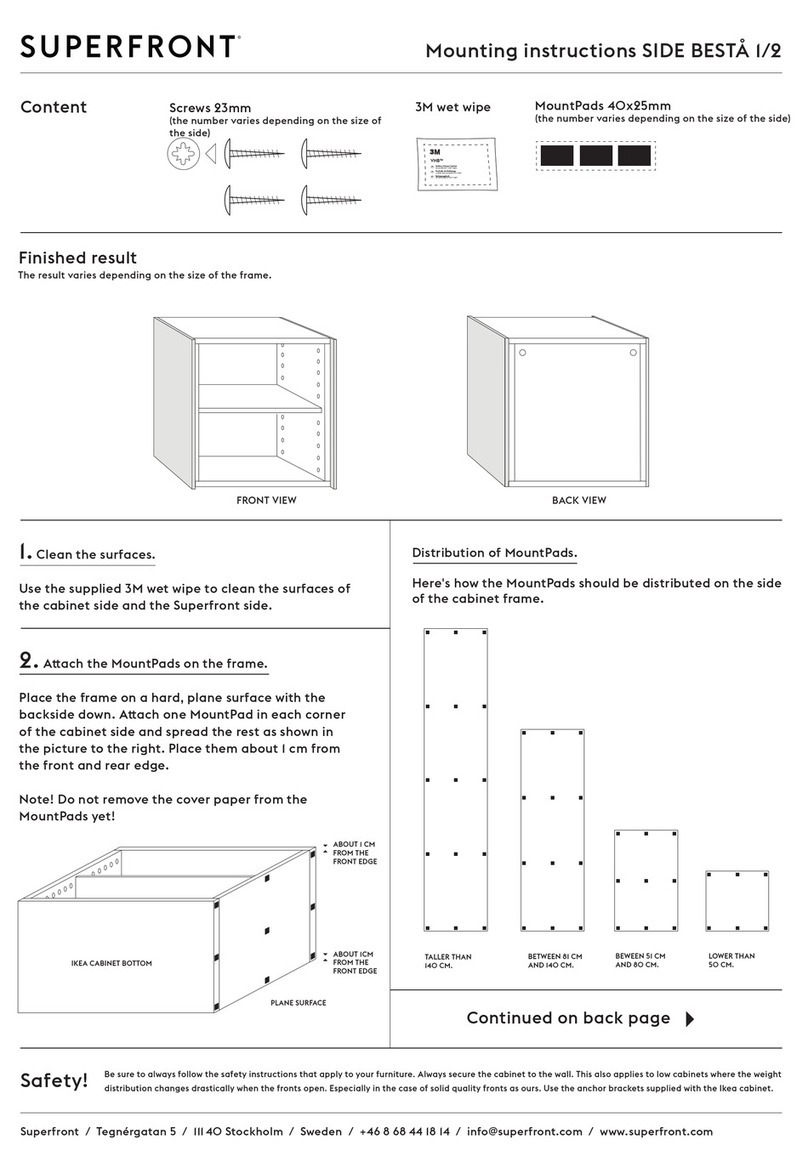
Use the aached 3M wet wipe to clean the surfaces of
the cabinet sides and the Superfront sides.
1. Clean the surfaces.
Mounting instructions SIDE PAX 1/2
Content 3M wet wipeScrew
(The number varies depending on the size of the side)
MountPads 40x25mm
(The number varies depending on the size of the side)
3M
VHB™
GB Surface Cleaner Sachet
Foruse with 3M™ VHB™ Tapes
FR Pochee de Neoyage
Autiliser avecle s rubans3M ™ VHB™
DE Reinigungstuch
Für den Einsatz mit 3M™ VHB™
Be sure to always follow the safety instructions that apply to your furniture. Always secure the cabinet to the wall. This also applies to low cabinets where the weight
distribution changes drastically when the fronts open. Especially in the case of solid quality fronts as ours. Use the anchor brackets supplied with the Ikea cabinet.
Safety!
2 & 3
4
4
Superfront /+46868441814 / info@superfront.com / www.superfront.com
