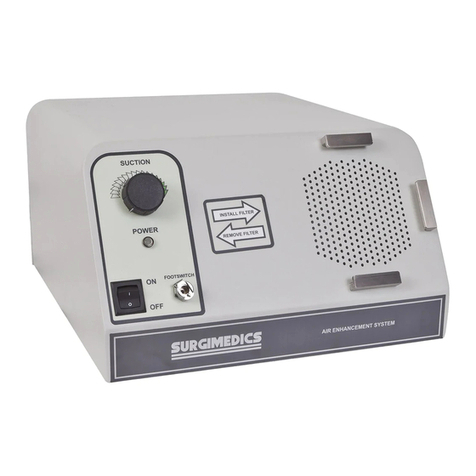
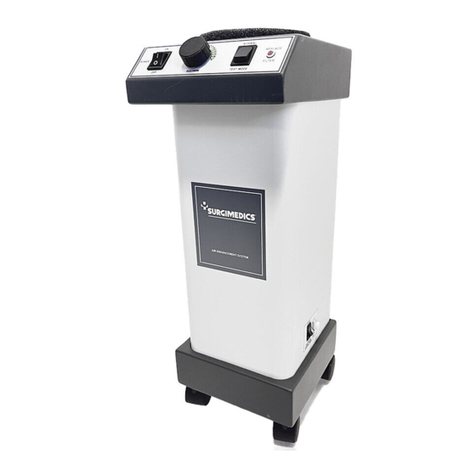
Surgimedics SURGI FRESH TURBO User manual

1
TURBO 230V 60Hz
PN 906760
OWNERS MANUAL
SAFETY PRECAUTIONS
This manual contains information that is important to your
safety and preventing damage to your smoke evacuator
CAREFULLY READ THIS INSTRUCTION MANUAL
BEFORE ATTEMPTING TO OPERATE THIS SMOKE EVACUATOR
Model #
Serial #
Purchase Date / /
SMOKE EVACUATION SYSTEM
SAFETY PRECAUTIONS
This symbol is intended to alert the user to the presence of uninsulated
“dangerous voltage” within the product’s enclosure that may be of sucient
magnitude to constitute a risk of electric shock to persons.
This symbol is intended to alert the user to the presence of important
operating and maintenance instructions in the literature accompanying
the product.
Warning -- indicates that a condition may exist which could adversely aect the
operator or patient.
Caution -- indicates that a condition may exist which could damage the smoke
evacuation system.
This Owner’s Manual and the equipment discussed herein are to be used only by qualied and
properly trained medical personnel who are skilled in the particular technique and surgical
procedure to be performed.
Notice: Federal (USA) law restricts this device to
sale by or on the order of a physician.
CONTENTS
WARNING ...................................... Page 2 CUSTOMER SERVICE .................. Page 9
INTRODUCTION............................ Page 3 TROUBLESHOOTING................... Page 10
OPERATING INSTRUCTIONS ...... Page 4 SPECIFICATIONS.......................... Page 11
MAINTENANCE............................. Page 8 WARRANTY................................... Page 12
http://www.surgimedics.com
301838 ART Rev 0
© Coastal Life Systems, Inc.

2
WARNING
Warning: To prevent electric shock
• Do not connect a wet power cord to the wall receptacle.
• Do not expose to moisture.
• Do not use extension cords, adapter plugs, or a non approved hospital grade
grounded polarized receptacle. Be sure electrical plug blades are fully inserted in
receptacle.
• Do not remove covers from the unit. The unit is non serviceable except for
component replacement. Refer to qualied service personnel.
• Unplug the unit from the wall receptacle before cleaning.
• Unplug the unit from the wall receptacle if it is not to be used for several days or
more.
• To disconnect the power cord, pull it out by rmly grasping the plug, never pull the
cord itself.
WARNING
Warning: The smoke evacuator produces a strong vacuum. Properly adjust the suction control and
the position of the inlet end of the suction tubing or wand to prevent injury to the patient or
inadvertent damage to surgical materials prior to turning power on.
Warning: Laser and electrosurgical plume are potentially hazardous. Used lters, tubing, and
accessories should be handled according to your institution’s procedures for biohazardous
materials.
Warning: To prevent a re or explosion hazard, do not use the unit in the presence of ammable or
potentially ammable materials.
Warning: Some cannulas, valves, or other instruments combined with suction may cause rapid
reduction of the pneumoperitoneum in laparoscopic procedures.
CAUTION
Caution: Use the unit in a well-ventilated area.
Caution: Introduction of uids into the lters could damage them and the smoke evacuation
system.
Caution: An occlusion of the smoke evacuation system can overheat the unit.

3
INTRODUCTION
1. INTENDED USE
The SurgiFresh® Turbo Smoke Evacuation System is intended to be used to evacuate
plume / smoke created during electrosurgery, laser surgery, and laproscopic or power tool
surgical procedures.
Do not use the SurgiFresh® Turbo for applications other than its intended use.
Use only Surgimedics accessories with the SurgiFresh® Turbo. Using products and
accesories other than Surgimedics may void warranty.
Contact Surgimedics with questions concerning features, performance, intended use of this
device, and to order Surgimedics accessories.
Distributed by: Surgimedics, a division of Coastal Life Systems, Inc.
7027 Fairgrounds Pkwy.
San Antonio, TX 78238 USA
800-645-7418
www.surgimedics.com
1. DESCRIPTION OF SYMBOLS
The following is a description of the symbols located on the SurgiFresh® Turbo
Caution, consult accompanying documents.
Consult instructions for use.
Not category AP equipment.
Danger, explosion risk if used in presence of ammable anesthetics.
AP

4
OPERATING INSTRUCTIONS
1. FEATURES AND CONTROLS
Figure 1 User controls
A. Power Switch, Suction Control Knob, Filter Test Switch, and Replace Filter Lamp.
B. Footswitch Tubing Port and Footswitch Control -- connection and control for remote
footswitch.
FIGURE 1
Folding
Handle
Cord Wrap
Power Cord
Circuit Breaker
IEC Connector
Circuit Breaker
B
Footswitch Tubing port
Footswitch Control
A
Power Switch
Suction Control
Knob
Filter Test Switch
Indicator Lamp

5
OPERATING INSTRUCTIONS
2. SYSTEM SET-UP
2.1 Installation
The SurgiFresh® Turbo with manual will arrive in a single carton. Inspect the carton and the
product for any scratches, dents or damage which may have occurred during
shipment. If any damage is noted, follow the instructions per the Warranty section.
Smoke evacuation disposables lters, tubing and accessories may be shipped separately. The
same shipping damage instructions apply to these items.
After removal from the carton, the SurgiFresh® Turbo is set up as follows:
Note: Save carton and packing for future use.
1. Connect the footswitch tube to the side tubing port on the smoke evacuator. Place the
footswitch control in the footswitch mode. If the footswitch is not desired for use, override
the footswitch by placing the footswitch control in the normal mode.
2. Install an ULPA lter in the central core of the unit. Note the air ow direction arrow on the
ULPA lter. The arrow should be pointing downward. Be sure the are no obstructions and
the lter seats completely by pushing all the way down.
Note: Fill out the date sticker (included with lter) and apply it to the top of the
unit. The normal replacement is 90 days from the date of installation. Early replacement is
possible due to heavy usage as indicated by the ULPA lter test or odor.
3. Connect the power cord to the unit and an appropriate electrical receptacle.
4. Perform the ULPA lter test per the procedure in Section 4.2.
Note: The ULPA lter test is performed with no pre-lter or tubing in place. After
testing is satisfactorily completed, turn the motor speed knob to approximate ¼ speed to
ensure that the unit will not be activated at high speed.
5. Install a pre-lter to the top of the ULPA lter.
Caution: Be sure both the ULPA lter and pre-lter are securely seated to ensure
proper suction ow.
6. Determine the type of procedure, select the appropriate tubing and accessories, and
prepare the unit for use as described in Section 3.1
2.2 Typical Setup Instructions
1. OPEN PROCEDURES -- EVACUATING DRY PLUME / SMOKE
a. Ensure an ULPA lter and applicable pre-lter are installed per section 2.1.
b. Connect an adapter if required and/or tubing appropriate for the procedure to the pre-lter.

6
OPERATING INSTRUCTIONS
2. OPEN PROCEDURES -- EVACUATING SMOKE WITH INCIDENTAL FLUIDS
a. Ensure ULPA lter / pre-lter are installed and tested per section 2.1
b. Secure a disposable suction canister near the unit.
c. Attach a 1 1/3” diameter hose from the suction canister to the pre-lter.
Note: Hose attaches to the ‘vacuum’ port on a suction canister.
d. Connect the adapter and/or tubing appropriate for the procedure to the ‘patient’ port of the
suction canister.
Caution: If 3/8” tubing is used, avoid dislodging from the suction canister by using a
sucient length for the procedure.
3. CLOSED PROCEDURES
Note: Closed procedure set up for dry smoke or smoke with incidental uid is the same as
the corresponding open procedure set-up.
Warning: Some cannulas, valves, or other instruments combined with suction may
cause rapid reduction of the pneumoperitoneum in laparoscopic procedures.

7
OPERATING INSTRUCTIONS
3. SYSTEM OPERATING INSTRUCTIONS
3.1 Pre-op preparation
1. Choose the appropriate set-up per Section 2.2 for the intended procedure.
2. Verify the power cord is plugged into the unit and an appropriate electrical receptacle.
3. Verify the footswitch tubing is attached to the unit. Uncoil the footswitch tubing and place the
footswitch near the operator’s station.
4. Turn on the power switch. Note: On is the “I” position. O is the “O” position.
5. Rotate motor speed control knob slightly to verify that the motor speed varies.
6. Press the footswitch to ensure that the unit starts and stops using the footswitch.
7. Turn o the power switch until the smoke evacuator is required.
3.2 Operative Use
Warning: The smoke evacuator produces a strong vacuum. Properly adjust the
suction control and the position of the inlet end of the suction tubing or wand to
prevent injury to the patient or inadvertent damage to surgical materials.
Warning: Some cannulas, valves, or other instruments combined with suction
may cause rapid reduction of the pneumoperitoneum in laparoscopic procedures.
1. Move the SurgiFresh® Turbo into position near the procedure area.
2. Attach tubing per the instructions in Section 2.2.
3. Turn on the power switch.
4. The footswitch may be pressed by personnel in the procedure area to start and stop the
suction as needed during the procedure. Place the footswitch in a convenient location.
5. Rotate the motor speed control knob clockwise to increase air ow (suction) and
counterclockwise to decrease air ow. Stop at desired setting.
6. Verify adequate air ow is set by inquiring with the surgeon. Adjust as necessary with the
motor speed control knob. Turning the knob completely clockwise places the unit in turbo
mode.
7. When the procedure is nished, turn o the power switch.
8. Collect the footswitch and electrical cord.
Follow cleanup instructions per Section 3.4.
3.3 Maximizing Use Suggestions
1. Air ow
a. The distance of the tubing from the plume source aects capture and removal of the
plume. The tubing end should be within several inches of the procedure site.
b. Larger tubing will permit a higher volume of ow for better plume removal. Do not
occlude tubing.
2. Noise
a. Lower speed equals lower noise.
b. Larger tubing equals lower noise. Do not occlude tubing.
c. Use the footswitch to turn the suction on and o as it is needed during the procedure.
3. Incidental Fluids
a. Replace lters immediately if contaminated by uids.
b. The SurgiFresh® Turbo should not be used as a primary uid suction system.

8
OPERATING INSTRUCTIONS
4. Filters
a. Ensure lters are securely seated.
b. Perform the ULPA lter test (Section 4.2) prior to the start of each procedure.
5. Tubing
a. Check throughout the procedure to be sure tubing is not occluded.
Caution: Ensure sponge guard is attached to prevent surgical materials or tissue
from being aspirated/pulled into the tubing.
3.4 Clean-Up
After each procedure, the SurgiFresh® Turbo smoke evacuation system should be cleaned and
prepared for future use.
1. Turn o the power switch and unplug the unit from the wall receptacle.
2. Remove the unit from the immediate procedure area.
3. Wipe the footswitch and footswitch tubing with an appropriate hospital disinfectant. Coil the
footswitch tubing around the cord wrap at the back of the unit.
4. Wipe the power cord with an appropriate hospital disinfectant. Coil the power cord around
the cord wrap.
5. Remove the tubing from the pre-lter or suction canister.
6. If a suction canister was used, securely close lids/caps and properly dispose canister.
7. Remove the pre-lter.
8. Dispose of all operative waste materials according to your institution’s procedures for
biohazardous materials.
9. Check the ULPA lter to be sure no uids are on top of the lter. Replace if uids are
present.
10. Install a new pre-lter.
11. Thoroughly wipe all external surfaces of the SurgiFresh® Turbo with an appropriate hospital
disinfectant. Follow the procedures approved by your institution.
Warning: Ensure the unit is completely dry before restoring power.
MAINTENANCE
4. MAINTENANCE
4.1 Power Cord
1. Prior to each use, check the power cord along its entire length and at both plugs to ensure
no damage has occurred.
2. Do not use a power cord with exposed wires, cracks, or frayed areas.
4.2 Filter Test
Note: Perform the ULPA lter test with no pre-lter or tubing in place.
1. Ensure an ULPA lter is in the unit and seated properly.

9
MAINTENANCE
2. Turn on the POWER switch. Place the lter TEST SWITCH in TEST MODE. (See Figure 1.)
Operate the unit for ten to fteen seconds to assure the motor speed is stabilized.
3. Should the red REPLACE FILTER indicator lamp light, replace the ULPA lter with a new
one. Note: An ULPA lter that tests OK but produces an abnormal odor or is over 90 days old
requires replacement because the carbon life has been exceeded. Note: The lters design life
is 12 hours of heavy smoke/plume removal.
4. Move the TEST SWITCH to the NORMAL mode after the test is completed.
4.3 ReplacingtheULPAlter
1. Unplug the power cord from the electrical receptacle before replacing the ULPA lter.
2. Obtain a new ULPA lter. Remove its outer storage bag and dispose of the bag and twist tie
properly.
Note: Fill out date sticker and apply to the unit for future reference.
3. Open the biohazard bag provided with the new ULPA lter and prepare to dispose of the old
lter.
4. Grasp the used ULPA lter tabs. Carefully lift the used ULPA lter out of the unit, dispose of the
ULPA lter in the biohazard bag, and seal the bag.
Warning: Follow instructions and procedures for biohazardous materials
recommended by your institution.
5. Grasp the tabs of the new ULPA lter and insert it into the unit.
6. Install a new pre-lter on top of the ULPA lter. Make sure the prelter is not placed over an
ULPA Filter pull tab. Follow instructions in Section 2.0 as appropriate.
CUSTOMER SERVICE
5. CUSTOMER SERVICE
5.1 Parts Repairs and Accessories:
Surgimedics Customer Service USA
7027 Fairgrounds Pkwy.
San Antonio, TX 78238 USA
Phone: 800-645-7418
Service Department Repairs:
1. If a problem is experienced, rst review the troubleshooting section of this manual.
For troubleshooting support, please contact Surgimedics Customer Service (800)-645-7418
2. In the event your unit needs service or repair, do not attempt to repair. Please contact
Surgimedics Customer Service for a Return Authorization.

10
TROUBLESHOOTING
6. TROUBLESHOOTING
6.1 General
If the SurgiFresh® Turbo smoke evacuation system is not functioning properly,
review the items in this section for assistance.
1. Inspect the unit for visible signs of physical damage.
2. Verify all tubing and cords are connected properly.
3. Verify that the power cord has no exposed wires.
4. Ensure both lters are securely seated.
5. Check to see if the power cord is plugged into an appropriate electrical receptacle at the
wall.
6. Check to see if the power switch is turned on.
7. Perform a lter test to verify the lter and motor are functioning.
6.2 SpecicConditions
If the solution is not readily apparent, these items may be of assistance:
Condition Causes Correction
Smoke evacuator does not operate
when you turn on the power switch. 1. Disconnected or faulty power
cord.
1. Check and correct power cord
connections. Check cord for damage and
replace as needed.
2. No power from electrical
receptacle. 2. Connect power cord to functional
electrical receptacle.
3. Footswitch control is in
footswitch mode, was turned o
with footswitch and no footswitch
is installed.
3. Turn footswitch control to normal position
or install footswitch and turn unit on.
4. Circuit breaker needs to be
reset. 4. Press the circuit breaker switch on the
rear panel to reset the circuit breaker.
No suction when footswitch is
depressed. 1. Improperly connected
footswitch. 1. Check and correct footswitch cord
connection.
2. Damaged footswitch. 2. Check footswitch cord for damage and
replace as needed.
3. Kink in footswitch cord. 3. Straighten kinked section of cord.
Smoke evacuator is operating but
there is inadequate or no vacuum. 1. Improperly installed lter. 1. Turn the smoke evacuator o (O). Ensure
pre-lter and ULPA lter are seated properly.
2. Clogged or kinked tubing. 2. Unclog or replace tubing.
3. Clogged pre-lter. 3. Replace pre-lter.
4. Clogged ULPA lter. 4. Replace ULPA lter.
5. Obstructed or malfunctioning
motor and/or blower. 5. Refer to your Bio-Engineering Dept. or
Surgimedics Service.
6. Improper power supply. 6. Conrm voltage and frequency are correct.
System does not adsorb Smoke
Odors. 1. The charcoal component of the
ULPA lter has expired. 1. Replace the ULPA lter.
Above Normal Noise/Whining. 1. Poorly seated lters. 1. Check bottom of ULPA lter for condition
of seal. Seat ULPA lter properly inside unit.
Check seal around top of ULPA lter. Seat
pre-lter securely into ULPA lter.
2. Variation in line voltage. 2. Position motor speed control knob slightly
lower than maximum to ensure controlled
constant speed even with slight line voltage
uctuations.
3. Motor brushes worn, 3. Return to Surgimedics for service.

11
SPECIFICATIONS
7. TECHNICAL SPECIFICATIONS SURGIFRESH TURBO 230V
All specications are nominal and subject to change without notice.
Filters
Pre-lter: captures medium and large particles > 0.3 microns
ULPA lter: 0.1 micron particulate size at 99.9995% eciency; activated high grade
carbon for gas and odor adsorption
Air Flow
Motor Speed
Setting
1 1/3 in. X 6 ft.
(3.4 cm)
7/8 in. X 6 ft.
(2.2cm)
3/8 in. X 6 ft.
(1 cm)
0% 45 cfm 25 cfm 5 cfm
50% 50 cfm 30 cfm 6 cfm
100% 60 cfm 35 cfm 7 cfm
* Air ow is tested at 230 VAC in a controlled environment using a digital anemometer.
Maximum Static Suction
92 inches H20 (172mm Hg) suction pressure motor fan rating (sealed)
Safety
Circuit breakers: 5 amps / ea
Power cord: 10 feet, IEC to 2 prong continental European
Leakage Current (60 HZ): 300µA max.
Power
Input mains voltage (nominal): 230 VAC
Mains frequency (nominal): 60 Hz PN 906760
(refer to serial number tag on rear of unit)
Mains current: 3.25 amps maximum during normal operation
Physical Characteristics
Height: 25 1/4 inches (57.8 cm)
Depth: 10.5 inches (28 cm)
Width: 9 1/8 inches (23.2 cm)
Weight: 27.25 pounds (9.7 kg) without lters, hoses or box
8. TRANSPORT AND STORAGE
Ambient temperature range –40°F to 158°F (-40°C to 70°C)
Relative Humidity: <75%, noncondensing
Use original packaging materials when shipping or transporting via carrier

12
WARRANTY
Warranty Limitations
Surgimedics makes no express guarantees, warranties, or other representations as to its products, other than those
appearing in its written form in its own trade literature or written proposals. Surgimedics expressly disclaims the implied
warranties of merchantability, tness for a particular purpose, and noninfringement in relation to any of its products. In
no event shall Surgimedics be liable to the purchaser of any product for consequential, incidental, or special damages
irrespective of whether such damages are alleged to arise in tort, contract, law, equity, or by statute. The above
provisions relating to the exclusion of consequential, incidental, and special damages shall survive and remain in force
notwithstanding a nding by a court of competent jurisdiction that the exclusive remedy provided below to a product
purchaser has failed of its essential purpose.
For a period of one year, Surgimedics will repair or replace, at its option, any product, or part thereof, that fails because
of a material or manufacturing defect; provided that (1) the defect is not caused by the purchaser or its customer, (2)
the product was not custom manufactured to the specications of the purchaser, and (3) the product has not been
damaged, altered, or defaced. This limited warranty shall be the sole and exclusive remedy of the purchaser, irrespective
of whether the claims of purchaser are made in contract, tort, warranty, law, equity, or by statute. In the event that a court
of competent jurisdiction determines that the exclusive remedy set forth above has failed of its essential purpose, such a
failure shall entitle the purchaser to a return of the purchase price of the product involved.
Shipping Damage
Title and risk of loss will pass to purchaser upon delivery at the (Ex-Works) point. Delivery shall be (Ex-San Antonio,
Texas). Surgimedics will, as an accommodation to purchaser unless otherwise directed in writing, ship product to
purchaser at its address, freight prepaid and insured at purchasers risk and expense. Purchaser should (1) inspect all
packaging for external damage, (2) report the same to the carrier, (3) obtain an inspection report from the carrier within
15 days, and (4) le a claim with the carrier.
Returned Goods Policy
A request for return authorization must be submitted to Surgimedics Customer Service Department prior to the return of
any product. The request for return authorization must include the product catalog number, product lot number, quantity,
and specic reason for the return. No product may be returned after 90 days from the original date of purchase, unless
defective.
Where a return of any product is authorized, Surgimedics will provide a return authorization number and a Certicate
of Cleanliness to be completed by the customer. Each shipping container must be marked with the return authorization
number on outside of box, as well as a completed Certicate of Cleanliness, or it will not be accepted. All product must
be returned freight prepaid except returns due to our shipping error, material or manufacturing defects, or damage during
shipment that renders the product unsalvageable upon receipt. Unsalvageable product must be returned via the original
carrier.
Credit may be issued to the original purchaser for authorized returns of salable, unused product in unopened
boxes in Surgimedics current catalog, subject to a 35% restocking fee. Surgimedics Quality Assurance
Department will inspect returned product to determine whether it is in salable condition. Credit, including
transportation costs, will be issued to the original purchaser for authorized returns within 90 days for product
discovered upon inspection to be unsalvageable or shipped in error. Except for defective products, no credit will
be issued for unauthorized returns, returns after 90 days from original date of purchase, custom manufactured
product, or unsalable product.

13
BENUTZERHANDBUCH
SICHERHEITSHINWEISE
Das vorliegende Benutzerhandbuch enthält wichtige
Informationen zur Anwendersicherheit und zum Schutz
des Rauchabzugssystems vor Beschädigungen
VOR INBETRIEBNAHME DES RAUCHABZUGSSYSTEMS DAS
VORLIEGENDE BENUTZERHANDBUCH AUFMERKSAM DURCHLESEN
Modellnr.
Seriennr.
Kaufdatum / /
RAUCHABZUGSSYSTEM
SICHERHEITSHINWEISE
Mit diesem Symbol wird der Anwender auf nicht isolierte, spannungsführende
Komponenten im Gehäuse des Produkts aufmerksam gemacht, die gefährliche
Stromschläge verursachen können.
Mit diesem Symbol wird der Anwender auf wichtige Gebrauchs- und
Wartungsanweisungen in der Begleitdokumentation des Produkts aufmerksam
gemacht.
Warnung -- weist auf eine mögliche Bedingung hin, die sich negativ auf den Bediener oder
Patienten auswirken könnte.
Vorsicht -- weist auf eine mögliche Bedingung hin, die das Rauchabzugssystem beschädigen
könnte.
Das vorliegende Benutzerhandbuch und das darin beschriebene Gerät dürfen nur von qualiziertem
medizinischem Fachpersonal verwendet werden, das in der jeweiligen Technik und dem
durchzuführenden chirurgischen Verfahren angemessen geschult wurde.
Hinweis: Gemäß US-Bundesgesetz darf dieses Gerät nur von einem
Arzt oder auf Verordnung eines Arztes verkauft werden.
INHALTSVERZEICHNIS
WARNUNGEN...................................Seite 14 KUNDENDIENST..............................Seite 21
EINFÜHRUNG...................................Seite 15 STÖRUNGSBEHEBUNG..................Seite 22
GEBRAUCHSANWEISUNGEN........Seite 16 TECHNISCHE DATEN ......................Seite 23
WARTUNG........................................Seite 20 GEWÄHRLEISTUNG........................Seite 24
http://www.surgimedics.com
301838 ART Rev 0
© Coastal Life Systems, Inc.
TURBO230V 60 Hz
Teilenr.
906760

14
WARNUNG
Warnung: Zur Vermeidung von Stromschlägen
• Kein feuchtes Netzkabel an die Wandsteckdose anschließen.
• Das Gerät vor Feuchtigkeit schützen.
• Keine Verlängerungskabel, Adapterstecker oder unzulässige Netz- oder
Wandsteckdosen verwenden. Steckerstifte immer ganz bis zum Anschlag in die
Steckdose einführen.
• Keine Abdeckungen vom Gerät abnehmen. Servicearbeiten am Gerät beschränken
sich auf das Austauschen gewisser Bauteile. Dies darf nur von qualiziertem
Fachpersonal ausgeführt werden.
• Gerät vor der Reinigung von der Wandsteckdose trennen.
• Gerät von der Wandsteckdose trennen, wenn es mehrere Tage oder länger nicht
gebraucht wird.
• Zum Trennen des Netzkabels von der Steckdose fest am Stecker ziehen, niemals am
Kabel selbst.
WARNUNG
Warnung: Das Rauchabzugssystem erzeugt ein hohes Vakuum Saugkraft. Vor dem Einschalten des
Geräts die Saugkraft richtig einstellen und das Ansaugende des Saugschlauchs oder rohrs
so ausrichten, dass eine Verletzung des Patienten oder eine versehentliche Beschädigung
chirurgischer Artikel vermieden wird.
Warnung: Laser- und elektrochirurgische Rauchwolken sind potenziell gefährlich. Bei der Handhabung
gebrauchter Filter, Schläuche und Zubehörteile sind die für die jeweilige medizinische
Einrichtung geltenden Vorschriften für den Umgang mit biogefährlichen Stoen einzuhalten.
Warnung: Zur Vermeidung einer Brand- oder Explosionsgefahr das Gerät nicht in der Nähe brennbarer
oder potenziell brennbarer Stoe verwenden.
Warnung: Werden bestimmte Kanülen, Ventile oder andere Instrumente im Rahmen eines
Absaugvorgangs eingesetzt, kann dies eine rasche Reduzierung des Pneumoperitoneums bei
laparoskopischen Eingrien bewirken.
VORSICHT
Vorsicht: Das Gerät in einer gut belüfteten Umgebung verwenden.
Vorsicht: Gelangen Flüssigkeiten in die Filter, können die Filter und das Rauchabzugssystem
beschädigt werden.
Vorsicht: Eine Blockierung des Rauchabzugssystems kann eine Überhitzung des Geräts zur
Folge haben.

15
EINFÜHRUNG
1. BESTIMMUNGSGEMÄSSER GEBRAUCH
Das SurgiFresh® Turbo-Rauchabzugssystem ist für den Abzug von Rauch bzw. Rauchwolken, die
bei elektrochirurgischen, laserchirurgischen und laparoskopischen Eingrien bzw. bei chirurgischen
Eingrien unter Verwendung von Elektroinstrumenten erzeugt werden, vorgesehen.
Das SurgiFresh® Turbo-System darf nur im Rahmen seines bestimmungsgemäßen Gebrauchs
verwendet werden.
Verwenden Sie ausschließlich Produkte und Zubehör von Surgimedics in Verbindung mit dem
SurgiFresh-Turbo. Der Garantieanspruch kann erlischen, wenn Produkte und Zubehör verwendet
werden, die nicht von Surgimedics stammen.
Bei Fragen zu den Funktionsmerkmalen, der Leistung und dem bestimmungsgemäßen Gebrauch
dieses Geräts bitte mit Surgimedics Kontakt aufnehmen.
Vertrieben von: Surgimedics, eine abteilung von Coastal Life Systems, Inc.
7027 Fairgrounds Pkwy.
San Antonio, TX 78238 USA
800-645-7418
www.surgimedics.com
a
1. BESCHREIBUNG DER SYMBOLE
Im Folgenden eine Beschreibung der auf dem SurgiFresh® Turbo abgebildeten Symbole:
Achtung, bitte konsultieren Sie die beiliegenden Dokumente.
Lesen Sie die Bedienungsanleitung.
Kein Gerät der Kategorie AP.
Achtung, Explosionsgefahr bei Verwendung in Gegenwart entammbarer Anästhetika.
AP

16
GEBRAUCHSANWEISUNGEN
1. FUNKTIONSMERKMALE UND BEDIENELEMENTE
Abbildung 1 Bedienelemente
A. Netzschalter, Saugkraftregler, Filterprüfschalter, Filteraustauschlampe.
B. Anschluss für Fußschalterschlauch und Auswahlschalter für Fußschalterbetrieb – dienen
zum Anschließen und zur Steuerung eines Fußschalters für die Fernbedienung des Geräts.
ABBILDUNG 1
Klappgri
Kabel-/
schlauchhalter
Netzkabel
Schutzschalter
IEC-anschluss
Schutzschalter
B
Anschluss für fussschalterschlauch
Auswahlschalter für fussschalterbetrieb
A
Netzschalter
Saugkraftregler
Filterprüfschalter
Anzeigelampe

17
GEBRAUCHSANWEISUNGEN
2. SYSTEMEINRICHTUNG
2.1 Aufbau
Das SurgiFresh® Turbo-System und das Benutzerhandbuch werden zusammen in einem
Transportkarton ausgeliefert. Den Karton und das Produkt auf Kratzer, Beulen oder Beschädigungen
untersuchen, die möglicherweise während des Transports aufgetreten sein könnten. Werden Schäden
festgestellt, die im Abschnitt „Gewährleistung“ enthaltenen Anweisungen befolgen.
Einweglter, Schläuche und Zubehör für den Rauchabzug werden eventuell gesondert geliefert.
Für diese Artikel gelten dieselben Anweisungen im Hinblick auf Transportschäden wie oben.
Nach Entnahme aus dem Karton ist der SurgiFresh® Turbo folgendermaßen auf die Inbetriebnahme
vorzubereiten:
Hinweis: Karton und Verpackungsmaterial für zukünftige Zwecke aufbewahren.
1. Den Fußschalterschlauch an den seitlichen Schlauchanschluss des Rauchabzugssystems
anschließen. Den Auswahlschalter für den Fußschalterbetrieb auf den Fußschaltermodus
einstellen. Soll nicht mit dem Fußschalter gearbeitet werden, den Auwahlschalter für den
Fußschalterbetrieb auf den Modus „Normal“ einstellen.
2. Einen ULPA-Filter in der Mitte des Geräteinnenraums einsetzen. Dabei den Pfeil für die
Luftströmungsrichtung am ULPA-Filter beachten. Der Pfeil muss nach unten weisen.
Sicherstellen, dass es keine Blockierungne gibt. Dann den Filter bis zum Anschlag nach unten
drücken, bis er fest sitzt.
Hinweis: Den Datumsaufkleber (im Lieferumfang des Filters enthalten) ausfüllen und
oben auf dem Gerät anbringen. Normalerweise wird der Filter nach 90 Tagen ausgetauscht.
Bei intensivem Gebrauch kann eine UPLA-Filterprüfung bzw. eine entsprechende
Geruchsentwicklung jedoch darauf hinweisen, dass der Filter früher ausgetauscht werden muss.
3. Das Netzkabel am Gerät und an einer geeigneten Netzsteckdose anschließen
4. Das in Abschnitt 4.2 beschriebene ULPA-Filterprüfverfahren durchführen.
Hinweis: Die ULPA-Filterprüfung wird ohne Vorlter bzw. Schlauch durchgeführt. Nach
zufriedenstellendem Abschluss der Prüfung den Motordrehzahlregler (Saugkraftregler) auf
ca. ¼ der Höchstdrehzahl einstellen, um sicherzustellen, dass das Gerät nicht bei zu hoher
Drehzahl eingeschaltet wird.
5. Oben auf dem ULPA-Filter einen Vorlter anbringen.
Vorsicht: Den festen Sitz von ULPA- und Vorlter sicherstellen, um eine angemessene
Saugwirkung zu gewährleisten.
6. Den für den durchzuführenden Eingri geeigneten Schlauch und das passende Zubehör
auswählen und das Gerät gemäß Beschreibung in Abschnitt 3.1 auf den Einsatz vorbereiten.
2.2 Allgemeine Anweisungen zur Systemeinrichtung
1. OFFENE EINGRIFFE – ABZUG VON TROCKENRAUCH/-RAUCHWOLKEN
a. Sicherstellen, dass ein ULPA-Filter und entsprechender Vorlter gemäß Anweisungen in
Abschnitt 2.1 eingesetzt wurden.
b. Falls erforderlich, einen für den Eingri geeigneten Adapter und/oder Schlauch an den Vorlter
anschließen.

18
GEBRAUCHSANWEISUNGEN
2. OFFENE EINGRIFFE – ABZUG VON RAUCH MIT GELEGENTLICH ANFALLENDER
FLÜSSIGKEIT
a. Sicherstellen, dass der ULPA-Filter und ggf. der Vorlter gemäß Anweisungen in Abschnitt 2.1
eingesetzt und geprüft wurden.
b. In der Nähe des Geräts einen Einwegsaugkanister befestigen.
c. Einen Schlauch von 3,4 cm (1 1/3 Zoll) Durchmesser an Saugkanister und Vorlter anschließen.
Hinweis: Der Schlauch wird am ‚Vakuum‘-Anschluss eines Saugkanisters angeschlossen.
d. Den für den jeweiligen Eingri geeigneten Adapter und/oder Schlauch am ‚Patienten‘-Anschluss
des Saugkanisters anschließen.
Vorsicht: Wird ein Schlauch von 1 cm (3/8 Zoll) Durchmesser verwendet, ist durch Auswahl
einer für den Eingri ausreichenden Schlauchlänge sicherzustellen, dass sich der Schlauch
nicht vom Saugkanister ablöst.
3. GESCHLOSSENE EINGRIFFE
Hinweis: Die Systemeinrichtung ist bei geschlossenen Eingrien mit trockenem Rauch
oder Rauch mit gelegentlich anfallender Flüssigkeit dieselbe wie bei oenen Eingrien.
Warnung: Werden bestimmte Kanülen, Ventile oder andere Instrumente im
Rahmen eines Absaugvorgangs eingesetzt, kann dies eine rasche Reduzierung des
Pneumoperitoneums bei laparoskopischen Eingrien bewirken.

19
GEBRAUCHSANWEISUNGEN
3. ANWEISUNGEN ZUM SYSTEMBETRIEB
3.1 Eingrisvorbereitung
1. 10 ptDie für den geplanten Eingri geeignete Systemeinrichtung gemäß Anweisungen in
Abschnitt 2.2 wählen.
2. Sicherstellen, dass das Netzkabel am Gerät und an einer geeigneten Netzsteckdose
angeschlossen ist.
3. Sicherstellen, dass der Fußschalterschlauch am Gerät angebracht ist. Den Fußschalterschlauch
abwickeln und den Fußschalter in der Nähe des Bedieners aufstellen.
4. Den Netzschalter (POWER) einschalten. Hinweis: Ein ist die Schalterposition „I“. Aus ist die
Schalterposition „O“.
5. Den Motordrehzahlregler ein wenig drehen, um sicherzustellen, dass sich die Motordrehzahl
ändern lässt.
6. Den Fußschalter betätigen, um sicherzustellen, dass sich das Gerät mit dem Fußschalter
aktivieren und deaktivieren lässt.
7. Den Netzschalter ausschalten, bis das Rauchabzugssystem benötigt wird.
3.2 GebrauchwährenddesEingris
Warnung: Das Rauchabzugssystem erzeugt eine hohe Saugkraft. Die Saugkraft richtig
einstellen und das Ansaugende des Saugschlauchs oder rohrs so ausrichten, dass eine
Verletzung des Patienten oder eine versehentliche Beschädigung chirurgischer Artikel
vermieden wird.
Warnung: Werden bestimmte Kanülen, Ventile oder andere Instrumente im
Rahmen eines Absaugvorgangs eingesetzt, kann dies eine rasche Reduzierung des
Pneumoperitoneums bei laparoskopischen Eingrien bewirken.
1. Das SurgiFresh® Turbo-System in der Nähe des Behandlungsbereichs aufstellen.
2. Den Schlauch gemäß Anweisungen in Abschnitt 2.2 anschließen.
3. Den Netzschalter einschalten.
4. Der Fußschalter kann vom Personal im Behandlungsbereich betätigt werden, um die
Saugwirkung je nach Bedarf während des Eingris zu aktivieren bzw. zu deaktivieren.
Fußschalter an einem geeigneten Ort aufstellen.
5. Den Motordrehzahlregler im Uhrzeigersinn drehen, um den Luftstrom (d. h. die Saugwirkung)
zu verstärken, und entgegen dem Uhrzeigersinn, um den Luftstrom abzuschwächen. Den
Regler nicht mehr drehen, wenn die gewünschte Einstellung erreicht ist.
6. Richtige Luftstromeinstellung durch Rücksprache mit dem Operateur bestätigen. Den Luftstrom
nach Bedarf mit dem Motordrehzahlregler ändern. Um den Turbomodus zu aktivieren,
den Regler im Uhrzeigersinn bis zum Anschlag drehen.
7. Nach Abschluss des Eingris den Netzschalter ausschalten.
8. Fußschalter und Netzkabel abziehen.
Reinigungsanweisungen in Abschnitt 3.4 befolgen.
3.3 Vorschläge zur Nutzungsoptimierung
1. Luftstrom
a. Der Abstand zwischen Schlauch und Rauchquelle hat einen Einuss auf die Erfassung und
Beseitigung der Rauchwolke. Das Schlauchende sollte nicht weiter als einige Zentimeter
vom Behandlungsbereich entfernt sein.
b. Mit größer dimensionierten Schläuchen lässt sich ein größeres Luftstromvolumen und ein
ezienterer Rauchabzug erzielen. Der Schlauch darf nicht blockiert sein.
2. Geräuschentwicklung
a. Bei geringeren Drehzahlen läuft das Gerät leiser.
b. Mit größer dimensionierten Schläuchen läuft das Gerät leiser. Der Schlauch darf nicht
blockiert sein.
c. Die Saugwirkung mit dem Fußschalter je nach Bedarf während des Eingris ein- und
ausschalten.

20
GEBRAUCHSANWEISUNGEN
3. Gelegentlich anfallende Flüssigkeiten
a. Bei Kontamination durch Flüssigkeiten Filter sofort austauschen.
b. Das SurgiFresh® Turbo-System nicht als ein primäres Absaugsystem für Flüssigkeiten
einsetzen.
4. Filter
a. Sicherstellen, dass die Filter gut sitzen.
b. Vor Beginn jedes chirurgischen Eingris die ULPA-Filterprüfung durchführen
(siehe Abschnitt 4.2).
5. Schläuche
a. Schläuche während des chirurgischen Eingris immer wieder auf Blockierungen untersuchen.
Vorsicht: Sicherstellen, dass der netzförmige Saugschutz aufgesetzt ist, um zu
verhindern, dass chirurgische Artikel oder Gewebe in den Schlauch gesaugt/gezogen werden.
3.4 Reinigung
Das SurgiFresh® Turbo-Rauchabzugssystem ist nach jedem chirurgischen Eingri zu reinigen und für
den nächsten Gebrauch vorzubereiten.
1. Den Netzschalter ausschalten und das Gerätenetzkabel von der Wandsteckdose abziehen.
2. Das Gerät aus dem direkten Behandlungsbereich entfernen.
3. Fußschalter und Fußschalterschlauch mit einem geeigneten klinischen Desinfektionsmittel
abwischen. Den Fußschalterschlauch am Halter an der Rückseite des Geräts aufwickeln.
4. Das Netzkabel mit einem geeigneten klinischen Desinfektionsmittel abwischen. Das Netzkabel
am Halter aufwickeln.
5. Den Schlauch vom Vorlter oder Saugkanister abnehmen.
6. Wurde ein Saugkanister verwendet, Deckel/Kappen fest schließen und den Kanister
vorschriftsmäßig entsorgen.
7. Vorlter abnehmen.
8. Alle chirurgischen Einmalartikel entsorgen. Dabei die für die jeweilige medizinische Einrichtung
geltenden Standardvorschriften für den Umgang mit biogefährlichen Stoen befolgen.
9. Den ULPA-Filter prüfen und sicherstellen, dass sich auf dem Filter keine Flüssigkeiten
angesammelt haben.
10. Einen neuen Vorlter einsetzen.
11. Alle Außenächen des SurgiFresh® Turbo mit einem geeignetem klinischen Desinfektionsmittel
abwischen. Das von der jeweiligen klinischen Einrichtung vorgeschriebene Reinigungsprotokoll
befolgen.
Warnung: Vor Wiederherstellung der Stromversorgung sicherstellen, dass das Gerät
völlig trocken ist.
WARTUNG
4. WARTUNG
4.1 Netzkabel
1. Vor jedem Gebrauch das Netzkabel entlang seiner gesamten Länge sowie beide Stecker auf
Unversehrtheit überprüfen.
2. Ein Netzkabel, das freiliegende Drähte, Risse oder verschlissene Bereiche aufweist, darf nicht
verwendet werden.
4.2 Filterprüfung
Hinweis: Die ULPA-Filterprüfung ohne eingesetzten Vorlter bzw. angeschlossenen
Schlauch durchführen.
This manual suits for next models
1
Table of contents
Languages:
Other Surgimedics Medical Equipment manuals
Popular Medical Equipment manuals by other brands

Zeiss
Zeiss S7 / OPMI VISU 160 Instructions for use

Seers Medical
Seers Medical CLINNOVA Gynae Pro Instructions for use

Handicare
Handicare Xclusive Sales guide

Standard Diagnostics
Standard Diagnostics urometer 120 user manual

Drive DeVilbiss Healthcare
Drive DeVilbiss Healthcare Apollo II Cushion Instructions for use

medi
medi travel women Instructions for use